We hunted out the best 10mm 1911 we could find that fit nearly any shooter’s budget.
I’ve heard many purists scoff at the thought of a 1911 chambered for anything other than .45 ACP. Difficult to argue against the proposition.
John M. Browning came up with nearly the perfect pistol-ammunition combination lo those 100-plus years ago. However, if the heavy-metal sidearm is your passion, you most likely know there’s an equally, dare I say better chambering available.
While the 10mm Auto was not designed specifically for the iconic handgun its eventual marriage to the 1911 was a match made in heaven. Like any good couple, the cartridge and gun bring out the best in each other.
Heavy and accurate, the 1911 makes the snappy cartridge more manageable, enhancing its overall accuracy potential. And for its part, the 10mm endows the pistol with the trait most shooters cherish in the 1911—power, and plenty of it. Gad, who could want any more?
Thankfully, we live in an exceptional age when 10mm 1911 options abound.
True enough, many are expensive affairs running well north of the everyday marksman’s budget, making them prohibitive for many. We’ve come up with a few such specimens in our list of best 10mm 1911 options for any budget.
How We Chose The Best 10mm 1911s
Among the other Gun Digest editors, most trusted freelancers and myself, we have quite a few 1911 fans on our staff. When it comes to 10mm 1911s, we’ve had the opportunity to collectively put thousands of rounds down range from a wide variety of different makes and models. When it came time to boil down our list of the best affordable 10mm 1911s, we considered each gun’s overall build quality, reliability, accuracy, features and price. In the end, these were the top options that earned a spot on our list.
The Best 10mm 1911s:
- Editor’s Choice: Colt Delta Elite
- Best Range Pistol: Springfield Ronin
- Best Ergonomics: Ruger SR1911 Target
- Best Classic Design: Iver Johnson Eagle XL-10
- Best Compact: Rock Island TAC Ultra MS
- Best Budget: Girsan Influencer MC1911
Best 10mm 1911 Comparison
| Model | Capacity | Sights | Grips | Finish | Barrel Length (in.) | Overall Length (in.) | Overall Height (in.) | Weight (oz.) | MSRP |
|---|---|---|---|---|---|---|---|---|---|
| Colt Delta Elite | 8+1 | Novak | Black composite | Brushed Stainless Steel | 5 | 8.75 | 5.5 | 39 | $1,199 |
| Springfield Ronin | 8+1 | Fiber Optic Front ; Tactical Rack White Dot Rear | Checkered Wood | Two-Tone Blue/Stainless | 5 | 8.6 | 5.5 | 40 | $917 |
| Ruger SR1911 Target | 8+1 | Adjustable Target | Black Rubberized | Low-Glare Stainless | 5 | 8.67 | 5.45 | 40.4 | $1,299 |
| Iver Johnson Eagle XL-10 | 8+1 | Adjustable White-Dot Rear/Dovetail Front | Partially Checkered Walnut | Matte Blue Frame/Black Cerakote Slide | 6 | 9.75 | 5.5 | 46 | $933 |
| Rock Island TAC Ultra MS | 8+1 | LPA MPS1 Adjustable Rear/Dovetail Fiber Optic Front | Black/Grey G10 | Black Parkerized | 4.25 | 8 | 5.5 | 37.76 | $849 |
| Girsan Influencer MC1911 | 8+1 | Low-Profile 3-Dot ; Optics-Ready Slide | Hexagonal Textured | Black | 4.4 | 8 | 5.5 | 37.6 | $669 |
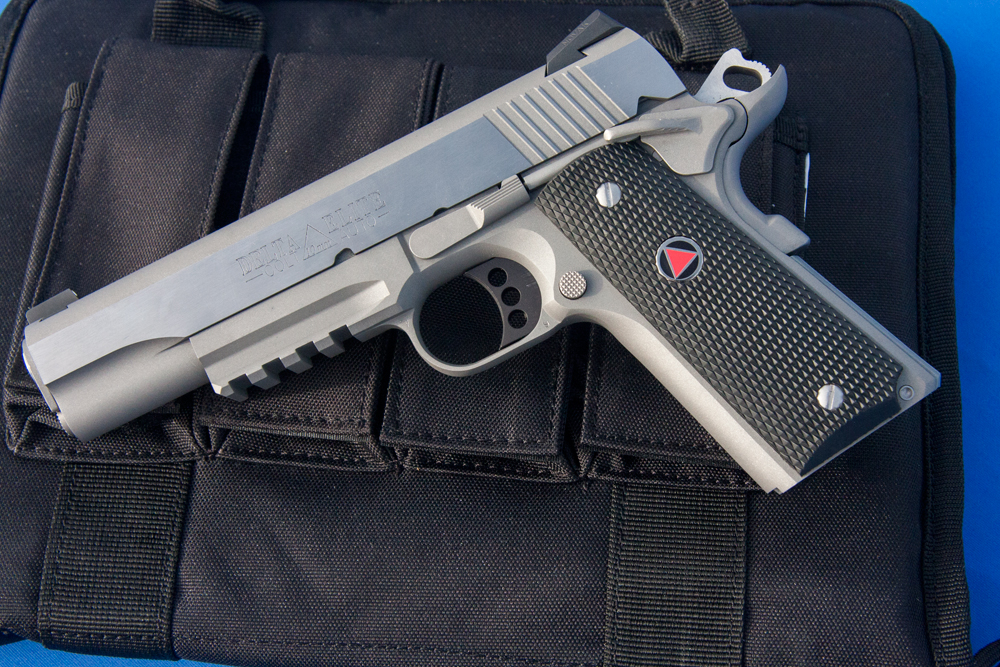
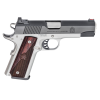
Colt Delta Elite
Pros
- The classic Colt 10mm
- Handsome finish
- Optional accessory rail
Cons
- Expensive
Colt Delta Elite Specs:
- Capacity: 8+1
- Sights: Novak
- Grips: Black composite
- Finish: Brushed Stainless Steel
- Barrel Length: 5 Inches
- Overall Length: 8.75 Inches
- Overall Height: 5.5 Inches
- Weight: 39 Ounces
- MSRP: Starts at $1,199
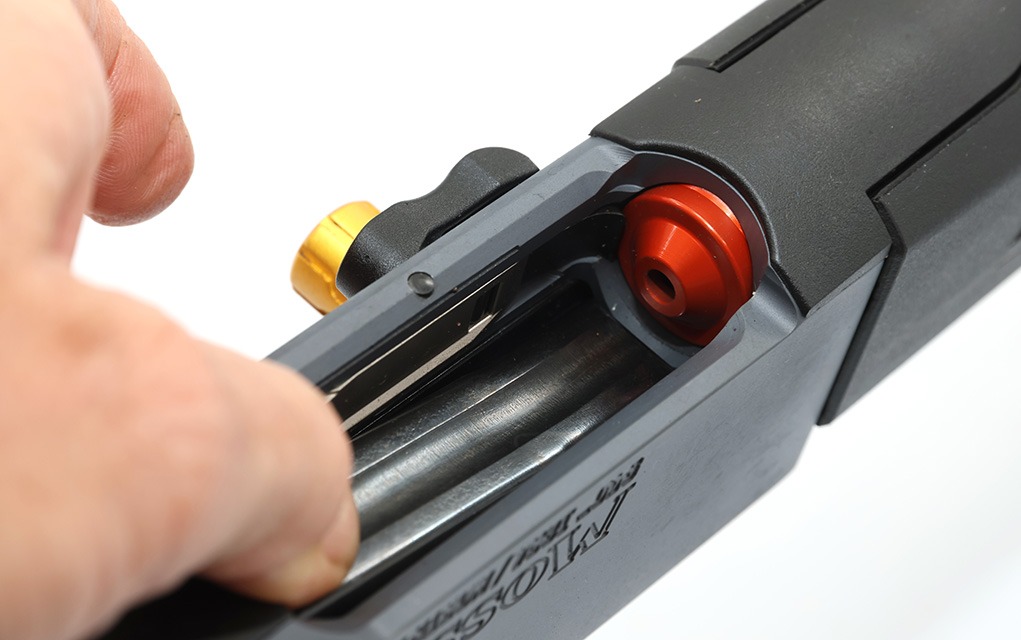
Sure, the Bren Ten gets all the love for kicking off the 10mm craze, but the Delta Elite did the heavy lifting in keeping the cartridge alive. Minted in 1987 the 10mm 1911 was one of the few options in the chambering through the late 1980s and early 1990s. While absent from the Colt catalog for several years, the gunmaker reintroduced the pistol in 2008, just in time to catch the new wave of Big-10 mania. Lucky for shooters. Few who shoot the Delta Elite come away disappointed.
Like any Colt 1911, the pistol is well made with excellent fit and finish, and in capable hands is a tack driver. Yes, it can drill the bullseye despite a Series 80 trigger. No, it’s not custom-trigger snappy, but its predictable 4-or-so-pound break is respectable enough.
At 35 ounces unloaded, I find the the 5-inch barreled pistol has enough heft to tamp recoil and plenty of texturing on the grips and backstrap for supreme control. Genuine Novak Sights deliver just what you’d expect, an eye-catching aiming system and just the thing to milk accuracy out of the gun. And a brushed stainless steel finish give it dashing good looks. I believe that the Delta Elite certainly qualifies as a modern classic.
Also, if you’re like me and prefer to have a light on your gun, Colt makes a version with an accessory rail as well.

Get An Edge On The 10MM:
- A Perfect 10: Best 10mm Pistols
- The 10mm Auto: Cooper’s Big Bore
- Best 10mm Ammo For Self-Defense And Hunting
- 10mm Vs .45 ACP: Making the Right Choice
- Glock 10mm: The Caliber’s Stalwart Option
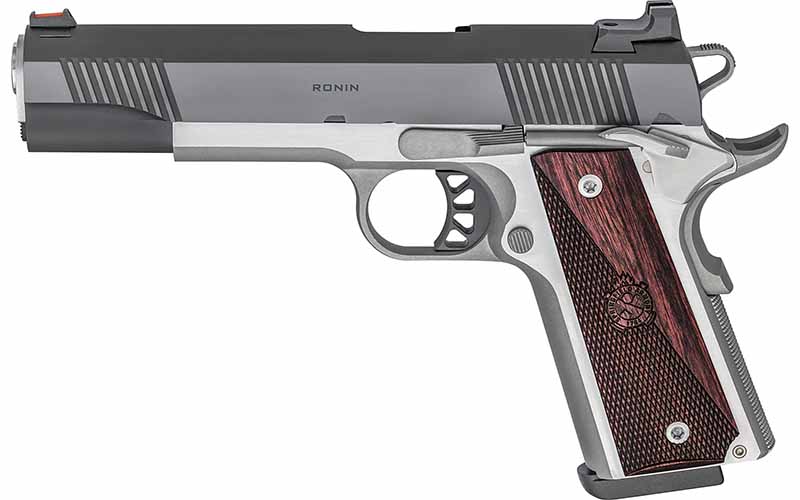
Springfield Ronin
Pros
- Great build quality
- Fiber optic front sight
- Forward cocking serrations
Cons
- No accessory rail
Springfield Ronin Specs:
- Capacity: 8+1
- Sights: Fiber Optic Front ; Tactical Rack White Dot Rear
- Grips: Checkered Wood
- Finish: Two-Tone Blue/Stainless
- Barrel Length: 5 Inches
- Overall Length: 8.6 Inches
- Overall Height: 5.5 Inches
- Weight: 40 Ounces
- MSRP: $917
Over the years, Springfield Armory 1911s have earned a rock-solid reputation. Deservedly so, given for the price point few hang with the clean line and nearly flawless performance of the gunmaker’s catalog. You have to step up a bit to get into one of Springfield’s 10mm 1911 pistols. The only model presently made residing in the Ronin series. But it’s not so great a leap as to preclude the shooter of modest means.
Springfield markets the Ronin series as a combination of classic style and modern features, built using a mix of modern and traditional manufacturing methods. I find that the result is a handsome, full-size two-tone 10mm pistol that performs as good as it looks. It uses a forged frame and slide, has a match-grade 5-inch barrel and an 8-round magazine capacity. Each Ronin 1911 also features forward slide serrations and checkered wooden grips.
The gun handles very nicely, plenty of weight in the hand—40 ounces—making for what I thought to be an extremely controllable 10mm. Top-notch sights enhance the overall system, an eye-catching fiber-optic pipe in front and two white dots in the rear. I’ll admit, I think the gun comes in too heavy for everyday carry for most folks, including myself. But with the right sights it could transform into a first-class hunter.
Springfield Armory 1911 RONIN
Ruger SR1911 Target
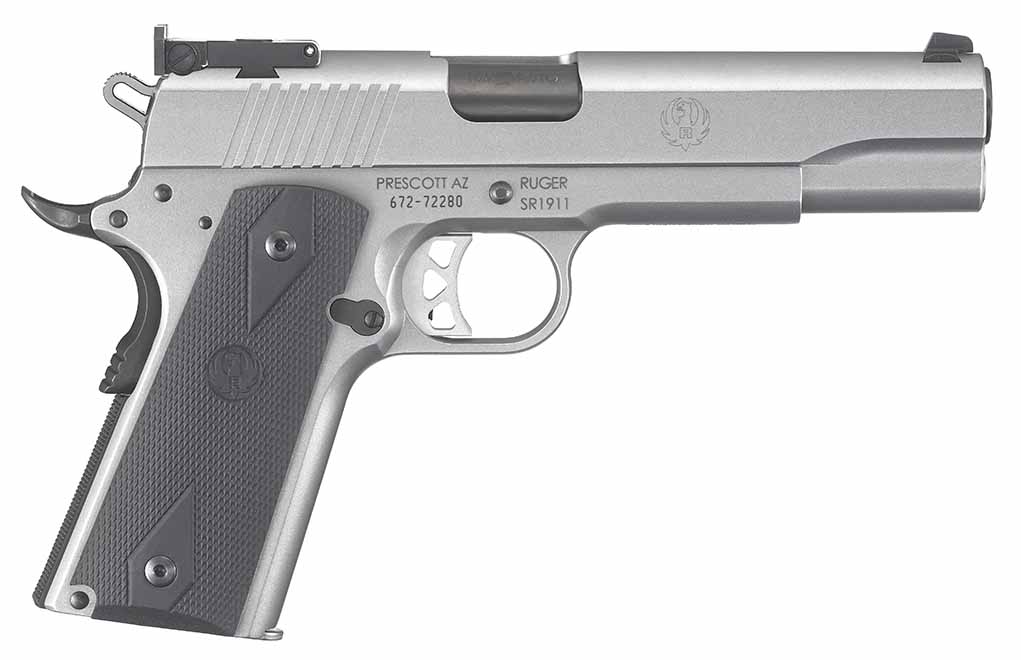
Pros
- Good target sights
- Nicely checkered backstrap
- Full-length guide rod
Cons
- Expensive
- Trigger could be better
- No accessory rail
Ruger SR1911 Target Specs:
- Capacity: 8+1
- Sights: Adjustable Target
- Grips: Black Rubberized
- Finish: Low-Glare Stainless Steel
- Barrel Length: 5 Inches
- Overall Length: 8.67 Inches
- Overall Height: 5.45 Inches
- Weight: 40.4 Ounces
- MSRP: $1,299
Ruger has an amazing ability to walk a fine line. Generally, this is between cost and performance and is perhaps best exemplified in its 10mm 1911, the SR1911 Target.
No, I definitely don’t think you’ll split gnat hairs at 20 paces with the piece, but for the money, I found the attractive-looking pistol delivers good-enough accuracy. Overall, the trigger was my sticky point with the pistol and felt in loosened my groups. Invest a little more with a competent gunsmith to clean up the trigger and you’d most likely have a lights out shooter.
Essentially the pistol is Ruger’s rendition of a Series 70 1911, though the gunmaker made some significant breaks from the original design. This is evident in opting for a 5-inch bull barrel over collet bushings. Debate rages over if bulls provide more support compared to bushings, but I’m not going to get into that here. One thing indisputable about the feature, combined with a full-length guide rod, the SR1911 has more heft up front. A good thing overall, helping tame some of the recoil.
I find the SR1911 very comfortable, it just feels good in the hand and is very controllable. Rubberized panels and ample checkering on the mainspring housing are to thank for this, as well as a high beavertail safety. A Bomar-style adjustable rear sight rounds out the package.
It’s a good 1911, one most shooters find capable of filling most roles.

Our Top Articles on 10mm Firearms
- Top Softest Shooting 10mm Pistol for Better Control
- A Look at the Best 10mm Pistol Carbines on the Market
- High Quality at a Lower Price: Affordable 1911 10mm Pistols
Iver Johnson Eagle XL-10

Pros
- 6-inch barrel, better ballistics
- Nice target sights
- Forward slide serrations
Cons
- Too long and heavy for carry
- No accessory rail
Iver Johnson Eagle XL-10 Specs:
- Capacity: 8+1
- Sights: Adjustable White-Dot Rear/Dovetail Front
- Grips: Partially Checkered Walnut
- Finish: Matte Blue Frame ; Black Cerakote Slide
- Barrel Length: 6 Inches
- Overall Length: 9.75 Inches
- Overall Height: 5.5 Inches
- Weight: 46 Ounces
- MSRP: $933
Yes, the owl head is the same as those budget revolvers from 100 years ago, but the modern Iver Johnson has nothing to do with its namesake. Unless you’re a sucker for nostalgia, this is a good thing. With a vastly expanded catalog, Iver Johnson is an importer with a slew of superb pistols from the Philippines (S.A.M. Inc.). What I find the best of all, the guns are at prices nearly any shooter can afford.
This includes its outstanding Eagle XL-10 10mm 1911. Certainly, the long-slide pistol isn’t a top choice for on-person defense. A 6-inch barrel and 46-ounce weight is plenty to keep under wraps. Outside of that, I definitely peg the 10mm fit for any other duty—home defense, competition or hunting.
I personally like the Eagle XL-10’s throwback appeal, dang near a spitting image of John Browning’s Government model design—only longer. For it’s prince range, I was impressed with the manufacturing quality of the the pistol as the gun’s fit and finish are impeccable. Honestly, I’m apprehensive about imported 1911s because many are rife with tool marks and other undesirable blemishes. Not the case here.
Even more impressive, I thoroughly enjoyed the Eagle’s trigger. Shooting out to 20-yards, the brisk 4-pound switch had me staying right around 2 MOA with a variety of ammo. About my only strike against the 10mm, it’s right-hand configured and not at all ambidextrous. For the price and performance, I think that even lefties can get over this.
Rock Island TAC Ultra MS

Pros
- Nice adjustable fiber optic sights
- G10 grips
- Accessory rail
- Commander-sized, could be carried
Cons
- Slightly worse ballistics
- Lighter means more recoil
- Shorter sight radius
Rock Island TAC Ultra MS Specs:
- Capacity: 8+1
- Sights: LPA MPS1 Adjustable Rear/Dovetail Fiber Optic Front
- Grips: Black/Grey G10
- Finish: Black Parkerized
- Barrel Length: 4.25 Inches
- Overall Length: 8 Inches
- Overall Height: 5.5 Inches
- Weight: 37.76 Ounces
- MSRP: $849
When it comes to budget 1911s that bring something to the table, Rock Island Armory is the king. Based out of the Philippines, the gunmaker offers one of the largest selections of the iconic pistol out there. And nearly every one I’ve handled has ticked like a clock, including the gunmaker’s impressive catalog of 10mm 1911 options.
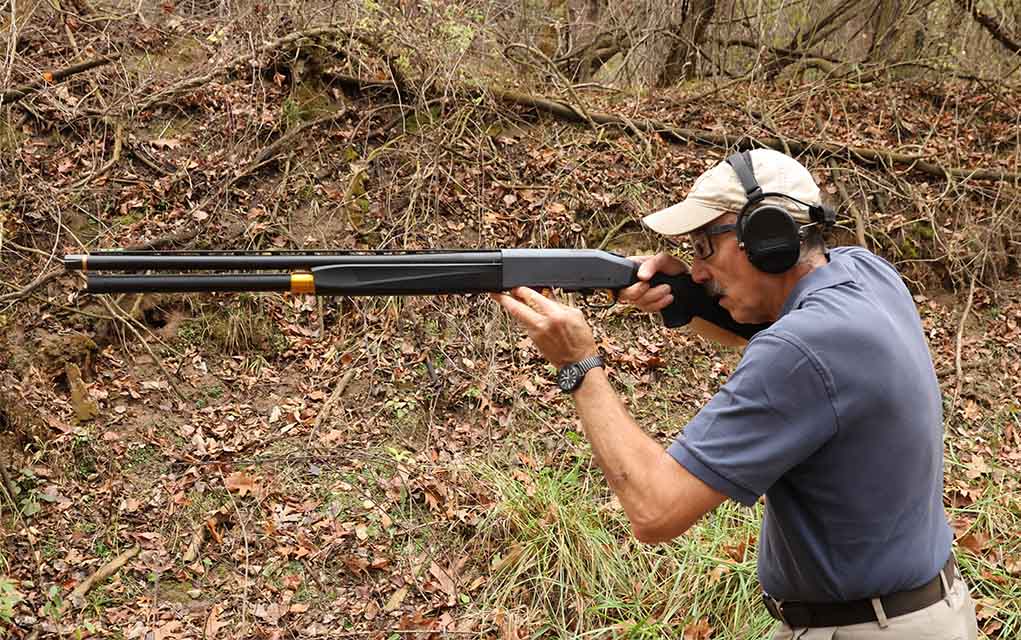
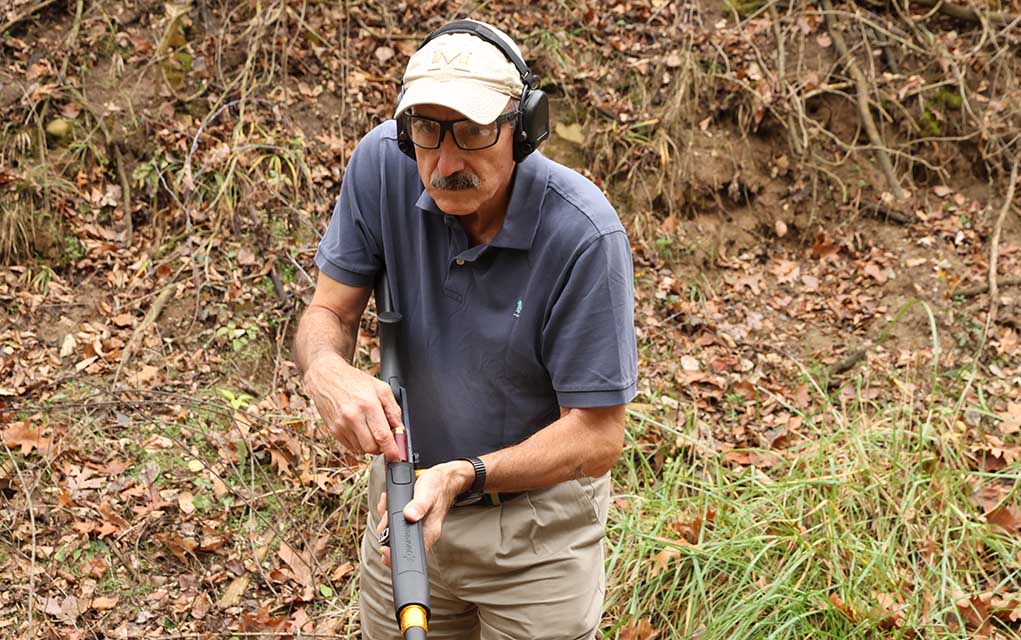
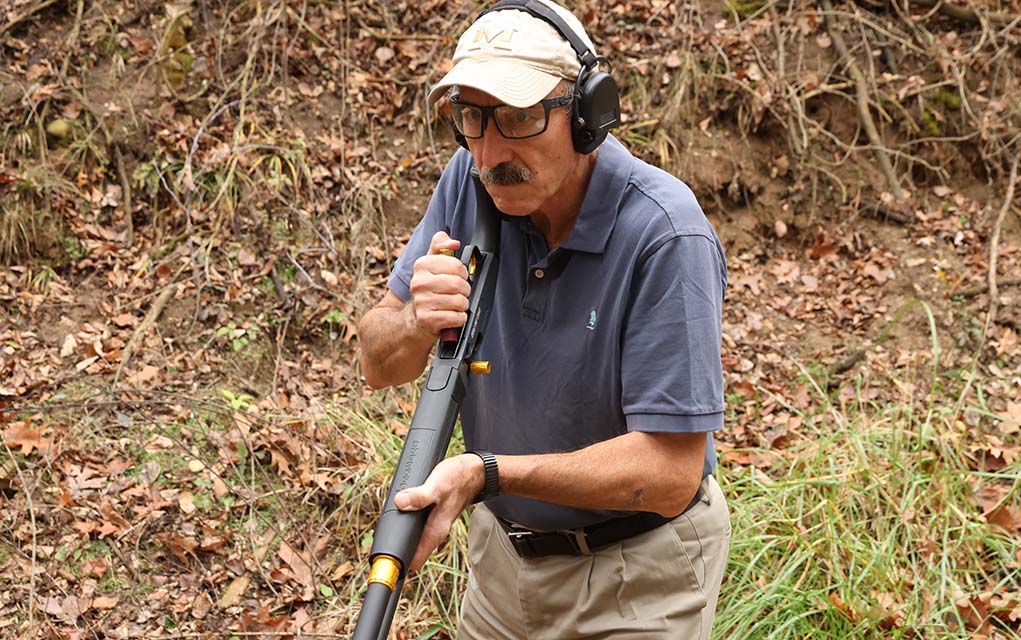
As far as budget options go, it’s difficult not to opt for the TAC Ultra. One of the truly-carry friendly configurations available in 10mm in this tier, the pistol is the perfect choice for overpowering personal protection.
Commander-sized, the 4.25-inch barreled TAC Ultra is much more concealable than other options on we put on this list. At the same tick, it boasts enough bore to get the powerful Perfect 10 to live up to ballistic expectations. But don’t expect a long-slide kitten when behind the trigger. At around 37-ounces unloaded it is decidedly lighter than most 10mm 1911s, which I can attest translated to more felt recoil.
Overall, the gun was bucky when I tested it, leading to slow splits due to having to rebuild my sight picture after every shot. However, the more time I spent with the TAC, the more proficient I became with the pistol. Regular practice and familiarity with the gun should tighten shot-to-shot accuracy.
Rock Island gives shooters the tools to manage the hand-fitted beast, with ample checkering on the mainspring housing and G10 grips that If found very positive. The pistol is also dolled up with carry-enhancing features, including a low-rise, fully adjustable rear sight and corrosion-resistant parkerized finish.
Rock Island Armory Tac Ultra MS Black/Gray Checkered
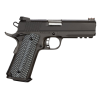
Girsan Influencer MC1911

Pros
- Optics-ready
- Accessory rail
- Forward slide serrations
- Very affordable
- Shorter barrel, could be carried
- Ambidextrous thumb safety
Cons
- Slightly worse ballistics
- Shorter sight radius
- Lighter means more recoil
Girsan Influencer MC1911 Compact Specs:
- Capacity: 8+1
- Sights: Low-Profile 3-Dot ; Optics-Ready Slide
- Grips: Hexagonal Textured
- Finish: Black
- Barrel Length: 4.4 Inches
- Overall Length: 8 Inches
- Overall Height: 5.5 Inches
- Weight: 37.6 Ounces
- MSRP: $669
Girsan is a Turkish company, and Turkish firearms have received a mixed reputation in the U.S. The truth is that the Turkish gun industry has grown massively in the past few years, and while some companies’ products have been less-than-stellar, plenty of others have proven themselves as great-value guns. The general consensus is that Girsan 1911s fall in the latter group.
Released in 2024, the Girsan Influencer MC1911 is more with the times than anything else on this list. Namely, that’s because it has an optics-ready slide. If you want to put a red dot on your 10mm 1911, this is the one to look at.
Besides being optics-ready (RMS/RMSc footprint), the Influencer has a few more tricks up its sleeve as well, and the features combine to make an excellent 10mm 1911 option at an impressively affordable price. They have low-profile magwells, ambidextrous thumb safeties, low-profile 3-dot sights and aggressively textured grips. Another great aspect of the Girsan Influencer is that you have your choice of size, as the 10mm model is available as either a Compact with a 4.4-inch barrel (pictured) or a Full-Size with a 5-inch barrel. You also have a choice between a blue/black, black camo or tungsten finish. Regardless of which version you choose, both have a capacity of 8+1 rounds. While still heavy at 37.6 ounces, the 4.4-inch model could definitely be carried concealed if that’s something you’re interested in doing.
All that said, the best part of the Influencer is probably its price, as the 10mm models range between $669 and $725 depending on the finish. Are its bones as good as a Colt or a Ruger? Probably not, but for the features you get for the money we think it would make an excellent option for both range shooting and defense.

10mm 1911 FAQ
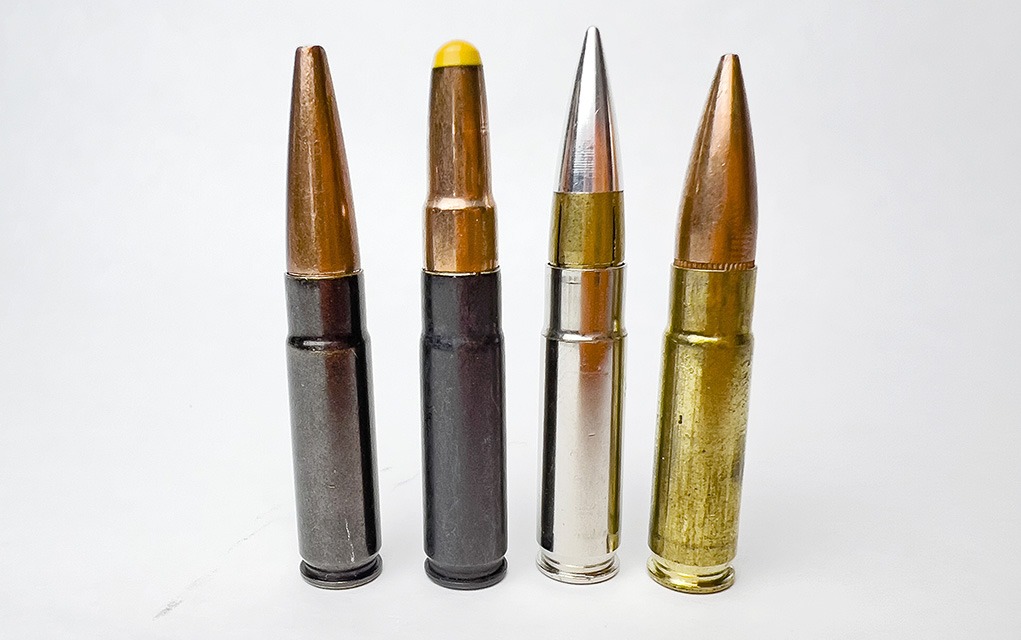
Yes. 10mm Auto has a higher muzzle velocity and more energy than .45 ACP, it also retains more of that velocity and energy over greater distances. That said, “stronger” isn’t a well-defined term when it comes to comparing handgun cartridges, and .45 ACP’s larger diameter and typically heavier projectiles lends itself to potentially better expansion with hollow-points.
Yes, but only with proper shot placement. 10mm is on record as having killed grizzly bears before, but you still have to do your part to hit the right spots.
While the FBI did adopt 10mm Auto and then subsequently decommission it, it’s only partly true to say that they “got rid of it.” The cartridge’s hefty recoil combined with the large grips of the Smith & Wesson 1076 pistol were too much to handle for most average FBI agents, leading them to adopt .40 S&W instead. However, FBI HRT and SWAT teams did continue to use it, at least for a period.
Raise Your 1911 IQ:
- Best 1911 Pistol Options For Concealed Carry
- Why The Hell The 9mm 1911?
- Tips For Getting Your Perfect Custom 1911
- 4 Reasons Why The 1911 Pistol Remains On Top
- Thinking Soberly About 1911 Grips
Editor’s Note: Adam Borisenko contributed to this article.