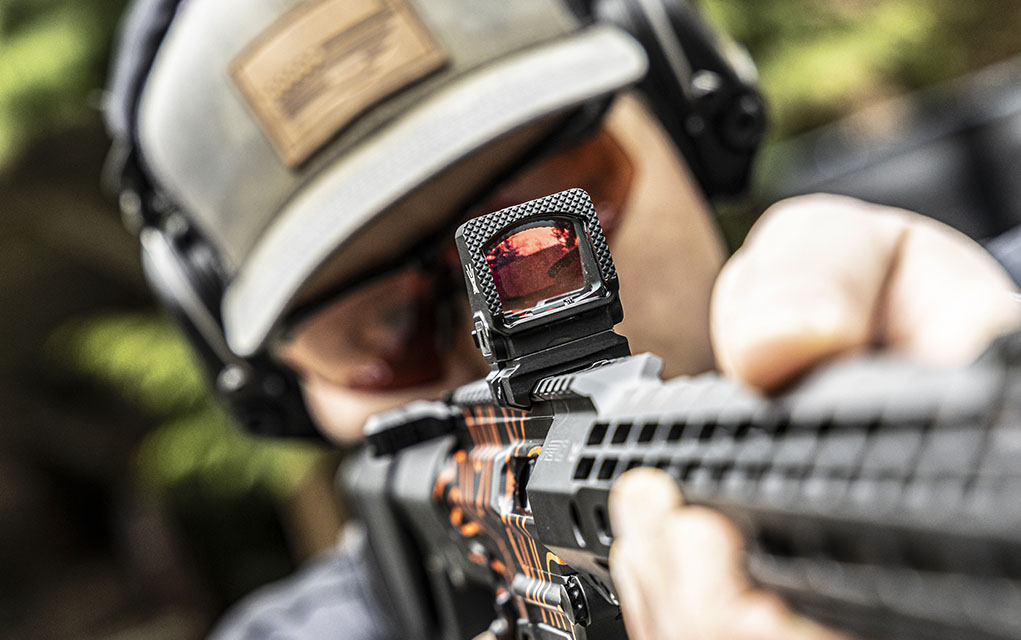
We take a quick look at the new Defender-XL from Vortex Optics, a large pistol red dot sight designed for competition.
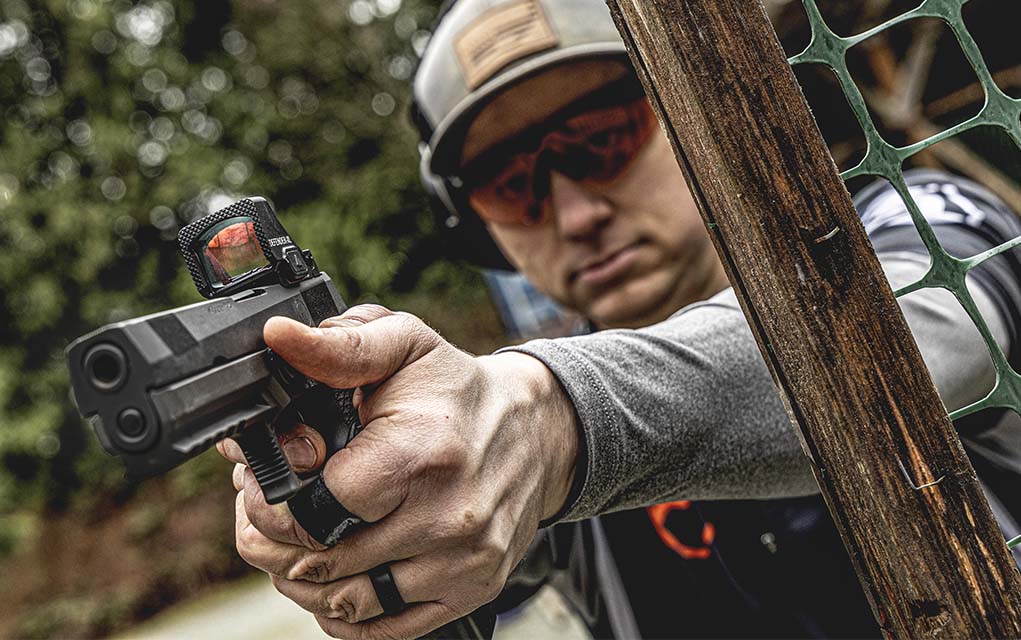
Vortex Optics has just released the third model in its Defender line of pistol red dots, the Defender-XL. As the name suggests, it’s larger than both the Defender-ST and the Defender CCW. While it was primarily made with competition handguns in mind, the Defender-XL will be right at home on any firearm where optic size doesn’t matter, whether that be a home defense pistol, a shotgun or even a PCC.
The biggest advantage of a larger red dot sight is the greater field of view it can provide given the increased window size, and the Defender-XL offers just that with its ultra-wide aspherical lens. To complement the enhanced window size, the red dot is available with either a 5- or 8-MOA reticle. Brightness is manually adjustable and there are 10 levels for daytime and 2 for use with night vision.
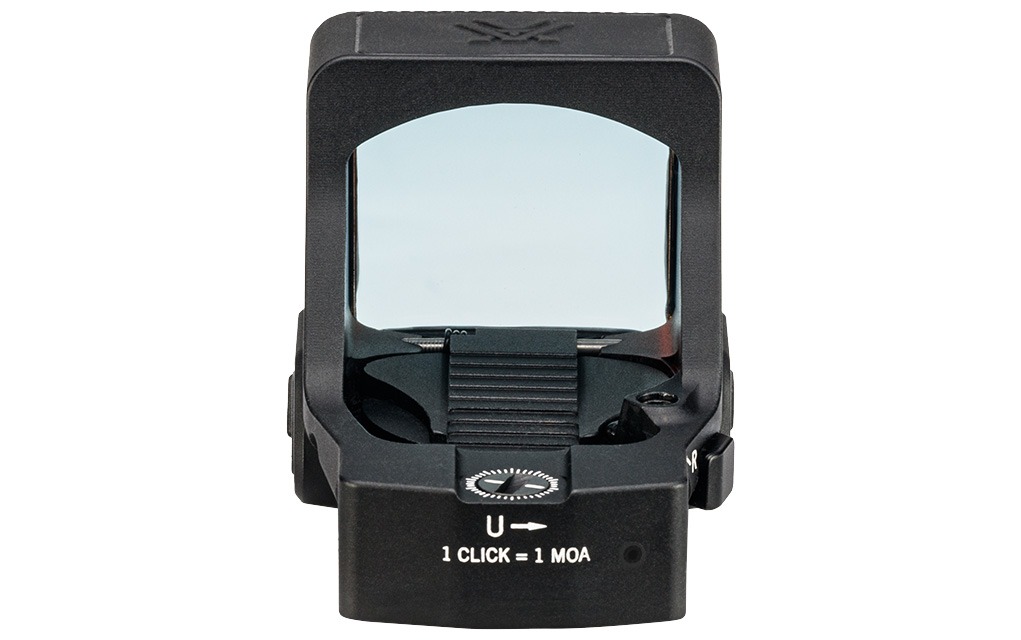
The other features worth mentioning are what you’d expect of a red dot in Vortex’s Defender line. Mounted via a DeltaPoint Pro footprint, it has motion activation, a 10-minute auto-shutoff, a textured front surface to assist with racking a pistol and a top-mount battery compartment. Speaking of batteries, it runs off one CR2032 and has an advertised runtime of 25,000 hours.
Each Defender-XL red dot will ship with a ShockShield polymer insert, a Glock MOS adapter plate, a Picatinny mount, a rubber cover, a lens cloth, a tool and one battery, as well as 5 sets of mounting screws. It’s available now and MSRP is $599.99.
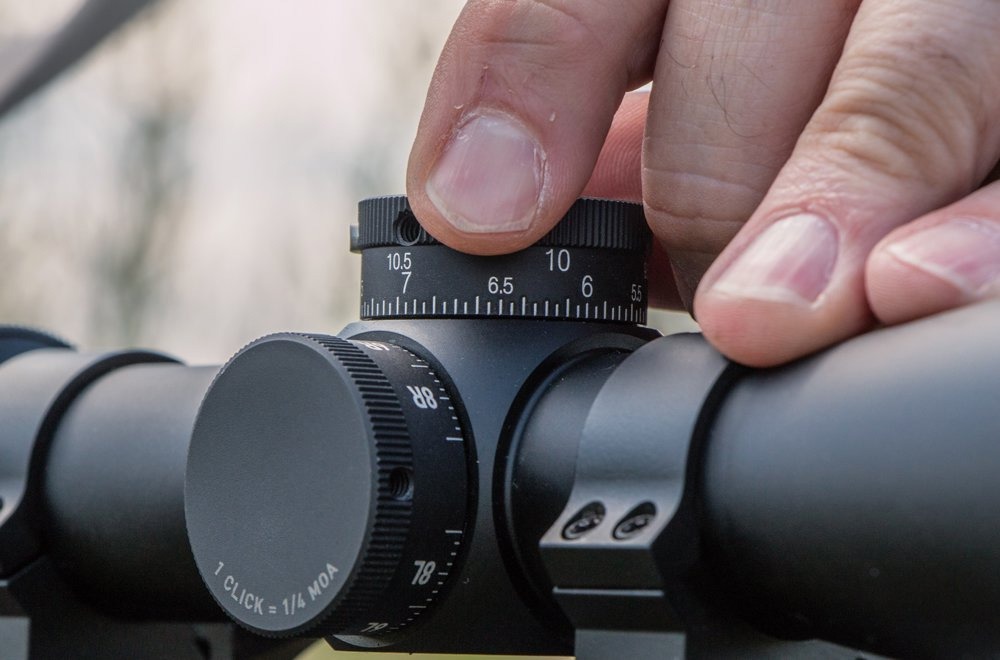
Are your shooting skills up to snuff? Here we take a look at how to properly assess your abilities with a firearm.
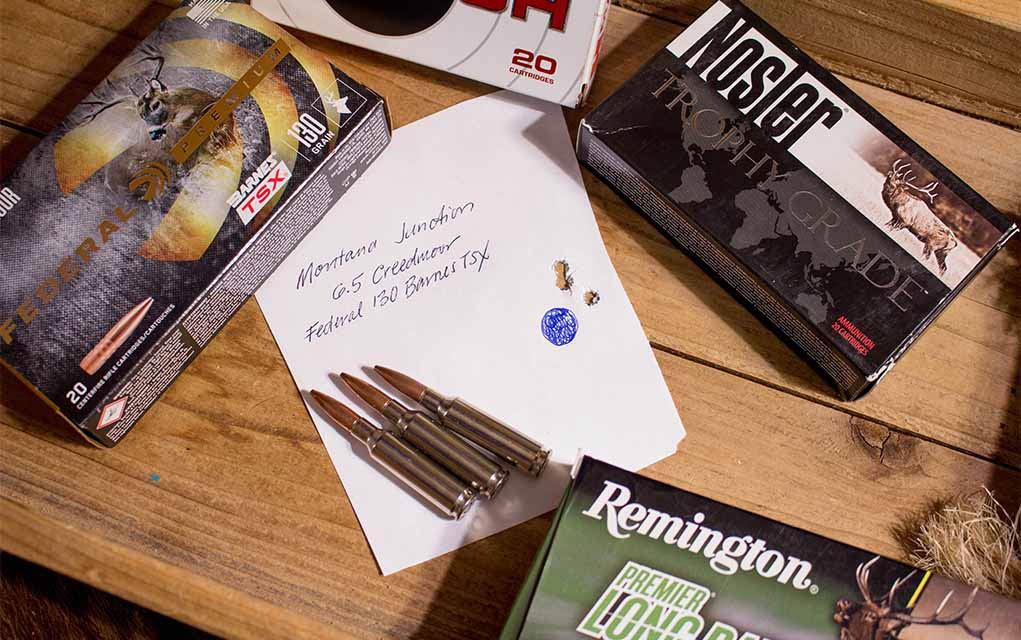
When I was still a teenager, I owned a Remington Model 700 chambered for the .270 Winchester. It was the rifle I learned to handload for, and I once fired a one-hole group at 100 yards with it. I carried that target around in my wallet so I could brag—with evidence—when I needed to. I figured it was a pretty good shooting rifle and that I was a pretty good shot.
I just didn’t know what I didn’t know.
A one-hole group that’s so rare you carry the target around with you is not representative—it’s an example of one. And when it comes to measuring precision or skill, examples of one mean nothing.
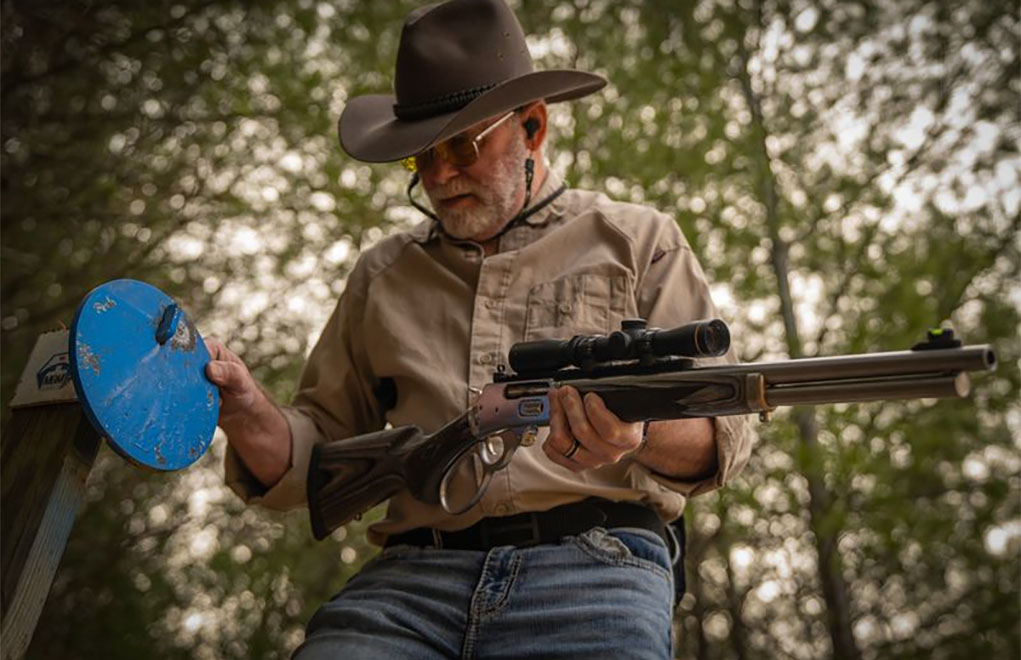
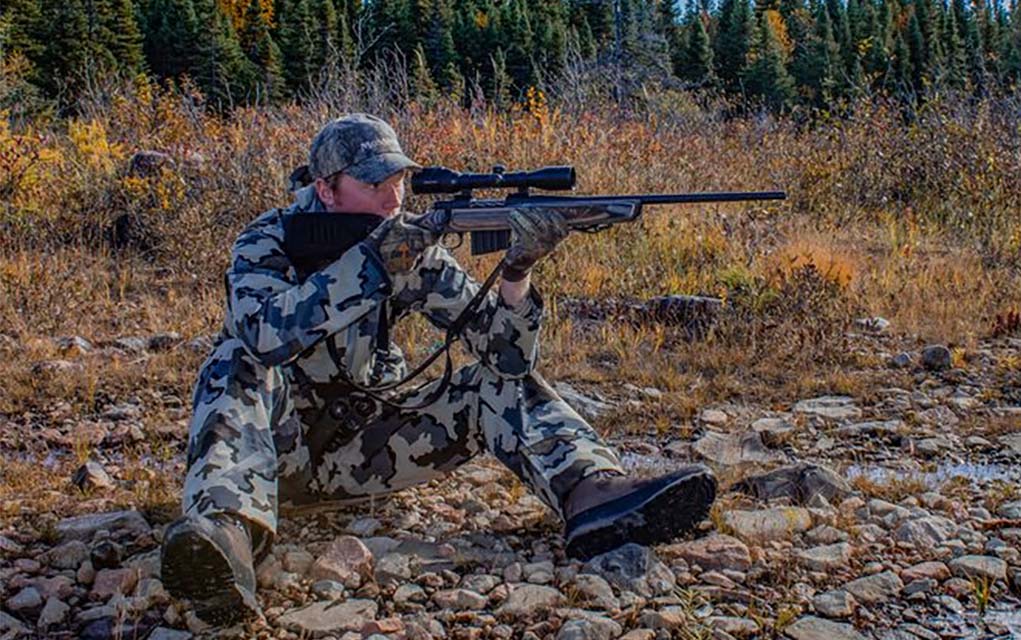
Can you hit an 8-inch plate at 100 yards from the standing position is less than 5 seconds? If you can do it on four out of five days, consider yourself a better-than-average rifleman.
Rifle Precision
It’s not uncommon to hear shooters proclaim they have a 1 MOA rifle. But just what exactly is a 1 MOA rifle? Is it a rifle like my old 700 that once-upon-a-time fired a one-hole group, or is it a rifle that’ll deliver less than MOA groups most of or all the time?
That’s a good question. Half of the equation involving a one-hole group is the shooter, and shooters are a lot less reliable than rifles.
I’d define an honest-to-goodness 1 MOA rifle as one that, when you consider every group the rifle has fired, the average is less than 1 minute of angle. This standard, of course, is easy to meet if the first three groups fired from a rifle average less than an inch—and I’ve had that happen on several occasions.
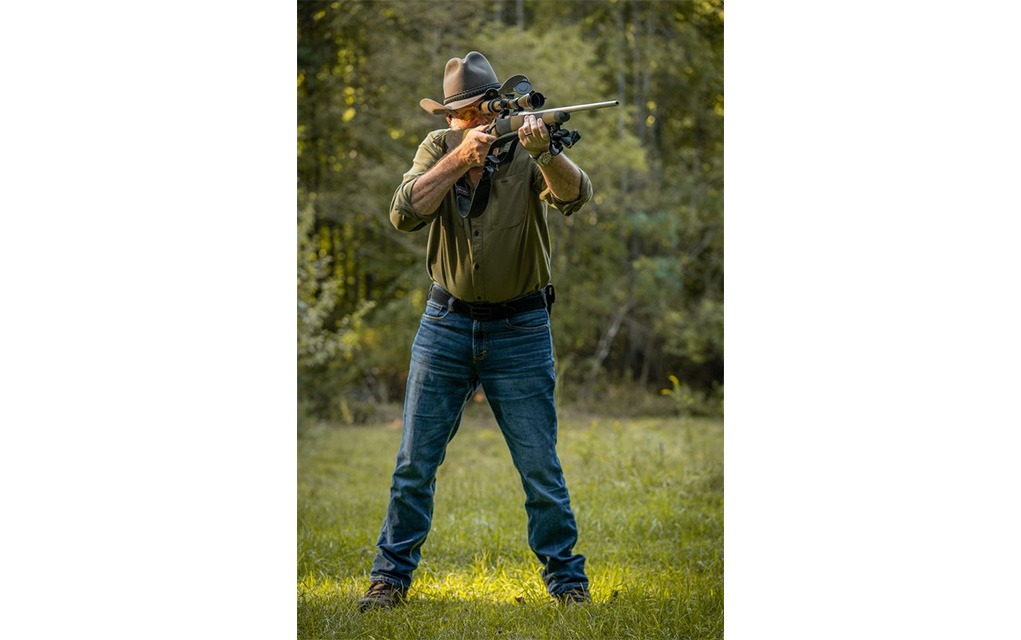
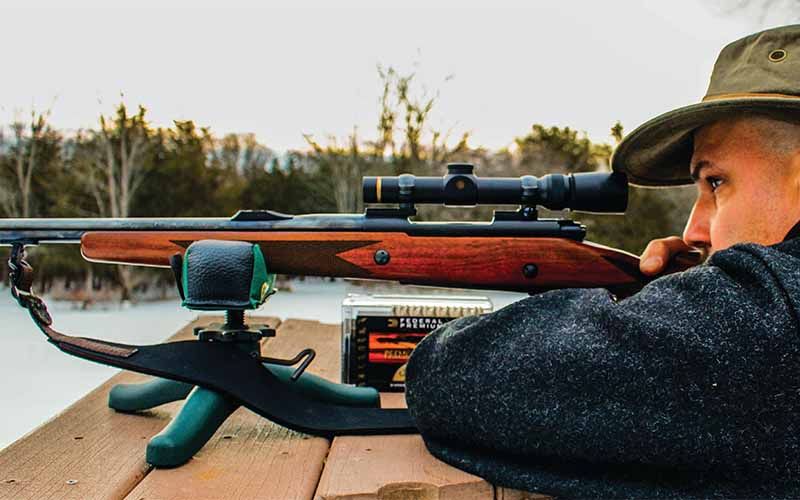
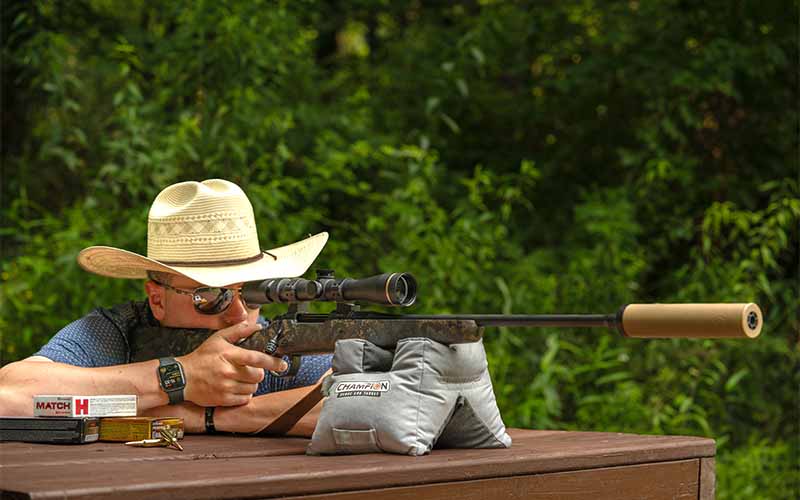
To be considered a rifleman, you should be able to shoot accurately and quickly from the off-hand position.
For the measurement to mean anything, though, the data set must be much larger. At a minimum, it should contain at least 20, three- or five-shot groups. When this standard is applied, the bar is much harder to clear. In fact, for a true 1 MOA rifle I believe you cannot stop there; that average should extend to the rifle’s lifetime and every group fired from it.
I’ve been testing rifles and reporting on them for more than a quarter-century. During that time, I’ve kept detailed records concerning rifles that cost as little as several hundred dollars and as much as several thousand. A true 1 MOA rifle is a rarity at any price range; according to my records, I’ve tested several but owned only four rifles that—over their lifetime and considering every group fired—would meet the 1 MOA standard.
Maybe a more practical measure for rifle precision would be what would rate as better than average. I looked at the performance records for all those rifles I’ve tested over the past 20 years and, on average, the precision for three- or five-shot groups worked out to 1.69 inches. When it comes to rifle precision, as far as I’m concerned, better than average would be a rifle with a lifetime group average of less than 1.5 inches or 1.5 MOA. If you have one of those, it’s a good ’un—don’t get rid of it.
Rifle Shooting Ability
Unlike most who recreationally shoot, I shoot almost every day because—by virtue of my vocation—it’s part of the job. Because of this, I know some days I just don’t shoot as well as I do on other days. The reasons for this are many, and it really doesn’t matter what they are. The point is, even if you do have a true 1 MOA rifle, some days you might not be able to prove it. Of course, shooting a rifle from a bench rest is one thing, and shooting a rifle off-hand from various field positions is another thing entirely.
Just because you can shoot well from a bench doesn’t make you a rifleman. A rifleman shoots well with or without support.
Yes, it takes skill to shoot itty-bitty groups from a bench rest; it just takes more skill and skill of a different kind to shoot from unsupported/field positions. During my time in the military and while working as a law enforcement officer, I was a firearms instructor. I’ve even conducted a good bit of training for armed civilians. I’ve spent enough time on the firing line to have a reasonable idea of, not only what the skill level of the average rifle shooter is, but to also understand how it can be measured simply and easily in a practical manner.
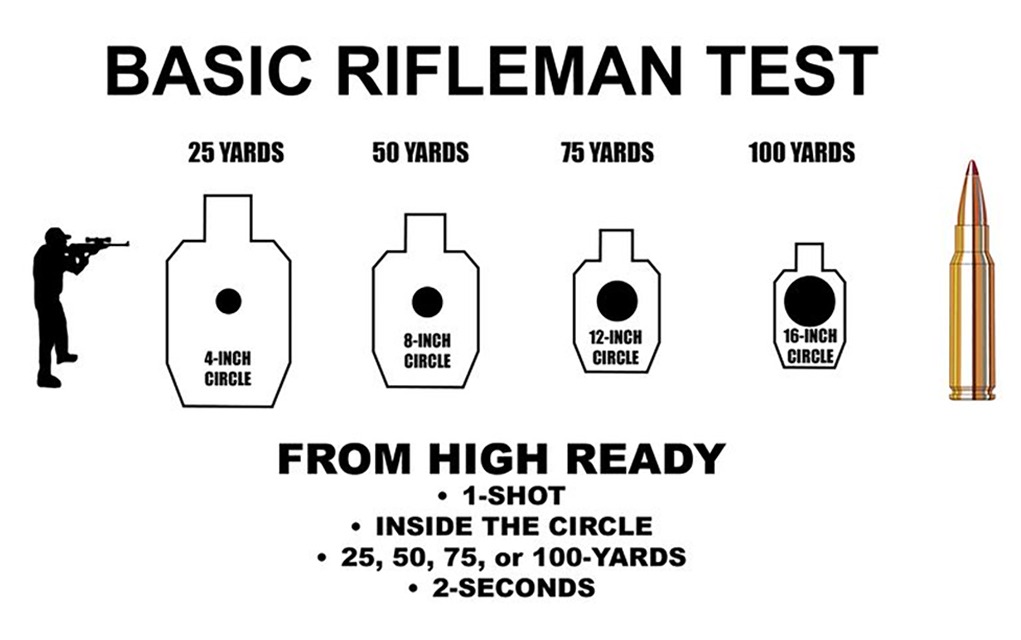
An above average rifleman can start, standing with his rifle in the high ready position, and on signal hit a 4-inch target at 25 yards, or a 16-inch target at 100 yards, in less than 2 seconds. An 8-inch target at 50 yards or a 12-inch target at 75 yards would yield the same results. From the standing unsupported position, an above average rifleman should also be able to hit an 8-inch target at 100 yards in less than 5 seconds.
Any of these evaluations could be considered a basic rifleman test, but to mean anything they cannot be an example of one, they need to be conducted over time. Five attempts on five different days would make sense, and a passing score of four out of five would qualify. Because remember: on some days you just don’t shoot as well as on others.
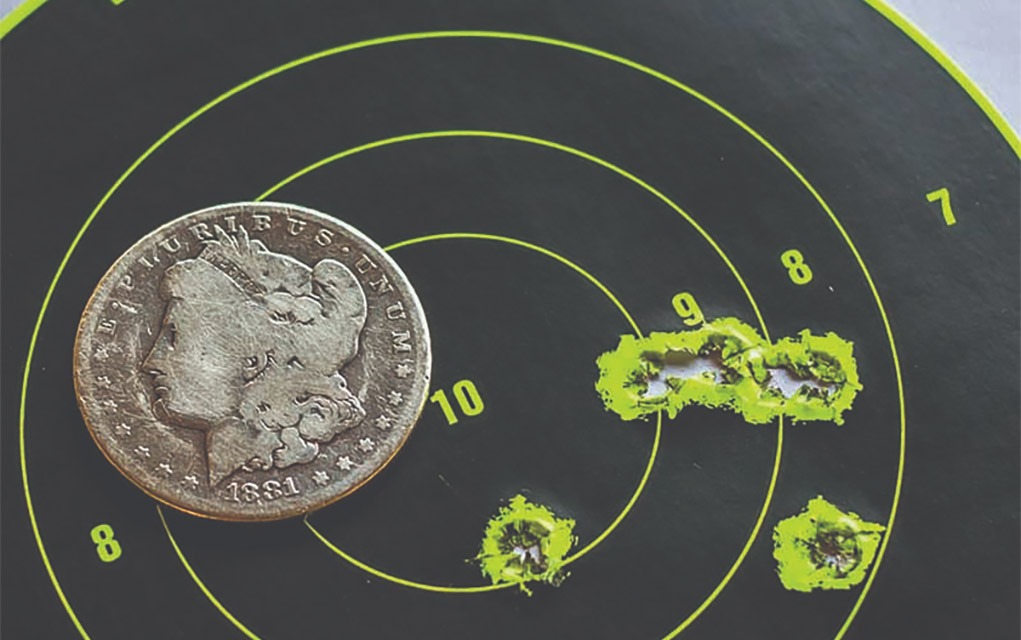
Handgun Precision
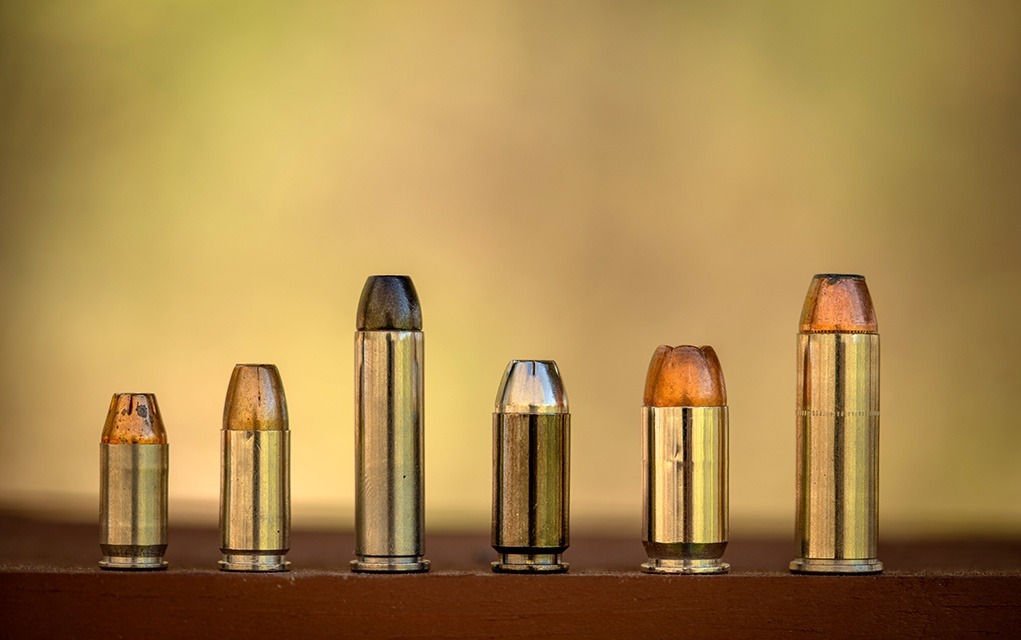
Handguns come in many shapes and sizes. They range from the itty-bitty, like derringers, to bolt-action pistols with barrels as long as 16 inches. Establishing a single precision standard for all handguns is just not practical. So, with the most popular handgun of the 21st century being a self-defense style pistol or revolver with a barrel of between 3 and 5 inches, that’s what we’ll focus on.
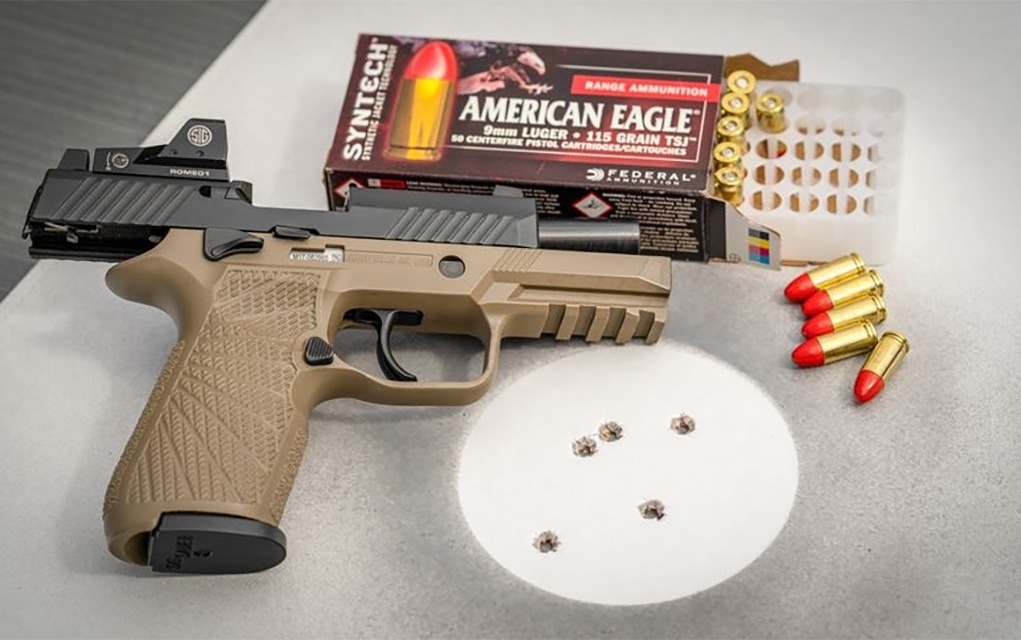
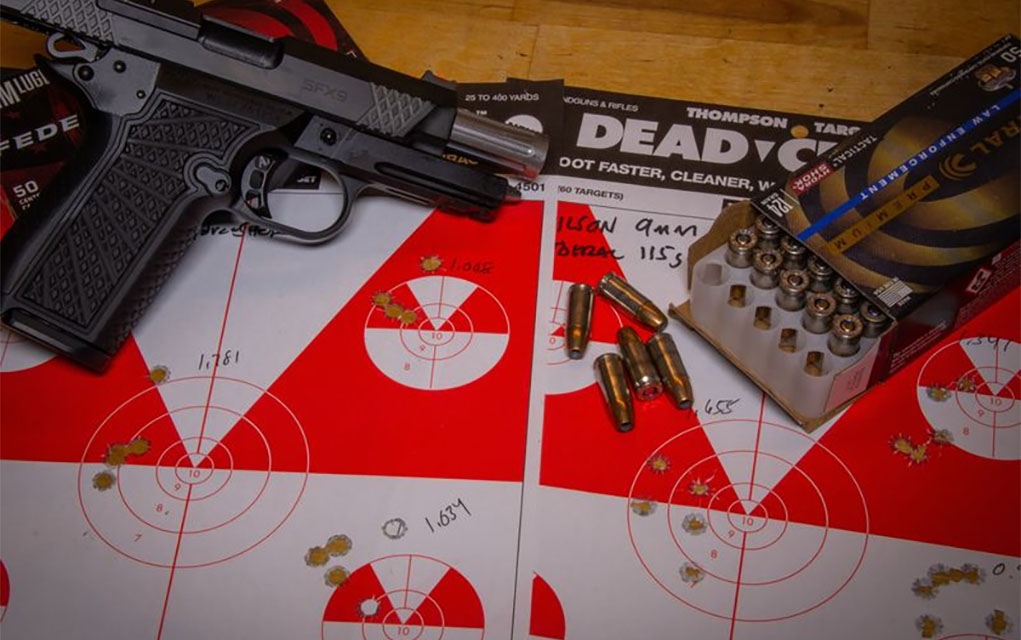
Just as with rifles, over the past quarter century I’ve tested many defensive handguns. And again, just as with the rifles, I’ve kept detailed records. Based on that data, the average precision performance for all the defensive-style handguns I’ve tested—fired at 10 yards from a sandbag rest—worked out to 1.58 inches. Just so you know, there were some real dogs involved in that mix, and there were also some handguns with very poor sights.
With this average, where one of the best-performing pistols had a retail price of less than $500 and the most expensive was over $4,000, I’d submit that better-than-average precision from a defensive handgun at 10 yards would be the same as better-than-average rifle precision at 100 yards. If your defensive handgun will average less than 1.5 inches for all the groups you have fired from it at 10 yards, it and you are exhibiting better-than-average performance.
Handgun Shooting Ability
Like how there are many styles of handguns, when it comes to measuring shooting ability, you must establish parameters. You simply cannot compare your shooting ability with a single-shot hunting handgun to your skill with the semi-auto handgun you carry for protection. So, in line with my established precision requirement—using self-defense handguns with barrels between 3 and 5 inches—the same applies here.
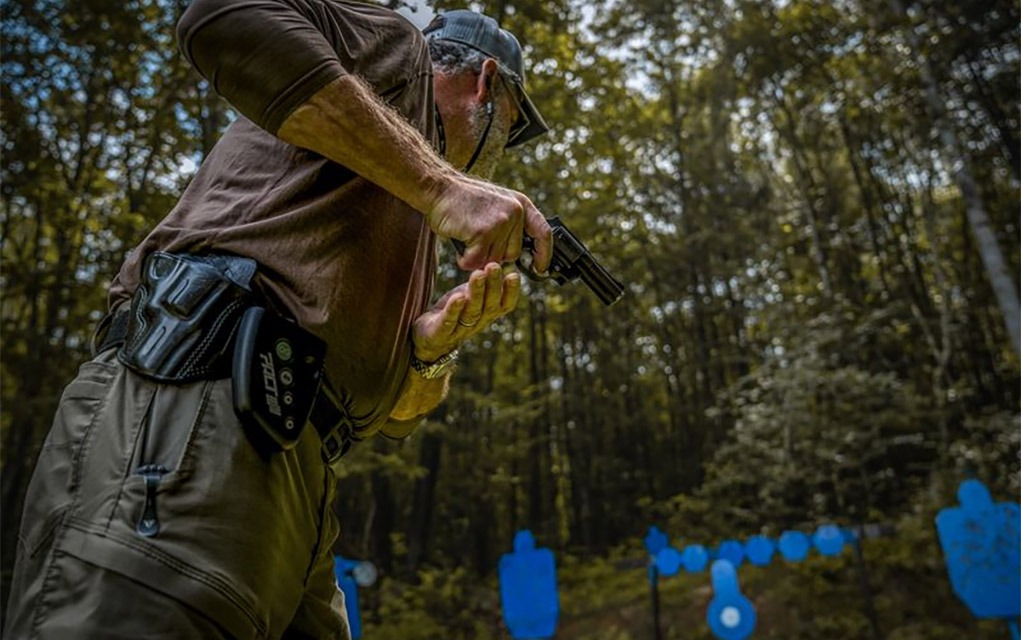
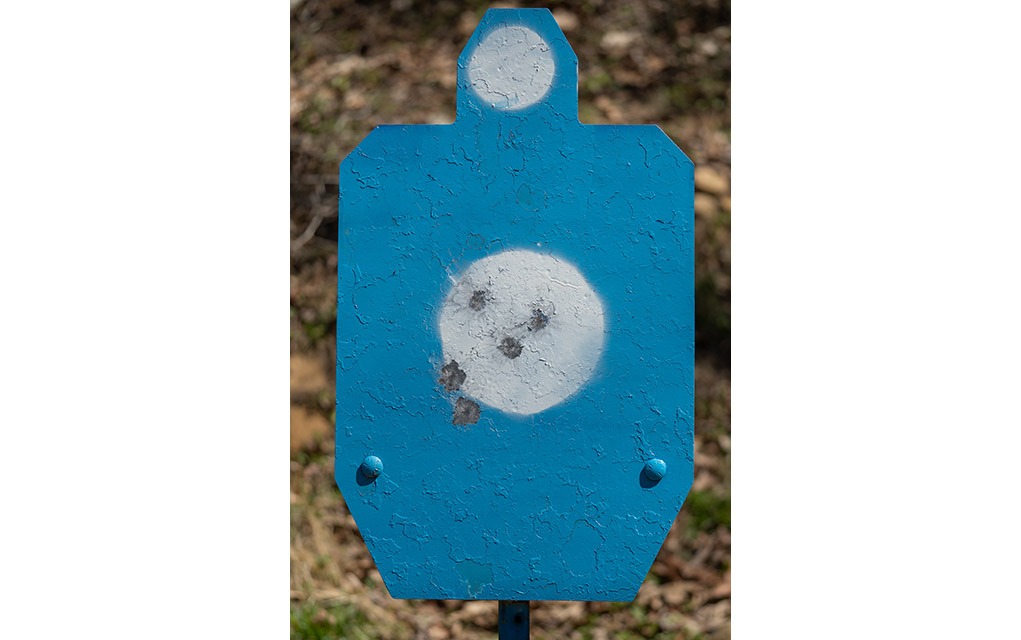
As a shooter, student or trainer, I have more time on the range with self-defense handguns than any other firearm. I have a reasonable idea concerning the average skill level of soldiers, policemen and enthusiastic civilians, and I believe the best measure of average defensive handgun shooting skill is what I call the “Forty-Five Drill.”
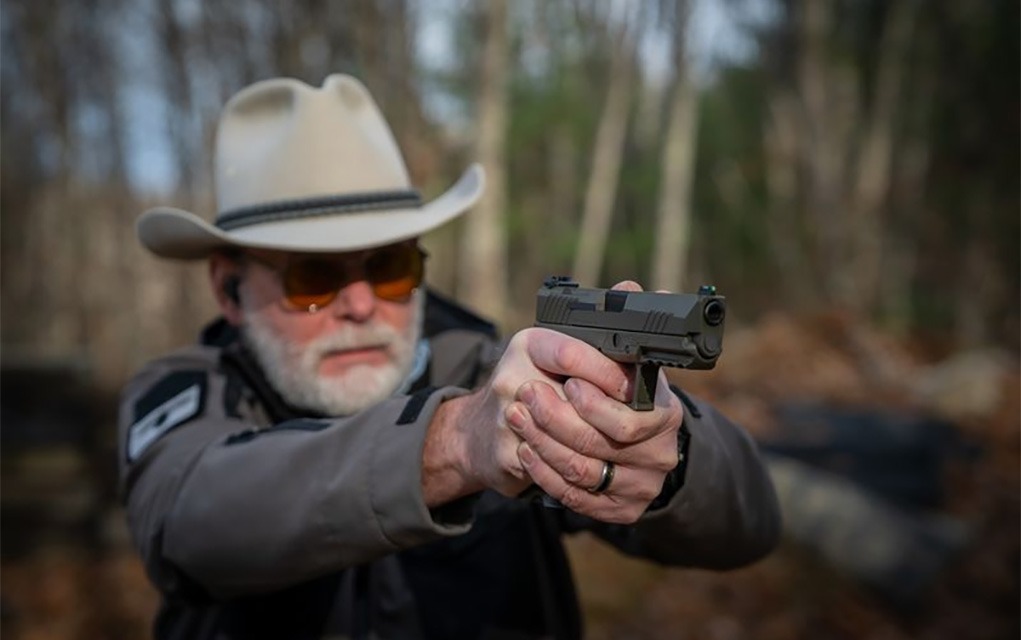
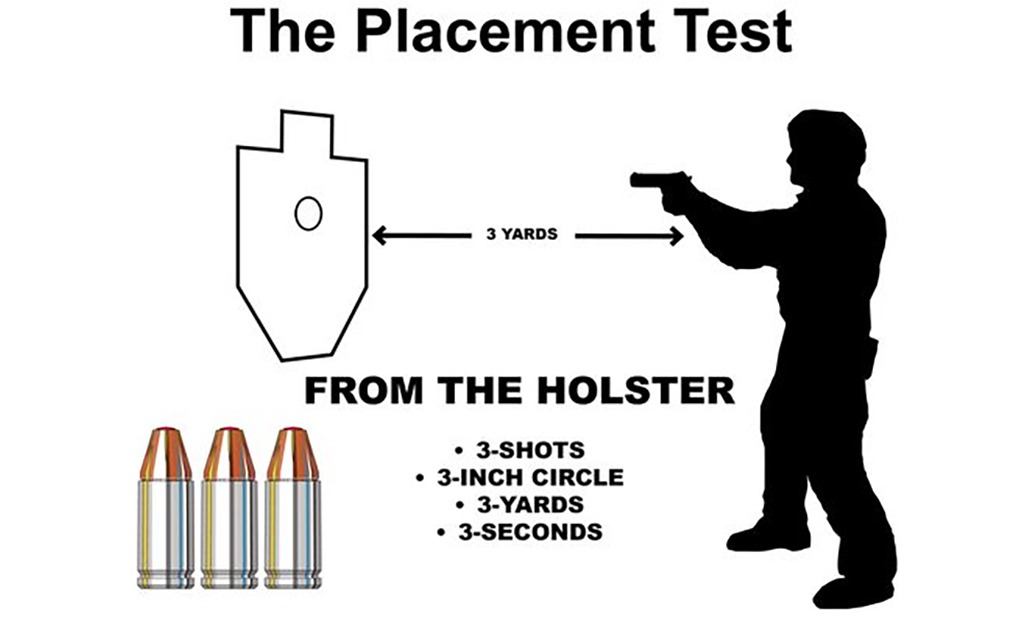
Both the Forty-Five Drill and the similar Placement Test are good measures of defensive handgun skill.
I’ve written about this drill many times, and it exists under other names too, but what’s important is whether you can meet the standard. If you want to consider yourself better than average with a defensive handgun, you should be able to start from the holster and draw and fire five shots in less than 5 seconds, and every shot should hit inside a 5-inch circle at 5 yards.
Ironically, I once asked firearms trainer John McPhee, who served in the U.S. Army Special Operations for more than 20 years, and who is better known for his callsign name of “Shrek,” what he thought a single self-defense handgun evaluation drill should be. He calls his drill the “Placement Test,” and it requires you to draw and put three shots into a 3-inch circle, at 3 yards, in 3 seconds.
If you like Shrek’s drill better than mine, use it. If you can perform either to standard, and on demand, consider yourself better than average with your self-defense handgun. But this isn’t a one-time thing. Like the rifleman test, you should be able to do this on five different days with a passing score on at least four of them.
Examples of One
Before I turned 18, I convinced my mother to buy me a handgun. I paid for it; she did the paperwork. It was a Smith & Wesson Model 66 with a 4-inch barrel. I told one of my buddies about it, and he wanted to shoot it but had never shot any type of handgun. So, we drove out to an old strip mine. I loaded up the .357, laid it on the hood of my truck, picked up a pop bottle and threw it into the air. Then, I grabbed the gun off the hood of my truck and busted that bottle before it hit the ground. It was the first shot I’d ever fired out of that revolver, and I doubt I could replicate that feat today with 20 tries. It was a splendid example of one.
In truth, a defensive handgun should deliver sub-inch groups at 10 yards from the bench. However, we must make allowances for shooter error.
And this is where I must retract my earlier statement that examples of one mean nothing. After shattering that pop bottle—for you millennials out there, pop bottles used to be made of glass—I laid the revolver back on the hood and said, “You try it.” He did, again and again, but he never hit the bottle.
I was smart enough not to shoot any more in his presence and after his telling of my grandiose performance to all our buddies, I was legend. That’s what examples of one are good for—legends.
Editor’s Note: This article originally appeared in the February 2023 issue of Gun Digest the Magazine.
We discuss the pros and cons of various rifle actions to better understand their strengths and their limitations.
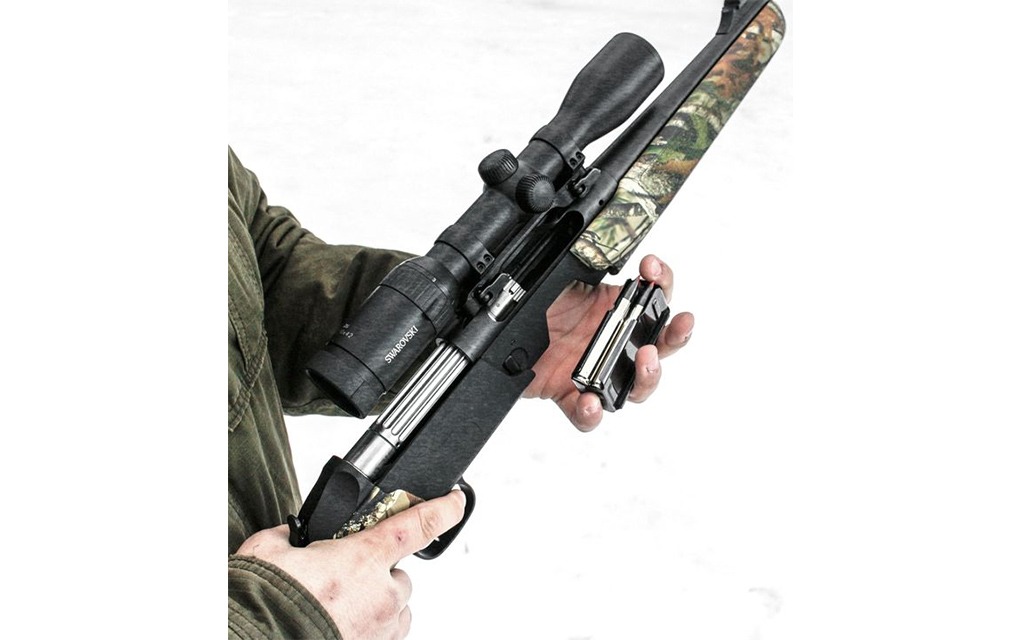
Standing in snowshoes, trudging up a nasty slope in 2 feet of snow after a December storm in the Catskill Mountains, I had doubted my sanity until I caught sight of the buck creeping through the hemlocks. Steadying myself as best I could on the evil footwear, I brought the Tikka T3X Lite to shoulder, and sent the AccuBond on its way. Working the bolt, I had no need to fire another shot; the 7mm-08 Remington had done its job. If you’ve ever hunted those hills, you know there aren’t deer behind every boulder.
I have a good amount of hunting rifles to choose from, but this little Tikka is very light, making it a perfect choice for the more rugged parts of the Catskills. I’m not a sheep hunter who counts ounces, but I sure do appreciate a lighter rifle when things get steep. Come down from the Catskills and into the Hudson Valley, with its farm fields, thick woods and everything in between, and rifle weight plays less into the equation.
My dad bought a Winchester Model 100 autoloader in the 1970s, when there were plenty of doe tags, and he would routinely take multiple deer when opportunity knocked. The Model 100 isn’t very heavy, and he relied on it for firepower, needing the rapid second and third shots on the fruit farm that could be quickly destroyed by deer.
The lever gun can offer rapid firepower as well, though they’re usually chambered for rimmed, round-nosed cartridges that perform best inside of 150 yards. The pump- or slide-action rifle had a bigger following in years past but can still be an effective hunting tool. The single-shot and double rifles are also a viable option, though they do come with their own issues. Invariably, the bolt-action rifle reigns supreme in the hunting world, with good reason.
Photo: Massaro Media Group.
The hunting rifle action that works best for you will most likely be determined by the type of hunting you do and the species you pursue. An AR might be perfect for deer and hogs, and for predators and varmints, but it probably won’t see much time in the sheep mountains. And while I absolutely love my Heym double rifle, carrying a .470 Nitro Express on a pronghorn hunt doesn’t exactly make much sense.
Let’s look at the different rifle actions available to us, and highlight their strengths and weaknesses, as well as their best applications.
The Bolt-Action
We owe a ton to Peter Paul Mauser, whose Model 98 might just be the pinnacle of the design, despite being more than 120 years old. Many of our favorite bolt guns are based—in one way or another—on Mauser’s dual-lug design, including the Winchester Model 70. And though a century ago the lever-gun ruled the roost, the latter half of the 20th century saw the bolt action rifle take over.
The Winchester Model 70 is among America’s classic rifle actions. Photo: Massaro Media Group.
First, it’s a strong design and can handle high pressures, easily housing magnum cartridges. The locking lugs turn into slots in the receiver, firmly sealing the breech. Second, it’s a rigid action, which lends itself to the best accuracy. The one-piece stock also enhances accuracy.
Third, it can be adapted to handle just about any cartridge, though the rimmed cases don’t really like to feed from a box magazine. The bolt-action rifle can be equally at home in a varmint rifle (I still love my old Ruger 77 MKII in .22-250), a deer, elk or moose rifle (I love .300 Magnums) or a true dangerous game rifle for brown bear, Cape buffalo or elephant (don’t even get me started about my Heym .404 Jeffery).
A bolt-action rifle allows the low mounting of a riflescope over the center of the bore and accounts for the action’s increase in popularity, as optics became more reliable in the second half of the 20th century. The bolt-action’s trigger can be tuned to break very lightly, and usually the adjustment is easier than on that of other action types.
Add all this together, along with the ease of manufacture that can lend to affordability, and you can see why the bolt action has ascended to the throne. They can be lightweight—perfect for mountain hunts—or equipped with short barrels for thick brush … or bedecked with long tubes to wring every last bit of velocity from your cartridge. Many models can be field-stripped without difficulty, and basic service isn’t a big deal. Were I pressed to use just one action type for the rest of my career, it’d be a bolt action.
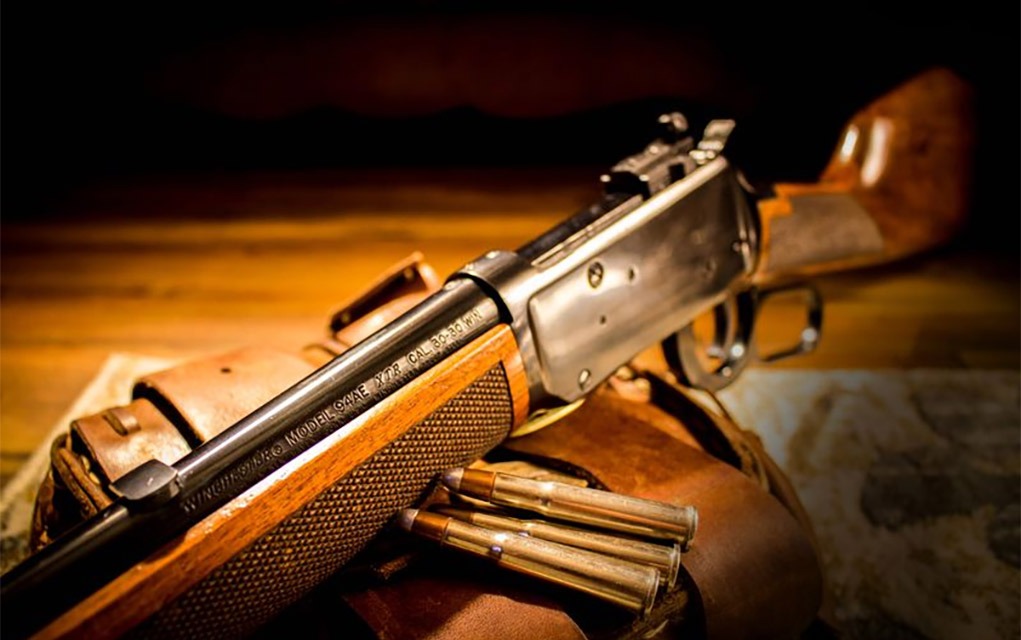
The Lever-Action
As American as apple pie, the lever gun represents the American West, the Eastern deer woods, gold strikes, exploration and so much more. It was the first successful repeating rifle action, offering an unprecedented level of firepower in comparison to the single-shot muzzleloaders of the Civil War era. The latter half of the 1800s, and the early part of the 1900s, were absolutely dominated by the lever-action rifle, with hunters of all classes enjoying the fine designs.
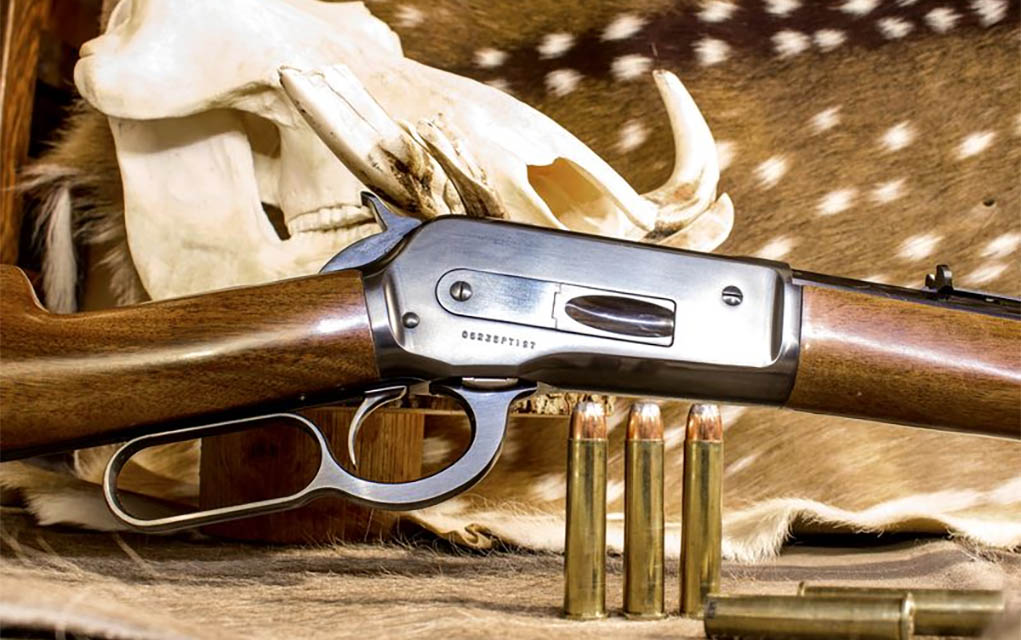
The Model 1886—shown here is a Browning Centennial Model—is a very strong action and can handle higher pressure loads in the .45-70 Government. Photo: Massaro Media Group.
Whether it’s a simple .30-30 Win., a classic .45-70 Govt. or one of the more rare and wonderful cartridges like the .348 Winchester or .219 Zipper, a lever gun can be a helluva lot of fun. The traditional designs offer a different experience, as they’re usually iron sighted, with top ejection preventing the use of low, center-mounted scopes.
Using tubular magazines, many lever guns are limited to flat or round-nose bullets, unless you opt for the Hornady LeveRevolution ammo with the FTX bullet and its pliable polymer tip. But I prefer to use a traditional lever rifle as it was intended: round-nose bullet, rimmed cartridge, relatively slow velocity. At close ranges, they work wonderfully. Keeping the butt on your shoulder, you can quickly cycle the action while staying on target for a quick follow-up shot.
The lever gun certainly evolved as time progressed, beginning with the Savage Model 99, which uses a rotary magazine and allows for the use of spitzer bullets and rimless cartridges. Winchester followed suit in the 1950s with their excellent Model 88, and Browning introduced what may be my favorite modern lever gun in their BLR in the early 1970s. All of these rifles can be scoped, and all have the potential for wonderful accuracy, despite the two-piece stock.
I tested a Browning BLR Lightweight ’81 Stainless Takedown in .30-06 Springfield that’d deliver ¾-MOA accuracy all day long. If you like the speed of a lever gun, but the cartridges of the bolt-action, one of these rifles will check the boxes, and can deliver the necessary accuracy out to sane hunting ranges. That BLR is even available in some common magnum cartridges like the 7mm Remington Magnum and .300 Winchester Magnum. With detachable box magazines, this class of lever gun qualifies as an all-around choice.
The Autoloader
This oft-maligned group of rifles most certainly has a place in the hunting world, and like the bolt and lever guns, comes in many guises. From the Remington Model 8 chambered in .35 Remington to the latest AR-15, the function of all these rifles is essentially the same.
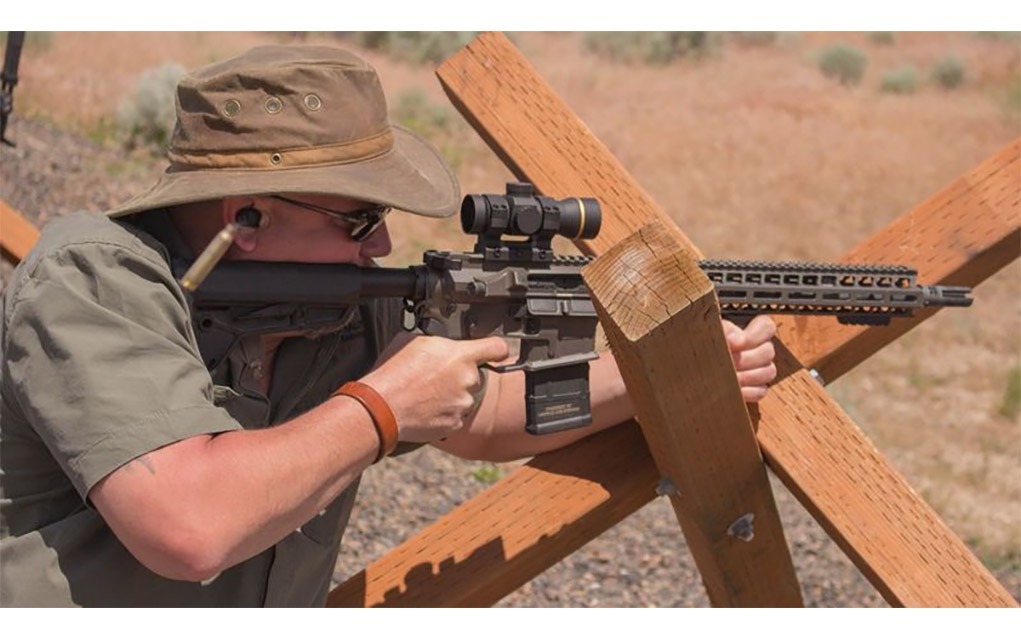
The author with a “modern sporting rifle,” which is no different than any other auto-loading rifle. Photo: Massaro Media Group.
When I was a younger man, the Remington 7400 autoloaders were extremely popular in my world; I suppose the quick follow-up shots had significant appeal. I remember a bunch of those rifles being rather inaccurate, and a plastic bushing that used to foul up, causing the rifle to malfunction. That aside, I took my first good whitetail with a borrowed 7400 in .280 Remington. The Ruger 44 Carbine was a handy little gun.
The autoloaders tend to be a bit heavier and can be noisy to load, or clear, in the woods. Many modern ARs can be wonderfully accurate and make an effective hunting tool. I don’t personally spend a lot of time hunting with them, but they’ve certainly become popular among deer hunters. They’re excellent for calling coyotes in open country, where multiple targets aren’t uncommon and where running shots can be the norm.
I’ve seen a number of autoloaders fail to go into battery, only to have the shooter find out when trying to fire the rifle. It usually requires cycling the action, which will more than likely ruin whatever shot opportunity you had. Still, there’s nothing wrong with an autoloader—just don’t try to substitute firepower for a well-placed shot.
The Pump (Slide Action)
These rifles are the least popular, yet they most definitely have their place. Pump rifles are popular in Europe, especially on driven hunts where autoloaders are prohibited. I spent some time with the Krieghoff Semprio, a strange rifle that operates sort of backward, with the forend (and the receiver) moving toward the muzzle to open the action … and rearward again to close it. Counterintuitive to every pump I’ve ever used, it’s strange as the scope moved away from my eye and came rushing back on the return stroke. But I must say, the rifle was accurate.
The Kreighoff Semprio, with its action open; note how the receiver and optic move away from the butt. Photo: Massaro Media Group.
With a two-piece stock and all sorts of things moving on a pump rifle, you shouldn’t expect the hair-splitting accuracy of bolt guns, but they can be minute-of-deer-heart, so for the woods hunter, it can be a fun rifle with which to hunt.
The Single Shot
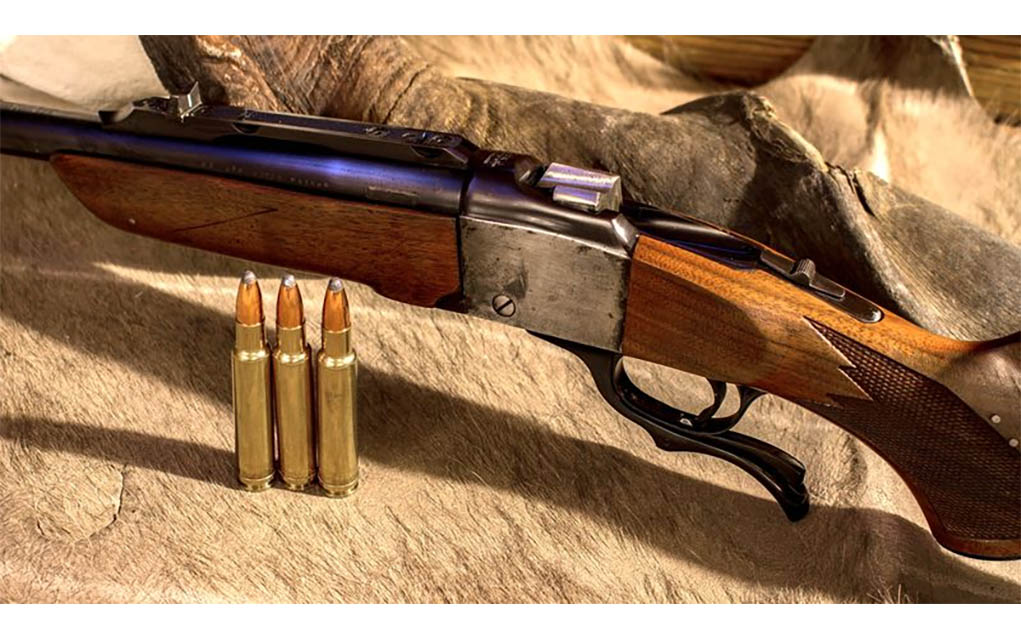
This group is revered for its simplicity of design and a natural derivative of the muzzleloading rifle. Whether falling block or break action, the single-shot rifle can be made shorter and lighter than their repeating relatives because no receiver is needed. They can house any style of cartridge, and those falling block rifles—like the Farquharson-based Ruger No. 1—can handle magnums with ease.
The Ruger No. 1 single-shot is based on the Farquharson falling-block action and is popular among hunters. Photo: Massaro Media Group.
Many hunters cut their teeth with a Harrington & Richardson break-action rifle, and Bill Ruger’s No. 1 and No. 3 have a devout following. There’s a certain mindset associated with single-shot rifles—having only one shot often makes you a more focused rifleman.
If you enjoy a single-shot rifle, there’s no reason not to take it on any hunt, and you’ll see them in just about every hunting situation. Hunting dangerous game with a single shot isn’t out of the question, but you may be looking at a situation where your Professional Hunter may be forced to fire a backup shot.
Some very fancy single-shots are available from bespoke shops and custom gunmakers. Folks like Martin Hagn or Luxus Arms can make some jaw-dropping rifles. Light, short and handy, single-shots are a solid choice.
The Double Rifle
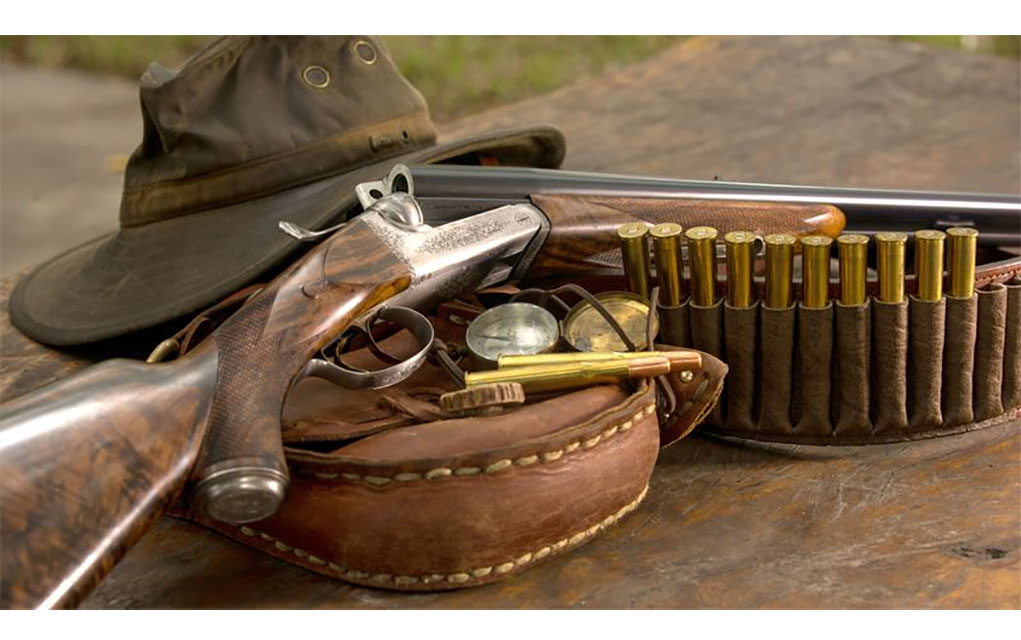
There’s something special about a double rifle; the twin pipes offer something cool and unique, and in the large Nitro Express calibers, there’s no quicker second shot. Getting two barrels to hit the same point is no easy feat and often labor-intensive, which is the primary reason the double rifle is so expensive. I’ve used several different models, from a scoped Kreighoff in 8x57R, to Heym Model 88B and 89B rifles, to the over/under Heym Model 26B in .45-70 and shot Rigbys, Boswells, Jefferys, Westley Richards and more.
The big-bore double rifles have a certain romance attached to them, though they do come with certain limitations. Photo: Massaro Media Group.
There are pleasures and pitfalls with the double rifle. They’re obviously heavier than their single-barreled counterparts, and though they can be scoped or have a reflex sight mounted, part of the romance is the wide-V rear sight and bold front bead. An iron-sighted rifle will definitely limit your shot opportunities; it’s part of the deal. You’ll want to spend some quality range time learning how to manipulate dual triggers, as well as the art of reloading without looking.
That said, if you’re an aficionado of Africa, few experiences will rival hunting Cape buffalo with a double rifle. I’ve taken a few with my Heym Model 89B .470 NE, and those hunts are among my fondest memories afield. The double rifles are usually associated with harder-kicking cartridges, though the additional weight of a double rifle will help mitigate that. Carrying that gun in the African heat for miles can be tough, but it’s nice to put a period at the end of the sentence when the shot opportunity arises, and that second barrel can save your bacon.
Editor’s Note: This article originally appeared in the September 2022 issue of Gun Digest the Magazine.
Looking for a new iron or piece of kit to enhance the one you already own? Check out these 7 new bits of guns and gear to grow your firearms wish list.
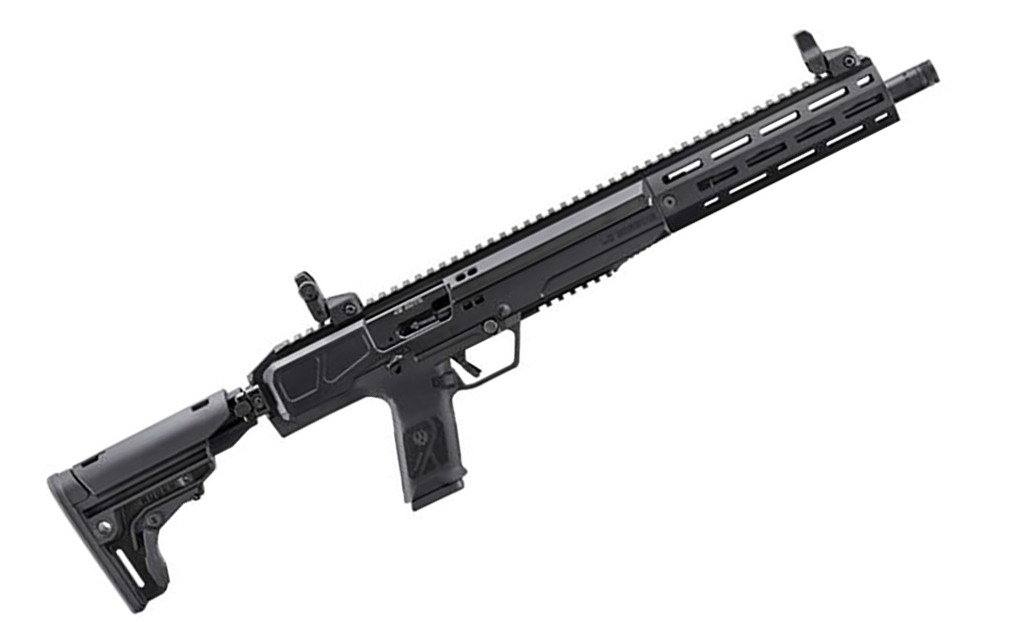
The LC Carbine has been a hit for Ruger, and it’s certainly bound to garner more attention now it’s going fat and slow. That’s right, the handy little PCC is now available in .45 ACP. Whether for home defense or playing around at the range, the combination of the carbine and the time-tested cartridge is certain to prove potent. Plus, Ruger hasn’t messed with the winning formula earning the LC Carbine the reputation as stalwart and shootable. Some of the high points include a 16-inch threaded barrel, Dead-Blow blowback operation, AR-style folding stock and the ability to use Glock and Ruger magazines. MSRP: $1,000
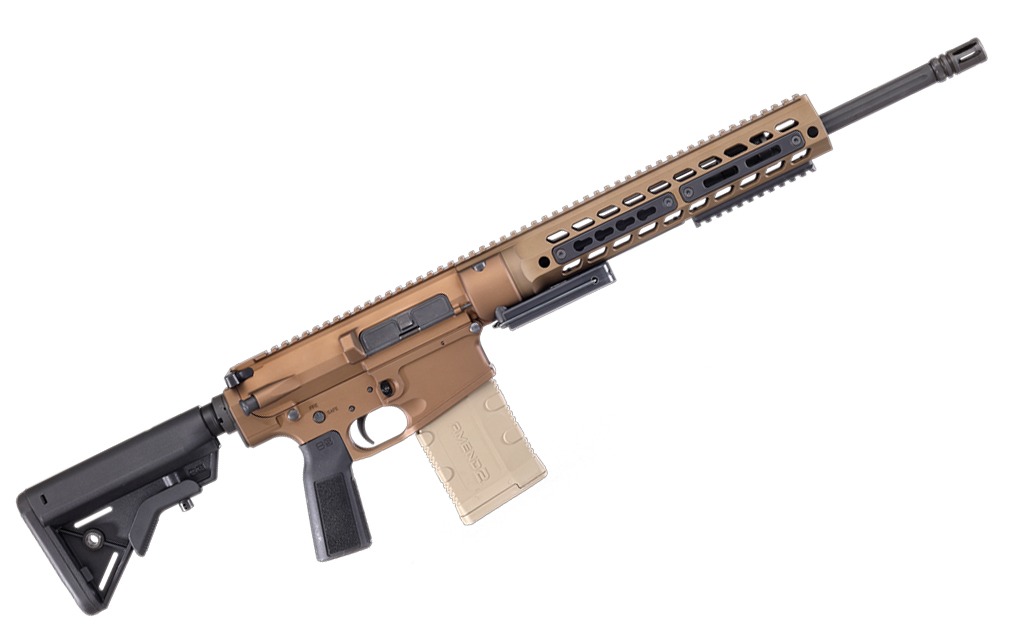
Hydra Weaponry Hydra 10
Hydra Weaponry always seems to have something up its sleeve. Its latest ace is certain to grab the attention of folks who appreciate a full-powered rifle. Meet the Hydra 10, a robust AR-10 that brings plenty to the table. First and foremost, Hydra developed the .308 Winchester around the DPMS-pattern receiver, which in turn opened up the doors to more mods and upgrades. Not that it’s necessary, given the Hydra 10 is fairly well decked out—available in 16- and 18-inch barrel configurations, each with ample M-Lok real estate and BLK B5 furniture. The trigger is snappy, too. For those in the market for a deadly serious hunting option or a home-defense gun that can reach out and touch miscreants, the Hydra 10 is just the ticket. MSRP: $3,000
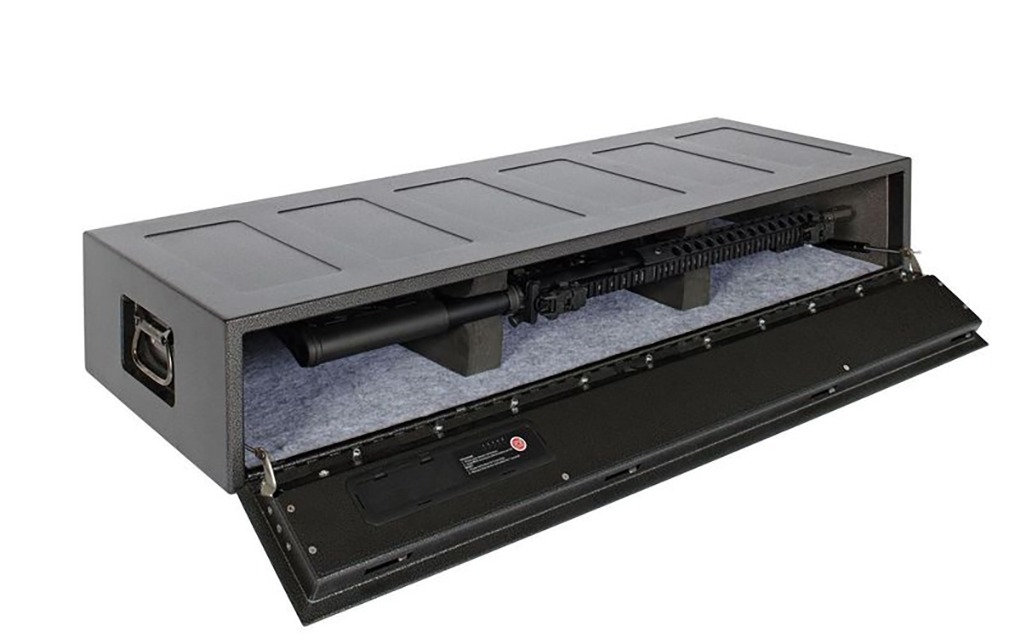
Hornady RAPiD Safe AR Gunlocker
Hornady Security expands its RAPiD safe line with the RAPiD Safe AR Gunlocker, providing secure storage for long-guns in compact spaces. Designed for under-bed, closet or vehicle storage, it’s tailored to always be at-hand. Available in two sizes, and accommodating up to three tactical-length shotguns or carbines, it features heavy-duty 16-gauge steel construction with four internal locking lugs. Accessible via RFID wristbands, key fobs or numerical keypad entry, it ensures quick access while maintaining security. With pre-drilled holes and a security cable, mounting options are flexible. MSRP: Starting at $420
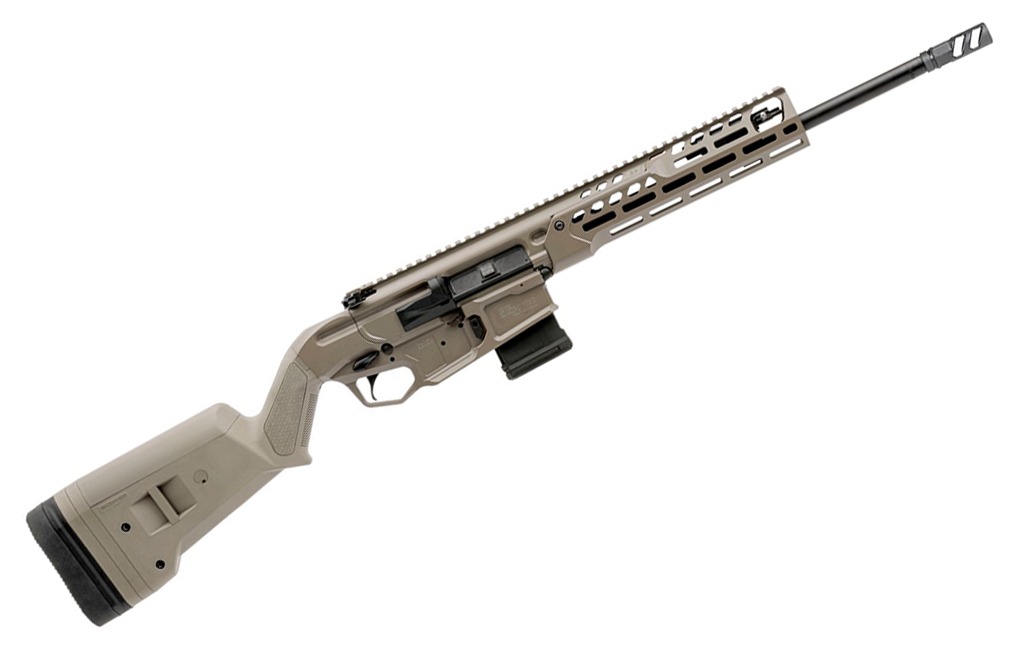
Sig Sauer Ranch Rifle
Sig Sauer has gone country. The MCX Regulator is a modern ranch-style rifle with some interesting twists. Available in 5.56 NATO or 7.62x39mm, it’s part of the MCX Spear LT family, featuring a gas-operated piston system. Departing from traditional AR-pattern firearms, it opts for a modified lower receiver compatible with traditional buttstocks. This design facilitates accessibility in restrictive states. Backward compatible with other Sig Sauer MCX upper receiver groups, it maintains versatility. Equipped with a two-stage match trigger, cold hammer-forged barrel, and Sig muzzle brake, it offers precision and reliability. The MCX Regulator includes a built-in Arca Rail and ships with a 10-round magazine. Oh yeah, it’s California legal. MSRP: Starting at $3,000
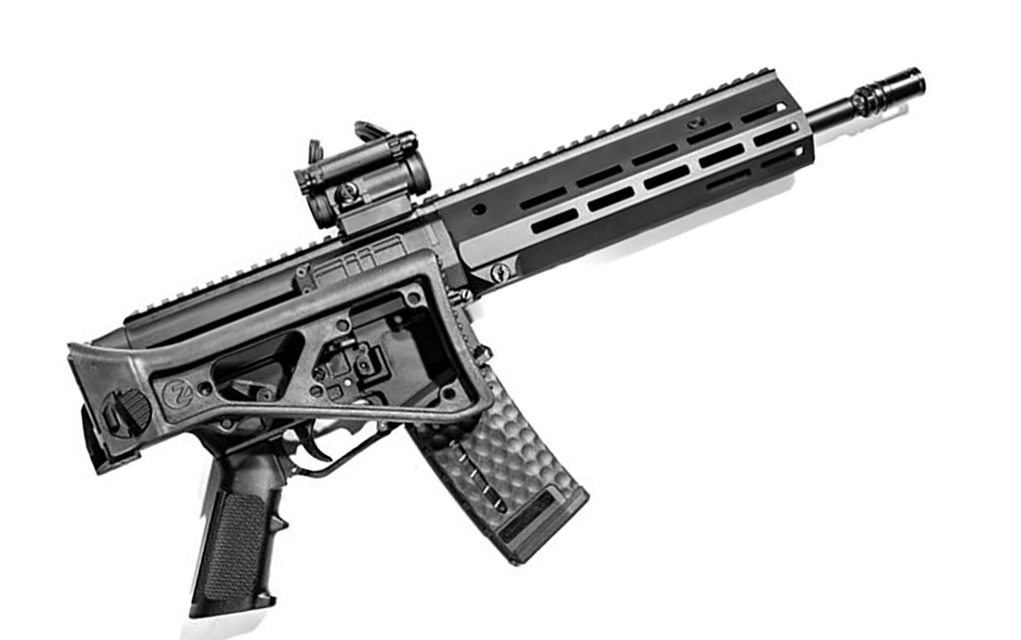
Zenith ZF-56
Good things come in small packages. Take the ZF-56 from Zenith. Renowned for its MP5 clones, the company has unveiled modern 5.56-caliber roller-delayed carbines and pistols. Departing from traditional HK-style designs, it integrates AR-like upper and lower receivers, enabling compatibility with AR stocks and folding designs. Equipped with an M-Lok handguard and optics rail, it balances versatility and customization. Featuring HK-like safety and AR-style magazine release, it offers familiarity and ease of use. With a HK-like charging handle and minimal recoil, it promises ergonomic handling and accuracy. MSRP: Starting at $2,375
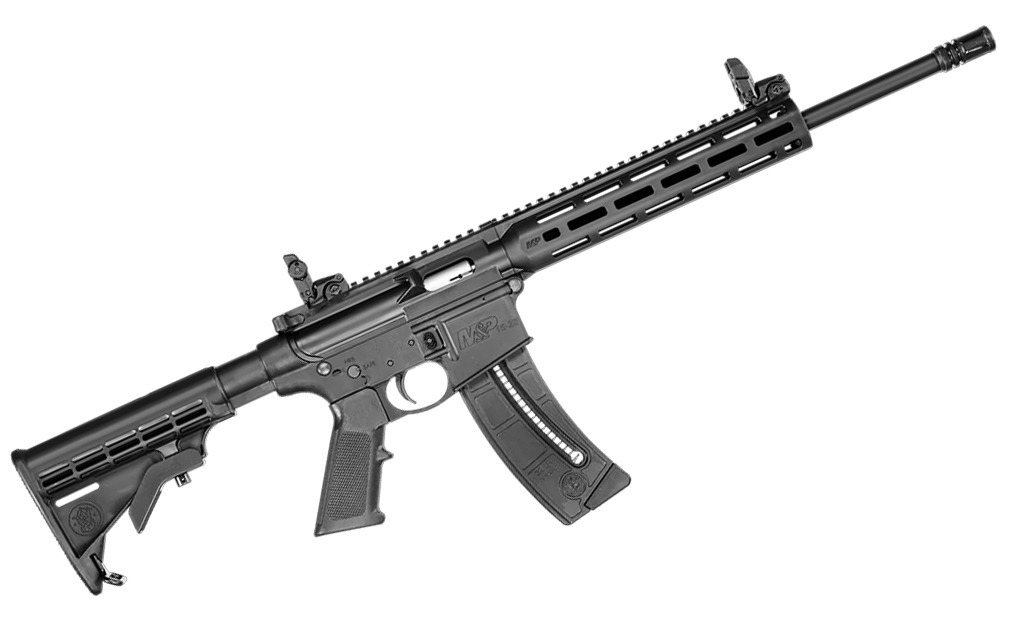
Smith & Wesson M&P15-22 B5 Edition
Looking for a plinker with a bit more pizzazz? Smith & Wesson has you covered with the M&P15-22 B5 Edition. S&W’s almost iconic .22 carbine is now offered bundled with Magpul MBUS folding rear sight and B5 Systems furniture. Although not new, the M&P15-22 remains a top choice for those seeking an AR-15-style .22 LR rifle. Crafted to emulate the AR-15’s look and feel, it boasts interchangeable parts with standard AR-15s, ensuring seamless handling and training. The B5 Systems Bravo Stock and P-Grip 23 enhance ergonomics and versatility, favored by AR-15 enthusiasts. Offering reduced recoil and lower ammo costs, the M&P15-22 B5 Edition delivers a premium shooting experience with modern enhancements. MSRP: $500
Bilson Arms BA-15FC Series
Bilson Arms unveils the BA-15FC series, a forward-charging AR-style rifle showcased at SHOT 2024. Cleverly, the charging handle is moved forward onto the forend and operates as a pump-slide on the semi-auto. The advantage here is the carbine is more intuitive and quicker on reloads, freeing up the dominant hand to only worry about magazines. Building on last year’s 9mm model, this year’s lineup expands to include versatile cartridge options: 5.56 NATO, 6mm ARC, .300 Blackout and .450 Bushmaster. Crafted from billet aluminum, Mil-spec and customizable Cerakote coatings, these are slick shooters. MSRP: Starting at $1,750
Editor’s Note: This article originally appeared in the June 2024 issue of Gun Digest the Magazine.
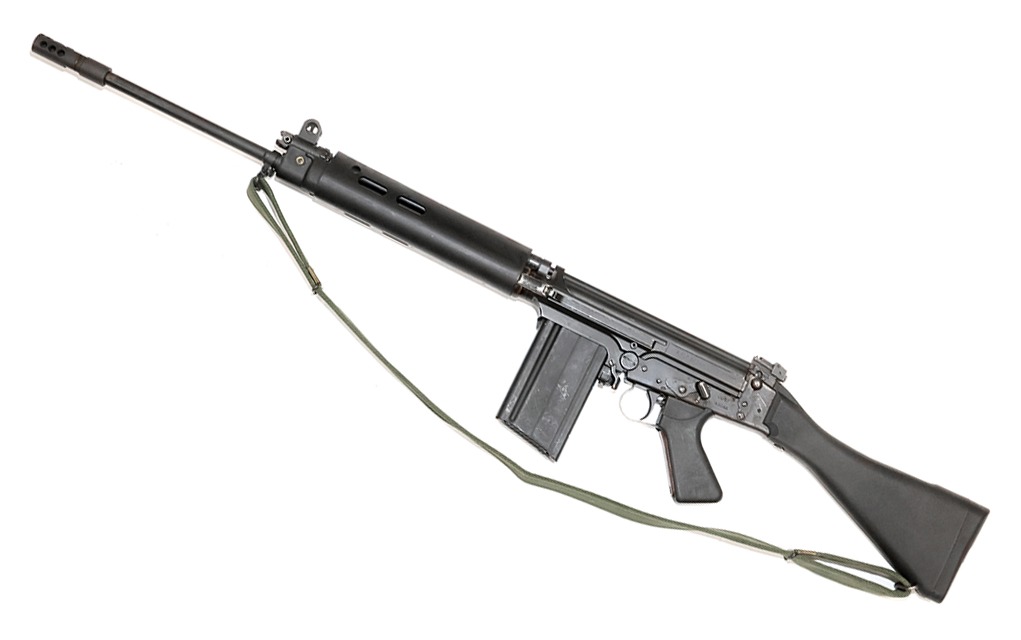
We discuss the history of the famous FAL, also known as the Fusil Automatique Leger or Light Automatic Rifle.
Post-WWII, the West had a problem. The Europeans, having paid attention to the recent fracas (especially the Eastern Front), had developed new less-robust service cartridges and rifles for them. The problem? The Americans and their insistence on retaining a 1,000-yard cartridge. All the Euro efforts at lightweight, compact rifles with low recoil and bullpups (we’re looking at you, England) were out the window. The USA was paying the bills, and the USA was going to get what they wanted, cartridge-wise.
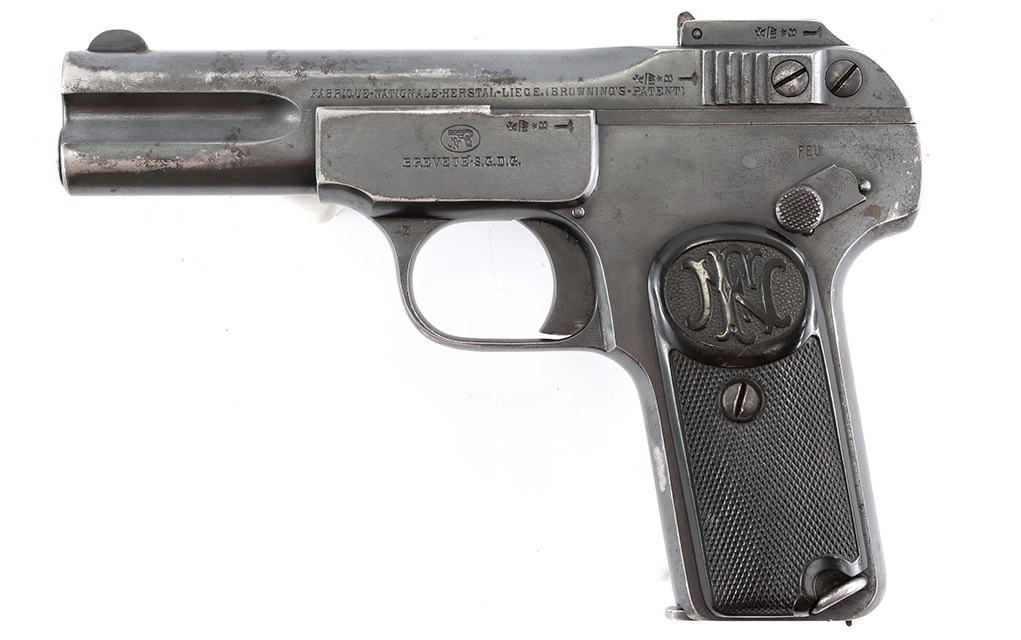
Deuidonne Saive, head designer at FN, modified his excellent (but already retro, even in the late 1940s) SAFN, the FN-49, to make it what NATO needed: Out went the fixed 10-shot magazine for detachable 20-shot magazines; out went the wood stock and in came plastic; out went the regular contour and in came a pistol grip.
The end result by 1953 was the FAL.
The Free World’s Right Arm
The FAL is a gas-operated, piston-driven, self-loading rifle, and it ended up being chambered in 7.62 NATO. The gas system is simple and straightforward, with a gas port in the barrel tapping gas out of the bore to hit the end of the piston. The piston slaps the bolt carrier, and after the carrier has moved, the FAL piston is returned forward by its own spring.
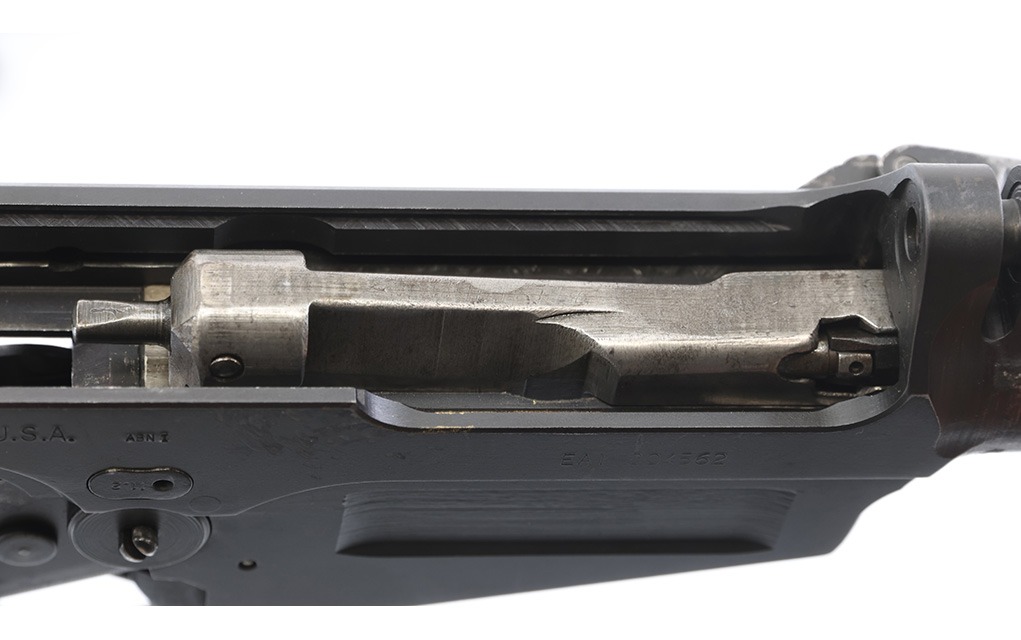
The carrier is a chunk of steel that cams the bolt up, then carries it back. Once fully back, it’s then driven forward by the action spring (contained in the stock in the non-Para version) to strip a round out of the magazine and cam the bolt down to lock it in place.
The FAL is not a turning-bolt design, as was the Garand and its successor, the M14.
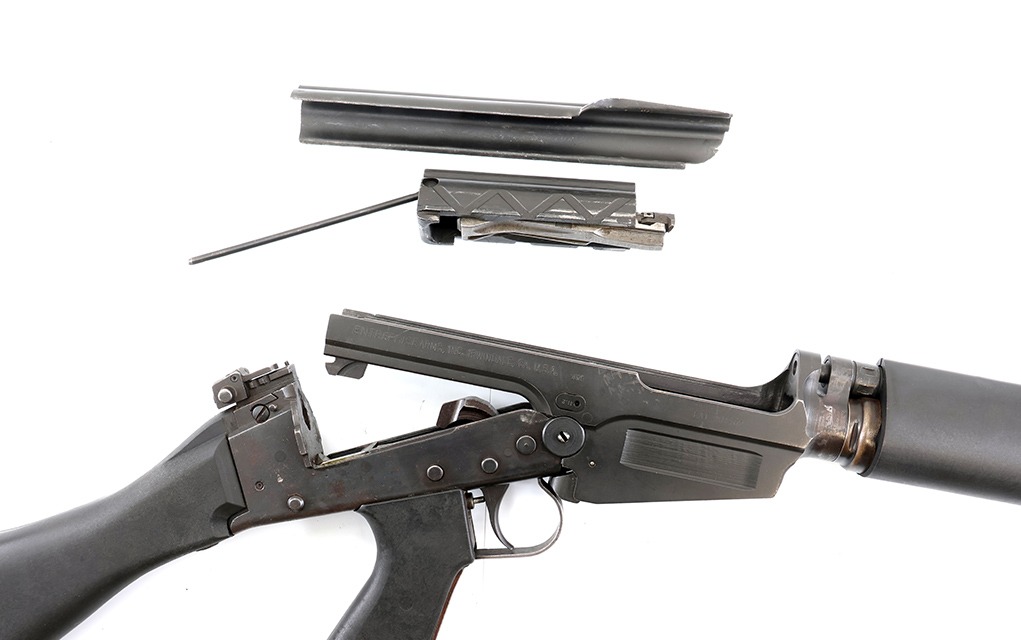
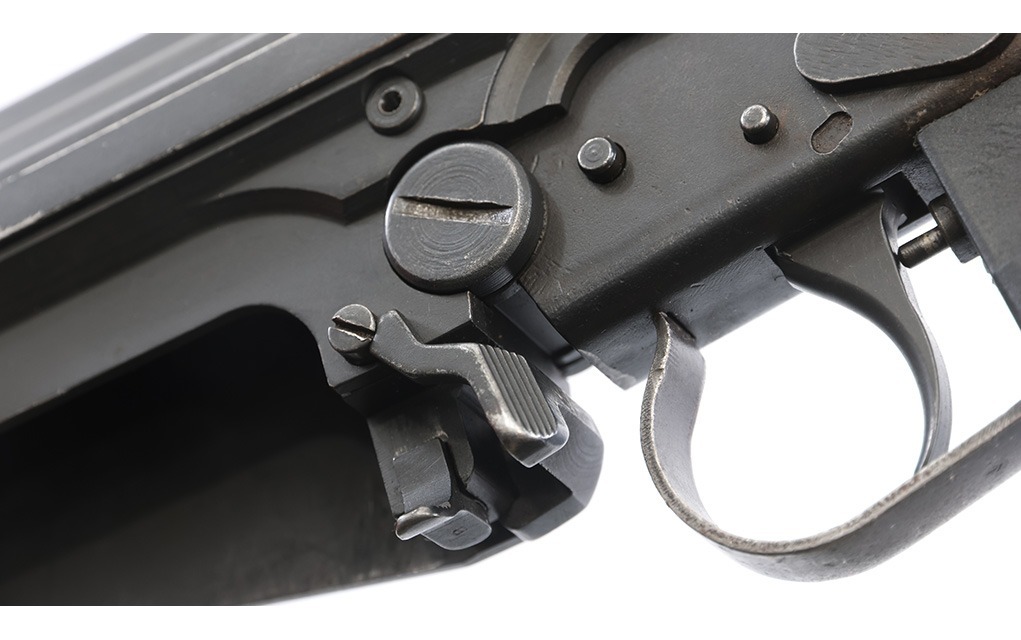
The FAL is made of two main assemblies, the upper and lower receivers. To disassemble, unload and remove the magazine. The magazine lever is on the left side, forward of the trigger guard.
Press the takedown lever on the left rear of the receiver back (or down on some variants) and hinge open the rifle. Grab the top cover and slide it out of the upper receiver. Now, pick up the tail of the carrier and slide it and the bolt. On the hinge point, you’ll see a large-head screw with a slot in it. It’s as simple as unscrewing the hinge and pulling the two parts out (one to each side) while keeping the two receiver assemblies under control.
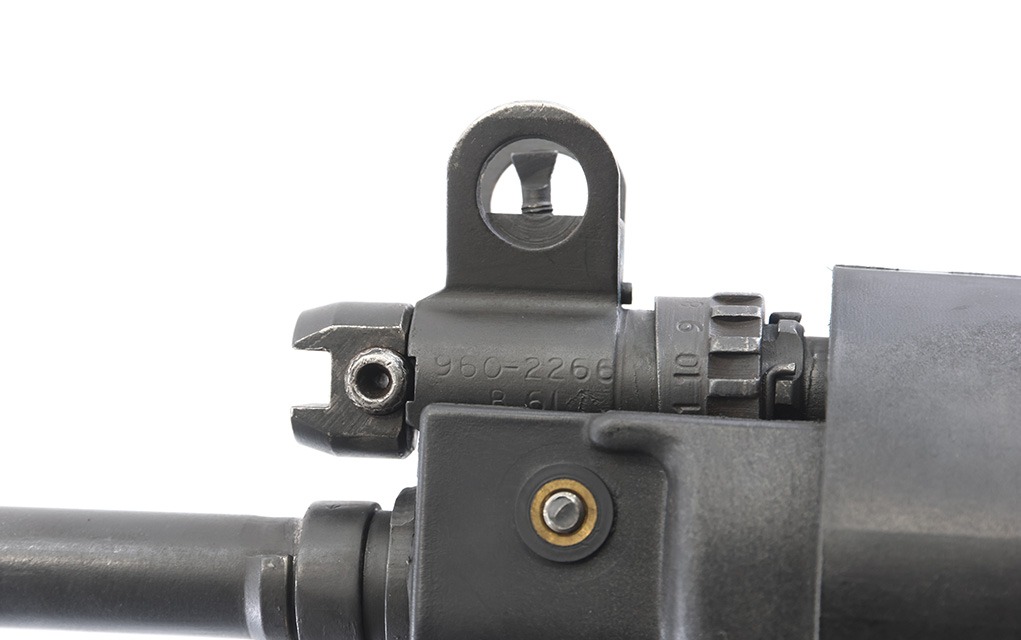
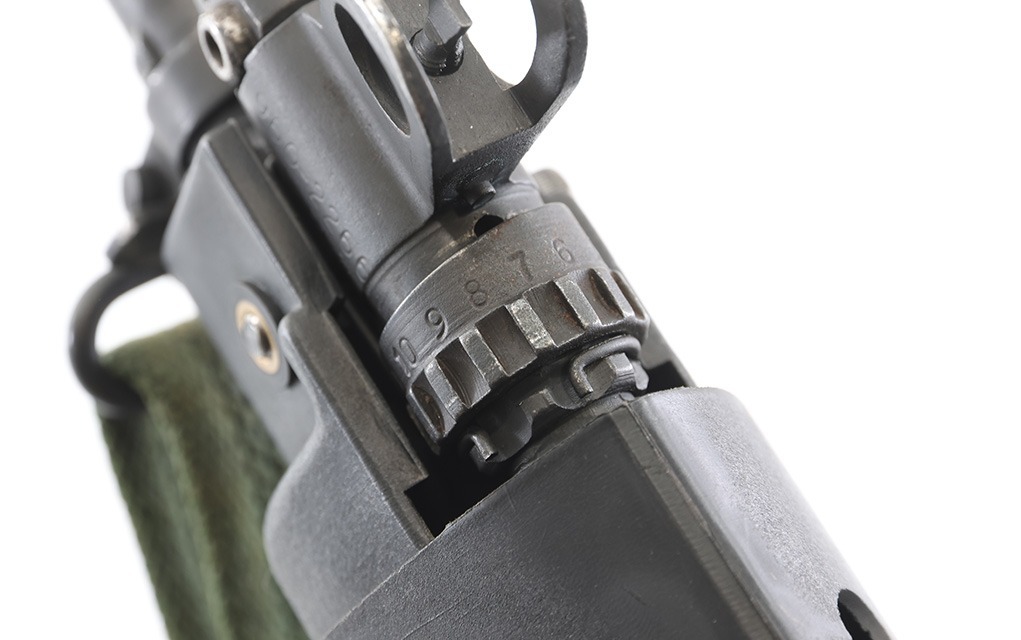
The gas system is adjustable. The gas port is a direct-to-air design, and the adjustment is done with a ridged nut on the gas block. The nut is machined with the top as a spiral cut, so as you adjust it, you cover or uncover more of the gas port bleed hole. More bleed, less gas to the piston; less bleed equals more gas to the piston. You adjust it by cranking it wide open and loading a single round.
Fire.
Does the bolt lock open? No? Click in a notch and repeat. Continue until the bolt locks open and then add one more click. What you’ll find is that your FAL (should you be so lucky) will work with pretty much everything at the setting you find with the first ammo you try.
Worldly Influence
Back in the 1970s and 1980s, the FAL was the Holy Grail of exotica small arms, the lust desire for survivalists, the rifle with enough panache to box up and sell. And a price to match. In 1980, the list price for an FAL was $2,000. Adjusted for inflation, that’s $7,580 today. A Colt AR-15 was $340 back then, and an HK 91 was $390.
Assuming you had 2 grand to spring for one, finding one would have been difficult. I was working gun shop retail then and walking local gun shows every weekend, and I do not recall ever seeing one—period. In fact, the first one I saw was when our gun club treasurer brought his to the club to shoot in his first 3-gun match. When he found out it was not at all competitive—and kicked him silly (he was maybe 5 feet, 7 inches and 140 pounds soaking wet)—he traded it at the next gun show for a Colt HBar and a literal trunkload of ammo.
The FAL was always a rarity in the U.S. until the “Great Parts Kit Era.” The initial imports were done from FN through Browning, and like other FN products, the markup was ferocious. There was a period when Century was importing parts kits and building up rifles, as they had done with so many other military rifles. Springfield Armory imported Brazilian parts, and rifles, as their SAR-80.
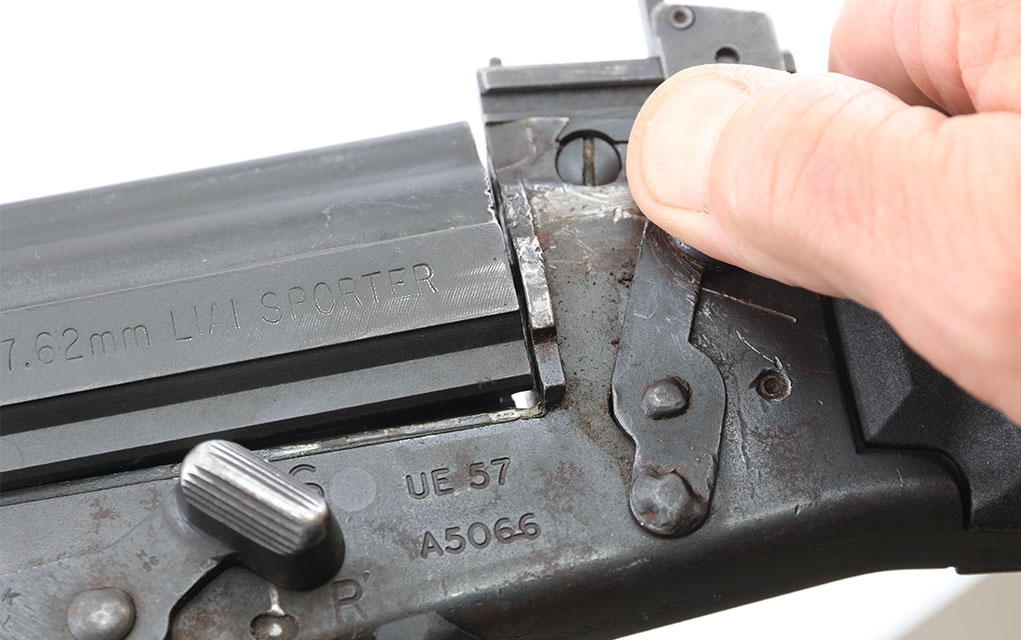
While literal boatloads of AK parts kits were being imported in the early 2000s, there were also large numbers of FAL parts kits brought in, just not as many. They were kits for two reasons. One, the importation of military arms had been restricted by the various “assault weapon” bans. And two, most FALs were select fire. You may read that the British L1A1 wasn’t select fire … well, yes and no.
The L1A1 was made exactly the same as select-fire FALs, but in the receiver opening for the auto sear and such, the British installed a bolt-lock setup that kept it from firing with the bolt only partially locked. In the words of the MOD Museum staff I’ve talked to about this, “Put in the full-auto parts and it runs full auto.”
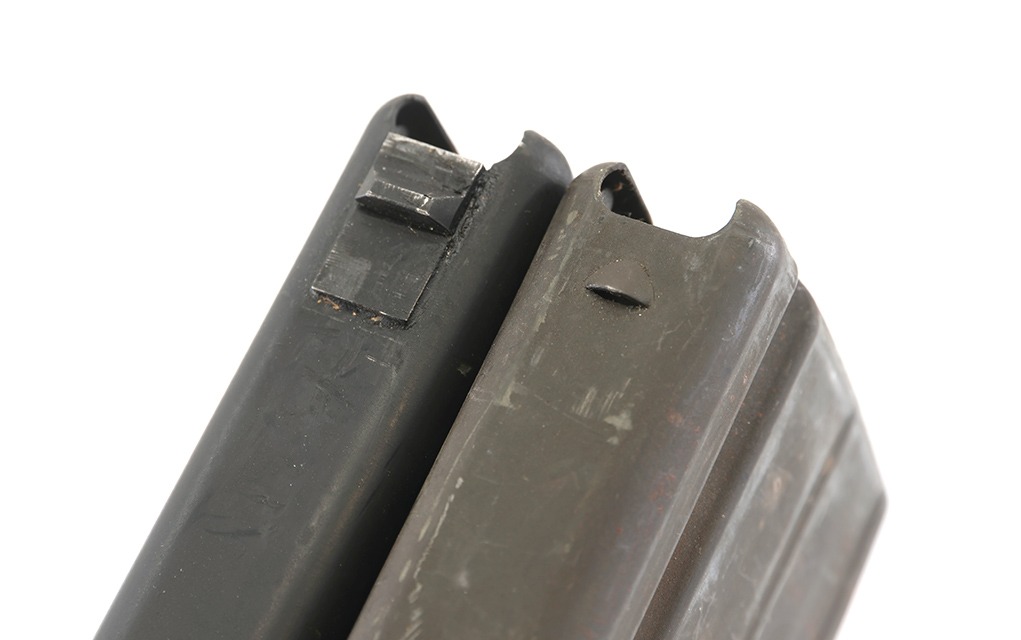
Oh, and the British changed one other big thing: You’ll read about “metric” and “inch pattern” FALs. As far as the dimensions are concerned, both are mostly the same, and details are close enough to not matter … except for the magazines.
Inch-pattern FAL mag (left) vs. metric-pattern.
The metric mags use a stabbed-out lip on the front as a latching tab. The British replaced that with a soldered-on steel lip. Why? Because they wanted to be able to use L1A1 magazines in the LMG L1A2 (a heavy-barreled L1A1), and in their modified Bren guns, and the metric stab-lip wasn’t up to the task.
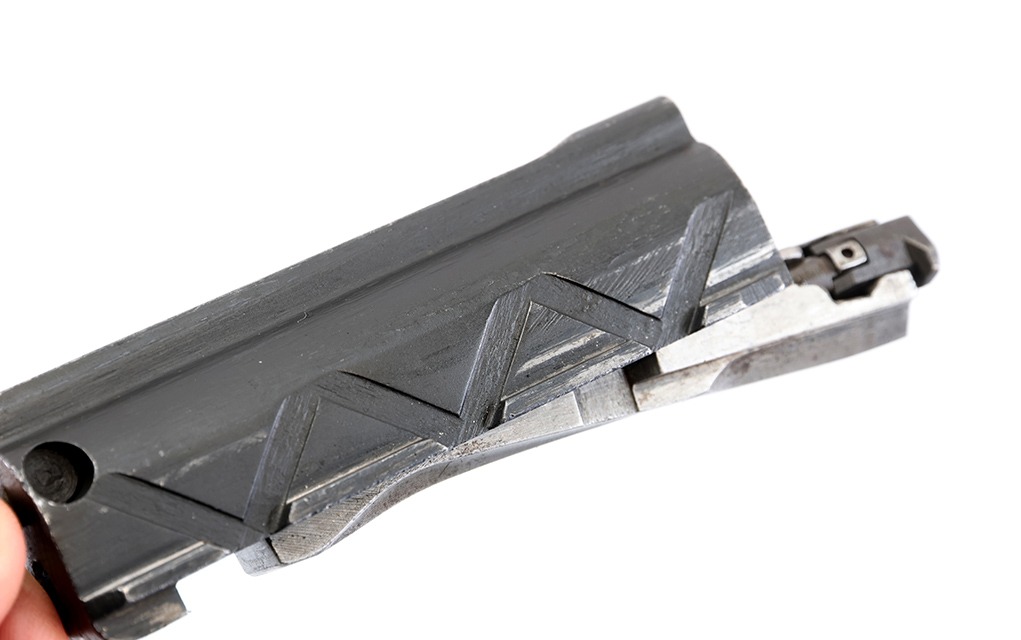
Oh, and the British also adopted the folding charging handle, from the Para version, for their fixed-stock FALs.
Parts kits had to be built on new receivers, which was a task a lot more difficult than bending flats to make AK receivers. Upper FAL receivers (the serialized part) are machined forgings (or in some replacements a casting), and it must be done right. Parts kits also had to have enough imported parts replaced to be “922r compliant,” which meant a handful of U.S.-made parts.
There Are Many Like It, But…
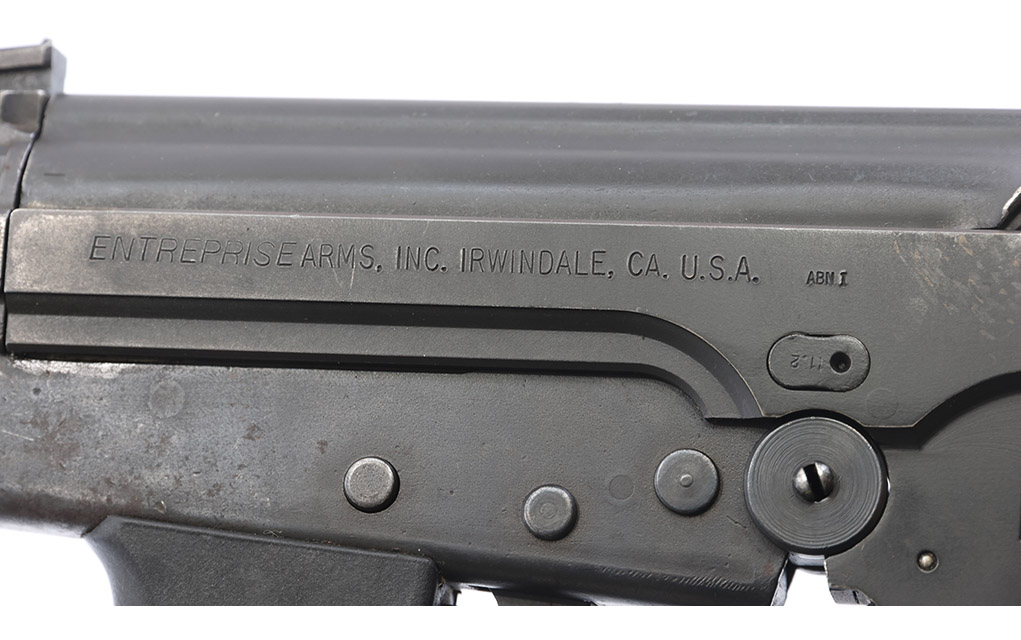
My FAL is an L1A1 parts kit built up on an Entreprise receiver. The history there is that the early receivers (mine seems to be) were good, but QC faded away, and the later ones were simply parts-holding anvils. Mine was assembled without the carry handle (something I’ll have to correct).
The FAL was built with a replaceable locking shoulder, so headspace could be adjusted and assembled correctly, and this is a detail that was apparently overlooked in some homebuilt FALs. (Mine, again, came out correctly.) Parts are getting scarce, but you can still have the headspace corrected if yours needs it, along with some other details.
The hard part for me was magazines. The FAL magazines have never been as available as AR or AK mags, and the inch pattern ones are even scarcer than metric mags. I considered myself lucky to have scored a bunch of them at $40 each, even though some were dented, and I’ll have to lift those dents.
The FAL is not a compact rifle. It’s 43 inches long, weighs more than 9 pounds and each magazine, holding 20 rounds, when fully loaded is 1 pound, 12 ounces by itself. If you are headed out on patrol with an FAL and seven magazines (140 rounds total), you are hoisting about 20 pounds of personal ordnance. This is not an exercise for those who have not been eating their Wheaties.
Recoil is what you’d expect, except more. Despite its weight, the FAL comes back at you. This is due in part to the mass of the bolt and carrier bottoming out in the receiver. The Para model, with its folding stock, uses a different recoil system, contained completely in the upper receiver (standard FALs are as common as dirt, compared to the rarity of the Para FAL).
Yes, you can rebuild an FAL into a Para model, but it requires a complete recoil assembly parts swap, as well as the stock. Assuming you could even find the parts now, it would cost about as much as just buying a Para. But darn, they are cool.
I’ve got one of those as well, a DSA build. And speaking of my DSA, a word about the parts kits: avoid the Indian ones. If you stumble across an FAL parts kit, you can still get it built, as DSA does offer upper receivers as well as built rifles.
The Indian parts are not to spec. When I arrived at DSA for the build for an article, one Indian part after another had to be rejected as out-of-spec, and often so out that it couldn’t even be modified, shimmed or altered to fit. I think by the time we were done, the resulting Para had two or three original parts—total—in it. That’s the risk you run.
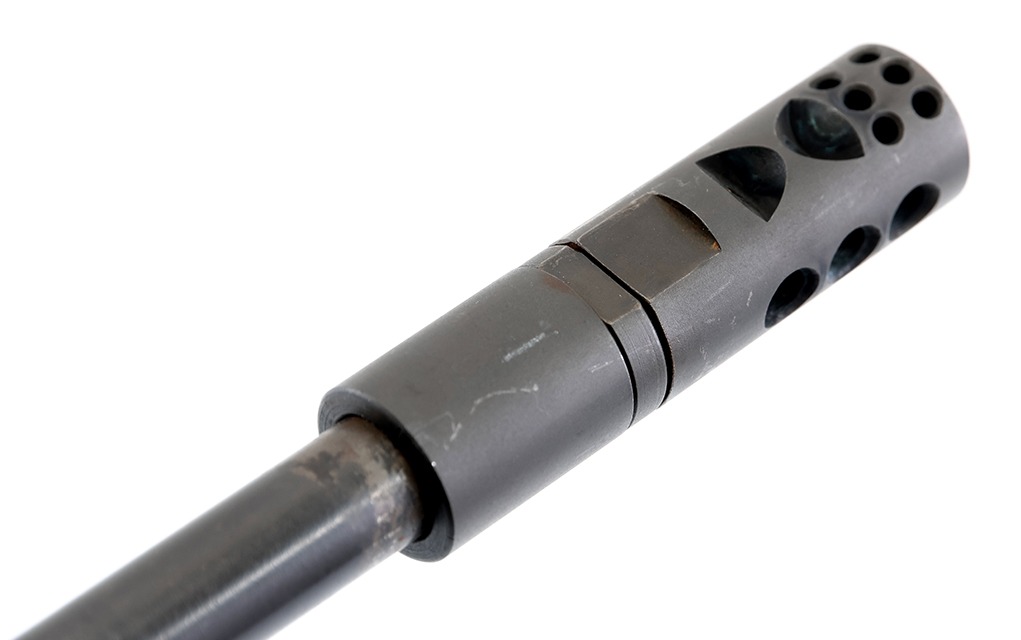
Running an FAL is fun, and assuming you can handle the length and weight, it certainly delivers. Mine has a muzzle brake on it, part of the 922r compliance build, and it also takes a couple of inches off the original length as well as keeping the muzzle down. The original flash hiders were even longer than the ones you’d see on an M14/M1A.
In the service life of the FAL, it was adopted by something like 75 countries, and produced under license in half a dozen of those countries. But not the United States. Why? Basically, the fix was in, the M14 was going to replace the Garand, and when it came time to test the M14 side-by-side with the FAL, the testers knew they had to make the M14 the winner.
There are a lot of rifles that will get you some attention at the gun club, or on the firing line at the range you frequent. But none of them, short of something in .50 BMG, or belt-fed, will get the crowd an FAL will garner. It recalls the Falklands War, the Rhodesian Selous Scouts, Israelis in the desert fending off Egyptian-armored columns and any number of movies made about mercs. (Every bar I walked into on the Falklands had a captured Argentine FAL up on the wall as a trophy.) Even in a plain-Jane formal black, it’s an eye-catching rifle.
The drawbacks are its cost and the shrinking supply of spare parts. The advantages are that it’s an all-steel rifle, and about the only part that will ever wear out is the barrel, which can be replaced. If the time ever comes when there are no more surplus barrels to be had, a competent gunsmith with a big-enough lathe can make a replacement barrel for you from a barrel blank.
It won’t be cheap, but then again, nothing about the FAL ever was.
FN FAL SPECS:
Type: Semi-auto gas-operated rifle
Caliber: 7.62 NATO
Capacity: 20+1 rounds
Barrel: 21 inches
Length: 43 inches
Width: 1.3 inches
Height: 7 inches
Weight: 9 pounds, 6 ounces
Trigger: 5 pounds, 7 ounces
Sights: Blade front, aperture rear
Grips: Polymer furniture
Finish: Black oxide, black paint
MSRP: Expensive, but worth it
CHRONOGRAPH DATA
Ammunition/Type
Bullet Weight (Grains)
Velocity (FPS)
ES.
SD.
Accuracy Average (Inches)
RG69 (Radway Green arsenal), British surplus FMJ
147
2,666
39
14.8
2.5
REM-UMC FMJ
150
2,725
57
25.7
1.9
Federal M80 ball, FMJ
149
2,781
19
8.8
2.1
Velocities are averages of 10 shots measured on a Labradar chronograph set to read 15 feet from the muzzle. Accuracy average of four, five-shot groups at 100 yards from a shooting rest.
Editor’s Note: This article originally appeared in the July 2024 issue of Gun Digest the Magazine.
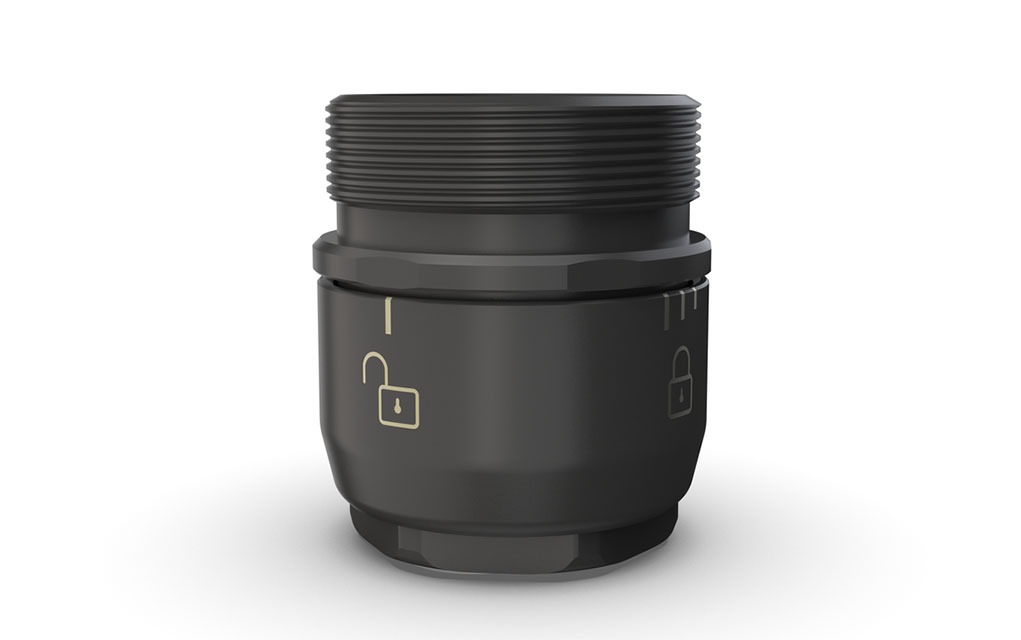
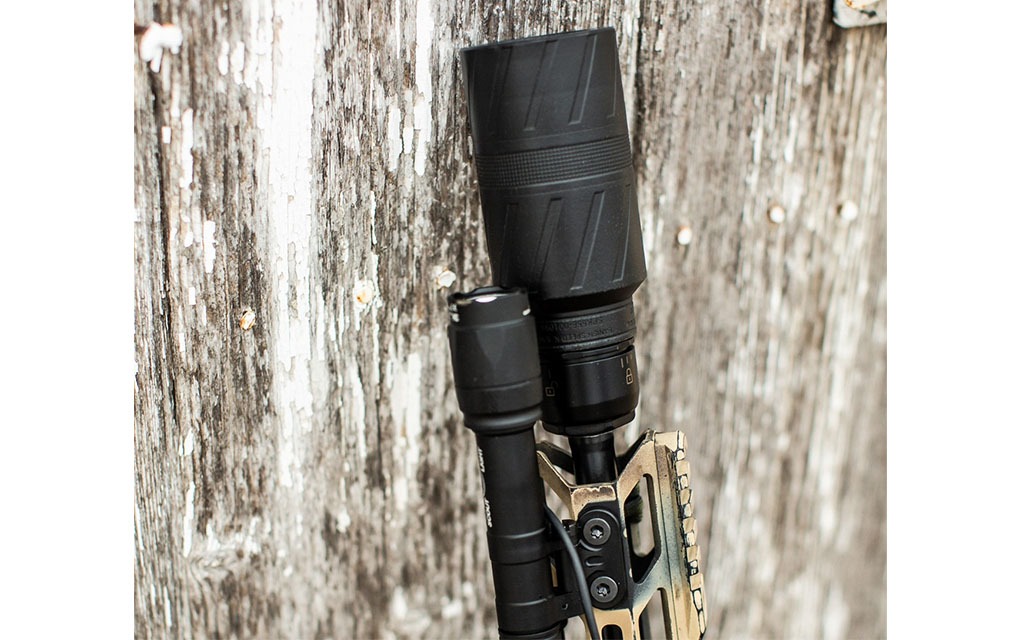
We take a quick look at Breek Arms’ Breek-LOK, an ultra-lightweight quick-detach suppressor mount system.
Quick-detach mounts are a popular accessory for suppressor owners, especially those who own multiple cans that they want to swap between firearms. Of course, suppressors already add a lot of weight and length to the end of a gun, and going with a mount system over a direct-thread attachment method means adding even more heft and bulk. As is often the case in firearms design, lighter and smaller is better, and that’s exactly what Breek Arms is delivering with its new Breek-LOK.
The Breek-LOK is a quick-detach suppressor HUB mount system that uses the industry-standard 1.375×24 thread pitch for maximum compatibility. The mount is made of titanium which brings its weight down to just 2.4 ounces, significantly less than most others on the market. Also, its 2-lug design enables it to only add 1.2 inches to the length of a suppressor once installed. Inches stack up fast when adding a can to a rifle, so anything that saves space is a welcome innovation. The speed with which a suppressor with a Breek-LOK mount can be installed or removed from a gun is also impressive, as only 1.5 turns are required to do so.
Josh Boomgaarden, President at Breek Arms, said this about the new system:
We are thrilled to introduce the Breek-LOK to firearm enthusiasts everywhere … With its unparalleled combination of lightweight design, lightning-fast operation, and universal compatibility, the Breek-LOK represents a true game-changer in the world of suppressor mounting.
The Breek-LOK HUB mount is available now and MSRP for the mount is $255.
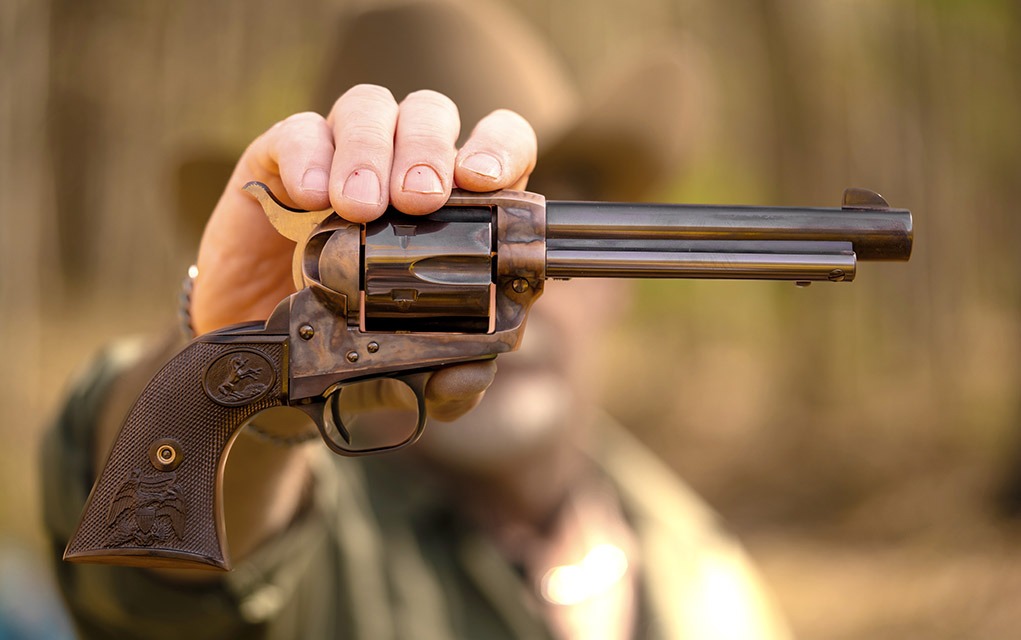
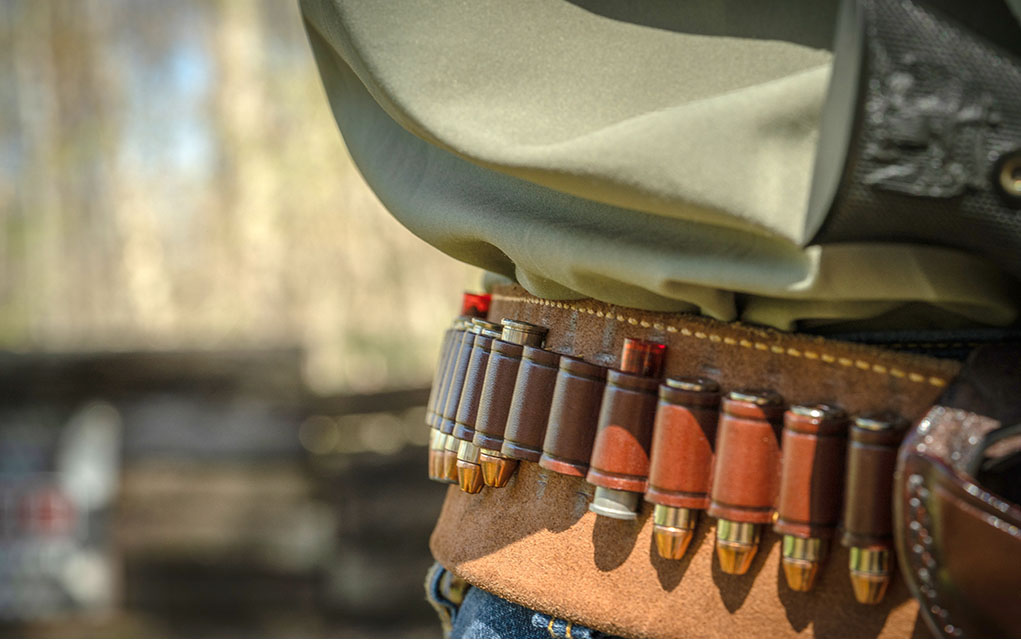
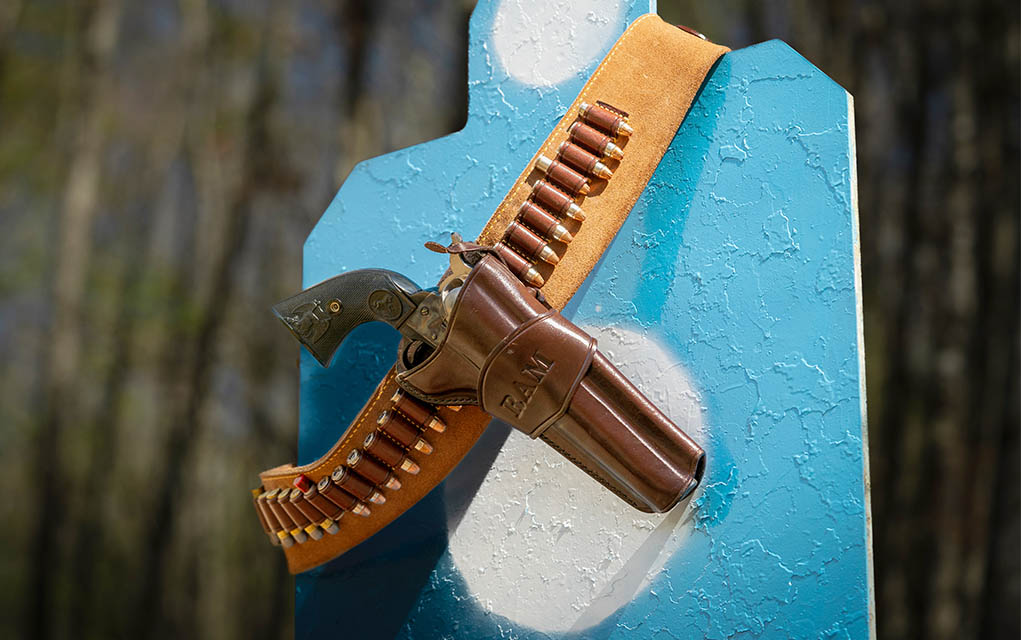
We take a look at the Colt SAA, or Single Action Army, and discuss the top 5 reasons to still own one today.
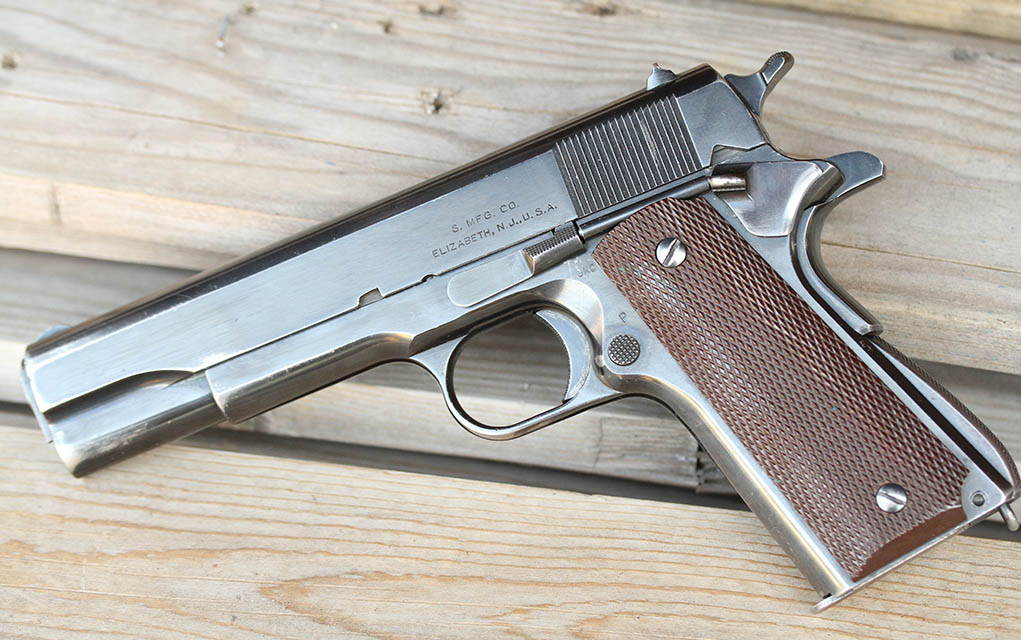
In 1872, Colt submitted a .45-caliber revolver to the U.S. Army for test and evaluation. In 1873, it was accepted, and one of the greatest firearm legends was born. The Colt Single Action Army (SAA), also known as the Peacemaker, was most generally offered in three barrel lengths. The short 4¾-inch barrel is often referred to as the “Gunfighter,” the 5½-inch-barreled version as the “Artillery Model,” and the longer 7½-inch-barreled version as the “Cavalry,” or standard model.
The revolver enjoyed immense popularity well after World War I, but after World War II Colt tried to retire it. Television Westerns and Bill Ruger’s introduction of the Blackhawk in 1955 forced Colt to bring back the SAA, and in 1956, the second-generation Colt SAA was born. By 1974, sales had once again fallen off, and Colt killed the SAA for a second time.
But shooters would have none of it. Colt began building them—though in limited quantities—again. Over its 150-year history, the Colt SAA has been chambered for more than 30 cartridges.
A new SAA has a retail price of $1,799—you can buy three Glock pistols for that price. And you might wonder what place an antique firearm like the Peacemaker has in this modern world of plastic pistols with electric sights that folks like to carry with the barrel shoved down in their pants toward their junk. That’s a good question, especially for the handgun that probably originated appendix carry. (Since the Colt SAA revolver’s hammer must be cocked before it can be fired, it’s much safer to carry one shoved in your pants behind your belt buckle.)
Here’s five reasons you should own a SAA.
The Colt Single Action Army is one of the most iconic firearms of all time.
Recreational Shooting
There are a lot of practical applications for firearms, and shooters often justify a firearm purchase with them. However, I think one of the most practical applications for the use and purchase of a firearm is to experience the fun of shooting it. Shooting recreationally is enjoyable, and in this fast-paced world filled with the stresses of employment, parenthood and inflation, a little enjoyment can go a long way.
When my son was younger, he really enjoyed shooting all the new guns I got to test. I was always surprised that the guns he enjoyed shooting the most were lever-action rifles and single-action revolvers. Though he never directly communicated it to me, I believe the enjoyment he found was partly due to their Old West connection, but even more so since he had to interact with the gun—shuck the lever or cock the hammer—to make the gun work.
And therein lies a large portion of the appeal of the single-action revolver: You have to thumb that hammer back before you shoot, and that action is appealing. It sort of has that ready, set, go feel. I have several single-action revolvers in addition to my Colt SAA. Some I use for specific and practical chores, but most often I shoot them just for the fun of it.
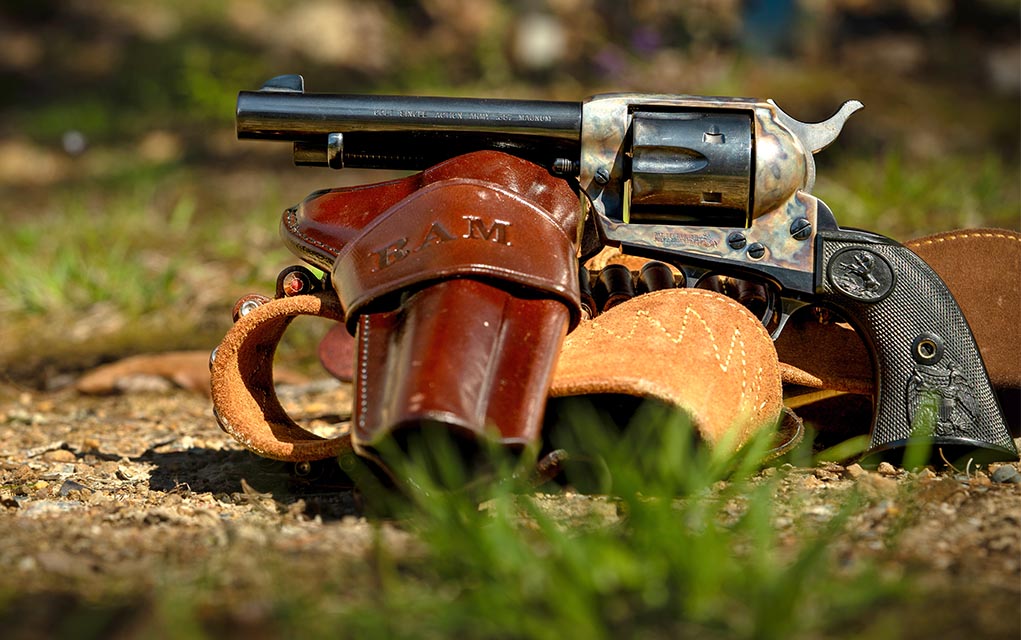
Competition
Most handgun competitions of the day revolved around semi-automatic pistols and, on occasion, double-action revolvers. Modern handgun competitions are fast-paced endeavors that also often include a good deal of athleticism: shoot here, run there, jump that and shoot some more. Not everyone likes to play the run-and-gun game. Fortunately, there’s a specific competitive organization that not only recognizes this, but they also require single-action revolvers.
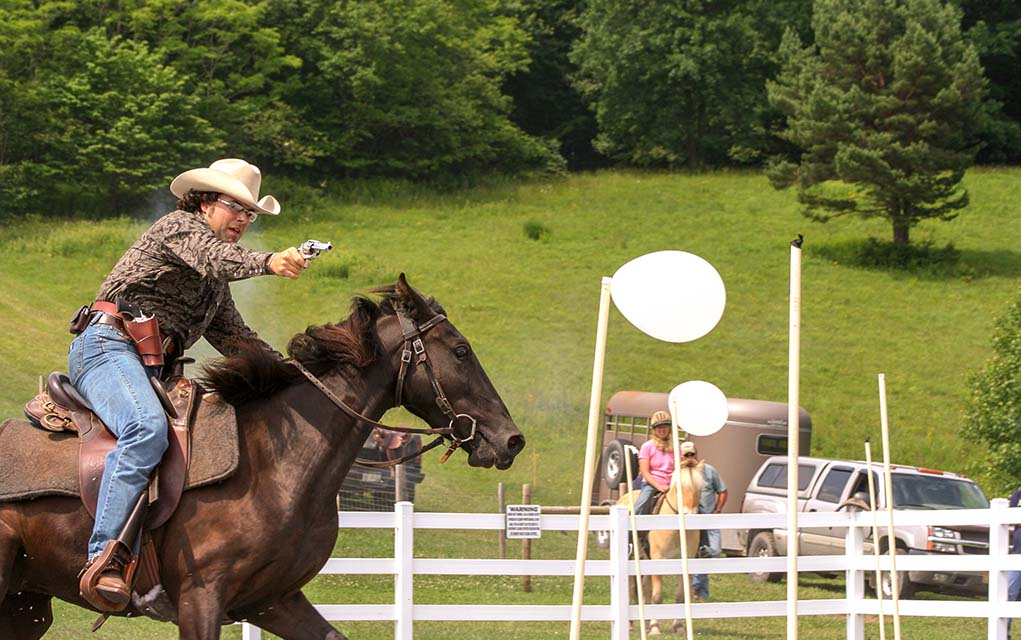
Mounted shooting is a popular sport with a revolver like the Colt SAA can shine.
The Single Action Shooting Society (SASS) is an organization formed to preserve and promote the sport of Cowboy Action Shooting. SASS was formed in 1987 and serves as the governing body for the sport. SASS members share a common interest in preserving the history of the Old West and the love of competitive shooting. The matches are exciting, and many of the competitors take as much pride in the period costumes they wear as they do in their shooting.
You can’t have cowboys without the Colt SAA.
Another sport where the single-action revolver like the Colt Peacemaker is prominent is in mounted shooting. The Cowboy Mounted Shooting Association (CMSA) is an equestrian sport where .45-caliber single-action revolvers firing blank ammunition are used to bust balloons as the competitor negotiates a riding course. And, in the CMSA events, you must wear Western attire.
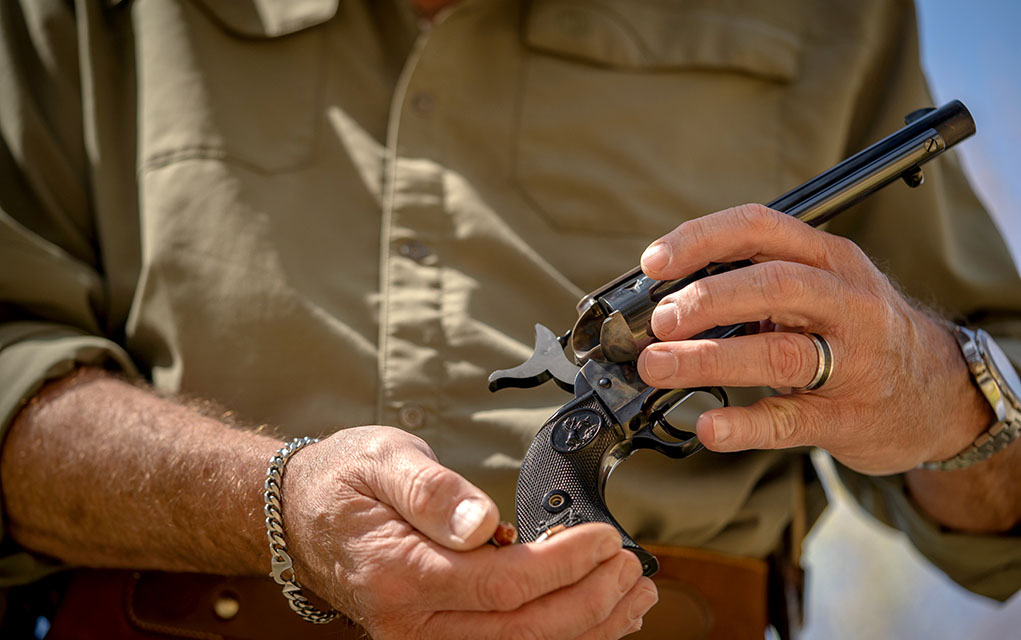
The Colt SAA is slow to unload and slower to load, but it’s a blast to shoot.
Hunting
Handgun hunting continues to gain in popularity, but most modern handgun hunters are using semi-automatic handguns … some even suppressed. But back in the day, the single-action revolver was the handgun most often used for hunting. Today, the Ruger Blackhawk is probably the most popular single-action hunting revolver, mostly because it comes with adjustable sights. This gives it a distinct advantage over the fixed-sighted Colt SAA.
This advantage is partly because the sights on the Ruger Blackhawk are much easier to see—some even come with fiber-optic front sights—but also partly because the sights on Colt SAA revolvers rarely point—when the sights are aligned—to the bullet’s exact point of impact. This isn’t a good thing with a handgun that will be used for hunting, especially at ranges extending out to 25 yards or so. Hunters want precise shot placement. For most recreational, competition and self-defense applications, the point of aim/point of impact is close enough for, as they say, government work.
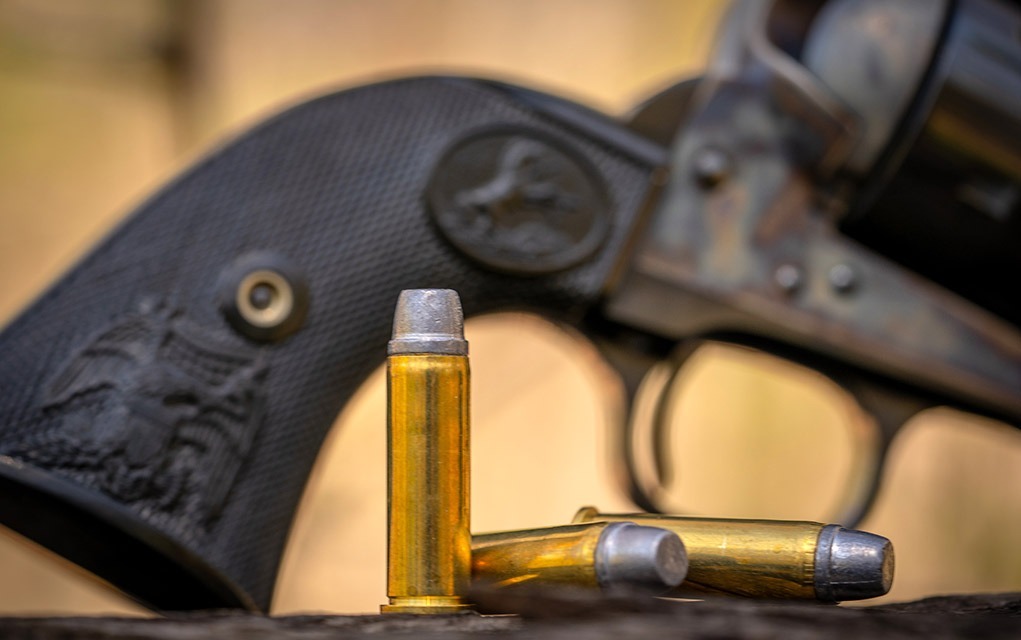
With the right ammo, you can do just about anything with a Colt SAA.
To correct this, you can do one of three things. First, you can find a different load that strikes more closely to your point of aim. Second, you can have a gunsmith slightly bend the front sight or minutely rotate the barrel to correct for windage. And you can file down the front sight to correct for elevation. (It’s been my experience that most Colt SAA revolvers shoot a bit low with full power loads.) Of course, you can also just apply Kentucky windage and hold off the target the appropriate amount to get the desired hit.
The best thing about using the Colt SAA for hunting is that they are available in either .357 Magnum or .45 Colt, and there are a host of powerful big-game loads for both cartridges from Buffalo Bore ammunition.
Self-Defense
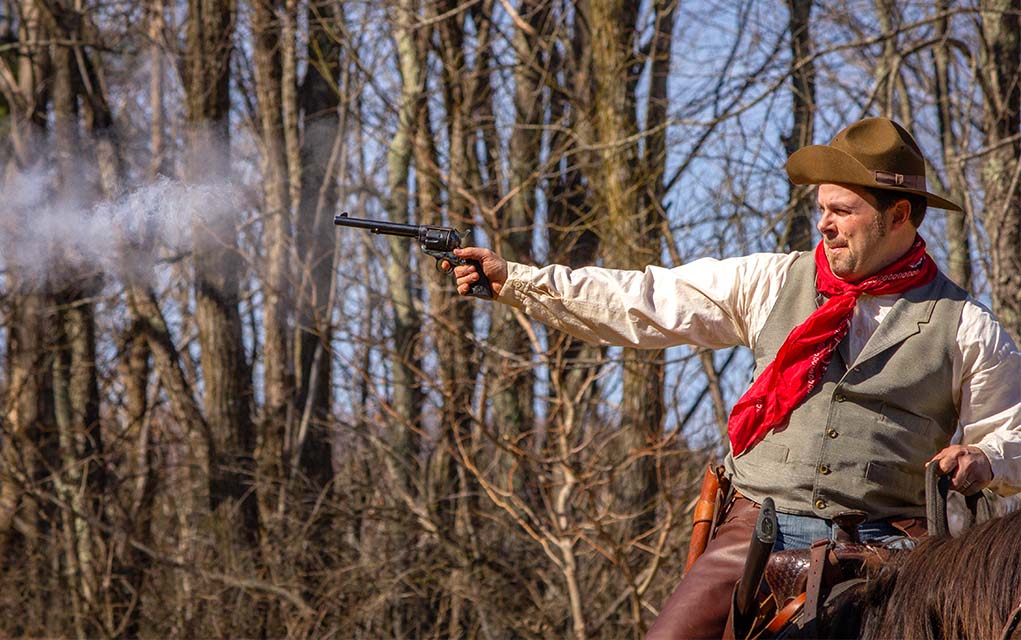
I get flustered when folks declare a single-action revolver like the Colt Peacemaker unsuited for self-defense. After all, it was used in the world’s most famous gunfight in Tombstone, Arizona, in 1881 at the OK Corral. It was carried up San Juan Hill by the Rough Riders, and it was a favorite of the famous Texas Ranger Frank Hammer. He liked it so much he nicknamed it “Old Lucky.” General George S. Patton used a Colt Peacemaker to shoot Captain Julio Cardenes, who was a thug in the Pancho Villa gang. The Colt SAA revolver has a long history of winning gunfights.
A wide range of ammo options in .357 Magnum and .45 Colt make a Colt SAA a versatile handgun.
But does that make it a great handgun for personal protection? Well, yes and no. It’s just as effective at stopping a bad guy today as it was when Bat Masterson and U.S. Marshal and manhunter Bill Tilghman relied on it. One well-aimed shot tends to end a gunfight quickly, and as John Wayne’s character John B. Books said in the movie The Shootist, “Most importantly, you gotta be willing.”
Granted, if you’re looking to purchase a handgun for self-defense, there are a lot of better options today than there were in 1873 when the Colt SAA was introduced, or, in 1901, when the movie The Shootist was set. However, if you have a Colt Peacemaker—and if you can shoot—it can serve well as a self-defense handgun. Would I choose it over a 1911 or a Glock? No. But oddly, and at the same time, if I was going to try and stop a pissed-off grizzly, I’d rather have a SAA in .357 Magnum or .45 Colt than I would a 1911 or a Glock in 9mm Luger.
And, as logic would dictate, if it’s a good choice for a toothy critter like a bear, then it would also be a good choice for a human intent on causing death or serious bodily injury. From the holster at 10 yards, I can generally hit an 8-inch plate two times with a Colt Commander in .45 Auto in about 2.8 seconds. Comparably, armed with a holstered Colt SAA in .357 Magnum, I can get the same two hits in about 3.3 seconds.
Finding Your Inner Cowboy
Though it’s been alluded to throughout this article, I do believe that one of the best things you can do with a Colt SAA revolver is find that connection to your inner cowboy. Yeah, I know, some folks like to wear cowboy boots, and others like to wear cowboy hats. I like both, and though I don’t wear slip-on boots as much as I used to, I’m almost always wearing a brimmed hat. Both are, in my mind, a symbol of the American pioneering and rebellious spirit that shaped this nation … and embodies everything that makes Americans, Americans.
The Colt SAA ain’t no Glock, but it’s just as fun to shoot.
But nothing—not boots, a hat, or even the lever-action rifle—can tether you to that cowboy spirt that formed this nation like the Colt SAA. If you’re a pro-Second Amendment patriotic American, who likes guns and likes to shoot, then I can’t imagine you not liking Colt’s SAA.
Editor’s Note: This article originally appeared in the July 2024 issue of Gun Digest the Magazine.
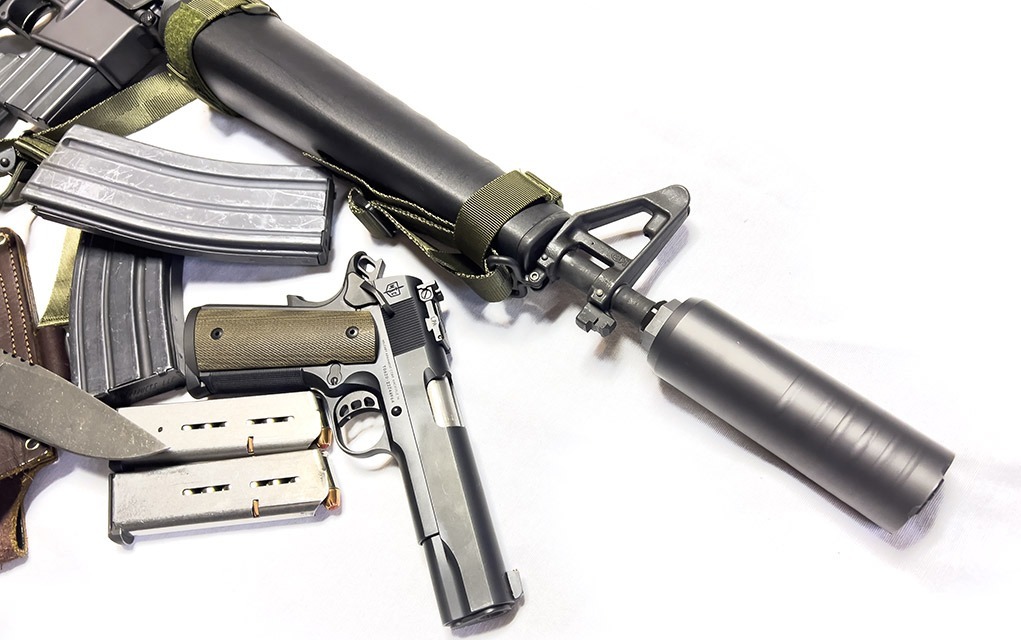
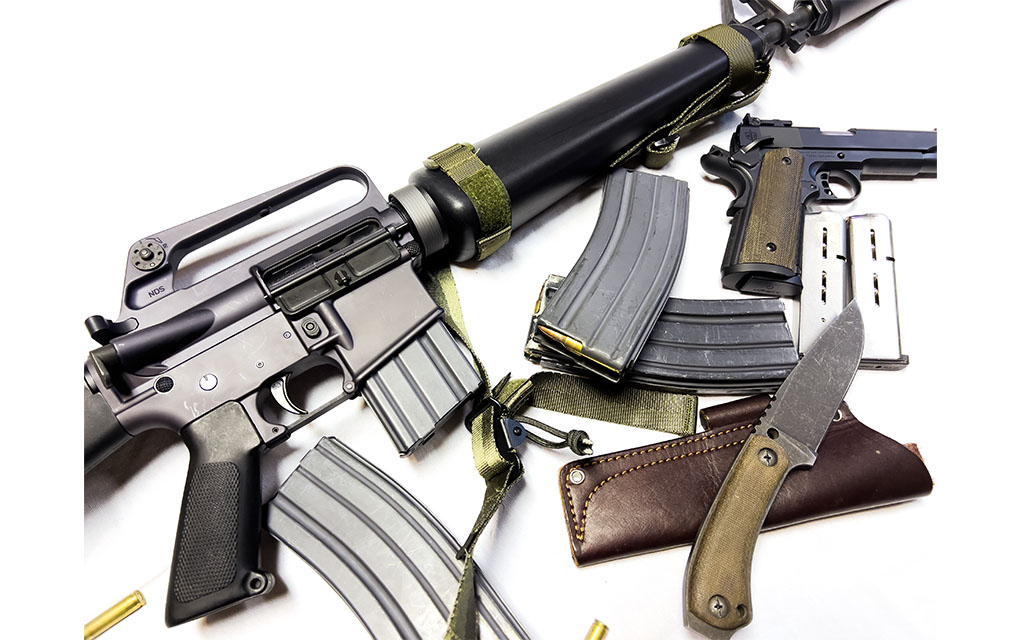
We discuss how to adapt the classic guns of yesterday for today’s retro firearms fashion.
They say that fashion is a boomerang: If you throw it out, the style comes back around in a few decades. The guys I grew up shooting and hunting with could never really be considered “fashionable” in terms of dress or style. Indeed, it was probably the opposite; the same uniform of jeans and button-up work shirts, metal-rimmed shop glasses and the ever-present layer of indeterminable grime that somehow never washed out.
Things come around again in the shooting industry, just like high-waisted jeans and bell-bottoms do for the ladies. Right now, we are in something of a retro era, and fashions are favoring the old and bold—as well as simple and nostalgic.
The Ever-Present Past
The interesting part about this current retro trend is that it’s happening almost as a reaction to the events of the world. Many people interested in guns are turning away from the sickening reality of modern warfare and tech-heavy hunting gear, instead looking at trappings of a bygone yesteryear. The ’60s to ’80s are back in style in the shooting world, likely as a collective attempt to forget the state of modern politics.
You see this trend take place again and again: The post-World War II era saw a dramatic shift in narrative to an idealized version of the American West with cowboy culture dominating Hollywood and TV in the face of nuclear Armageddon. Likewise, in the Vietnam era, WWII movies and guns became widely popular as a distraction from the questionable fighting taking place in real life. Today, after our own era of disappointment, we are again finding ourselves comforted by stories from the “golden era” of the 1970s and ’80s, delving heavily into the pre-cellphone age. In the shooting industry, we too are not immune from wanting that idealized comfort of yesteryear.
As a result of this craving for nostalgia, many people are homesick for a place they’ve never been and find it fulfilling to surround themselves with totems of that bygone time where, for some reason, things must have been easier and more rewarding.
We see today a plethora of retro options pouring out of factory doors: From two-tone 1911s with wood grips such as Springfield Armory’s Ronin line, to box-stock A1 and A2 rifles with “outdated” 20-inch barrels from SA, Windham, FN and more—we can’t seem to get enough. Wood stocks are making a big comeback as well, with shotgun vendors like Mossberg producing their own dedicated old-style guns made to look like what you’d see in an old Crown Vic’s cage, right alongside a Smith & Wesson .38 and a sharp mustache.
Gearmageddon
I see the return to retro as a natural phenomenon that has to do with the full-blown saturation of gear we now have. I have tons of gear, a mountain of suppressors, optics stacked high, bins of uppers and lowers, lasers, night vision … and all of it. My phone has many apps dedicated to helping me shoot better and further in day and in night. However, I can’t say that any of this has made me a lick better than the next guy.
Suppressor setups can in fact be retro … but only in appearance. Modern cans are much better than in years past, and you can dress up your existing suppressor to pair with a retro build easier than the other way around.
What it has done is made me carry as many CR123 batteries as I carry rifle cartridges on a given hunt. Most of my rifles are boat anchors that need a tripod to steady. My equipment is anything but simple and it takes me a great deal of time to maintain it all and keep it running. Simply getting out to shoot takes me a good bit of effort these days, and I’ve slowly grown to resent that feeling of tech over-saturation.
Technology and its associated dependence has led us to an interesting spot—its rejection. While it’s now common to find dot sights on carry guns as well as lights, lasers and all manner of devices to control recoil and blast, the fundamental problem is that these devices add cost and failure points. Remarkably, so many people have decided that iron sights are an appendix and unnecessary, but I don’t fully trust electronic sights even though I use them heavily. I want a backup option.
Seeing that more than a dozen companies are now releasing carry-handle rifles and carbines, the fashion has decidedly moved in a different direction that says, perhaps, that we are too reliant on these optics. While it could be said that these optics do improve many aspects of shooting, they are not the answer when the cash-generating power of simple nostalgia is concerned. The old carry handle guns almost disappeared for a stretch of five or six years with companies across-the-board dropping them by the mid 2010s. Today, we are seeing a huge comeback in their popularity. Function is not driving this—the idea of the good ol’ days is driving this.
What’s a ‘Retro’ Gun?
An interesting topic to consider when entering the “retro” market is that it’s largely just cosmetic. Retro is a style, an aesthetic, and not necessarily a 1:1 complete clone of a gun made in the past. A large reason for this distinction is that we don’t use the same tooling and machines as we used to even a couple of decades ago. What we have right now is completely modern guns being made on completely modern machines to simply appear as older models.
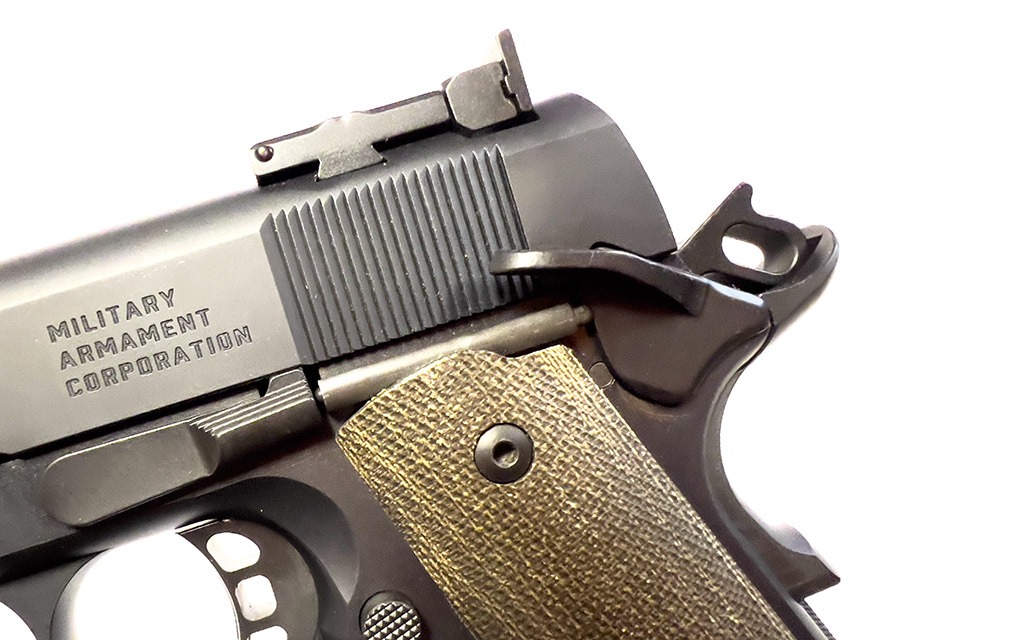
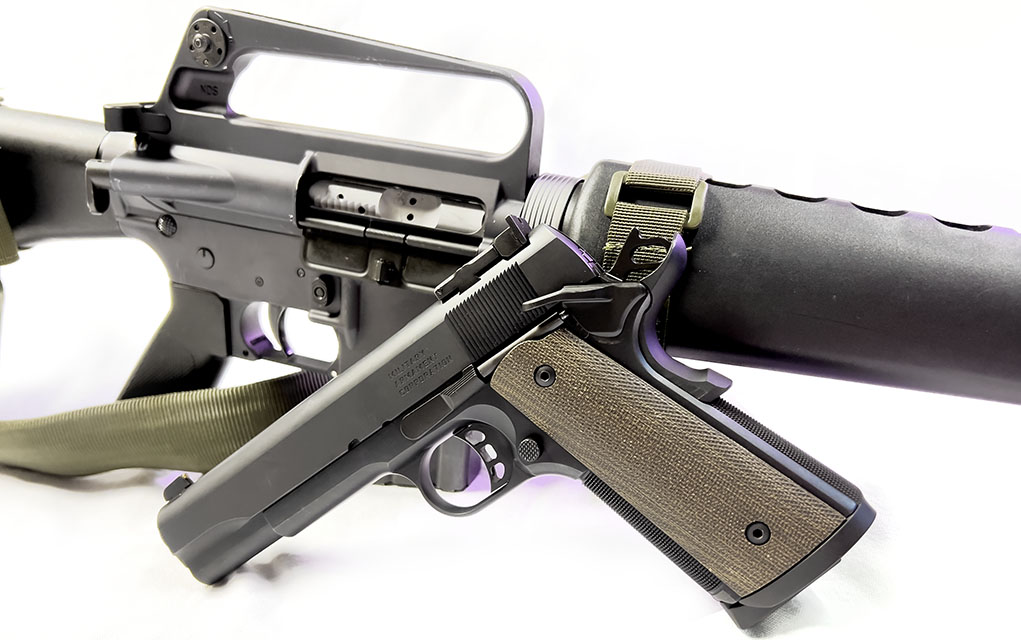
The MAC JSOC 1911 and Brownells M16A1 Dissipator give a truly retro vibe. Knife by Winkler Knives, sheath by TKC.
Think about it: It’s something of a true regression that we’re using this advanced technology to turn out products with often less capability than what could be made.
Indeed, this is truly a fashion trend, but one that’s not likely to die anytime soon. The past 5 years have been glorious for resurrecting these old styles, with companies like Brownells going as far as to recreate in-spirit copies of the entire family of early AR derivatives, including the original AR-10 and most pre-A1 M16 variants. Re-releases of known vintage classics, such as the Colt Python and the return of storied names like H&R to the rifle scene, have helped fuel the hype.
But it should be noted that not even the Colts are true copies of the old guns, and they are made on modern equipment … and much stronger as a result.
Keeping things simple but taking advantage of modern technology has shown many shooters just how advanced the old timers were. Eighties-style 1911s are the rage now, and many shooters who are jumping in find that the 1911 is just fine without light rails or night sights, and it works like a dream with a simple adjustable rear sight and funneled magwell. These lightly customized guns are making their way back into public consciousness even when lacking all the modern bells and whistles. What makes this time great for the retro scene is that we get to have it all: Many of these guns during their time were problematic in regard to reliable performance and good mags.
Retro features can be as simple as the type of rear sight and serrations cut into a slide.
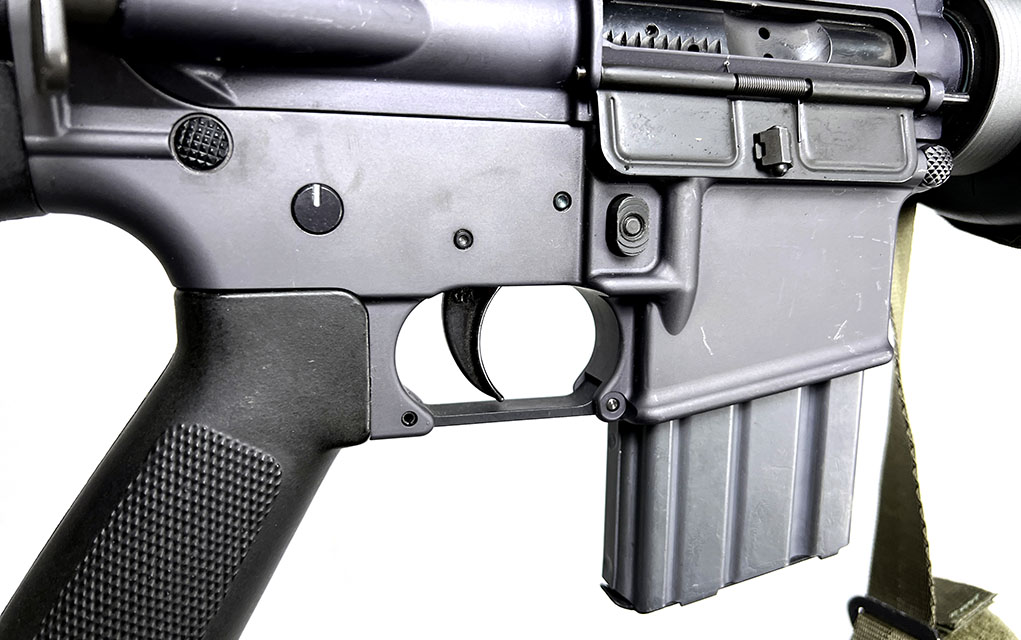
Take for example the AR. That rifle system was trouble from the start, and it took some years to get it right. However, you wouldn’t want to be seen shooting some of the old, slow-twist barrels today when we have such an abundance of 62- and 77-grain ammo. The smart companies aren’t making 1:1 copies; instead, they’re working with modern twist rates and even applying thought to the near-copies of historical designs.
For instance, the custom 16-inch Dissipator build featured in this article comes from my own workbench and has a Brownells receiver set and a 1:8-inch twist barrel. Using iron sights and an in-spirit suppressor setup, it produces groups of just 2 inches at 100 yards off the bench using many varieties of ammo. The barrel flat-out shoots and has a chrome-lined Wylde chamber, making it suitable for whatever you want to feed it.
I snuck in a Trijicon night sight for the front post, and the internals are all Geissele with a National Match trigger to boot. The carbine is also decked out in some OD green accessories that, while not totally correct, do at least give off that “jungle” vibe. I never get asked about my other carbines. This one, well … it turns heads.
Retro theme guns are just hard to ignore.
Modern triggers are incredible. This carbine has all Geissele internals.
The Ordnance Ordeal
You’ll notice that there are few—if any—retro guns that are showing up on shelves today in unique chamberings. For the most part, these guns are tearing up the market because they’re additions to an existing system. If it’s chambered in 7.62/.308, 5.56, 9mm, 10mm, .45 ACP or 12 gauge, it will have no problem selling. A big reason why most of these guns died off was changing consumer and military demands about features, but today we see that as long as the style meets the expectation of caliber, it will sell just fine.
Standardized components and replacement parts are also important, and it’s much easier to keep a retro-style gun shooting if it can be made from off-the-shelf parts or have a degree of interchangeability with existing platforms. The carbine in this article is a completely modern gun that can fire any modern 5.56/.223 ammo, as well as accept any Q-style suppressor.
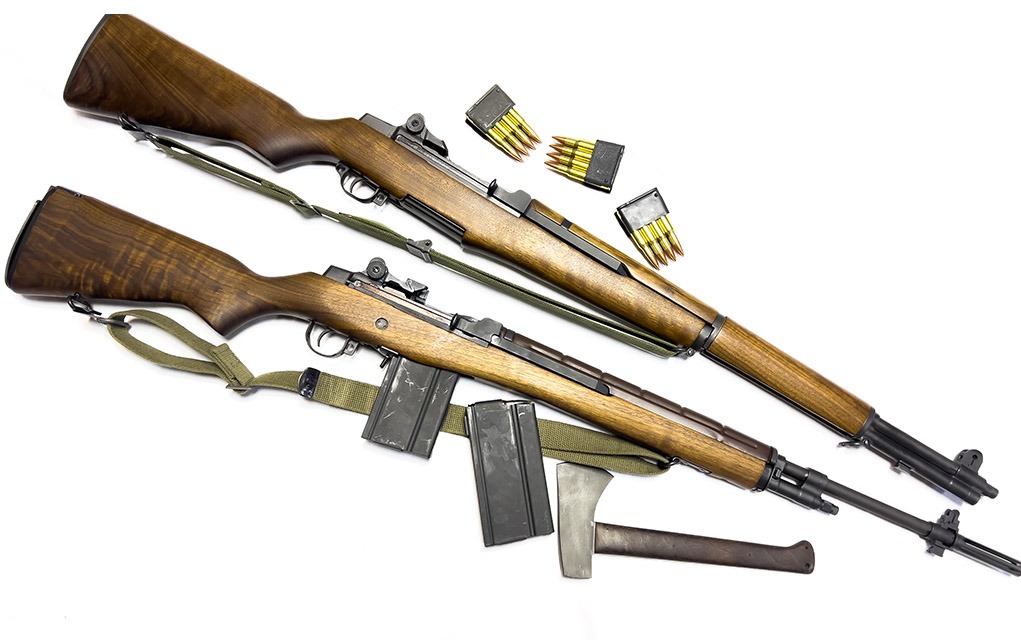
Fully reproduced vintage guns are harder sells. There’s the possibility we may see newly made M1 Garand rifles at some point, but for that to be feasible for the modern shooter it would need to be able to fire standard .30-06 loads, not special ones for the Garand as we must use today in these old warhorses. Fulton Armory does a great job rebuilding the M1 rifle with mostly modern parts and barrels, and adjustable gas system parts do exist to allow standard-pressure loads.
Fulton Armory M14 and M1 Garand rifles are the kings of retro. If you want the absolute best, most accurate retro rifles, there’s no other place to go. Custom options are available. Axe by Winkler Knives.
However, I can’t see a 1:1 modern M1 rifle being a success … even with the retro market the way it is now. If there was a mind to the future, it would be made for .308 and 6.5 Creedmoor with no attempt to completely duplicate the historical firearm. We see this with the current attempts to reproduce the Nazi STG-44: At least two companies attempting to make versions of this legendary rifle are offering it in 5.56, .300 BLK, 7.62×39 and the original 8x33mm … but unless we see sudden interest in a cartridge that was essentially killed off in 1945, most buyers will be getting this gun in a modern chambering.
Would I want an STG-44 in a modern chambering, or an M1 in 6.5 CM? Sure, why not?
Looking Cool is 90 Percent of Being Cool
A big segment missing from the market today is truly retro accessories. Retro optics are not easy to come by, and many competitive shooting organizations allow a range of optics for their Vintage Sniper and other types of matches. While the guns can be made immediately available and based on proven modern designs, optics, slings and other accessories are much harder to find and often struggle as a result.
The guns have stuck with us, but nobody pines for the good old days of fogged tubes and broken crosshairs. The retro flavor of any rifle is ruined with modern accessories, and a tactical optic would look out of place on a retro M40 USMC build. However it’s a custom proposition to have a scope made that resembles the original in size and color, making it an expensive option for less performance than a modern scope has to offer.
Reproduction retro slings and mag pouches are sometimes able to come by easily, but unless you’re looking for WWI or WWII era items, you’re going to be relatively limited in terms of support gear. Most of the surplus gear has dried up today, and it’s been a good 20 years since the classic Vietnam-era nylon gear disappeared. Early War on Terror gear can still be found, but it’s usually in sorry condition.
The thing about this type of gear is that it is fabric, and it falls apart with time, where the guns from the era tend to last longer.
Modern gear systems are far more customizable and allow for end-use upgrades, making for a longer life cycle. Sadly, there isn’t much available for replica support gear from the 1960s-’80s era to go with your retro rifles. Back in this time, a sling and perhaps a mag pouch were all that was commonly attached to rifles. Taped-up grips and painted insignias/slogans are technically period correct, but that always has a way of looking iffy in terms of appearance.
For pistols, you’re in luck: The only real retro accessory—aside from a Hawaiian shirt—are shoulder holsters, which are still in common production from many companies. It’s easier than ever to get your Magnum, PI on … unless you can’t grow that mustache, in which case just say you’re a Miami Vice fan and get a 10mm.
Retro accessories will probably always be hard to come by, but remember it’s more of a look than anything else. If it looks cool, well … that’s about all you need to worry about.
Editor’s Note: This article originally appeared in the July 2024 issue of Gun Digest the Magazine.
More Retro AR Stuff:
Retro AR-15: The Old Rifles That Inspired The New Ones
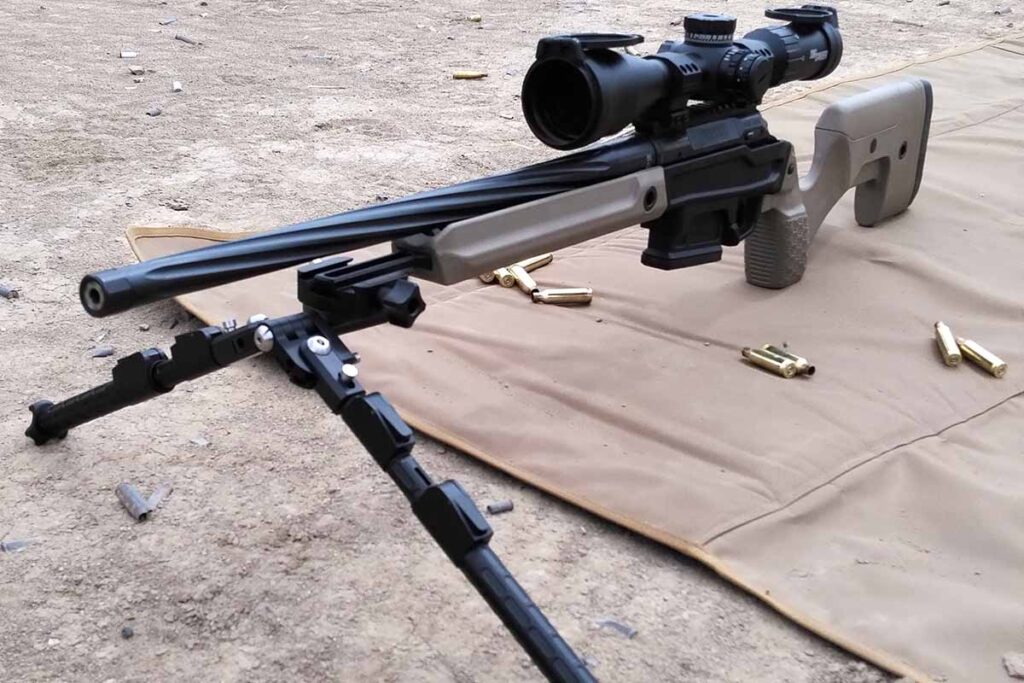
Decked out with premium components, the Pursuit ups the game for hunting rifles.
Stag Arms is known for its AR-style rifles. Lots of them—available in both right- and left-handed configurations. But times are changing at the Wyoming-based manufacturer.
Pushing into the hunting market, the company has set aside gas impingement and turned its attention to a more traditional system: bolt-actions. The result is the Pursuit Bolt Gun. It’s a marked break from the same-old, same-old at Stag and hunting rifle-making in general.
Decked out with premium parts, engineered to connect with vitals at a country mile, the rifle is situated at the vanguard of new precision hunters. And Stag brings it in at a price so nearly any hunter—with a little savings—can consider adding one to his gun safe.
Outfitted with a SIG Whiskey 4 5-20x50mm, the rifle proved formidable.
Having handled the prototype at the 2023 SHOT Show, I couldn’t wait to get one to the range for live fire. Finally getting the opportunity a year later, I have to say that the Pursuit was well worth the wait.
Stag Pursuit Bolt Action Specs
Made In America?: Yes
Action Material: 416 Stainless Steel
Action Footprint: Remington 700 SA
Barrel Contour: Spiral Fluted Sporter
Barrel Material: 416 Stainless Steel
Finish: Blac Cerakote
Scope Base: 20 MOA Biased 1913 Rail
Caliber: 6.5 Creedmoor
Barrel Length: 20 inches
Twist Rate: 1:8
Thread Pitch: 5/8×24 RH
Trigger: Trigger Tech Primary – Adjustable 1.5lbs-4.0lbs, Single Stage
Stock: Fully Adjustable Stag Arms Hybrid Hunter, Tan
Magazine: AICS/AIAW
Weight: 8 pounds, 12 ounces (striped and unloaded)
MSRP: $1,899
Getting In On The Action
For anyone paying attention, there’s been a ton of buzz around another bolt-action as of late—the Aero Precision Solus. We did a hands-on review of the Solus, well worth the read. A sister company to Stag, there are a ton of similarities between the Aero rifle and Pursuit. Chief among these is the rifle’s actions.
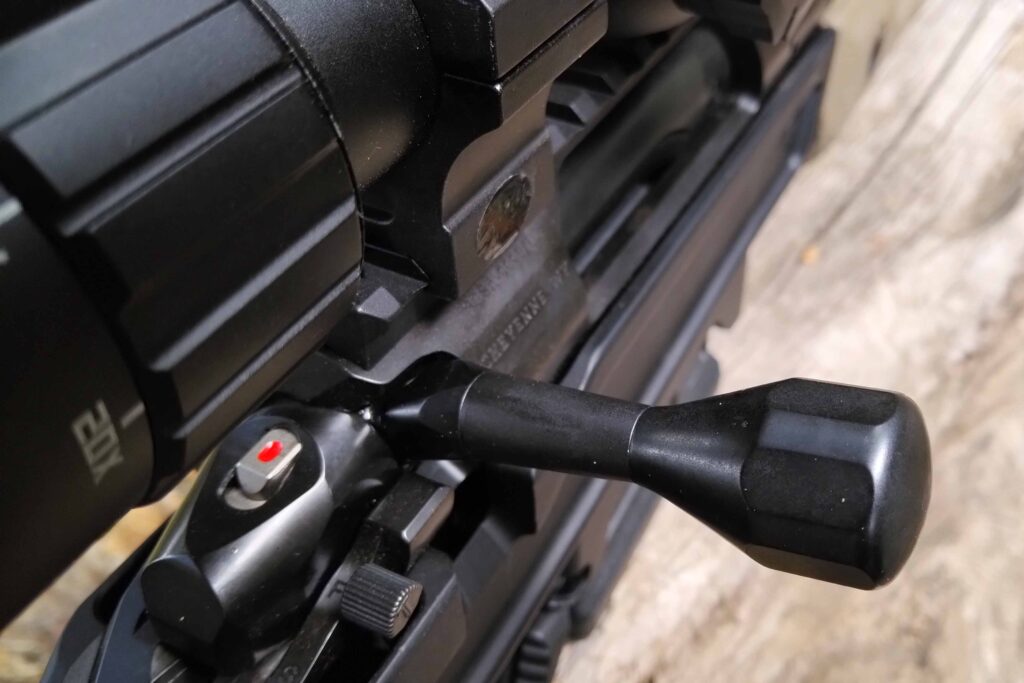
The Pursuit’s action features a number of high-end features, not among the least the ability to accept Savage small shank barrels or shouldered Zermatt Origin pre-fit barrels. Oh, yeah, check out that 60-degree bolt throw–fast and makes room for larger optics.
First off, and perhaps most importantly, the push-feed action has a Remington 700 footprint. Given this is the most common dimension in the bolt-action world, jumping chassis or stocks are a snap, as are trigger upgrades.
The bolt is a full-diameter three-lug design that has come into prominence in the past decade or so. Not only does this style of bolt keep production costs down, without compromising strength, it comes with some added benefits. Highlighting these is the bolt’s 60-degree throw, which makes it fast as well as allowing plenty of room for larger optics.
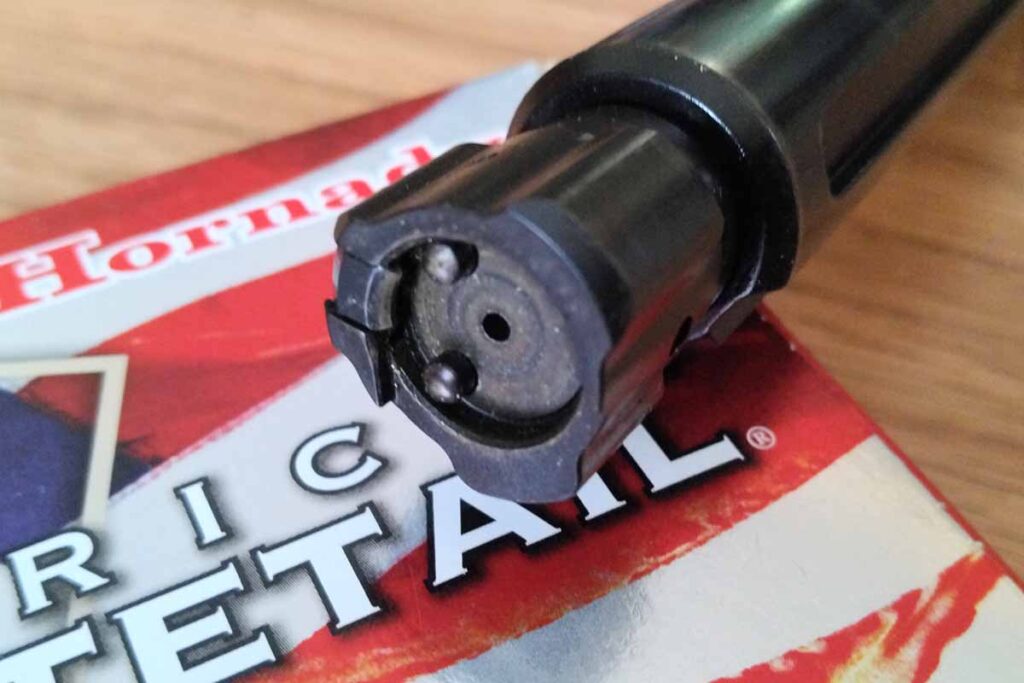
Interestingly, the bolt-head is interchangeable, though Stag does not offer any stand-alone components. It’s outfitted with dual ejectors that kicks the brass like nobody’s business and all of it is made of stainless steel
The dual ejectors really kick the brass on the Pursuit’s three-lug bolt.
Perhaps, best of all, the action accepts Savage small shank barrels or shouldered Zermatt Origin pre-fit barrels. This, combined with the interchangeable bolt heads gives the Pursuit system a ton of flexibility, allowing barrel and caliber swaps without the need for a gunsmith.
Essentially, this adds up to a list of custom-action features found on an off-the-rack rifle action.
Barrel
Stag turned to another in-house partner to create the Pursuit’s barrel—Ballistic Advantage (it too is under the Aero banner). BA has more than earned its reputation for creating precision barrels and has come up with a solid system for the Stag rifle. The rifle I tested was a 6.5 Creedmoor and was outfitted with a 20-inch barrel; though, Stag optimized the length to the cartridge, with the .308 model coming with an 18-inch fire tube and the 6.5 PRC with a 22-inch barrel.
Across the board the BA barrels are machined from 416 stainless steel, Cerakote finished and spiral fluted. This final feature reduces some weight from the overall platform and creates more surface area, so the barrel disperses heat quickly. Finishing it all off, Stag threads the muzzle 5/8-24 so it’s ready to accept an aftermarket brake or suppressor.
Stock
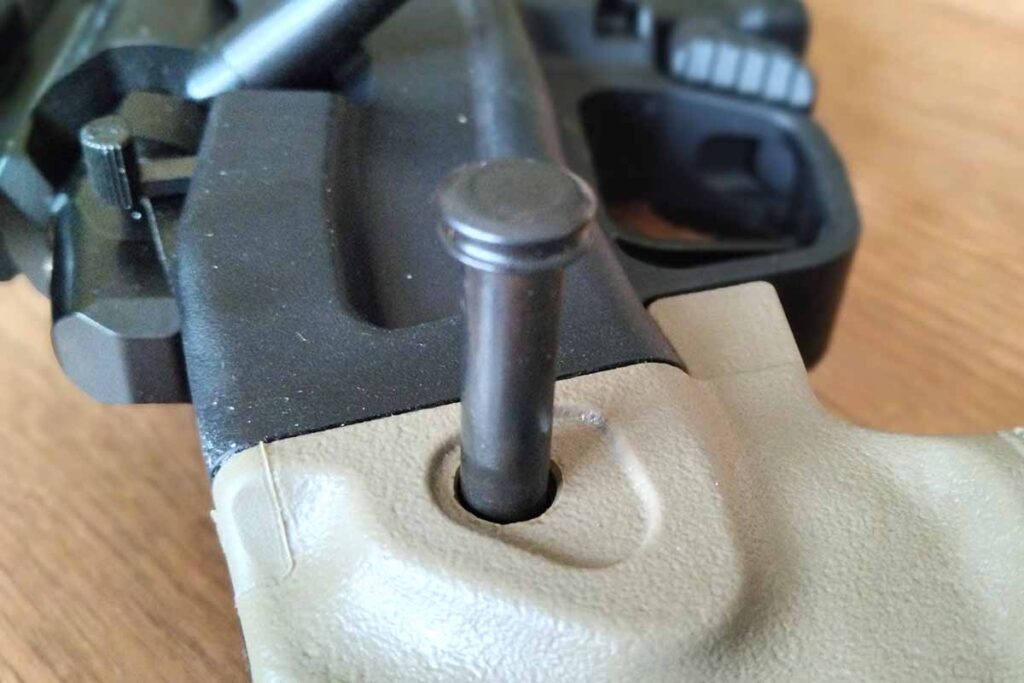
The Stag Pursuit uses a chassis system, but it has a unique twist. There is the chassis proper, but then it has two independent stock pieces—the fore and butt. At SHOT, the Stag representative told me the company would offer multiple stocking systems, but this has yet to manifest itself on the company’s website.
Interestingly, the butt is held on via an AR-style push pin.
The fore of the gun has a flat ample base that keeps it rooted when shooting off a support. Even so, I found it manageable off-hand, though perhaps not so much as a traditional sporter hunting rifle (more on that in a bit).
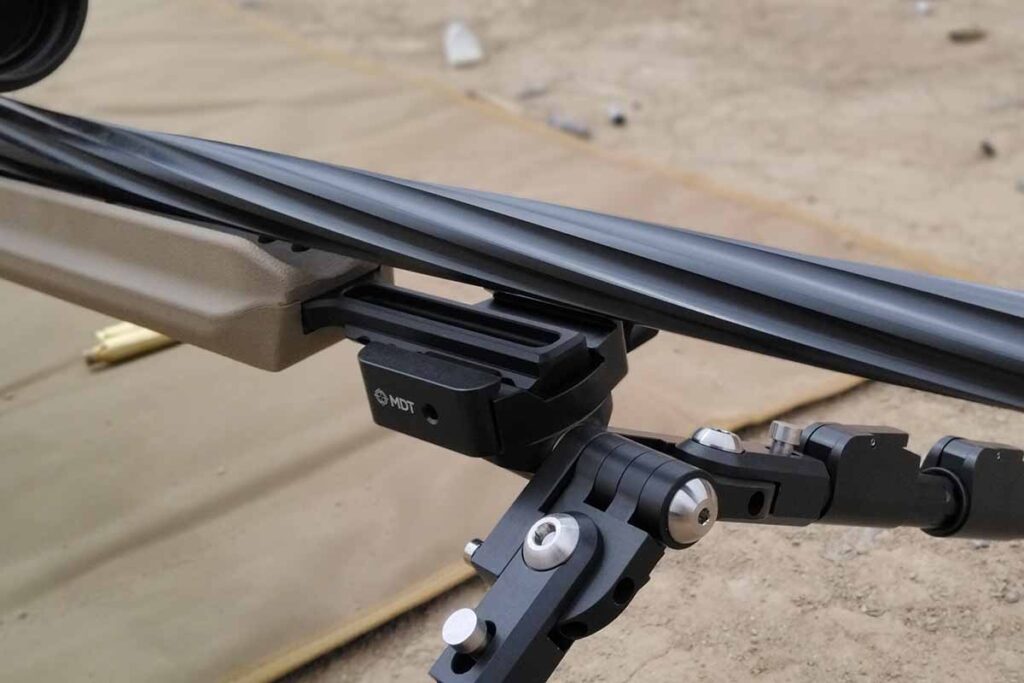
The Pursuit Bolt Gun doesn’t lack in tripod and bipod mounting options up front. In addition to M-LOK sections, the fore also boasts a half ARCA rail and a Picatinny rail spigot that juts out the front. The spigot not only gives excellent leverage when using a bi/tripod, but it also keeps the accessory well out of the way of your hand if you need to use it on the fore.
The buttstock is fully adjustable for length-of-pull and cheek rise. The LOP system uses spacers, personally not my favorite way of going about things, but an understandable way of pinching pennies. The comb adjusts via a tension screw near the rear of the butt.
The butt is also nicely hollowed out and comes with a detachable bag hook, I like the idea of this for competition. However, I found that the lightweight stock material and svelteness of the butt tended to make the rifle front heavy.
The ability to remove the butt makes transport of the rifle simpler.
Interestingly, the butt attaches via an AR-style pin and comes off the chassis quickly and easily. This feature is especially nice when transporting the gun and space-savings are at a premium.
A final note on the stock, there are ample quick detach nodes on the fore and butt—six total, three on each section. Though I didn’t incorporate a sling to the test rifle I worked with I appreciated the additions, making the carry system very customizable.
Other Notables
The Pursuit Bolt Gun is aimed at accuracy and Stag put in a trigger to aid it in this mission. A single-stage TriggerTech Primary trigger is the order of the day, featuring a wonderfully comfortable flat-faced shoe. I didn’t have to mess with the switch out of the box, with the trigger breaking at right around 2.9 ounces consistently. Furthermore, Stag did its thinking when it designed the Pursuit for hunting, incorporating an oversized trigger guard, ample enough for a gloved finger.
The rifle feeds off AICS/AW-style magazines and Stag simplifies reloads considerably with a large ambidextrous release paddle at the front of the trigger guard. It also does the same on manipulating the bolt, including an oversized tactical-style handle.
Stag Pursuit At The Range
I put 240 rounds down range with the Stag Pursuit Bolt Gun and walked away thoroughly impressed. First off, AmmoToGo.com provided the ammunition for this review, so a big thank you to them.
I left the rifle fairly stock out of the box, only topping it with a SIG Whiskey4 5-20x50mm scope and slapping an MDT CKYE-POD Lightweight bipod to the Picatinny spigot. I’ll admit the support was a bit of overkill for the hunting rifle, yet still a workable choice—particularly for anyone who might consider the rifle for NRL Hunter-style competitions.
The Trigger Tech flat-faced trigger and consistant break adds to the package.
The Whiskey4 was a perfect match for the Pursuit, a hunting optic but one with refined upgrades for long-range engagements with game. Not to mention, its ample magnification and crystal-clear glass ensured the rifle could perform up to its billing.
And the Pursuit more than did. Through three different loads—Winchester 125-grain HP Target & Practice, Hornady 129-grain SP American Whitetail and Sellier & Bellot 140-grain FMJ BT—shooting four groups of five with each ammo type at 100 yards — the bolt gun acquitted itself well. One might even say phenomenally.
First off, shooting groups of five offers more validity to a rifle’s true performance. Three-shot groups aren’t statistically significant and nearly any modern rifle can achieve MOA results at this standard.
With the rifle averaging .937-inch groups across the three brands, it’s safe to say the Pursuit knocked it out of the park. Especially heartening, it played well with the Hornady hunting ammunition, which produced the best single group of the day—.331 inches. However, it performed best overall shooting Winchester, with an impressive .744 inch four-group average.
Load
Muzzle Velocity (FPS)
Muzzle Energy (FT-LBS)
Group Size (Inches)
Winchester 125-grain HP Target & Practice
2,850
2,254
.744
Hornady 129-grain SP American Whitetail
2,820
2,277
.927
Sellier & Bellot 140-grain FMJ BT
2,658
2,202
1.139
Average
.937
Accuracy was determined by firing four groups of five with each load from prone on bipods at 100 yards.
Impressions
The rifle was extremely pleasant to shoot supported from the prone position and the CKYE-POD more than did its job. The bolt was silky smooth cycling without an iota of rattle when moving down the raceway. Furthermore, I genuinely believe the TriggerTech trigger enhances the rifle’s overall performance.
First off, I found it very consistent in its break allowing for an exceptionally smooth squeeze. Additionally, its flat shoe makes repeated finger placement easily achieved, making it an amazingly comfortable switch to run.
Plan on using one of the Pursuit’s many bi/tripod attachments, because the gun is heftier than most hunting rifles.
The rifle’s hefty, more than 9 pounds loaded and with a scope. But this weight ate up recoil and allowed me to track my shots to the target. However, the Pursuit’s weight is a double-edged sword.
While it’s manageable to shoot offhand, I’m not going to say it’s the most pleasant due to its load. If I were to take this in the field, I believe I would invest in a solid tripod to shoot off—at least a very stout shooting stick.
The Pursuit’s weight also concerned me about plain old carry burden. I hunt a lot of mule deer and generally average close to 10 miles of hiking throughout a hunt to get a shot. My shoulder throbbed with the thought of humping this gun that distance.
Yet, when you’re shooting sub-MOA groups consistently with a hunting rifle, you have a lot of incentive to man up and tote the gun.
Parting Shot
I like the Pursuit Bolt Gun… a lot. It’s comfortable, consistent and above all accurate. You can’t ask for much more. Hunting rifles have improved by leaps and bounds in the past 20 years, yet Stag proves there is still room to grow in this market.
I perhaps don’t recommend the gun as a starter for first-time hunters—you’re better off spending less and investing in learning woodcraft. But for those who hunt wide-open spaces and want reassurance a long-range attempt will come in on a once-in-a-lifetime buck or are looking for a solid competition rifle, well one thing is certain… the Pursuit is on!
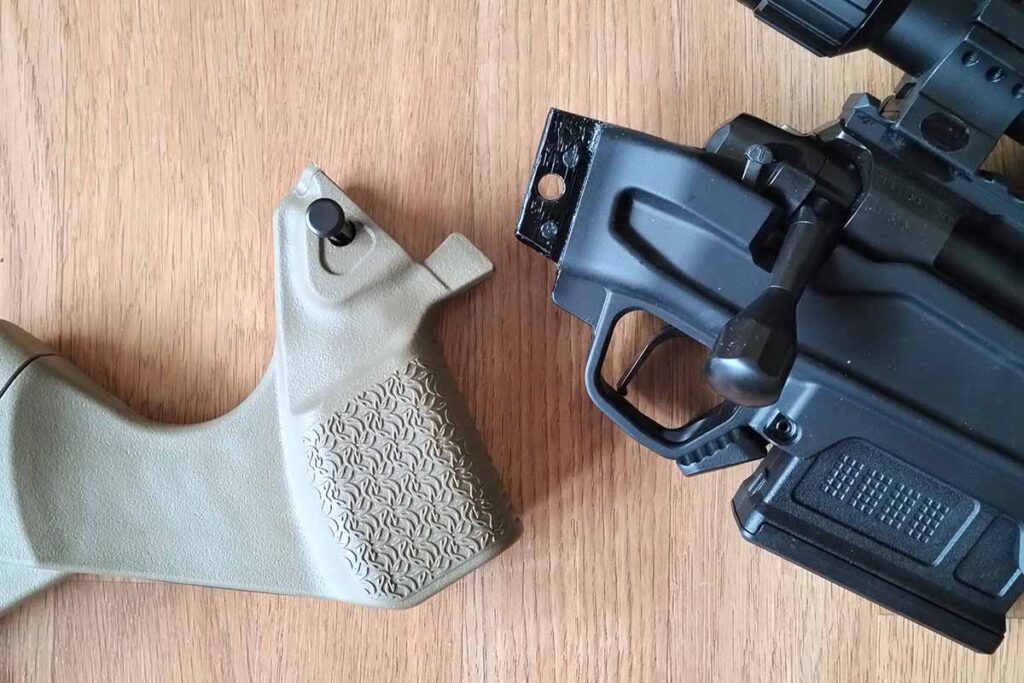
We take a look at Stan Chen Customs’ excellent aftermarket 1911 thumb safeties.
It’s easy to become a snob in this business. There are many truly good products, but by the same measure, there can’t be too many. I’ve known Stan Chen for (mumble, mumble, how many years?) a good long time, and he never ceases to amaze me.
He just sent me some of his thumb safeties—and wow. OK, so you want a safety on your 1911, but which one? How big, what shape, what need?
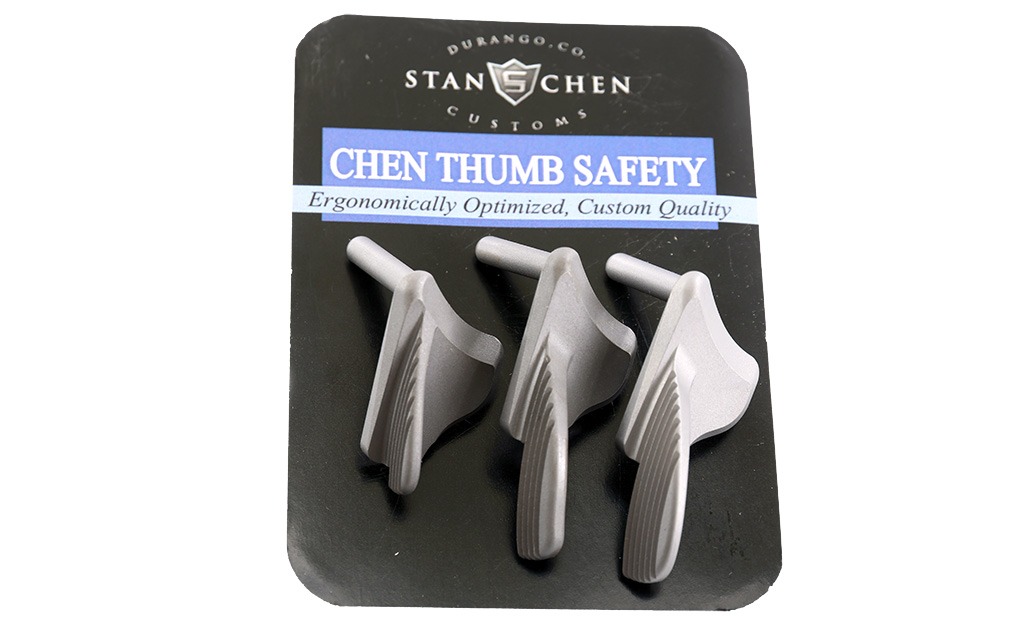
Stan makes three; they’re all stainless, and they’re all perfect.
You’ve got the “baby bear,” which is the short, narrow, thumb safety for deep concealment.
If you have bigger hands or less need of deep concealment, then the “mama” safety—the longer and wider one, but not too long or wide—will serve you perfectly.
And then, for those who don’t worry about concealment or have learned to dress around the gun and want all the leverage they can get, there’s the “papa” safety—longer, wider but not lower. (Not a ’49 Hudson, so to speak. It’s an inside joke.) Open carry, competition, or just “I want a big safety.”
The Stan Chen Custom thumb safeties come in two steels, blue and stainless, and three sizes. One of these will be perfect for you.
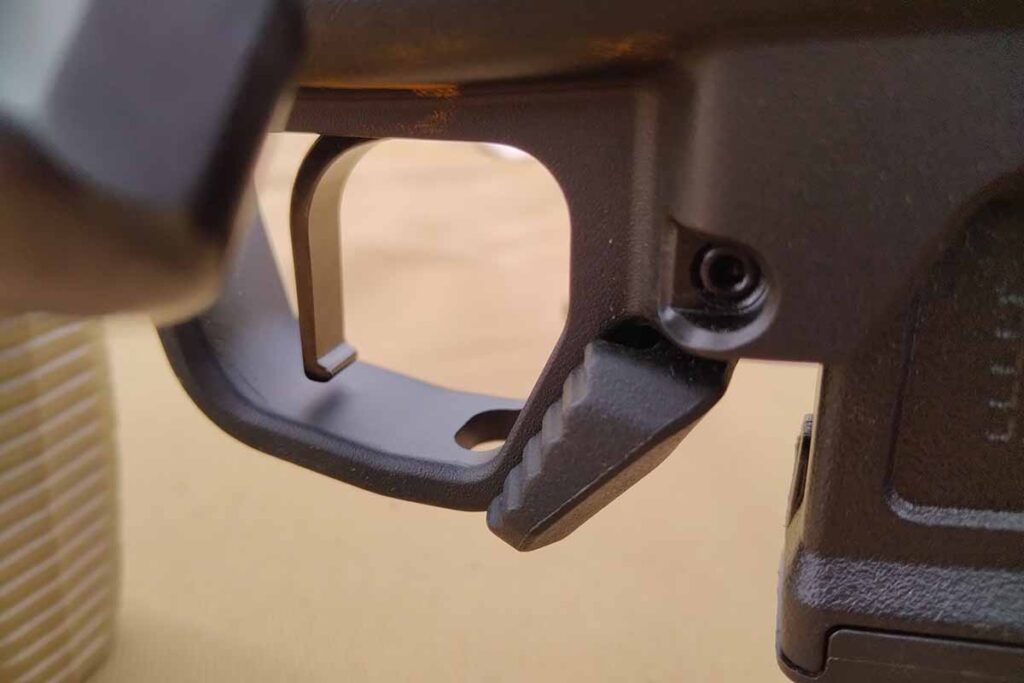
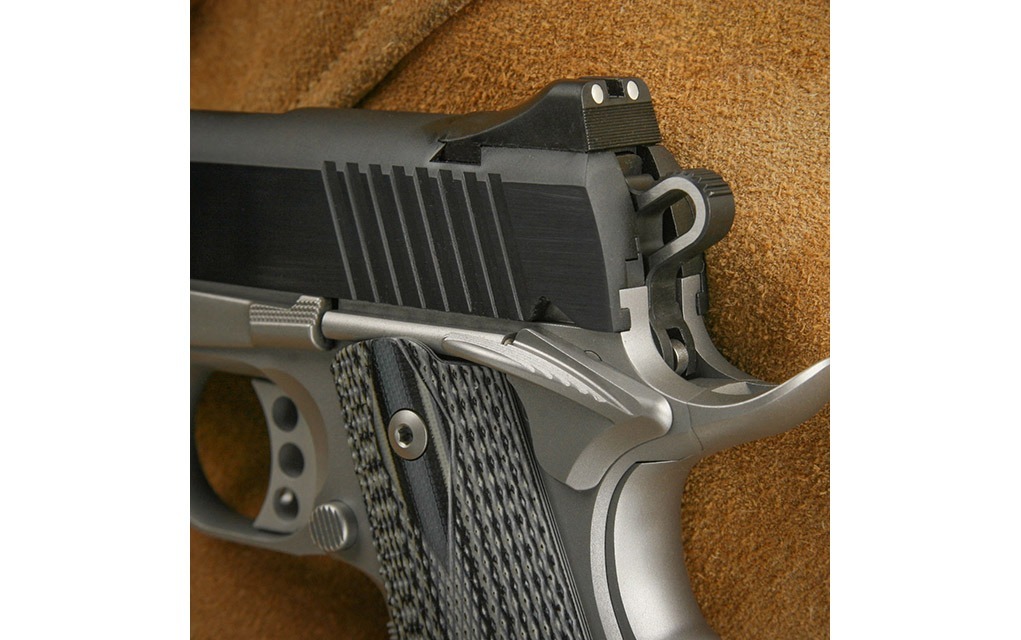
All three are de-horned, so there are no sharp edges or corners to bite or gnaw your hands. They are all deeply grooved on top, so you will have full purchase to press them off when the noisy times commence. With the deep grooving, those of you who are doing it properly, that is, your thumb riding on the safety when firing, will not have to worry about your thumb slipping off during recoil.
And they are, after being machined, bead-blasted so they don’t show the toolmarks (not that Stan would leave any) and will blend in with any finish except a polished stainless or nickel 1911. (Who does that?)
And those of you who have had an opportunity to wrestle with various 1911s will appreciate this: The detent angles and engagement surfaces have been designed and engineered so it clicks on and off cleanly and precisely. No squish, no “is it off or on?” where is the lever riding—Stan won’t have it otherwise.
The thumb safeties are precisely machined, ergonomically correct, aggressively grooved and bead-blasted for a final finish. No bites, nibbles or sharp edges to cut you.
They do require fitting, because there is no such thing as a drop-in thumb safety on a 1911. And since you are springing for top-end parts, you might want to practice on a lesser thumb safety before touching a file to a Stan Chen Custom part.
If stainless isn’t your thing, or you have a blued 1911 and don’t want the contrasting finish, of course Stan makes them in blued steel. C’mon, get real. The safeties, like all the other Stan Chen Custom parts, are made in-house by Stan or an assistant who has been trained by Stan. Stan doesn’t send things out or have subcontractors and thus doesn’t have to gauge everything nor negotiate “good enough” specs and dimensions. It’s right or it doesn’t get packaged and shipped.
Quality doesn’t come cheap, but remember the old adage, “Buy right, cry once.” At $75 to $80 each, you could buy any of a wide selection of thumb safeties for less … even half that. And after you’ve fitted it, then de-horned it and adjusted the up-and-down engagement, the saved money will be nothing but a memory, replaced by the recollection of the hassle of refining your “inexpensive” part.
Editor’s Note: This article originally appeared in the July 2024 issue of Gun Digest the Magazine.
We take a deeper look at the history of the 1911, tracking its journey from the mind of John Browning to its place today as the most iconic American handgun ever made.
When the late physicist Stephen Hawking was working on his book, A Brief History of Time, his publisher told him that each equation he used would cut the book sales in half. He rolled the dice and risked it, including just one equation. The book was a success, and when it came time to update it to a second edition, he included a second equation. I’m no Hawking, but I will resist putting in equations unless necessary. And I’ll try to be brief.
You may hear 1911 fans talk about “Saint John” or “The Mormon Genius.” The period we’re looking at here is the last decade of the 19th century. Smokeless powder was still new but was around long enough that gunmakers were now comfortable with it. A self-loading pistol would be the hot new property to make some lucky somebody rich. The bolt-action rifle had been perfected (several times, in fact). While the double-action revolver was a good thing, Smith & Wesson had revealed in 1898 the frame that would become the K-Frame and the .38 Special to go with it—a self-loading pistol would be a real money-maker.
The only problem was design. And the designers of the age were stuck in the “receiver and breechblock” paradigm. The exemplar here would be the Luger, which was a receiver with a barrel screwed into it, just like rifles, and used a breechblock that cycled inside of the receiver. Another was the Mauser Broomhandle, the C96. Again, a barrel in a receiver and a cyclical breechblock. The difference is that the Luger breechblock locks itself, and the C96 locks to the lower frame.
Along came John Moses Browning. He had been designing rifles and shotguns for Winchester for 15 years, and his latest was a self-loading shotgun. He wanted to make some real money with this one and spurned the customary process of a flat fee from Winchester for the design. He wanted royalties, a piece of the action. Winchester declined (one of the stupidest decisions ever made in the history of, well, history), so Browning headed off to Belgium, after several other problems, for a meeting with the new firm of Fabrique Nationale. Having fulfilled its Belgian Army rifle contract, FN needed new products and customers. Browning arranged for them to make his shotgun, which he would purchase for export to the U.S. and which FN could manufacture and sell in Europe.
Browning also had a self-loading pistol design, the FN1900, which FN executives fell all over themselves to acquire. Browning had been working on it for a while, and it was a transitional design—a kinda-sorta receiver-and-breech system. The barrel was screwed into the frame, but the breech looked like a slide, and it was blowback, so there was no need to lock the mechanism. It was chambered in a new cartridge, the .32 ACP, which Browning designed for the pistol. It was flat, compact, lightweight, reliable, and accurate, and, in 1900, no one sneered at the .32 as a defensive cartridge. It sold like hotcakes. FN made and sold a million of them in the next 12 years. The sales of the FN1900 slowed down mainly because Browning himself came up with better designs in short order.
The FN1900 is the pistol that saved Fabrique Nationale from bankruptcy and established John Moses Browning as a pistol and rifle designer. He even developed the cartridge for it, the .32 Auto. No design aspect of this pistol made it into the 1911.
But, the 1900 was already an obsolete design even before the first one left the Liege factory. Browning was also working with Colt, for which he had designed a new approach to pistol mechanisms: the slide enclosing a barrel and the slide and barrel lock to each other, not to the frame or receiver. The Colt 1900 (yes, two Browning pistols, each called the 1900 by two different manufacturers, in different calibers. Browning was a busy and prolific designer.)
The Colt 1900 and its successors appear odd to us. Browning had ideas about what worked, but the end-users had their own. Things like a safety that was the rear sight and had to be pushed to permit firing didn’t go over well. And that brings us to the reason for many of the details on the 1911 that we see today: the U.S. Cavalry. The Cavalry was the premier arm of land militaries in all armies of the period. They were the paratroopers, special ops, SEALs, Rangers and LRRPs of their day, all rolled into one. And they used pistols. Oh, they had rifles, but a pistol and a saber (or sabre) were the classic arms of a cavalryman. And while the Colt 1900 showed significant promise, there were things about it that they did not like.
First, the cartridge. In 1900, the .38 Auto was a hot number. A 130-grain bullet at 1,100 fps was plenty good enough for people, but cavalry had to stop horses. So, it had to be a .45, or they would not buy it. Second, many functions of the Colt 1900 required two-handed operation. So Browning, in the next decade, would change, alter, redesign, and ditch whatever he must to use a .45 cartridge (and stand up to hard use and long service life) and make it as much as possible a one-handed pistol. That’s why all of the controls on a 1911 pistol can be managed with one hand: your firing hand. Safety on and off, magazine drop, slide release—they take one hand. To load it took two, but hey, there were limits even for Browning.
He did all this design work at a time when the average man stood 5 feet 8 inches tall, and the word “ergonomic” hadn’t been coined, yet he was a master of ergonomics. And, like the FN1900, the resulting 1911 was flat, powerful, accurate, reliable, durable and sold like hotcakes.
Much like the original 1900, the first 1911 had some design quirks. Bill Laughridge, owner of Cylinder & Slide, went to the trouble in the early 21st century of recreating the exact design of the first-production 1911, in the details before the various changes were made, as a centennial model. He tracked down as many un-molested original pistols as possible from the first production run and made exact replicas. These were beautiful pistols, pistols that were maddening in some regards. I tested one, and he asked me not to take the magazine catch assembly apart. “No one has ever managed to take one apart and reassemble it without scratching the finish,” he said. And a beautiful, mirror-finish blue job it was, I might add, so I did not take it apart.
One aspect of Browning’s design genius is that the grips aside, the 1911 is not held together by screws, pins, or other fasteners. Instead, he used interlocking assemblies, which lock each other into a mechanism and require a specific sequence to assemble or disassemble. That’s part of what we’ll be covering in this book.
With the manufacturing, assembly, and maintenance details taken care of, we entered World War I, and Colt made as many 1911 pistols as possible. Springfield Armory (the government arsenal, not the later company) also produced pistols. Post-war, the Army wanted changes based on feedback and use in The Great War. Those changes resulted in the 1911A1, which included larger sights (still minuscule by today’s standards), a grip safety tang and hammer spur combo that didn’t bite, and an arched mainspring housing.
Leading up to WWII, the government actually had some foresight and engaged the services of a few companies to let them learn how to make 1911A1s “just in case.” Just in case quickly turned into “make them now, as many as you can” and they made millions.
Even the Singer Sewing Machine Company got into the act in WWII, doing a test run of 1911A1s, all 500 of them. Finding one of these is like getting a winning lottery ticket.
One detail about the 1911 that might interest Glock fans is that parts interchangeability was paramount to the companies producing 1911A1s for the WWII effort. Government inspectors would look over pistols as they were being made to ensure quality. Each lot of 5,000 handguns had a certain number test-fired to more than the “magazine’s worth of ammo to make sure it works” level. One in each lot was fired a whole lot more than that, and if it failed, the entire lot would be rejected, reworked, and tested again. And, at regular intervals, representatives of each company would meet and bring a box of regular production pistols with them. They would each disassemble a pistol and toss all the parts from each manufacturer’s pistol into bins. Then, the handguns would be assembled by those present, who grabbed a random part from the bin until the samples were all back together again. The resulting pistols would be inspected and test-fired. If a pistol failed, an immediate analysis would determine which part was the problem, who made it, and the problem corrected.
Everyone got into the act when it came time to tool up for World War II. It was patriotic to shoulder part of the war effort, and Union Switch & Signal did a contract run of 1911A1s. They are now rarities of the first order, as Union only made 55,000.
Once the war ended, and we had more 1911A1s than we’d need for decades, all the institutional knowledge vanished. The Army immediately started looking for a replacement, which would not be concluded for over 40 years. (And this would not be the only time it would take decades to replace something. The Army is still looking for a replacement for the Browning .50 machine gun, which first saw service in 1921. My prediction is that it never will.)
During the ’50s and ’60s, the only place the 1911A1 saw use (well, in the holsters of GIs and Marines, but pistols in military service are way down on the list of essential items, except to the people who are getting shot at) was in Bullseye competition. As a general rule, if a tool is used in one environment for one purpose, it will be gradually or not-so-gradually modified by the users until it is suited only to that use. A Bullseye 1911, while accurate, wasn’t useful elsewhere. And with no other design driver, the choices were USGI, box-stock as it were, or a 1911/1911A1 set up for Bullseye. Then, the IPSC (International Practical Shooting Confederation) came along. The idea that a pistol, especially a 1911, could be both accurate and reliable was new to many. But it could be built that way. You might snicker, but in the early days of IPSC competition, the standard of reliability we strove for was no more than one malfunction per thousand rounds fired. Part of the learning process was the pistol, part the magazine and part the ammunition, but we could exceed that level with work. And at that level of reliability, the 1911 delivered Bullseye-level accuracy.
This is the kind of accuracy you could expect from an IPSC gun of the 1980s (and this is a Brownells’ recreation of the same) when fed the classic IPSC load of a 200-grain L-SWC and 5.8 grains of WWS-231. This was a limited run, so don’t look for it in Brownells’ catalog.
A brief aside: It is now common for 1911s to be far better than that old-school “one malf (malfunction) in a thousand” reliability standard. These days, you might never see a 1911-induced malfunction shooting a current-production pistol. And it is typical for them to be quite accurate. Les Baer guarantees his pistols will shoot no larger than 3 inches at 50 yards, and you can pay a bit extra to get 1.5 inches at 50 yards accuracy.
One obstacle to that performance level was Colt itself, which spent much of the 20th century in dire economic straits. It just couldn’t get a break between two World Wars (and the miscalculations involved in over-working machinery, etc.), economic downturns and at least one factory flooding. For the last half of the 20th century, Colt was owned by one or another conglomerate that viewed it as a cash cow, and thus, it was always strapped for new machines, designs and labor. My Colt Series 70 is an example.
In 1981, I attended the Targetworld National Championships. In those early years, IPSC was like drag racing, and if your match could get enough people from enough states, you’d call it a national championship. By looking over the sign-up sheet and seeing who was where (the list of top shooters was small enough that we all knew each other, not that I was a “top shooter” in 1981), I managed to place high enough as a Pro shooter to win a gun. That prize of a new-in-the-box Colt Series 70 was magnificent. And it was unreliable. One in a thousand? It wouldn’t go a full magazine without a malfunction. And it wouldn’t “malf” the same way twice in a row. In desperation, I learned gunsmithing to make my pistol work properly. And that was the case for all of us back then. By the early ’80s, the 1911s to build on were GI-standard surplus 1911/1911A1s or Colts. Both needed work to be competitive; they just needed different kinds of work.
After the 1911 and A1 were issued, they were everywhere. Here, Private Stack of 9 Commando, at Anzio, is all set with his.
And that is the source of the urban myths—myths now, back then, truths—about the 1911 that “It needs a gunsmith to be reliable” or “You can have reliability or accuracy, but not both.” Today, no one makes an unreliable 1911 simply because they would be out of business quickly if they did.
Into the 1980s, the standard 1911 for IPSC was a 5-inch .45 ACP. And the Power Factor for Major was 185. (For example, a 230-grain round nose going 805 fps is now called a +P load.) But two competitors, Robbie Leatham and Brian Enos, changed that. Just as we were all learning about the advantages of a “comp,” a compensator, they also switched to .38 Super. Comps work by re-directing muzzle gases. The Super runs at a higher pressure, and higher pressure gases are better than lower for comps. In short order, we had all switched over to .38 Supers; then they got red-dot optics, and then a few years later, we swapped our single-stack red-dot guns for hi-cap Supers with red-dots. By 1995, you were uncompetitive if you were not running a red-dot hi-cap Super with 28-round magazines. And the howls of “not real-world” were deafening. (I can’t help but look around now at hi-cap, comped 9mm pistols for everyday carry, with slide-mounted red dots, and smile a little.)
The evolution of the IPSC gun happened so fast at times that it was hard to keep up. In the fall of 1989, this was a top-end competition gun without the optics. A year later, even with the optic, it was obsolete for winning matches.
The early 1990s saw a new 1911 design with a plastic grip and a steel rail section made by STI. Now, it is named Staccato, and there are other makers of the same approach, from overseas and here in the U.S. by Springfield Armory.
Look around you today and see how many shooters carrying a pistol for defense (and law enforcement agencies) have a red-dot optic on a 9mm holding at least 17 rounds, and with some straight from the factory compensated, and consider again the guy in your gun club who says “competition isn’t real” and “IPSC will get you killed.” No, competition pushes the boundaries. Determining if the changes benefit you in a defensive role is up to you.
Simultaneously, the equipment categories in IPSC (by then, the USPSA or the United States Practical Shooting Association) fragmented. The origins of “run what you brung” had proven what won, but not everyone wanted to be shooting a Super. So, competition added equipment divisions. And there, the .40 S&W proved to be—for various, arcane reasons—the alternative to the Super in some divisions. The Production Division allowed 9mm pistols to compete and grow until IPSC/USPSA, the home of the .45 1911, had most competitors shooting a 9mm pistol that wasn’t a 1911. Such is life.
In the mid-1980s, Springfield Armory saved us from Colt by offering 1911A1s. At first, they were parts kits, everything you needed to assemble a 1911A1 in the box, but no tools, assembly required, or batteries were included. I won a bunch, bought them, and built them. Springfield Armory then offered assembled pistols and sponsored competitions. Other companies entered the competition field and offered their guns, gear and equipment—so much so that you could shoot in a local club’s annual championship and win a Springfield. If you practiced and were good, you could win enough loot to build a better gun, load enough ammo to get better, and then really get a leg up on the competition.
As did Colt and Smith & Wesson, Springfield sponsored a team, and smaller, specialized companies would sponsor individual shooters. The era of the professional practical shooter was born. The top shooters could travel the circuit, compete, win, get paid, and, on the side, be paid to teach other shooters. Of course, this was a gypsy life, spending most of the year on the road, and divorces and near-divorces were common.
By the mid-to-late 1980s, it looked like the days of the 1911 were over. Oh, it would still maintain a presence in Bullseye, at least as long as those using it were still competing. But the 1980s saw the rise of the “Wonder-nine” high-capacity 9mm pistols with a double-action firing mechanism and holding many rounds. A Browning Hi Power didn’t much threaten a 1911 with 7+1 of .45 ACP with 13+1 rounds of 9mm. But a G17 with 17+1? An S&W M59, a Sig P226, a Beretta 92, and more to come? With the adoption of the M9 for military use and police acceptance of 9mms, ammo makers were turning to make hollow-points that actually expanded.
The 1911’s days were numbered. But they were saved by, of all people, Bill Clinton. The Assault Weapons Ban of 1994 vilified some features of the AR-15 and made magazines of over 10 rounds verboten. This did two things: First, tell Americans they can’t have something and many will ask, ”Where can I buy one?” By the time the ban expired 10 years later, there were markedly more AR-15 manufacturers than before.
And in the pistolverse, people rightly figured, “If I can only have 10 rounds, I want 10 big ones, not smaller ones.” A G17 with a 10-round magazine was just stupid. And at the height of all this, Glock 17-round magazines were offered for as high as $150 per. (No, I’m not kidding or making it up. I don’t know if any sold, but that was the asking price.) The sales of 1911s jumped.
If you get lucky and score a CMP pistol, it will be rebuilt like this Range-Grade 1911A1. The happy owner has kitted it out with the right web gear, holster and ammo box.
At the beginning of the 21st century, Kimber decided (after various business changes) to get into the 1911 market. But, rather than make stock guns—as Springfield had when it entered—Kimber went semi-custom. It could exploit modern manufacturing techniques and build a 1911 with mid-level custom details as a production item and sell for less than you’d pay a custom pistolsmith to upgrade your box-stock pistol. Similarly, the Dan Wesson company jumped in and offered semi-custom features on production guns. Rock Island Arsenal brought parts and pistols from the Philippines, and its catalog is full of options. The newest entrants are the Turkish makers, such as Tisas, which make custom-featured 1911s at excellent prices compared to what we paid for those as extras “back in the day.”
The price of USGI 1911s has gotten so high that 1911 makers are now producing GI clones. This Rock Island Armory only needs some USGI plastic grips to be a close enough copy that you’d have to look at the slide to see the difference.
Now, a couple of decades later, if you want a USGI-level pistol, you must hunt down that variant in a catalog of 1911s because everything else is now semi-custom or higher-featured. Of course, at the moment, the CMP (Civilian Marksmanship Program) is selling off the 1911s and 1911A1s it has, so if you get lucky and score one, you can get a real-deal GI pistol. It won’t be new; it will be rebuilt, but it will also cost you less than an identical one would require in gunsmithing should you win one at an auction. Today, the details you can get out of the box on newly made pistols are often better than custom-built ones in the old days and for less cost. And yet, anything made by the hand of man is imperfect. So, your 1911 might need some work. Or you want something a bit different from what the maker offers. Or, you have worked yours hard, and it needs some TLC. Maybe you want to know how things work, what cleaning entails, or what a given part does in the scheme of things.
Heritage Manufacturing has just announced the Roscoe, a classic .38 Spl revolver available with two barrel length options.
The popularity of snub-nose revolvers as concealed carry guns has dwindled over the decades, but it never died out. That said, most available today have modern features, finishes and aesthetics. For those with a penchant for the classics, especially anyone who wants to emulate the noir detectives of old, Cerakote and rubber grips just won’t cut it. With a marked lack of affordable, retro carry revolvers on the market, Heritage Manufacturing is aiming to fill the void with the Roscoe.
Made in Brazil, the Heritage Roscoe is a 5-shot .38 Special +P DA/SA revolver that features all the classic style of the guns of yesteryear. Namely, an attractive glossy, polished black finish and old-school wood grips. They’re available with either a 3-inch or a 2-inch barrel as well. Other features of the Roscoe revolver worth mentioning include the fixed serrated blade front sight, fixed rear sight and the inclusion of a transfer bar safety.
Heritage Manufacturing said this about the new revolvers:
Inspired by the hard-boiled detectives battling mob crime, the movie sleuths, and the real-world cops of yesteryears, the Heritage Roscoe pays homage to these legends with its classic design and rugged performance. Crafted with meticulous attention to detail, the Roscoe features a deep glossy polished black finish, reminiscent of the iconic firearms of the era.
Both the 2-inch and the 3-inch models of the Heritage Roscoe are available now and they share an MSRP of $363.99.
When it comes to guns, everything is a tradeoff. With defensive handguns, that means balancing accuracy, power and speed.
The USPSA (United States Practical Shooting Association) represents more than 37,000 members and more than 400 affiliated clubs. It’s the largest practical shooting association in the United States, and it’s the second largest region within IPSC (International Practical Shooting Confederation), which was founded in part by Jeff Copper.
Collectively, IPSC and USPSA have provided a test bed for equipment and techniques, some of which are now standard for police and military training. There are three letters displayed on the USPSA logo—DVC—and they represent the foundational guide for both organizations.
DVC are initials for the Latin words, Diligentia, Vis, Celeritas, which mean accuracy, power and speed. The acronym was popularized by former Marine, firearms trainer and gun writer, Jeff Cooper, who also founded the American Pistol Institute, now known as Gunsite Academy. Maybe to the annoyance of some, I routinely reference Cooper in this column. But, like Robbie Barrkman, who was the first gunsmith at Gunsite and founder of Robar, I believe we can link everything related to the defensive handgun today to the work and philosophy of Cooper. Yes, there have been advancements, but Cooper laid the foundation.
As established by Cooper, DVC is a triangular approach to the application of the defensive handgun. It’s a triangle that every shooter must balance so that they can deliver a sufficient level of power, accurately and as fast as possible. In an article written by Jeremy D. Clough, he compares DVC to a quote from Confederate General Nathan Bedford Forrest who famously said, “Get there the firstest with the mostest.”
This is a great analogy and good advice, but DVC, as it relates to the use of a defensive handgun, will be different for everyone. What’s often overlooked is that you must balance DVC to best suit you.
Diligentia = Accuracy
Your accuracy is a skill driven and largely dependent on how fast you shoot.
Of the three elements of DVC, the concept of accuracy is the least negotiable. As it relates to the defensive handgun, it varies from a hit in the lethal area of the target to a hit center mass of the available target. If you must shoot to save your life, bullets placed at the center of the lethal area will most often provide the fastest relief. Short of that, any hit is better than no hit, and a hit located center mass of the available target is the easiest to obtain.
Vis = Power
Power is a product of the cartridge you choose, and it will impact your speed and accuracy. (Left to right: .380 Auto, 9mm Luger, .357 Magnum, .40 Smith & Wesson, .45 Auto and .44 Magnum.)
Cooper felt appropriate defensive handgun power started with the .45 Auto. However, not all shooters are capable of wielding a pistol chambered in .45 Auto efficiently and effectively. For some, the handgun is too big; for others, it recoils too much—and with today’s miniature pistols that are so popular, many can find it impossible to control. This is why the 9mm Luger is so popular: Most shooters can manage it well, either in a duty or ultra-compact pistols.
The point of this element of the DVC triangle is that you need enough power to get the job done. To incorporate these cartridge/power differences, IPSC applies points to hits based on a power factor rating of the cartridge being fired. You are left with logic when it comes to the power decision.
Celeritas = Speed
This doesn’t apply to the speed of the bullet, but to the speed with which you can obtain your hits. It is highly dependent on shooter skill as well as the shooter’s ability to effectively control the power level of the handgun—for subsequent shots/hits—in the size handgun they have chosen to use.
Finding Your Balance
There’s no shortage of self-defense shooting drills for measuring your abilities and skill. I’ve championed several in these pages, such as the Forty-Five Drill and the Step Back Drill. These and others are a measure of accuracy (diligentia) and speed (celeritas). If you can shoot them to standard, you can assume a reasonable level of proficiency.
The unmeasured element here is power (vis). All these drills are easier to shot with a .22 rimfire pistol than they are with a .357 Magnum. You must balance your DVC triangle with the most powerful handgun you can use to obtain good hits—quickly. Since we cannot sacrifice accuracy, it mostly becomes a balance of speed and power.
For example, I’ve found that I can shoot a 5-inch 1911 about 8 percent faster than I can shoot a 4-inch 1911, and about 19 percent faster than I can shoot a 3-inch 1911. Similarly, I can shoot a 4-inch 1911 in 9mm about 14 percent faster than I can shoot a 4-inch 1911 in .45 Auto, but the 9mm does not hit as hard.
The .357 Magnum has a great reputation as a stopper of bad men and gives an edge to the power side of the DVC triangle. But its increased recoil negatively impacts the speed side. For me, I’m about 8 percent slower with a .357 than I am with a .45 Auto. Is that extra power worth the reduction in speed with which I can fire accurate follow-up shots? In my opinion it’s not, and this illustrates the DVC decisions we must all make.
DVC vs. EDC
Balancing DVC is important, but no more than important than finding the right equilibrium between DVC and EDC.
Shooting drills are a great tool to help us make these comparisons and decisions, but DVC cannot measure concealability and carry comfort. No matter how well you shoot whatever gun you might have, if you cannot carry it concealed and comfortably, you probably won’t, and that’s when your insurance policy becomes more important than DVC.
The DVC versus EDC (everyday carry) is another balance that must be found. Like with balancing DVC, the DVC/EDC balance will vary for everyone. Seek guidance, conduct experiments and make your own choices based on your findings. After all, it’s your life that will hang in the balance you find.
Editor’s Note: This article originally appeared in the July 2024 issue of Gun Digest the Magazine.
Math is hard, and MOA can be confusing, so here we deep dive into the minute of angle concept to help refine your long-range accuracy.
MOA, or minute(s) of angle, is a standardized measurement of 1.047 inches at 100 yards that’s used as a benchmark for measuring how precise a firearm (typically a rifle) is capable of shooting.
The idea is that one minute of angle, 1 MOA, is a benchmark standard of how tight a rifle can group shots. The smaller the groups, the more precise the weapon is. Rifles that can produce groups smaller than 1 minute of angle are referred to as sub-MOA.
While MOA is something most shooters are certainly aware of, it’s usually not something they’re terribly familiar with either unless they take long-range shooting seriously. There’s nothing inherently wrong with that, as it’s not something that most casual shooters regularly need to use, but it’s time to change that if you have any interest in honing your accuracy at extended ranges.
So, let’s dive into exactly what minute of angle is both practically and mathematically, how to use it and what you need to know to avoid common mistakes when dialing in your scope.
A sub-MOA group produced by a Montana Rifle Company Junction in 6.5 CM.
What Is A Minute Of Angle?
First things first, the definition of a minute of angle is an angular measurement equal to 1/60th of a degree. In shooting MOA is handy, because it’s used as a measurement of mechanical accuracy. In other words, it’s a way of expressing how small a shot group a rifle or other firearm is capable of shooting in perfect conditions.
MOA became a popular way to measure accuracy in the U.S. since 100 yards was a common increment of distance on American rifle ranges. If a rifle could produce a 1-inch group of shots at that distance, aka a 1-MOA group, it was considered an accurate gun. MOA was also a natural fit for American shooters given our use of the imperial system and familiarity with measurements in inches, although it also means that we typically round the true measurement of 1.047 inches down to just 1 inch. More on that later.
MOA matters because it describes a potential shot group size relative to distance. 1 MOA at 100 yards is roughly 1 inch, but it’s roughly 5 inches at 500 yards and 0.25 inches at 25 yards. In other words, MOA is really good for predicting shot dispersion at different ranges.
This graphic of a pistol and pie slice helps visualize how a constant MOA value gets larger the farther the muzzle is from the target. This is why a small misalignment at close range can result in major deviations at distance.
As an angular measurement, MOA is also a scalable measurement of windage and elevation adjustments, as you eventually must account for the wind pushing the bullet off target and the bullet naturally dropping over distance.
That makes it not only useful as a unit of measurement for how large your shot group will be but also for scope adjustments or holdover calculations that you may need to make to account for bullet drop and windage.
Okay, so MOA is clearly very useful for certain aspects of shooting, but why are we measuring angles in minutes at all?
MOA Vs. MRADs
That all said, minute of angle isn’t the only system for measuring the length of an angle proportional to distance. The other is milliradians, also called mils, MRADs or milli-rads. These days MRAD scopes are nearly as (if not more) popular as MOA models.
One radian is an angle subtended from the center of a circle that intercepts an arc equal in length to the radius of the circle. A milliradian is 1/1000th of a radian, which is useful for measuring small angles at a distance.
The Illuminated ACSS Athena BPR MIL Reticle for the GLx 4-16×50 FFP riflescope.
Just like minutes of angle, an MRAD works out to the size of an arc, in this case the size of the shot group or area that you intend the bullet to land in, proportional to the distance. 1 MRAD is 1 centimeter at 100 meters or 1 meter at 1,000 meters.
Milliradians are technically also easier to deal with mathematically compared to arcminutes and arcseconds since they are base 10 rather than base 60, but that is generally not an issue that shooters will have to deal with. MRAD scopes are growing in popularity, but MOA is still arguably more intuitive to understand for American shooters. Whichever style you decide to use is up to you.
With all that out of the way, how do you put this all to use in the field?
Using MOA For Marksmanship
Understanding minutes of angle became very useful for marksmanship following the advent of scope reticles with MOA hash marks. Before then, scopes on the consumer market typically only featured simple crosshairs.
A Maven MOA reticle in an FFP scope, as seen at 2.5x and 15x. Note the size difference.
Of course, getting the full benefits of understanding MOA requires the shooter to put in work before hitting the field hunting or going to a long-range shooting match. We’ll get to that in a moment.
We understand that MOA is an area in proportion to distance: roughly 1 inch at 100 yards, roughly 2 inches at 200 yards and so on. The stadia lines of a riflescope are in MOA intervals, such as 2 MOA or 4 MOA, and the manufacturer will provide these details in the owner’s manual.
This comes in handy when you know the range of your target and the ballistics of your particular rifle and load. If you know how many inches your bullet will drop at that range, you can convert it to MOA and use the reticle’s stadia lines to hold in the right spot to compensate for the drop.
If you also know your holds for windage, you can use the hash marks on the horizontal reticle line, as well.
If your scope has exposed/adjustable turrets, you could also make click adjustments on the fly rather than holding over the target using the stadia lines.
Another benefit of reticles of this style is that you can use the lines for range estimation if you know the size of your target.
Even so, you’ll need to put in some work of your own before taking full advantage of these features and techniques.
That’s because in order to make the proper adjustments or calculate the correct holdover, you need to know how your gun and your load correspond to the reticle in your scope. It is very, very rarely that they will perfectly coincide unless you have a scope that is calibrated for a specific load at a specific velocity
For instance, a Trijicon ACOG’s reticle is calibrated for 62-grain 5.56mm at the velocities you get from a 20-inch barrel. Put an ACOG on a carbine, and the reticle isn’t going to match the point of impact because you’ve changed the velocity and therefore the trajectory.
Ergo, you have to work up the data on your gun, your load, and how it relates to the reticle in your scope to really be able to put this all together.
Other Factors To Consider When Refining Accuracy
There’s the size of the group measured in MOA, but then there’s how you produce a group of that size which is another matter entirely.
Mechanical accuracy, meaning the precision that your gun is capable of when all potential complications (the shooter causes most) are removed, is the result of balancing an equation of multiple factors.
How your gun is made, the ammunition you’re shooting, the ambient conditions and so on all play a role.
A bolt-action rifle may not be glass- and pillar-bedded, the twist rate might be wrong for the bullet weight you’re using (77-grain 5.56 in a 1:12 twist rifle, for instance) and maybe you just can’t properly press that terrible trigger correctly.
An increase in humidity or a decrease in temperature can have an effect as well. The rule of thumb is a 0.5- to 1-MOA increase in drop for every 20 degrees Fahrenheit of temperature difference from zeroing. In other words, if you zero at 70 degrees and your bullet drops 4 MOA at 400 yards, expect a 4.5- to 5-MOA drop if you’re shooting when it’s 50 degrees.
Ammunition can vary from lot to lot, especially if a manufacturer changes powder or primers. That isn’t an if that’s a when. Propellant formulas change all the time, and you won’t know when it’s happened until you see results on paper.
This 1.4-MOA group shows that there’s still potentially room for improvement. Either with the shooter’s skills, the rifle or the ammo.
The point is that the accuracy your rifle is capable of in MOA is one thing on paper, but what it’s capable of doing once you’re on the range or in the field are two entirely different things.
That’s not even touching on mistakes shooters make. Those are just some of the things that can hinder precision without any interference from the person behind the gun.
So, while a proper understanding of how minute of angle plays into measuring accuracy is an important skill, it’s not the most important factor. You are. Once you develop the foundational skills needed to shoot for small groups at long ranges and have the utmost familiarity with your specific shooting setup, that’s the time to start capitalizing on MOA, holdovers and dialing in your scope. Once armed with the knowledge of exactly how your bullet and reticle interact, you can really start shrinking your groups and stretching your rifle’s legs.
More On Long-Range Shooting
Mils vs. MOA: Which Is The Best Long-Range Language?
We take a quick look at .44 Auto Mag, a cartridge with a short and stormy career.
Introduced late in 1971, the .44 Auto Mag cartridge was developed for the Auto Mag pistol designed by the late Harry Sanford of Pasadena, California. The gun was also made and marketed for a few years by High Standard. The cartridge is made by cutting off .30-06 or .308 Winchester cases to a length of 1.30 inches, inside reaming the case neck to accept 0.429-inch bullets and trimming to a length of 1.298 inches. The newly formed case is then loaded with 0.429-inch jacketed bullets of 200 to 240 grains.
For a time, .44 Auto Mag cases were made in Mexico, by Cartuchos Deportivos Mexico and headstamped CDM. Loaded ammunition was later offered by Norma of Sweden. A few custom ammo makers furnished loaded rounds. Dies are made by RCBS. The .44 Auto Mag cartridge was used only in the Auto Mag semi-auto pistol, which is no longer in production.
General Comments
The Auto Mag semi-auto pistol operates on the short recoil principle, with a six-lug, front-locking rotary bolt. Made almost entirely of stainless-steel, it has a 6.5-inch barrel, an overall length of 11.5 inches, and weighs about 3.5 pounds. It was the most powerful commercial semi-auto pistol manufactured at that time. When loaded to maximum, a 200-grain bullet can be pushed at over 1,500 fps, and the 240-grain to 1,400 fps.
.44 Auto Mag Loading Data
Bullet Grains/Type
Powder
Grains
Velocity
Energy
Source
180 JHP
2400
25.0
1,600
1,024
Sierra
200 JHP
W296
26.5
1,500
999
Hornady
240 JHP
W296
24.0
1,350
972
Sierra, Hornady
240 JHP
H110
23.0
1,400
1,045
Hornady
Unfortunately, the Auto Mag pistol had a rather short and stormy career marked by more than its share of manufacturing, marketing and mechanical troubles. The .44 Auto Mag pistol was developed primarily as a sporting gun. It has been used to take all kinds of big game, including deer, elk, moose and Kodiak bear. It’s in the same class as the .44 Magnum.
We discuss whether this garage invasion incident was justified self-defense or an example of excessive force.
In a video circulating on social media, a startling scene unfolds as a homeowner faces off against intruders in his own garage. The footage captures the tension of a life-threatening encounter, raising crucial questions about the boundaries of self-defense. The video is available for you to watch at ForgeOfFreedom.com, but I’ll describe it and analyze it here as well because there’s a lot to be learned.
The Situation
The video begins with a man pulling his car into his garage, only to find himself under threat as the garage door begins to close: A hand appears under the garage door just before it closes, halting the door’s descent, and soon three individuals enter the garage. The “leader,” armed with a gun, walks right up to the driver-side door and opens it. The driver of the car, presumably whose house this is, starts shooting—and shoots the guy who just opened the car door (with a gun in his hand).
As soon as the driver starts shooting, as you might expect, the other two guys flee—the two accomplices turn around and are quickly gone. The main perpetrator who opened the door departs after a brief pause: He seems to have been shot three or four times by the number of muzzle flashes seen.
Then, the driver jumps out of his car and chases the fleeing perpetrators as they run out of the garage. The driver continues to shoot as he runs to the edge of his garage, while the perpetrators flee.
So Many Questions
The pivotal question arises: Was the homeowner justified in his use of deadly force for self-defense? The answer is yes … and no.
Examining the sequence of events through the lens of the law provides some clarity amid the chaos.
The initial confrontation, wherein the armed intruder attempts to enter the homeowner’s vehicle, falls squarely within the realm of justifiable self-defense. Clearly, the three men entered the garage with the intent of at least carjacking the driver. We don’t know what else they might have wanted to do.
Maybe it was going to be a home invasion, too. We don’t know.
Indiana law, like many states, permits the use of deadly force to prevent a forcible felony, such as the carjacking of an occupied motor vehicle. By firing upon the armed assailant, the homeowner exercised his right to protect himself.
However, the subsequent shots fired as the fleeing felons exit the garage require closer scrutiny. Some might believe that Castle Doctrine applies here. While the Castle Doctrine affords individuals the right to defend themselves in their dwelling with deadly force without an obligation to retreat, its application to a garage is unclear. You can use reasonable force, including deadly force, if it’s necessary to prevent or terminate an unlawful entry into your dwelling. Let’s assume, for the sake of discussion, that your garage is part of your dwelling. There’s a good chance that courts would say so, especially if it’s an attached garage.
The key word here is “necessary.” Is the use of force necessary to prevent or terminate an unlawful entry when the perpetrators are fleeing? If they’ve turned and ran, is any force necessary to terminate the unlawful entry? No. The attempted carjacking or home invasion is over. They’re running away. You’re not preventing the carjacking if you’re shooting at someone running away, especially once they’ve exited the garage.
So Many Factors
Now, am I saying that all of these guys would get prosecuted? No, not necessarily. A prosecutor might decide they’re simply not going to bring charges. But technically, the shooting while the perpetrators are running away is not justified. Irrespective of the potential application of Castle Doctrine, once the intruders retreat from the premises, the necessity of further force ends. Pursuing and shooting at individuals in flight exceeds the bounds of lawful self-defense.
Each shot fired carries the burden of justification. While rapid succession may be warranted in the heat of the moment, the cessation of the threat mandates an end to lethal force. As the intruders exit the garage and flee, the imminent danger ends, rendering continued gunfire legally questionable. While the initial response aligns with legal principles of self-defense, the subsequent pursuit was not clearly justifiable.
Some may have no qualms with the response, but going too far in the eyes of the law places your future freedom in jeopardy. While the homeowner may avoid charges based on extenuating circumstances, the legality of his actions merits examination. Understanding the nuances of self-defense law empowers individuals to navigate threatening situations with clarity and restraint.
This video serves as a sobering reminder of the complexities inherent in self-defense encounters. By dissecting the legal framework surrounding the incident, we gain insight into the rights and responsibilities of individuals in defending themselves and their property. As discussions surrounding self-defense continue, informed dialogue rooted in legal understanding remains essential.
Editor’s Note: This article originally appeared in the July 2024 issue of Gun Digest the Magazine.
Looking to go armed, but are stuck in the weeds as to what to arm yourself with? Here are 20 of the best concealed carry gun options that will keep you on the defensive.