
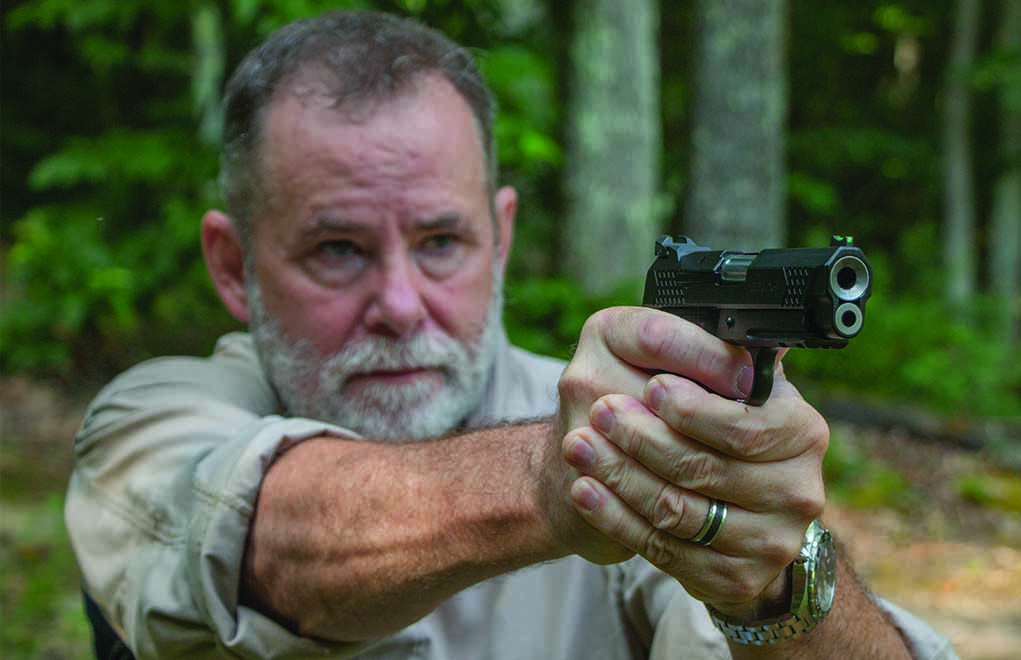
Contrary to popular belief, there’s no one right way to aim a defensive handgun. The dynamic situation requires multiple techniques to quickly get on target.
What Are Some Aiming Techniques:
- Precision Sight Picture
- Flash Sight Picture
- Target Focus Shooting
- Gun Indexing
- Hip/Point/Retention Shooting
When it comes to the practical application of aiming and shooting a defensive handgun, there’s endless arguments about which technique is best. The reality is that if you only practice or use one technique, you’re limiting your ability to deliver peak performance. There is, however, a difference between a beginner learning to shoot a defensive handgun and an experienced shooter wanting to enhance their abilities.
The truth of the matter is that without a specific definition of “aiming,” it’s hard to classify any handgun shooting technique applied to an intended target as “unaimed” fire. Aim is, after all, your intent to hit.
Aim is also a topic often discussed by clinical psychologist Jordon Peterson—not “aim” as it relates to shooting, but aim as it relates to life. As it turns out, both are similar. When it comes to aiming a handgun, if you think you’re going to do a bad job, that you don’t have enough time, or that you’re going to have to do it perfectly, the end result is the same as an aim you might have with any other goal you might want to achieve—it’ll never happen or it’ll happen too late to matter. Peterson’s advice is to do it, if nothing else, haphazardly. At least then you’ve taken a shot.
So, comparatively, aiming is anything between and including taking a precise sight picture and, as some would suggest, haphazardly, point shooting. In both cases you’re attempting to hit—aiming at—a target, whether you’re actually using the sights to do it or not. Starting with what is generally considered the technique that’ll produce the best results on target, let’s examine that technique and others, all the way through to the one that’ll generally give the best results on a clock. As you’ll see, as with most things in life, the best answer for most problems lies somewhere in the middle.
Precision Sight Picture
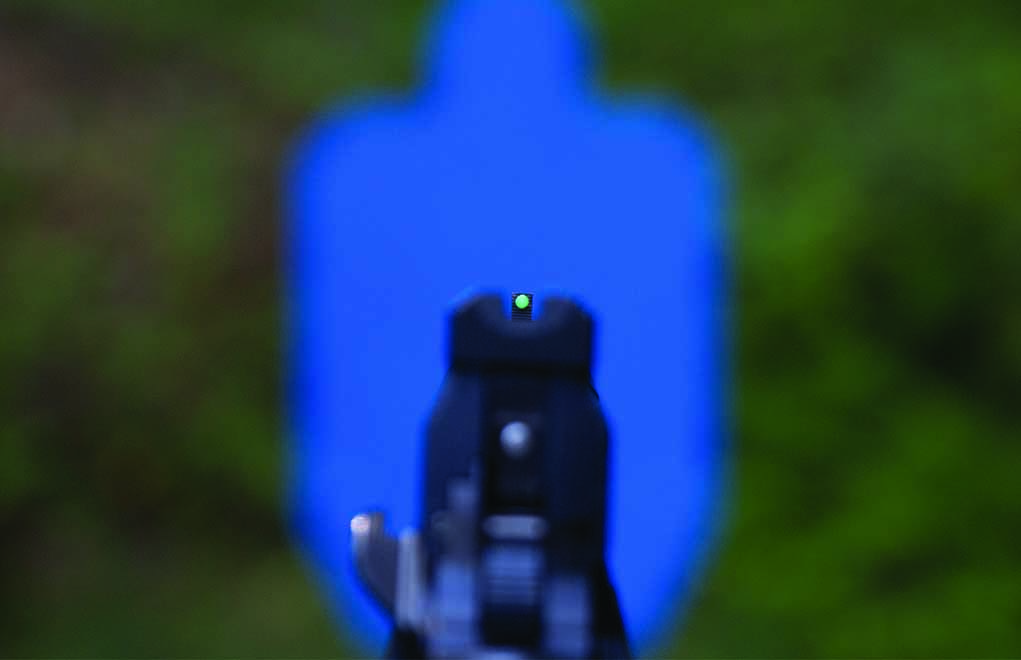
What is it? If you want your bullets to arrive at the target as close as possible to where you’re aiming, you need to hold a precision sight picture as the trigger is pressed. A precision sight picture is one where the front sight is perfectly centered in the rear sight and remains unwaveringly on target as the trigger is pressed. This obviously will take the most time of any technique.
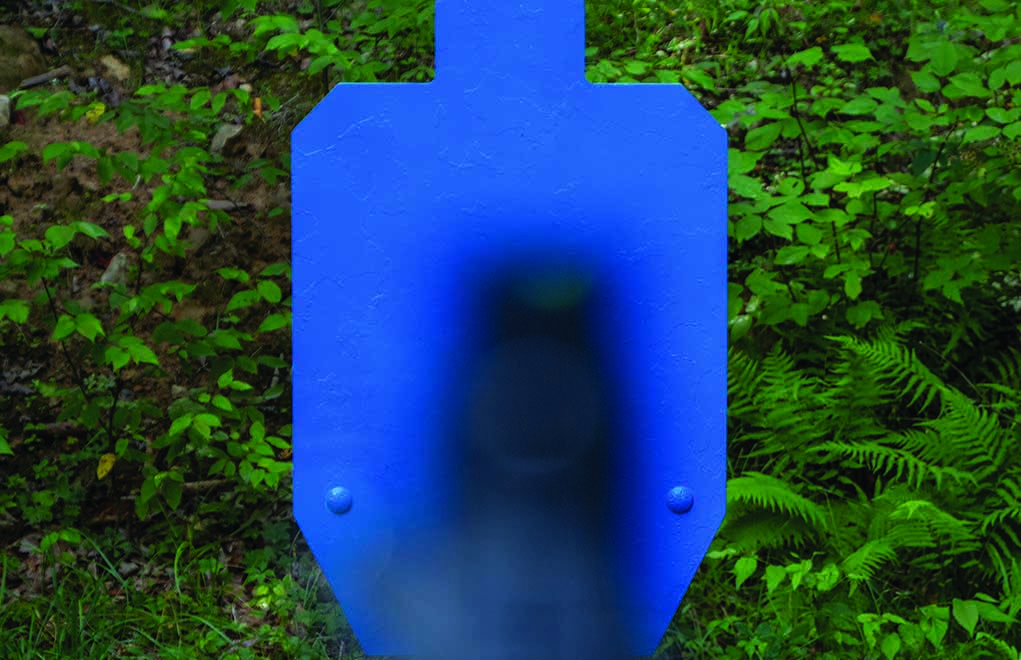
When do you use it? It’s best used when time allows or distance demands to ensure a vital zone hit. For some shooters, this could be 10 yards; for others, it could be 20, depending on skill level and size of the available vital zone there is to shoot at. Furthermore, if you’re shooting to stop the threat, you’re shooting at a vital zone, not a shirt button; for most real-world defensive shootings, a precision sight picture isn’t necessary.
More Aiming And Aiming Solutions:
- Open Your Eyes! Red-Dot Sights Are Superior
- Instinctive Advantage Of The Laser Sight
- After Drawing, When Should You See Your Sights?
- Self-Defense: How Much Sight Picture Do You Need?
- Open Sights 101: Upgrades, Adjustments and Uses
Flash Sight Picture
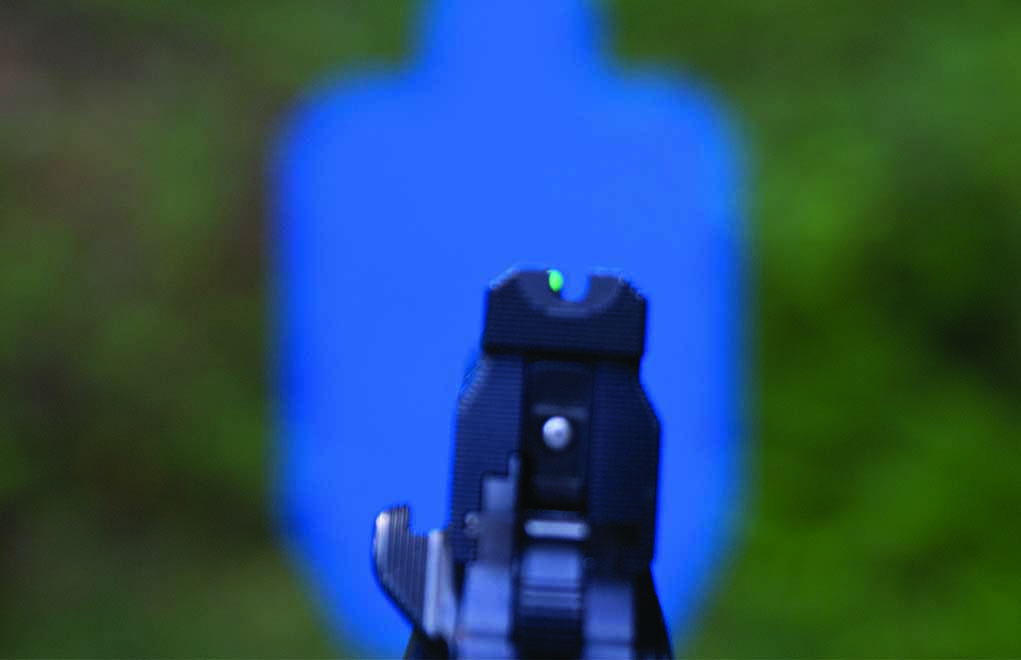
What is it? Jeff Cooper talked about the flash sight picture as being part of his Modern Technique. As described in the book, The Modern Technique of the Pistol by Gregory Boyce Morrison to which Jeff Cooper served as an editorial advisor, “The flash sight-picture involves a glimpse of the sight picture sufficient to confirm alignment.” Let’s try to define it another way. The flash sight picture is confirmed with a focus on the front sight, and instantaneous verification is within the rear notch and covering the vital zone.
When do you use it? The use of the flash sight picture is driven by time: The less you have, the more it’s needed. How close or how far away should the flash sight picture be used? At any distance where you need to focus on the front sight to get a vital zone hit.
Target Focus Shooting
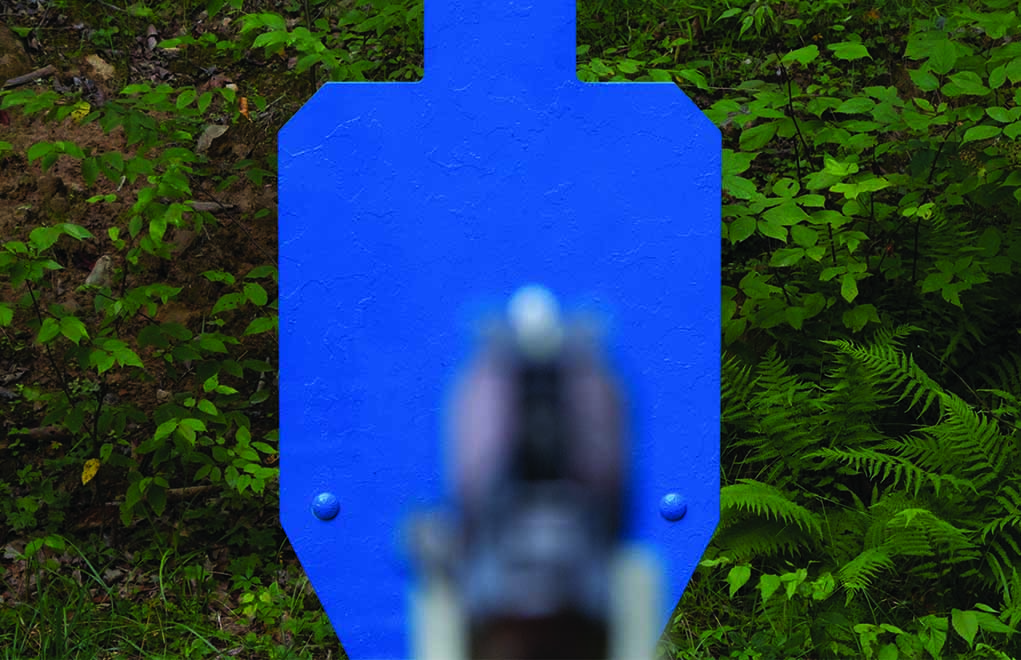
What is it? Shooting with a target focus is very similar to shooting with a flash sight picture. The difference is that your eyes are focused on the target as opposed to the front sight. The similarity is that you can still see the front sight over the vital zone. Essentially, it’s the introduction of the handgun sights—properly or very near properly aligned—between you and the target or threat zone you’re focused on.
When do you use it? For most shooters of at least moderate skill, target focus shooting can be applied in and around three to five yards. More practiced shooters might stretch it to seven yards. Here’s a good way to look at it. It can and should be used until the distance to the target and the available or exposed threat zone requires you to focus on the front sight to get a hit.
Gun Indexing
What is it? Gun indexing is very similar to target focus shooting; you introduce the handgun between you and the target/threat zone you’re focused on. The difference is that instead of attempting to see sights that are lined up but out of focus between you and the target, you’re just looking for a gun between you and the target.
When do you use it? For novice shooters, they may have to be no more than a couple yards from the target to apply this technique. It’s very fast because the action is essentially no more than shoving the gun between you and the target. As you become more experienced you might be able to stretch this distance to as far as five yards.
Hip/Point/Retention Shooting
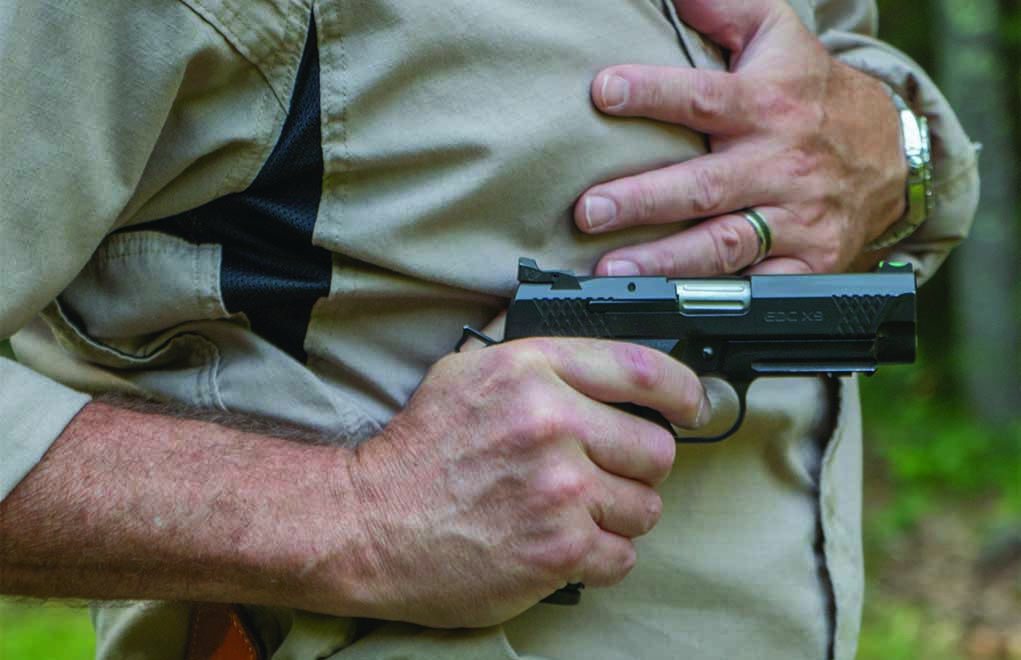
What is it? The best way to explain this method is to describe it as cowboy shooting, at least the cowboy shooting you see in movies where the gun clears leather, is rotated toward the target, and fired from the hip or near the hip in the retention position. This is a very hard skill to master, because the gun is being aimed by body position without a visual reference of its relationship to the target.
When do you use it? Obviously, this technique should be used when your target/attacker is very close—inside three yards—because with the gun closer to your body, it’s more difficult for the attacker to grab hold of. It’s a very fast technique, but it takes an experienced shooter to be able to hit a target—much less a vital zone—with this method at any distance at all. Most will max out at about three yards.
Making the Call On Aiming Technique
Which is best? What might surprise you is that none of these techniques are better than the other. They’re all equally important, because from a tactical standpoint they should all be applied based on the situation. If you’re three yards from the target and take the time to establish a precision sight picture, you might get your gun taken away from you or pull the trigger too late to save your life. Conversely, if you’re at 15 yards and try to shoot from the retention position, you could incapacitate your adversary with laughter because he’ll be cackling at your inability to hit anything. The key is to know your limitations with each technique and apply them accordingly.
An experienced shooter will move between these techniques subconsciously as the situation dictates. Practice has taught them what they need to see or feel given the range, target size, and perceived available time. If you’re five yards from a threat and you think you need to point shoot in order to incapacitate the threat before it reaches or shoots you, that’s a noble goal. However, the reality might be that you must shoot with a target focus or at least a flash sight picture in order to get the hits you need as soon as they’re needed.
To try to put some numbers to this and after the expenditure of a lot of ammunition, I found that I could keep five shots inside a 5-inch circle at 25 yards using the precision sight picture. Problem was, it took me about 15 seconds to do it. I also found that between one and three yards I could shoot from the retention position and keep five shots inside a 5-inch circle—about half the time—in less than 2.5 seconds.
With the gun indexing method, most of the time I could keep five shots inside a 5-inch circle out to about four yards and within about 3 seconds. By using the flash sight picture, I could stretch that distance to about 12 yards, but it took me about 5 seconds at that distance. As for the target focus technique, for me it worked about as well as the flash sight picture; however, I had to switch to a different handgun with a very bold XS Sights’ Big Dot Sight for the best results.
Interestingly, with all the techniques where the handgun was being fired out in front of my face, I sometimes found I’d use multiple techniques for individual shots within the five-shot string. This was possible and happened because of conditioning/practice. My brain recognized when the gun was indexed properly, when the front sight was positioned properly, and when I had the correct flash or even precision sight picture, and it made my finger pull the trigger.
How Do You Train and Practice Aiming?
The best way to train or practice is the crawl, walk, run, method. Pick a reasonable distance—something between three and seven yards—and become proficient with the precision sight picture. When you get to where you can put five shots inside a 5-inch circle in less than 5 seconds, you’ll very likely be using the flash sight picture but not realize it. Then, you can try to do the same with a target focus, and ultimately—hopefully—progress with the same results by doing nothing but indexing the gun.
As for effective hip/point/retention shooting where you can reliably hit the vital zone, that takes a hellacious amount of time on the range and lots and lots of ammo. I was once conducting a torture test with a Remington R51 and after about 250 rounds became bored. So, I started hip shooting/quick drawing. At first, I could hardly hit a silhouette target at 10 yards. But after the remaining 750 rounds and another two days on the range, I was getting hits from the holster in about a second. Even now, and after a lot more practice, I need to be inside five yards to reliably get vital zone hits with this technique.
So, which technique should you use? All of them, but more specifically, the one that’ll allow you to get vital zone hits as fast as possible, given the situation.

Next Step: Get your FREE Printable Target Pack
Enhance your shooting precision with our 62 MOA Targets, perfect for rifles and handguns. Crafted in collaboration with Storm Tactical for accuracy and versatility.
Subscribe to the Gun Digest email newsletter and get your downloadable target pack sent straight to your inbox. Stay updated with the latest firearms info in the industry.


So…
1.)iron sights, 2.)red circle/dot sight, 3.)laser sight
For my small 9 mm auto carry gun I MUCH prefer the Crimson Trace laser sight with its grip switch. It’s always an “instant on” and I’m much more accurate with it than with iron sights. Practice with it is sure to improve your “muscle memory”. And it’s cheap, no ammo needed.
For my 5.7 x 28 RUGER 57 I like its HOLOSUN 509T fully enclosed circle/dot sight for the longer shots i may need to take outdoors because it’s my hiking carry gun here in the Mojave Desert.
But in both cases the safest way is through constant PRACTICE. OK, ammo scarce right now? Get a laser training system – and PRACTICE.
People may think you are joking about the Hip/Point/Retention Shooting being hard to it the target. My father was a police officer decades ago and when they went to the range the Hip/Point/Retention Shooting was taught because the average distance between an officer and the guy about to shoot him was 3 feet or less. Most police are shot as they walk up to a car in a traffic stop. My father told me that he drew and fired somewhere over 50 times before he hit the target. I tried it on a silhouette and found the problem is we pull and fire straight ahead which means you are shooting 3-4 inches to the right of the perp (if you are right handed and same to the left if you are left handed). It takes a while to develop muscle memory to angle the barrel slightly inward to hit the target reliably.