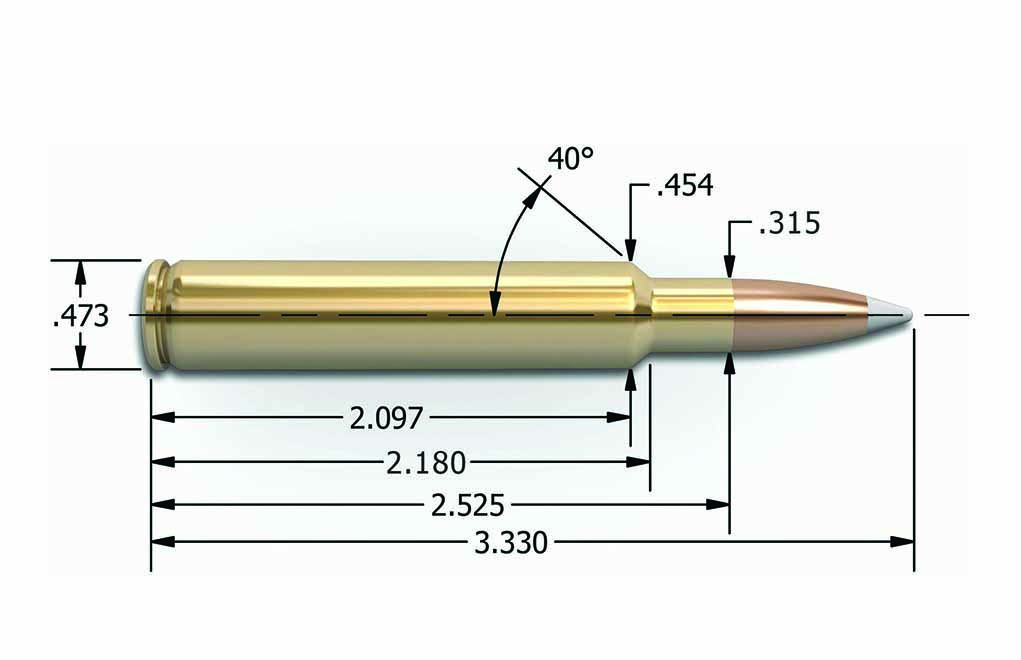
Designed by the legendary P.O. Ackley, the wildcat .280 Ackley Improved has been a mainstay for handloaders for more than half a century.
Where the .280 Ackley Improved differs from the .280 Rem.:
Wildcat created by the legendary P.O. Ackley.
Shoulder is set at 40-degrees.
All things equal, improves on the .280 Rem. by 100 fps.
Originally cases were fire-formed by shooing a .280 Rem. out of an Ackley chamber.
Factory loaded, starting with Nosler, in 2007.
In addition to being a famous gunsmith, barrel maker and college professor, P.O. Ackley absolutely ruled the roost when it came to creating wildcat and improved cartridges. One of his earliest was the 7mm-06 Improved, which was formed by necking down the .30-06 case and fire-forming it to less body taper and a 40-degree shoulder angle. Years later, and not long after the .280 Remington was introduced, reloading equipment maker Fred Huntington reformed its case to the Improved configuration with minimum body taper and a 35-degree shoulder angle and called it the .280 RCBS.
Since cases for Huntington’s cartridge could be formed by firing .280 Remington ammo in a rifle chambered for it, Ackley abandoned his 7mm-06 Improved and started chambering rifles for the .280 RCBS. But rather than staying with its 35-degree shoulder angle, he changed it to 40 degrees. And so was born a cartridge we know today as the .280 Ackley Improved.
After close to a half-century of being something only handloaders could love, the .280 Ackley Improved became a factory number, when Nosler registered it with SAAMI, started loading the ammunition and began chambering rifles for it in 2007. The Ackley version is a fine old cartridge and, when loaded with the right bullet, is big enough medicine for game up to elk and moose.
Even so, the .280 Ackley Improved is not as fast as the 7mm Remington Magnum, as a few of that cartridge’s avid supporters would have us believe. All things, including barrel length and the chamber pressure to which the two are loaded being equal, the .280 Ackley Improved is about 100 fps faster with all bullet weights than the standard .280 Remington. Cases are easily formed by firing .280 Remington factory ammo in a rifle properly chambered for the .280 Ackley Improved.
Editor’s Note: This article originally appeared in the 2018 Shooter’s Guide issue of Gun Digest the Magazine.
Watch world record-holder Dave Miller launch paint cans and other trick shots on the next Modern Shooter.
When it comes to breaking clays, few know more than Dave Miller. The Guinness World Record holder for the most clays broken in an hour, the man is an absolute machine with a shotgun in his hand. That sort of skill, it’s obvious Miller can do more than simply break blue rock. Pheasant roosters have no more determined foe, and neither do paint cans. You heard that right … paint cans.
Known to flaunt what he’s got upon occasion, Miller treated the Modern Shooter crew to a few of his more unorthodox shooting skills. This included not only sending paint cans sky high and suspending them for 10 rounds, but also breaking clays with his gun above his head and some downright steely shooting from the hip. Honed from hours behind the business end of a shotgun, Miller makes it all look as simple as pulling the trigger.
It goes without saying, this was a closed range and inadvisable to try on your own. First off, because your local trap range will kick you off, but more importantly, because it’s dangerous. Just let Miller take care of the trick shots and check out what else he has in store on the next Modern Shooter, 10 p.m. ET tonight on the Pursuit Channel.
For more information Aguila Ammunition, please visit www.aguilaammo.com.
The Mauser M18 gives every shooter the chance to own one of the iconic German gunmaker’s rifles.
How the M18 stack up against other bolt-actions:
Three-lug, push-feed bolt design.
Dual plunger ejectors.
60-degree bolt throw.
Three-position safety.
Drilled and tapped for scope.
Five-round polymer magazine.
Black polymer stock.
Soft-grip inlay on grip.
1-inch thick rubber recoil pad.
Trigger adjustable from 2 to 4 pounds.
22- and 24-inch cold-hammer-forged steel barrels.
If you enjoy shooting a bolt-action rifle, you owe a debt of gratitude to Paul Mauser. Even if all his other designs were removed from the equation, the Gewehr 98 has had enough of an impact on the shooting world to cement the Mauser name in the history books. So many designs have been based on the still-viable Model 98 Mauser, and the rifle is still in production to this day.
Mauser rifles are still in production — including the timeless 98 — and have continued to evolve; the Mauser M12 is a wonderful hunting rifle, and the company listens to the shooting market, offering rifles at many different price points. The latest is the Mauser M18, the most affordable of the Mauser line.
Introduced at the 2018 SHOT Show in Las Vegas, the M18 is Mauser’s affordable rifle and — in the traditions of the Mauser line — is utterly reliable. The M18 is a sensible, rugged design, which will serve well in a number of hunting and shooting conditions; it’s a handy, fast-cycling bolt-action rifle, made to follow you on adventures. It’s not the classic Model 98 Mauser, nor is it intended to be — the M18 is responsible for its own destiny, and will stand on its own merits.
The M18 is — very fortunately — a means of putting a Mauser rifle in the hands of the common hunter, without breaking the bank account or generating that vocal frequency attainable only by a spouse who does not approve of a new firearm purchase.
Simple, Elegant Features
Starting with the M18’s round, steel receiver, it uses a three-lug, push-feed bolt design. The lugs are of the same diameter as the bolt body, with a recess cut into the body just behind those lugs. Maintaining the same body/lug diameter eliminates much of the chatter and wobble associated with the M98 and its clones. In fact, operating the bolt of the M18 is refreshingly smooth in comparison to many other new designs on the market today.
The Leupold VX-3i 3.5-10×40 – in Talley rings and bases – complemented the M18 very well.
The bolt face uses the space of one of the lugs for an extractor, and it’s equipped with dual plunger ejectors, which will certainly throw brass. An ample bolt knob compliments the entire affair, and it makes running the bolt very easy, especially when going for a quick follow-up shot — I found that a firm grip with the index finger and thumb felt the most natural.
The M18 bolt has a short, 60-degree throw, and — what I find to be one of the nicest features — the bolt handle only rises to level when fully upward. This allows the shooter to mount any optic, as low to the bore as is possible, without any hindrance from the angle of the bolt handle. The M18 is a cock-on-opening design, though you wouldn’t know it considering how little effort it takes to lift the bolt, with a handy little red cocking indicator at the rear of the bolt.
The ejection port is approximately 90 degrees, creating plenty of room for the cartridges or spent brass to cleanly exit the receiver. A three-position safety is located on the rear right side of the receiver, operated front-to-back in a similar manner to the Remington Model 700 safety. There is a red dot on the forward (fire) position, and two white dots on the rearward positions, indicating the middle, which blocks the sear and allows the bolt to operate for the safe unloading of the firearm, and the fully rearward position, blocking both the bolt and the sear.
A spring-loaded tab on the left rear side of the receiver can be depressed in order to remove the bolt. The M18 comes drilled and tapped for scope mounts, and any mounts that fit a Remington Model 700 receiver will fit perfectly on the M18.
The three-lug bolt of the Mauser M18, with dual plunger ejectors.
The M18 has a detachable, five-shot polymer magazine, which is released via a button located just toward the muzzle, set in a recessed housing so that the button is flush with the stock. This button is rather sensitive, and I can see where, during the normal activities of a hunt, this button could be accidently depressed, releasing the magazine at a most inopportune time. This magazine-release button is the only gripe I have with the Mauser M18 and is probably indicative of my personal dislike of detachable magazines all-together on hunting rifles; all too often they will release at the worst time, and I’m way too familiar with Mr. Murphy and his Law.
Mauser Goes Poly
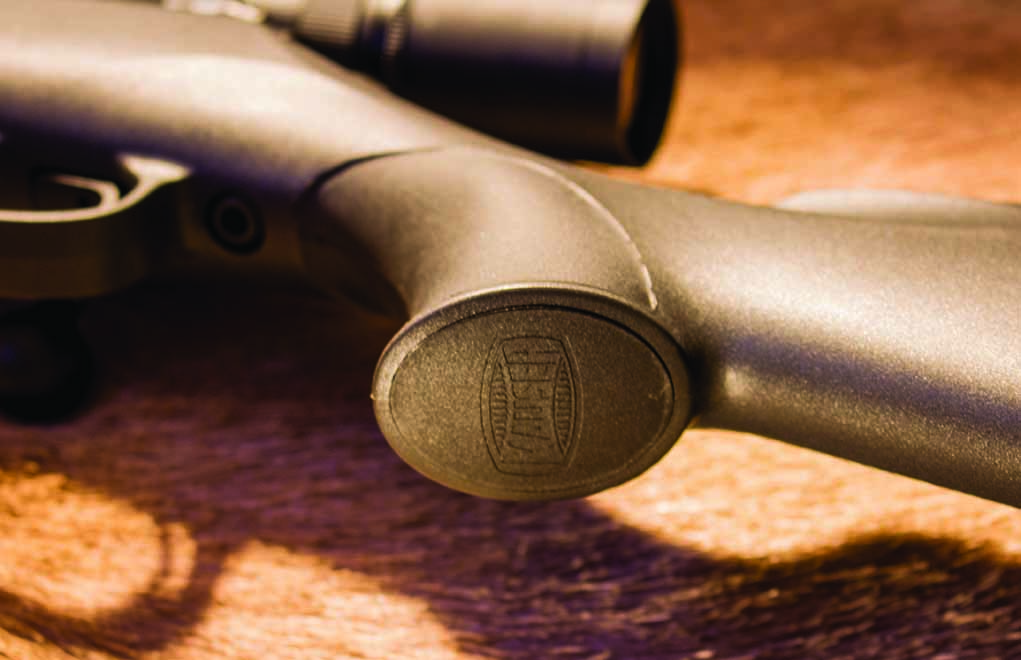
The M18’s stock is a simple design, yet effective. It is a smooth black polymer, with soft-grip inlay areas on the pistol grip and the underside of the forend. The comb is straight, and of the proper height for using a riflescope. There is a gentle palm swell on the pistol grip, affording a natural, comfortable grip with the trigger hand. There is no floorplate, as the magazine well is molded polymer integral with the stock, as is the trigger guard.
At the butt, a 1-inch thick pliable rubber recoil pad takes any sting out of the shot; it’s comfortable on the shoulder and its traction definitely aids in keeping the rifle where you want it when the shot presents itself. Mauser has provided sling studs at the rear and on the forend.
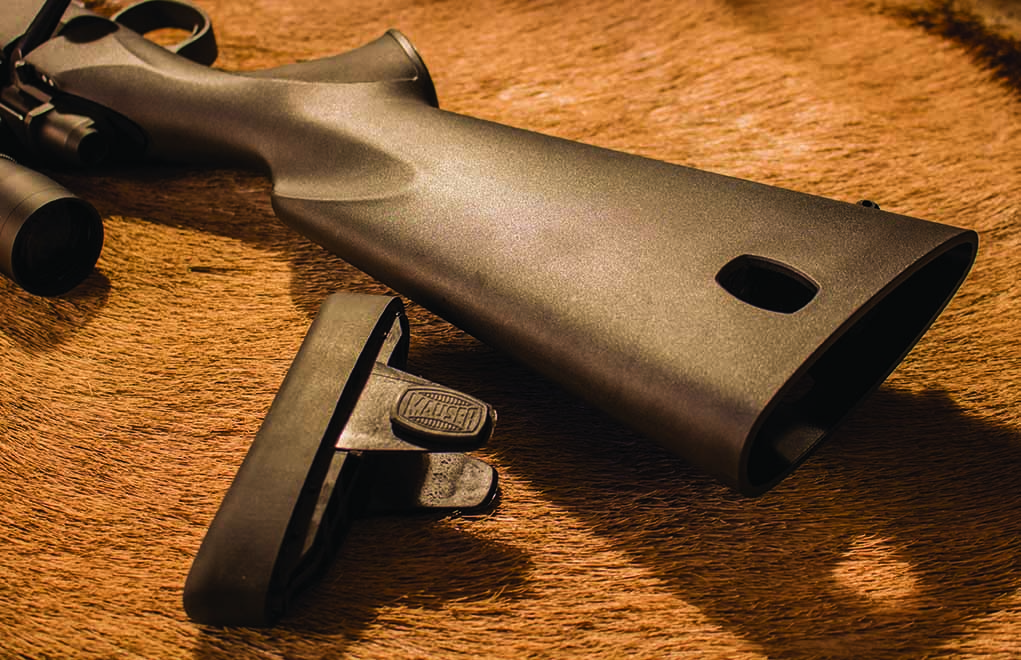
They’ve also added a neat little feature at the rear of the stock: The recoil pad can be easily removed via two retention tabs (adorned with the Mauser logo) at the base of the stock. You may choose to store a few small items in the base of the stock, or customize the length of pull for your rifle. The M18 I tested was equipped with a length of pull of 14 inches even. Like many European rifles, a longer length of pull is employed (for reasons few can actually explain to me), but it fit me very well, both with a hunting coat on and with just a shirt.
The Mauser embossed grip cap and soft-touch pistol grip.
A trigger can easily make or break a rifle, and I’m happy to report that the M18 has a good one. It’s user adjustable from 2 to 4 pounds, and my test rifle came from the factory with the trigger set at 2 pounds, 4 ounces — according to my favorite little Lyman digital trigger scale — with almost no creep and the slightest hint of overtravel. Personally, as a hunting rifle, I wouldn’t touch the trigger, as it feels just right as it came from the factory, but it’s nice to know you can adjust it if you feel the need.
My test rifle was chambered for the .308 Winchester — the M18 is currently chambered in .308 Win. and .30-06 Springfield, but additional cartridges, such as the .243 Win., .270 Win., 7mm Rem. Mag. and .300 Win. Mag are in the works.
A 22-inch cold-hammer-forged steel barrel is used for the .308 Winchester, a perfect length to utilize the powder column of the short cartridge, and maintain a proper balance for the rifle. The barrel is blued, and finished with a series of fine grooves, along the lines of the grooves once found in a music record (I may be dating myself here), that you can barely feel with your fingernail. Mauser uses a medium contour barrel — I measured 0.661 inch at the muzzle — with a crown that is slightly concave. The barrel is clean, with no iron sights, as the Mauser M18 is designed for use with a riflescope.
To The Range!
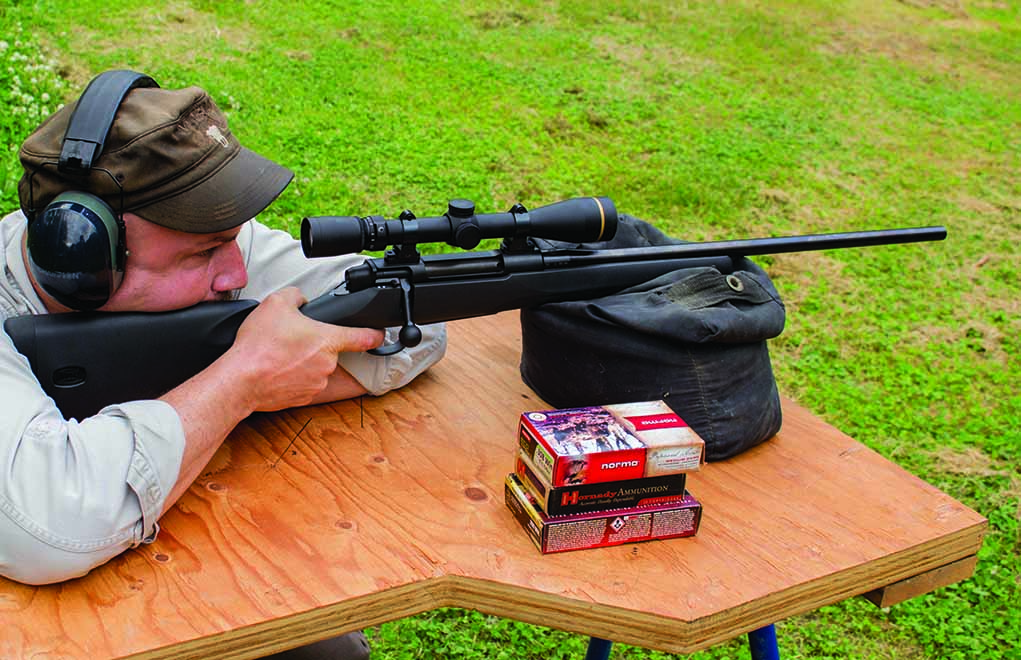
Mauser advertises their M18 with a five-shot, 1-MOA guarantee, and I was determined to test that claim. I set the M18 up with a set of Talley bases and fixed rings — what I consider to be among the highest quality available — and a Leupold VX-3i 3.5-10x40mm riflescope. That Leupold is as American as the Mauser is German, and this particular scope makes a great choice as the magnification range will truly cover all the bases (at sane hunting ranges), and the 1-inch tube keeps the scope’s weight down so as not to ruin the balance of the rifle.
The M18 in action at the range. Recoil was minimal, and the rifle was plenty accurate, living up to the 1-MOA guarantee.
As I’ve seen so many times while mounting a scope in Talley rings and bases, putting the scope on the bore-sighter required very little adjustment. It seems that Talley’s tolerances are so spot-on that the scope is naturally centered. No lapping or fooling about here — Talley rings just plain work.
I grabbed a selection of .308 Winchester ammunition — including both hunting and target ammo — and headed off to the backyard range to see if the Mauser M18 would stand up to the 1-MOA claim.
It did not disappoint.
Hornady’s A-Max load gave even MOA groups at 100 yards, making for a perfect choice for those who enjoy using their hunting rifle for the occasional target work. It fed perfectly from the magazine, with no issues at all. My test rifle really liked the new Federal Edge TLR hunting load. At 175 grains, it clocked in at 2,610 fps on the Oehler 35P, and I put five shots into a 0.95-inch group. Combine this level of accuracy with the terminal performance of the Edge TLR, and you’ve got a solid choice for nearly all North American and most African game. The mild recoil of the .308 Win. allows almost any shooter to place his or her shots accurately, and while the muzzle velocity may be tame in comparison to the .300 magnums, few game animals will ever live to declare the difference.
Mauser has included a removable butt pad, complete with storage compartment.
The Norma Eco-Strike ammunition broke the MOA deal, with a five-shot group measuring 1.25 inches, but trust me, I wouldn’t hesitate to take this combination hunting for any game that the 150-grian lead-free bullet would be suited for. I’ve used this ammunition in several calibers on hunts in Europe and here in the States, and I can confidently attest to the terminal performance of the bullet design. It works very well on deer as well as wild boar, and with a muzzle velocity of 2,820 fps, it would make a solid choice for antelope and mule deer in the more open country.
While this is just a sampling of the potential of this rifle — I remember shooting a very tight group with the Hornady ELD-X ammo at the SHOT Show Industry Day at the Range — I think you can get a feel for the possibilities of the well-proven .308 Win. cartridge in the Mauser design. All the ammunition fed perfectly from the M18’s magazine, and the ejection port design, coupled with the dual plunger ejectors, threw brass as far as any rifle I’ve shot.
In Conclusion
Mauser calls the M18 the “People’s Rifle,” and I feel that it holds up to that name very well. For the MSRP of $699, you get a lot of rifle; never before has it been possible to own a Mauser rifle at this price point. If you want a ton of custom features in your rifle, or beautiful walnut, perhaps the Mauser M18 is not for you. If you want a no-nonsense rifle that will match your skills as a shooter and hunter, you’ll find that the Mauser M18 is well worth the price.
M18 Specs: Caliber: .308, .30-06, .243 Win., .270 Win., 7 mm Rem. Mag., .300 Win. Mag. Barrel length: 22 inches for Standardcaliber/24 inces for Magnum caliber Overall length: 4.7 inchesfor Standard caliber/44 inches for Magnum caliber Weight: 6.4 pounds for Standard caliber / 6.6 pounds for Magnum caliber Magazine Capacity: 5+1 Surface: Black burnished Stock: Polymer 2-Componend with Soft grip in lays
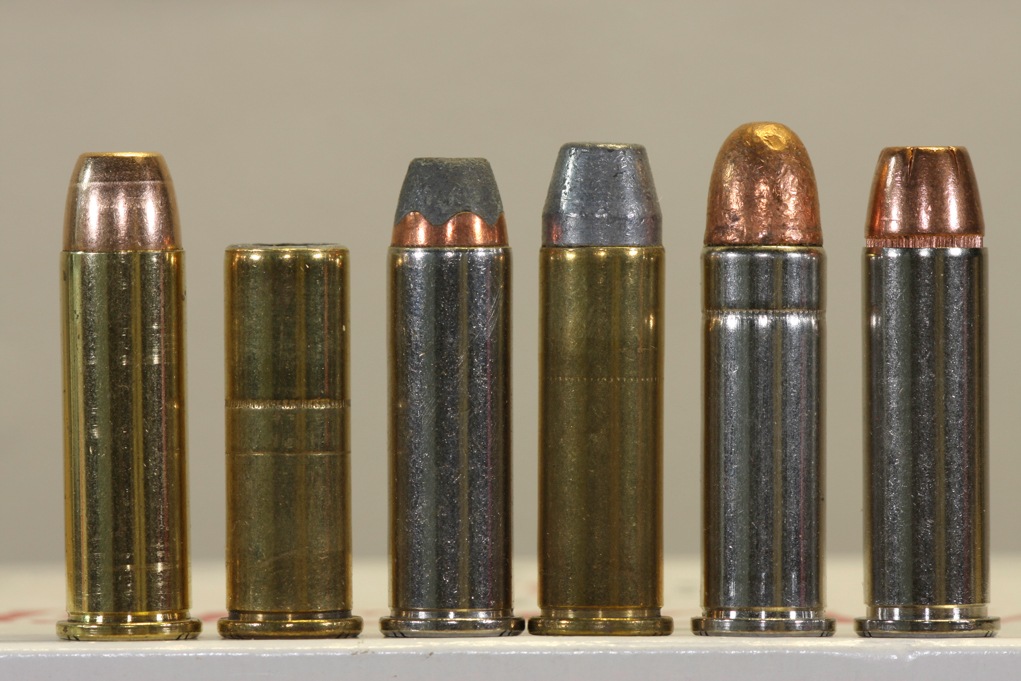
Pistol-caliber carbines and rifles generally get a bad rap. “Sure,” sing the naysayers, “they’re fun for plinking, but what else are they good for?” Generally, this sentiment bubbles to the surface because these doubtful souls target intensify on one particular class of pistol-caliber long guns — semi-automatics. If they happened to step-up to a revolver magnum, say in a lever-action, many of their complaints might very well evaporate.
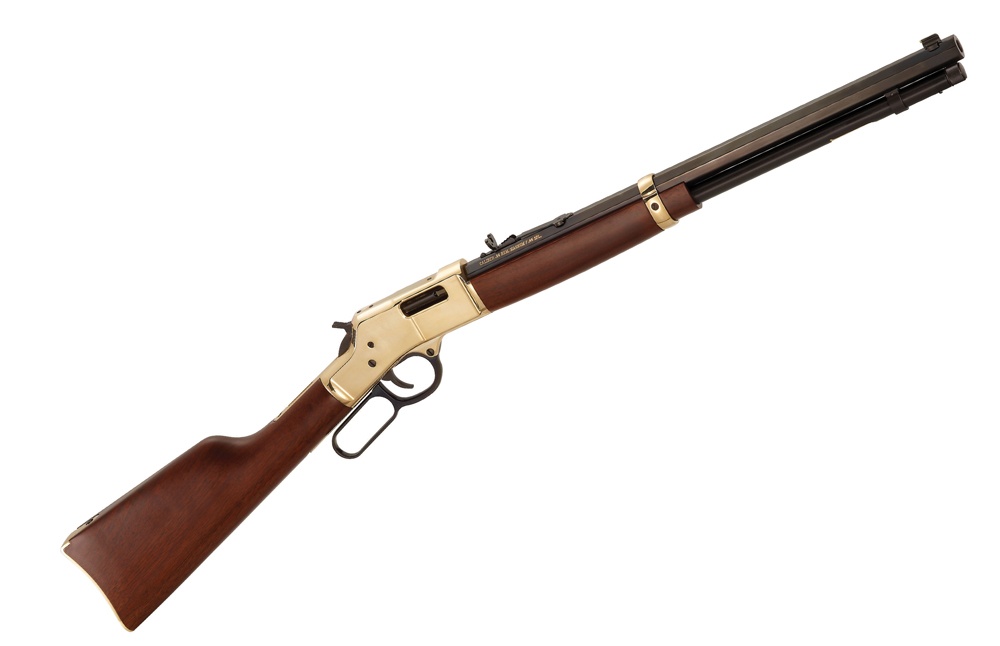
Far from putting a moped engine in a half-ton truck, revolver magnums more than hold their own coming out of a rifle or carbine. Gaining substantial velocity and reducing recoil, the powerful cartridges becomes almost a different creature with added inches of bore. Admittedly, you won’t curl up on a rocky ridge and drop a round in on a crow’s eye from 1,000-yards out with a Henry Big Boy or Winchester Model 1873. But most sober shooters don’t expect this sort of performance out of this class of rifle; just like they wouldn’t anticipate coming out on the winning end swatting coastal brown bears with a .22 LR.
The understanding is you get a rifle born to raise hell from around 100-yards in. One that shoots fast, hits hard and is dancer nimble. For most, with an honest appraisal of their practical shooting, such a gun would potentially handle 90-percent of the situations they routinely face.
Presently, there is a fair selection of revolver magnum long-guns, generally found in the most popular of the calibers — .327 Magnum, .357 Magnum, .41 Magnum, .44 Magnum and, while not a magnum, .45 Colt. But, if you were going to jump into this end of the firearms world, what would be the best chambering?
Depending on what you look to get out of the long gun any of them are potentially solid choices. But for an all-around performer, it’s difficult to beat a .357 rifle. Delivering everything you’d want from a pistol-caliber long gun, the granddaddy magnum covers nearly all the bases and even a bit more.
Shootability
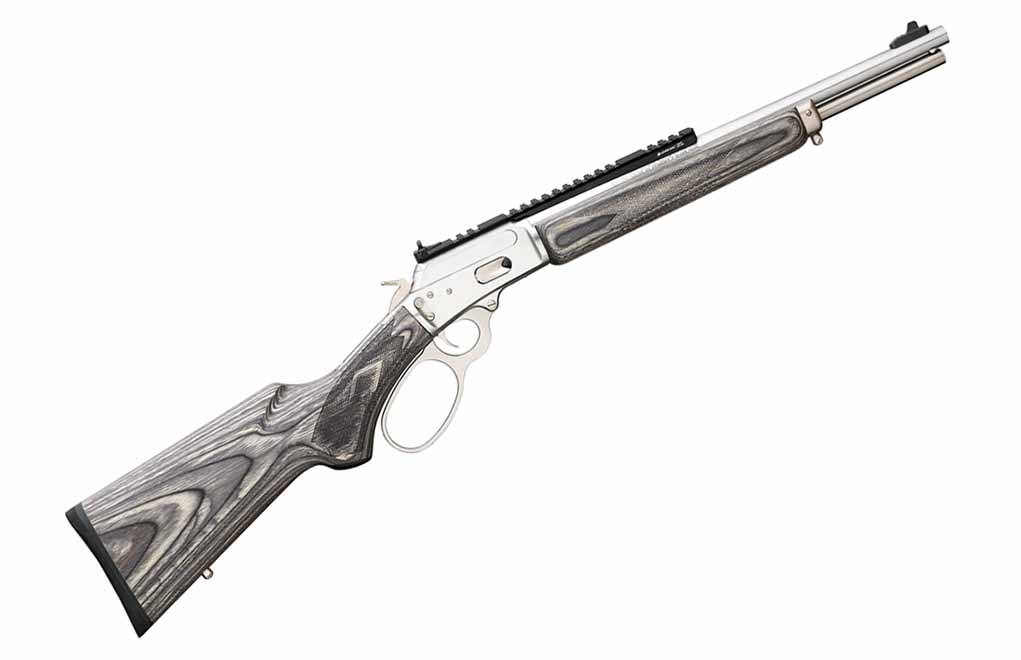
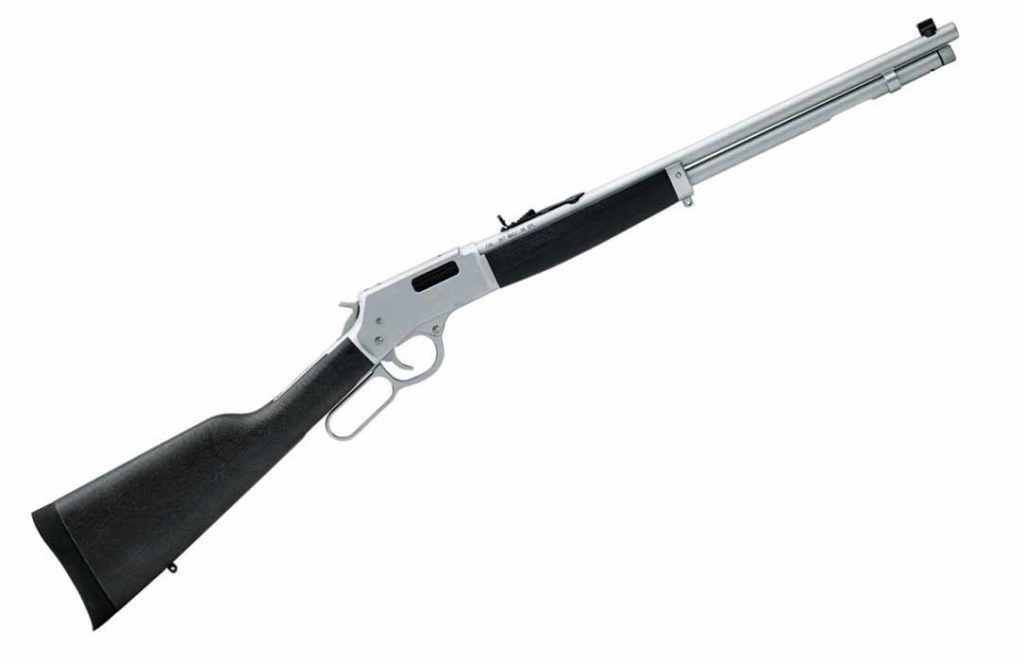
All magnums are tamed considerably out of a rifle or carbine compared to a handgun, but the .357 Magnum is among the most pleasant to shoot. Out of 6-pound Marlin 1894 or 8-pound Henry Big Boy, recoil is a mere suggestion of what it is out of a 6-inch barreled revolver. This feature alone makes the caliber available to more shooters, some who perhaps shied away due to the wrist-snap inherent in any magnum cartridge.
More .357 Magnum:
The .357 Magnum: 20th Century Handgun and Cartridge
Furthermore, the mild nature of a .357 rifle opens the doors to some truly wicked loads. Most wouldn’t get too fired up about pitching Buffalo Bore’s .357 Magnum Heavy Outdoorsman, a load that throws 180-grains of hard-cast lead at around 1,400 fps, from a revolver. Conversely, out of a long-gun such a round is barely a second thought, even for young shooters and the most recoil sensitive.
Performance
As even novice shooters are typically aware, more barrel means more velocity. But when it comes to extra bore, of all the revolver cartridges the .357 Magnum responds best. An example is in order.
Using data from BallisticsByTheInch.com, out of a 16-inch rifle the .357’s velocity jumps on average around 500 fps at the muzzle compared to out of a 4-inch revolver. Furthermore, with the right load the magnum can easily break the 2,000-fps mark. For a pistol cartridge that’s moving.
This isn’t to say the .44 Magnum and the .45 Colt don’t perform well out of a carbine or rifle. They do, just less dramatically. On average, the .44 and .45 enjoy a modest 300 to 350 fps increases moving up from 4- to 16-inch barrel. And in the case of the .44 Magnum, there’s a lot more recoil involved to get to those higher ends.
Economy
This is somewhat negligible when talking magnum to magnum. Certainly, the .357 generally comes in cheaper than the .44 Magnum, but not at an earthshaking margin. A quick, unscientific survey of Midway USA’s offerings puts the difference at around .20 cents a round — a little more or less depending on the brand. Yet, a .357 rifle has a price advantage over the other cartridges when you consider its parent — the .38 Special. You heard right, similar to almost all magnums you get a twofer with the .357 rifle, which is compatible with the .38.
The magnum’s parent cartridge isn’t 9mm cheap, but it tries its hardest to flirt in that direction. Shop well and each trigger pull with .38 Special will run you less than .40 cents. Furthermore, there’s a lot of ammo to choose from below this mark, not just one or two. This isn’t the case for the .44 Magnum’s parent, the .44 Special. It runs closer to .357 prices. You aren’t going to get magnum performance out of most .38 Special ammo. But plinking tin cans or punching paper, you probably won’t care.
Availability
The .357 Magnum is simple a .38 Special cartridge that has been lengthened by 1/8 of an inch.
Even with the deluge of semi-automatic pistols in recent decades, the .357 Magnum (and .38 Special) remain among the most shot handgun calibers. A fact of which ammo makers are conscious. A testament to this, every major ammunition brand — along with most minor — load the cartridges.
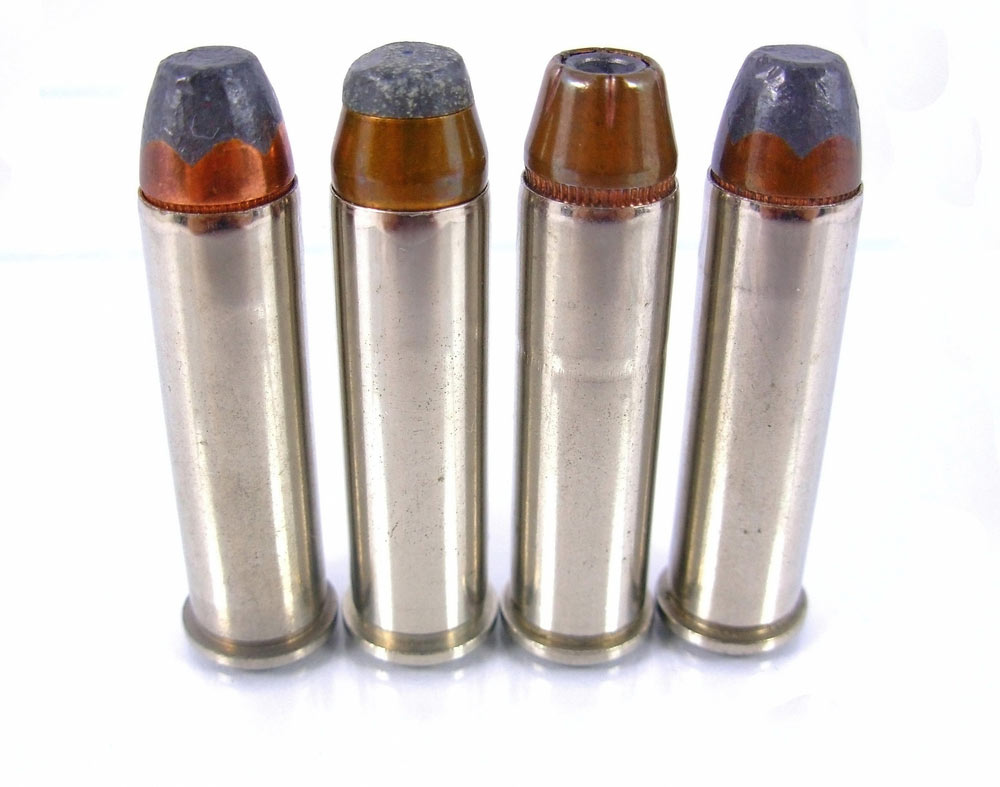
Good news, given you can walk into almost any retailer that sells ammunition and find a box of .357 Magnum or .38 Special. Furthermore, the ammunition selection is excellent and diverse, particularly bullet styles. Given revolvers more utility stature nowadays, you can load a rifle up with everything from old-time semi-wadcutter target loads, wicked defensive ammunition and even tailor-made hunting options. Additionally, .357 and .38 are a bit more drought-proof compared to other cartridges, though not entirely. When there’s a true buying frenzy, they’ll get sucked up as well.
Finally, if you are a reloader both the .357 and .38 are among the most forgiving and simplest fodder for your press. Between two of the top bullet makers — Hornady and Speer — there are over 20 bullet options. More than enough to keep you busy.
As just mentioned, one of the grand aspects of the .357 Magnum — tack on .38 Special for safe measure — is ammunition diversity. Between the two cartridges, there is a load and bullet for all occasions — from shoot-all-day target rounds to blister-hot hunting ammo. A spectrum that wide, a .357 rifle is suited for almost any duty you can cook up, short of long-range tasks.
Hunting wise, in the right hands and with the right load, the .357 Magnum will hammer everything up to deer and black bear. With that same gun you can also sling mild .38 all afternoon without once dreading the next trigger pull. This versatility is a rare quality in a rifle.
Utility
Outside of fun gun or throwback shooter, .357 rifles are mainly called into hunting duty. Good reason too, they more than do the job.
As mentioned, it’s not appropriate on all game. An ethical hunter wouldn’t set their sights on anything larger than the aforesaid deer or black bear. And it’s not appropriate for long-range attempts, the magnum is a medium- to close-range specialist.
There are hunters that make kills flirting with 200 yards, doable with the appropriate round and a firm understanding of its ballistics, but overall inadvisable. It takes intimate knowledge of the .357 Magnum to make such a shot, given most rounds will drop more than a foot at 200 yards and get bullied by the wind. Close in it’s a much safer bet, where the rifle is pure dynamite.
At the same tick, a .357 rifle isn’t pigeonholed as purely a hunter. It’s nimbleness and speed — at least the level-actions — make it an ideal truck gun or defensive firearm in a pinch. And if you have an eye toward prepping for the worse, the rifle gives you the flexibility to feed it and a handgun from the same trough. Nothing to scoff at when flexibility is key.
Parting Shot
Admittedly, the .357 rifle isn’t a do-all long gun, but comes pretty close. The nearly 100-year old cartridge still has the stuff to dazzle even in an era of hand-cannon options.
At the same tick, even the greenest shooter can master the .357 Magnum — particularly out of a long-gun. For a young hunter, it makes an excellent choice for a first rifle and there are few other options as forgiving on the recoil shy. But don’t think it’s strictly for novices and the sensitive. Well-seasoned marksmen can and will find a load of uses for this time-tested cartridge enhance with extra bore.
Those who shoot it know, there’s a lot to love about the .357 Magnum and more of it to love when shot through a rifle.
Generating wicked recoil, the .454 Casull nonetheless remains popular with big-bore shooters given its red-line power.
A wise man once said, “There’s no free lunch.” In short, it doesn’t matter the situation, there’s always a price to pay. This not only holds true in the world of money but also firearms. In the case of the .454 Casull, the toll is recoil.
Despite its recent popularity, the cartridge generates so much recoil it’s generally considered unmanageable in all but the most dedicated big-bore shooter’s hands. By some estimates, it generates around 75-percent more recoil than the .44 Magnum, which is saying a lot. When the .44 was introduced in 1955 average shooters flocked to it and, equally as quick, they scuttled away after pulling the trigger and unleashing the angry mule. The .454 is a whole bunch more mule.
More Gun Digest Videos:
The Elegant Power Of The Ruger Blackhawk Bisley .45 Colt
Given this, why in the name of the sane would anyone want to drop the hammer on exceedingly powerful .45? Simple, you harness the power to take down any game that walks the earth — coastal brown bears, Cape buffalo, and even elephants have fallen to the Casull. That, for many, is more than worth the price of entry — which is learning to handle hot fury, then place a follow-up shot accurately with it.
Unveiled three short years after the .44 Magnum, the .454 Casull is the brainchild of Dick Casull and Jeff Fullmer. While it was a mid-century invention, it took until 1983 before the first commercial revolver was chambered for it — the Freedom Arms Model 83.
Essentially a .45 Colt lengthened around 1/10 of an inch, the .454 Casull is fully capable of kicking out a 300-grain bullet at 1,600 fps. Though the cartridge is not simply a lengthier Colt. Operating at pressures that would devastate the cartridge it’s based on (60,000 psi plus), the .454 Casull endures due to reinforced case head and walls.
Surpassed today in power, the Casull nevertheless is among the most brawny cartridges available. And despite the price it wrests — generally out a shooter’s wrists — it remains among the most popular big-bore cartridges.
Proof Research’s versatile new switch-barrel rifle is a lethal combination of adaptability and accuracy.
How Proof Research’s Switch tops other switch-barrel rifles:
Switches between cartridges with different case rim sizes.
Floating bolt head removable without tools.
Locking lugs make full contact when bolt is closed.
Barrels simply thread on.
Carbon-fiber stock.
Carbon-fiber wrapped barrel.
Weighs just over 7 pounds.
Rifles that can be taken apart or adapted to fire cartridges of a different caliber have always mesmerized shooters. They bring with them a level of versatility that is unmatched: You can have a big game rifle and a varmint rifle … that’s the same rifle. A switch-barrel rifle sort of makes the idea of a both-ways cartridge — a cartridge suitable for large and small game — obsolete. For many, a switch-barrel rifle pegs the cool meter. I’ve messed with a few over the years, but none better than Proof Research’s aptly named “Switch.”
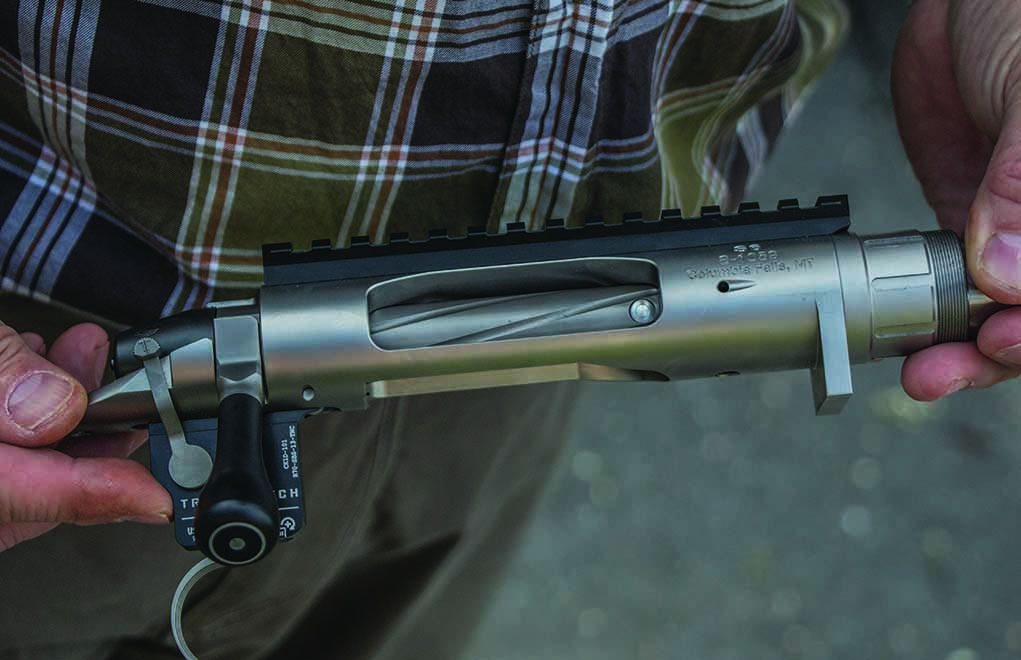
The Switch is built around a unique bolt-action manufactured by Big Horn Arms. This action is what’s known as a controlled-round, push-feed, action. It has an extractor that’s mounted perpendicular to the bolt body: As the cartridge is pushed from the magazine, it’s captured by the extractor and controlled all the way to the chamber. However, unlike a true control-round feed action, with the Switch’s action, you have the option of dropping a cartridge into the ejection port and closing the bolt.
The action also has a fixed ejector. This means that ejection force and distance will be directly proportional to the effort used when pulling the bolt to the rear. On the left side of the action is the bolt release/stop. And, while small in nature, I experienced no issues with failure and I worked the bolt with substantial force most every time I cycled it.
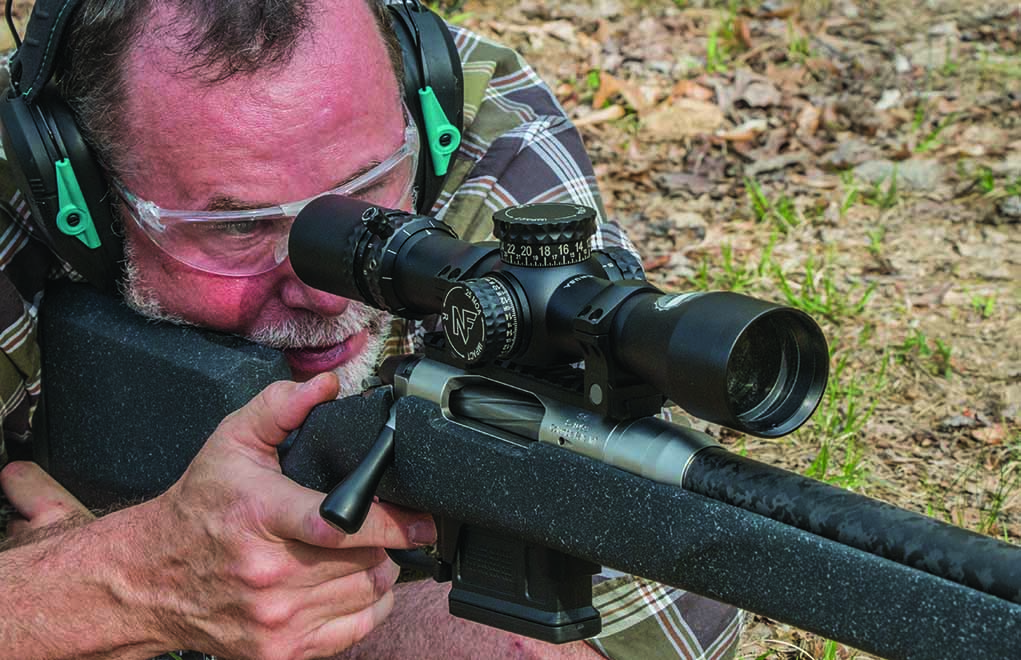
The Proof Switch rifle is ideally suited for long-range application, but its light weight also makes it an excellent choice for varmint calling or big game hunting.
But the neatest feature of the Switch’s action is the end user’s ability to field-strip the bolt to change-out the bolt head by hand, using no special tools. This floating bolt head — as some will call it — is part of the Switch’s distinctiveness. Lot’s of switch-barrel rifles allow you to change barrels and go between cartridges with the same cartridge case rim size. With the Switch, you can change the bolt head permitting you to swap between, for example, a .223 Remington with a 0.378 case rim and a .308 Winchester with a 0.473 case rim. Bolt adaptation takes all of about a minute.
This floating bolt head also permits both of the locking lugs to make full contact when the bolt is closed. This is similar to the bolt system Savage has used for years, and it has a positive influence on accuracy. It’s also an integral mechanical feature in the switch barrel capabilities of this rifle. Once bolt adaptation is complete — if required by the new cartridge — a barrel switch is all that remains before you’re shooting a different cartridge.
Engineering, Not Magic
After installing the barrel, snug the barrel nut against the action and finalize the headspace setting with the GO gauge.
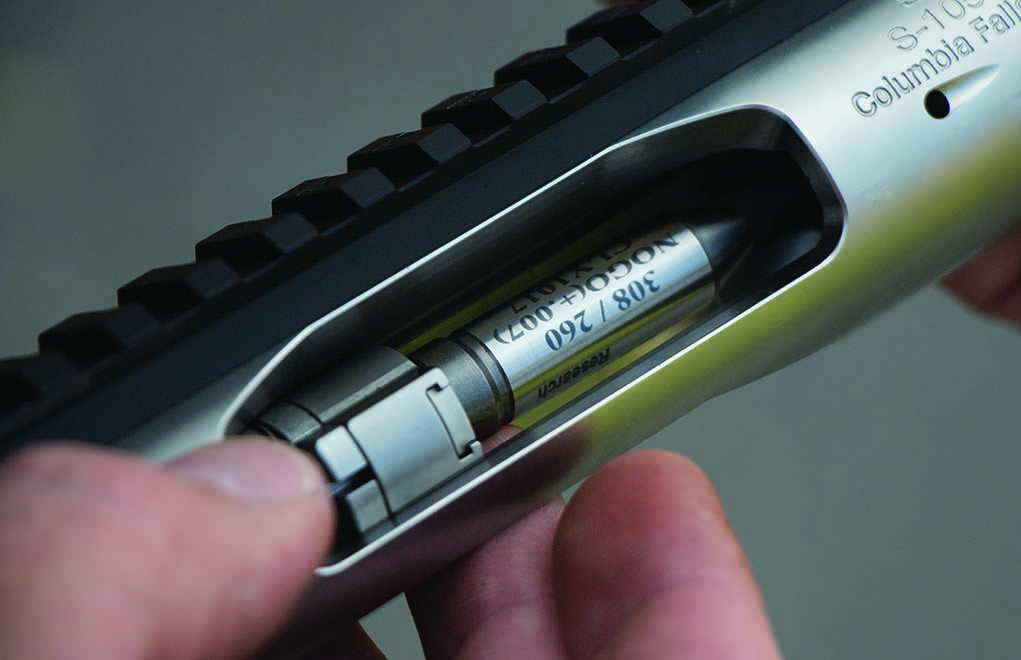
The barrel switch system is nothing all that magical: You simply thread one barrel off and another on. What’s different is the way it’s done and how it looks when the switch has been completed. When the barrel is threaded to the action, it’s held in place by a locking nut, again very similar to those used by Savage. This nut is grooved to accept a wrench that’s supplied with the rifle. Lots of folks think this locking lug is ugly, but Proof engineered a cartridge identification sleeve that hides it. Another cool feature of this sleeve is that it’s engraved for the cartridge the barrel is chambered for.
All of this wondrous metal engineering is perfectly fitted to a proprietary carbon-fiber stock. It’s a stock that’s been very well configured to offer a good balance of performance when being used either from the bench or in the field. The stock’s high comb allows for a large objective scope to be mounted without sacrificing a good check weld, and a cut-out in the nose of the comb allows for bolt removal.
Combine all these features with a detachable AICS center-feed magazine, soft butt-pad, dual front sling swivels, a near vertical and swelled grip — along with a variety of color options — and you have one of the few rifles that can be easily configured by the end user, to perform just as well during a long-range shooting match as it will on a sheep hunt. You’d probably expect a rifle like this to be heavy, but that’s not the case. With its standard carbon-fiber-wrapped 24-inch barrel, the rifle — with an empty magazine — weighs only 7 pounds, 2 ounces.
Barrel On, Barrel Off
You’re probably wondering what the barrel switch procedure involves, how it’s done and how proper headspace is maintained. Though the process is a bit involved, in actuality it’s very simple.
Use the GO gauge to set headspace after installing a new barrel. The bolt should close with minimal resistance.
First — and obviously with the rifle unloaded — secure it in a vice, by the barrel, with soft jaw protection. Then, remove the stock, remove the bolt and remove the barreled action from the vice. The rifle comes with an action wrench that might be better called a vice rack. Slide the barreled action on to the action wrench/vice rack and unscrew the cartridge identification ring.
The rifle also comes with a wrench to fit the slots in the barrel nut, which is hidden under the caliber identification ring. Loosen the barrel nut with that wrench and a ¾-inch ratchet. Then, you can unscrew the barrel. You’ll now want to apply some gun grease to the threads on the new barrel, and install the barrel — by hand — about halfway into the action. The next step is to remove the barreled action from the vice rack and install the bolt.
Now we get to the critical part, where we set the headspace. Insert the GO gauge behind the extractor on the bolt, and close the bolt. Hand-tighten the barrel until light resistance is felt, and then snug the barrel nut up, hand-tight. Install the action back on to the vice rack, and using the barrel nut wrench, tighten the barrel nut to 70 foot-pounds. You can now install the new cartridge identification ring and remove the action from the vice.
You’re almost done, but you need to verify the correct headspace. You do this by inserting the NO-GO gauge behind the extractor on the bolt, and by verifying that the bolt will not close. With this complete, install the stock, and torque the front and rear action screws to 65 inch-pounds. All together this only takes about 5 minutes to complete. The only non-usual tool required is a torque wrench, but I’ll admit, I only used the bicep-torque wrench and the rifle shot, as you can see, exceptionally well.
Adaptability With Accuracy
After you’ve set the headspace of the new barrel with the GO gauge, insert the NO-GO gauge and verify that the bolt will not close.
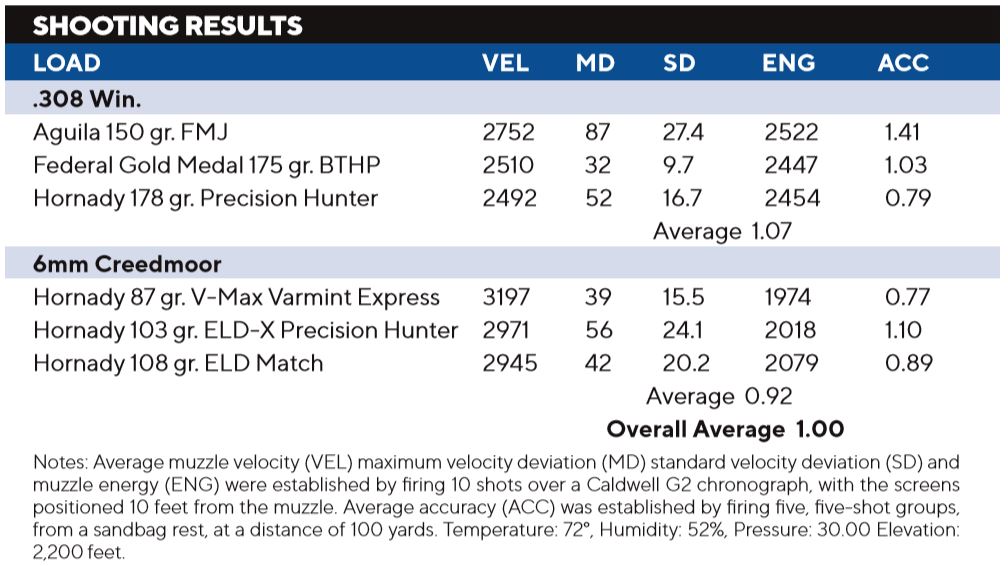
The two barrels provided by Proof were a .308 Winchester and 6mm Creedmoor barrel. I tested three loads in both barrels, firing five, five-shot groups, at 100 yards, from a sandbag rest, with each.
The average for all 30 groups was a pretty amazing 1.00-inch. But here’s what’s even more amazing: The first group with each load was fired slow and methodical like. The remaining four groups were fired in a hurry — five shots in less than 60-seconds, and all four groups within 10 minutes. Groups might have opened slightly due to the fast shooting, but no stringing or substantial group expansion was seen. Try that with just about any other rifle on the planet and see what kind of results you get.
To say I’m impressed with the Proof Research Switch would be an understatement. It’s an exceptional rifle, even if you don’t consider its switch-barrel versatility. Base rifles with either a stainless-steel or carbon-fiber-wrapped barrel are offered in .223 Remington, .22-250 Remington, .243 Winchester, 6mm Creedmoor, .260 Remington, 6.5 Creedmoor and 7mm-08 Remington. A fully adjustable TriggerTech trigger, 20 MOA Picatinny rail and threaded muzzle are standard, as is the ½-MOA guarantee.
If you are rifle-poor like me, a multi-caliber rifle, capable of filling about any need you might have does not make a lot of sense. After all, that’s what I/you have all those other rifles for. However, there’s always the option of selling those other rifles and simplifying life. Like you’ve probably heard, beware the man with one rifle. Trust me, there is some truth to that.
For those looking for a first rifle or maybe a first serious rifle, the Proof Switch might be the best option on the planet. It’s innovative, accurate, light, versatile and about the coolest thing I’ve seen since an acquaintance of mine tried to build a blackpowder rocket to launch his GoPro camera into the atmosphere. Unlike the Proof Switch, that was a monumental failure; considering the damages done, he blew up enough money to have paid for a Switch, and maybe an extra barrel or two.
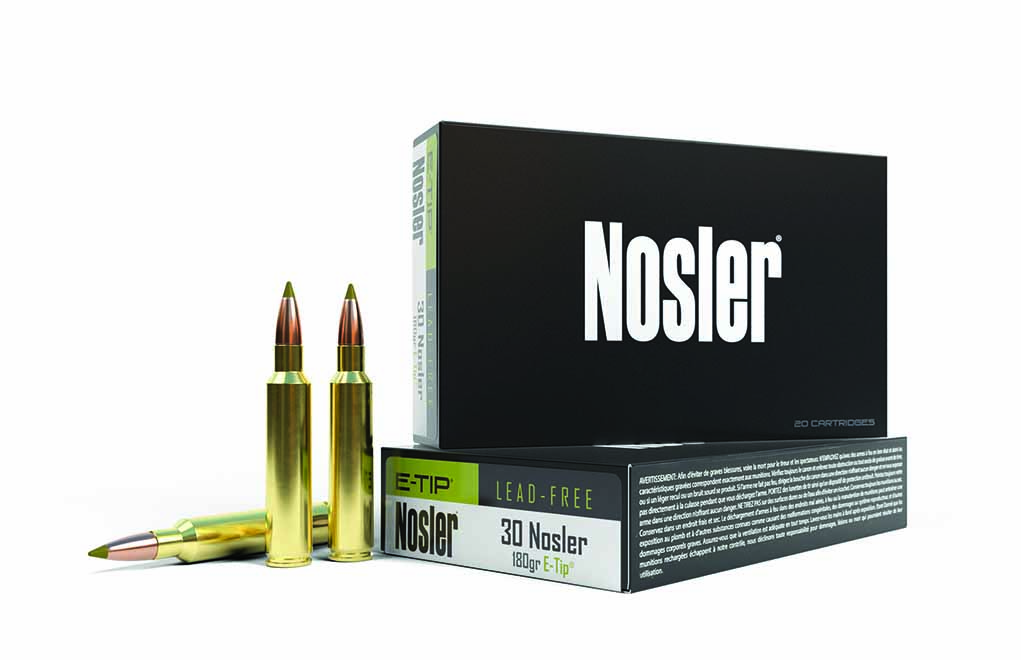
The 30 Nosler pushes the limits of the .30-caliber with efficiency and velocity to spare.
What you need to know about the 30 Nosler:
.30-caliber.
Velocity surpasses the .300 Weatherby.
Unbelted case, headspaces off the shoulder.
Chambers in standard-length actions.
Powder column burns more efficiently.
Introduced in 2016, the 30 Nosler meets the velocity of the .300 Weatherby, headspaces on the shoulder like a .300 RUM, has an efficient powder column like the .300 WSM and fits in the same standard-length action of a .300 Win. Mag. The 30 Nosler is a SAAMI-standardized cartridge, and Nosler will be supporting this new cartridge with Nosler brass, Trophy Grade ammunition and the full line of M48 rifles. Designed with a maximum COAL of 3.340 inches, the .308-caliber, rebated-rim centerfire rifle cartridge has a case capacity of 88 grains.
Initial offerings in Nosler’s Trophy Grade Ammunition line were 180-grain AccuBonds and 210-grain AccuBond LRs (Long Range). When fired out of a 26-inch barrel, the company claimed of muzzle velocity of 3,200 fps for the former and 3,000 fps for the latter. For 180-grain bullets in Nosler loadings, that’s better than the muzzle velocities of the .300 Weatherby Magnum (3,175 fps), the .300 Win. Mag. (2,950 fps) and the .300 H&H Mag. (2,950 fps), and just behind the .300 RUM (3,250 fps).
The 30 Nosler is well behaved with nearly all powders of proper burn rate for the bullet being loaded. Anything from Retumbo up to H4831 work well, with IMR 7828 and RL 22 being a couple of the best. As a tip, adjust your sizing die to just barely bump the shoulder back between firings, and case life can be extended significantly.
Editor’s Note: This article originally appeared in the 2008 Shooter’s Guide issue of Gun Digest the Magazine.
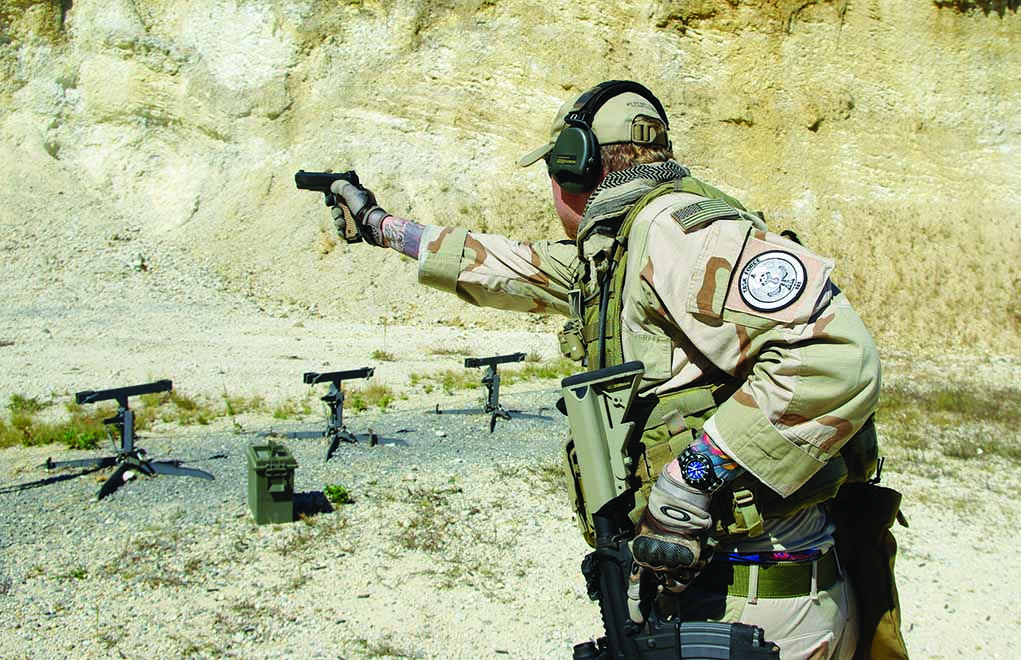
Some of the best practice a precision rifle shooter can experience comes from the trigger of a handgun.
Why precision rifle shooters should train with a handgun:
Focus on fundamental form and technique.
Understand mechanics of draw, presentation and shot.
Effectively transition between hand and long gun.
Become more safety conscious.
Shoot more (more handgun ranges available).
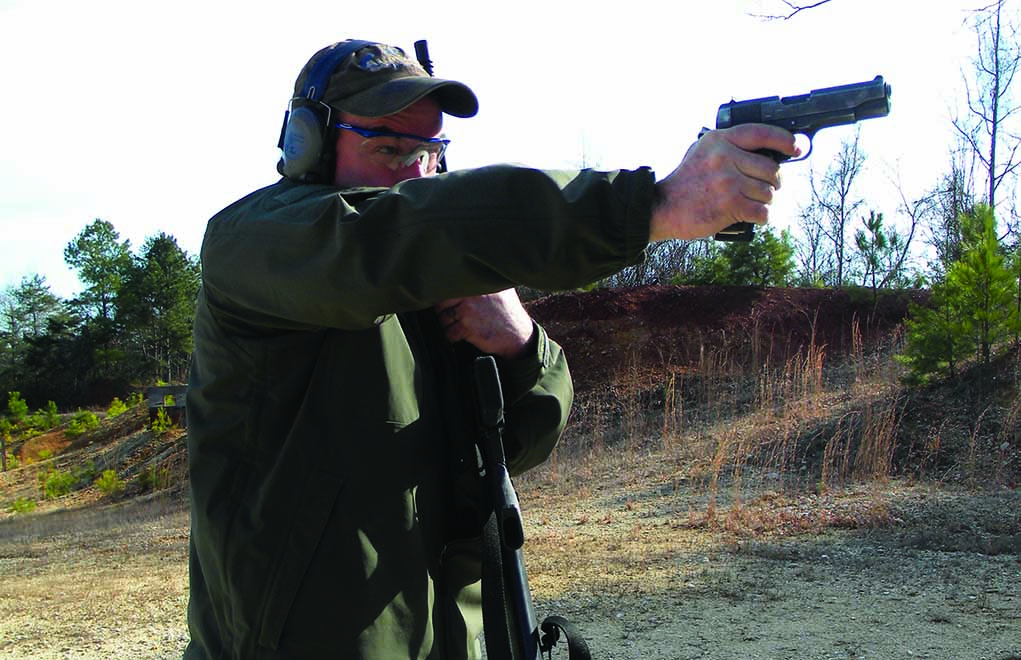
As a precision rifle shooter, I see a lot of other shooters in my discipline neglect their handgun training. We are often so detail-oriented and wrapped up in tasks such as load development or software that we forget to return to the basics.
Keeping your basic marksmanship skills tuned up through handgun work is an excellent way a complement long gun training.
I used to say, “The handgun was only there to make noise until I reached for my rifle.” But that’s no longer my stance because I took the time to get training. I cannot overstate the value of a good, basic course of instruction. Even when I was teaching long-gun courses full time, during the breaks I would seek competent instructors to hone my handgun skills. In many cases, I would call in last-minute favors to get a slot in a pistol class. With all but one, I always took the basic handgun course. I find it the most beneficial to me to sharpen neglected skills.
Before the various rifle series competitions really took off, we used to include handgun stages in all our competitions. Even at a place called “Rifles Only,” we had a balanced focus on our handgun use. Each match had at least four stages that included handgun targets before, after or during our rifle engagements. Close in we fought back to our rifles, or after engaging our long-range targets we would fight away from contact. These stages in the match were always the most fun because it mixed up the pace.
Returning To The Basics
Today, Sniper’s Hide field competitions do include a few handgun stages: There aren’t as many as before, but we’re getting back to this tool because it’s an easy fix to sharpen our skills. But if long-gun shooters see no use for them, it’s easy to forget — and that’s not a good thing. Even as a devote student of the precision game, it’s important to balance your training and include a few handgun stages.
Return to the basics and focus on your form and your technique — you’d be surprised what a little pistol work will do to your long-gun skills. Stress accuracy regarding shot placement. Don’t worry about speed right off the bat — that will come after you fixed any fundamental flaws. Understand the mechanics of a draw and how to carry your handgun properly while also carrying a precision rifle properly. Can you access it with all your other gear? I see lots of images online of guys with leg holsters that drop close to their knees. While standing straight up, you want to be able to cup the bottom of the barrel while it’s in the holster. Letting it hang too far down restricts movement — and it just looks bad.
Be sure to vet your instructors and stay away from the sensational types who want to make a name for themselves. If the highlight of their video reel is them standing next to a target, and the next scene has the student shooting at it with them there, please turn the page. I like guys such as Clint Smith and Larry Vickers — old-school instructors who have a serious take on fighting with a handgun. There are plenty others, especially in the field of speed shooting. Those guys would be my next step after establishing a solid foundation.
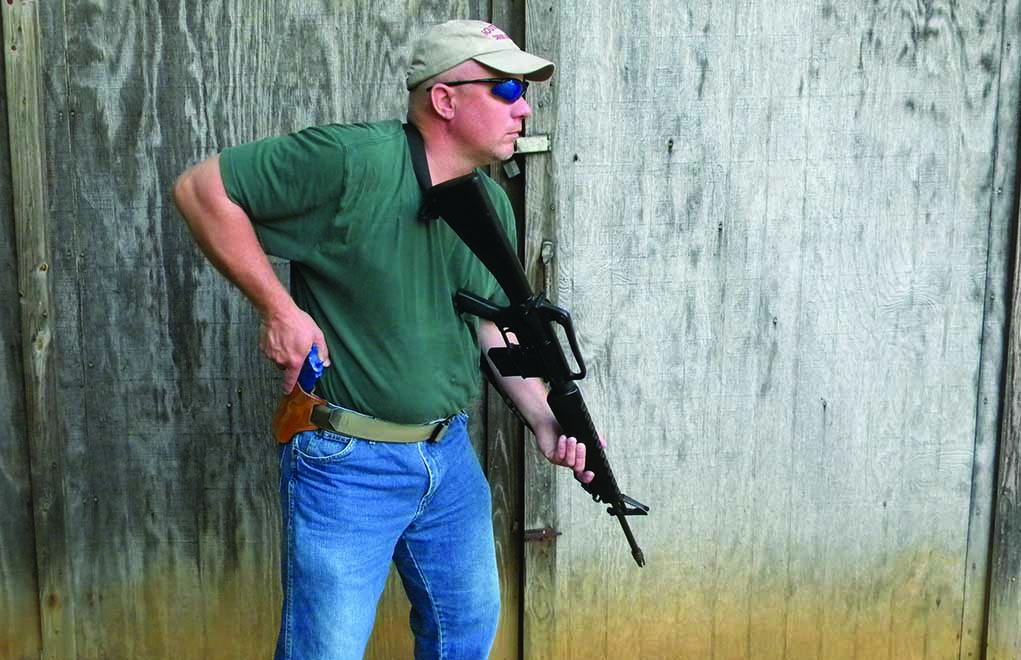
Mixing It Up Is A Must
If you work with a precision rifle, it’s essential to do transition training. Moving from the prone position behind your long gun, learn to engage targets to both the front and rear of your position. You want to be smooth and effective, moving in and out of the prone position during the draw phase, making sure your kit is not in the way to foul up the transition. Much of it is common sense in a lot of ways, but all too often I see it overlooked or completely forgotten.
My suggestion: For every 8 hours of precision rifle training, include a minimum of 1 hour of handgun work. That’s not too much, and it will increase your long-gun effectiveness by a wider margin than I can illustrate.
Don’t forget the safety: I see a lot of problems with precision rifle shooters when they have to shoot handgun stages. Safety became one of the reasons why handgun disciplines disappeared in specific events. With our long rifles, we apply more control. Put a pistol in those same hands, and it’s an instant safety violation. These things are not difficult to master, but they do take diligent practice and repetition.
The best part about practicing my handgun fundamentals is often a disadvantage to being a long-range shooter: There are handgun ranges everywhere. I can walk to the end of my block and there’s an indoor range. For my precision rifle work, I have to travel an hour. If you haven’t already, join a pistol range; many have weekly matches, and trigger time is trigger time, regardless of what you’re shooting.
Don’t get so tied up in your precision rifle work that you neglect your other options out there. Become a well-rounded marksman.
Editor’s Note: This article originally appeared in the September 2018 issue of Gun Digest the Magazine.
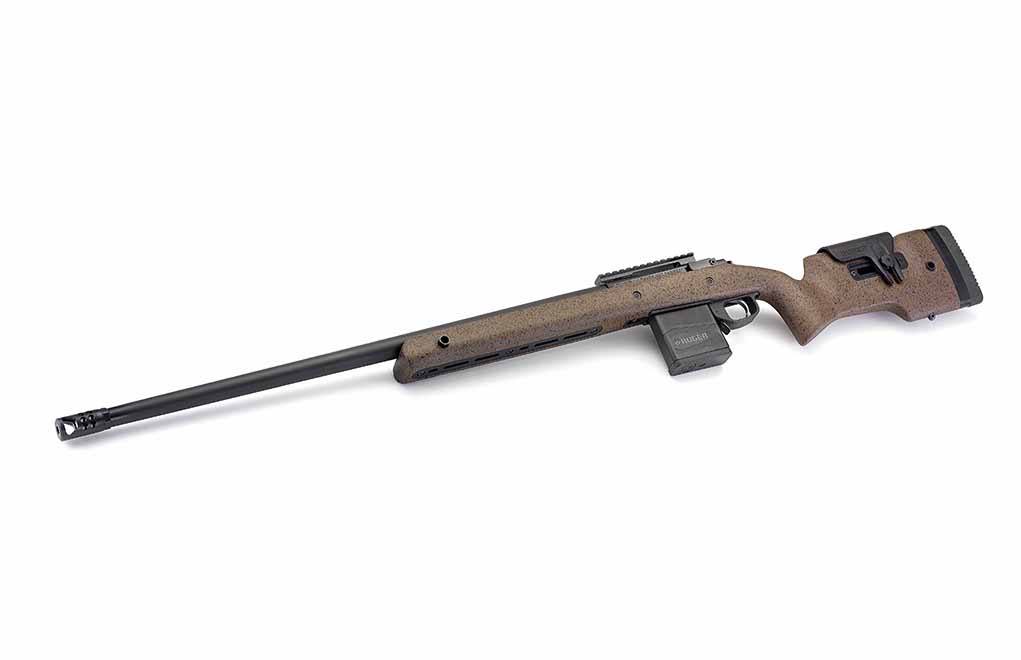
Building on the success of its magnum version, Ruger expands the Hawkeye Long-Range Target line to include popular 6.5mm chamberings.
How the Long-Range Target goes the distance:
5R rifle limits bullet deformity.
Heavy barrel for added stiffness.
Heft stock for added platform rigidity.
Creep-free two-stage trigger.
Lower M-LOK rail for bipod addition.
Available in .300 Win. Mag., 6.5 Creedmoor, 6.5 PRC.
Long-range shooting is a wave that continues to defy cresting. Each month, there’s a new shooting iron tricked out with the latest and greatest technology that makes punching the bull in the eye at a country mile all the more likely. Similar to many companies, Ruger has been front and center in this shooting revolution and continues to up the ante.
While best known for its relatively affordable chassis Precision Rifle line, the company branched out early this year. Taking aim at competitive shooters, Ruger launched the Hawkeye Long-Range Target at the start of 2018, to great fanfare. And the company has been quick to capitalize off the interest generated from the .300 Win. Mag., with the introduction of two additional calibers recently. If you know a thing or two about recent trends in long-range shooting you already know where this is going — 6.5mm.
A fairly logical move, Ruger has introduced the Long-Range Target in 6.5 Creedmore and 6.5 PRC, which should bolster interest in the fairly decked out rifle. Not only are the calibers popular — especially the ubiquitous Creedmoor — they also take full advantage of the platform’s accuracy potential. Furthermore, while the .300 Win. Mag. is an excellent precision-shooting option, it delivers a bit more than a love tap each time the trigger is pulled. In turn, the early iteration of this Hawkeye simply wasn’t for everybody.
Mils vs. MOA: Which Is The Best Long-Range Language?
Outside of chambering, the new Long-Range Target rifles boast the same features as their predecessor. Among the more eye-catching aspects is the Hawkeye’s 5R rifling in its heavy barrel. Tapered lands arranged to oppose a groove instead of another land, the configuration is meant to cause less bullet deformation, thus preserve a projectile’s ballistic integrity. Additionally, it has a dandy stock, made to milk the most shot-to-shot accuracy possible. Stiff laminate, the two-tone stock is a fully adjustable target pattern complete with a straight grip that facilitates complete control over the rifle. Usually an unheralded aspect, the stock is also hefty, kicking up the rifle’s overall weight to 11 pounds. In the magnum chamberings this does a number on recoil, and overall makes for a solid shooting platform. On the downside, this does make it a bit heavy for field use, unless you’re a glutton for punishment.
Other notables included on the long-range target include a creep-free two-stage trigger, Mauser-type claw extractor, 20 MOA Picatinny rail for optics, flush-fit lower M-LOK rail and QD attach points. The rifles are compatible with AI-style detachable box magazines, the 6.5 Creedmoor ships with a 10-round mag and the PRC a 3 round.
Like any long-range option, Ruger isn’t giving the Hawkeye away, but with an MSRP of $1,279 it is competitive with this end of the market. And with the 6.5 Creedmoor and 6.5 PRC in the Long-Range Target family, the line will likely get more shooters considering putting a Hawkeye in the safe — even if they aren’t match shooters.
Combining a pistol and shotgun into one compact package, the LeMat Revolver was meant to arm the South’s cavalry with overwhelming firepower.
As with any conflict, the American Civil War saw great leaps forward in firearms technology. In this crucible, the repeating rifle and pistol gained wide-spread renown, the self-contained cartridge came into its own and the proto-machinegun (the Gatling Gun) made its appearance. It was a busy time for those who had the next big idea in firearms, even it did little to jostle time-test concepts – such as Springfield Model 1861 rifled-musket – off the battlefield.
Like any time of innovation, the Civil War not only enjoyed the good but also the bad, mediocre and the downright odd. Of these classifications, the LeMat Revolver most certainly falls into the latter most.
More Gun Digest Videos:
The Cane Gun And Clandestine Self-Defense Firearms
Mainly used by the Confederates, the pistol was designed to give cavalry soldiers overwhelming firepower. Though, that only started with the cap-and-ball’s 9-round cylinder. On top of pitching .42-caliber balls, the LeMat had a surprise up its sleeve in that its cylinder rotated around a 20-gauge shotgun barrel. Quite a shock for anyone caught at the wrong end of the payload if they were within range.
Simple enough to operate, the LeMat – also know as the Grapeshot Revolver – jumped between rifled and smooth bores through an adjustable hammer. Clever as it was, the handgun had a short lifespan, thanks in part to one of the dominant firearms technologies gaining traction at the time – self-contained cartridges. Reasonable in size as a cap-and-ball revolver, it evolved to absurd proportions as a cartridge gun – mainly its cylinder. In the end, the backup scattergun wasn’t enough to keep it competitive with the sleek six shooters coming to dominate the market.
Even so, the LeMat continues to stir the imagination and is a Hollywood prop-room favorite. Most recently, Ed Harris’ character in HBO’s Westworld toted what appeared to be a Grapeshot Revolver – though not a true-to-life version. Eh, it’s Tinsel Town, what do you expect?
It’s a hard trudge if you want a LeMat of your very own, at least an original. Only around 3,000 were made. However, a number of black-powder replicas are available from companies such as Taylor & Company and Pietta of Italy.
For more information on the NRA Museum, please visit: www.nramuseum.org.
Which .38 Special ammo will save your life? Patrick Sweeney gives you the inside edge.
What you need to know about.38 Special ammo:
Developed in 1898.
Primary law enforcement service cartridge from 1920s to 1990s.
Regained popularity due to small concealable revolvers.
Snubbies knock off around 100 fps of muzzle velocity.
+P ammunition does not function well out of snubbies.
Hotter loads are generally easier to shoot out of larger revolvers.
Poly-case ammunition and copper solids offer excellent penetration.
The .38 was invented in the late 19th century, given up for dead in the latter half of the 20th, and resurrected by the time the 21st rolled around. It is now a viable choice for those who feel a compact carry gun is more important than shooting through cars.
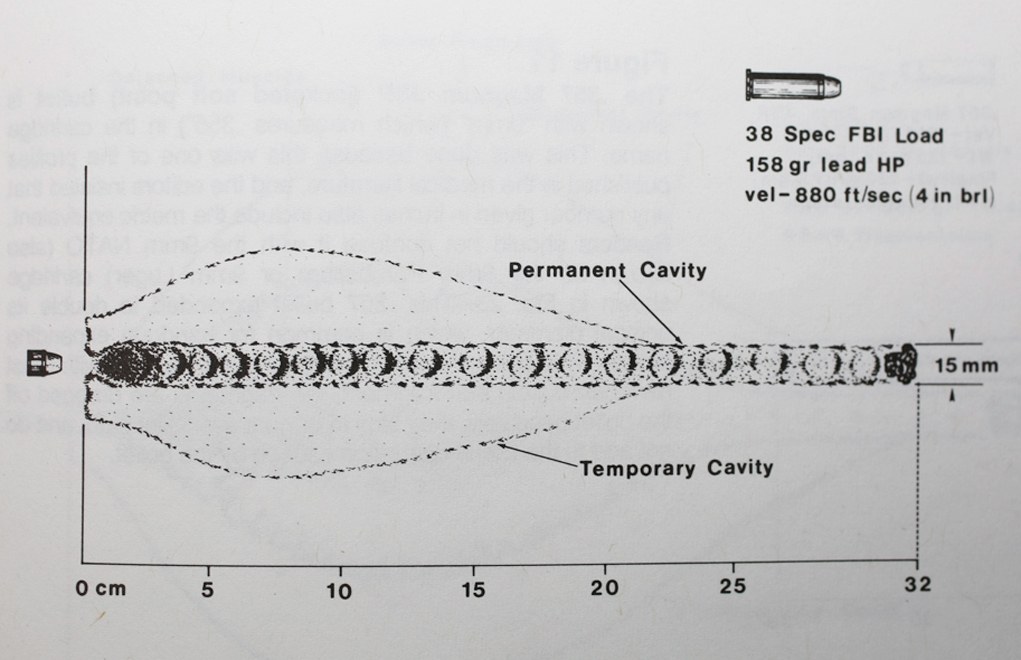
If it wasn’t for the yaw, there’d be not much of a wound track at all. The old lead .38, the great perforator.
The original load, a lead round-nose 158-grain bullet, was marginal as a stopper. It was earth-shattering in 1898, when invented, but even before WWII we knew better.
It just took a long time to develop something better and get it out where it could be tested.
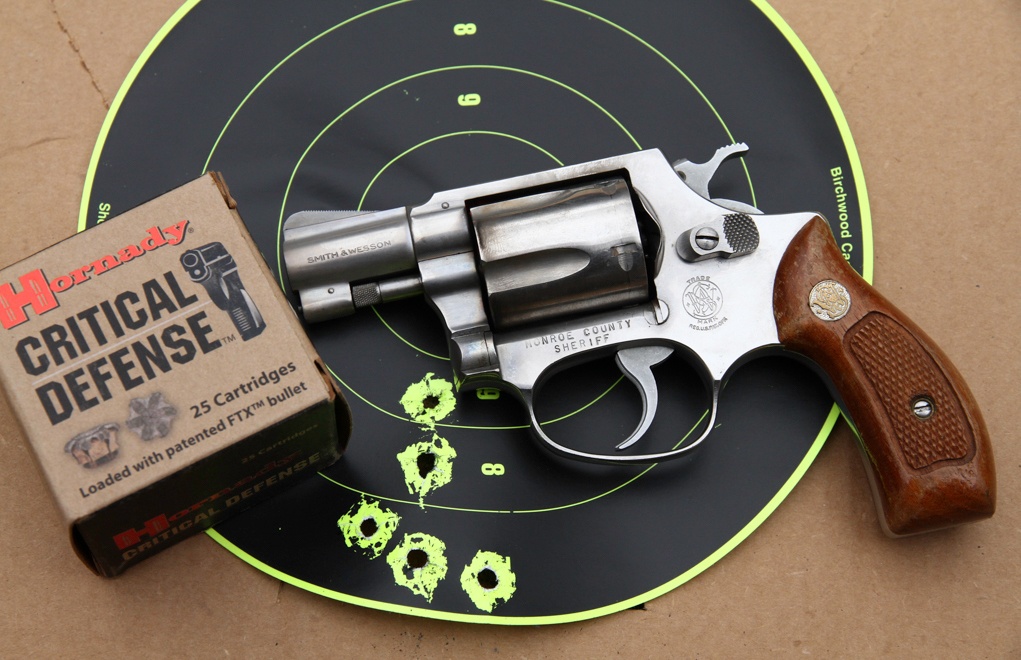
Two inches, single action, 25 yards, with Critical Defense 110-grain FTX bullets. Any complaints? I thought not.
One aspect of a .38 Special revolver that people might have forgotten is accuracy. Revolvers can be amazingly accurate, and a quality DA revolver delivers all of that.
You do, however have a few choices to make, choices that will determine your path in life.
First, snubbie or medium-sized revolver?
Snubbieland
Short-barreled revolvers are harder to shoot, kick more and deliver less performance than those that are bigger. The smallest have diminished capacity, five shots vs. six. So, you have to determine how much recoil, blast and difficulty in shooting you are willing to put up with to get the performance you desire. Snubbies are easier to carry, but they extract a cost in velocity. As a starting point, knock 100 fps off of the book value of a load if you are using a snubbie. More if it is lightweight bullet.
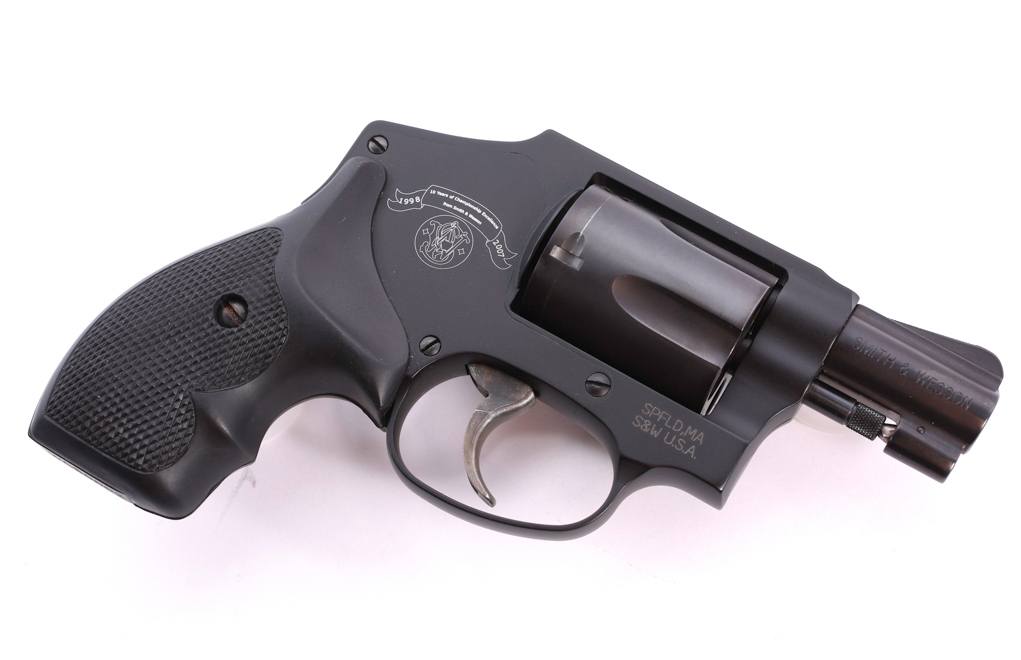
A snub-nosed revolver is a joy to carry. It can, however, be a beast to shoot well. The smaller and lighter it is, the harder it is to shoot well, and the less fun it will be to shoot. Keep that in mind when picking a defensive handgun.
Medium-sized revolvers, the six-shot wheelguns and those with 3- or 4-inch barrels, are a lot easier to shoot and deliver the ballistics you want.
Ammo Choices
Choices for .38 Special ammo breaks down in a three-axis decision making tree. Light weight bullets or heavy? Jacketed bullets or lead? Standard pressure or +P?
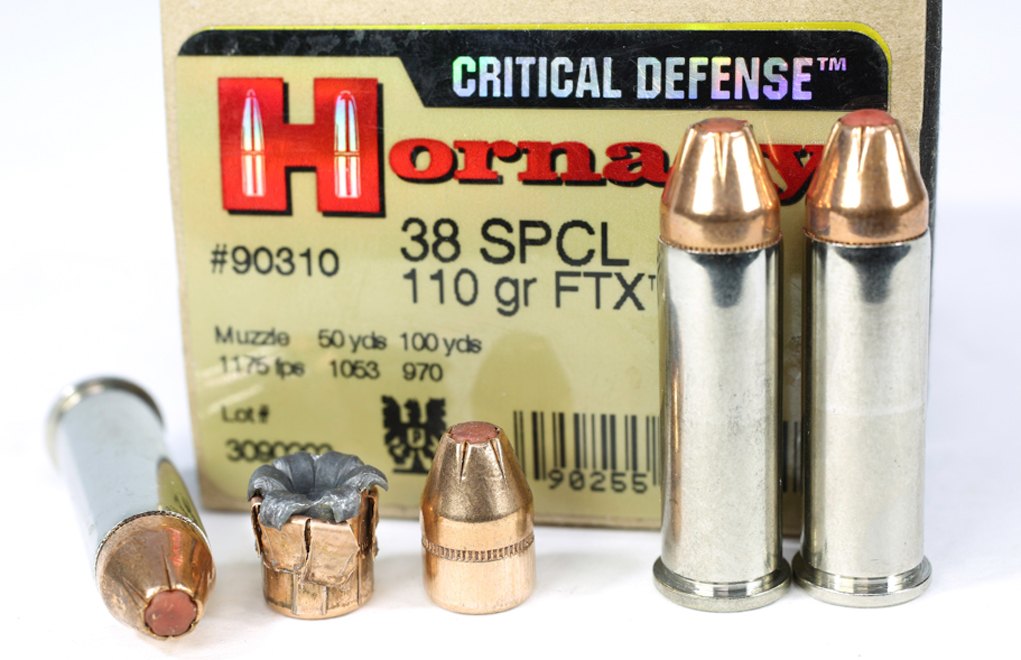
The Hornady Critical Defense line is meant to offer good performance without beating up the shooter. Don’t fault it for that.
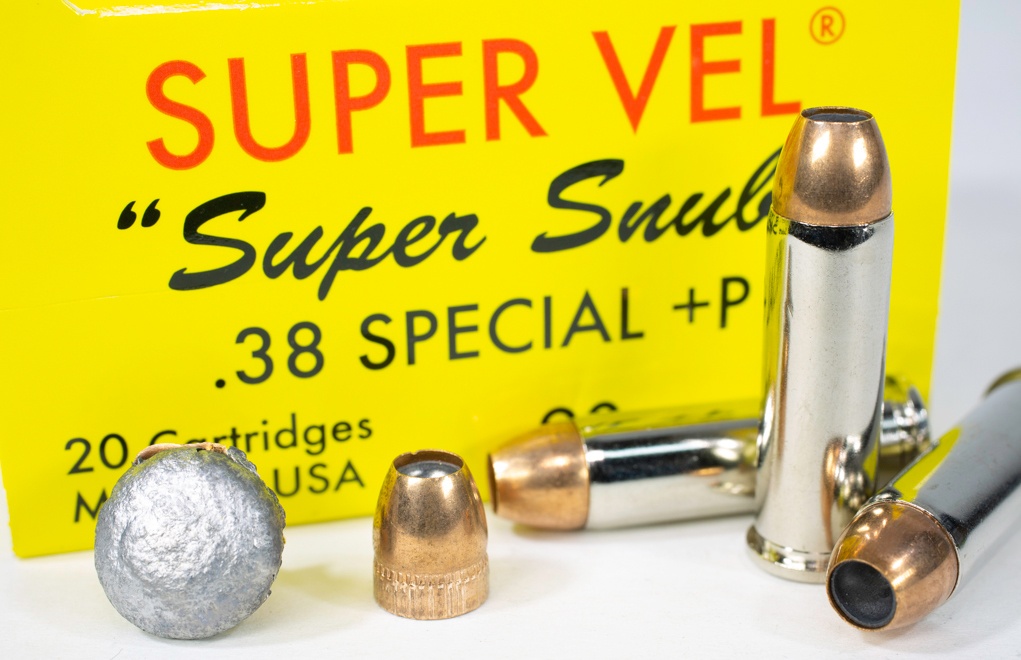
In lightweight bullets, you have high speed and normal. A high speed would be something like the Super Vel Super Snubbie load, which features a 90-grain bullet at over 1,200 real fps out of a snubbie, and recoil to go with it.
A lightweight .38 Special ammo choice that won’t punish you would be the Hornady Critical Defense, or Critical Defense Lite. These are 110-grain bullets and they do not get to 1,000 fps out of a 2-inch barrel. They are easy to shoot, but they will not deliver performance like the stouter loads. You get what you pay for, and you pay for what you get.
This is what extreme velocity does for you, expansion from a 90-grain bullet that practically turns it inside-out.
There are some loads that feature weights less than full but not all the way to light. Generally around 125 to 130 grains, they are compromise loads. They offer more mass for more penetration, but you have to either give up velocity or accept a bit more recoil.
The heavyweights top out at the normal for .38 Special weight, 158 grains. You can have jacketed hollow points, all-lead or lead hollow points.
The combination of a bit more weight and a bit more velocity nets you a lot more performance, but also a noticeable amount of extra recoil.
Pressure is all. The standard pressure limits for the .38 Special are just fine for the snubbies and make for a soft life for the medium-sized revolvers. If you want more you can have it, but you will pay for it, in particular, a +P load in a five-shot snubbie becomes work, or even painful, to shoot. Unless you absolutely need that level of performance (and I can’t imagine how to require it, and not move up in gun size), then live with it.
But, if you want the benefits of extra pressure you need extra barrel length. This makes for EDC problems. A 6-inch .38 revolver might be entirely suitable for a home defense gun. But for Every Day Carry it would be bulky. You need the barrel length to get all the velocity the extra pressure promises.
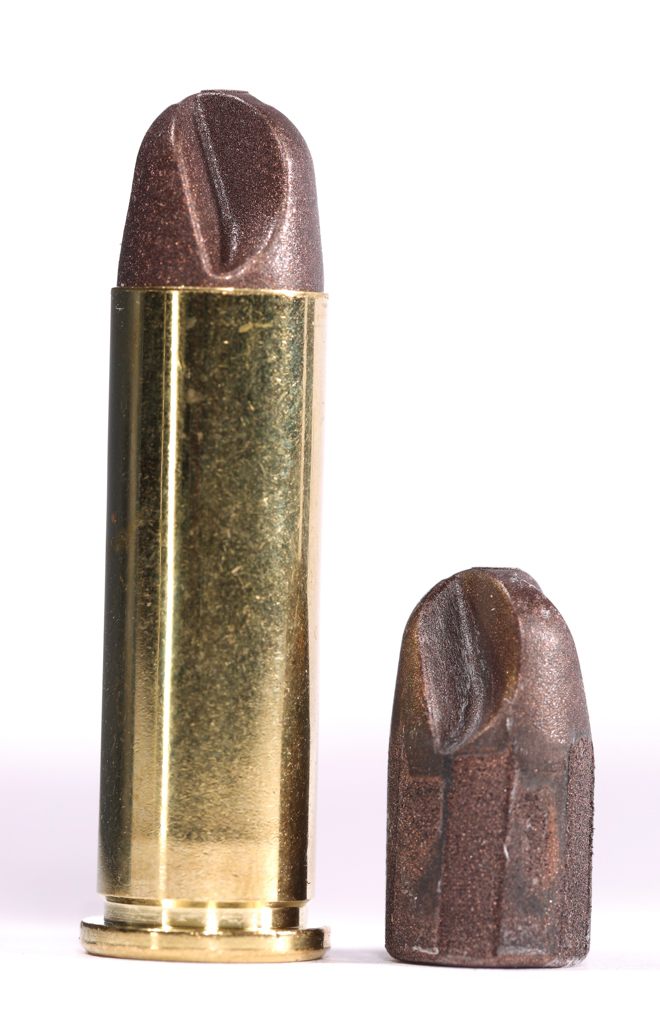
Polycase ARX
Polycase thought outside the box and this is the result. A sintered, epoxied, fluted bullet that does not need expansion to deliver.
This is a new approach, and we see it working in the .38 Special. It offers barrier perforation, but doesn’t have to expand to stop in the FBI distance. It is super-soft to shoot, but the extra velocity can cause it to hit low, below your usual point of aim, due to barrel lift timing differences.
Old-school
Wadcutters are an anomaly. They offer a full-diameter cutting shoulder, and yet they penetrate as well as anything else out there. A super-soft load to shoot, if you were arming someone who was really recoil sensitive, using wadcutters might be a viable approach. Just be sure they understand they must make use of the tack-driving accuracy that wadcutters offer.
FBI classic
The FBI load is full weight, +P and all-lead. But for expansion like this, you are good. Just don’t expect barrier-blind performance, because lead can’t do that.
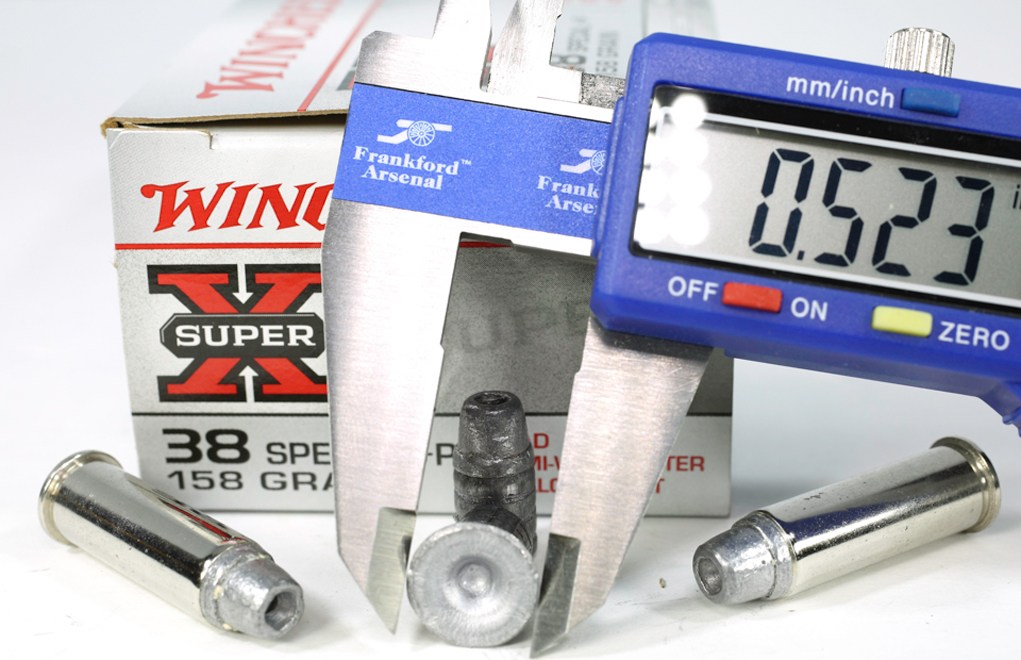
The FBI load in .38 Special, 158-grain, lead semi-wadcutter, at +P pressures, worked then and works now. It just doesn’t perform well in barrier testing. If you do not anticipate barriers, then you will be happy.
Federal HST .38 Special
Federal took a different approach. They took the old reversed hollow-base wadcutter, put a jacket on it, tuned the jacket for consistent expansion, and then loaded it to normal .38 Special performance, not wadcutter performance. As a result, it delivers every bit of the power a .38 can muster and expands well while doing so.
Honey Badger
The performance of the Honey Badger, a solid copper, fluted bullet at less than robust recoil, seems to have been made for the .38 Special. Even if it does not work out in pistols, I suspect that the Honey Badger load for a backup or snubbie may just be the perfect load of the future.
How to pick?
The FBI load is full weight, +P and all-lead. But for expansion like this, you are good. Just don’t expect barrier-blind performance, because lead can’t do that. Bottom: Above: Even back in the old days, we knew how good the FBI load was. Image courtesy the late Dr. Martin Fackler.
What is your carry need? How compact/concealed must you be? Is this a main gun or a backup? How resistant to recoil are you? Be honest with yourself on this one, because no one else is going to take the recoil hit for you.
Then, pack the largest .38 revolver you can comfortably carry and conceal, and use the stoutest load in it that you can comfortably shoot. I know, it sounds like the most basic common-sense advice you’ve ever heard. It surprised even me.
Ammo performance chart:
.38 Special & .38 Special +P
Brand, bullet
velocity
penetration*
expansion
Black Hills Honey Badger 100 gr
982
14.6”
.355”
Black Hills Sierra +P 110 gr
945
9.75”
.583”
Black Hills Sierra 125 gr +P
873
13.6”
.529”
Remington golden Saber 125 +P
767
—
—
Black Hills 148 gr WC
689
15.5”
.428”
Federal HST 130 gr
834
14”
.486”
Hornady FTX Lite 90 gr
1129
8.5”
.467”
Hornady FTX 110 gr
833
13”
.440”
Hornady FTX+P 110 gr
1031
12”
.501”
Hornady 125 gr XTP +P
807
16”
.437”
Polycase ARX 77 gr
1059
14.5”
.358”
Speer GDHP 135 gr
840
13’
.565”
Super Vel 90 gr
1278
11.5”
.574”
Winchester Defend 130 gr +P
939
11.5”
.617”
Winchester FBI 158 gr L-SWC+P
799
13”
.521”
Hornady XTP 158 gr
758
15”
.472”
Corbon FMJ 147 gr
773
27”
.357”
CCI Blaser LRN 158 gr
815
25”
.358”
Black Hills CNL 158 gr
725
—
—
Winchester FMJ RN 130 gr
765
28”
.358”
Remington HBWC 148 gr
655
30”
.358”
Oregon Trails 148 DEWC 2.7 gr Bullseye
657
36”
.358”
*Bare gelatin for expansion and penetration, unless otherwise indicated.
Despite some issues, the Colt Paterson Revolver was a watershed moment in handgun design.
He wasn’t the first, but arguably he might have been the best.
Despite the legend, Samuel Colt didn’t cook up the repeating revolver and it certainly wasn’t inspired by his seafaring. More than anyone, Elisha Collier and his flintlock revolver — among the first repeaters — had more to do with the iconic gunmaker’s work than any capstan. But what Colt did in advancing the concept of a rotating cylinder handgun more than made up for his tardiness into the field.
More Gun Digest Videos:
The Cane Gun And Clandestine Self-Defense Firearms
Little heralded now outside collectors, the Colt Paterson was a watershed moment in firearms. The first successful revolver — in the modern sense of the design — whetted the gun-buying public’s appetite for repeating arms and redefined firepower for nearly a century to come. Patented in 1836, some 2,000 of the cap-and-ball revolvers were manufactured and while they suffered from some mechanical issues, they nonetheless got the attention of the right people. Among the most important, Samuel Hamilton Walker.
The Captain in the Texas Rangers understood a handgun capable of multiple shots before reloading would give his men a marked advantage in the open plains. Walker’s order proved a godsend at the time, not only spurring the creation of the fabled Colt Walker, but also helping Colt himself eventually salvage his struggling company. Good thing too, especially for lovers of fine historic revolvers, given the survival of Colt Firearms led to some real doozies down the line, such as the Single Action Army.
Certainly, being first in a field of endeavor has its advantage. But in the scheme of things, it comes in a distant second to being the best.
For more information on the NRA Museum, please visit: www.nramuseum.org.
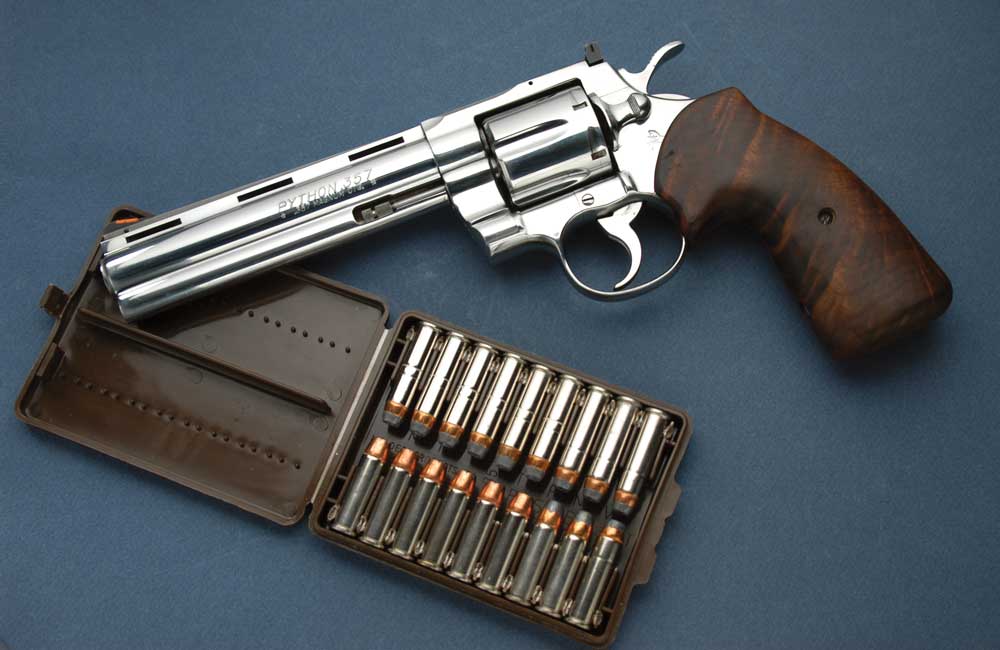
From the right gun, most .357 SIG and .357 Magnum ammo choices are the best and hardest-hitting self-defense rounds.
Pros and cons of the .357 Magnum and .357 SIG:
Pros:
Exceed FBI test standards for penetration.
Able to defeat the most common barriers.
Excellent performance no matter the bullet weight.
.357 Magnum has among the best reputations as a stopper.
.357 Magnum can also shoot .38 Special.
Cons:
Both cartridges require barrel length to achieve desired performance.
Given barrel considerations, carry options aren’t a fit for every armed citizen.
Excessive muzzle blast.
Recoil with full-powered loads can be excessive.
The .357s are the start of the revolver cartridges that have enough horsepower to easily pass the FBI tests. This is both good and bad. It’s good in that you can count on any of the modern bullet designs to get the job done. No new bullet, in either .357 Magnum or .357 Sig, will fail the tests. They will all, in any weight (the .357 Sig doesn’t offer many choices there, but that’s not a big deal) penetrate well past the minimum depth, expand, and do so even after passing through barriers.
No, the problem is blast and recoil.
A .357 Magnum load in particular was the focus of stopping power inquiry a few decades ago. The 125-grain JHP was seen, even by those who were not fans of the “smaller” calibers, as having a sterling reputation as a stopper. As well it should have. The projected velocity of the 125 JHP was 1,450 fps. That was not the real velocity, of course, but that was what everyone used as their goal, their aspirational speed, if you will.
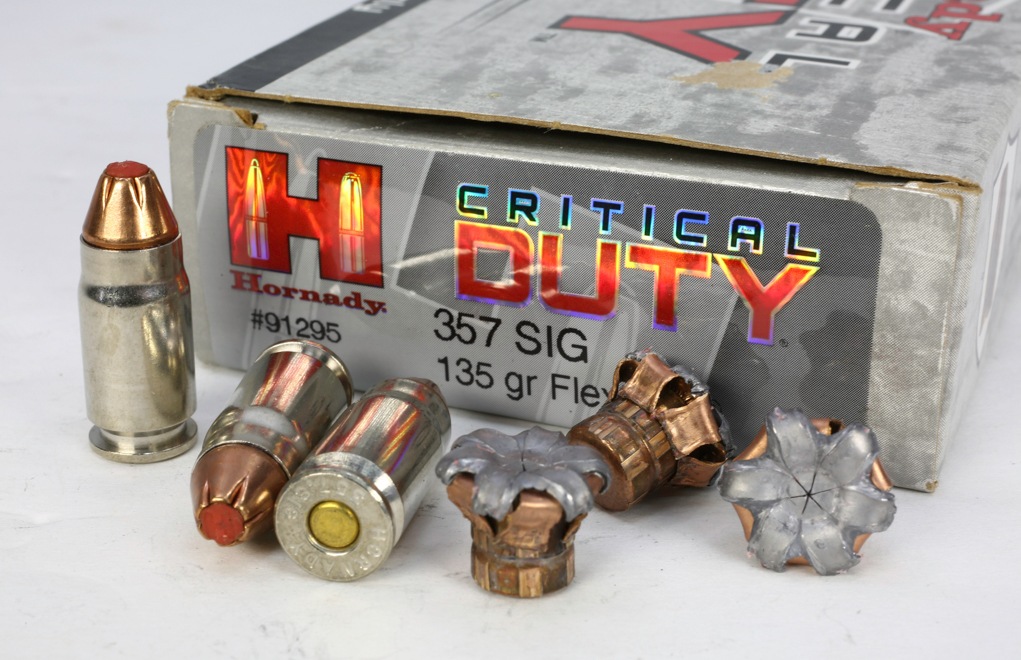
If you want power and performance in an autoloading pistol, then the Hornady Critical Duty .357 Sig delivers. Just don’t expect this out of a compact pistol. Short barrels and the Sig are not a happy combo. Image courtesy Black Hills.
It came close out of a 6-inch barrel, doing high 1,300s, but out of the more-common carry gun it was between 1,250 and 1,300 fps. Which was plenty to get the job done.
Where in the 9mm the research was to produce a bullet that would expand at the velocities that could be generated, in the .357 the task was to design a bullet that would hold together at the velocities already existing.
.357 Sig
The Sig was designed to deliver the ballistics of the .357 Magnum out of an autoloading pistol. The case is essentially (but not as a practical, handloading matter) the .40 S&W necked down to 9mm. It has a capacity close to that of the .357 Magnum, and therefore can generate the same velocities as the longer revolver cartridge.
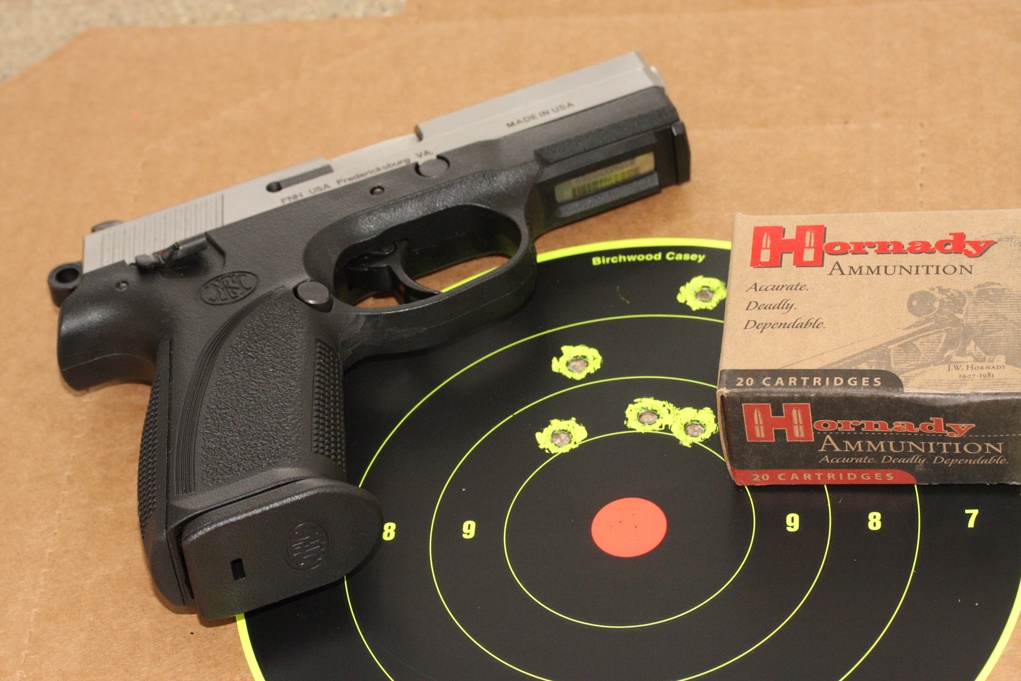
If you want compact, then this FNP does that. But chambered in .357 Sig, you are hobbling it with the shorter barrel. Better to have gone for the FN in 9mm and gained a lot more in magazine capacity. Still, it is hard to fault the accuracy.
But, and this is important to understand, it is limited in the same way the .357 Magnum is: it needs barrel length to deliver. If you expect to get the full .357 Sig ballistics out of a 4-inch barrel, you are kidding yourself. If you go for a compact .357 Sig, you are basically doing the 9mm+P+ dance, but only with more noise and blast.
More .357 Magnum Articles:
The .357 Magnum: 20th Century Handgun and Cartridge
So, if you want the full .357 Sig power, you have to be willing to pack a full-sized handgun. If you are not willing to pack the biggest one, then save yourself the hassle and step back to a 9mm, since that is about all the velocity you will be getting anyway.
.357 Magnum and .38s
The barrel of lightweight revolvers gives you a clue about limits. Pay attention so you don’t get in trouble, and know your own limits, too.
One of the big advantages of the .357 Magnum is that revolvers chambered in it can also readily fire .38 Special ammunition. This is good, as it allows for less-strenuous practice. This is bad if you use .38s for practice and then load up with full-power .357 Magnum ammo for EDC. This was supposedly one of the problems encountered in the Newhall incident. At the time, the California Highway patrol and many other law enforcement agencies felt it entirely appropriate to practice with .38s (sometimes even soft-recoiling .38 wadcutter ammo) and then carry .357s on duty.
One problem is that the shorter .38 cases cause lead and powder residue buildup in the chambers. The bigger problem is that the practice isn’t similar enough to be useful.
If you want to use .38s in a .357 because you don’t want the recoil, and want a stronger, longer-lasting revolver, go right ahead. Just don’t think that practicing with .38 is going to fully prepare you to use your revolve when loaded with .357 Magnum ammo.
Light bullets
The lightest carry revolvers often have a warning to not use the lightest bullets. This is for good reason: the bullets will “jump the crimp” due to inertia and recoil. While it is rare for a round to pull longer (the revolver moves back, the bullet “attempts” to stay in place) enough that it will tie up a revolver in only four or five shots, you should not risk it.
This is what a full-sized pistol and Critical Duty gets you.
If you want to test, fair warning: the recoil is beyond stout, it is sharp enough to be painful, and you can easily work yourself into a flinch. In fact, you probably shouldn’t use full-power .357 Magnum ammo in the lightest-available carry revolvers. It’s just no fun and you can’t really practice, just learn what your pain threshold is.
Choosing ammo
The problem is not picking what works, they all work. The problem is in picking something you can live with. In addition to the advice with other calibers (use what is reliable, use what is accurate), you can add use what you can stand to shoot.
In a certain sense, you could call me a professional shooter. I shoot more ammo on an annual basis than most people walk by at the big-box store when they go to buy ammo for a day at the range. I have shot, and continue to shoot, every handgun caliber made. Several times a week I’m at the range, and several times a year I spend a week at a class, range, seminar or other industry function. I shoot a lot.
In any revolver caliber, a longer barrel gets you more velocity. It is a trade-off between handiness and speed.
I don’t find any full-power .357 Magnum ammo to be fun in any revolver below the medium-frame all-steel ones. One of my favorites is an old S&W M-65, 3-inch, in .357. That I’ll shoot a lot, but not all day. If I’m shooting all day with .357s, then they go through the M-27. The lightweights? Unless it is for an article or a test, I will only put .38s, and not a lot of .38+Ps, through them. It’s just no fun, it’s too painful and I don’t want to learn a flinch.
This will take some work and range time. That’s good, because there is no such thing as too much, and certainly there is such a thing as too little. The bad news is that this may be work, could be annoyingly painful and will take time.
Now, in the .357 Sig I have one top choice, and that is the Hornady Critical Duty. Of course, I’ll only pack it in a full-sized pistol, but boy, what performance you get.
Ammo performance chart:
.357 Sig
Brand, bullet
velocity
penetration*
expansion
Sig V-Crown, 125 gr
1298
11.5”
.676”
Winchester Defend 125 gr
1311
12.75”
.581”
Fiocchi FMJTC 124 gr
1366
31”
.355”
Corbon JHP 125 gr
1470
13.5”
.614”
Georgia Arms FMJ 125 gr
1449
29”
.355”
Hornady FTX 115 gr
1199
14.5”
.568”
Hornady XTP 124 gr
1394
15”
.549”
Hornady XTP 147 gr
1241
16.5”
.504”
Hornady Critical Duty 135 gr
1206
14”
.605”
Speer Gold Dot 125 gr
1329
15.5”
.599”
Michigan Ammo FMJ 125 gr
1324
32”
.355”
Sig Sauer V-Crown 125 gr
1332
14”
.710”
.357 Magnum
Brand, bullet
velocity
penetration*
expansion
Super Vel 110 gr
1339
11.75”
.546”
Black Hills XTP 125 gr**
1083
16.75”
.525”
Black Hills XTP 125 gr***
1340
14”
.589”
Hornady FTX 125 gr
1257
13”
.575”
Sig V-Crown 125 gr
1394
—
—
Hornady Critical Duty 135 gr
1241
14.5”
.604”
Aguila JSP 158 gr
1183
—
—
Federal Premium 158 gr
1172
—
—
Hornady XTP 158 gr**
1199
18”
.567”
Black Hills XTP 158 gr***
1222
19.25”
.553”
Remington L-SWC 158 gr
1201
—
—
* Bare gelatin for penetration and expansion, unless otherwise indicated ** 4” barrel *** 6” barrel
Everyone has favorites — and I’m no different — but I do get to shoot and evaluate a lot of different semi-auto pistols. Here are my favorites by category.
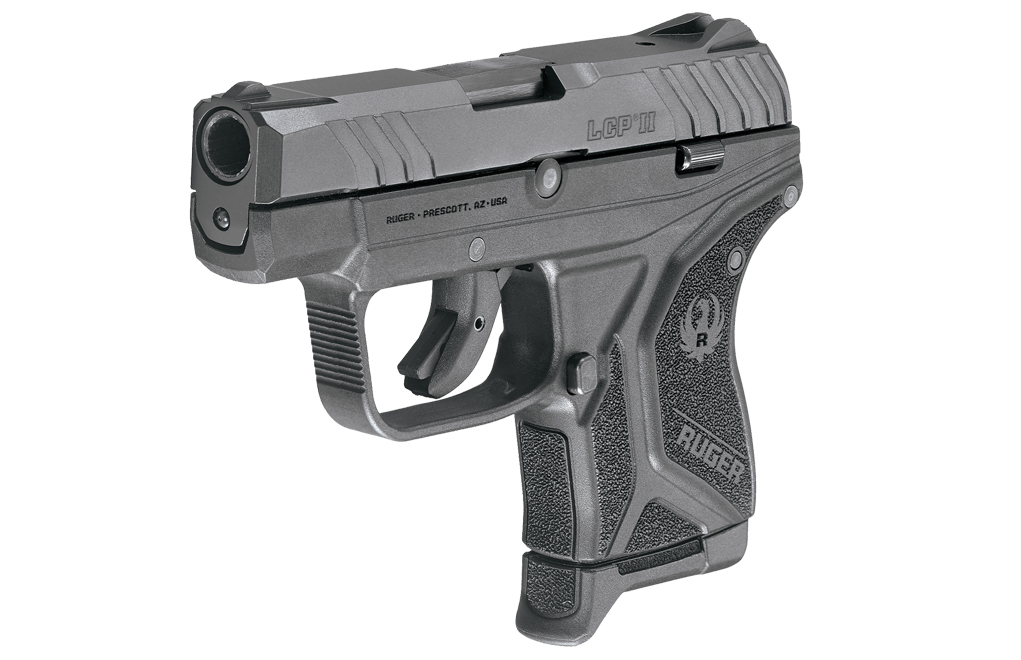
Of the tiny guns, my hands-down favorite is the Ruger LCP II. It was a good pistol to begin with, and they fixed everything I complained about on the original. It’s very affordable, and it’s as easy to conceal as any gun on the market. While I’d prefer a larger caliber, modern .380 ammunition is more effective for defense than the standard .38 Special round-nosed load most law enforcement carried until just a few years back. The trigger replicates a striker-fired trigger even though it has an internal hammer, the slide is easy for weak hands to operate, and it locks back on the last round. For its diminutive size, it’s reasonably easy to shoot well.
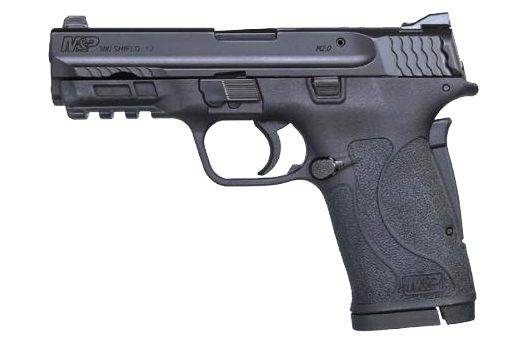
I had to create this category specifically for the Smith and Wesson .380 Shield EZ because it’s the gun I’ve been crying for. There are so many older people, especially women, who simply don’t have the hand strength to operate most guns. People with low hand strength need personal defense and they need a gun they can operate.
Based on the popular M&P .22 Compact from Smith & Wesson, the .380 EZ is easier to operate than many .22s. The slide is well shaped for grip, the recoil spring is light, the magazine has a loading assist button and there’s a grip safety. I’d suggest the version without a manual safety because those likely to purchase this gun probably aren’t going to do the training required to operate a manual safety under duress.
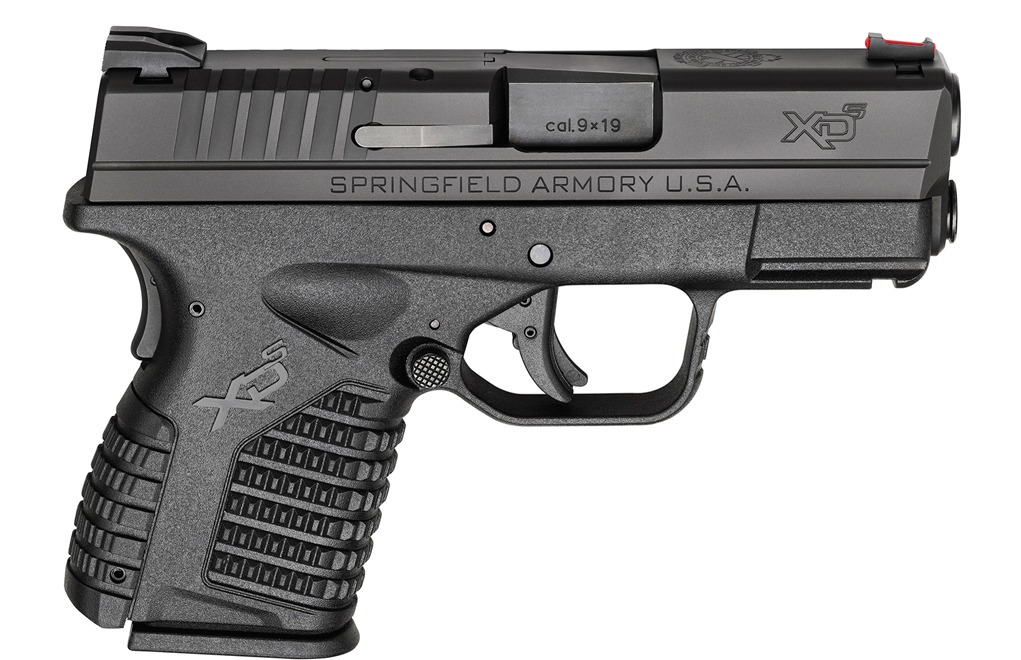
There are a lot of great pistols in this category. It’s the largest category of defensive guns and it’s dominated by the Smith and Wesson Shield. This is a crowded field and it’s really hard to find a bad gun in the lot. Besides the Shield, Ruger’s excellent EC9 is a great gun at a great price. The Glock 43 is the most graceful and handy of these. The Springfield Armory XDs has a grip safety, and I really like that, but I have to give the nod to the P365.
The SIG P365 has every feature a subcompact single-stack should have, except it isn’t a true single-stack. It isn’t a double-stack either. I’ve put it in that class because its width is just 1 inch, as narrow as other single-stacks. The remarkable thing is the capacity of 10 + 1, giving it the capacity of some double-stack pistols and a weight of just 18 ounces.
It also has a trigger style I like. The trigger is a long, sweeping pull that’s light in weight but with a long enough stroke to make it safe to carry without a manual safety. It’s been my experience that most novices shoot better when they don’t know the exact instant the trigger breaks, preventing recoil anticipation. The price is also reasonable for the class at $599 and will likely settle down a bit more once demand catches up.
Sub-Compact Double-Stack: Springfield XD Mod 2, 3.3
This one has to go to Springfield Armory and their excellent XD Mod 2, 3.3. With a grip that offers enough surface for sweaty hands and a passive grip safety, the shorter Mod 2 is a great pistol. The trigger is good, the passive safety makes it a great choice for less experienced shooters, and the shape of the slide makes it easy to charge and clear. I like grip safeties because defensive guns are hidden away under clothing, and inserting a pistol into a holster surrounded by loose clothing is a great way to generate an accidental discharge. It’s easy to teach new shooters to place their thumb on the rear of the slide when holstering, serving not only to help get the index finger further away from the trigger, but also assuring that the slide is in battery by press checking as the gun is inserted. The Mod 2 is easy to shoot well with great sights and a good trigger.
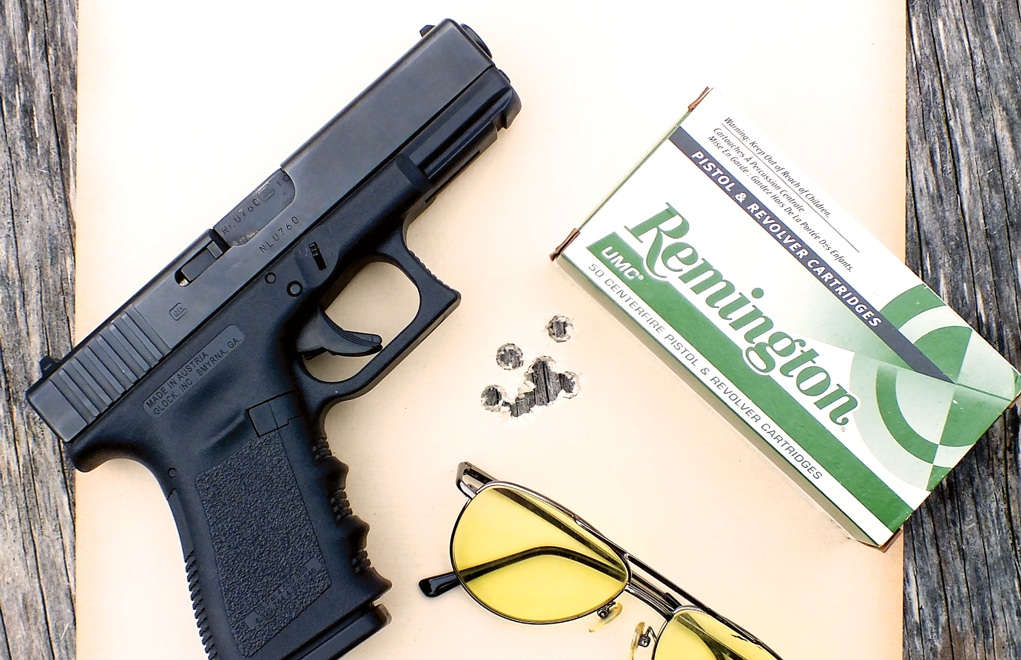
Compact: Glock 19
There are a lot of great double-stack compact pistols at the gun shop, but I’ll probably get hate mail if I do this rundown without mentioning Glock. The Glock 19 is everything a defensive pistol should be: It’s reasonably priced, more reliable than a Ford F150 and easy to shoot well. It’s been proven since it was introduced, and the only people who say bad things about Glocks do so for emotional reasons rather than functional ones.
They’re not pretty, there’s no effort spent on bells and whistles, but they do everything they were designed to do … and the G19 is my favorite of the bunch.
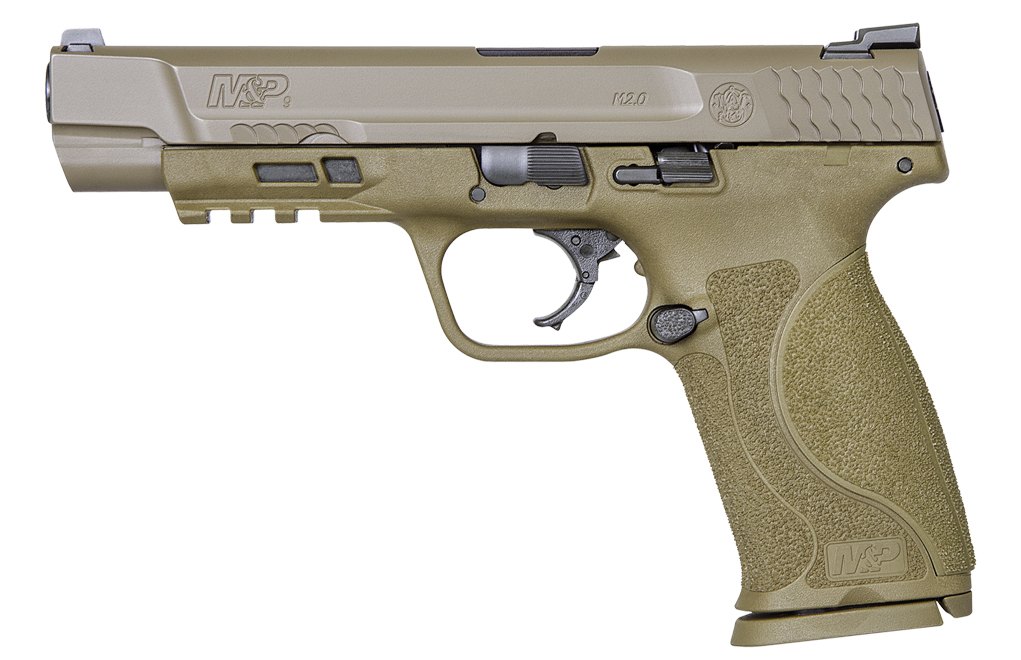
Once again, there are a lot of great choices in this category, but my choice of the best service-sized pistol is Smith and Wesson’s M&P 2.0. The improvements to the trigger and grip surfaces bring the M&P to a level of function that deserves note in a field of excellent pistols. With multiple grip inserts that are easy to change, functional sights and an aggressive grip texture that’s the best yet on a production pistol, the M&P 2.0 checks all the boxes. It also benefits from an extensive range of holster and aftermarket upgrade options.
You might notice that I didn’t include a single 1911-style pistol in my picks. Before you push the send button to tell me I’m an idiot, please take into consideration that most people who purchase defensive handguns spend almost zero time on real training and practice. While they’re great guns, 1911s and similar designs require extensive practice and training to handle effectively.
Law enforcement officers are required to train and qualify on a regular basis — and yet only a handful of departments issue traditional single-action semi-autos to their departments. This is based on painful experiences of officers having trouble operating a more complicated weapons system. In the hands of a trained up individual, these guns are wonderful and that’s why you see them in competitions, but most civilians simply aren’t proficient enough to be safe and competent with them.
While these are my choices, you likely have different preferences. We all like different things, otherwise, there would only be one gun in each category and I’d have nothing to write about. For that matter, I guess there’d only be one category.
Editor’s Note: This article originally appeared in the Shooter’s Guide 2018 issue of Gun Digest the Magazine.
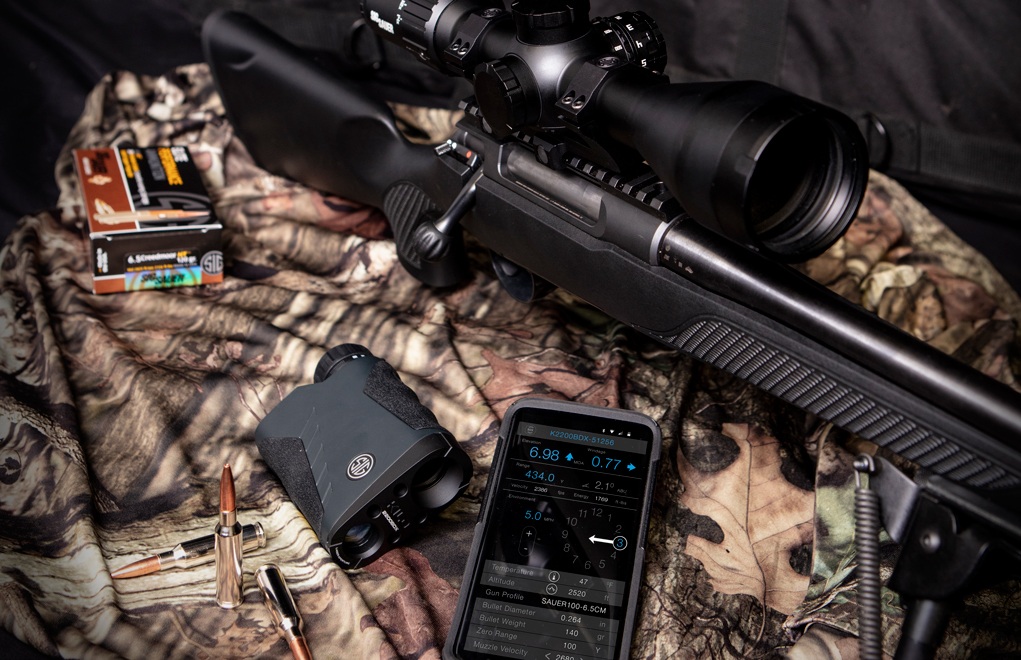
Though it sounds complex at first, the Sig BDX system is simply a smartphone, rangefinder and riflescope combination that calculates holdover. The rest is up to you.
How the Sig BDX system is changing shooting:
Sig BDX smartphone app programmable for a number of rifles and loads.
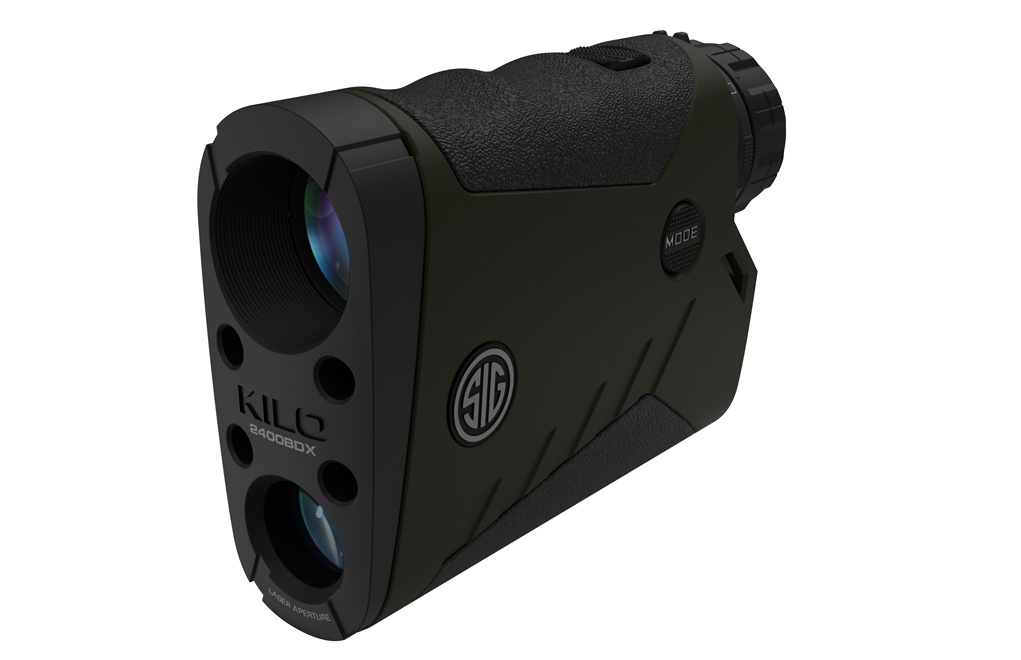
Kilo rangefinder provides app the ballistic and environment input.
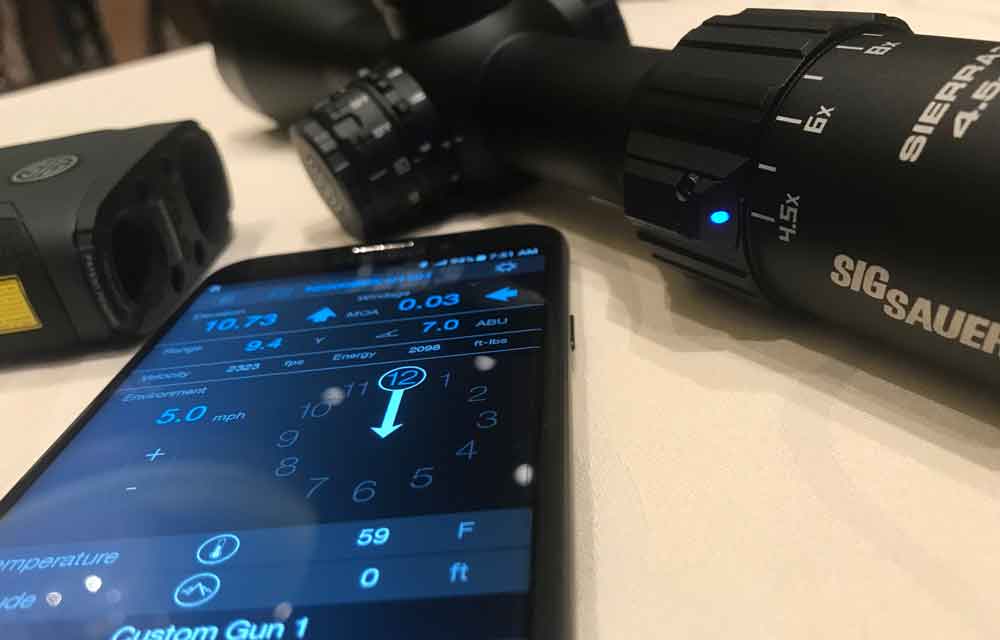
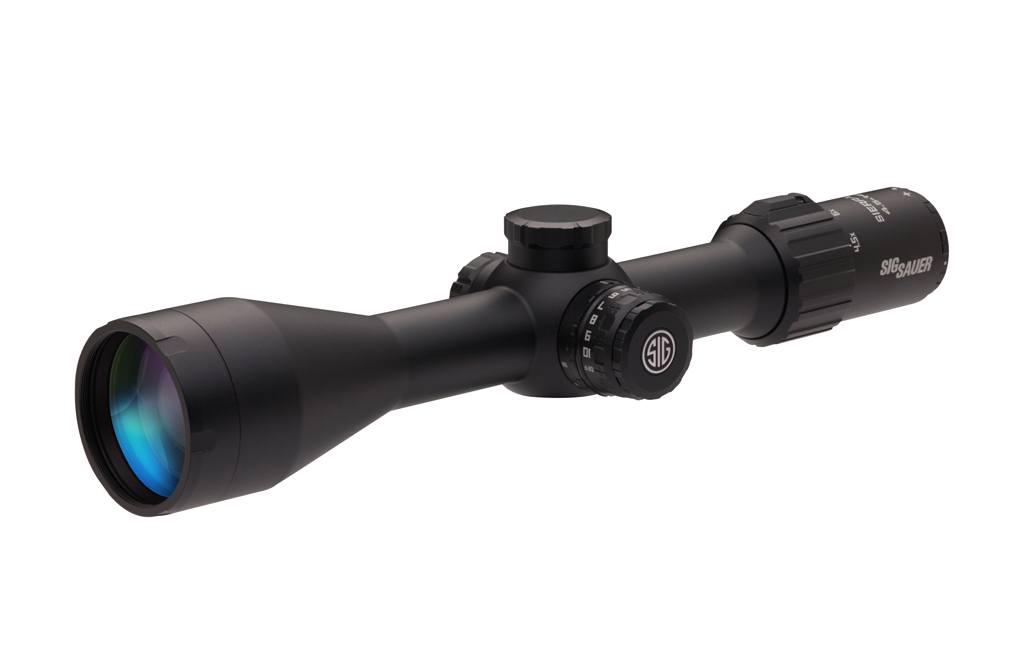
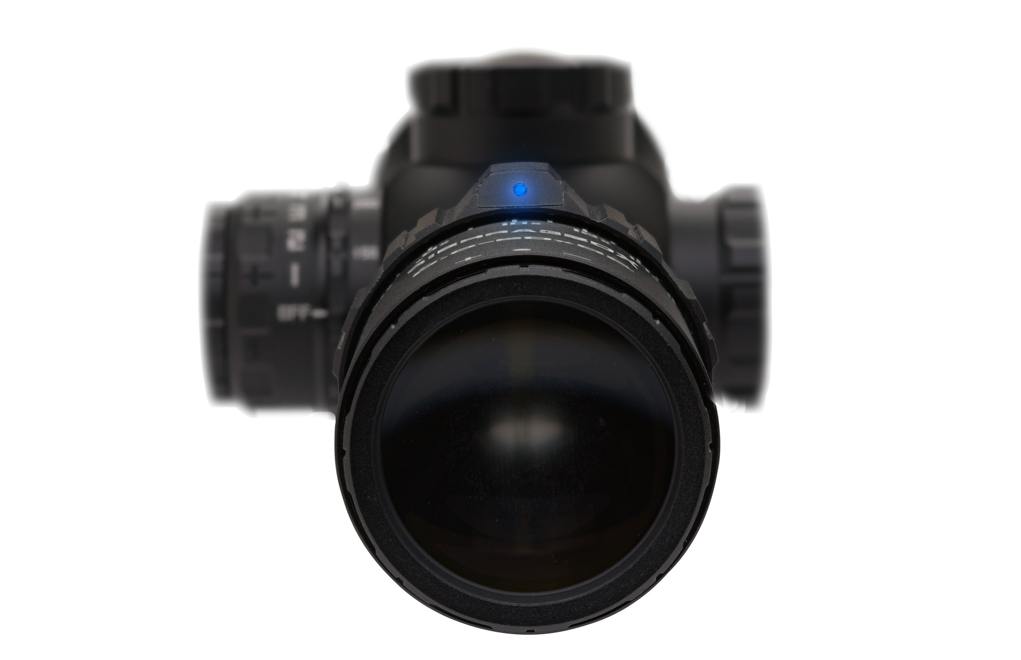
Sierra3 rifle scope presents the holdover in an illuminated dot.
System calculates real-time and alerts if a new holdover has been calculated.
Anti-cant system adjusts to rifle’s angle.
App alerts shooter if potential shot is out of range.
On May 3 of this year, I entered a conference hall in Dallas on the eve of the 2018 NRA Annual Convention and Meetings under the promise of not disclosing what I was about to see until the embargo was officially lifted at 9 am the following morning — at the open of the show. The curtain lifted, jaws dropped — and I’ve been fielding questions from readers and friends alike ever since.
Behind that curtain was the new Sig BDX (Ballistic Data Xchange) System, a cutting edge collaboration of rangefinder, riflescope and smartphone that makes holdover calculations so bulletproof that it almost seems unfathomable. I hate the phrase “game changer,” but if ever there was a category-revolutionizing product worthy of that moniker, this very well seems to be it.
Similar products are have been on the market for quite a while now, but each has its drawbacks. The Burris Eliminator is a great rangefinding riflescope, but it does kinda look like you’ve got a couch strapped to your rifle by the time you’re all done. And it’s arguable that no one makes a better rangefinding riflescope than Swarovski, but I could buy a pretty solid winter beater car for about the same cost.
While no product in this category is truly perfect — we are dealing with aiming solutions that involve batteries — the Sig BDX system seems to have the edge in just about every facet of the technology, and that includes price. I say “seems” because, well … this system is that new. Though the introduction was made in early May, product is now just becoming available. And because Sig has designed this beast to be a hunter’s new best friend, you need this information now to properly determine if this is an optical pool into which you want to dip your toe.
Mils vs. MOA: Which Is The Best Long-Range Language?
Sig is calling the reticle around which this system revolves the “BDX-R1 Digital Ballistic Reticle,” claiming that this entire setup is capable of providing a ballistic solution out to 8000 yards with 1 MOA of accuracy. That’s bold. But — if you’ve used ballistic apps before, you should already know the “garbage in, garbage out” mantra: The information this system provides is only as good as the information you put into it.
So, let’s break this BDX System down, piece by piece, and have an in-depth look at what makes the Sig BDX System tick because it seems pretty intense at first glance. However, although the technology that goes into this system far extends the reach of my cognitive grasp, the user interface is very straight forward, and that’s what matters.
The Brains
You already own the brains of the BDX System: your smartphone. Through either Google Play or the App Store, down load the “Sig BDX” app for whatever you’re packing, Android or iPhone, and create a profile much like you would on Facebook — except for your rifle: Luke’s Creedmoor, Big John … heck, maybe you’ve got a gun named “Battle Axe” after your wife (may I suggest password protecting your phone?).
The app allows for profile creation to match a handful of your rifles, and it’ll ask you all the basics — caliber, manufacturer, bullet, ballistic model — and even a few intimate details to make sure it knows your gun inside and out. Remember: This is the brain that feeds the entire system the necessary data.
If you’ve previously worked at all with a ballistic app, this is going to be old hat. And once you’re in the field, you can update the Sig BDX app with environmental conditions, including altitude, temperature, wind speed and wind direction. The more you can help BDX, the more BDX can help you in return. Precision is the name of the game here.
Via Bluetooth, exactly like when your phone tells your truck what songs to play through the speakers, the BDX app uses your smartphone to translate all your rifle’s ballistic information (remember what you shared with your app about the Battle Axe?) with the rangefinder.
The Translator
The Kilo rangefinder is the middle man in this system. It takes your rifle’s ballistic information and the environmental information you input into the app, and it cross-references all that with real-time range readings — and then translates and feeds that info to the riflescope.
At present, there are four Kilos in the BDX system: 1400, 1800, 2200 and 2400 — starting at $299.99. The Kilo2400BDX also features built-in environmental-reading capabilities.
Once your phone and the rangefinder are paired, the Kilo operates exactly as any other rangefinder does: Press a button to get the digital display to wake up and then press away to range to your heart’s desire — it’s talking to your riflescope via Bluetooth the entire time.
The Eyes
There are currently four Sierra3 riflescopes compatible with the BDX system: 3.5-10x42mm, 4.5-14x44mm, 4.5-14x50mm and 6.5-20x52mm — with prices starting at $599.99.
On the outside, the Sierra3 looks like most any other riflescope — almost. On the magnification adjustment ring, there’s a small blue light that indicates when the rangefinder has locked a range and successfully transmitted that information to the Sierra3.
Everything up to this point — the profile information uploaded to the app, the environmental data, the range provided by the Kilo rangefinder — everything has been a building block to make sure that when you look into the scope and prepare to pull the trigger, the correct holdover dot in the reticle is exactly where it should be. Place the yellow dot where you want the bullet to impact and go to work.
Peace Of Mind
There’s a lot going on in this system that must fall into the trust category. The beauty of this system is that you’re allowing it to completely calculate your hold point. The scary part of this system is that you’re allowing it to completely calculate your hold point.
When the Sierra3 is searching for data from the rangefinder, the blue indicator light on the magnification ring flashes slowly. When the data had been locked, the blue light glows solid. And because things can happen quickly, the light flashes quickly when there’s new holdover dot update from the rangefinder. Think of it as your riflescope letting you know what it’s thinking through Morse code. There still needs to be trust that everything is going to work and that trust must come through range time, but that little blue indicator light is a nice visual addition to affirm that all the guts are working correctly.
Just A Riflescope
Minus the blue indicator light (which is not really noticeable then the scope is off), the Sierra3BDX riflescopes look and operate like any other “traditional” riflescope. Each wears HD glass, a 30mm maintube, side-focus parallax adjustments and Sig’s LevelPlex digital anti-cant system. And when the system is shut down, the reticle looks like any other duplex configuration.
Changing Winds
There’s no doubt the entire BDX System is going to rattle a few cages. Sig knows this. And, quite frankly, it took me a bit of thought to settle on the moral conclusion that this entire system is set up to force the shooter to do more work on the front end though data input so that there’s less room for computation errors on the back end — during the shot.
Editor’s Note: This article originally appeared in the August 2018 issue of Gun Digest the Magazine.
Popular in the mid to late 19th Century, the cane gun was the choice of the well-dressed armed citizen.
Compact, polymer-framed pistols dominate concealed carry nowadays, but it wasn’t always that way. Long before the plastic fantastics and even snubby revolvers, a completely different, arguably odd class of firearms gained favor for everyday carry. Though, in many cases, the guns tended to look like anything but a gun. That was the whole idea.
Popular in the mid to late 19th Century, cane guns and other clandestine firearms were all the rage. Wholly impractical in use, the guns nonetheless gained a toehold among a particular class of armed citizen. In particular, the more gentlemanly types. At the time, the well-dressed man simply did not leave home without a cane. What better accessory to build a gun around? They’d been sticking swords into them for some time, after all.
Cane gun manufacturers abounded, among the most regarded was Remington. From 1858 until 1888, the company produced nearly 5,000 of the firearms, originally designed by J.F. Thomas. The gunmaker first built .31 and .44 caliber black powder percussion-cap models, later .22 and .32 caliber rimfire versions. In any case, the gun delivered a thief or villain a nasty surprise, biding the owner of the secreted firearm could cock, deploy the hidden trigger and aim before having their head stove-in with a barrel stave or cobblestone. Long odds, but better than nothing.
Canes guns are the tip of the iceberg when it comes to clandestine firearms. Pocketknives, iron keys, writing utensils, pocket watches, belt buckles, you name it, at some point an inventive soul has outfitted the common object with an ignition system and trigger. Sadly, these dual-purpose gadgets typically performed subpar in their original and self-defense roles.
For more information on the NRA Museum, please visit: www.nramuseum.org.
Looking to go armed, but are stuck in the weeds as to what to arm yourself with? Here are 20 of the best concealed carry gun options that will keep you on the defensive.