Amazon isn’t exactly the first place you think about gearing up for your next trip to the range or out hunting. Furthermore, outwardly the eCommerce giant isn’t even all that firearms friendly. Hunt around the shadows of the retailer and it’s a different story. As long as it’s not gun proper or ammunition there’s plenty of gear to get you shooting straight. And there’s no better time to pick out a choice piece of kit than now.
It’s Amazon Prime Day until midnight Oct. 14, giving Prime members the opportunity at excellent deals from the retailer. This includes a good deal of gun accessories, gunsmithing tools and other firearms-related gear. We combed through the site to see what we could see and came up with 10 firearms Prime Day deals worth taking a gander at.
Also, you might consider checking out the Amazon Smiles program, which allows you to donate to your favorite charity through a purchase. Word is Gun Owners of America and other gun rights groups are part of the program, allowing you to give a boost to the 2A community while you shop.
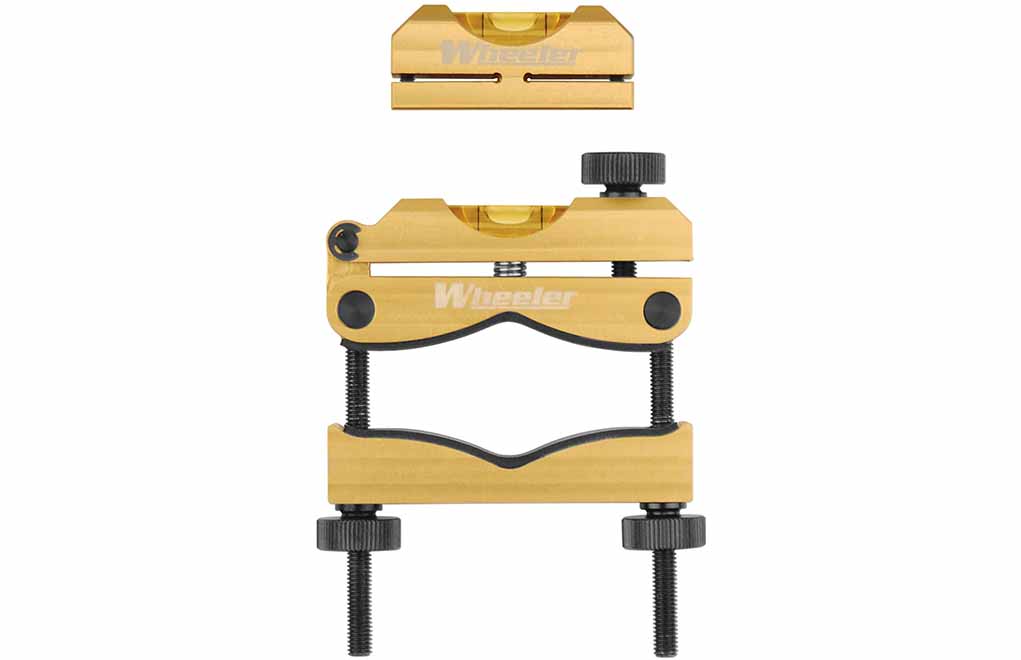
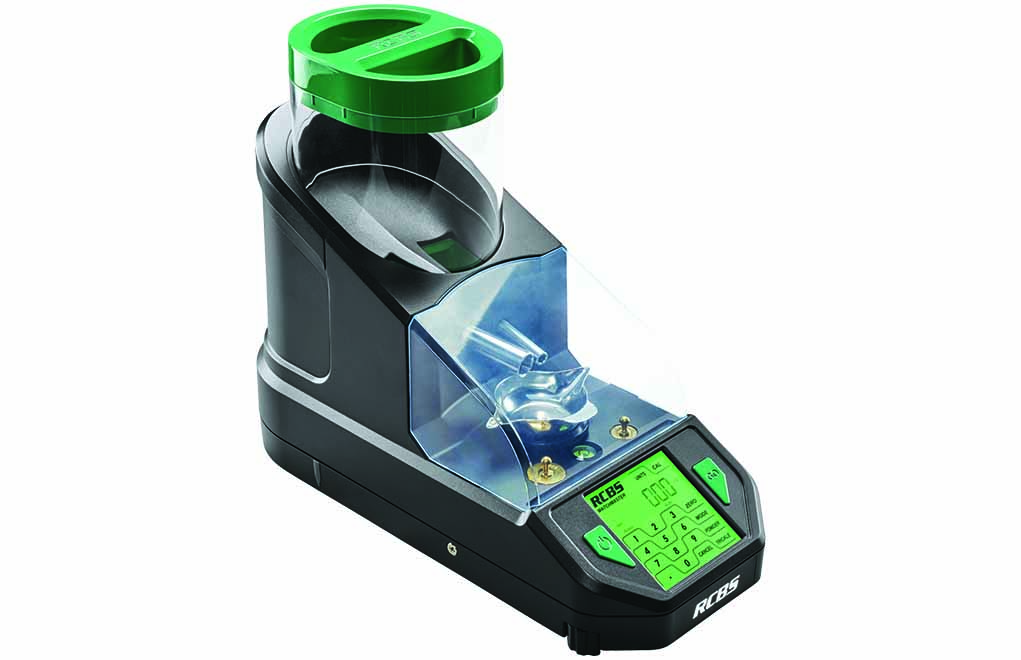
Wheeler Engineering Professional Reticle Leveling System
A precision tool ensuring your scope is perfectly leveled, thus accurate to the utmost. Quality CNC machined to tight specs, the system is comprised of two aluminum level housings calibrated to their integrated levels—barrel clamp and reference. Takes all the guesswork out of mounting a scope.
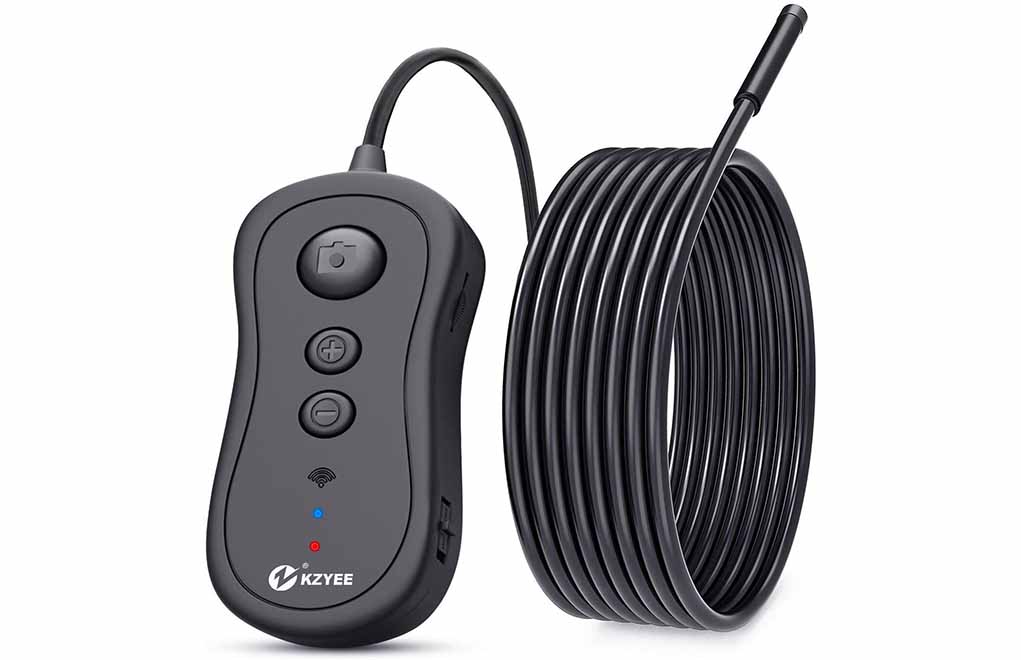
KZYEE Wireless Borescope
No more wondering how your bore is holding up once you invest in a borescope. KZYEE’s version is especially handy, linking up to a smart device via WiFi to give you a clear view of the interior of your barrel. Features adjustable resolutions of 1920×1080, 1280×720, 640×480, 2 MP camera, semi-rigid snake and 6 dimmable LED lights.
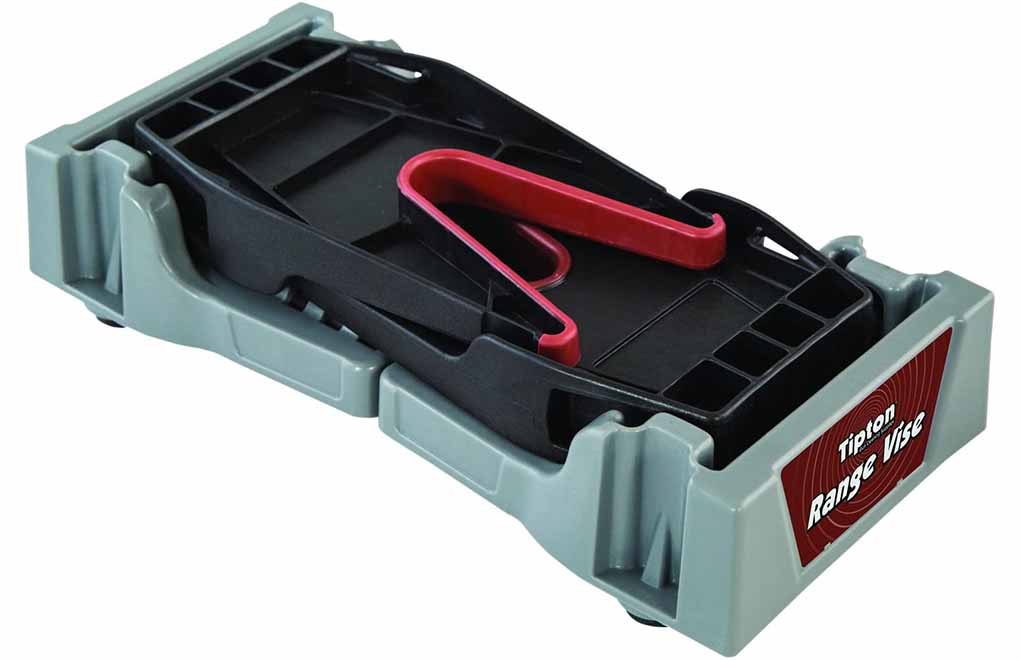
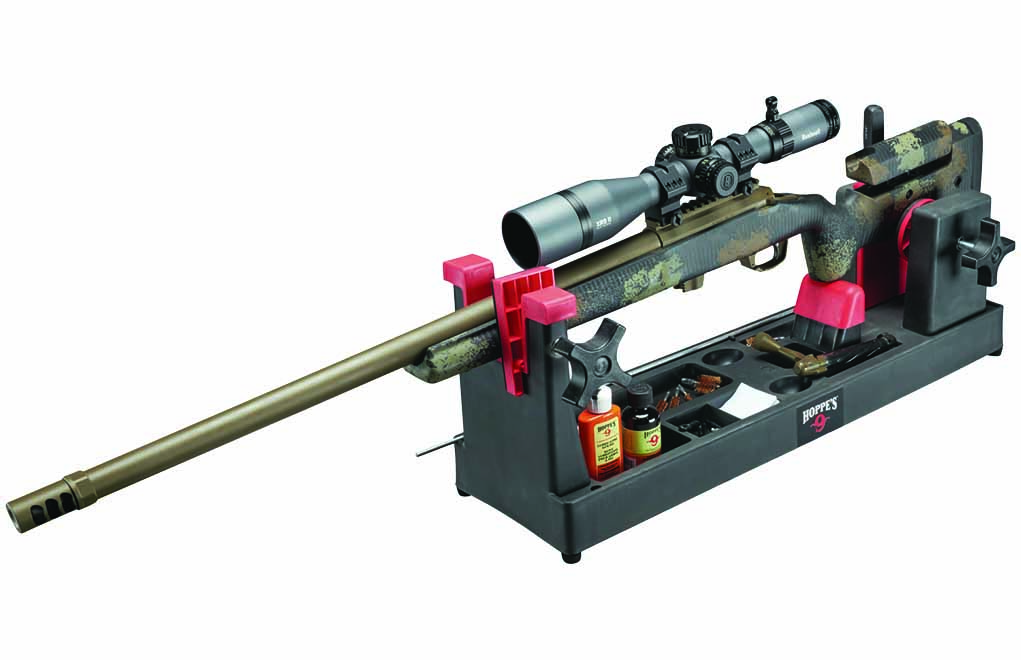
Tipton Compact Range Vise
The perfect addition to a range bag or to save space in your gun maintenance area. Collapsing to 11-1/4-inch, the Tipton vise is sized right to go on the road or store in a small cabinet. But expand it and you have a full 17-3/4-inch workspace that keeps your firearms secure while you clean or tinker with them. Constructed of durable nylon, the vise is solvent-resistant and made to deliver for years.
Three Affordable Chronograph Options To Check Your Speed
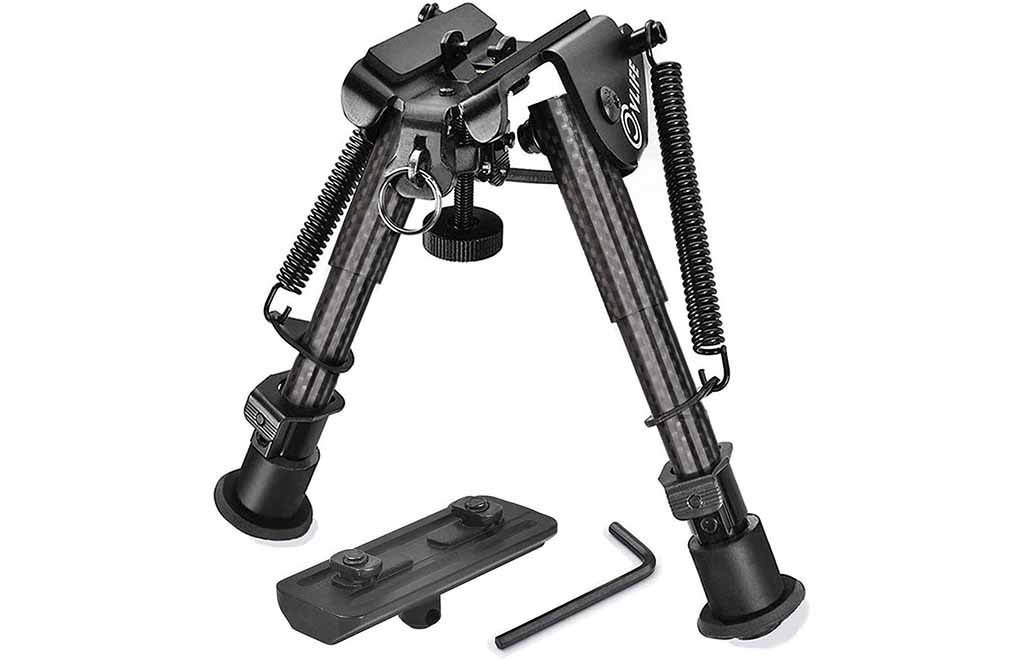
CVLIFE Carbon Fiber Rifle Bipod
Providing all the support at a fraction of the weight, the CVLIFE Carbon Fiber bipod is an excellent addition to any precision rifle. Attaching via the ubiquitous M-LOK system, the bipod is compatible with a majority of modern rifles. Provides 6 to 9 inches of rise without throwing a rifle out of balance for an off-hand shot.
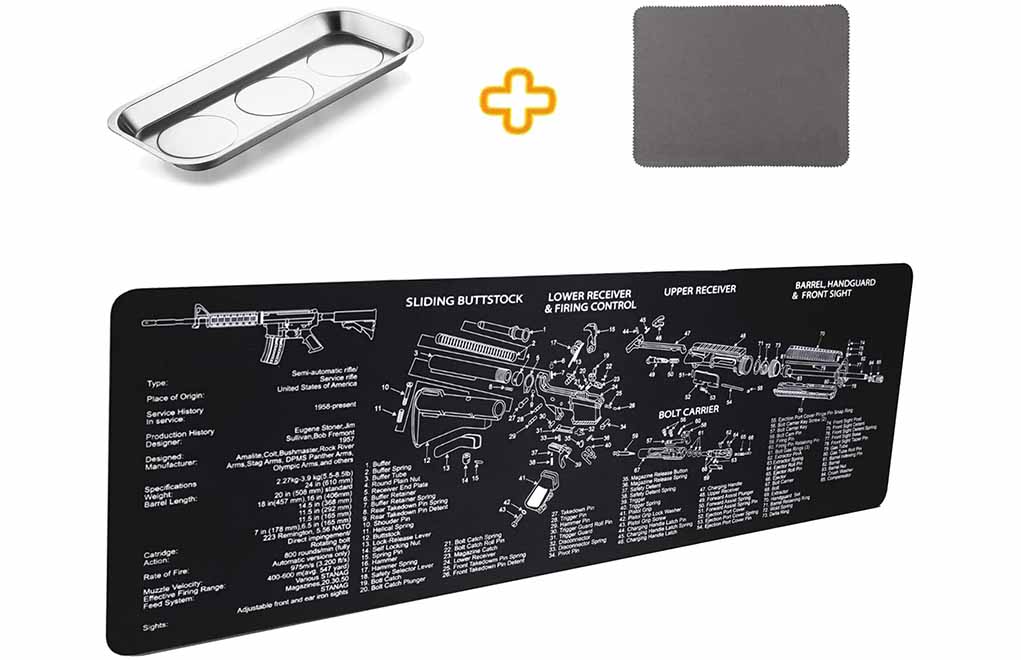
YFEEX AR-15 Gun Cleaning Mat Pad
The exploded drawing of an AR-15 is a nice touch, perhaps even handy. But the entire gun mat system is what takes the cake. Not only do you get a handy 36.2×12.2-inch solvent-resistant surface to clean your guns, but you also get a magnetic parts tray and cleaning cloth in the deal. Not bad.
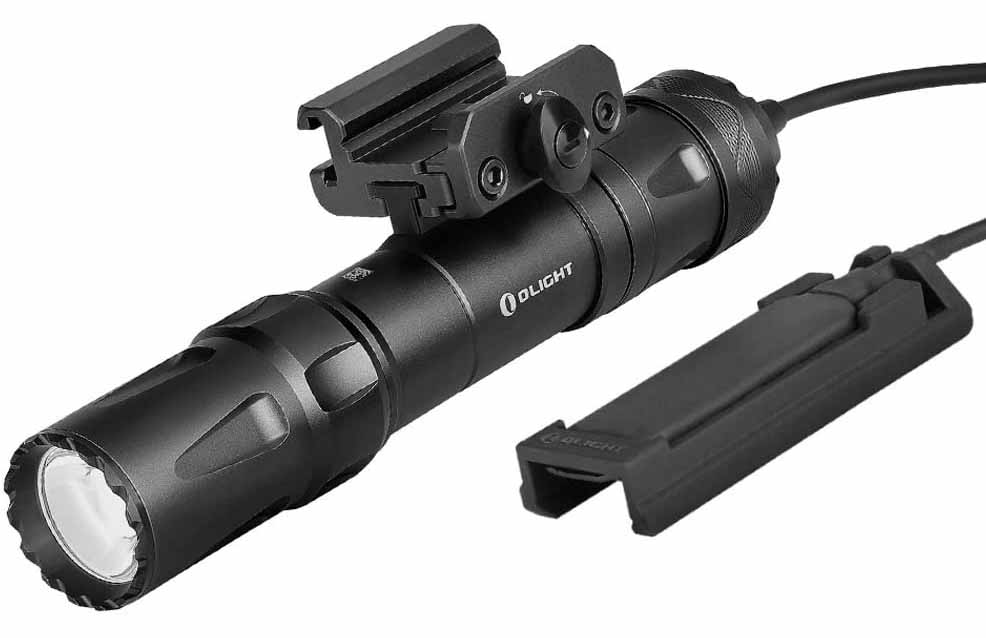
Your carbine needs light. OLIGHT’S Odin is an excellent option to get the job done. Compatible with Picatinny mounts, the torch produces 2,000 lumens of light, capable of reaching 300 meters. Powers on and off through both a tail cap switch and a remote pressure switch. Best of all, the unit is rechargeable.
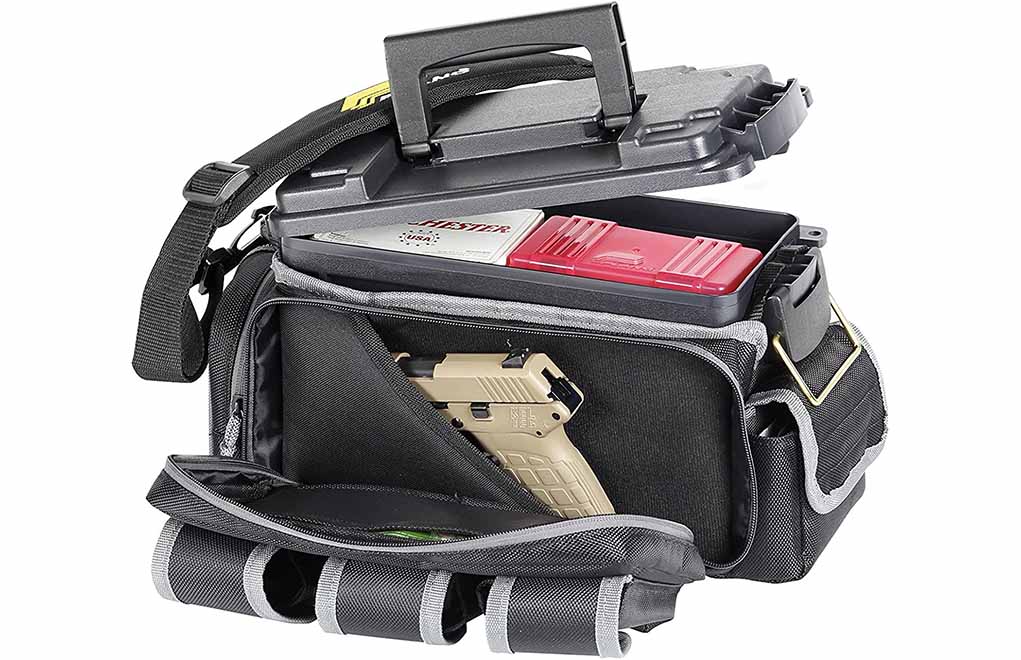
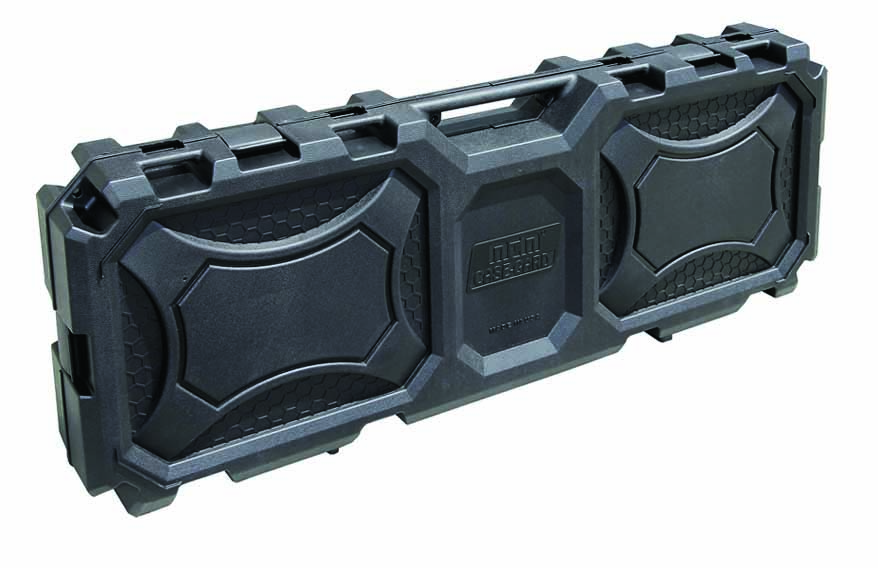
Plano 1312 X2 Range Bag
You need something to get your guns and gear to the range. Plano has you covered. A large outer pocket is perfect for guns, shooting accessories, tools or personal items. Three external magazine pouches keep ammo at hand. Integral gun mat gives you space to work on your pistol. And large internal well holds a 1312 ammo can.
LOCKDOWN Dehumidifier Rod
Next to thieves, humidity is your guns’ worst enemy. LOCKDOWN keeps them protected with its Dehumidifier Rods—a must for any gun safe. Slightly increasing and maintaining the air temperature inside the gun safe, the device allows warm air to circulate throughout the safe continually, thus eliminating humidity, mildew, and condensation.
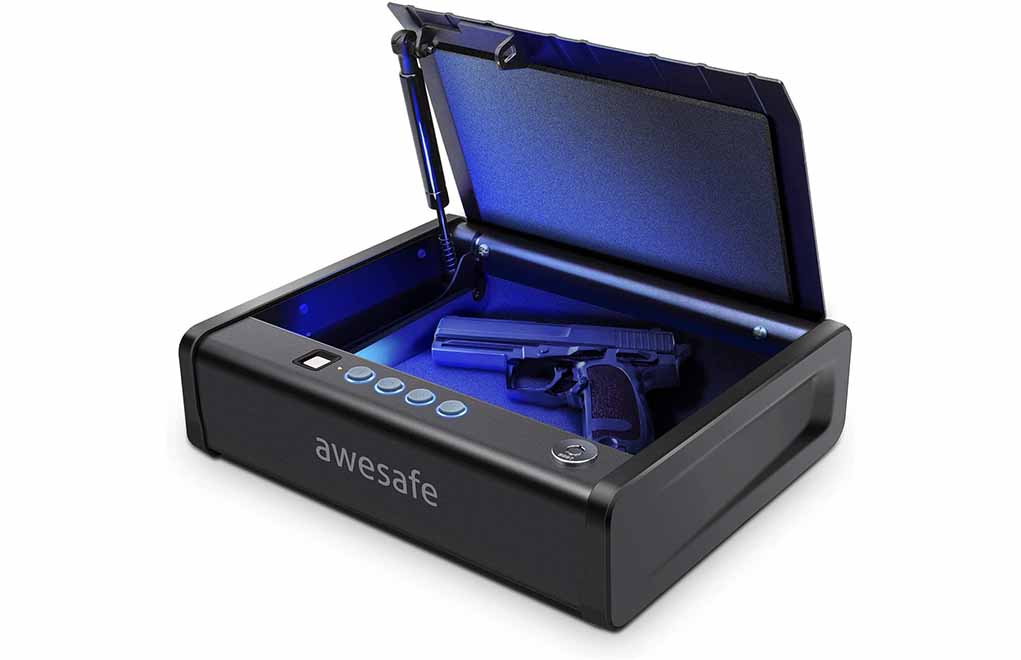
awesafe Quick Access Handgun Gun Safe
Keeping your handgun under lock and key, but within reach, awesafe’s quick-access model is perfect for a home-defense gun. Featuring both biometric and push-code entry, you can unlock the safe one-handed. Once unlocked, a gas strut opens the lid and a soft blue light illuminates the interior. Made of solid steel sheets and pry-resistant.
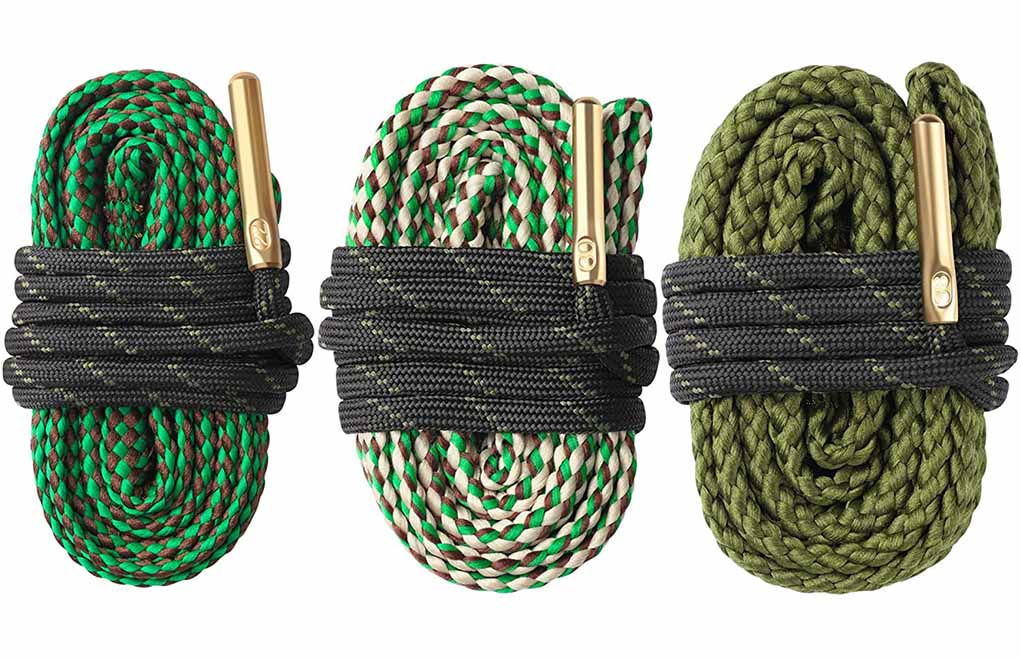
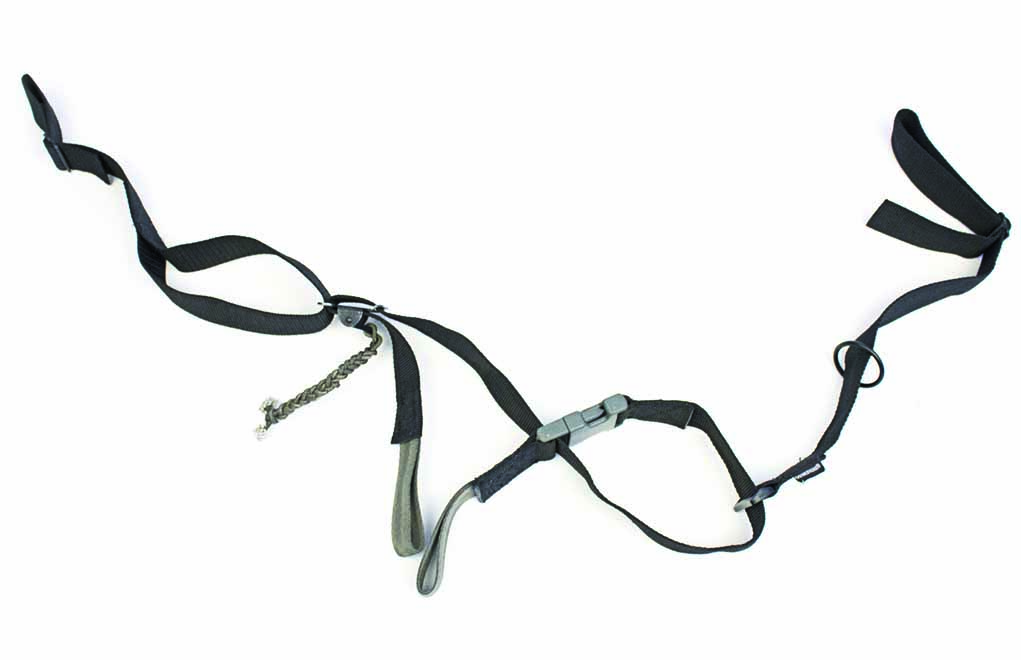
Feyachi Gun Bore Snake
In short, this is handy as all get out. Even if you prefer a cleaning rod to get the job done, a bore snake is a convenient and portable alternative when you’re at the range or in the field. Made of durable nylon with a brass bore brush embedded in the cord, a swipe or two will get your rifle or pistol clean as a whistle.
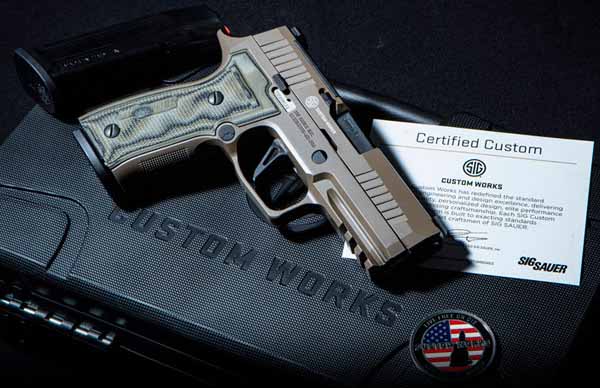
Marking a new direction for the pistol, the P320 AXG Scorpion is the first commercially available metal-framed pistol in the series.
Important Points Of The P320 AXG Scorpion:
Boasts 31.3-ounce aluminum-alloy grip module.
Hogue G10 Piranha grip panels and rear insert come standard.
Outfitted with X-Series flat skeleton trigger.
Comes with XRay3 Day/Night sights with U-notch rear.
Features X-Series Optic ready slide, compatible with SIG Romeo 1PRO, Leupold Delta Point Pro, or Trijicon RMR red dots.
Running like a prairie fire, Sig Sauer has burned through the handgun market in recent years. Not that the gunmaker hasn’t always been a major player, it’s minted some out-and-out classics in its decades of turning out pistols. But since the release of the P360, it’s adoption by the U.S. Military, and following up with the P365, the company has been white-hot. Looking to continue this streak, Sig recently released an enhanced version of its popular modular polymer-framed, striker-fired pistol it’s dubbed P320 AXG Scorpion.
Not attempting to reinvent the wheel, the pistol retains all the P320’s popular features that won the handgun legions of fans in the first place. Chief among these, a modular chassis system. For those not familiar with this bit of gun tech, the fire control mechanism is the serialized part, meaning it is considered the gun. Thus, shooters can remove it and jump from frame to frame to match their pistol’s size and configuration to meet their particular needs at the moment. Pretty clever.
Sig builds off this ingenious piece of engineering in the P320 AXG Scorpion with a number of structural and ergonomic improvements for arguably a more rugged and intuitive iron. Most distinctive, the AXG Scorpion’s Alloy XSERIES Grip module.
“The P320 AXG Scorpion is an exciting product introduction because it’s our very first commercially available metal P320, and the first pistol release from SIG Custom Works,” said Tom Taylor, Sig’s Chief Marketing Officer and Executive Vice President, Commercial Sales. “The P320 AXG Scorpion combines the weight and balance of a metal-framed pistol with the performance and reliability of the P320, delivering a uniquely refined shooting experience unlike anything else. This SIG Custom Works exclusive delivers performance you can feel.”
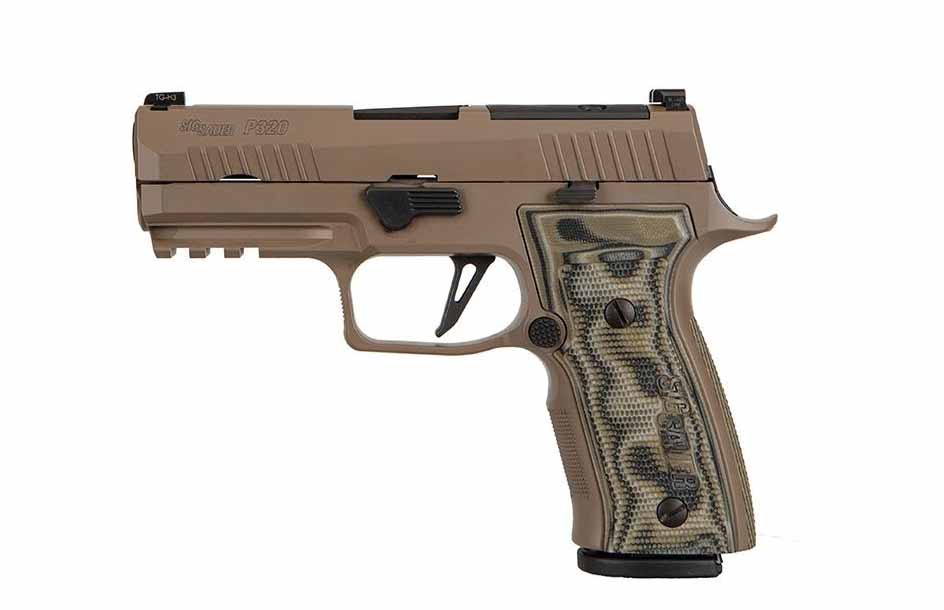
With the same dimensions as the P320 Compact, the 3.9-inch barreled AXG Scorpion has an additional 5-ounces of heft. At 31.3 ounces, the 9mm is still very much an EDC candidate, one that should prove a mild-mannered shooter, producing less felt recoil and muzzle flip. Competent shooters should be capable of running the pistol fast, thanks to its weight, without worry of accuracy degeneration.
Sig outfits the P320 AXG Scorpion with the upgrades to let it run. These include the very positive Hogue G10 Piranha grip panels and rear insert, X-Series flat skeleton trigger and XRay3 Day/Night sights with U-notch rear. Additionally, the pistol features an X-Series Optic ready slide, compatible with SIG Romeo 1PRO, Leupold Delta Point Pro, or Trijicon RMR red dots.
The pistol is finished in a flat dark earth Cerakote and ships with three 17-round magazines, Sig Custom Works Case, challenge coin and certificate of authenticity. As to price, the P320 AXG Scorpion has an MSPR of $1,129.99, so expect it around $1,000 when it hits your local gun store’s shelves.
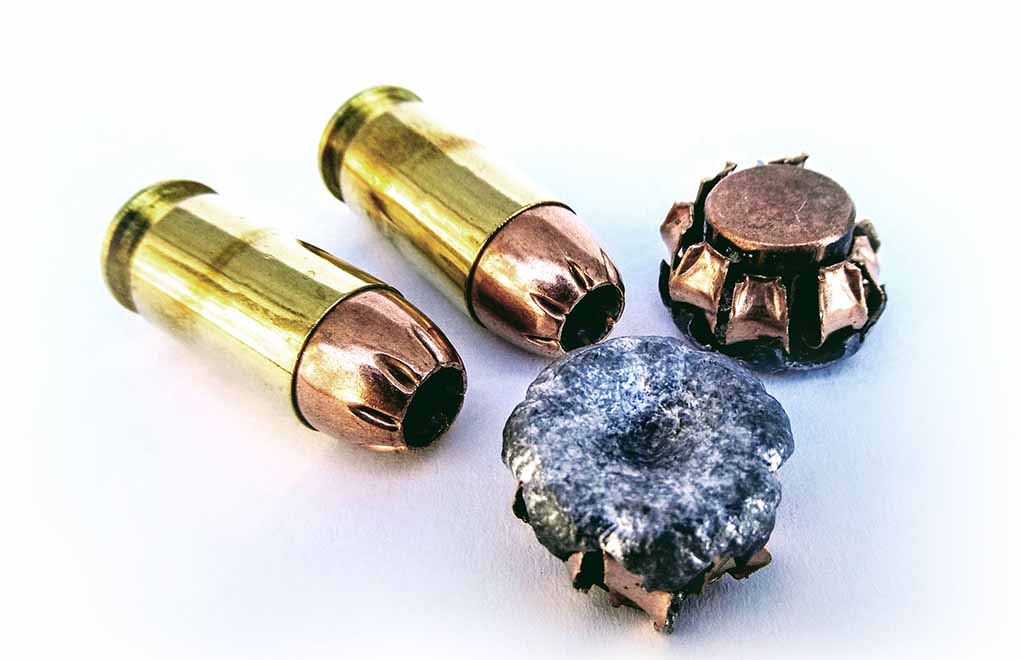
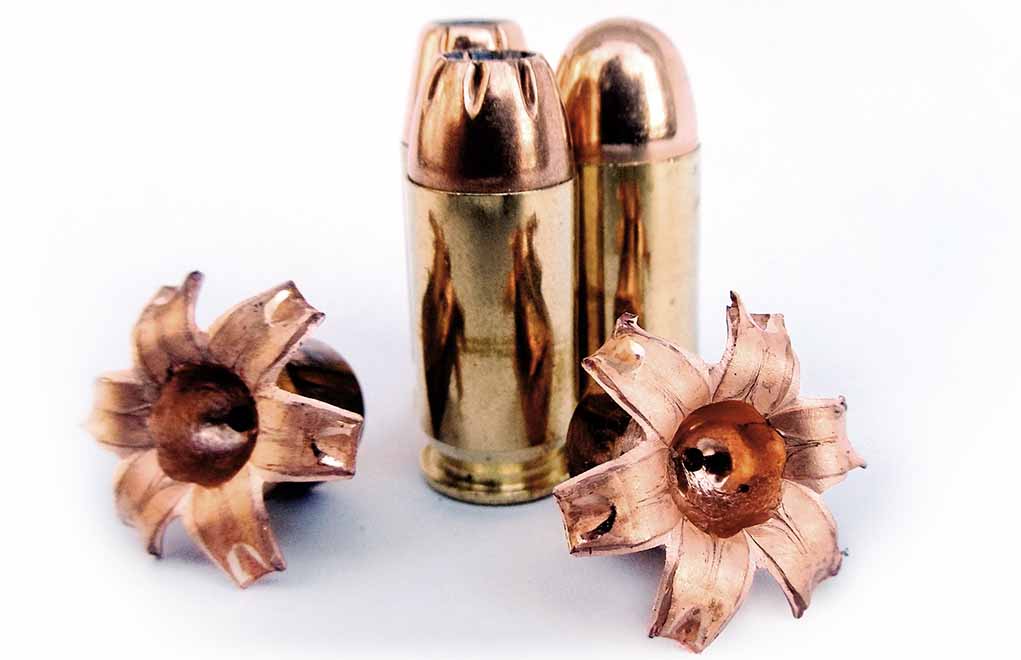
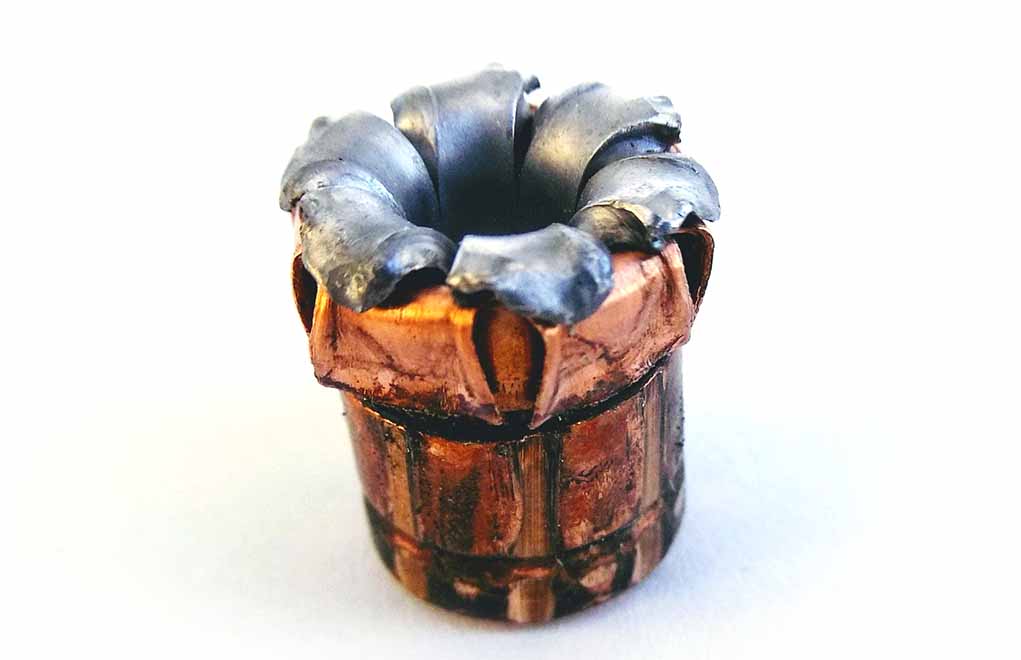
The Black Hills 230-grain JHP+P provides dramatic and devastating expansion. In addition, it’s a very tough bullet with great weight retention. This bullet expands reliably, even out of short barrels on carry guns.
Don’t believe the hype over the .45 ACP as some dusty relic of a bygone era. The cartridge is better than ever and is here for the long haul.
A Few Reasons Why The .45 ACP Still Rules The Roost:
Tested in countless wars, Americans have an inherent trust in the cartridge.
While leveled somewhat by modern bullets, the .45 still punches a larger hole in a target.
Inherently a subsonic cartridge, it funtions well out of nearly every barrel length.
Americans did not develop the first handguns in the world. However, it can be said that we were truly the first country to create a culture surrounding the handgun. The story of this is also the tale of what is arguably the quintessential American handgun cartridge: The .45 ACP has survived into our modern era, and today, it’s better than ever. However, its relevance is hotly debated.
To really understand why the .45 ACP has lasted as long as it has, all you have to do is look at the tumultuous era of design that existed in the second half of the 20th century. From the time it was introduced prior to World War I until it was (mostly) replaced in the 1980s, there really wasn’t anything better out there.
Establishing Trust
There’s a reason Americans trust the .45 bore. Every time the country goes into battle with some smaller or lighter ammo type, disaster often follows. This was true when the .38-caliber was issued to replace the .45 Colt, and it was again true when the 9mm was adopted to replace the .45 ACP.
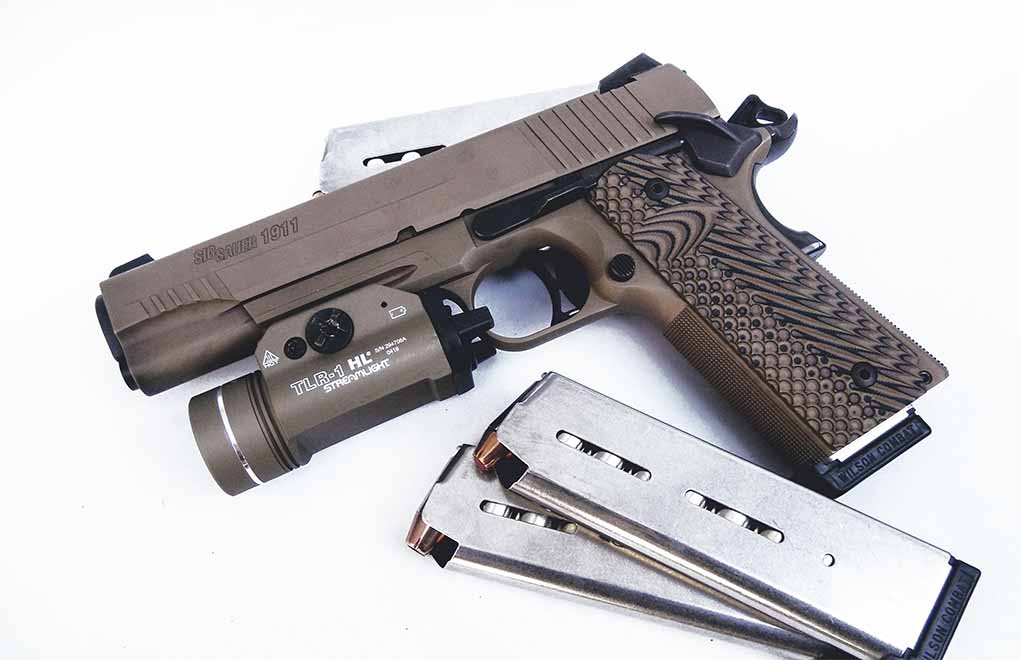
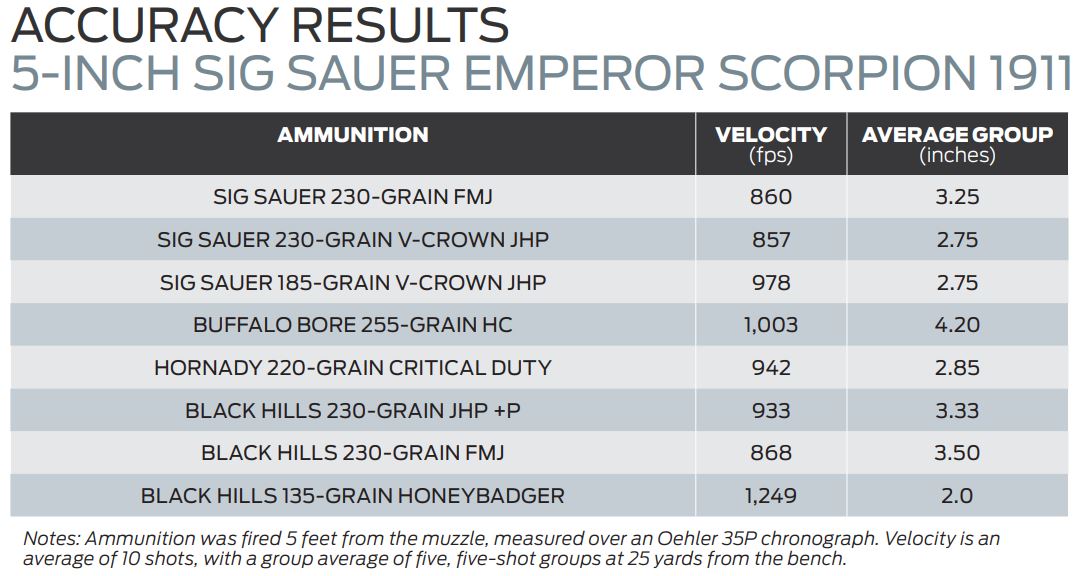
Sig Sauer’s Emperor Scorpion 1911 is one of the better production guns you can buy today. This pistol is rugged, reliable and very accurate.
Because of the terrible combat in the Philippines during the Moro Rebellion (1902–1913), the military wanted a modern gun equal in power to the .45 Colt. It could be said that the American experience in the Philippines soured our view of .38-caliber weapons—including 9mm. A new round was needed, and the choice was the long-standing American favorite, .45-caliber. History happens fast, and by 1904, a design was ready.
Many detractors of the .45 ACP see it as an antiquated round designed around a poor understanding of ballistics in botched tests. While it’s true that the round was developed, at least in part, by shooting corpses and animals, the results can’t be argued with. The engineers responsible for the .45 ACP—including one John Moses Browning—used the best methods of data collection available at the time and delivered a 230-grain bullet at 850 fps. This became the baseline standard for multiple generations of gunfighters and the round to beat for the next 100 years.
The trust forged between Americans and the .45 ACP made it the sidearm cartridge-of-choice in virtually every conflict to date. This further reinforced the relationship the cartridge had with the shooting public. Even today, many other cartridges designed to replace or improve upon the .45 ACP have fallen short.
There are many other options in .45 ACP than just ball loads.
Americans truly trust the .45 ACP and the 1911 platform, even if ballistics science says there are better options. A 1911 in .45 ACP is culture. Cartridges such as the .40 S&W and 10mm Auto were supposed to do away with .45 ACP. They didn’t.
Even groundbreaking cartridges such as the 6.5 Creedmoor have struggled with maintaining relevance. The greatest merit that the 6.5 CM had was that it offered an improvement over .308 Winchester in an identically sized rifle. There are already rounds that exceed the 6.5 CM in many arenas: 6mm Creedmoor, 6.5 PRC and others like them.
The same thing happened to 10mm Auto: It’s a popular niche round today, but it’s nowhere near the level of .45 ACP in terms of mass acceptance. The trust just isn’t there for most firearms consumers and, in most cases, it’s seen as a “boutique” solution to a non-existent problem.
When we look at how bullets have improved, even in the past 10 years, there’s a significant and valid trend going toward the 9mm in carry guns, law enforcement and military use. As far as technology is concerned, it’s improved substantially. Recent studies by the FBI and others have confirmed that when using modern jacketed, hollow-point, high-performance ammunition, there’s very little difference between major law enforcement calibers such as 9mm, .40 S&W and .45 ACP. The studies essentially confirmed that 9mm can accomplish the same thing as the other two when using modern ammunition.
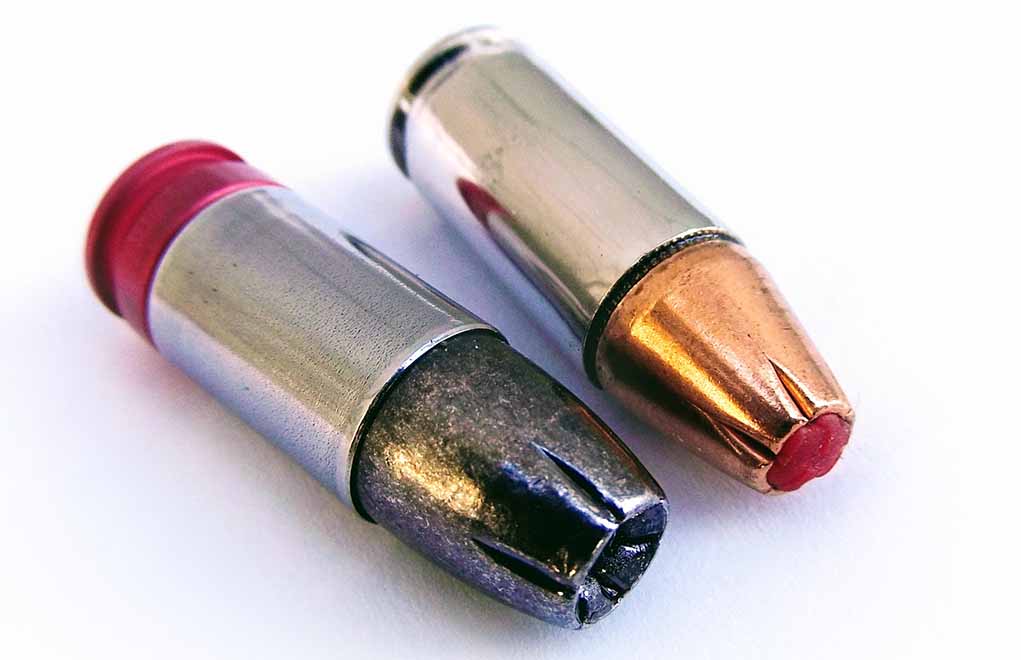
In terms of popularity, the 9mm is the foremost competitor of the .45 ACP. The Seismic 185-grain cartridge (left) offers the highest bullet weight for 9mm, as well as high sectional density. The Hornady 135-grain Critical Duty +P is a state-of-the-art 9mm load that’s an example of why the 9mm is so good today.
However, there’s a pretty big difference when looking at FMJ ammo and military bullets. The .45 ACP offers a tremendous advantage in this respect, and we haven’t really had a need to go the same distance in technology with the .45 ACP.
Another area to address is velocity. The .45 ACP is an inherently subsonic cartridge that’s designed for optimum performance at those lower speeds. It’s difficult to find a .45 ACP cartridge that doesn’t function well. There isn’t a large degree of difference in performance from barrels between 3 and 6 inches, considering that there isn’t a large disparity in velocity between those barrel lengths. Jacketed hollow-points and other expanding ammunition will typically work just as well in a compact .45 or a full-sized pistol. Many types of 9mm ammunition aren’t geared toward low velocity. Sometimes, there are significant performance gaps between compact carry guns and full-sized duty guns.
There are certainly ammunition types that have come about recently that offer a tremendous upgrade to this classic. Among these is the advent of non-expanding fluted projectiles such as Black Hills Ammunition’s HoneyBadger line.
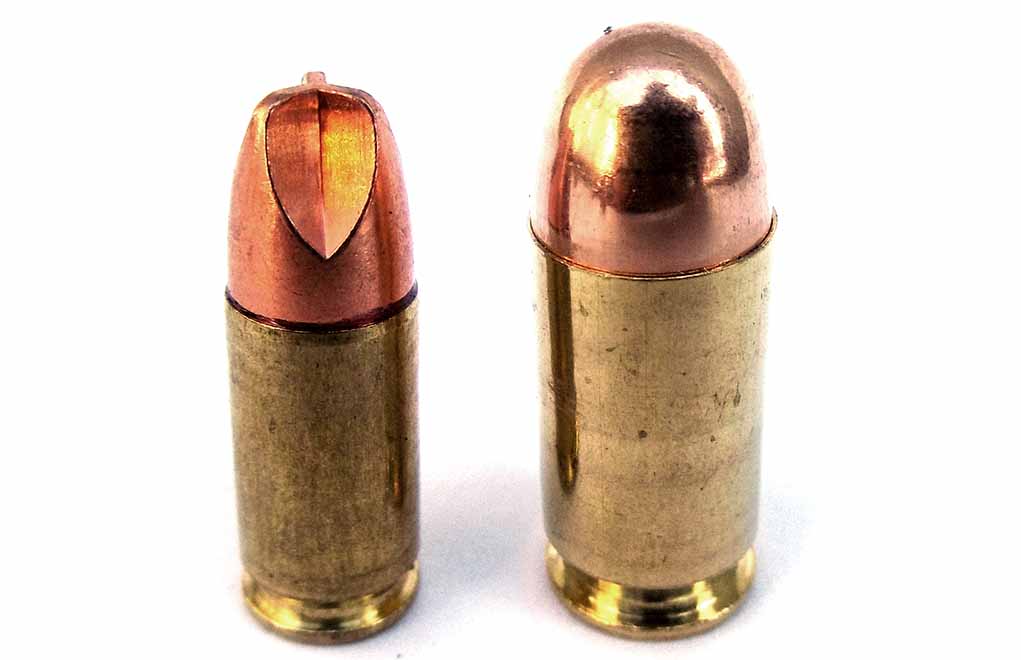
The Black Hills 125-grain Subsonic HoneyBadger in 9mm has flutes cut to increase effectiveness at low speed. The old-school 23-grain FMJ is ready to go at subsonic velocities—just as it was over a century ago.
This ammunition takes the .45 ACP to a different level of performance through penetration and tissue displacement. While smaller calibers benefit the most from this type of bullet, what it offers for rounds such as the .45 ACP is nothing short of stunning. The bullets behave almost like an FMJ but are able to penetrate a diverse range of materials with no risk of clogging, as will a hollow-point. Damage is then done not through expansion, but by means of the rotation of the bullet, itself, causing tissue displacement. The ammunition is also significantly more accurate than many cup-and-core-style bullets or hollow-points.
Another incredible, yet extremely rustic, ammunition offered for the .45 ACP comes in the form of hardcast lead from Buffalo Bore, which is known for producing some of the most powerful ammunition on the market. The 255-grain hardcast load is quite powerful and can throw a bullet at 1,000 fps from a 5-inch barrel. Penetration in gel is dramatic, with bullets commonly passing completely through 36 inches of bare gelatin. This particular load is as powerful as the original black powder .45 Colt loads for the 7½-inch Single Action Army … which is saying something!
Long Live the 1911
It’s impossible to have a discussion about the .45 ACP without looking at the 1911 pistol. The two are forever linked. There have, of course, been other calibers of 1911 made, although none ever achieved the popularity in the 1911 platform as the .45 ACP has.
The Hornady 220-grain Critical Duty features a tough bullet that’s excellent at weight retention and barrier penetration. It’s one of the more powerful loads out there for your .45 ACP pistol.
The 1911 is an old, outdated and overcomplicated “dinosaur” that can be fickle as far as ammo goes. It needs tuning, hand-fitting of parts as benign as safeties and sights, and it can be picky with magazines. The descriptor, “drop-in,” has a completely different meaning with the 1911 than it does with Glock pistols and AR rifles. The idea that you’d have to file something is foreign to many modern gun builders. To work on a 1911 is to have deep knowledge of everything from staking sights to hand-filing slide rails. You also need the right tools.
Despite all that, it’s still the single greatest handgun ever designed. It has its flaws, but there’s a big difference between a well-built 1911 and everything else out there. You feel a sense of confidence when you put your hand on one: The 1911 and the .45 ACP get the job done.
Today’s 1911 pistols are typically quite good from the factory. Most are ready to run, right out of the box, and they don’t need much tuning. Unlike many modern guns, 1911s are, by nature, tight fitting and sometimes require a few hundred rounds to get them going.
As more companies began to produce 1911 pistols, the quality of the models went up and became more accessible to more people.
There are a couple schools of thought on this, the first being that a gun that needs break-in is a well-built gun. The other is that the company making it didn’t want to spend the extra time ensuring it was reliable when it shipped. Both have their merits, but it’s a challenge to find a poorly built 1911 behind the counter these days.
The .45 ACP is an American staple. So is the 1911. And they aren’t going anywhere.
Hunting dangerous game requires a cartridge of substantial size, one powerful enough to handle those species that have the potential to turn the tables. There are those who find the lighter cartridges—the 9.3mms and .375s—to be the pinnacle of versatility, because they offer trajectories similar to some of the popular deer cartridges, such as the .308 and .30-06, yet carry enough horsepower to handle even the largest game.
And then there are those who feel that anything smaller than the .500 Jeffery or .500 Nitro Express is a waste of time, because no smaller cartridge could possibly stop a charge. I feel that somewhere in the middle lies the best balance of trajectory, striking power and ease of shooting—those lower .40-caliber cartridges.
Yes, the .various .450s , .470s, .475 and their clones work great. After all, the .450 Nitro Express set the benchmark for dangerous-game cartridges—but their trajectories give up a considerable amount to those lower .40s. And, in comparison to the .375s and 9.3mms, the bullet weight (along with correlative energy) of these lower .40s makes a definite difference when it comes to penetration.
Am I suggesting that cartridges such as the revered .375 H&H Magnum aren’t sufficient for dangerous-game hunting? No sane gun writer would ever put those words in print, and I’m a longtime proponent of the .375. But even with the 350-grain Woodleigh Weldcores, the .375 H&H doesn’t quite hit as hard as the .40s do.
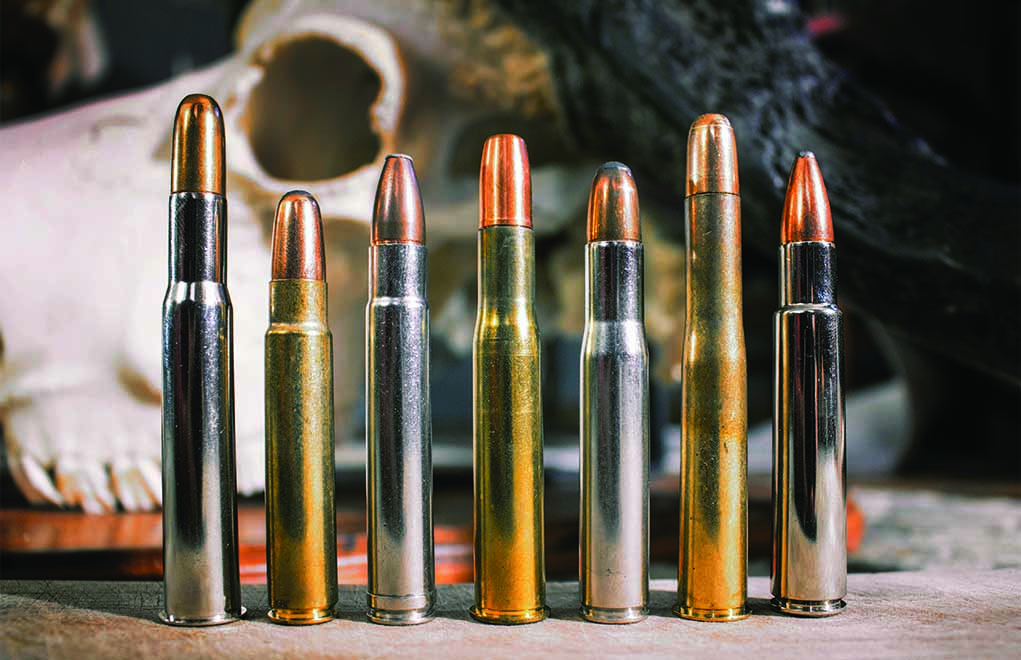
Here’s the crop of the lower .40-caliber cartridges, including their strengths and weaknesses.
.405 Winchester
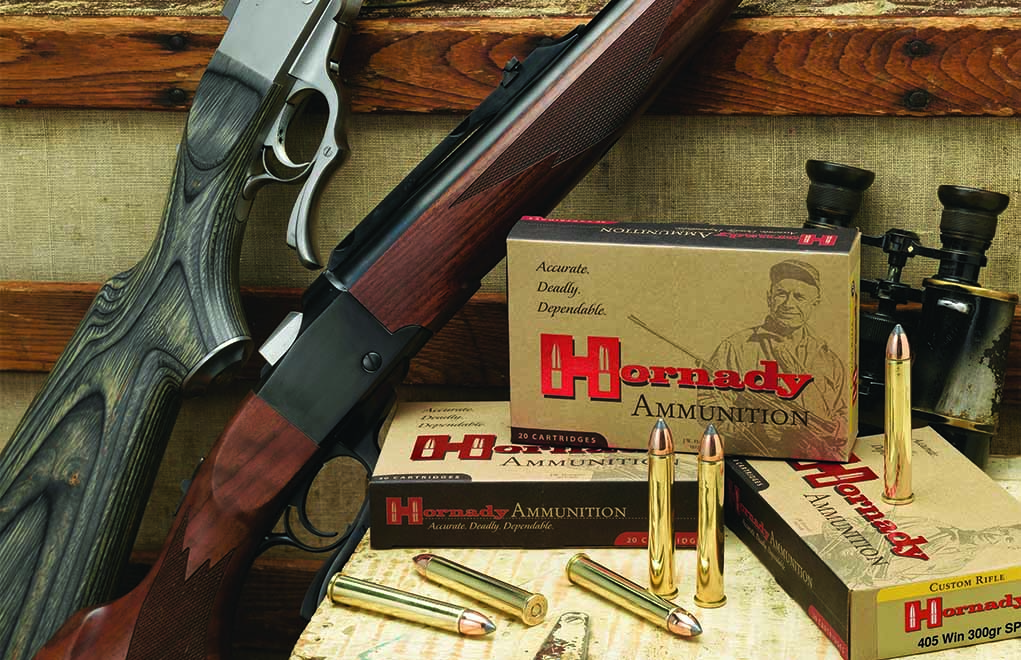
Starting with the least potent of the lot, the .405 Winchester is a straight-walled cartridge released in the Model 1895 Winchester lever-action rifle. It was a particular favorite of Theodore Roosevelt, who dubbed it his “medicine gun” for lions.
Launching a 300-grain, .411-inch-diameter bullet at 2,200 fps for slightly more than 3,200 ft-lb of muzzle energy, the .405 Winchester is definitely light, especially in comparison to the .375 H&H with heavy bullets. Roosevelt used this .40-caliber on lions and other game on his 1909–1910 safari and obviously lived to tell the tale, but I’m of the opinion that there are much better choices.
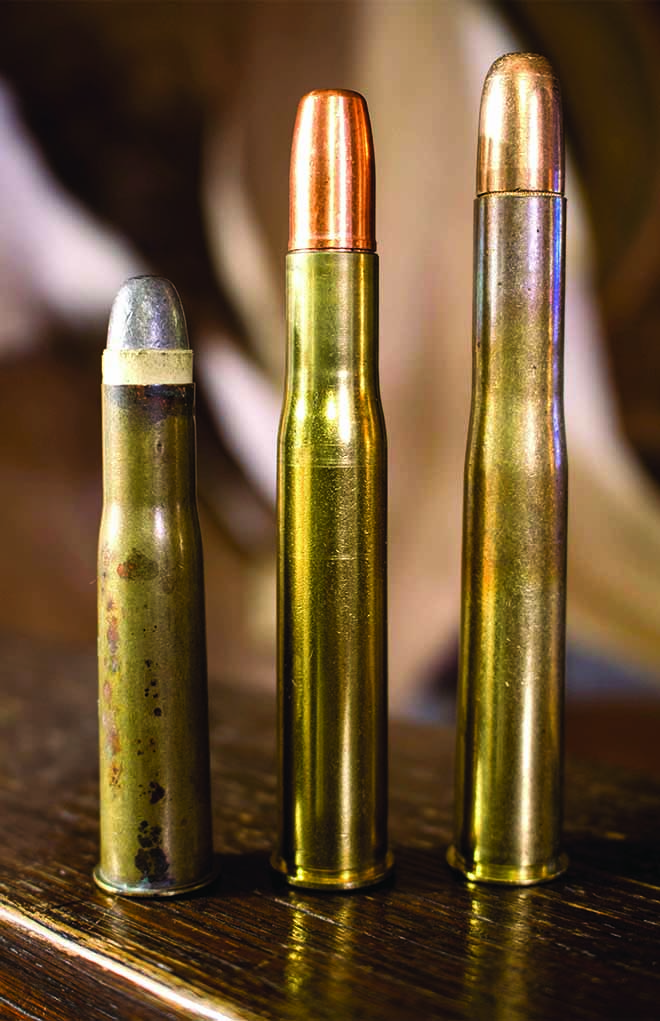
.450-400 3-Inch Nitro Express
Three variations of the .450-400 theme: the 2 3/8-inch; the 3-inch NE; and the 3¼-inch NE.
The .450-400 (the British naming system uses the parent cartridge first) has gone through several iterations, at various lengths (2 3/8 inch, 3 inch and 3¼ inch) and has been fueled by black powder and smokeless alike. The 3-inch variant has been the most popular with many new double rifles, as well as the Ruger No. 1 single-shot, with ammunition produced by Hornady.
Using a .410-inch bullet, the classic .450-400 3-inch load consisted of a 400-grain bullet at 2,050 fps for 3,732 ft-lb of energy. While its paper ballistics indicate that the .375 H&H 300-grain load has more energy (4,263 ft-lb. vs. 3,732 ft-lb), the heavier bullet weight of the .450-400 gives it an advantage in the field.
The old .40-caliber cartridge (released in 1902) was used by Jim Corbett for tiger and leopards in India, as did John “Pondoro” Taylor in Africa. I used this excellent cartridge for a handsome Cape buffalo in Mozambique. It remains a great choice for a light-recoiling double-rifle cartridge capable of handling all game, including elephant. The .450-400 3-inch is also known as the .400 Jeffery.
.400 H&H Magnum
An obscure offering from Holland & Holland, this .40-caliber is usually revered by its users. Based on the belted .375 H&H case, using an 8-degree shoulder and the .411-inch-diameter bullets of the .450-400, the .400 H&H hasn’t really caught on. Yet, pushing a 400-grain bullet to 2,375 fps is a recipe that’ll most certainly have great success in the field. While I think the ship has sailed, there’s nothing wrong with using a .400 H&H for all dangerous-game hunting.
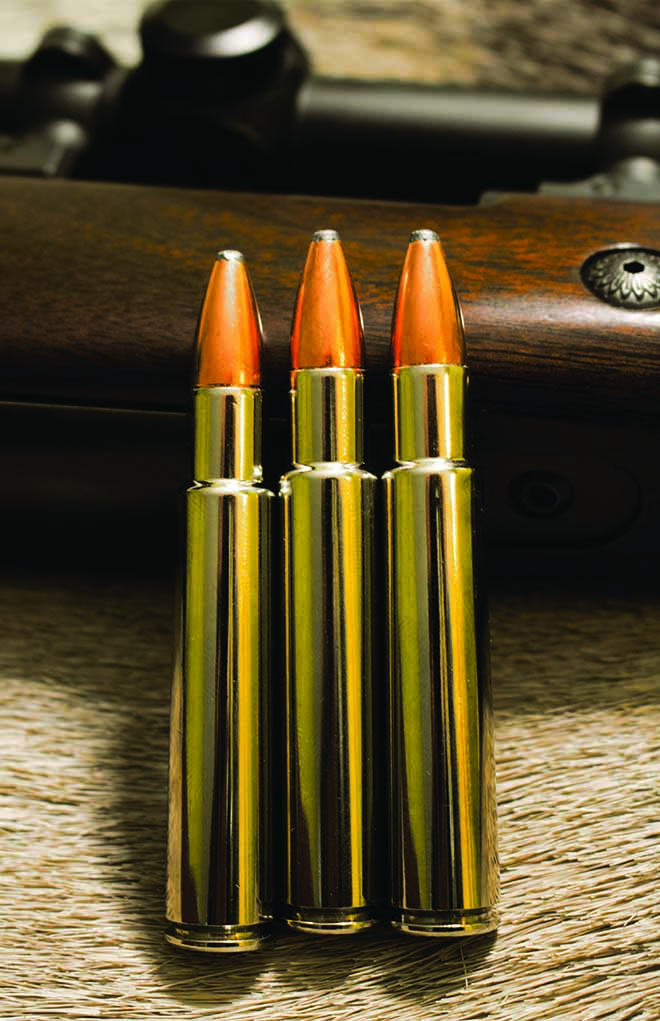
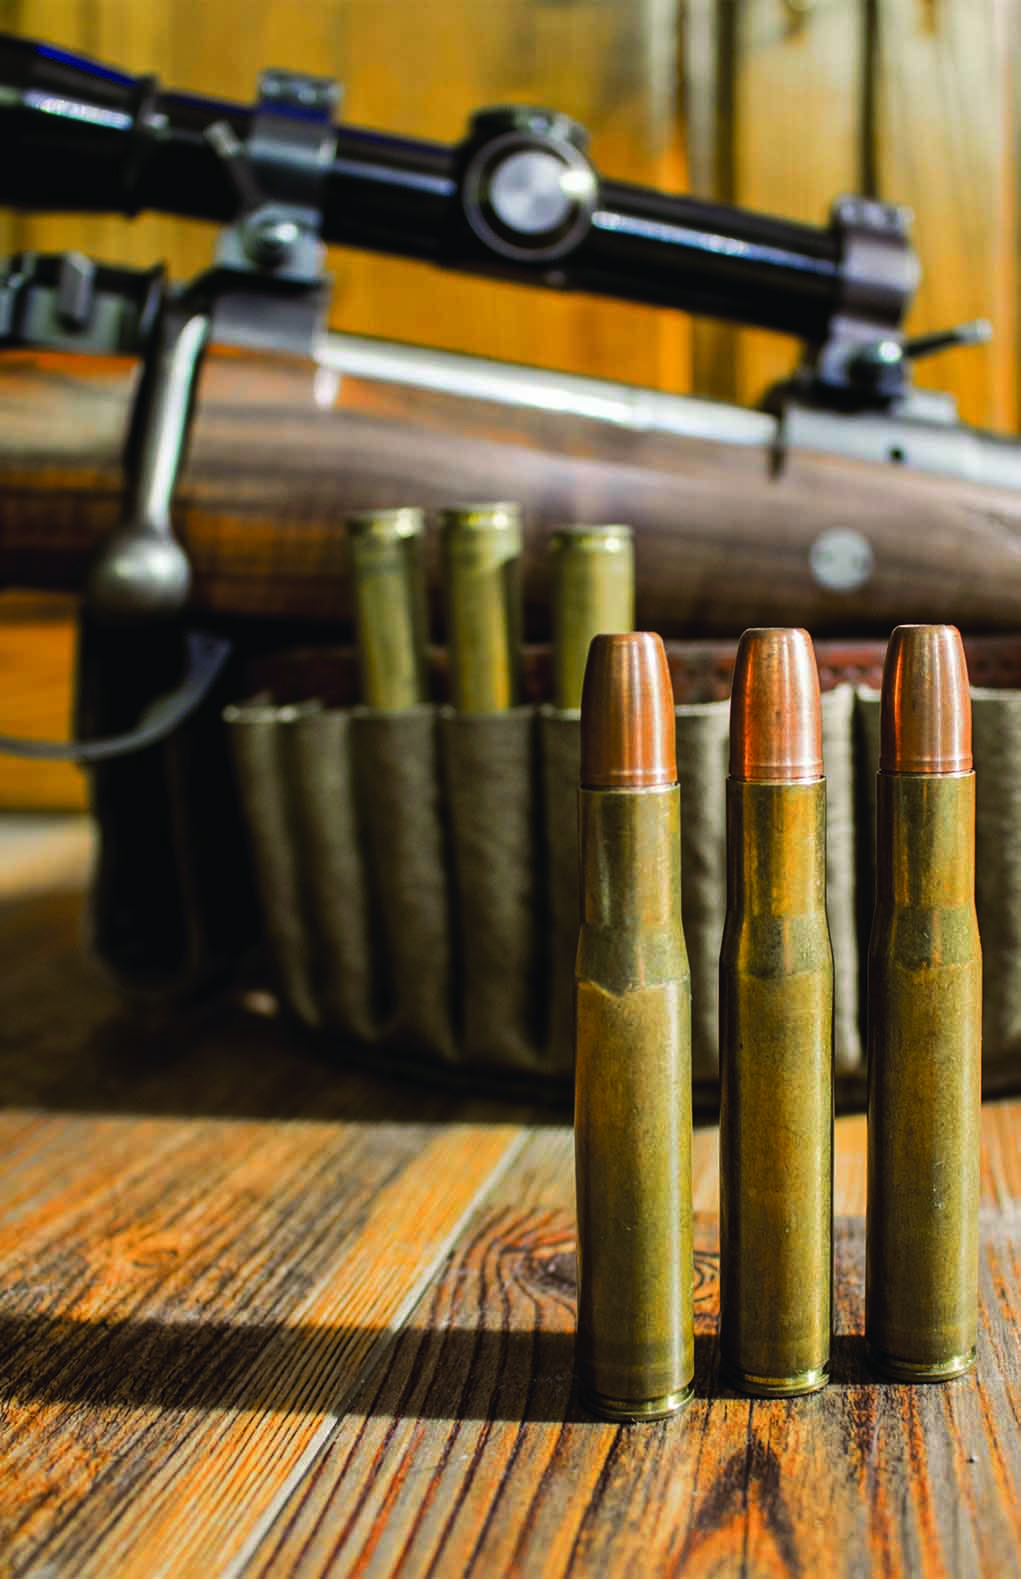
.416 Rigby
With its voluminous case and a 45-degree shoulder, the .416 Rigby is an absolute classic.
An undeniable classic, the .416 Rigby was released in 1911. Although fewer than 200 rifles were made up until World War II, the writings of Robert Ruark and John Taylor immortalized the cartridge. Simply put: The 410-grain bullet of nominal diameter at 2,370 fps (modern loads use a 400-grain bullet at 2,350 or 2,400 fps) offered more than 5,000 ft-lb of muzzle energy—and virtually unequaled penetration—due to the high sectional density.
Kenyan professional hunter Harry Selby procured a Rigby rifle in .416 Rigby when his .470 double was accidentally run over, and Robert Ruark’s Horn of the Hunter made both the man and cartridge famous. The .416 Rigby is a huge rimless case with a 45-degree shoulder. The case volume is a direct result of the volatility of cordite in the African and Indian heat in order to keep pressures low.
Its recoil, while higher than that of the .375 H&H, is manageable in a well-fitting rifle. And although the volume of the .40-caliber’s case is more than is probably needed with our modern powders, the pressures are low—and that isn’t a bad thing. The .416 Rigby is a flat-shooter, yet it hits like a freight train. To fit properly, a magnum-length receiver should be employed.
Rigby has recently announced the release of the .416 Rigby No. 2, a rimmed version of the classic .416 Rigby that’s built for double-rifles. It shares the same geometry (except for the rim), and its ballistics are nearly identical.
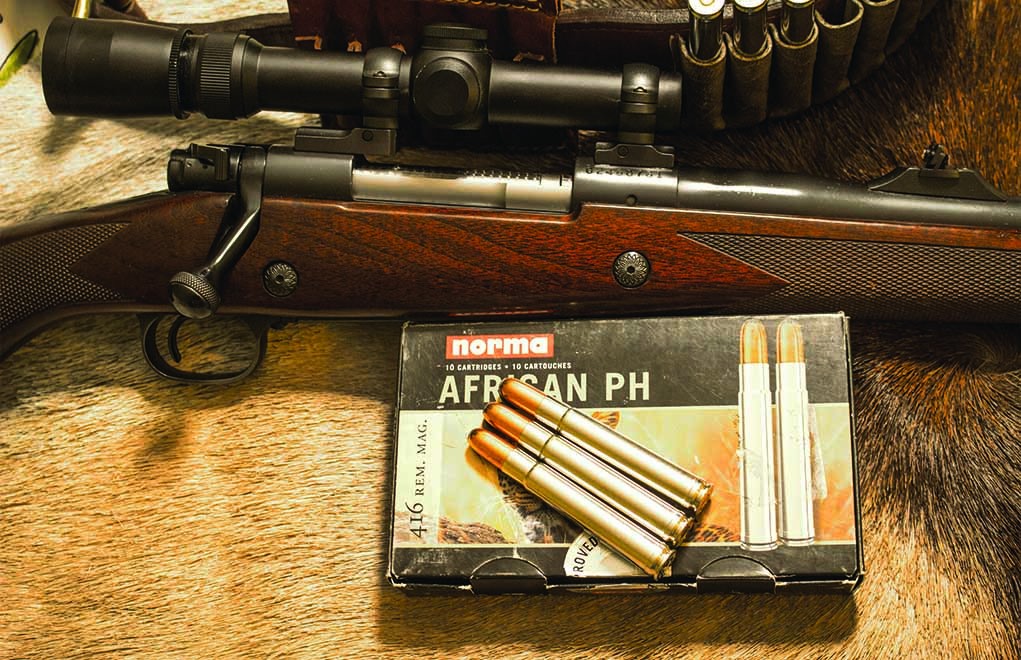
.416 Remington Magnum
The 1980s saw a revival of the .416-inch-bore diameter: Federal brought back the .416 Rigby, and Remington introduced its .416 Remington Magnum, which is officially based on its 8mm Remington Magnum case (but the .40-caliber more than resembles the wildcat .416 Hoffman). Using the belted .375 H&H case as a platform, the .416 Remington Mag duplicates the ballistics of the .416 Rigby, but in a smaller diameter case and at a higher pressure.
The .416 Remington Magnum duplicates the performance of the .416 Rigby—albeit at a higher pressure … but in a smaller case.
The cartridge received some negative press early on, but in a high-quality, controlled-round-feed action, this cartridge is nothing shy of amazing. With the exception of those who’ve handloaded the Rigby case to the red zone, the Remington variant will match the performance of the older cartridge. Yes, its belt is unnecessary; and yes, the pressure is higher than some shooters like, but in the field, I doubt any animal could ever tell the difference between a Rigby and Remington. It shares the same case length as the .375 H&H and fits perfectly in a magnum-length action.
It was 1989 when Weatherby adapted its big, double-radius case to the .416-inch bore, with the signature increase in velocity in tow. Weatherby’s .416 will push a 400-grain bullet to 2,700 fps, with a correlative recoil level. Of the .416s, I’d say the Weatherby is the least popular, although as with many of its other cartridges, its fans are fervent. With premium bullets, the .416 Weatherby will certainly handle any game that walks the Earth.
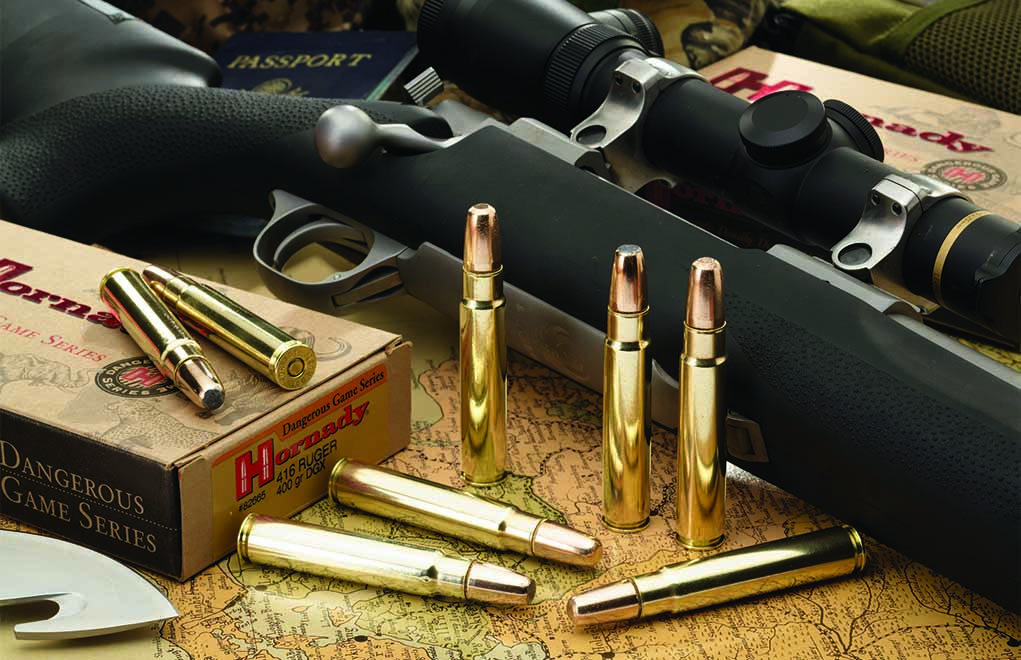
.416 Ruger
In 2008, the joint effort between Hornady and Ruger was expanded to include the .416 Ruger—a beltless case designed to fit in a long-action receiver, matching the velocity of the Rigby and Remington cases. Chambered in the Ruger Hawkeye African rifle, the .416 Ruger is affordable, effective and, for reasons I can’t quite explain, remains an unpopular choice.
Affordable and effective, the .416 Ruger will cleanly take any and all game animals.
The design is certainly sound: In both factory ammunition and handloaded stuff, I’ve seen nothing but good results from the .416 Ruger. Even so, perhaps it’s the fact that only Hornady provides ammunition; or perhaps the .40-caliber lacks the “look” of power. Nevertheless, rest assured that the .416 Ruger brings the goods.
.416 Taylor
A wildcat based on the .458 Winchester Magnum and necked down to hold .416-inch bullets, the .416 Taylor is a solid design. DoubleTap has offered factory ammo for it in the past, but it remains a handloaded proposition. However, the .416 Taylor (developed in the 1970s by Bob Chatfield-Taylor) will come close to the Rigby benchmark, driving a 400-grain bullet to 2,350 fps. Donor brass is readily available; and, with a good set of dies, you end up with a belted case that fits perfectly in a long-action receiver.
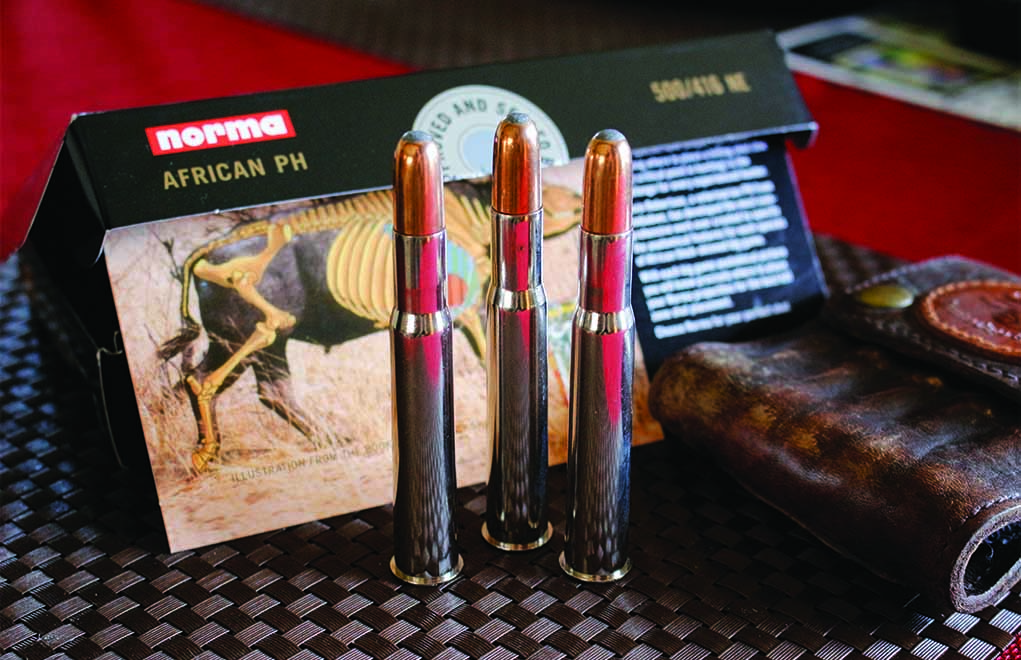
.500-416 Nitro Express
The .500-416 NE is a rimmed cartridge perfectly suited to double-rifles.
This modern rimmed case from Krieghoff uses a 3¼-inch case to push a 400-grain, .416-inch bullet to 2,300 fps and makes a solid choice for a hunter who wants a double-rifle in .40-caliber. Compared to the venerable .450-400 3-inch NE, it has a definite advantage in terminal ballistics and an increase in recoil. Popular in the Krieghoff doubles, the .500-416’s popularity has waned as of late; and, with the introduction of the .416 Rigby No. 2, I expect that trend to continue.
.404 Jeffery
The slender shoulder of the .404 Jeffery allows for a very smooth -feeding rifle. Loaded with premium 400- or 450-grain bullets, the Jeffery can nearly equal the ballistics of the .416 Rigby and Remington.
This has become my personal favorite of the lot. According to the best evidence available, it was released in 1905, and although the .416 got the glory, the .404 did the work. The .404 Jeffery uses a 400-grain bullet of .423-inch diameter, with the original load leaving the muzzle at 2,150 fps and modern loads ramping up that figure to 2,350 fps. This puts it in the same league as the .416 Rigby, Remington and Ruger.
Modern bullets have made this .40-caliber even better. If I were forced to pick a single cartridge-and-bullet combination for all my dangerous-game work, it’d be my .404 Jeffery, loaded with 400-grain Woodleigh Hydrostatically Stabilized Solids to 2,280 fps. This combination has accounted for elephant, buffalo and all sorts of plains game animals at ranges from 16 to 225 yards.
.425 Westley Richards
The .425 Westley Richards came onto the scene in 1909, using a .435-inch-diameter, 410-grain bullet at 2,350 fps for slightly more than 5,000 ft-lb of muzzle energy. The design used a severely rebated rim in order to use the standard .473-inch bolt face of the 98 Mauser, as well as the stripper clips to facilitate fast reloading.
The issue posed by the rebated rim was the tendency for the bolt face to ride over the rim and onto the case body, causing a feeding malfunction. While it’s a unique cartridge, the .425 isn’t incredibly popular, and Kynoch is the only ammunition provider … when this ammo is available.
Compare and Contrast
Looking at the performance level among the .375s, lower .40s and the .45s, using 300-, 400- and 500-grain bullets, respectively, you’ll see the trajectories of the .40-calibers staying very close to that of the .375s, where the .45s drop off quite a bit more.
Yes, the .45s have more weight and a greater frontal diameter, but the energy figures between the lower .40s and the .45s aren’t radically different: They both have roughly 1,000 more ft-lb at the muzzle than do the .375s. And, I’ve found there’s a definite ramp-up in recoil when you go to the 500-grain, .45-caliber cartridges, which run at 2,150 fps and upward.
The beauty of the .375s is found in the wide selection of bullet weights (235 to 350 grains). However, the .40s aren’t exactly married to the 400-grain bullet—although it’s the most popular. There are bullets for these cartridges ranging from 300 to 450 grains.
Sectional Density
The classic cartridges—those that made their reputations before World War II during the “golden age of the safari”—all used a bullet with a sectional density greater than 0.300. While our modern bullet construction has lessened that requirement, the premium bullets of traditional weight extend the performance of these cartridges.
The 400-grain bullet for the .450-400 3-inch—the smallest diameter of the lot—has a sectional density of .340. The 410-grain .425 Westley Richards bullet—the largest—has an SD of .310. All have the desired length for a proper dangerous-game cartridge.
Choosing Yours
The choice of one of these .40-caliber cartridges is as subjective as choosing a deer cartridge. Of the cartridges listed, each has their merits. The .416 Rigby and .416 Remington are the most popular, followed by the .404 Jeffery. In spite of its lower velocity, the .450-400 3-inch remains the most popular of the rimmed cartridges—although I predict the .416 Rigby No. 2 will gain ground over the next decade.
If it’s affordability and availability that concerns you, the .416 Remington might be the best value. However, I’ve become enamored of the .404 Jeffery. But with the exception of that .405 Winchester, any of these cartridges will make you a happy hunter.
Editor’s Note: This article originally appeared in the May 2020 issue of Gun Digest the Magazine.
If Prairie Enemy varmint ammo is any indication of what’s to come, shooters are very lucky Sierra Bullets has entered the ammunition manufacturing game.
Bang! The next sound, “You got him! Nice shot.” My spotter was elated. So was I.
Sending a white-tailed prairie dog to varmint Valhalla from 495 yards isn’t the end-all-be-all, but I’d be lying if I said it wasn’t satisfying. Following up a minute later on his buddy, misfortunate enough to poke his head up … well, tickle me pink.
The shots were a grand finale to a two-day varmint hunt this summer in southern Wyoming, sponsored by Sierra Bullets. More than an exercise in pest control, the legendary bullet-smiths set a horde of gun writers free on the sage-addled expanses of the Spur Ranch to showcase the newest addition to its catalog—Prairie Enemy. And what a place to put varmint medicine to the test.
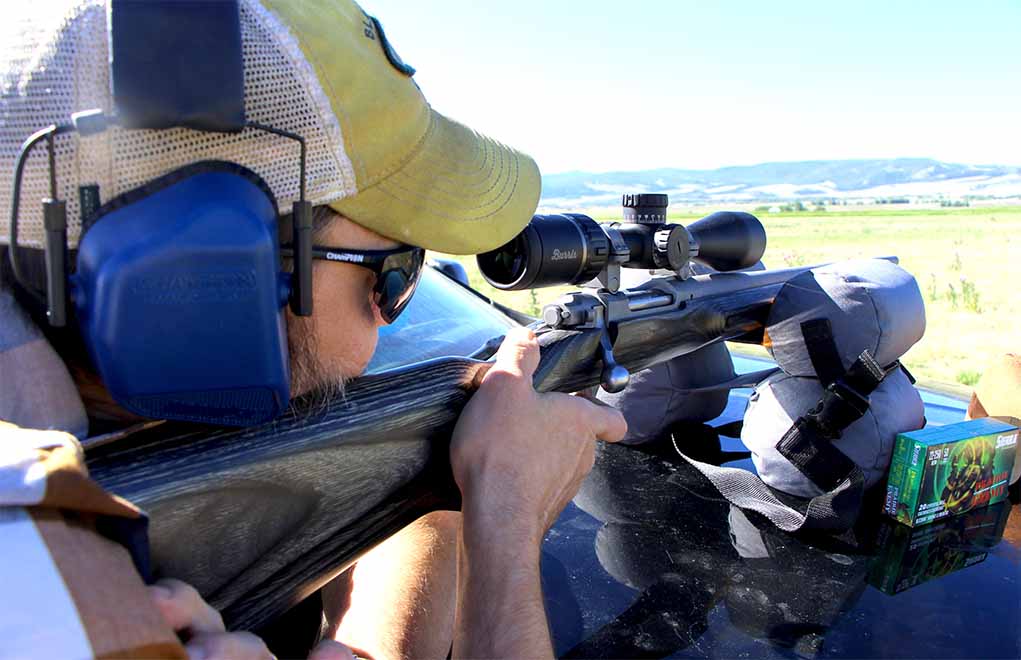
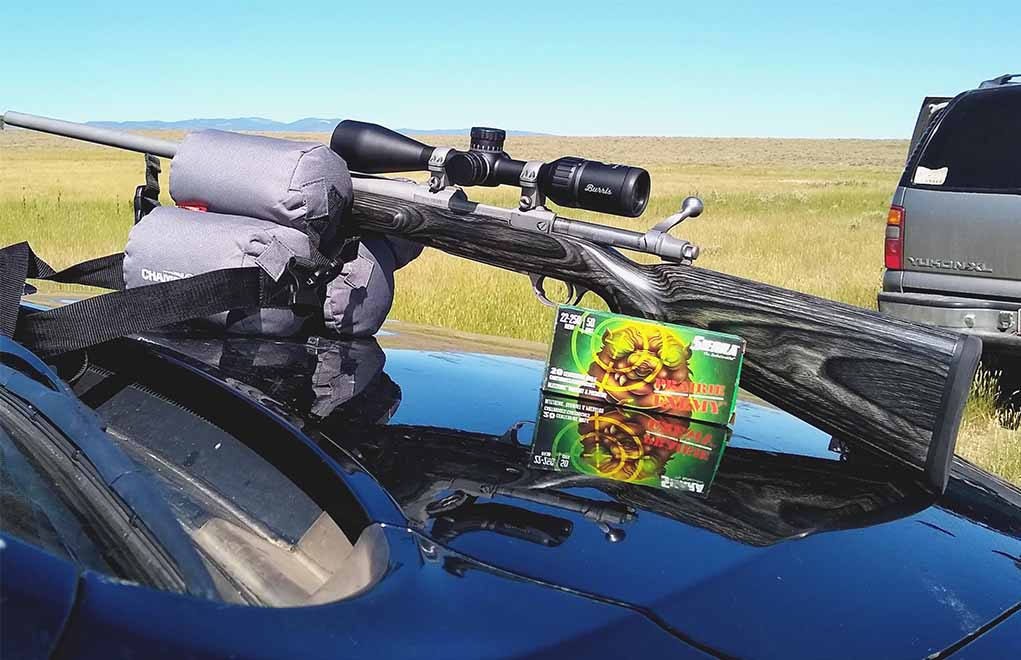
The author barely pulled the rifle off his shoulder in Wyoming with nearly unlimited targets of opportunity and plenty of Prairie Enemy ammunition at hand.
Nestled between the snowcapped Snowy and Sierra Madre mountain ranges, the limitless draws and endless flats of Carbon County provide targets to the horizon. Throw in the ever-present Wyoming variable—wind—and, well sir, you’ve got everything to assay not only a shooter’s mettle but his tools.
One Big Year
Before we get to the finer points of Prairie Enemy’s in-field performance, we should clear the air about something. Yes, the ammo came from the same Sierra Bullets handloaders know and love. The home of the Sierra MatchKing and a slew of other high-performance projectiles. Like countless other reloaders, the company’s little green boxes have become synonymous with accuracy for me. Though, Sierra’s expansion into full-fledged ammunition manufacturer flew somewhat under my radar.
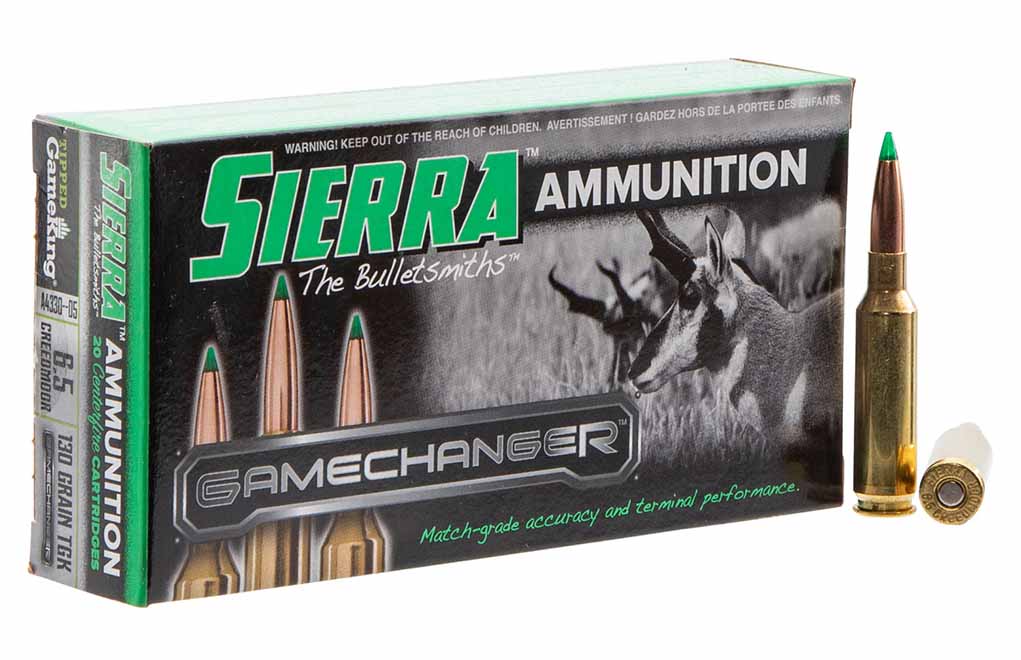
For the record, it occurred in 2019 with the introduction of Gamechanger hunting ammunition, a premium option topped with Sierra Tipped GameKing bullets. Prairie Enemy—pitching Sierra BlitzKing bullets—followed this year. In all, the company now produces 17 loads covering 13 calibers ranging from .204 Ruger to .300 Winchester Magnum. For the ambitious hunter, there are options for about any game in North American … the better part of the globe for that matter.
If I think hard enough, I can vaguely recollect Prairie Enemy ballyhooed at SHOT Show 2020. (Apparently, I had a picture of the line’s display on my phone.) Forgive the cloudiness, it’s been a big year for Sierra. At the convention the news was the company’s partnership with polymer-composite-case ammunition pioneer True Velocity on their impending consumer line.
A truly cutting-edge partnership with True Velocity, Sierra looks to redefine ammunition in the future.
Not to overhype this union, but it has the potential of being a big deal. Scoff if you must at the thought of plastic ammo, but there’s a good chance what True Velocity releases in 2020 is the future.
Lighter, more customizable, highly accurate, potentially cheaper—the cutting-edge ammo could up shooters’ performance expectation as much as, say, polymer tipped bullets. Sierra is right there with True Velocity, topping the high-tech cartridges with MatchKing and Tipped MatchKing bullets.
Incidentally, here’s how the True Velocity will roll out: The initial offerings will include a 168-grain MatchKing and 175-grain Tipped MatchKing .308 Winchester round. The planned follow-up includes 142-grain MatchKing 6.5 Creedmoor and 300-grain MatchKing .338 Norma loads.
The Time Is Right
As to Sierra’s ammunition, it’s an about-time move for a company that up to this point seemed wed to pure bullet manufacturing.
Topped with Tipped GameKing bullets, Gamechanger arms hunters with match precision in the field.
Some stars had to align to make it happen according to Duane Siercks, Sierra’s Ballistic Technician Lead. Acquiring Sierra in 2017, the Utah-based Clarus Corporation holding company has proven much more receptive to evolving the brand to keep them proverbial kings of the hill. One of those steps is factory-loaded ammunition.
Smart move, given pure bullet companies, outside the boutique variety, are becoming rare. Factory-loaded ammunition is where it’s at and the market—even in good times—has an insatiable appetite for it. Especially top-shelf stuff.
Not that Sierra is going it alone … yet. According to Siercks, the company still sources its cases, primers and powders from outside vendors. As is common in the ammo industry, he wouldn’t tip his hand whose assembly line each rolls off. Suffice to say, it’s all top quality. Sierra has a sterling reputation for precision to maintain, after all.
Precision … that raises an obvious question for non-hunters in the audience—So what about match ammunition? Who wouldn’t want MatchKing performance with the convenience of factory ammo loaded to Sierra’s meticulous standards? Precision shooters can officially begin holding their breath, Siercks said it’s in the works. He didn’t have an ETA, but optimistically quipped, “The sooner the better.”
The Tools
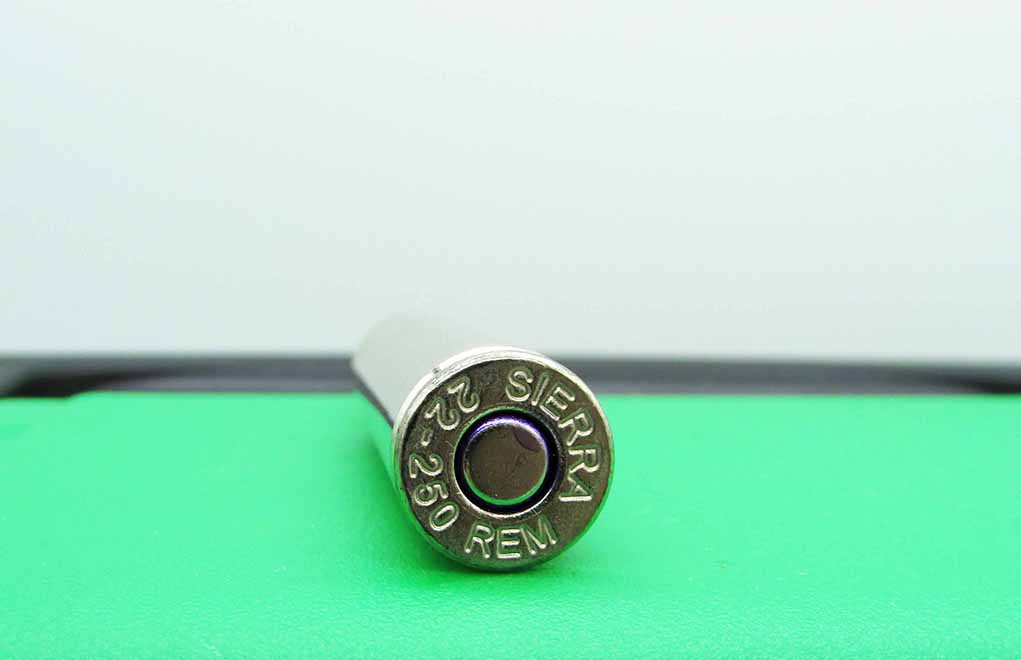
Tackling the high-desert varmints Sierra gave us four different loads of Prairie Enemy to work with: 36-grain .204 Ruger, 50-grain .22-250 Remington, 69-grain .223 Remington and 105-grain 6.5 Creedmoor. Though we had none in stock, the company also offers a 55-grain .223, 69-grain .224 Valkyrie and 70-grain .243 Winchester loads. Even before chambering any, it was easy to see Prairie Enemy was top-notch—nickel-plated brass cases, sealed primers and, of course, Sierra BltizKing bullets.
Without even chambering a round, it’s easy to see Prairie Enemy is top shelf, with nickel-plated brass cases, sealed primers and, of course, BlitzKing Bullets.
Modeled after the renowned MatchKing bullets, although with a polymer tip and much thinner jacket, the projectiles have exceptional ballistic coefficients for their class and explosive terminal performance. And they can be hot-rodded like no other.
A constant concern among varmint hunters is whether their bullets will hold up to the velocities they’ll push them. Breaking up in flight is a real possibility with thin-jacket projectiles. Not BlitzKing. Utilizing a proprietary gliding alloy (95-percent copper, 5-percent zinc), the bullets are renowned for in-flight integrity. For instance, .20 and .22 caliber BlitzKings remain intact at muzzle velocities up to 4,400 fps. Which is to say, well beyond anything coming out of a factory or off a reloading bench.
Paired with Prairie Enemy, a selection of Ruger rifles from the gunmaker’s American, Hawkeye and Precision Rifles lines. Up top, Burris glass of every shape and magnification. The rifles were an especially nice mix, to my mind, with a variety of barrel lengths from 16 to 24 inches. To the elements, ranges and quarry, Prairie Enemy’s rifle compatibility would also go under the microscope.
The Quarry
Growing up in Colorado I’m intimate with the prairie dog issue.
Targets to the horizon and stiff Wyoming winds weren’t enough to stifle Sierra’s varmint ammunition.
Unchecked, their town’s balloon to absurd sizes threatening the viability of hay fields and endangering livestock. In Wyoming, some other writers came upon a young bull with a broken hindleg, not for certain, but presumably from a misstep in one of the rodents’ dwelling. To the chagrin of the rancher, this would be chalked up in the loss column, given the bull would have to be put down.
This fails to mention the bubonic plague of which the rodents (more exactly the fleas on them) are a vector. Animal to human transmission is rare but possible; Colorado recorded a case this year in the southwest corner of the state. Additionally, the disease is hell on the animals themselves. At times, the plague runs like grass fire through prairie dogs, hastened by overpopulation, decimating regional numbers.
Which is to say, there are good reasons why the state of Wyoming classifies them and equally prolific ground squirrels and other rodents as vermin, meaning a license is not required to hunt them. It is also why farmers and ranchers greet hunters with open arms and open gates.
That is if you can get the buggers in your crosshairs. If you do with Prairie Enemy, watch out! The stuff hits like Thor’s hammer.
Finally, a headstamp bearing Sierra’s name. Expect to see more in the future.
For me, the most impressive results came with hot-rod 36-grain .204 and 50-grain .22-250 loads, both pitched from Ruger Hawkeye predator rifles. For factory ammunition, the flat-shooting cartridges were frighteningly on-target, making anything out to the maximum point-blank range a proverbial chip shot. And going long? Those final shots of my hunt came via the .22-250 in the face of 10 mph quartering headwind. That was enough to make me a believer in Prairie Enemy’s accuracy when wielded properly.
I did and saw a heap of good shooting on the hunt—close, mid and long-range. No matter the rifle-ammunition combination, Prairie Enemy did its job—which is saying plenty. All in all, I feel comfortable saying that with the appropriate twist rate-bullet weight combination it will prove accurate out of any iron it’s chambered.
And when it gets to its destination … This being a family website, play-by-play of Prairie Enemy’s terminal performance perhaps isn’t warranted. Suffice to say, most shots 100-yards in with most calibers, you’d have more prairie dog to mourn if you strapped a stick of dynamite on its back.
Not to say there weren’t pass-throughs on smaller dogs with the heavier loads. The .223 and 6.5 CM didn’t produce as dramatic detonations, but nonetheless killed the communal gophers graveyard dead. At 105-grains, the Creedmoor was much too heavy for this particular hunt. Still, I’m sure it and the .223 are ideal for long shots on running dogs. We never spotted a coyote, so this remains a theory only.
Parting Shot
By no means are the dusty flats of southern Wyoming a laboratory test of Sierra Prairie Enemy ammunition. In my humble opinion, they’re better.
Under real-life conditions on living, breathing game the bullet-smith’s venture into fully-loaded ammunition showed its pluck regardless of caliber or rifle. To me, that speaks volumes louder than quantifying temporary cavities in ballistic gelatin or caliper measuring cloverleaves in paper.
Boots on the ground, Prairie Enemy gets the job done. Personally, with days short and coyotes putting on their winter coats, I’m stocking up on .223 and .22-250.
As hunters, we’re lucky Sierra has thrown its hat into the ammunition game.
For more information on Prairie Enemy, please visit sierrabullets.com.
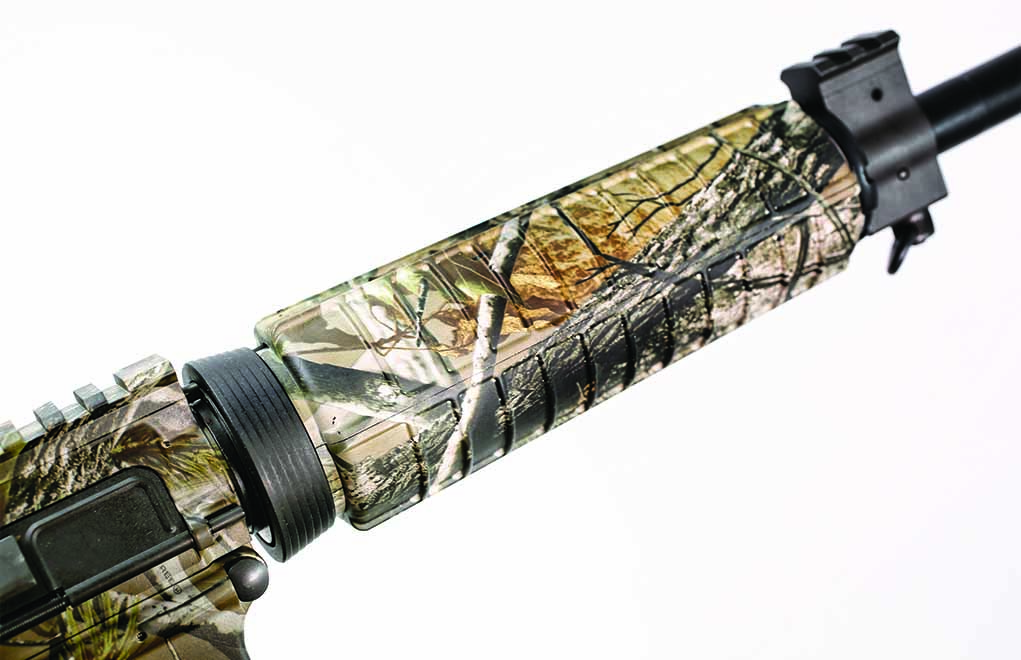
A lightweight carbine, and one with soft recoil, the S&W M&P15 in .300 Blackout is a stellar tool.
What You Get With The M&P15 In .300 Blackout:
Bolt and carrier are mil-spec and are given a matte-black finish.
Medium-profile barrel is made of 4140 steel, and the barrel is given an Armornite finish.
Low-profile gas block has a section of Picatinny rail machined on top, also holds the front of the handguard.
Boasts mil-spec trigger parts, with a pull weight on the order of 5 pounds.
The carbine buffer tube has a mil-spec-shaped M4 carbine stock with six positions for length.
Stock and the gas block each have a sling swivel.
At 100 yards, capable of near MOA accuracy with the right load.
When I was learning guns and gunsmithing, Smith & Wesson was the handgun provider to law enforcement. Oh, it offered long guns from time to time, but not ones it actually made. The 21st century has brought us a lot of changes. S&W now makes revolvers, pistols and rifles. No shotguns, but this company would be crazy to try that … and S&W is not crazy.
Also, the .300 Blackout and its predecessor, the .300 Whisper, were once thought of as solely super-quiet, used-with-suppressors thumpers. Hurling 200-plus-grain bullets just under the speed of sound, they were essentially .45 ACP+P carbines that could be made the epitome of quiet.
Well, that also changed.
You can use anything from a five- to a 30-round magazine in your M&P15.
You see, the .300 BLK has just the right-sized case to get a 110- to 125-grain hunting-type bullet up to useful velocities. In fact, if you’re willing to go with a carbine or longer barrel, you can get those bullets up to pretty much equal the .30-30.
Handy Hunting Carbine
And S&W has the carbine for it, if not the rifle—the M&P15. Carbines are handier for hunting anyway. S&W starts with its excellent M&P receiver set—a pair of forgings that are machined to mil-spec dimensions. The flat-top receiver is ready for whatever optic or irons you select.
I see this as a good thing, because we all have different ideas as to what comprises the perfect setup for our own hunting situations. When gunsmithing, I had no end of customers who wanted a 3-9X scope on their .30-06 rifle for deer hunting. But where I hunted (and most of the state was the same, truth be told), 100 yards was a long shot, and 9X was more than I needed or wanted. So, “long” shots are most often at 100 yards, max, for most shooters and in most thick-cover situations.
However, S&W gives you the option of having more, if you want it. So, put the scope you want on top, using the rings you want, because S&W made that easy.
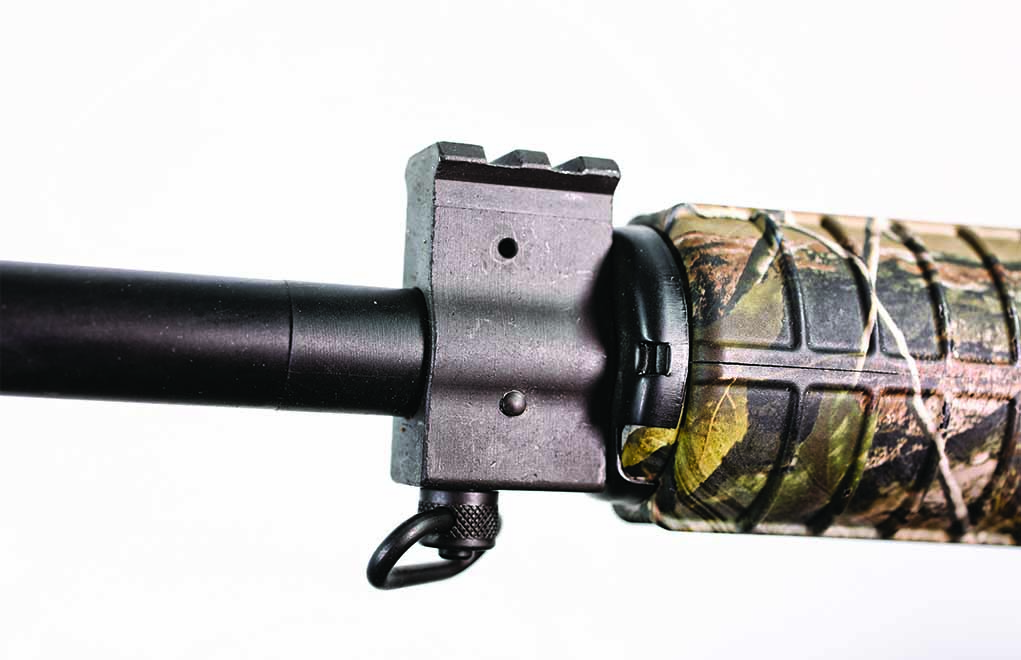
The gas block on the M&P15 is fixed and has a rail on top in case you want to mount back-up iron sights. Depending on how hard you are on optics, that might not be a bad idea.
Inside, the the M&P15’s bolt and carrier are mil-spec and are given a matte-black finish. They mate up with a medium-profile barrel that’s made of 4140 steel, and the barrel is given an Armornite finish. This is a surface-hardening and corrosion-resistance treatment that we’re now familiar with; it’s known as a “nitrocarburizing process.” The barrel has a twist of one turn in 7.5 inches—plenty fast enough to stabilize those heavyweights (should you wish to spend an afternoon of giggle-worthy plinking) while hurling 220- to 240-grain bullets downrange at leisurely velocities.
Get On Target With The AR:
Go Small With These 8 Economical AR Pistol Options
The gas block isn’t a standard A1 triangle; rather, it’s a low-profile gas block with a section of Picatinny rail machined on top. This means that if you want iron sights on your S&W M&P15, you can do it. Just be sure to order a front sight that’s labeled as “gas block rail” height, not handguard height.
The gas block is also the part that holds the front handguard retaining ring in place. The M&P has standard carbine handguards—not a tacti-cool, free-float handguard. Some might see this as a step back. I don’t.
Free-float handguards are both an individual preference (in that regard, not unlike sights/optics) and more expensive than standard handguards. And, as with the optics, if you have a preference, and it matters that much to you, it’s easy enough to rebuild any AR-15 rifle or carbine.
M&P15: Trigger and More
The lower internals in the M&P15 are vanilla-plain, mil-spec trigger parts, which means it’s a single-stage trigger with a promise of something on the order of 5 pounds of pull weight. I know—we’re all accustomed to a clean, crisp, 3½-pound trigger, but that’s not always an option on an AR-15. And, when it is, it’s an expensive one. This one has a 4½-pound trigger with a short takeup and a relatively clean let-off. As mil-spec trigger parts sets go, this one’s pretty darned good.
The handguards are the standard, round, plastic ones. Even so, they also get the Mossy Oak treatment.
If you’re still worried that the trigger isn’t “good enough,” fear not. I have, on regular occasions, dropped the small, computer-controlled popup targets on a National Guard range—the 300-meter ones—with a rack-grade trigger on an M4 and iron sights. If you have magnifying optics or a red-dot sight and a deer at 100 yards, a 5-pound trigger isn’t going to be a hindrance.
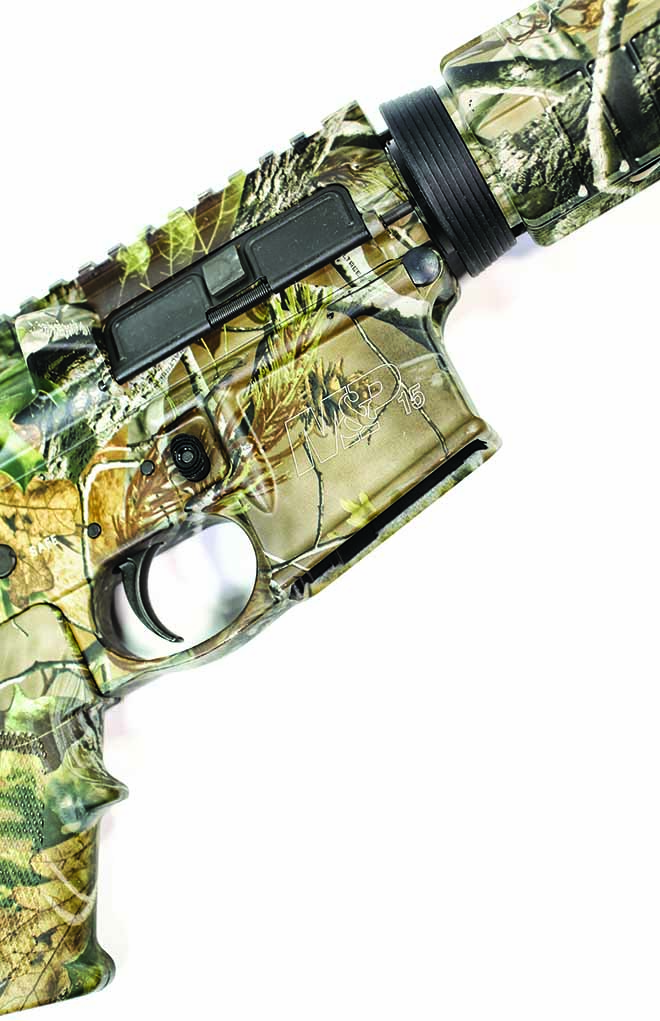
The pistol grip is a standard A2 with the finger hook on the front face. However, the M&P15’s trigger guard is integral to the lower receiver. Even so, it does have a bit of extra room—more than enough for a gloved trigger finger. And, if you’re wearing gloves, the 5 pounds of trigger weight are now a good thing.
On the back end, the carbine buffer tube has a mil-spec-shaped M4 carbine stock with six positions for length of pull adjustment. And again, if you’re sighting-in on a nice summer day in shirtsleeves, you’ll find that the length of pull you’ll need while in a blind, all bundled up on a November morning, will differ from the length of pull you need on a pleasant summer’s day. So, you can easily make it shorter to account for the extra insulation. This is one area in which the AR-15, as the modern sporting rifle, has it all over the traditional rifles and carbines.
The M&P15’s receiver set is a forged, mil-spec set. However, it gets a Mossy Oak camo coating before it leaves the factory.
The stock and the gas block each have a sling swivel, so you can easily install a sling for the hike to your blind. In addition—and not that you need it for most uses—the barrel is threaded at the muzzle, and S&W has installed a flash hider. I don’t know of any load for the .300 Blackout that produces enough muzzle blast to need a flash hider, but the company put one there because, well, some of you are going to install a suppressor, and for that, you need threads.
Blackout-Specific Bullets
As previously mentioned, the .300 Blackout was developed to be a heavy-thumper subsonic cartridge. Nevertheless, to use it for hunting calls for a lighter bullet, and that’s where the 110- to 125-grain bullets come in—unlike bullets designed for other cartridges (the .30 Carbine and the 7.62 AK come to mind), for which a stubby projectile is needed or demanded.
Just to fit the action, the Blackout has different needs. In order to feed properly, bullets have to be longer than the Carbine or AK bullets would be, and this means a bullet meant for the AK round won’t be suitable for loading in the Blackout. As a result, the cartridge-and bullet-makers came up with Blackout-specific projectiles.
The trigger guard is integral to the lower receiver but has plenty of room for a gloved finger.
Another reason for the longer bullets, besides reliable feeding, is safety. It’s possible to mix up a .300 Blackout cartridge with .223/5.56 ammunition and not notice it while loading it into a magazine. A properly longer bullet in the .300 will wedge into the .223 chamber neck and prevent the bolt from closing (this situation is called a “clue”!). If that happens, you simply work the bolt to extract the improper cartridge, check the rest and continue.
A too-short bullet, in this instance, might allow the bolt to close. But, when you pull the trigger, bad things happen. Very bad things. So, don’t mix ammo; and, if the bolt won’t close, find out why. And don’t use a .300 cartridge loaded with a too-short bullet.
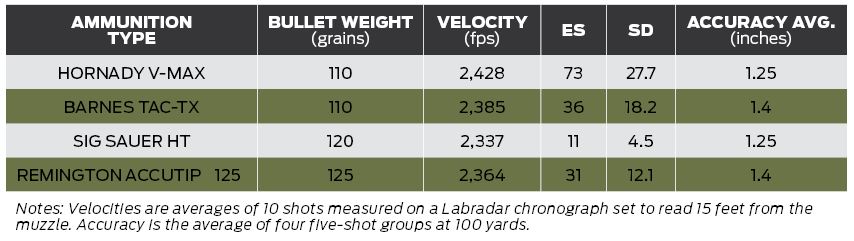
M&P15 Test Results
Testing the M&P15 was easy. I simply swept a suitable array of hunting loads off the shelf, carted the carbine to the range (along with a suitable scope) and had fun.
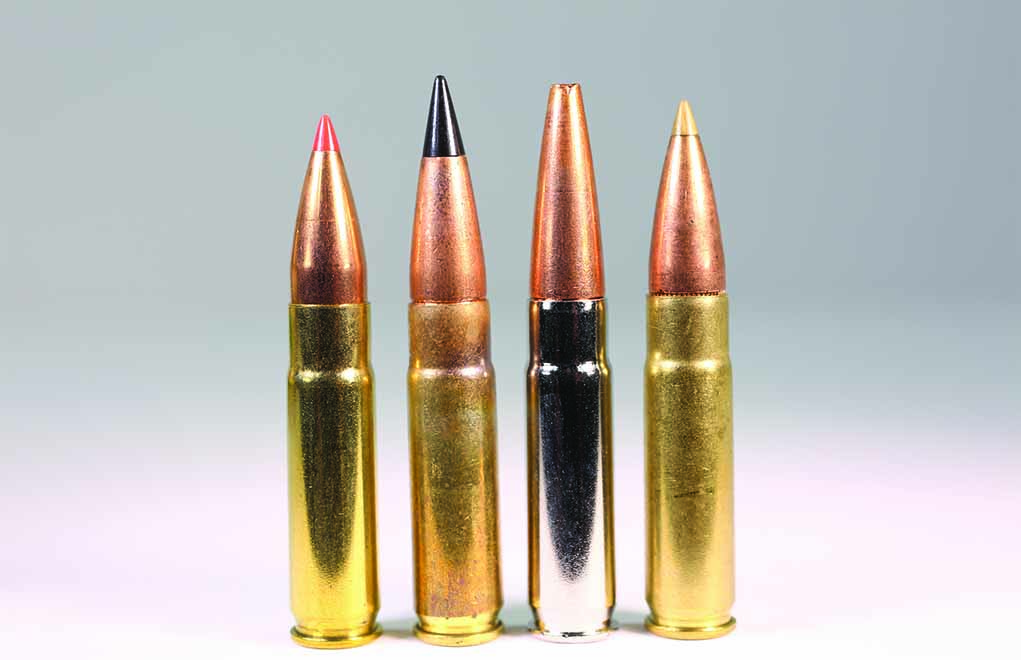
The lineup, left to right: Hornady 110 V-Max, Barnes 110 TAC-TX, Sig Sauer 120 HT and Remington 125 AccuTip.
The scope I selected is a new one to me. It’s Primary Arms’ 1-6X24 ACSS-Raptor, which features a 30mm tube and an illuminated reticle. It’s a first focal plane optic, which means that the reticle apparently increases in size as you zoom up to 6X. For fast engagements, it has a reticle with a horseshoe loop, along with a chevron in the center with holdover bars for bullet drop compensation. Primary Arms is asking $400 for this scope—a smoking-good deal! It might sound like overkill, but I chose a Geissele Super Precision mount.
Considering the trajectory and range of the .300 Blackout, you simply (once zeroed) nestle the horseshoe behind the shoulder of the whitetail in question and cleanly press the trigger. As far as trajectory goes, if you sight-in dead on at 100 yards, your drop at 200 is going to be 5 inches. If you sight-in 1 inch high at 100 yards, you’ll be 3 inches low at 200. If you limit yourself to shots out to 180 yards, your bullet is never more than 1½ inches from your line of sight between 20 and 180 yards. Basically, you just point and click.
Those with sharp eyes can opt for a red-dot sight and use the 1X with the variable-power dot to aim with. Just for plinking fun, I parked an Aimpoint Micro m2 on top and had a merry time clanging the steel plates on my club’s 100-yard range.
Simply Stellar M&P15
Accuracy from the M&P15 and the various .300 loads was everything you’d need, and expect, for a hunting rifle. A lightweight carbine, and one with soft recoil, the S&W M&P15 is a stellar tool.
OK, here’s a comparison—the classic Winchester M94 carbine in .30-30. Here, we have an iron-sighted carbine with no provision to mount a scope. At 6.8 pounds, it fires a .308-inch bullet weighing between 125 and 170 grains. The current standard is 150 grains. The “book” velocity on a 125-grain bullet is approximately 2,500 fps, but you can chronograph a lot of .30-30 ammunition and never see that. Mostly, your 125-grain bullet will be doing (big surprise) 2,400 fps or slightly fewer. Oh, and your .30-30 is always going to be a five-shot lever gun. But, the M&P15 can easily be fed from a five-shot magazine or can use 30-rounders for plinking.
The M&P15 in .300 Blackout gets a 125-grain bullet up to more than 2,300 fps. Sure, that isn’t the more-than-2,400 fps the .30-30 can allegedly do, but with the M&P15, you get a self-loading rifle of the same weight with easy optics mounting options and velocity that’s more than close enough. And really, I’m not sure the difference matters to any whitetail out there.
The bonus Mossy Oak camo pattern is something that comes with the M&P and saves you the work of trying to camo-paint your own flat-black MSR.
If you have a .30-30 and want to hunt with the same rifle your father, grandfather and perhaps even your great-grandfather used, don’t let me stop you. However, the S&W M&P15 Mossy Oak camo in .300 Blackout could be the start of a new tradition.
M&P15 in .300 Blackout Specs Type: Gas-operated, self-loading rifle Caliber: .300 Blackout Capacity: 30+1 rounds Barrel: 16 in. Length: 35 in. Weight: 6 lb., 9 oz. Trigger: 4.5 lb. Finish: Anodized aluminum, black oxide steel MSRP: $ 1,119
For more information on the M&P15, please visit smith-wesson.com.
Editor’s Note: This article originally appeared in the June 2020 issue of Gun Digest the Magazine.
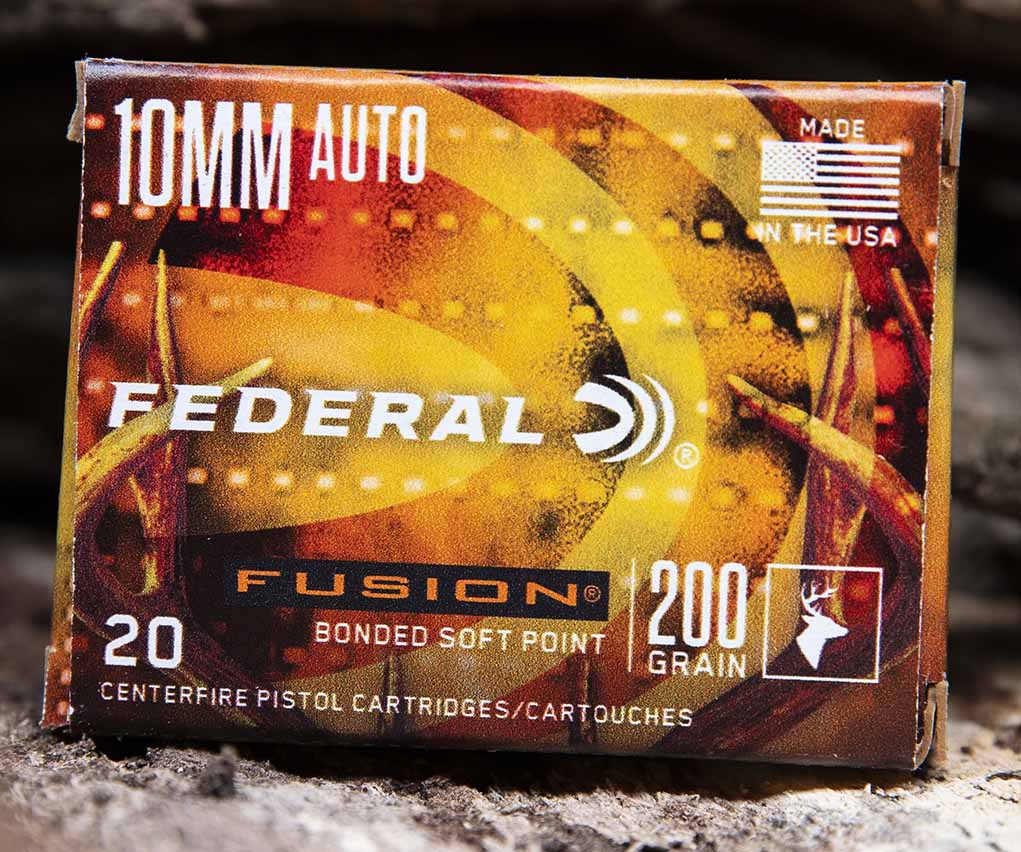
Loaded to take full advantage of the ‘Perfect 10’s’ ballistic potential, Federal’s new Fusion 10mm hunting ammo is built to fill tags.
Handgun hunting was one almost the exclusive territory of revolvers. Heavy hitters such as the .44 Magnum, .41 Magnum, .454 Casull, .500 Linebaugh, among others, have taken center stage in the up-close and personal pursuit. However, things have changed in recent years. With the 10mm Auto’s recent resurgence, sportsmen have come to embrace the hard-hitting and fast shooting semi-automatic pistol cartridge.
Catering to these shooter’s needs, Federal Premium has introduced a 200-grain Fusion 10mm Auto Hunting option, perfect for the impending hunting season. The crux of the ammo is an advanced bullet design, built for deep penetration and impressive expansion—the elements required to put game down. The bonded-core projectile has skiving on its copper jacket, allowing for consistent mushroom one it’s at its target. And moving 1,200 fps at the muzzle, the ammo has enough velocity to punch through and appropriately penetrate at most ethical hunting distances.
More From Federal Premium:
ANOKA, Minnesota – October 6, 2020 – Federal ammunition introduces a new load to its popular handgun hunting ammunition lineup. The new Fusion 10mm Auto load uses a 200-grain bullet and 1200 fps muzzle velocity take full advantage of the 10mm Auto cartridge, with more energy and better terminal performance on impact. Shipments of this product have begun to arrive at dealers.
“Our Fusion 10mm Auto load delivers the toughness, accuracy, reliability and terminal performance that handgun hunters are looking for,” said Federal Centerfire Handgun Product Manager Chris Laack. “Built with the same molecularly-bonded hunting bullet used in Fusion rifle ammo, it produces ideal upsets and deep penetration when striking game. We know this new load is everything any hunter could hope for in a 10mm Auto hunting cartridge.”
Features & Benefits -New 10mm Auto load -1,200 fps muzzle velocity -Copper jacket is electro-chemically to the core -Perfectly uniform jacket -Skived, pre-programmed nose provides consistent expansion -Maximum weight retention for deep penetration
Part No. / Description / MSRP F10FS1 / 10mm Auto Fusion, 200-grain, 1200 fps, 20-count / $32.99
For more information on Fusion 10mm Auto Hunting ammunition, please visit federalpremium.com.
Utterly unique and strong as bull, Hoenig’s Rotary Round-Action Double Rifle is the definition of a modern classic.
After World War II, a Hungarian refugee was standing aboard a transport ship in the fog, wondering where he was. After several days of steady travel, the ship had stopped. Had the Russian communists found them?
When the fog lifted, the Statue of Liberty emerged, and 16-year-old George Hoenig cried with relief.
To this day, Hoenig tears up when he relates that joyous escape to freedom. He credits these United States of America with not only saving him and his parents from the horrors of post-World War II communist Europe, but also of giving him the opportunity to pursue his dreams, to become what he wanted to become—and not what some government wanted him to become—a gunsmith. A gunmaker. A master gunmaker.
The Dream Takes Shape
Young Hoenig wasted no time getting there. Before he had graduated from high school in Los Angeles, he’d designed and built a single-action revolver, winning a prestigious national industrial arts prize. By age 17, he was working at Pachmayr Gunworks, one of the largest firearms repair shops in the country, repairing everything and anything that came in.
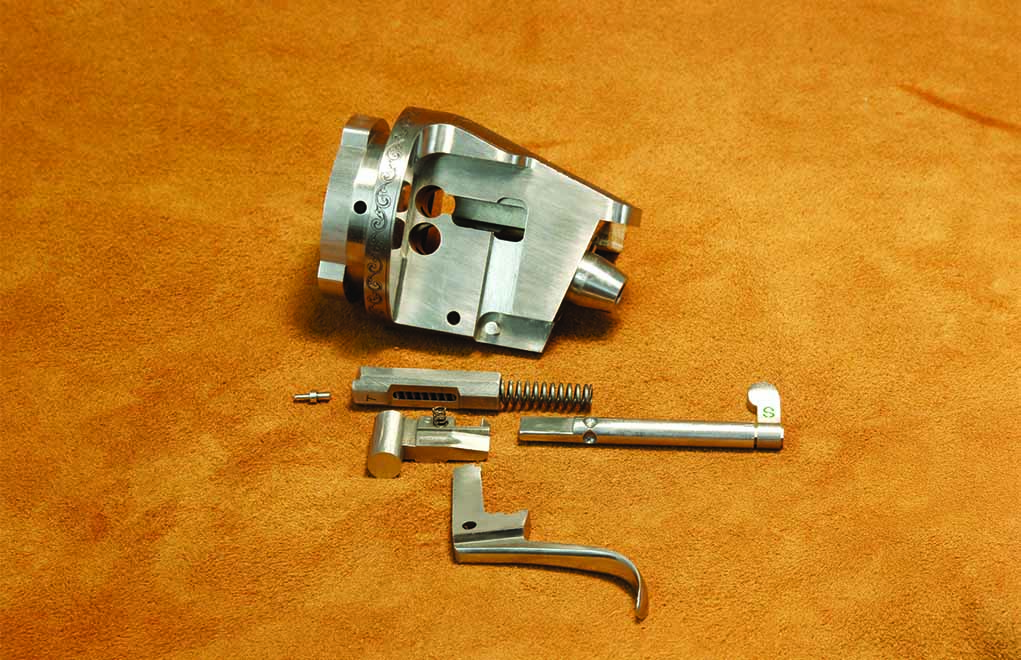
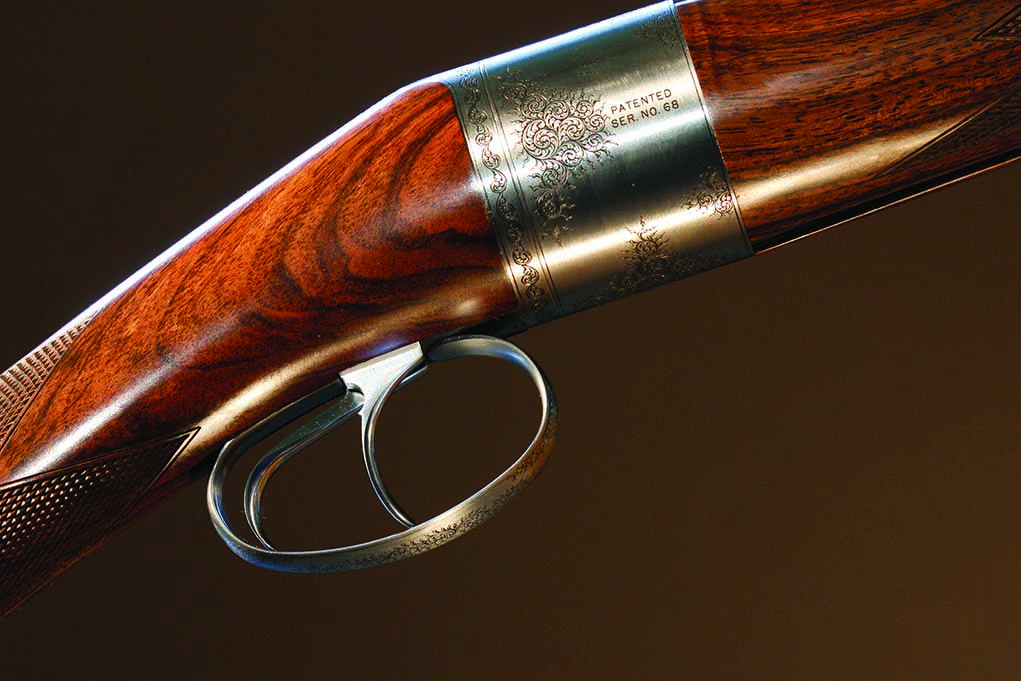
Simplicity on display. A Hoenig Rotary Round-Action rear receiver ring with half the working parts that fit within it. Two complete sets of firing mechanisms ensure that both barrels are not inoperative if one fails to function. Note the tiny firing pin: Its mass is so insignificant that it can be dry-fired endlessly with no fear of breakage.
By 1964, he was building traditional custom rifles and shotguns of such high quality that he was able to escape big-city California for Idaho, run his own custom gun business and concentrate on perfecting his already-fine stock-making and metal-working skills. He built custom guns of class and distinction for some of the biggest names in gun circles.
A quarter-century later, the “gestation period” for his unique gun was nearly up. By 1992, he was ready to build it. Hoenig’s mechanical genius, augmented by his extensive experience, informed and inspired his crowning achievement—a design like no other, an action that epitomizes simplicity, durability, strength and function: the Hoenig Rotary Round-Action Gun.
Locked, Cocked and Ready to Fire
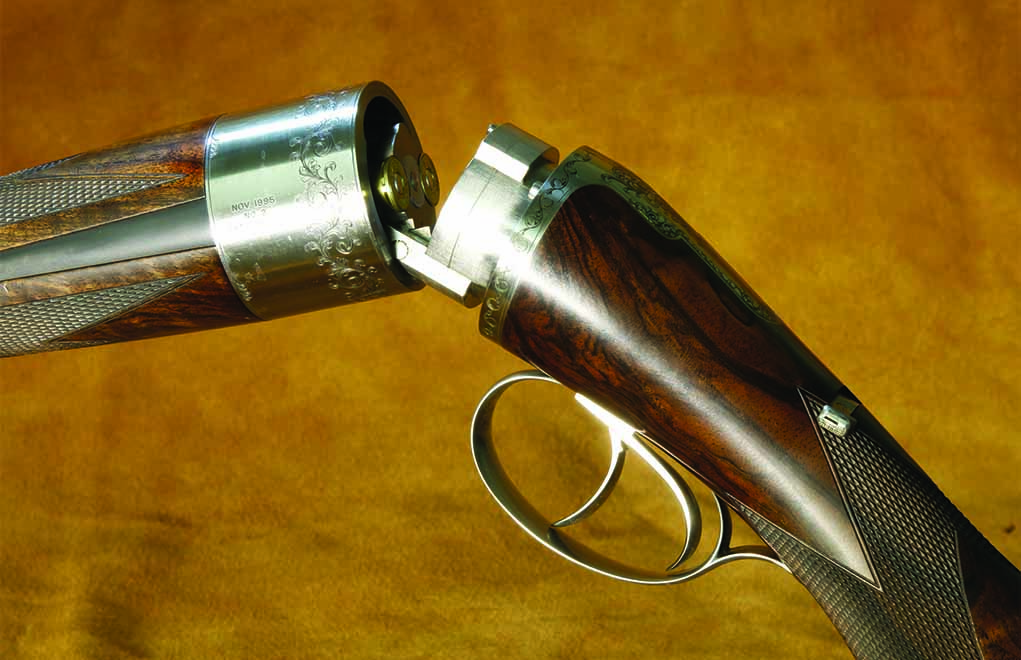
Because the Rotary Round-Action is unique, we should describe its basic operation before diving into a more detailed description. To operate this doubled-barreled over/under, you flick off the safety and then pull each trigger to fire each barrel. Ho hum; nothing unusual about that.
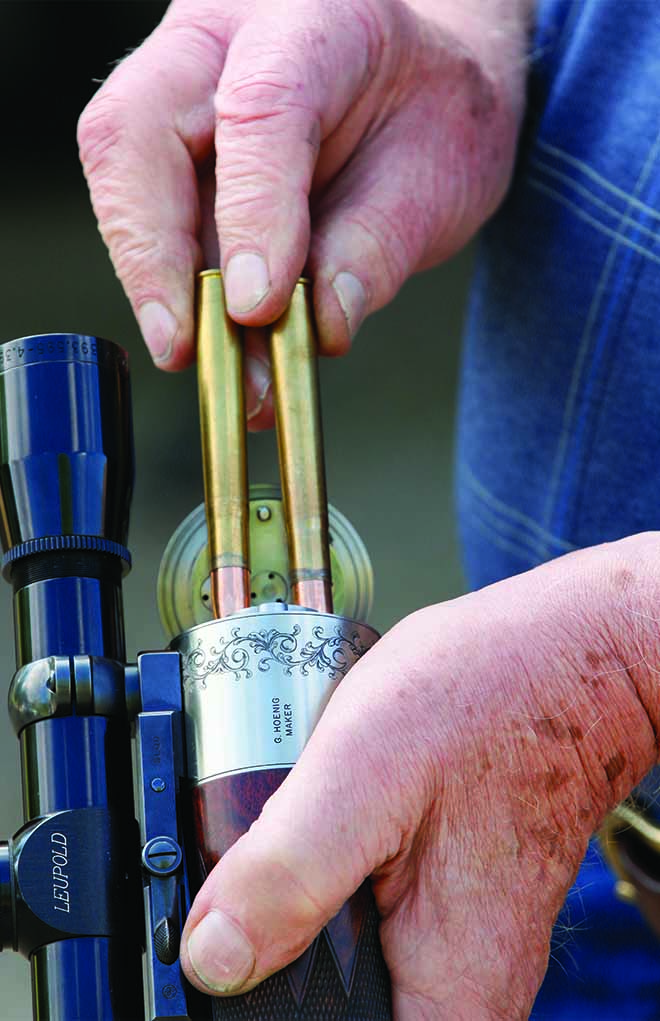
Hoenig’s Rotary Round-Action guns can be chambered for shotshells or rimmed, centerfire rifle cartridges, including 22 rimfire.
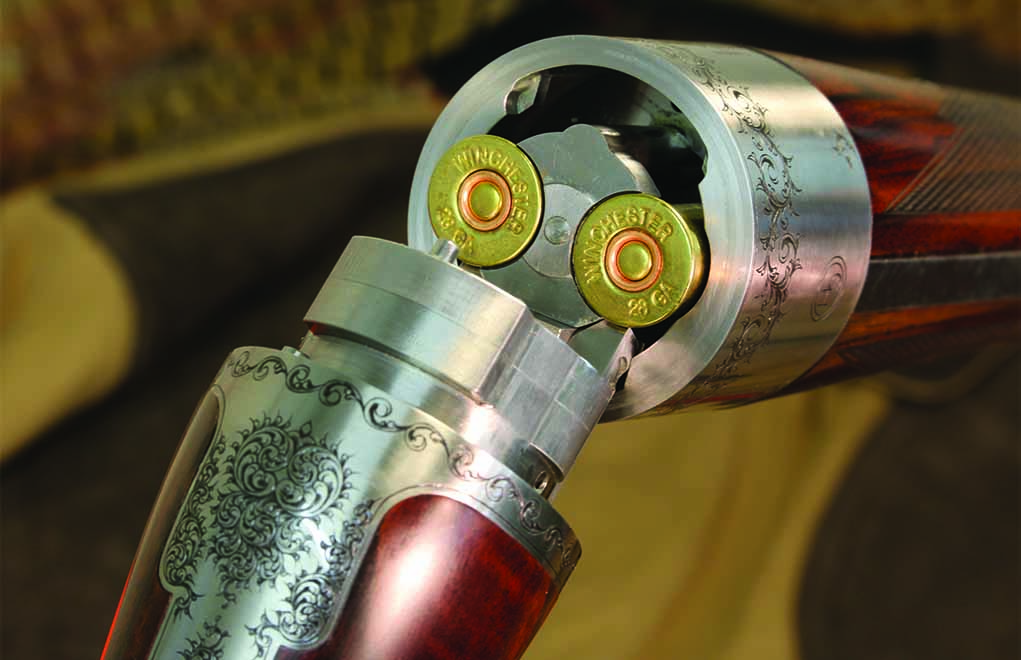
But here comes the novel part: Instead of pushing a top tang lever to open the action, you merely twist the barrels a quarter-turn to the right. You then pull them away from the breech. After an inch of travel, the barrels will hinge down, activating the expansive ejector. This single piece engages fully one-half of each case rim and lifts both simultaneously a full inch out of their chambers. You pluck them out or simply raise the muzzles so the fired brass falls out.
The strikers are cocked via a cam when the barrels are twisted open. To reload, drop a fresh round in each chamber, hinge the barrels level with the breech, push together and twist a quarter-turn to the left. The gun is loaded, locked, cocked and ready to fire.
Performing these tasks is quick, easy—and a lot faster than describing them!
But why did Hoenig bother with all this? Why didn’t he just build a high-quality double on already famous and proven actions?
The basic premise of the Rotary Round-Action is avoiding the inherent weakness of those traditional, hinging double barrels. Because these guns lock below the line of their barrels, the equal and opposite force of the payload moving down the barrels is transferred against breech faces that perch well above the locking point. This causes the barrels to push away from the breech, hinging downward and pivoting around those locking lugs. Over time, the gun is sprung loose, and the barrel breeches are gapped away from the face. With high-pressure rifle cartridges, this happens much sooner than it does with lower-pressure shotshells.
The builders of the HRRA guns: George Hoenig (left) and his associate, Owen Bartlett, in their shop.
Such wear can’t happen to the Rotary Round-Action, because its locking lugs are equidistant above and below its barrels. Firing forces try to pull the barrels away from the face, but they’re held evenly by those massive, matching locking lugs. Brilliant!
The twin locking lugs are milled from the same cylinder of steel that makes up the frame of what is essentially the back half of the receiver/action. This piece, which is fitted to the front of the butt stock, encloses most of the working mechanisms, few though they are: two triggers, two tiny firing pins, two strikers with coil springs to drive them and a single safety that blocks the strikers. Mechanical simplicity. Mechanical perfection.
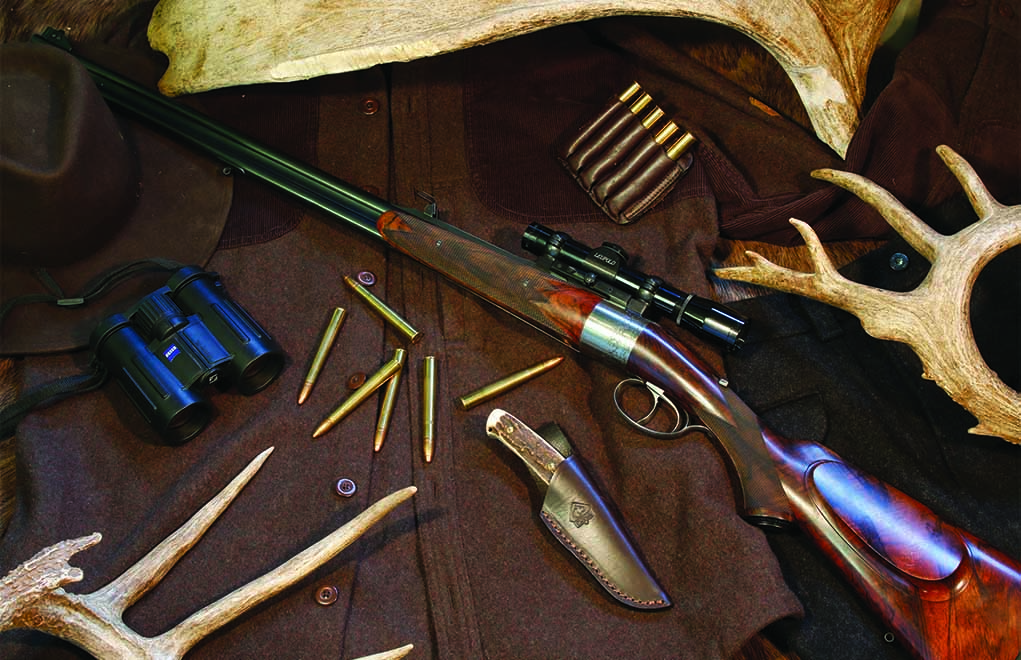
An HRRA in 9.3x74R with a quick-detach scope and fixed iron sights is rugged and ready for any big game.
To the face of this receiver block is bolted a steel plate with matching lugs, along with a bottom hinging bar roughly akin to the action bar jutting forward from classic double-gun breech blocks. A stout lifter hinging within this bar pushes the mechanical extractor in the front half of this action when the mechanism is operated. Cocking is done by twin fixed cams that push back the strikers when the barrels are twisted open.
Impeccable wood-to-metal fit and engraving enhance the inherent elegance of every cylindrical Hoenig Rotary Round-Action gun. A fully manual safety and double triggers enhance reliability. Even if one barrel fails to fire, the other is independently functional and instantly ready.
The front half of this action is the steel ring to which the barrels are screwed. We could call this the “front receiver ring,” because it harbors the locking lug recesses. The fit is so precise that the gun sounds and feels like a bank vault locking. Closed, it exhibits not the slightest hint of movement. It’s as solid as one continuous bar of steel. Other than the sliding extractor, it has no moving parts.
Unlike a typical hinged double-action, the forend wood of the Rotary Round-Action has no function other than to provide a checkered surface for your hands to grasp. There are no push rods, springs or plungers to assist with opening or cocking and no little springs or pins to wear or break.
Unusual though it is and unfamiliar though it might seem, Hoenig’s mechanism epitomizes rugged simplicity. The only doubtful part strikes some as the hinge, which they imagine is too weak to withstand repeated opening, hinging and closing. I haven’t heard of this being an issue with any of the approximately 78 Rotary Round-Actions that have been built. Given Hoenig’s obsession with unfailing, rugged, precision performance, I can’t imagine he’d design a weak link.
If ain’t broke, don’t fix it! The HRRA hinges down to load and unload like typical break-action doubles, but it locks up uniquely around twin locking lugs equidistant above and below the barrels. The result is that inertial forces during recoil don’t tear the breech away from the face.
In my estimation, the only flaw in this gun—which can be built as a rifle, a shotgun or a combination—is its price. During the last year of production, these rifles had been going for $27,500 and the shotguns for $22,500, depending on walnut quality and a few options.
What You Get
Options really aren’t many—or needed. The standard rifle comes with Hoenig’s swiveling front sight hood, detachable posts, hinged-grip cap storage and a one-lever, quick-detach scope mount that’s as clean and precise as every other part of this unique gun. Barrels are regulated to a remarkably precise degree, with most rifles delivering bullets from each barrel within 1 inch of one another at 100 yards. And, at 50 yards, many are touching.
In addition to nicely figured and precisely checkered walnut, the stainless steel action is beautifully engraved by Hoenig’s longtime associate, Owen Bartlett, who also checkers and does much assembly. Yes, it’s a two-man shop. (Well, it was a two-man shop: Alas, George, now in his 80s, has retired.)
HRRA guns can be chambered for shotshells or rimmed, centerfire rifle cartridges, including 22 rimfire.
Beginning in the mid-1990s, Hoenig and Bartlett built an average of five guns a year. Shotguns were mostly 20- and 28-gauge. Rifles were virtually any rimmed cartridge per the buyer’s preference. Hoenig’s favorite is the 9.3x74R. Driving 270-grain bullets at about 2,300 fps, it handles smoothly, recoils mildly and is an absolute delight to shoot. The one thing wrong with it is the unfortunate fact that I didn’t get to carry it through the buffalo swamps of Mozambique (or anywhere else except for a shooting range).
One can only hope Hoenig will sell his patent rights to enable a gun builder who’s equally obsessed with precision and quality to again produce one of the finest—and most unusual—guns in the world. Until then, if you want one, the used market is your only hope.
Editor’s Note: This article originally appeared in the May 2020 issue of Gun Digest the Magazine.
These are the deals that we’re currently tracking. Check back for updates.
*Note – Ammunition deals are currently extremely short-lived due to lack of inventory nationwide. If you find a deal you are interested in we encourage you to purchase quickly.
How do you face gun trouble on the go? The Wheeler Engineering Micro Precision Multi-Driver Tool Pen is one of the answers.
How Wheeler Engineering Equips You For Small Jobs:
Kit comes with 17 tips, including Phillips, slot, Allen and Torix.
Driver’s handle is hollow and holds 5, the 12 others are held in a separate tray.
The handle also doubles as a wrench.
Comes with a handy spring clip to attach to a pocket or in a pack.
“My old man is a television repairman; he’s got the ultimate set of tools. I can fix it.”
That was the assurance Spicoli gave in Fast Times at Ridgemont High.
He was wrong, of course, because it takes more than just tools to fix things. However, if you don’t have the tools, you’re out of luck—even if you have the skills.
And portable tools are more likely to be there than non-portable ones.
Long Name, Small Package, Lots of Options
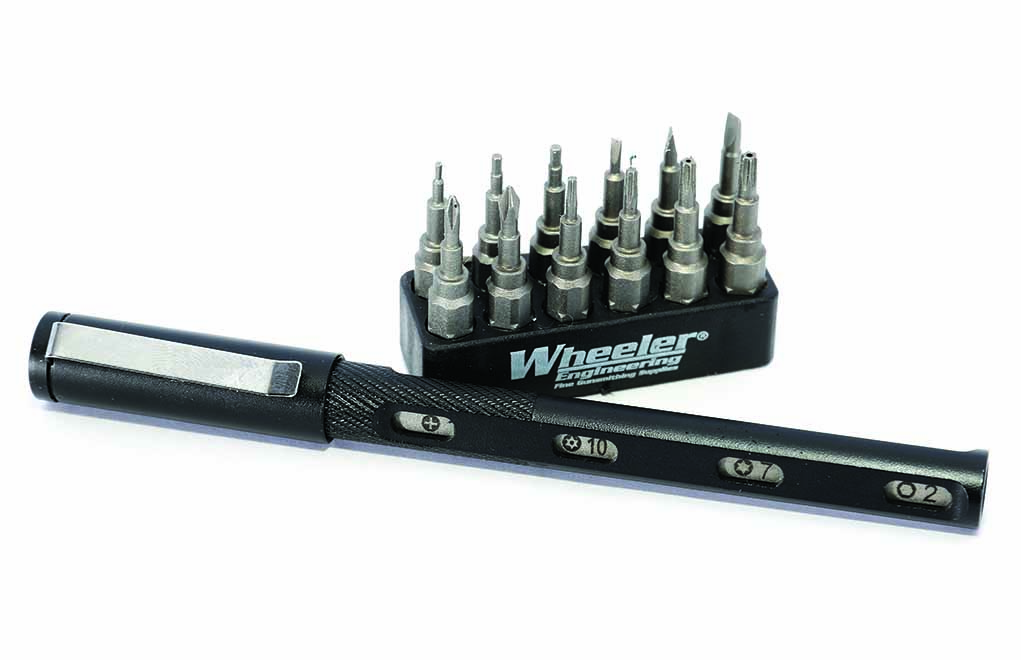
Enter the Wheeler Engineering Micro Precision Multi-Driver Tool Pen, whose name is bigger than the package. This kit comprises a pen-shaped screwdriver handle that’s hollow and a set of 17 tips. Twelve of those are in a separate press-fit tray.
The screwdriver bits are your basics: a Phillips head (curse the man and the widespread adoption of his design!), slot, Allen and Torx tips. The handle/wrench holds five of them; the others will stay in the tray.
These aren’t large tips. You’re not going to be able to snug the action screws to their proper torque limits on a precision rifle. However, what you can do is check the tightness of some scope-mount and ring screws. You can adjust the point of impact of a red-dot sight and tighten smaller screws on various optics. You can adjust the smaller screws on iron sights. You can make sure your various electronics attachments are still tight—and even, if the screw slots are close enough in size, make sure the grip panels on your pistol are tight (you polymer-framed pistoleros: Please ignore that last part).
All of this is in the pen and the 12-pack press-fit holder.
Wheeler Engineering arms you with five bits stored in the handle. You can mix and match and leave the five you need most in the handle.
The beauty of it is that it will fit into a gear bag, web gear pouch, a cleaning kit or other range essentials and not be noticed until it’s needed.
I don’t go to the range without camera gear (a side effect of being a gun writer), and so the best place for me to stash this tool is in my photo gear case—and also because there are a lot of photographic items that are held on with small screws; the Wheeler micro-set fits those as well.
The last use of the Wheeler micro-set is one some might view as abuse, but I have found that some battery compartment covers are too tight to remove with my bare hands. The smaller slot-head screw tips are good for “convincing” the recalcitrant covers to budge.
Three Affordable Chronograph Options To Check Your Speed
Some Suggestions
If you wish, you can simply dump the five bits out of the handle and replace them with the five most commonly used ones for a given application. Then, put the pen with the bits in the gear for that application and stash the unused ones in the general toolkit box.
You can do this for several applications, with several kits stripped and rebuilt, because the list price for this set is all of $27.
It’s not uncommon to spend that much just establishing a basic zero for a rifle, so having invested three or four lattés-worth of cash for a tool you can keep on hand at all times is just prudent.
Now, a pen-like handle is not going to provide you with a whole lot of torque. But how much torque do you really want to be generating with bits this small? Do you really think a 1/8-inch Allen-head screw is going to stand up to more torque than you can generate with a pen handle?
Spicoli was wrong … but that doesn’t negate the usefulness of tools.
Editor’s Note: This article originally appeared in the February 2020 issue of Gun Digest the Magazine.
While metric marvels have made headway in American shooting, they’ve yet to supplant the versatile and potent .308 Winchester.
Why The .308 Winchester Is Still Among The Best:
The cartridge more than holds its own at long range, is dead-on at medium range.
Hitting hard, the cartridge is appropriate for nearly all North American game.
With a slew of bullet choices, it is among the most versatile cartridges to reload.
As far as centerfire cartridges are concerned, it’s among the most affordable and available.
Open any gun publication or dial up a firearms website nowadays and you’ll see they’re awash in metric calibers. It used to be around elk season that there was a polite nod to the sturdy 7mm Remington Magnum or perhaps the 7mm-08. Those have since been supplanted by a wave of 6mm and 6.5mm cartridges, each billed as the second coming in brass, copper and lead.
That said, don’t believe the hype that these reinvented wheels have stricken traditional American favorites from the rolls forever. That especially goes for the standby they are most often measured against—the .308 Winchester.
For more than half a century, the squat .30-caliber has excelled as a long-range precision option, lights-out hunting choice, versatile target pick and as a first pick for any other role you’d expect from a non-magnum cartridge. And while it might have a bit more competition now, the .308 Winchester is as capable as ever now. It’s even fair to say that a gun collection isn’t quite complete without the old standby in the rack.
Ballistics Are Stong With The .308
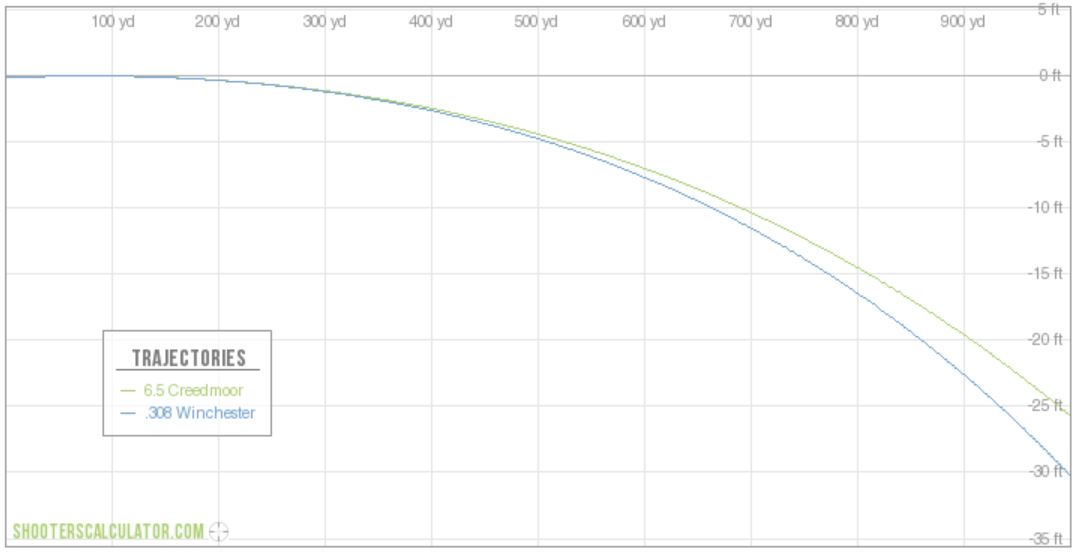
Admittedly, the sexy six and six-and-a-half have the .308 Winchester beat hands down at long distance. There’s no denying the superior aerodynamics vastly flattens the metrics’ trajectory, making them less susceptible to wind deflection and improving hit percentages 700 yards out.
Does it beat every cartridge’s ballistics? Not by a long shot, but the .30-caliber does hold its own.
That said, the .30-caliber is still a legitimate long-range option that, in the hands of a skilled shooter, is more than capable of consistent 1,000-yard performance. Beyond that is pushing it a bit. Regardless of bullet weight, the .308 typically goes sub-sonic around 1,100 yards. But let’s face it: across the shooting world there is a handful of marksmen that make this range their goal.
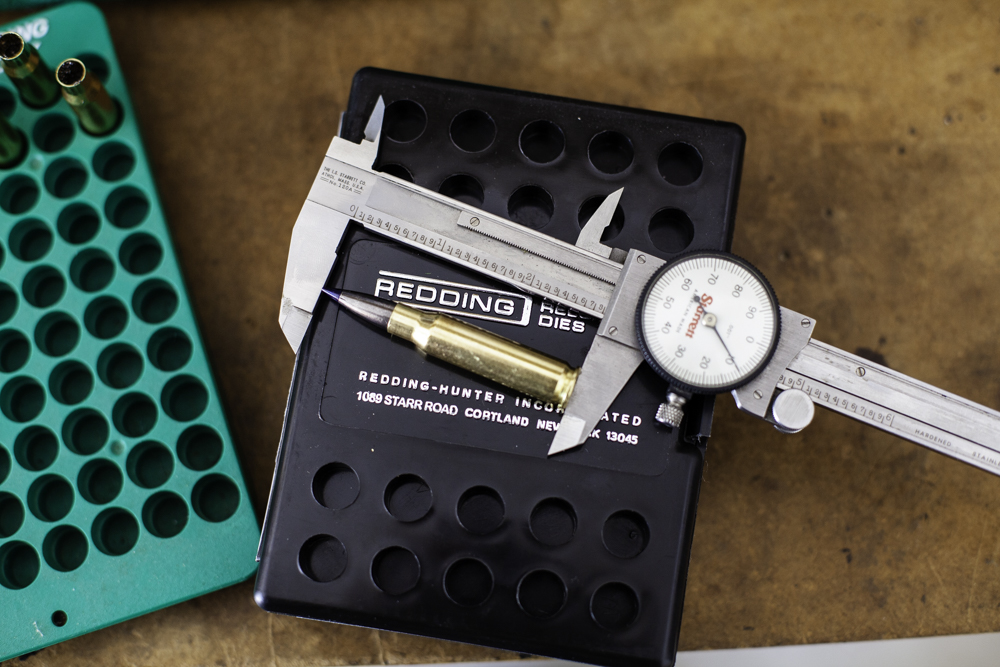
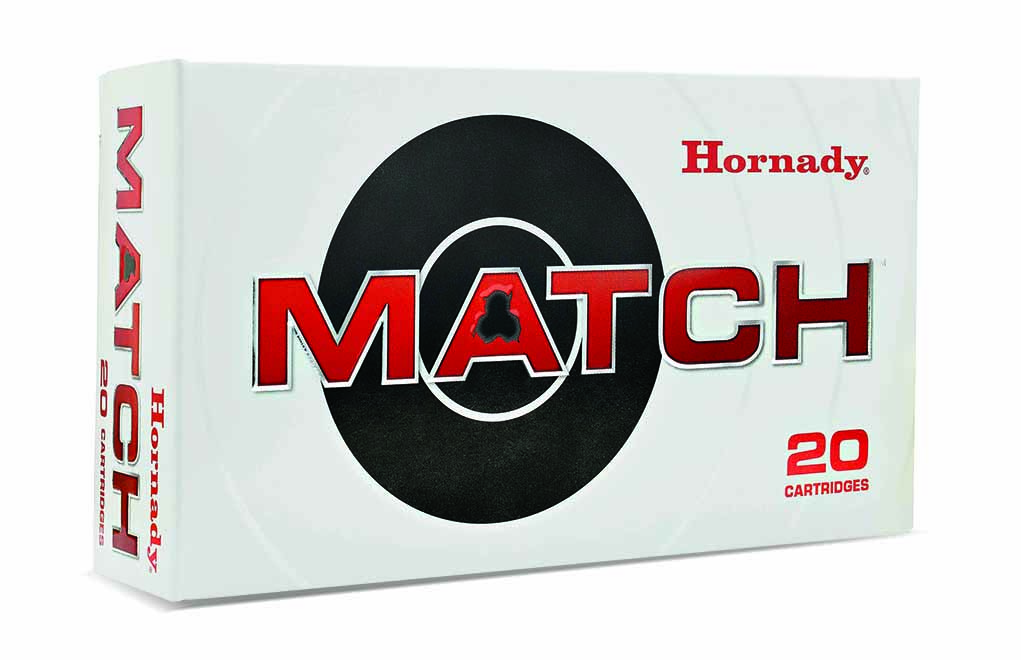
Furthermore, when talking typical, Joe-sixpack ranges of 500 yards in, most 6mm and 6.5mm offer little decisive ballistic advantage over the .308 Winchester. A “for instance” is in order. Let’s go with Hornady’s heaviest Match Ammunition loads with the same type bullet in each cartridge—the company’s ELD Match. In the case of the .308, this is a 168-grain load with a ballistic coefficient (BC) of .523 with a listed muzzle at 2,700 fps. For the 6.5 Creedmoor, it’s a 147-grain projectile with a BC of .697 and a muzzle velocity of 2,695.
Hornady ELD Match .308 Winchester and 6.5 Creedmoor trajectory comparison.
At 500 yards, the .30-caliber only drops around 4 inches more than the 6.5mm, which is negligible. Wind drift plays out in a very similar fashion, with a 10 mph crosswind defecting the .308 5-inches more than the Creedmoor Very manageable.
Extend the range to 1,000 yards, and the difference inflates to more than 5 feet and wind drift to nearly 3 feet, with the advantage going to the metric cartridge. But again, those longer pokes are the minority of shots taken by a majority of shooters.
As to capability against North American game, the .308 Winchester is right on target. Outside of coastal brown bears and the polar cousins, the .30-caliber has been proven over and over again against the likes of elk, moose, black bear and deer. Additionally, lighter loads in the 110-grain neighborhood, are more than appropriate for predators—if you fancy yourself a one-gun hunter.
Outside large, tough-skinned animals, the cartridge is appropriate for nearly all North American game.
Aiding the .308 in terminal performance is one of the largest bullet selections of any caliber—not only by weight but style. Everything from tried-and-true cup-and-core bullets and cutting-edge polymer-tip controlled expansion options are on the menu. In turn, you’re more likely to match your ammunition to your quarry than any other cartridge—except perhaps the .30-06 Springfield. But that’s a different discussion. READ MORE LINK
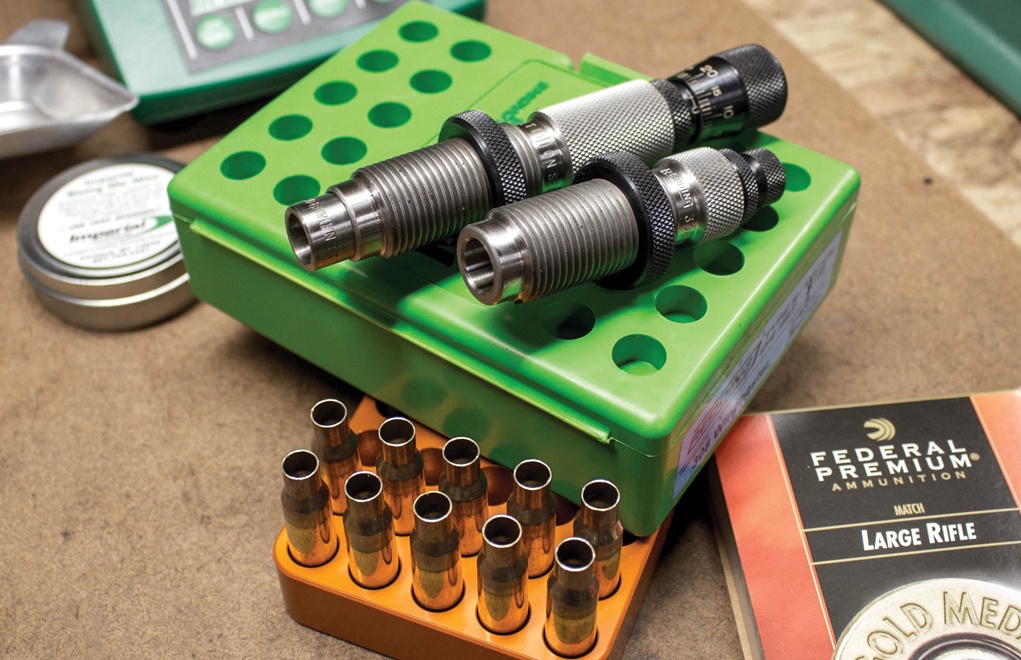
Reloading The .308
The vast selection of bullet weights and styles not only matches the .308 Winchester up against a vast array of game animals, but also makes it a gem to reload. As it stands, the .30-caliber loads projectiles from 100 to 200 grains, with a couple of specialty options north of this point. That’s versatile and opens the door to plenty of experimenting. That’s half the fun of reloading.
Like a versatility in your reloading projects, the .308 delivers it in full.
Additionally, the .308’s case has enough capacity to allow a fair degree of tinker as well. Roughly speaking—and depending on what brand of brass—the case holds around 56 grains of water. Certainly, that’s shy of the moderately larger .30-caliber .30-06, but big enough to trickle in a load that hits the sweet spot of your particular rifle or application.
The .308 Winchester Keep Costs Down
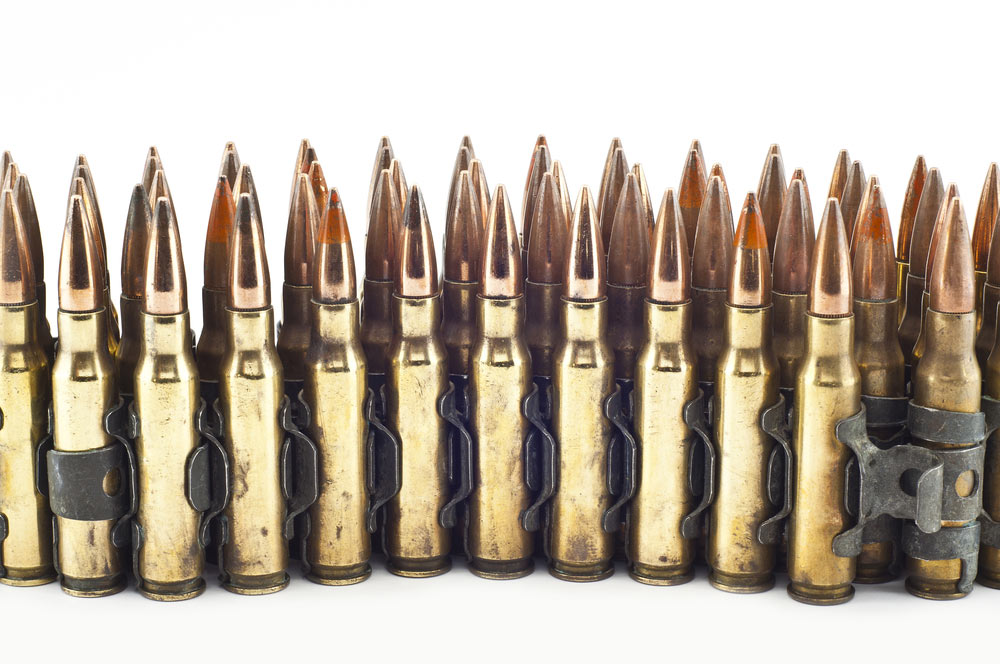
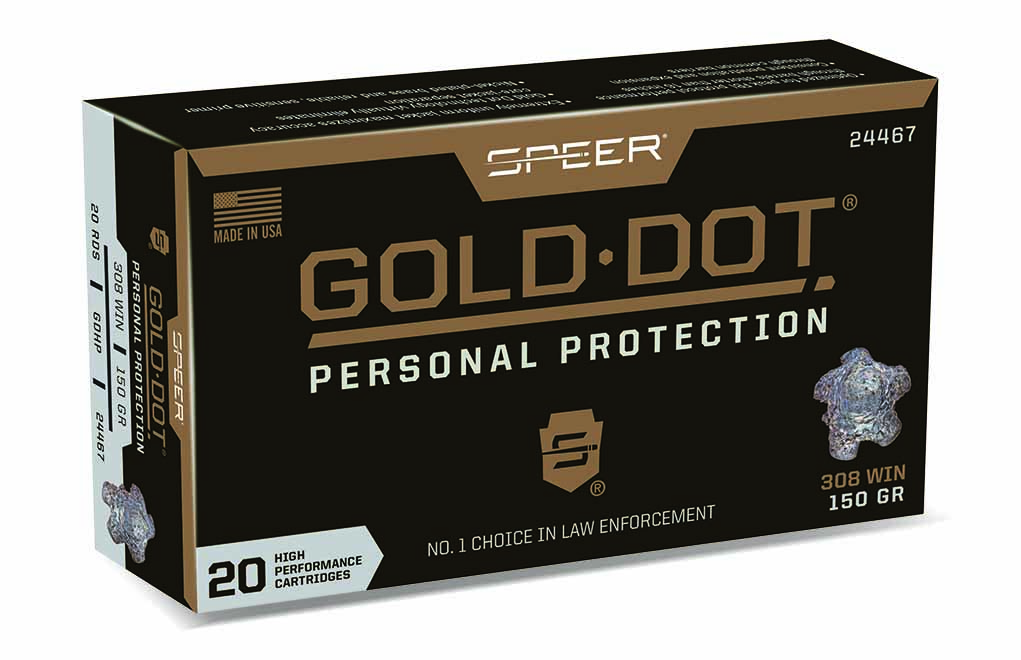
We’re getting into the nitty-gritty of what helps keep the .308 Winchester on top. Added to its other attributes, it’s also among the most affordable cartridges to shoot. Paying 50 cents or less per trigger pull isn’t unheard of, which puts it in rare company among centerfire rifle cartridges. You pretty much have to jump down to 5.56 NATO/.223 Rem. or go Russian—7.62x39mm or 7.62×54mmR—to find a cheaper cartridge to shoot.
Also known as the 7.62×51 NATO, the cartridge is among the most affordable centerfire cartridges.
Compare that to the metrics. While there are a few options below the $1 for the 6.5 Creedmoor and 6mm Creedmoor, the vast majority is well above this mark. Essentially, going with the metrics increases your ammo tab anywhere from 30 to 50 percent, which for most means half the shooting.
Availability
With ammo shelves bare as of this writing in late 2020, it might not seem like .308 ammunition is all that easy to find. But outside anomalous droughts such as this year’s, it’s about as plentiful as it comes. Aiding in its availability is the fact that the .30-caliber has a military guise—7.62x51mm NATO—and was widely used in the western world. That’s a boon for shooters, as surplus is often abundant and affordable.
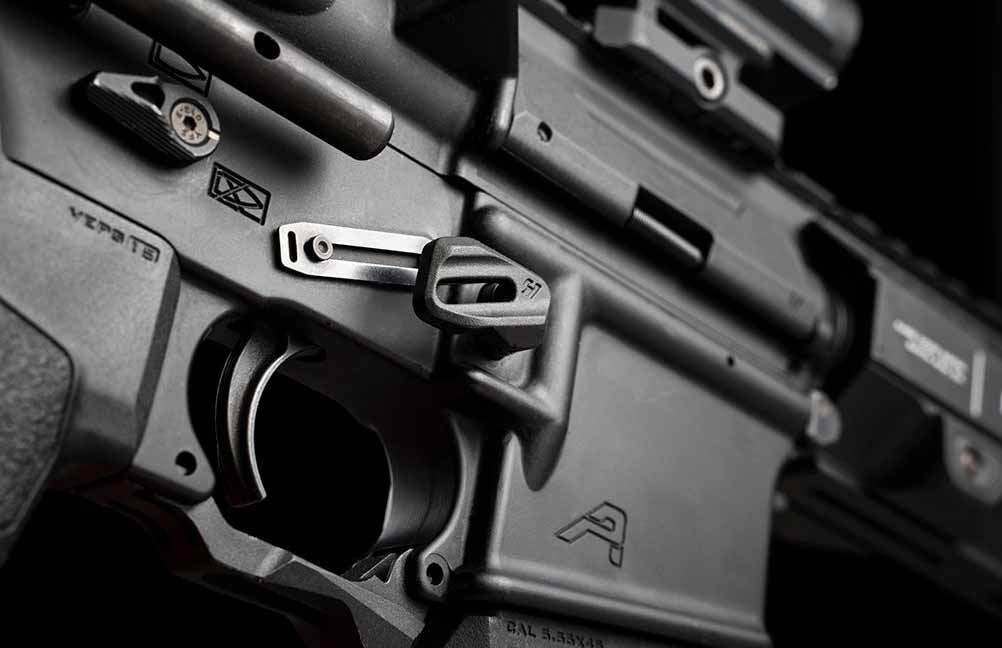
Competition or personal defense, the Strike Industries AR Modular Magazine Release optimized your carbine’s controls.
How The AR Modular Magazine Release Upgrade A Rifle:
Give shooters three configurations to choose from: standard, extended and oversized.
Switches out quickly with a small screwdriver or punch.
Built for hard use—impact resistant polymer button, stainless-steel shaft.
Next to lights out accuracy in most of its calibers, the attraction of the AR-15 is its modularity. Quick to upgrade, the rifle is easily configured to excel in any role, typically with minimal effort. Now the gun’s protean nature has been extended to among its smallest features.
Strike Industries AR Modular Magazine Release rethinks the vital control, giving shooters a button that adapts to circumstances. Outfitted with a T-Slot at the base and retained by a spring-loaded square adapter, the release is modifiable to three configurations: standard, extended and oversized. Changing buttons is simple, requiring a small tool to retract the spring and slide off the adaptor and then put a new one in place.
The release buttons are made from a lightweight and durable polymer affixed on a stainless steel shaft sleeve. Furthermore, they are textured to provide a tactile reference point, as well as a positive surface for maximum control. Included in the kit is a steel magazine catch along with a magazine spring, everything for drop-in installation right out of the package. Additionally, the AR Modular Magazine Release is compatible with mil-spec AR-15 lower receivers as well as DPMS pattern AR-10 lowers, covering nearly all bases.
True enough, the upgrade is a bit of overkill, given most shooters are good with one size of release—standard or otherwise. However, the modular release could have a place, particularly for one-rifle shooters and the like. Shooting in a competition, run one of the oversized buttons to ensure lightning-fast reloads on the move. Need to stay streamlined and snag-free, pop off the big levers and run standard. It seems to have a place, at least for some.
For the price Strike Industries is asking, the AR Modular Magazine Release is at least worth experimenting with. Its MSRP is $35.95.
For more information on the AR Modular Magazine Release, please visit strikeindustries.com.
Get On Target With The AR:
Go Small With These 8 Economical AR Pistol Options
Looking to reach out? From reloading bench to range, we’ve got the long-range gear to get you on target.
From competition to hunting, shooters are getting their rifles to reach out. But you need more than a precision iron to stay on target at extreme distances. We’ve gathered up some of the top long-range shooting gear to get to ensure you’re always sub-MOA no matter how far out.
There’s nothing so rewarding—and simultaneously time-consuming and occasionally frustrating—as loading precision ammunition. Trickling perfect loads makes for long hours. RCBS speeds up this process without compromising precision with its MatchMaster Powder Dispenser. Not just another electronic dispenser, this machine uses a twin-tube design to throw charges to within .10 grain in fewer than 20 seconds. That’s impressive, to say the least. Additionally, it boasts user-adjustable powder settings to tune its operation to particular propellants, along with adaptable feet, which makes shimming a thing of the past. Completely programmable and as precise as they come, the MatchMaster should be on every serious long-range reloader’s bench. MSRP: $1,082; rcbs.com
Vortex 1000 Rangefinder
A key factor in connecting at long-range? Knowing the range. Vortex makes this vital piece of data easier than ever to collect with its new 1000 Rangefinder. As its name suggests, the device delivers measurements out to 1,000 yards on reflective targets and produces nearly equally impressive results on nonreflective targets: 500 to 800 yards, depending on the surface. Overall, that makes it a regular jack-of-all-trades—good for ranging a gong way out for that trophy elk. Additionally, this smallish rangefinder has angle compensation, continuous reading and easy-to-use controls. All in all, it’s a snap to use in the field. MSRP: $270; vortexoptics.com
Timney Impact Trigger
Among the quickest and most effective upgrades to a rifle—long-range or otherwise—is a quality trigger. Timney has an option that’s perfect for those who want a lot of performance for a small price. A single-stage trigger, the Impact trips at a meager 3 to 4 pounds and is crisp on its break. All components are encased in a lightweight, aluminum alloy housing. The hammer is wire-EDM machined from S7 tool steel that combines hardness to resist wear with superior impact resistance to withstand heavy use without chipping or breaking. Other components are EDM cut from A2 tool steel and then heat-treated to Rc 56-60 for a long service life. MSRP: $135; timneytriggers.com
Leupold Performance Eyewear
Producing crystal-clear optics that shooters have trusted for decades, it makes sense that Leupold would turn its expertise to eyewear. We shooters are lucky it has, because its line of performance eyewear is designed for the most rugged use and to enhance your shooting experience. The lenses boast infused polarization that eliminates glare to deliver flawless images—whether you’re looking through a scope or scanning the field. A diamond-tough, scratch-resistant coating on ANSI Z87.1+ lenses ensures the glasses’ integrity through the toughest abuse you can dish out. These glasses are available in five styles—and, if you need it, the lenses can also be ground to your prescription. MSRP: Starting at $129; leupold.com
Ulfhednar UH303 Sling
Precision rifle shooters know that keeping a rifle rock steady is key to consistent accuracy. Ulfhednar’s UH303 Sling has been designed to help steady your shots quickly and easily. Featuring PRS non-elastic web and adjustable cam-buckle, the sling length can be adjusted quickly from rifle carrier to a support. One of the two solid-plastic clamps adjusts the total length of the loop; the other locks the loop around the arm. Together, they ensure that once an adjustment has been made, it’ll stay there until you physically change it. For target-shooting or big game, it’s an indispensable tool. MSRP: $160; ulfhednar.no
Primary Arms GLx 4-16x50mm FFP Mil-Dot Riflescope
Optics, not guns, can prove the prohibitive factor to precision shooting. A purveyor of solid, long-range aiming solutions, optics manufacturer Primary Arms has come out with a doozy in 2020: the GLx 4-16x50mm. It has more than enough magnification to handle most precision shooting situations and is enhanced with a light-gobbling 50mm objective lens. What’s more, it’s a first focal plane scope, which means you can utilize Primary Arms’ mil-dot reticle perfectly, no matter how high or low you have it dialed. New in this line are enhanced locking turrets with a return to zero, AutoLive motion-sensing reticle illumination and a hardened steel-on-steel adjustment system. All that,and there’s still money left over for ammo. MSRP: $700; primaryarms.com
After nearly 11 years in development, powerhouse optics maker Swarovski has released its NL Pure binocular line with unique ergonomics, wider field of view and tack-sharp image definition. The new binos sport an interesting, slimmed-down barrel that gives the user a slimmer hold to alleviate many of the cramps and discomfort that come with using an optic for long periods. Additionally, the famed optics maker is releasing three variants—8×42, 10×42 and 12×42—giving you the perfect set for any operation. Interestingly, all are the same size. Finally, a new mechanical system works with the internal prisms and downsized barrels to maintain Swarovski’s legendary image quality but creates a more comfortable and immersive glassing experience for the user. These are the real deal, whether for glassing for high-country elk or pinning down your last grouping. MSRP: $3,299; swarovskioptik.com
Remington R2Mi
Have a passion for long range that the average 6mm or 6.5mm isn’t satisfying? Shake hands with the Remington R2Mi bolt-action rifle. This behemoth brings all the inherent ballistic advantages of .50 BMG and also offers a number of intriguing design points to put it on target. Situated on the left of the receiver, the bolt handle allows the right-handed shooter to operate with their support hand, thus not breaking position when cycling. It boasts a Lothar Walther free-floated, match-grade barrel, an eight-groove bore with a 1:15 twist and an ACC muzzle brake, which accepts a Cyclops suppressor. The receivers are made of machined, aircraft-grade aluminum and mated with a vented handguard. MSRP: $4,999; remington.com
Woox Furiosa Chassis
A unique option for precision marksmen, the Furiosa Chassis is a hybrid option that combines the best that wood and aluminum have to offer. At its heart is a rigid metal frame, providing the stout platform required to put distance shots on target again and again. This is augmented by a hardwood skin that gives it the look and feel of a traditional rifle stock; it also goes a way to improve the chassis’ performance. Of course, it comes with the features most shooters look for in a chassis—an adjustable buttstock and M-Lok compatibility. But, with the choice of walnut or Midnight Gray composite, the Furiosa turns your precision Remington 700, Tikka T3 or Sauer 100 into a head-turner. MSRP: $900; wooxstore.com
CMMG Endeavor in 6mm ARC
Hornady’s 6mm ARC is intriguing … but you need a little something to launch it from. Ever cutting-edge, CMMG chambers its Endeavor rifle for the ballistically talented precision cartridge. A mainstay in tack-driving semi-autos, the AR-style rifle is decked out with a number of accuracy-enhancing features. Prime among these is a 20-inch heavy barrel, fully adjustable Magpul PRS buttstock and SV Brake. When it comes to the trigger, CMMG outfits the iron with the Geissele Automatics SSA two-stage model—a favorite among competitors and others who take a pristine trigger break deadly seriously. Want a rifle to take the 6mm ARC the distance? Look no further. MSRP: $1,800; cmmginc.com
MTM Case-Gard Tactical Rifle Case
If you’ve invested a couple of grand into a shooter meant to clip the rear off a gnat at 1,000 paces, you need something to protect that investment. The MTM Case-Gard Tactical Rifle Case gives you peace of mind that your top-end iron is safe and sound when on the go. In addition to an impact-resistant exterior shell and sturdy eggshell foam interior to protect your rifle from any dings, built-in nylon straps keep your gun from shifting around. Four exterior clasps keep the case locked tight, and multiple locking points ensure it can’t be pried open by some malcontent. In addition, tie-down points make the case a snap to carry on an ATV or other vehicle. MSRP: $73; mtmcase-gard.com
Hoppe’s Gun Vise
As important as fundamental marksmanship, proper care of your long-range rifle is key to staying on target at a country mile. Jags, brushes and cleaning rods are obvious must-haves for the task, but so is a solid platform on which to work. Hoppe’s, the purveyor of tried-and-true No. 9 Solvent, has pieced together an excellent workspace in its Gun Vise. Dual lockable sides keep your firearms in place while you tinker away, and interior padding ensures the integrity of your gun’s finish. Furthermore, storage compartments keep lubricant, solvent, cleaning equipment and small, easy-to-lose gun parts in order and in reach. Chemical-resistant, the polymer vise is constructed for long and hard use, ensuring you always have a place to keep your favorite firearms in working order. MSRP: $69.99; hoppes.com
Hornady 6mm ARC 108-grain ELD Match
If it hasn’t hit your radar yet, Hornady has released a new long-range round. As to performance, the 6mm ARC does a lot with a little. Hornady’s 108-grain ELD Match kicks a bullet 2,750 fps at the muzzle that only drops 44.8 inches at 500 yards. Side to side, this is 3 inches fewer than the company’s 168-grain, match .308 round at the same distance. At the same tick, it maintains its velocity better than the .30-caliber, moving 1,971 feet at the 500-yard mark and staying supersonic well past 1,000 yards. This is an advantage for soldiers, as well as for anyone who has a yen to reach out while hunting, target shooting or otherwise. MSRP: $24 (box of 20); hornady.com
Speer Gold Dot 150-Grain .308 Winchester
Long-range-capable rifles seem to be pigeon-holed for purely target-shooting pursuits. However, there are other applications. For the ones pulling duty for personal defense, Speer has cooked up potent fodder certain to neutralize any threat—both two- and four-legged. A regular tooth-chipper, the company’s 150-grain .308 option is topped with a Uni-Core bonded bullet and loaded hot. At the muzzle, Speer lists its velocity at 2,820 fps … which should get the most out of the .414 BC bullet. The projectile has an excellent expansion profile and is designed to hold together, creating a continuous and devastating wound channel. If you turn to an AR-10 or other .30-caliber rifle to protect your homestead, this one should be in the chamber. MSRP: $31 (box of 20); speer.com
The single most important element in your survival is a cultivation of your situational awareness skills. Many people don’t realize their situational awareness skills are more important than their marksmanship skills. Well, you can’t shoot something you don’t know is there or don’t know it needs to be shot.
Situational awareness and alertness are not, for most people, innate behavior traits. This is a learned behavior pattern and, like most skills, it is best learned through repetition. Make a conscious effort at first to be more aware and see the details around you. After a few weeks of effort, it will become second nature.
You should have been taught this as a child, but unfortunately, most children now are not taught this or other vital social skills. One thousand years ago, all children were taught at a very early age to be situationally aware, alert and in tune with their surroundings. If they were inattentive, they might get eaten. One hundred years ago, children were taught to be aware and pay attention to their surroundings, or the hay bailer might tear off their arms and legs. In our time, if you fail to pay attention to your surroundings, someone might cut your throat. Each example is simply a different manifestation of the exact same problem.
On the street, you must be aware of your environment. If you know who is around you and what they are up to, you are in charge. If you do not know who is around you and what they’re up to, you are meat. It’s that simple.
When you walk into a room, scan around and see who is in it besides you. Don’t be surprised by someone you did not see. When walking on the sidewalk, glance into storefront glass and see who is behind you. Get your head up, open your eyes, and look around.
Advanced Self-Defense Training:
7 Steps To Control Fear And Make Sound Decisions Under Stress
Let’s look at a couple of examples. Carjacking is a very common problem right now. In fact, in my city, there are about 1,000 carjackings each year, and roughly half of the victims wind up seriously hurt. This is a perfect example of how passive attempts to fight crime just make it worse, by the way. By putting steering-wheel locks, kill switches and car alarms on your car, it is now easier to drag you out of it while it is running than to steal it from your driveway as you sleep. Where do most carjackings occur? At intersections, as you wait for the light to change.
When a typical driver pulls up to a red light, he sits and stares at the light, as if it is going to sing and dance. He then hears a tap on his window and turns to look into the muzzle of a gun—too late to fix it now. To avoid this, all he had to do was scan his surroundings instead of staring at the light. If you see a guy standing on the corner looking at your car the way a hungry man looks at a steak, start thinking. You saw him because you are in Condition Yellow, and you go to Orange and start thinking, “What am I going to do?” “If he steps off that curb toward my car, I will accelerate around the car in front of me and be gone.” Problem solved.
Most carjackings occur at intersections as drivers stare at the stoplight, waiting for it to change and not paying attention to what is going on around them. It is best to keep your head up, scanning your surroundings, looking for someone who might be acting suspiciously.
Another crime that really annoys me is the practice of following people to their homes in the suburbs and robbing them in their driveways as they exit their vehicles. This happens two or three times a day in my city. It cannot happen unless the victim is a willing accomplice. You have to go out of your way to have this happen to you.
I say this because not one of these victims lives on a major thoroughfare. By definition, they live in residential neighborhoods. I don’t care where you have been: bank, grocery store, ATM, theater; when you turn off the main drag into your neighborhood, look in the rearview mirror. It’s not there so you can shave on the way to work or put on makeup; it’s there specifically to see what kind of car is behind you. If you make a turn into your neighborhood, again, look in the mirror. If you turn onto your street, again, look in the mirror. If you have made three turns inside your neighborhood and the same ragged, old car you’ve never seen before is right behind you, you might have a problem. It is, however, a relatively small problem at this point. You are still mobile and in control. If, on the other hand, you are too damned lazy to look in your mirror three times, pull into your driveway, open your door and find a guy standing there with a gun in your face, you have a much bigger problem. Fix it the easy way: by being alert. Every fight you avoid, you win.
Honing Situational Awareness
There are some exercises to help you become more situationally aware. As a car passes you in traffic, look away and quickly describe it to yourself. What was its make, model, color, two or four door, license number? What was the gender, race, age of the driver? Of the passenger? Look back and see how much information you got right. When you walk past someone in the mall, mentally describe them to yourself. Hair color? Glasses or facial hair? Shirt, pants, shoes? Turn around and look. How much did you get right?
Right now, close your eyes. Visualize your own living room. Describe every detail to yourself as you visualize it. Describe the paintings on the wall. What is the title of the book lying on the floor by the couch? What color is the coffee cup left on the table?
What most of us refer to as “vision” is actually a two-part process, which involves sight and observation. “Sight” refers to the actual physical process of having light enter your eyes and make images on your retina, which are then transmitted to your brain. “Observation” refers to the process of sorting, prioritizing and making sense of these images. This is where the typical person falls short.
In a retail environment, such as a fast-food restaurant, the cash register is the center of likely problems involving criminals. Be away from it, in position to see it and behind anyone who might be planning a robbery.
Human beings are visually oriented creatures. Our eyes have been elevated off the ground with our upright posture; they have been moved to the front of our head for stereoscopic vision; we have color vision; and our visual acuity is among the best of all living creatures. For a typical person, roughly 70 to 75 percent of all sensory input is visual. The average person, however, consciously processes only a tiny fraction of the total visual input the brain receives from the eyes. This is pathetic.
You must learn to raise this level of consciousness through actual specific effort. You need to see the gun when it is still in his pocket—not when he pulls it out and points it at you. You need to see him standing behind that column in the parking garage—not when he is in your face. Shame on you if you get a speeding ticket. You should have seen the cop long before he could get a radar reading on you.
Let me give you a recent example of how being alert allows you to avoid problems. My wife and I stopped at a local barbecue joint for a sandwich on a recent Saturday afternoon. We were sitting in a corner booth by the entrance. Anyone who entered the store had to walk past us to approach the counter, giving us a good view and putting us behind anyone who started a problem. In a retail environment, the cash register is the center of likely events. Be away from it and in position to see it. Every time the door opened to admit a patron, my wife and I simply glanced up from our lunch to briefly look them over. This in no way interfered with the conversation or our lunch, but we were simply aware of our surroundings (Condition Yellow).
The third man to come in was a young man of about 20. He was wearing worn denim jeans; clearly outlined in the right rear pocket was a small semi-auto pistol. He had been sitting on it in his car, and the gun’s outline was clearly printing through the material of his pants. As he passed us on his way to the register, I quietly asked my wife, “Did you see the gun?” “It looks like a Lorcin .380,” she replied (she’s very good at this). Go to Condition Orange.
I continued eating, but kept an eye on the young man, assessing him. As the customer in front of him paid for her order, the young man got up on his toes and checked the contents of the till over her shoulder. Condition Red!
It was obvious that he was planning a stickup. I emptied my hands and mentally prepared for possible violence. Before pulling a gun and announcing a stickup, however, he decided to scan the store and take a head count first. As he turned to me, his eyes got very wide, and he ran out of the store, got into his car and sped away—without ever doing anything remotely aggressive.
What did he see that scared him so badly? I looked him right in the eye and smiled. He knew that I knew and that I was prepared to deal with him. This is a perfect example of violence that did not happen because I was alert and aware of my surroundings. Situational awareness is often situational dominance.
The scary part was that no one else in the place, customer or staff, noticed any of this interplay. They did not see the gun, did not notice him checking the till and did not even notice him hustling out of the place. Other than my wife and I, every single person in the store was in Condition White.
Parting Shot
The predators are out there. They are looking for the distracted and the preoccupied. If you shuffle around, your head down, looking at your feet, you might as well wear a sign around your neck that says, “Take me. I am a victim.” Get your head up, open your eyes, and move them around. Take that damned sign off and get rid of it. It’s not up to them whether you’re going to be a victim; it’s up to you.
Making its first foray into bolt-action rifles, Springfield Armory has whipped up a lightweight and deadly accurate hunter in the Model 2020 Waypoint.
How The Model 2020 Waypoint Is Designed As An Accurate Hunter:
Rigid and lightweight hand-laid carbon-fiber stock.
Unique carbon-fiber wrapped barrel that dissipates heat.
Crisp and consistent TriggerTech adjustable trigger.
Rock-solid Model 2020 stainless-steel action.
Springfield Armory has dipped its beak in a lot of areas in the world of firearms—imports, semi-auto rifles, striker-fired pistols and, of course, 1911s. Explicitly missing from its ventures, a bolt-action rifle. Now the company can scrub that off the list.
The Illinois firearms manufacturer and importer is striking new ground with the introduction of the Model 2020 Waypoint. Marketed as a hunting rifle, the bolt-action is the flagship of an entirely new line built around the Model 2020 action. No word on how and when Springfield will expand on its initial offering, but that’s alright—the gunmaker has given shooters plenty to mull over in the Waypoint.
To that end, the company has built a solid foundation for the rifle and its successors with what appears a well-constructed action. The heart of the Model 2020 Waypoint is built from stainless steel and kept to exceedingly tight design and manufacturing tolerances. In addition to a two-lug, push-feed design, the action features glass-smooth EDM-machined lug raceways to improve the bolt’s action. The bolt itself is fluted and employs dual cocking cams and an enhanced extractor to ensure there are no hang-ups, even with high-pressure loads. Finally, Springfield tops everything off with an oversized bolt handle, making operation all the more intuitive and easy.
While the rifle is angled at the game field, it’s taking cues from the tactical end of the market. This is evident in the Model 2020 Waypoint’s stock from AG Composites, complete with full pistol grip, optional adjustable comb, pillar bedding and the wide fore-end of a target model. Unlike typical precision stocks, Springfield’s is featherlight, a function to its hand-laid carbon-fiber construction. Impressively, the lightest models come in well under 7 pounds. Very merciful heft indeed.
Though, the stock doesn’t get to take all the credit for weight savings. The lithest models shave bulk thanks to a carbon-fiber wrapped barrel from BSF Barrels. Its construction is unique. Utilizing a process known as roll-wrapping, a majority of the carbon-fiber sleeve doesn’t make contact with the stainless-steel barrel. Instead, it free-floats allowing the barrel to dissipate heat—also helped by fluting on the barrel proper— to preserve pristine harmonics for repeatable accuracy. The lightweight material is kept in place via two caps.
Springfield Armory guarantees .75 MOA accuracy in the Model 2020 Waypoint and has spared no expense to ensure it. This is no more evident in the gunmaker opting for an adjustable TriggerTech trigger. Leaders in precision fire control groups, the unit in the Springfield rifle is adjustable from 2.5 to 5 pounds and features a patented roller promoting a spotless and repeatable pull. It’s lock time is also lightning fast—1.9 milliseconds—so it cuts down on any potential wobble off-target at the break.
Initially, the Model 2020 Waypoint is available in .308 Winchester, 6mm Creedmoor, 6.5 Creedmoor and 6.5 PRC. Other notables include AICS magazine compatibility, QD pockets, reinforced M-Lok slot on the fore-end, removable radial muzzle brake (5/8×24 thread pattern), Picatinny optics rail and the choice of Evergreen or Ridgeline camo patterns. One other thing to note, Springfield also offers the Waypoint in more affordable configurations, which non-adjustable stock and fluted stainless steel barrel.
As to cost, all that carbon fiber elevates the price tag. For the whole hog—adjustable stock and carbon-fiber barrel—the MSRP is $2,399; stainless-steel barrel and static stock cuts the suggested retail price down to $1,699.
Springfield Model 2020 Specs Calibers: 6mm Creedmoor, 6.5 Creedmoor, 6.5 PRC, .308 Winchester Capacity: 5 rounds Barrel: Stainless-Steel; BSF Barrels Carbon-Fiber Barrel Length: 20, 22, or 24 inches Weight: 6 pounds 10 ounces to 7 pounds 6 ounces Stock: AG Composites Carbon-Fiber Trigger: TriggerTech Adjustable MSRP: Starting at $1,699
Affordable and high performance, Leupold hits the sweet spot with its new SX-2 Alpine HD spotting scope line.
Unless you’re setting up a tree stand in dark timber, chances are you need quality observational optics. Without a spotting scope or a pair of binoculars, you’ll spend more time on the hoof and less time finding game. Luckily, Leupold has you covered with optics designed to pick out elk from shadows from a country mile.
Recently introduced, the SX-2 Alpine HD spotting scope line delivers impeccable images and ample magnification, upping your chances of filling your tag. Presently two models are available, a 20-60x60mm internal optics and a 20-60x80mm option. In both cases, the scopes offer best-in-class features, ergonomic designs, and field-rugged durability. Oh yeah, and they’re priced in the range most shooters can afford. The MSRP on the 60mm SX-2 Alpine HD is $519.99 and the 80mm $649.99.
“The SX-2 Alpine HD delivers exactly what hunters and shooters want in a spotting scope, and it does it in a price class that you’re not going to be able to beat,” said Zach Bird, Product Line Manager for Leupold & Stevens, Inc. “Our in-house optical engineers are working every day here in Beaverton, OR, to bring consumers the product quality they deserve, and the SX-2 is the perfect example — it’s lightweight, rugged, clear, and exactly what you’ll need whether you’re spending the day at the range or heading out in the field.”
Despite their relatively affordable price tags, the SX-2 Alpine HD scopes have top-notch features, including generous eye boxes to reduce eye strain, comfortable oversized eyepieces and water and fog proofing. Perhaps the most useful feature is Leupold’s Twilight Max Light Management System that extends the scopes’ usefulness into low-light conditions. Intensifying ambient light and reducing glare, the system keeps images clear even in the dim environments hunters find themselves at dusk and dawn.
Furthermore, the scopes will stand up to the toughest conditions. Leupold’s Diamondcoat lenses come standard on SX-2 Alpine HD scopes, making them nearly impervious to scratches. And high-tech lens coatings further protect the lenses from dirt and water build-up, while enhancing and sharpening images. Additionally, there is a rotating tripod adjustment ring to allow for more flexibility when glassing large areas, along with an integrated, adjustable sunshade.
Of course, the SX-2 Alpine HD scopes come with Leupold’s lifetime warranty. A solid package for the price.
For more information on the SX-2 Alpine HD spotting scope line, please visit .
Looking to go armed, but are stuck in the weeds as to what to arm yourself with? Here are 20 of the best concealed carry gun options that will keep you on the defensive.