Rifles keep getting lighter, so why haven’t scopes kept up? Here we discuss the future of lightweight riflescopes and look at the top models currently available.
It all that long ago, there were a lot of lightweight riflescopes to choose from. This was back before hunters and most shooters thought 18x magnification was necessary to hit anything, and it was also before target turrets and parallax adjustments on riflescopes became standard features. When I first started writing for gun magazines about 25 years ago, the fixed power Leupold 4×33 riflescope was very popular. Leupold has since discontinued that riflescope, and lightweight riflescopes in general are now on the endangered species list.
Arguably, this transition from light to heavy riflescopes began in 2014 with the release of the movie American Sniper. The martial and marksmanship abilities of the rifleman have always impressed us, and that combined with Chris Kyle’s patriotism, devotion to duty and untimely and terrible death, made for a fabulous story. The movie was also an anthem to every American who has worn the uniform. Most importantly, then as now, American’s needed a hero.
Much like Clint Eastwood’s Dirty Harry film of 1971 launched the .44 Magnum revolver to stardom, American Sniper was the inspiration shooters needed to spark an indulgence in long-range rifle craft. Not only did this create a demand for heavy long-range riflescopes, but it also elevated the 6.5 Creedmoor—which had been languishing with only so-so interest since 2008—to one of the most popular rifle cartridges of all time.
As happens with all shooting disciplines, a bubble of interest developed, like with cowboy action shooting and three-gun competitions. Today, we’re at the height of long-range shooting popularity, and the rifles and riflescopes being manufactured reflect the demands of the consumer.
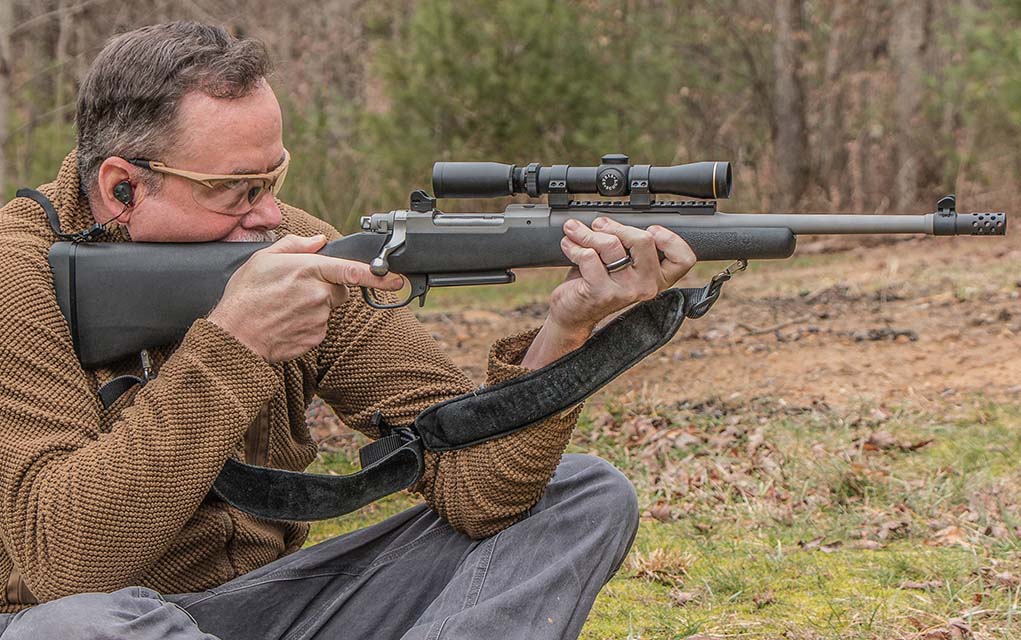
Interestingly, our hunting rifles are getting lighter. Just look at the six-pound Redline from Springfield Armory, the lighter than 6- and even 5-pound NULA rifles from Wilson Combat, as well as a host of lightweight hunting rifles from other manufacturers. Oddly enough, some hunters are using these lightweight rifles as an excuse to go with a heavy riflescope.
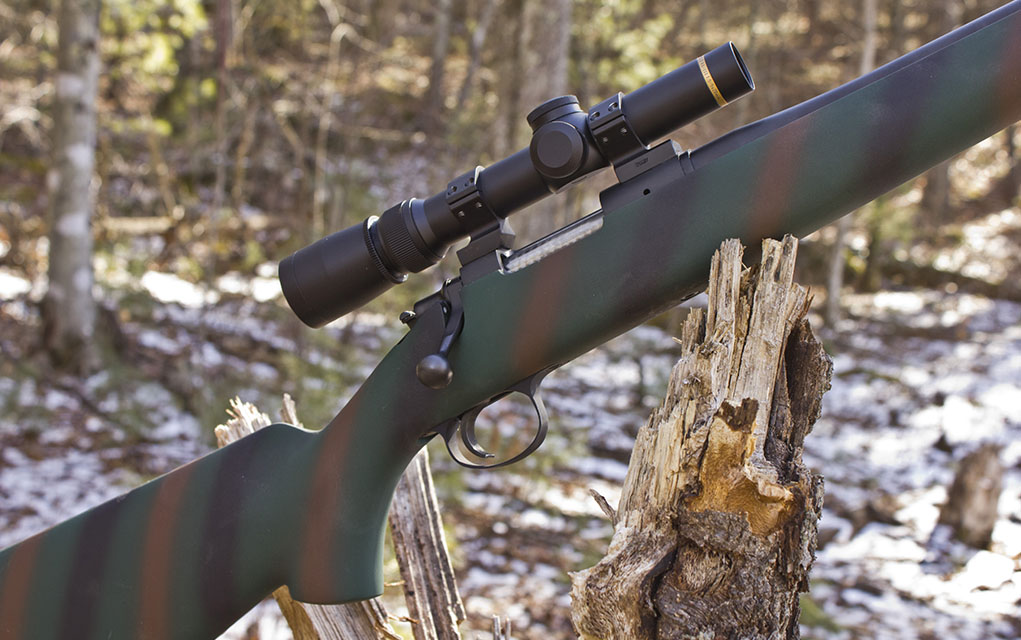
An acquaintance recently purchased one of the Wilson Combat NULAs that weighed less than 6 pounds and then paired it with a Nightforce riflescope that weighted nearly 2 pounds. While his overall field-ready weight is less than it would have been with a heavy rifle, the heavy scope destroyed the lithe and nimble handling qualities of the expensive featherweight rifle he chose.
The beauty of the lightweight riflescope is that it pairs perfectly with a lightweight rifle. And, as the great gun writer Townsend Whelen once so astutely observed, “A man will travel farther, hunt over more country, have a better chance of coming on game, and be in better condition when he does if his weapon is light.”
For hunters looking to keep weight down in the field, or even for shooters who do not want to overburden themselves or maybe youngsters with an overly heavy rifle, there’s still a valid and practical —though seemingly much overlooked—need for lightweight riflescopes.
Modern Lightweight Riflescopes
I spent a full day crawling the internet looking for lightweight riflescopes that are still in production. I found six options that weigh 12 ounces or less and that I thought practical for general-purpose use and common hunting applications. Here’s a rundown of the best of the current less than 12-ounce lightweight riflescopes available. The good news is I’ve used them all and can recommend them.
Burris
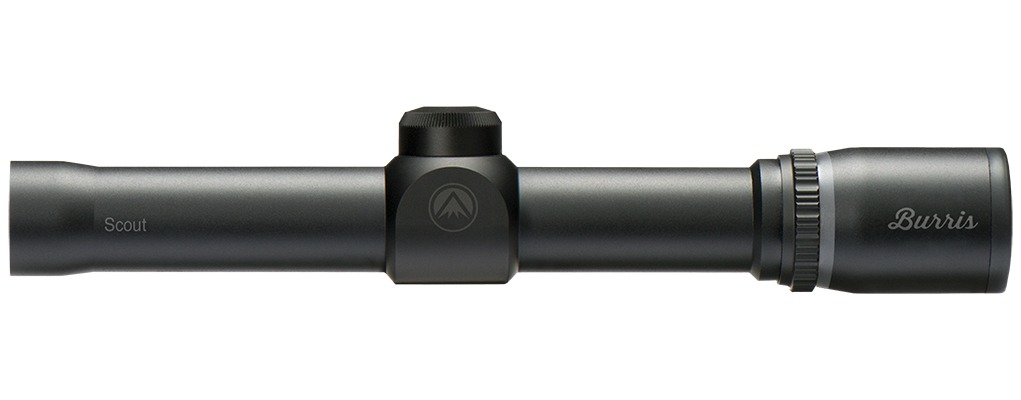
Burris makes great riflescopes that are dependable. Over the years I used several of them and their now discontinued 2-7x35mm Fullfield II was one of my favorites. Currently, Burris doesn’t catalog a traditional riflescope weighing 12 ounces or less. However, what Burris does have is what’s arguably the best and most traditional scout scope offered by any manufacturer. Their fixed power 2.75x20mm Scout scope weighs only 7 ounces and features a heavy plex reticle and Burris’ Forever warranty. A variable power scope might be more appealing and more versatile, but you won’t find one this light. It retails for $348.
Leupold
Leupold has been and continues to be the leader when it comes to lightweight riflescopes. Even if you’re comparing heavy riflescopes, it’s more than likely the Leupold will weigh the least. Even though Leupold has discontinued some of their best lightweight riflescopes like their fixed power 4x33mm and 2.5x20mm, they still catalog five excellent lightweights that should serve most any practical need.
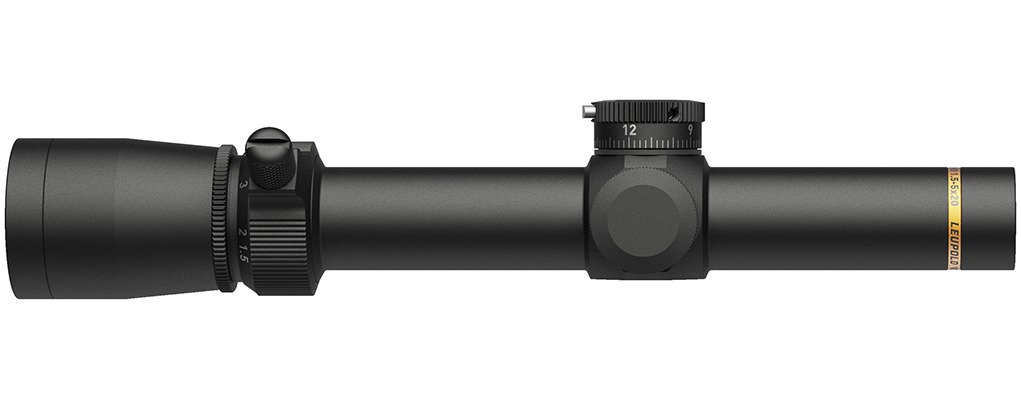
An excellent choice for lever-action rifles, muzzleloaders and other short to moderate range rifles is Leupold’s VX-3HD 1.5-5x20mm riflescope. I’ve used several of these over the years and now it even comes with Leupold’s excellent CDS trajectory compensating dial system. This riflescope weighs only 10.1 ounces, but it also costs $500. In today’s economy, some of us don’t have $500 to spend on anything but groceries and gasoline.
Leupold’s VX Freedom line replaced their VX-I and VX-II riflescope line; they’re American made and recoil rated to withstand the energy of a .458 Lott. They have click adjustments, Leupold’s proprietary Twilight Light Management System, and they all have 1-inch scope tubes. If you’d really like the VX-3HD 1.5-5x20mm but just cannot afford it, Leupold’s VX Freedom 1.5-4x20mm is a great option, and it’s available with the unique MOA Ring or the Pig Plex reticle. It weighs 9.6 ounces and retails for only $299.99.
If you want a lightweight scope but need a bit more magnification, I think the Leupold VX-3HD 2.5-8X36mm is one of the best riflescopes money can buy. I’ve had one on my dedicated whitetail rifle, which is a 5-pound New Ultra Light Arms Model 20S chambered for the 30 Remington AR for almost a decade now. This riflescope is less than a foot long and weighs 11.9 ounces. Like the VX-3HD 1.5-5X20mm Leupold, it also comes with the CDS dial system and has a suggested retail price of $499.99.
A lesser expensive but similar option is the Leupold VX Freedom 2-7x33mm. The first riflescope I ever purchased for a centerfire rifle was a 2-7X, and I used it to take a lot of groundhogs, a lot of deer and to even win my first off-hand silhouette match. This less expensive lightweight Leupold weighs 11.1 ounces and has a suggested price of only $299.99.
The is another lightweight Leupold that comes in at only 9.6 ounces, and it’s the Leupold VX Freedom 1.5-4x28mm IER Scout scope. This riflescope is a great companion to any scout rifle but must be mounted a bit further back due to its 6.0- to 6.9-inch eye relief. However, this amount of eye relief is almost perfect for some of the modern lever guns outfitted with a rail and an aperture sight like Marlin’s new SBL and Dark series rifles.
Swarovski
Swarovski makes some of the finest optical instruments hunters and shooters can look through. Their $5,100 dS riflescope will range the target and instantly provide you with an aiming point that reflects the shooting solution. Their less expensive Z8i line ($3,299 to $4,049) contains some of the most optically brilliant riflescopes money can buy, but they’re also heavy. The dS riflescope weighs 39 ounces and Swarovski’s lightest Z8i weighs 21 ounces.
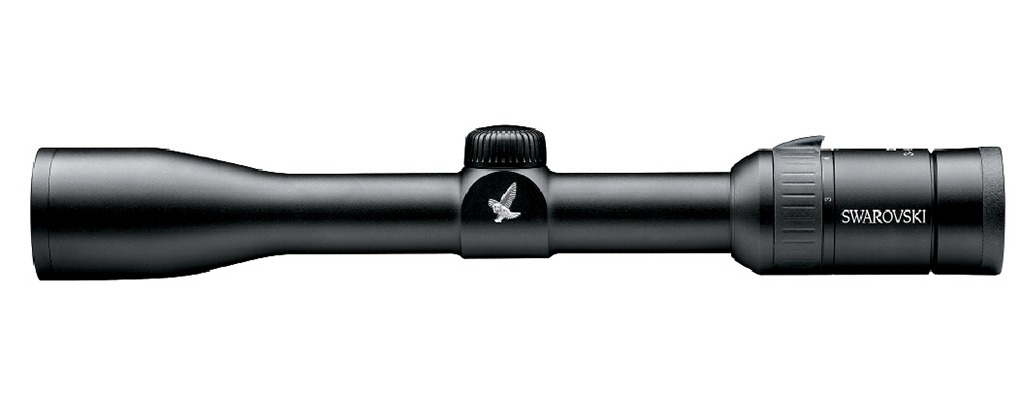
Because of the steep prices, weight and size of Swarovski’s best riflescopes, shooters often overlook them when it comes to a compact and lightweight option. However, Swarovski’s excellent Z3 3-9x36mm is one of the best general-purpose riflescope made. My wife used it on her 243 during her first African safari, and I’ve used the same scope on several hunts and to frequently evaluate lightweight rifles. The Z3 3-9x36mm retails for $799 and weighs in at 12 ounces on the nose.

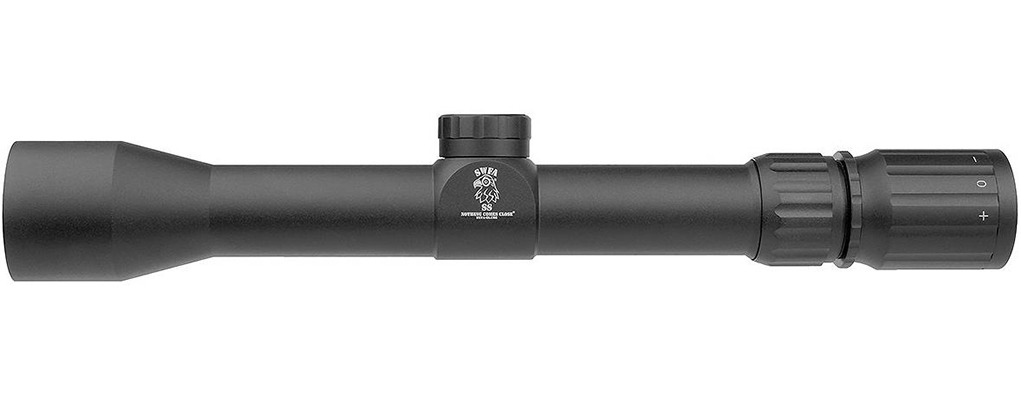
SWFA
SWFA Outdoors is a family owned and operated business located in Waxahachie, Texas. SWFA used to retail a wide range of riflescopes but today they only offer their own line, which has a long story behind it. In 1993, Tasco provided a 10X sniper scope to the U.S. Navy. Now a lot of shooters don’t have a high opinion of Tasco riflescopes, but Tasco outsources their manufacturing, and the Navy’s scope was built very well and to government contract specs.
Ultimately, Bushnell acquired Tasco and SWFA worked with the factory Tasco was using to build the Navy’s excellent riflescope to develop their own comprehensive line, which is now known as SS riflescopes. The SWFA 2.5-10x32mm SS Ultralight riflescope is one of three similar lightweight riflescopes offered by SWFA. One has a BDC-style reticle, another has a 50-yard parallax for rimfire application, and the third has the conventional Plex-style reticle. At 9.5 ounces, these just might be the lightest 2.5-10X riflescopes in the world. The lenses are fully multi-coated, and the scope is waterproof, fogproof and shockproof. It retails for $349.95.
The Future
The interests in various shooting disciplines have a half-life. They rise in popularity and then slowly fade away. Oddly enough, in 2024, at the height of the popularity of long-range marksmanship we saw the introduction of a wide assortment of lever-action rifles. Some were traditional and others were radically modified lever guns that some refer to as “tactical” renditions of what is truly an iconic American firearm. The lever gun is the antithesis of the long-range sniper rifle and as its popularity ignites, I expect we’ll see more compact and lightweight riflescopes better suited to this weapon system.

Hopefully, with the influx of modern lightweight rifles, manufacturers will also begin to offer re-engineered and even lighter lightweight riflescopes suited to more general-purpose applications. Fortunately, I’ve still got several and until the times change, I’d suggest that you pick up one or two when the opportunity presents itself. Who knows what shooting trend will drive the market next or when we will see a return to more practical and lighter weight riflescopes?
Editor’s Note: This article originally appeared in the November 2024 issue of Gun Digest the Magazine.
More Riflescopes:
- The Venom 5-25×56 Riflescope From Vortex
- Two Upgraded Elite Tactical Riflescopes From Bushnell
- The SVIII Premium Riflescope From Sightron
- Review: Leatherwood ART Riflescope
- The Vortex Razor HD LHT