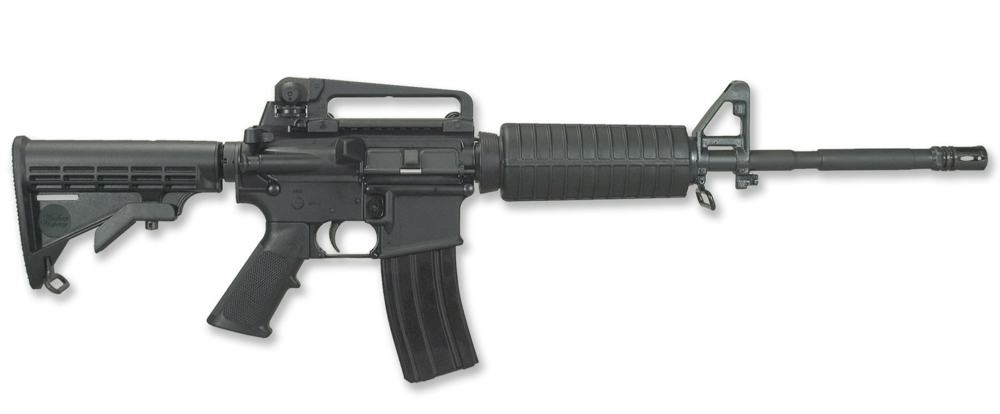
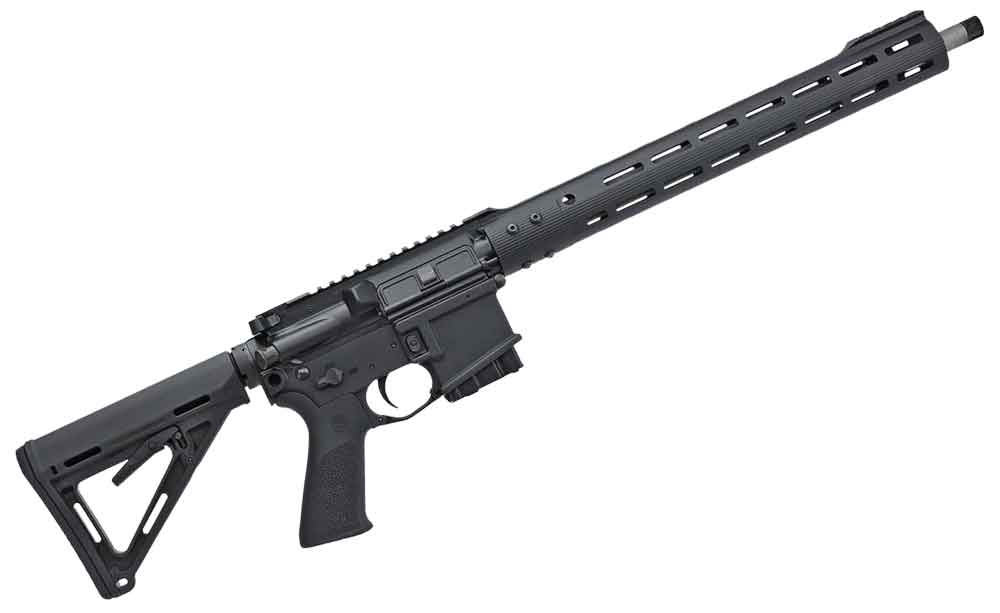
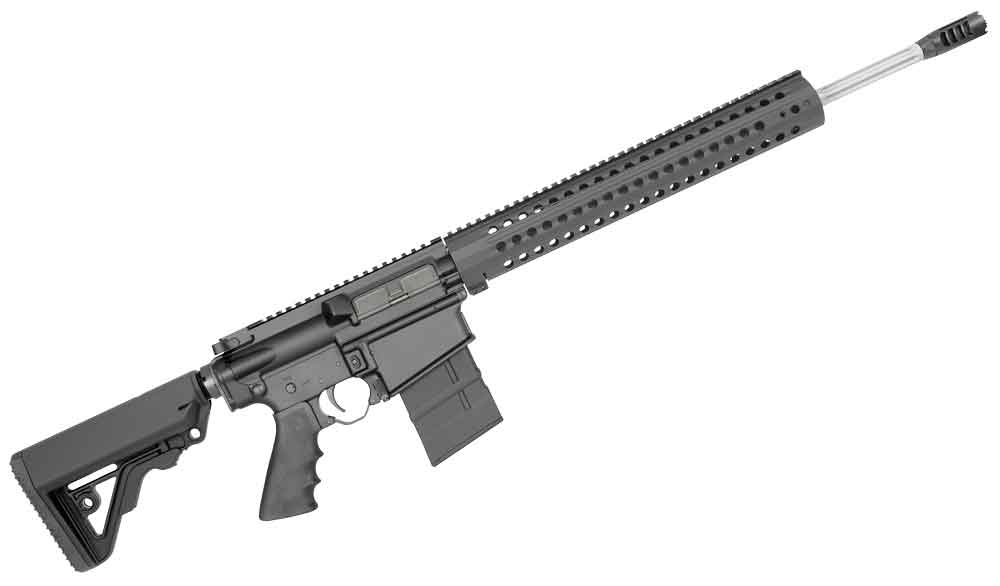
The Windham Weaponry MPC 16 doesn’t have a lot of extra bells and whistles — making it a top pick for a survival gun.
How the MPC 16 thrives as a survival gun:
Windham Weaponry ARs have a lineage of quality going back to the Bushmaster days.
For survival, a simple, rugged AR-15 might be all you need; Windham’s MPC 16 delivers.
Completely Mil-Spec throughout, this 16-inch-barreled carbine runs reliably.
It can also be handled by a variety of shooters based on skill level and experience.
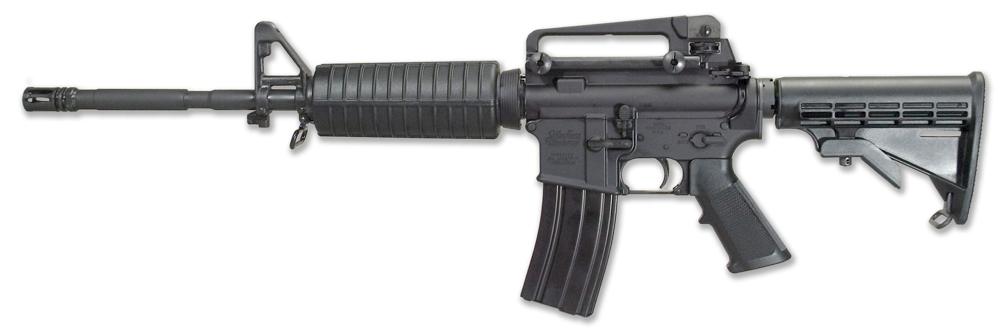
The Windham Weaponry MPC 16 is simple, which makes it easy to maintain and use. During the stress of a survival situation, you don’t want things overly complicated. Photo: Windham Weaponry
Windham Weaponry, named after the town of Windham, Maine where the guns are made, may be an unfamiliar name, but it is far from a new manufacturer. The factory, machinery, owner, and most all the employees were formerly under the Bushmaster name. Now, that same experience and attention to detail are being devoted wholeheartedly to this endeavor.
I was quite eager to see how the new Windham Weaponry MPC 16 would look and perform, and I was not disappointed. The rifle is an M4-style carbine with a direct gas impingement system chambered for 5.56 NATO. The rifle’s solid, proven design and features — without a lot of extra bells and whistles — lend themselves ideally for use as a survival rifle.
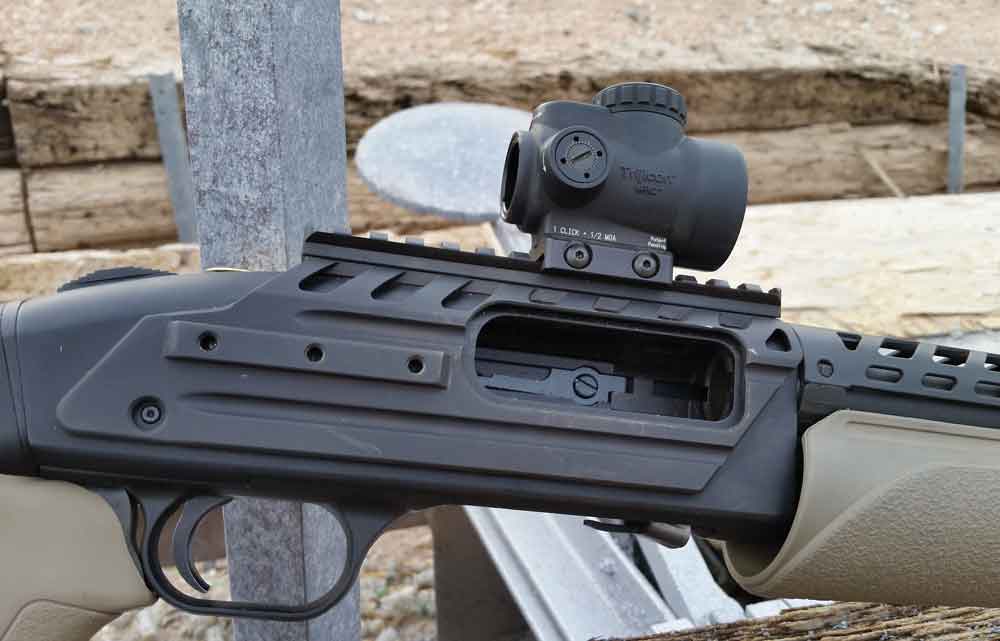
Both the upper and lower receiver of the MPC 16 are manufactured from forged 7075 T6 aluminum and have a hardcoat black anodized finish. The upper receiver has a flattop design with a removable carry handle and A4 dual aperture sights that are elevation and windage adjustable.
There are no indexing marks on the top Picatinny rail; so, you would need to take care when removing and replacing optics to maintain proper zero.
The 16-inch chrome-lined barrel of the MPC 16 has an M4 profile and is made from Mil-Spec 4150 chrome-moly vanadium steel. Chrome-moly results in increased carbon content in the steel and adds significant strength and durability, both very desirable features in a duty rifle.
The 16-inch chrome-lined barrel on the Windham AR has an M4 profile and is made from Mil-Spec 4150 chrome-moly vanadium steel. Photo: Windham Weaponry
The barrel has a standard 1 in 9-inch twist rate, which does a good job of stabilizing a wide range of bullet weights, including very low-weight projectiles.
Another Mil-Spec feature is the addition of M4 feed ramps at the back of the chamber. The standard threaded muzzle is topped off with a removable A2 flash hider, and the front sight base is elevation adjustable.
Standard Mil-Spec AR
Some folks are sticklers for properly F-marked bases on carbines; the Windham Weaponry AR is not so marked, but this is a distinction with very little real-world application.
Because of the difference in sight radius of a carbine over a rifle, an F-marked sight base is infinitesimally lower than a standard base. This is only an issue when using iron sights at distances past 200 yards, and it can easily be corrected by installing a taller front sight post.
The CAR black plastic handguards have double aluminum heat shields and were extremely effective at protecting the carbine-length gas tube (as well as my hand) from a hot barrel during a full day of range testing. The bolt and bolt carrier are phosphate finished and chrome-lined.
The MPC 16’s bolt carrier has a Mil-Spec M16 contour (as opposed to a cheaper commercial bolt), which is stronger and heavier to ensure longer and more reliable operation — and it’s paired off with a standard carbine buffer. It should be noted that Mil-Spec M-16 bolt carriers are legal to install in semi-auto rifles.
The controls on both upper and lower receivers, dust cover, forward assist, bolt release, magazine release, charging handle, and safety selector are all located in the familiar places with nothing ambidextrous. The trigger guard is the fold down aluminum type for use with gloves.
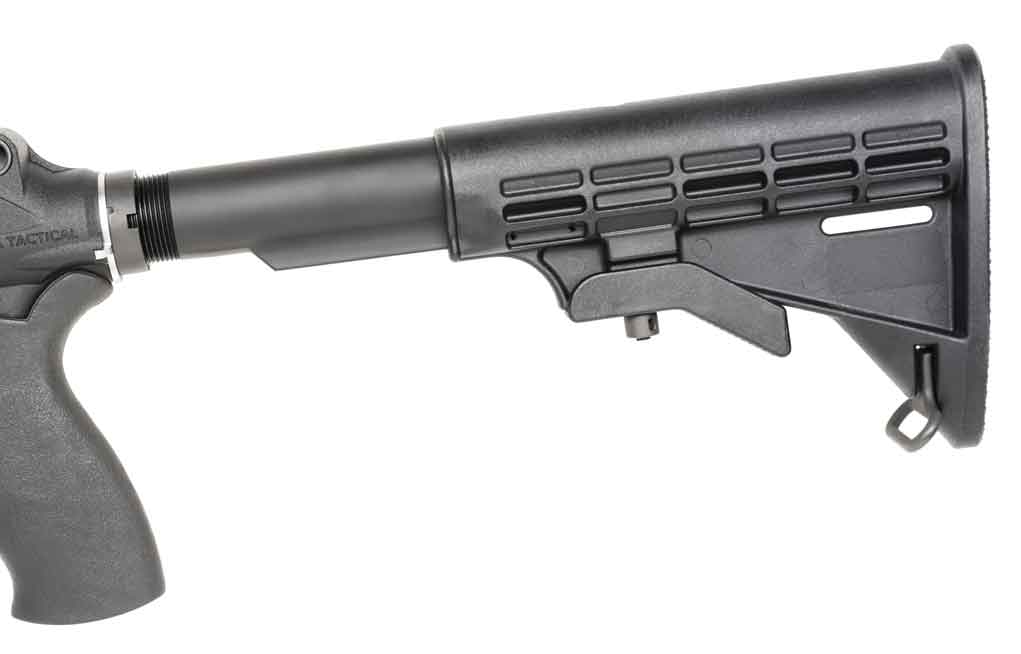
The M4-type collapsible buttstock has six positions for length of pull to adjust for shooters of varying stature or with use while wearing body armor, and it features the Windham Weaponry logo.
The stock of the MPC 16 was well installed and exhibited excellent fit with very little play. Also, the fit between the upper and lower receiver was excellent with only the slightest amount of play between the two. The lower receiver comes with a standard military-type plastic pistol grip with finger grooves and a slightly flared magazine well.
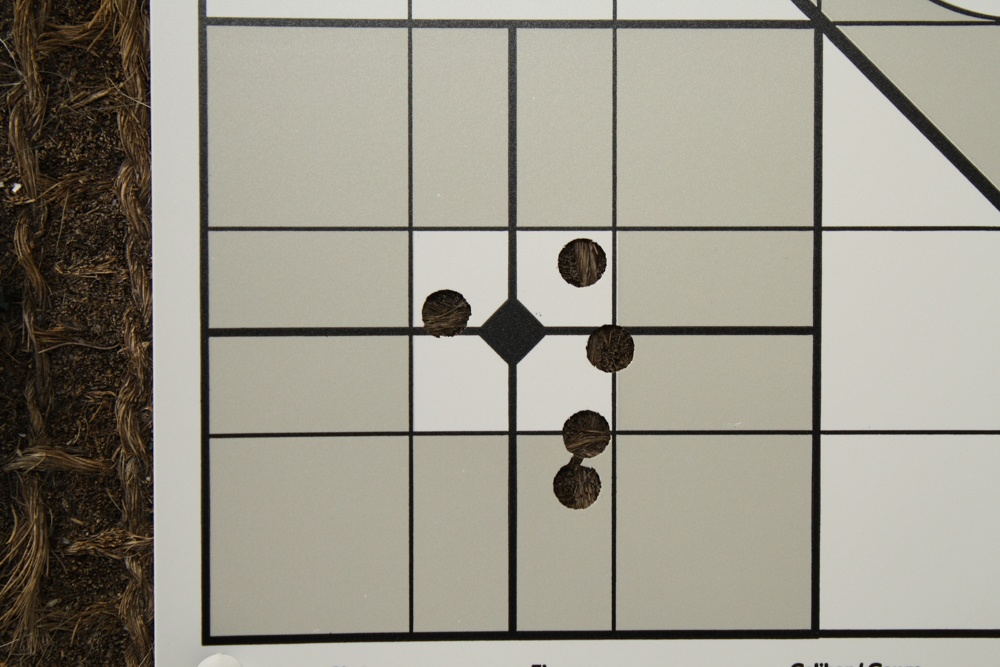
During his range sessions, the author did not experience a single malfunction of any sort from the Windham, and it performed admirably, certainly capable of 1 MOA accuracy.
The trigger is of the standard, single-stage AR variety with the typical utilitarian feel I have come to expect. Unfortunately, that means it’s not great, and the trigger exhibited a fair amount of noticeable creep that felt quite gritty, but mercifully avoided any stacking or over-travel.
It did break consistently at 7.5 lbs., and it should be noted that this was not developed as a sniper-grade rifle but rather as a utility survival gun. And in that regard, it should serve well.
Survival Gun Simplicity
At 6.9 pounds, this isn’t the lightest AR carbine one can purchase, but it is lighter than some of the feature-laden alternatives out there, and its short overall length and excellent balance make it easy to handle and pleasant to shoot. During my entire range session, I never experienced a single malfunction of any sort, and the rifle performed admirably.
Accuracy from a bench rest at 100 yards was about what one should expect from a Mil-Spec rifle, with groups measuring from the best of the day at 1 MOA to the worst at 4 MOA and averaging in between. With the right ammunition and a better trigger, this rifle is certainly capable of pinpoint accuracy.
Windham Weaponry ships their rifles in a black hard plastic case with one 30-round magazine, a sling, and a well-illustrated operators’ manual. Currently, the company’s offerings include state-compliant models.
Specifications:
Windham Weaponry MPC 16 Caliber: 5.56mm/.223 Rem. Barrel: 16-inch chrome-lined 1:9 twist Overall Length: 36.25 in. stock extended, 32.5 in. collapsed Weight: 6.9 lbs. empty Stock: M4 double heat shield handguards/6-position telescoping buttstock Sights: Removable A4 adjustable rear sight and A2 standard base front Action: Semi-auto Finish: Black hardcoat anodized Capacity: 30-round magazine MSRP: $1,086 Contact: 855-808-1888; www.windhamweaponry.com
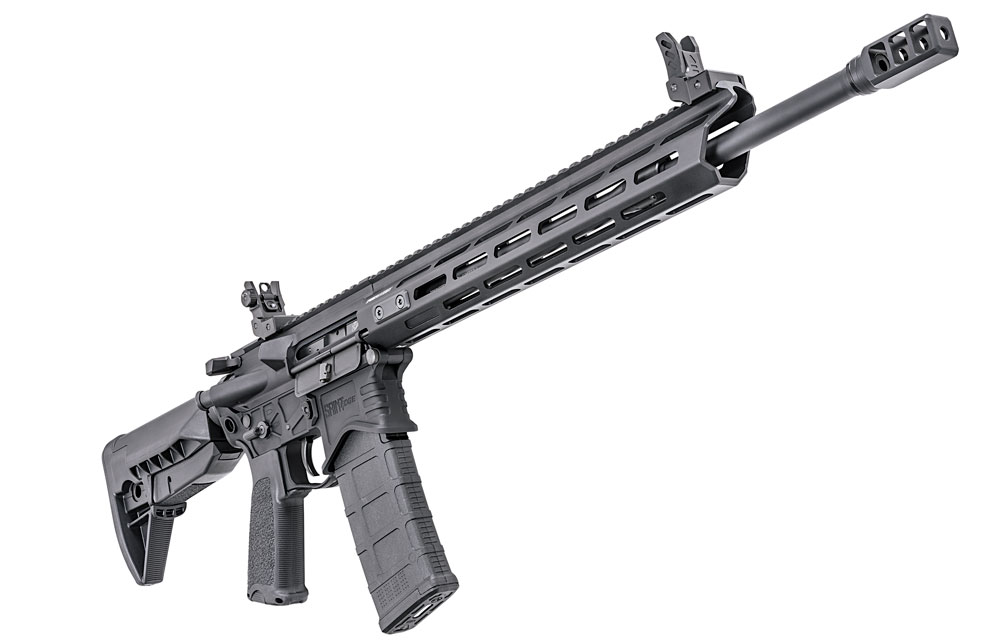
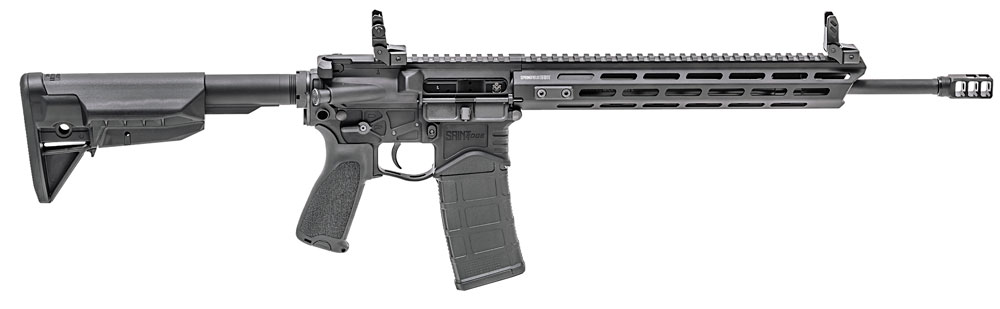
Lighter and smaller, Springfield Armory gives AR-15 fans something to consider with the additions of the SAINT Edge and SAINT Pistol to its lineup.
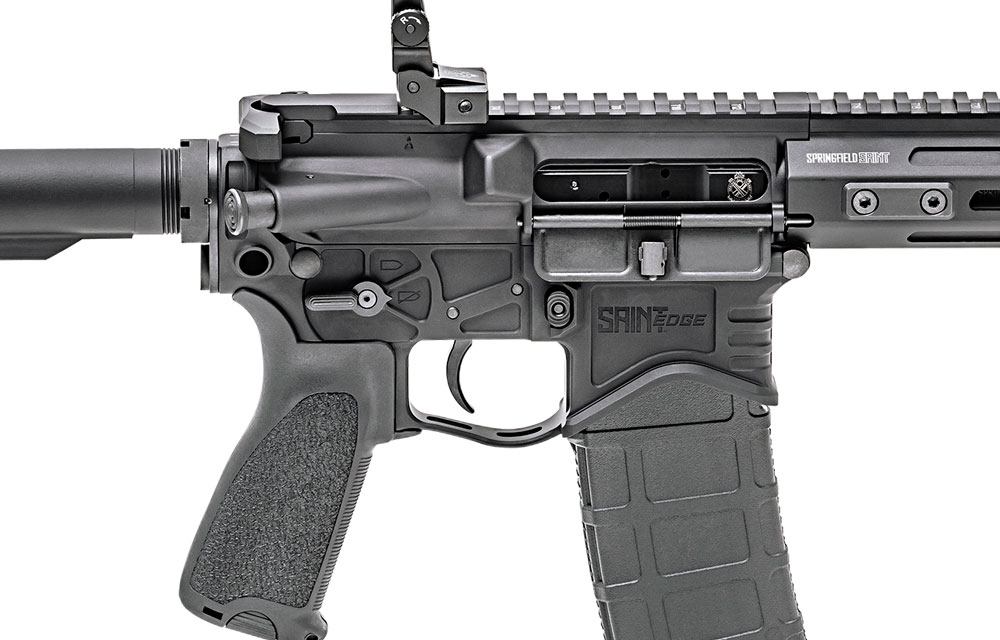
Material around the Edge’s mag well has been removed — it’s the lightest SAINT model.
The carbine boasts a match-grade single-stage trigger.
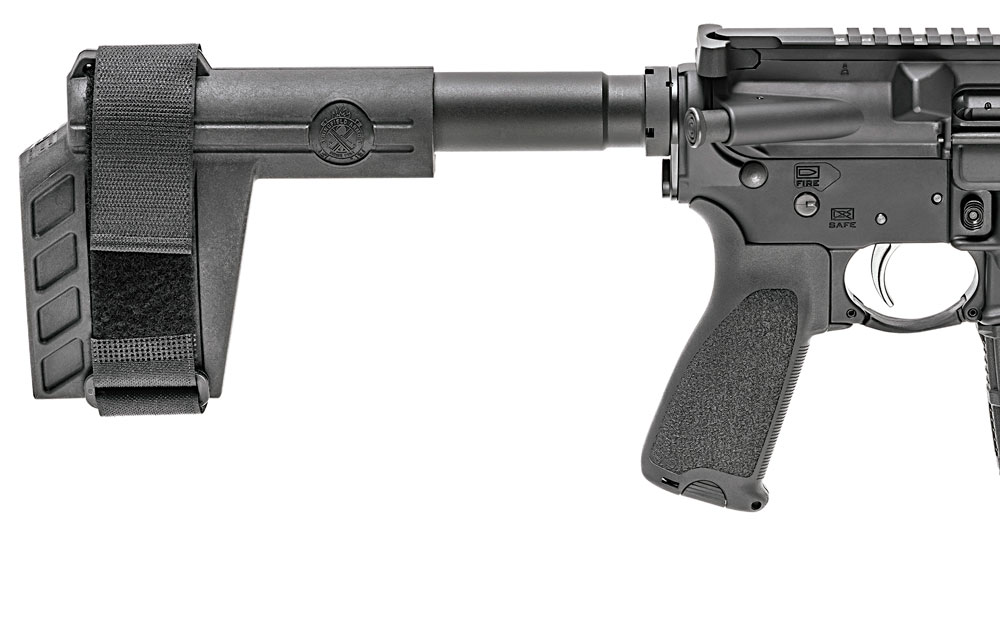
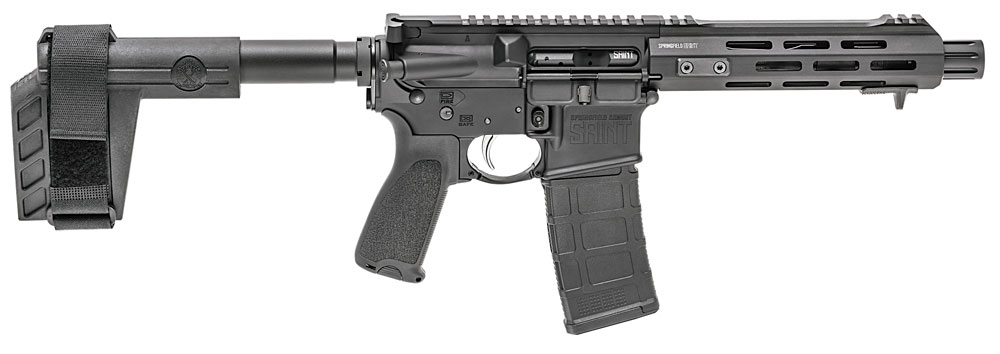
The SAINT pistol is outfitted with an SB Tactical forearm brace.
It also comes with a proprietary blast diverter.
Both new models have heavy “H” tungsten buffers to help with felt recoil.
Saturated with every conceivable breed of AR-15, Springfield Armory set out to do the impossible a year ago — launch a new black rifle. But at this point, the gamble on well priced and built SAINT AR-15 appears to have paid off.
A little more than 365 days into its history, the carbine has won its share of accolades not to mention a solid place in the overall market. Nowadays, when it comes to black guns, neither is simple to do, if for any other reason than the rifle is seemingly more common than highway mile markers in America (no small feat).
And now Springfield Armory is shooting to parlay the SAINT’s strong start with a pair of releases this past month that take the line in some new and appealing directions.
Saint Edge
As a rule, a carbine should be light. After all, it’s meant for fast handling, excelling when quarters are close and proving less burdensome when humped in and out of an operating area.
The SAINT Edge seems nearly the dictionary definition of this. At 6 pounds, 3 ounces, the carbine should provide the handling attributes that will make it lightning quick on target transitions and easy to carry, no matter the situation.
Springfield trimmed back the Edge’s weight through a unique lower-receiver design, removing material around the mag well to make it feather light. And given the company has retained the mid-length gas-system, and heavier “H” tungsten buffer system, the carbine’s recoil is noticeably tamed, despite its lack of heft. An added bit of insurance against kick, the .223 Rem./5.56 NATO comes standard with Springfield’s proprietary SA Lite muzzle brake, which dampens recoil to next to nothing.
Aside from shootability, the new SAINT has another ace in the hole with an upgraded fire control. While Springfield won points by including an upgraded GI-style trigger in the original iteration — nickel-boron coated — it has left nothing to chance with the Edge. The company’s single-stage modular match trigger is Melonite treated, ensuring it has a crisp and clean brake each and every squeeze. And it should prove fast shot to shot, with a noticeably short reset.
Like the original, the 7075 T6 aluminum upper and lower receivers mate with the Accu-Tite tension system, a nylon-tipped tension set screw that tightens the fit to remove any play. Being outfitted with a 16-inch lightweight profile barrel — Melonite finished — with a 1:8 twist allows the carbine to digest a wide spectrum of ammunition. And it comes with Bravo Company furniture, including the Mod 0 SOPMOD adjustable buttstock, with QD swivel mounting points.
The SAINT Edge has the same proprietary full-length aluminum handguard as the SAINT Free Floating model. This is a nice carry-over, giving ample M-LOK slots at seven points around the handguard. The carbine is a flattop, with full-length Picatinny rail, but comes with Springfield’s low-profile flip-up sights.
The SAINT Edge is, presently, the top end AR of the line and has the price to prove it, with an MSRP of $1,299.
Saint Pistol
Often times, it seems gun companies don’t invest a ton of thought when they move their AR lines into pistols. Shorten the barrel and gas system, jettison the buttstock of an existing AR and, voilà, pistol.
This is not the case with Springfield. The execution of the SAINT Pistol shows a bit more forethought, as it is well configured to offer more than just a scaled-down carbine. And it appears ready to excel at any small job thrown at it.
The .223 Rem./5.56 NATO variant comes in at a scant 26.5 inches in overall length and light at 5 pounds, 8 ounces. These are expected in a gun boasting a 7.5-inch barrel. But where the design succeeds is in the accessories it’s outfitted with — particularly at the butt and muzzle.
Giving the pistol greater overall control, the small SAINT comes equipped with a SB Tactical SBX-K forearm brace. The shorter version of the original SBX offers a lower profile, ensuring a clear line of sight. But, while trim, it still provides the same amount of support as the older brace, giving the platform greater controllability.
At the other end of the gun, the blast diverter should make the pistol a heck of a lot more pleasant to shoot, as well as increase its accuracy potential. Routed forward and away from the shooters, once again enhancing the line of sight, the muzzle blast is less distracting and the pistol is easier to keep on target shot to shot.
Additionally, the diverter just peeks out from the handguard, giving it a fairly sleek look. Yet, it adds enough length to the barrel that it should nearly be impossible for a thumb to inadvertently slip over the muzzle, always a concern on AR pistols. Aiding in the overall safety, Springfield has made a hand stop standard on the pistol, once again protecting shooters from over extending their grip into dangerous territory.
The handguard itself is a modified variation of the company’s free floated model, featuring SA locking tabs and M-LOK slots. Intelligently, Springfield has done away with the greater part of the handguard’s upper Picatinny rail, typically unused on AR pistols and obtrusive on the grip. It has, however, left enough for the installation of a front post or flip-up sight — just in case.
Like the rest of the SAINTs, the pistol’s barrel is Melonite finished, as is the carrier group. It features the Accu-Tite Tension System, which takes away the play between the upper and lower receivers. And it comes outfitted with Springfield’s nickel-boron-coated GI-style trigger that breaks cleaner than most stock AR triggers. Importantly, the company has also retained the line’s heavy “H” tungsten buffer, a nice point that should do plenty to tame the pistol’s recoil.
The SAINT Pistol is competitive with much of the AR pistol market, with an MSRP of $989.
Specifications:
SAINT Edge
Caliber: 5.56x45mm NATO (.223REM) Length: 35.75 in. Fully Extended / 32.5 in. Collapsed Weight: 6 lbs., 3 oz. Upper Receiver: Forged Type III Hard Coat Anodized Aircraft Grade 7075 T6 Aluminum Flat Top w/ Forward Assist & M4 Feed Ramps Lower Receiver: SA Proprietary Machined Aircraft Grade 7075 T6 Billet w/ Accu-Tite™ Tension System & QD Swivel Mounting Points Barrel: 16 in., 1:8 Twist, LT WT Profile, CMV Melonite® Finish Internally & Externally – Unique SA Multiport Muzzle Brake Gas System: Mid-Length, Low-Profile Multi/Mode Adjustable Gas Block Trigger: Springfield Armory® Proprietary, Modular Match Short Reset Single Stage Sights: Springfield Armory® Low Profile Flip-Up Rear, Dual Aperture Sights, 1/2 MOA Windage Adj. & Flip-Up Front, 1/2 MOA Elevation Adj. Trigger Guard: Integral to Receiver Pistol Grip: Bravo Company Mod 3 Handguard: Unique SA Proprietary Patent-Pending, Full Length Aluminum Free Floating w/ SA Locking Tabs, M-Lok Butt Stock: Bravo Company Mod 0 SOPMOD Buffer Assembly: Carbine “H” Heavy Tungsten Buffer Receiver Extension: Mil-Spec Dimension Carbine Receiver Extension Manufactured from 7075 T6 Type III Hard Anodized Aluminum Charging Handle: SA Proprietary Mid SIze Bolt Carrier Group: Enhanced M16 Melonite® Finish, MPT, 9310 Steel Bolt MAGAZINE: 1 – 30-round Magpul PMag Gen M3 MSRP: $1,299
Specifications:
SAINT AR-15 Pistol
Caliber: 5.56x45mm NATO (.223REM) Length: 26.5 in. Weight: 5 lb., 8 oz. Upper Receiver: Forged Type III Hard Coat Anodized, 7075 T6 Aluminum Lower Receiver: Forged Type III Hard Coat Anodized, 7075 T6 Aluminum w/ Accutite™ Tension System Barrel: 7.5 in., 416R Stainless Steel, 1:7 Twist, Melonite® Gas System: Direct Impingement Pistol-Length Gas Port w/ Low Profile Pinned Gas Block Trigger: Springfield Armory® Proprietary, Nickel Boron Coated GI Sights: Not Included Trigger Guard: Bravo Company Pistol Grip: Bravo Company Mod 3 Handguard: M-LOK Aluminum SA Patent Pending Free Float w/ SA Locking Tabs & Forward Hand Stop Butt Stock: SB Tactical – SBX-K Forearm Brace Buffer Assembly: Carbine “H” Heavy Tungsten Buffer Receiver Extension: SA w/ QD Swivel Mount Charging Handle: GI Style Bolt Carrier Group: Enhanced M16, Magnetic Particle Tested, Melonite® Magazine: 1 – 30-round Magpul PMag Gen 3 Case: Soft AR-15 Pistol Case MSRP: $989
The AR has come a long way since it rolled off Eugene Stoner’s drawing board. Find out what’s the best of the best when it comes to black rifles from 2017.
SIG Sauer has been expanding its reach into optics and suppressors the past couple of years, but it’s never lost sight of its ability to craft some of the best firearms on the planet. The M400 Predator is a case in point. Chambered in 5.56 NATO, the M400 Predator AR is equipped with an 18-inch barrel with 1:8-inch twist, two-stage match trigger and has an overall weight of 7 pounds. An M-LOK accessory rail makes attachments for predator hunting a walk in the park, while ½-28-threading makes for quick, easy attachment of a suppressor. On a coyote hunt in the Sandhills of Nebraska, the M400 proved exceptionally reliable in the cold and highly accurate even with fast follow-up shots. For a high-quality build with a great trigger, the M400 comes in at a relative bargain. MSRP: $1,582
Savage MSR 10 6.5 Creedmoor
Savage has built a solid reputation in the bolt-gun world with its highly affordable, highly innovative designs that the company is now rolling over to its new MSR line. Built explicitly for hunters and long-range enthusiasts, Savage’s MSR 10 Long Range is available in .308 Win. and 6.5 Creedmoor. The Creedmoor variant features a 1:8-inch twist in a 22-inch, fluted heavy barrel with QPQ finish, Magpul PRS Gen3 buttstock and free-float M-LOK handguard. The rifle also utilizes a non-reciprocating side-charging handle and Blackhawk’s two-stage target trigger, which makes for one highly accurate rifle. MSRP: $2,284
Noveske/Nosler Varmageddon in Nosler 22
If there’s one manufacturer that stands out in the world of cartridge development during the last couple of years, it’s Nosler. Pioneering new commercial loads such as the 26, 28 and 30 Nosler, the company is working hard to perfect the high octane, hot rod cartridge. The newest addition is the 22 Nosler, which is available in a Noveske-built Varmageddon AR and offers an incredible 300 fps increase in velocity over the .223 Rem. The rifle features an 18-inch barrel with 1:8-inch twist, MOE pistol grip and Super Badass charging handle. An NSR-15 FDE handguard features Key-Mod attachment points and matches the FDE finish on the rest of the rifle. Perfect for extending the range on predators, the Varmageddon AR in 22 Nosler is a tack-driving machine. MSRP: $2,869
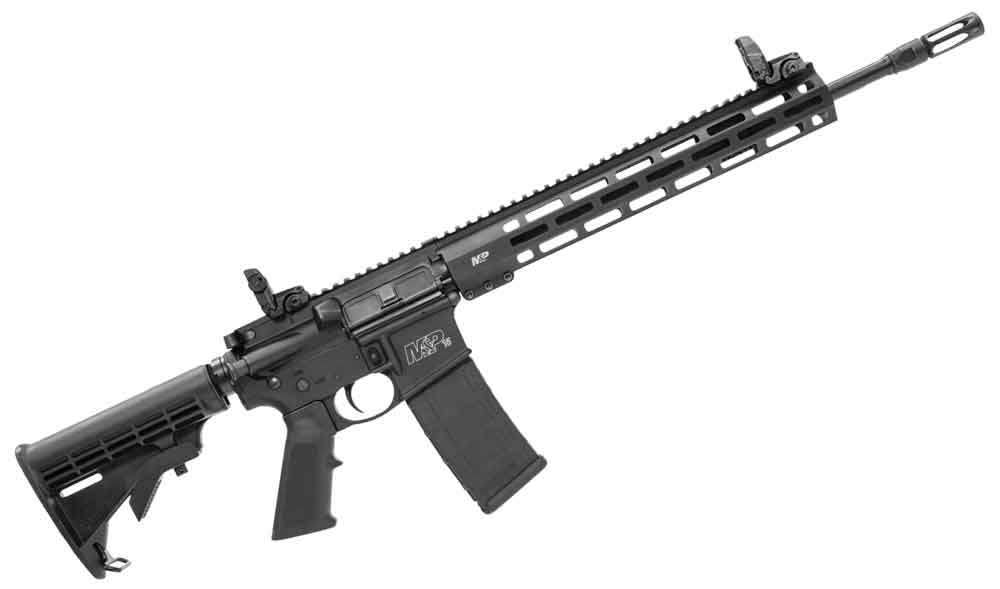
S&W M&P 15 Tactical M-LOK
Smith & Wesson’s line of M&P AR-15s has long been a benchmark in the AR world, and the newest iteration, the M&P15T, certainly lives up to that reputation. The M&P15T features a 16-inch barrel with a 1:8-inch twist and 13-inch M&P slim, free-float modular rail system with M-LOK attachment points for maximum accessorizing. At just 6 pounds, the M&P15T is ideally suited for home defense and doubles as a fantastic truck and coyote rifle. Highly accurate, reliable and incorporating a lightweight, contoured barrel for maximum maneuverability, the M&P15T is also incredibly affordable. MSRP: $1,189
Alexander Arms .50 Beowulf Tactical
Let’s face facts: a .50-caliber AR with a name like the Beowulf immediately garners attention. And rightfully so. Bill Alexander has been a frontrunner in new AR designs and concepts, and the new .50 Beowulf Tactical is no exception. Featuring a Bravo Company B5 Systems SOPMOD stock, Geissele SSA or Alexander Arms Tactical trigger and Manticore Arms Transformer Rail handguard, the .50 Beowulf Tactical is no doubt one of the heaviest hitters ever built on the AR platform. The rifle comes in FDE, OD green or black, and features a flat-top receiver and 16.5-inch barrel with 1:20 twist rate. MSRP: $1,750
Rock River Arms Predator HP in 6.5 Creedmoor
I had the chance to shoot Rock River Arms’ newest AR, the Predator HP in 6.5 Creedmoor, during a long-range shooting class at The Site in Illinois, and I have to say I was thoroughly impressed. Featuring a forged LAR-8M lower receiver and A4 upper with Rock River’s crisp two-stage match trigger, the Predator HP performed exceptionally well on steel at 400 yards and was dead-on when we switched to shooting moving targets. The trigger is excellent, the operation is flawless and the barrel produced pin-point accuracy all day long. The rifle features a 20-inch fluted, stainless-steel barrel with 1:8-inch twist, low-profile gas block and RRA Operator Brake, as well as a Hogue rubber grip. Paired with Copper Creek loads in the 6.5 Creedmoor, the Predator HP proved to be a dependable, highly accurate rifle even at extended range. MSRP: $2,000
Editor’s Note: This article originally appeared in the Winter 2017 issue of Gun Digest the Magazine.
Bullet lethality is defined by how much damage it does and how much energy it dumps once it reaches a target. How do new bullets measure up in these departments?
In hunting, how much damage a bullet does is more important than its toughness.
A bullet that sheds weight and deforms chaotically causes more damage.
Conventional mono-metal bullets dump about 50% of their energy in the first 8 inches.
Traditional cup-and-core and lead core dump about 80%.
Somewhere along the way, the notion that you can decipher a bullet’s lethality by weighing, measuring and looking at it after you pull it from a dead animal became common practice. Pragmatically speaking, there’s no logic to support this conclusion. In fact, trying to equate the lethality of a bullet to its recovered shape and weight is about as precise as looking at a turd and trying to divine what someone had for dinner.
Bullets matter, but what matters most is the damage they do, not their ultimate shape.
Hunters and gun writers often get too caught up in the advertising hype of manufacturers. And then too, by exercising what might seem to be a reasonable deduction, we assume a bullet that is tough — one that holds together and sheds no weight — will kill better. Admittedly, a tough bullet sounds like a great idea; after all, we’re shoving it into an animal at velocities sometimes as high as 3,000 fps. It should be tough, right? The truth is we want the bullet to damage as much tissue as possible. That damage, not the recovered bullet, is the true measure of lethality.
Defining Lethality
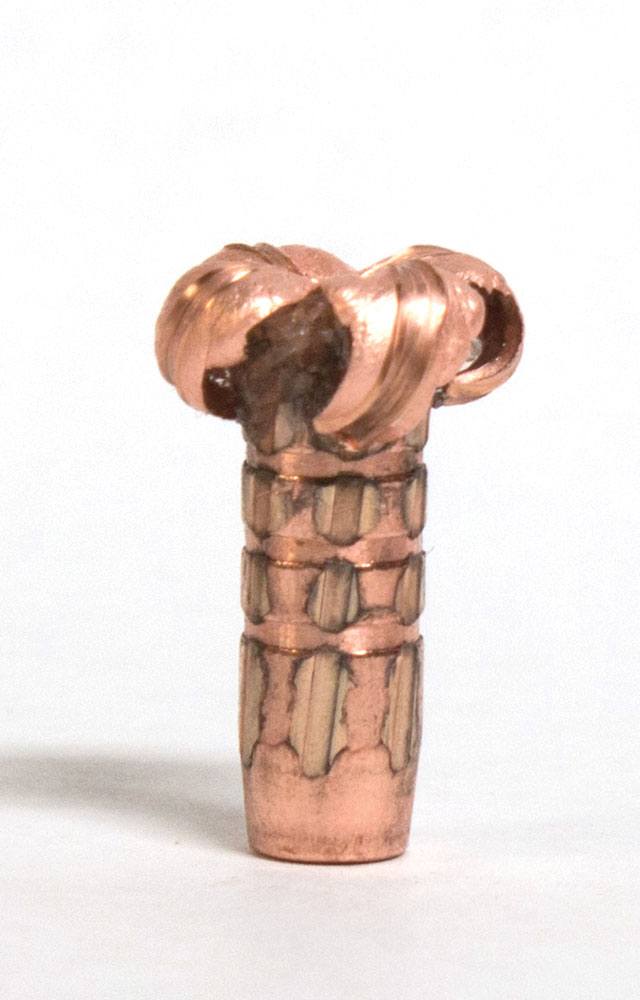
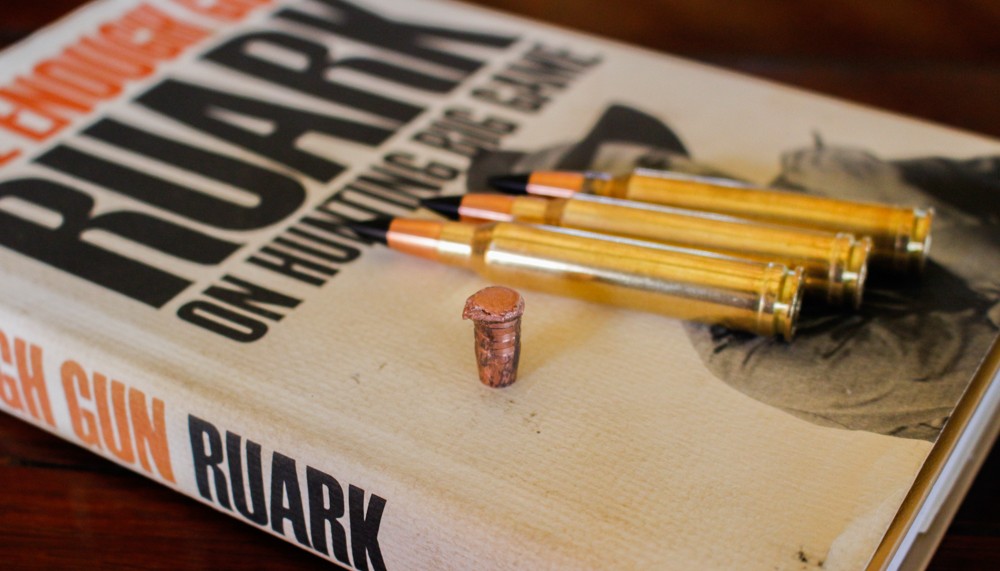
The Barnes Tipped Triple Shock bullet is robust and tough. It will retain all of its weight and penetrate deeper than most. However, because of its limited energy deposit, it will not damage as much tissue as what might be called “weaker” bullets.
The point of all this is that hunters should evaluate bullets on how well they kill, not what they look like when we recover them or if they shoot through the animal. For example, I participated in a whitetail cull hunt in Texas. We were using .308 Winchester rifles loaded with 168-grain Barnes Triple Shock bullets. At the end of the first day, we’d killed 20 deer, but the hunters were complaining because none of the deer were falling down when hit. Granted, you generally expect a deer to run a short distance after the shot, but we should have had at least one “bang-flop” out of 20. What we were getting were 100-yard dashes into the pucker brush.
One hunter had a case of Hornady Zombie Max ammo for range play. The next day several shooters switched to that load. (Zombie Max ammo is loaded with Hornady SST bullets.) We immediately started seeing bang-flops, like you would expect with high heart shots when using a .308 Winchester on whitetail deer.
The question is, “Why were the SST bullets putting deer down faster than the Barnes Triple Shocks?” After all, the Triple Shock is a much tougher bullet and almost always deforms into a beautiful mushroom.
The answer is really very simple and two fold. First of all, the lethality of a bullet is tied to the damage it causes, not its toughness. Because SST bullets shed weight and chaotically deform, they create a more violent wound cavity than the Triple Shock, which essentially just expands and pushes a hole through the animal. This violent wound cavity creates more hemorrhaging, faster.
The other reason is a bit more scientific and one I tested and confirmed at the Barnes Bullets laboratory in Mona, Utah. We chronographed various bullets after they’d passed through 8 inches of ordnance gelatin. We found that a Barnes Triple Shock and similar mono-metal bullets only dump about 50 percent of their energy during the first 8 inches of penetration. A cup-and-core or more conventional lead-core bullet like the SST, Core-Lokt or Ballistic Tip will dump as much as 80 percent of its energy through the same distance. This energy dump results in massive tissue destruction and a serious shock to the animal’s system, often causing instant collapse.
Hornady’s SST bullet is nowhere near as tough as a Barnes Triple Shock bullet. However, while it will not penetrate as deep, it is every bit as lethal.
Notice I said collapse, not death. Death is a result of the brain running out of oxygen. However, when an animal goes down after a lethal hit, it’s much less likely to get up and run off before it dies.
None of this is to suggest a Hornady SST bullet will kill better than a Barnes Triple Shock. All of the deer hit correctly with Triple Shocks ended up on the meat pole; they just managed to run a ways before realizing it was pointless. The Triple Shock is a very good bullet, but to deliver the bang-flop so many hunters like to see, Triple Shocks need to be pushed faster so they can dump more energy. On the other hand, sometimes hunters need that ultra-deep penetration the Triple Shock is so renowned for.
Controlled Chaos
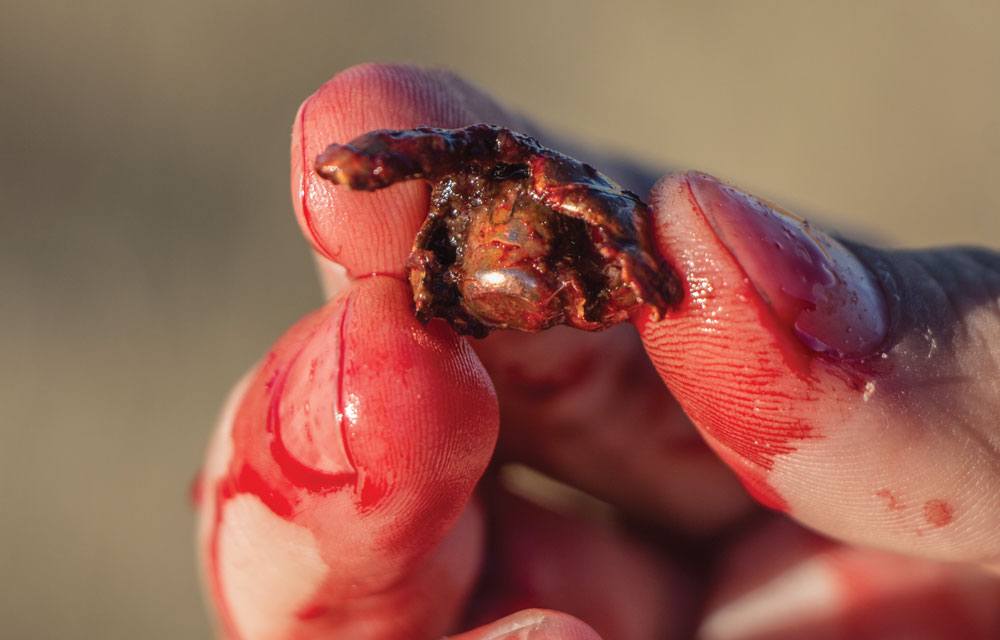
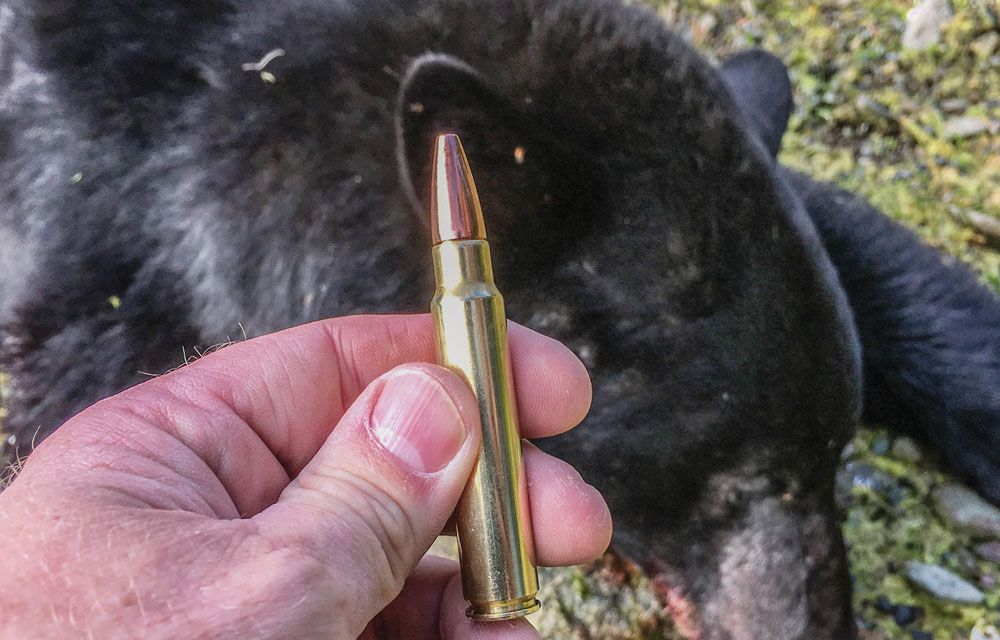
A radical new mono-metal bullet designed by Lehigh Defense dropped this mature Vancouver Island black bear quickly, even at a moderate impact velocity.
Lehigh Defense realized that mono-metal bullets could be more effective at moderate impact velocities if they shed some material and weight. This shedding helps the bullets dump energy and create wicked wound cavities. The Lehigh Defense Controlled Chaos bullet is a solid copper bullet, but it’s engineered to fracture and throw shrapnel as it penetrates. When the bullet impacts, the front section breaks apart, with particles being thrown from the bullet. However, the rear section — or shank — of the bullet continues to penetrate. This offers a good balance of lethality. It’s kind of a modern interpretation of the very lethal Nosler Partition.
How do they work? I used a 185-grain Controlled Chaos bullet out of a .375 Ruger on a big Vancouver Island black bear. But this was a reduced load, launched at a modest muzzle velocity of only 2,600 fps. The bear ran only about 45 feet and dropped stone dead. My son used a 270-grain version of this bullet out of the same rifle, and loaded to the same velocity, on an African buffalo. That huge beast went to the ground in less than 45 feet. These bullets offer near conventional mono-metal-like penetration, with wound cavities similar to what you would expect from a cup-and-core bullet. And, they’re accurate, too.
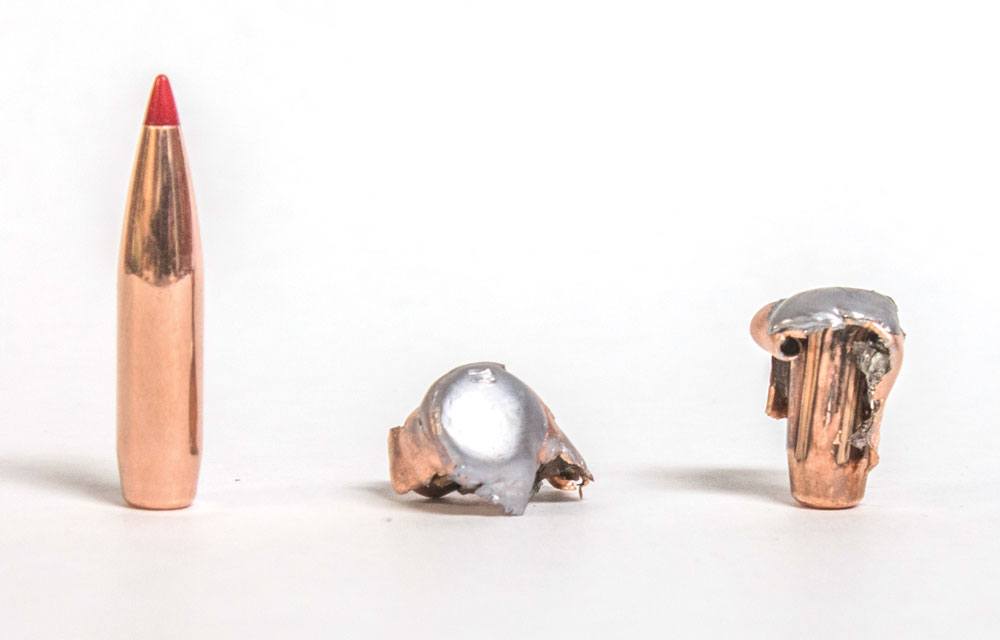
ELD-X
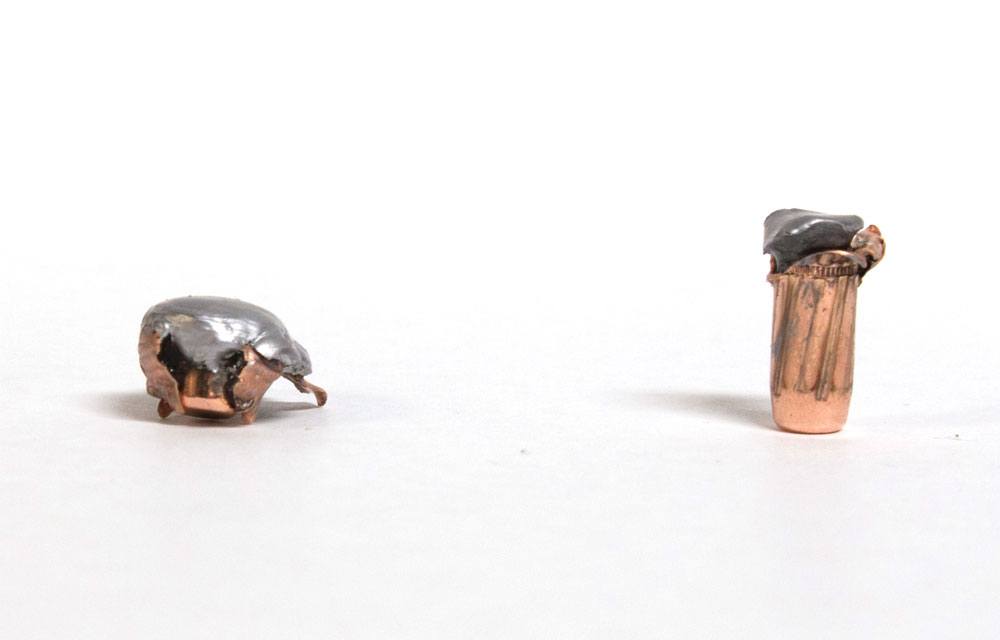
Not the prettiest mushroom in the woods, but it’s a deadly one. Hornady’s ELD-X bullet is lethal at 100 yards (left) and out to 700 yards (right).
With its ELD-X line of bullets, Hornady took a different approach to lethality. And, like with the Controlled Chaos bullet, it has nothing to do with the recovered weight, shape or prettiness of the bullet. Hornady wanted to devise a bullet that was just as lethal at long range as close. The company’s answer was a conventional cup-and-core design with a lead core. The key to its performance is a heavily tapered jacket that will peel way back at close range, but not so much at long range. However, in either instance, you get a nasty wound cavity inspired by deformation and core erosion that creates extensive hemorrhaging.
I’ve seen this bullet work just as well on big-game animals at 100 yards as at 600 yards — even though the core might occasionally work lose during penetration. (Contrary to popular belief, this is not necessarily a bad thing.) Not only does the ELD-X shed lots of energy when impacting at either distance, it shoots very flat and resists wind very well due to its high ballistic coefficient. During the recent Scout Rifle Safari I organized in Africa, more than 50 head of African game were taken with the 178-grain .308 Winchester Precision Hunter ELD-X load. I saw enough animals go down and enough guts and gore during that safari to trust the ELD-X.
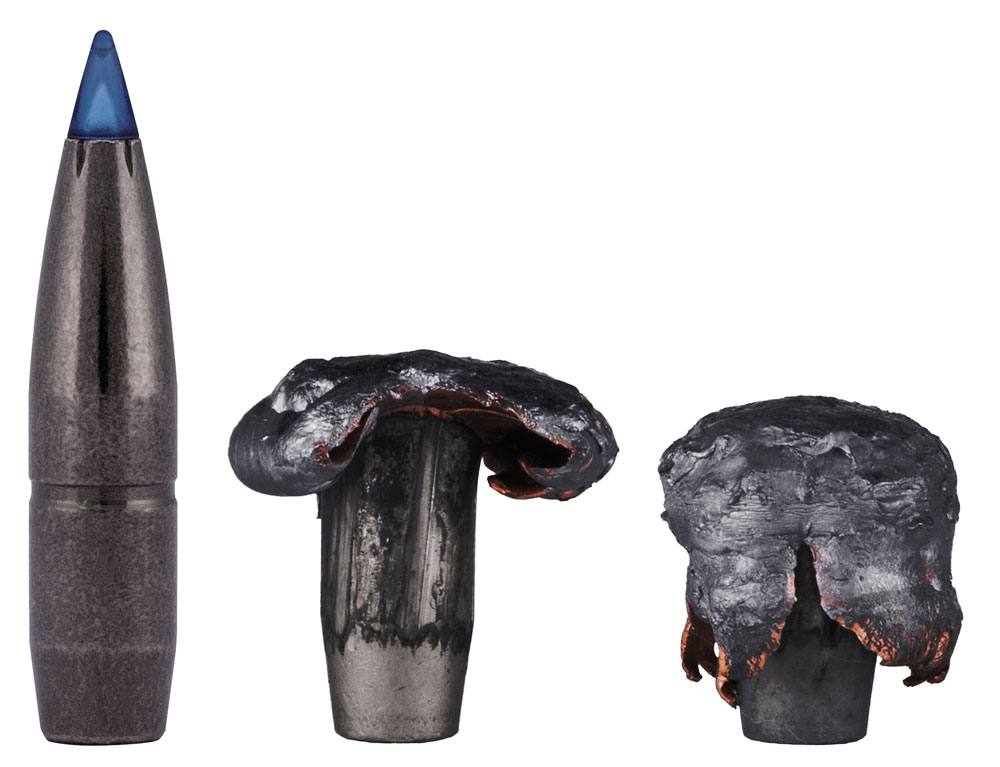
Edge TLR
Federal’s new Edge TLR bullet is a mixture of a variety of design principles, in an effort to provide lethality at close and distant ranges. The tissue it damages will illustrate the true effectiveness of this bullet, not how uniform it deforms, or what it weighs after penetration.
Another new bullet/ammunition from Federal is the Edge TLR. It’s another take on finding the best balance of lethality up close and at distance. By incorporating a deep hollow point cavity, capped with an aerodynamic tip, surrounded by a skived jacket that’s bonded to a lead alloy core, this bullet is presented by Federal as an ideal any-range big-game bullet.
Unlike the Controlled Chaos and ELD-X bullets of Lehigh Defense and Hornady, the Edge TLR will likely deform into that perfect mushroom-like shape we’ve been convinced all recovered big-game bullets should exhibit. Because it’s bonded, it should also retain most of its weight. I’ve yet to shoot, hold or even see one of these bullets. Will it kill? I’m positive it will, but one thing’s for sure: My evaluation will not be based on whether it shoots through the animal or how pretty the recovered bullet looks or weighs. It will focus on the internal damage the bullet caused because that’s what really matters.
Recovered bullets are not supposed to be pretty —they’re supposed to make animals go down quick, die fast and be easy to find.
Editor’s Note: This article originally appeared in the October 2017 issue of Gun Digest the Magazine.
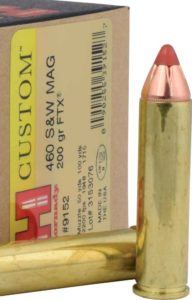
Known for its blistering velocities and long-range accuracy, the .460 S&W Magnum is the very definition of a red-hot revolver cartridge.
The .460 S&W Magnum reaches velocities around 2,200 fps with a 200-grain bullet.
This makes the .460 S&W Magnum one of the fastest revolver cartridges ever produced.
The .454 Casull is the parent case, lengthened 1.8 inches.
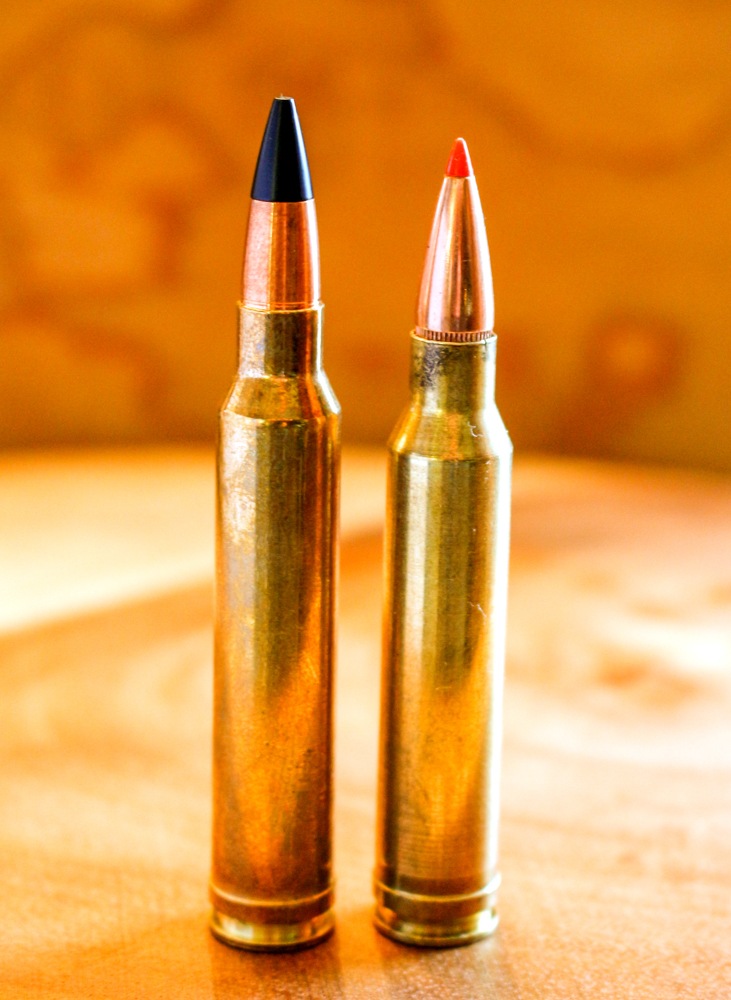
The .460 S&W Magnum is the first commercial revolver cartridge to utilize tipped bullets.
Announced in 2005 as a joint Hornady-Smith & Wesson development, the .460 Smith and Wesson (S&W) is the fastest revolver cartridge ever produced, reaching velocities of about 2,200 fps with 200-grain bullets. It is chambered in the S&W M460 Extreme Velocity Revolver for long-range handgun hunting. Used by a skilled pistol shooter, the .460 S&W Magnum cartridge can achieve MOA accuracy at 100 yards.
The .460 S&W uses the .454 Casull case lengthened to 1.8 inches as its parent case. It is the first commercial revolver cartridge to use tipped bullets. Hornady and CorBon offer loaded ammunition for the .460 S&W. Hornady and Starline supply reloading components and data for this cartridge. It is well suited for use in whitetail deer hunting at 150 yard-plus ranges.
Over the years Patrick Sweeney has learned a few unique ways to attach a sling to an AR. Here are some tips and tricks to make any sling work on your AR-15.
Visit your local hardward store and, for as little as $10, you can get enough material to make as many of these loops as you need to sling up all your ARs.
I’m a Neanderthal when it comes to slings. Sure, I learned the classic leather target sling. You know, where the thing is so tight you can see your heartbeat in the scope and your fingertips turn blue as you aim. But I never had any use for it, since the competitions I shot in never called for it. Those contests even made the device difficult to use. So, for me a sling is simply a means of carrying a rifle, and to keep it off the ground while you use both hands for something else.
To that end, I have settled on a pretty simple sling system. The stock end is the easiest to describe, since it doesn’t involve any hardware.
Rear Sling Attachment
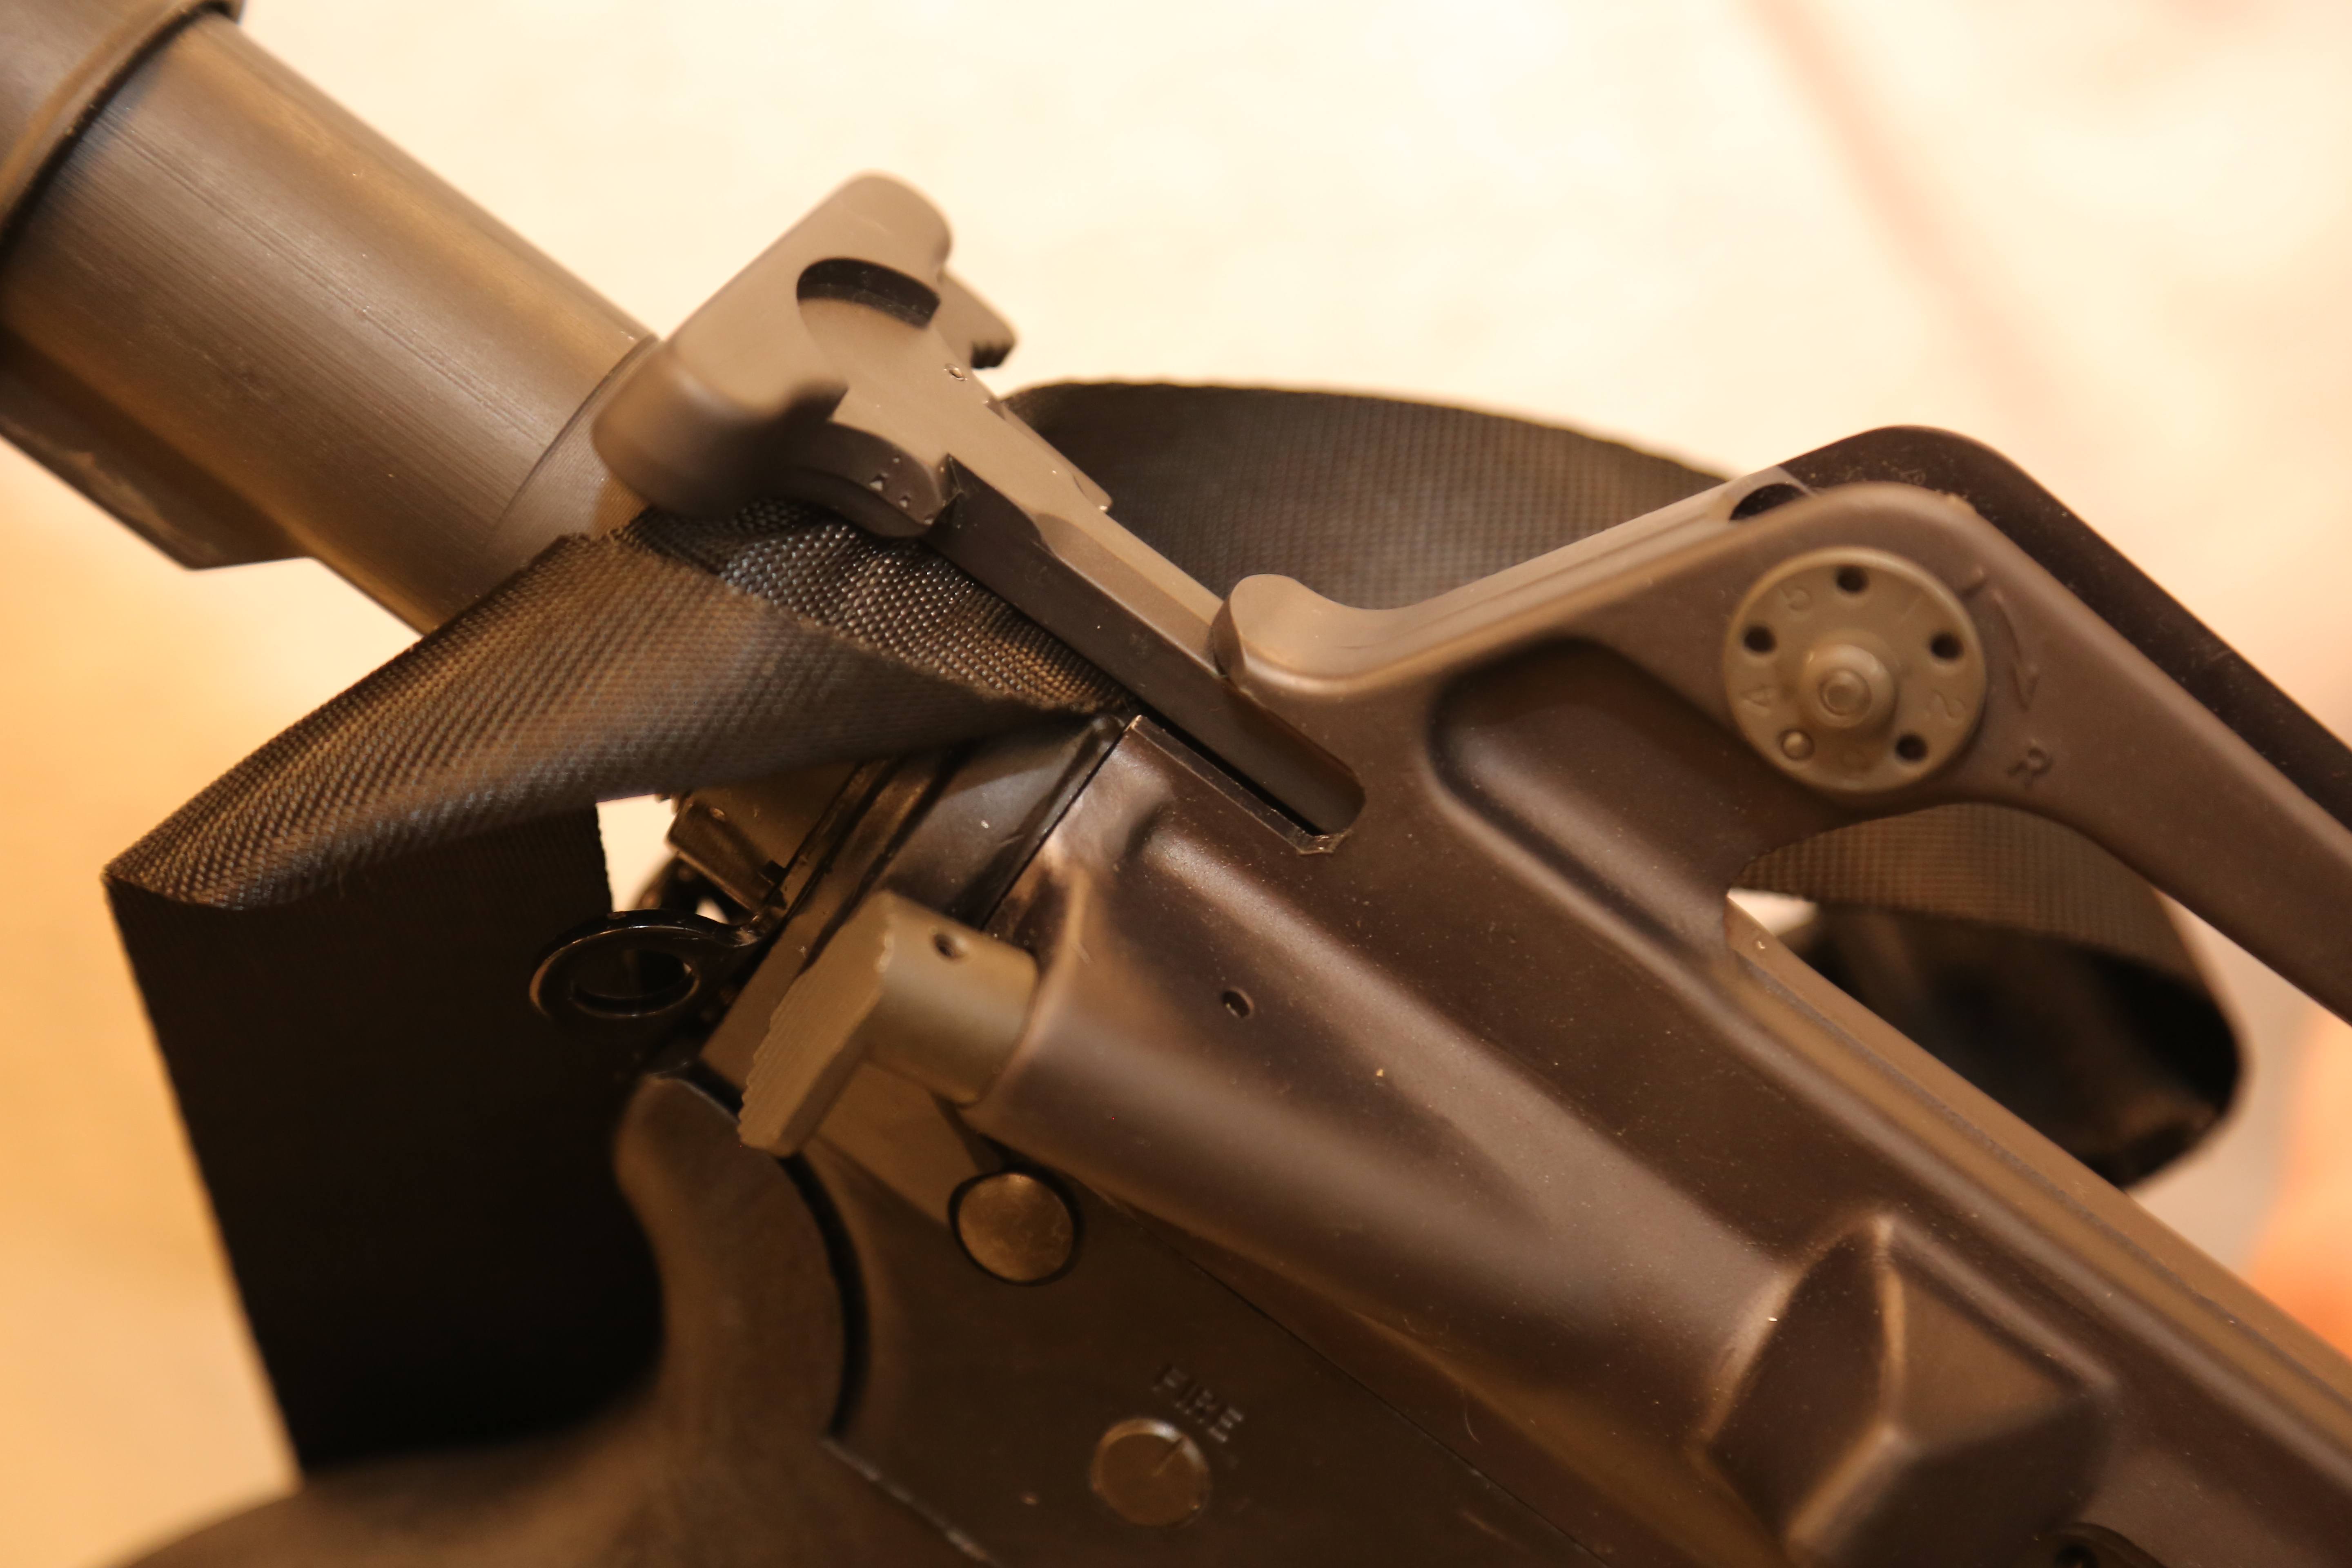
Want a top-mount sling on your fixed stock? This works and is cheap.
Take a length of 550 cord, 2 feet is a start for fixed stocks, 18 inches for telestock. Loop it over four fingers and tie a knot. Hold the loop at the top of the stock, while you run the tail ends over the other side and back up to the top.
On the fixed stock, loop the ends so they are behind the bottom sling swivel. This way it can’t slide forward. Tie the ends in a knot behind the loop on top. Melt or glue the cord ends so they can’t come loose. The knot behind the loop keeps it from sliding off the back of the stock when you use it. Pull the knots as tight as humanly possible.
On the telestock, loop the ends down and through whatever slots, gaps or opening the maker of the stock provided, and back up to tie off just as you would with the fixed stock.
This is your rear sling swivel. With this approach, the sling comes off the top of the rifle , not the side or bottom. It is light, inexpensive and quiet. I can install it on any rifle in a matter of minutes, and take it off even faster. I can put it on a rifle for a class and take it off when I’m done, without any permanent modifications to the rifle.
A loop of 550 cord, properly tied and sealed, makes a lightweight and compact sling attachment system.
Three Approaches To Front Sling Attachment
On the front, I take one of three approaches.
A front sling swivel can be as simple as a loop of braided stainless cable.
1st Approach The first is a loop of braided stainless steel wire/cable, secured in a circle with a cable pinch. I loop the wire though the front sight housing, and then back through itself so the loop is locked to the rifle, extended for the sling. A refinement of this is to add a length of cable cover, to reduce the wear on the sling.
The advantage of this approach is that you can put a side-mounted sling on a bone-stock rifle or carbine, and then remove it when you’re done. If you arrive at a class where they’ll be using issued rifles, and you don’t want to screw around with a classic sling, this is the answer. You can have this loop in your gear, install it in a minute, and get to the class with something resembling modern equipment.
You can simply tie 550 cord to your free-float handguard.
2nd Approach The second is to tie a short section of 550 cord to the railed handguard and use that as the front sling loop. The advantage of this is that it is cheap and you can install it on a rifle you’ll be using for only a short while.
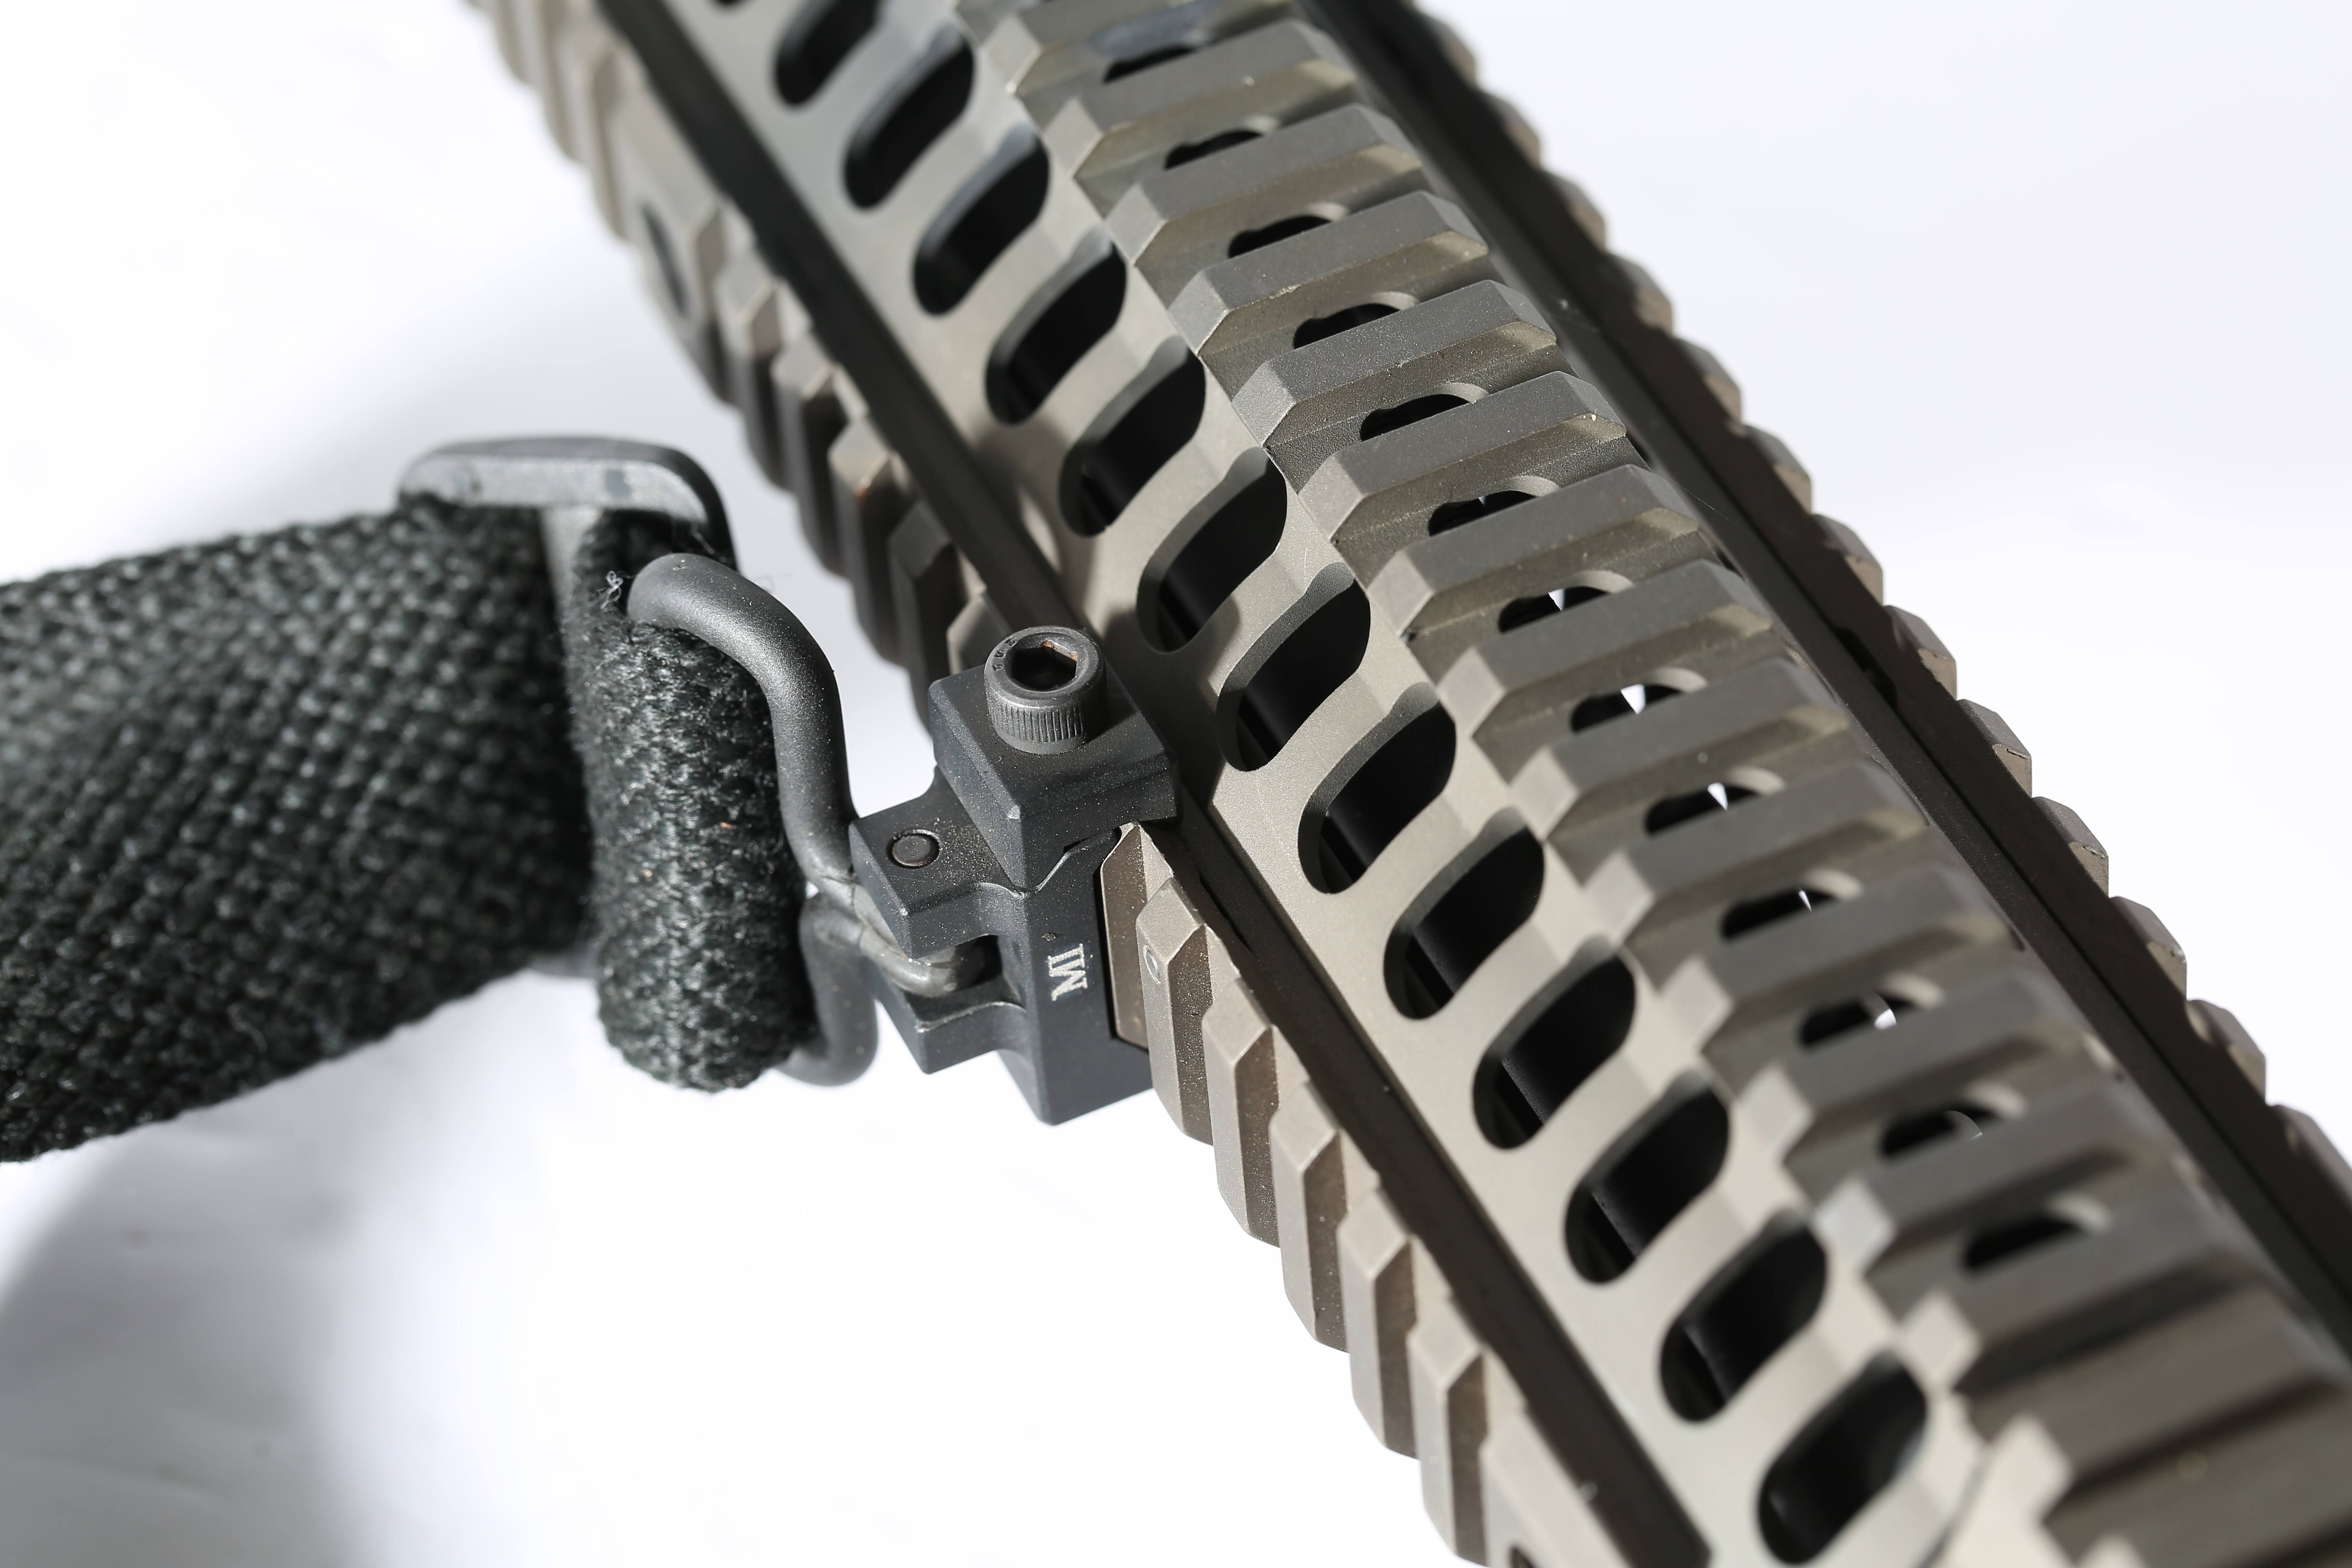
Midwest Industries, among others, makes a bolt-on sling swivel that also works as a hand-stop.
3rd Approach The third method is to use a clamp-on sling swivel on a railed handguard. This can be a quick-detach (QD) style. It’s easy to attach (requires a railed handguard) and you can place it right where you want a hand stop.
Make sure you keep your sling under control. Too much can be too much
The Sling Strap
The sling itself is a simple nylon strap to get the rifle hanging where you need it. The strap allows you to sling the rifle behind, but not so loose that it dangles down around your waist or knees. Too much sling can be a problem. Not only can it let the rifle hang too low or swing around too much, but it can get tangled up in the darndest things.
Those little circular holes in many stocks and forearm designs are the sockets for the QD sling system.
Single-Point Slings
I am not a fan of single-point slings, and avoid them if I can.
Now, if you do not want to experiment with 550 cord, then modern free-float handguards quite often incorporate QD sling sockets in the design. Modern stocks do this as well. It is easy enough to simply pick up a set of QD swivels, attach your sling, and plug them into the sockets. My recommendation for slings is this: the simpler the better.
No matter if that special marksman in your life lives to break blue rock, bang the gong from a country mile or is deadly serious about concealed carry, we’ve picked a little something they’ll love. On top of that, we’ve tried to hit every reasonable price point without going crazy and suggesting a fully decked out chassis rifle. You’re on your own with that one bub.
So kick back and take a gander at 10 great Christmas gift ideas any shooter would love. We’re certain you’ll hit the bullseye with these Yuletide goodies.
What’s better than one gun? How about 365! The Gun Digest Great Guns 2018 Daily Calendar delivers just that in full color. From the newest tactical rifles to the hottest handguns to the sleekest shotguns, your favorite shooter will be left dreaming and drooling over them day after day. It’s the perfect addition to any office desk, reloading bench or gunroom. Price: $14.99
Ammo Cans
Honestly can you have enough of them? For a shooter — any shooter — ammo cans are about the most useful small storage system you can find. And, really, they’re pretty dang cool looking too. The .50-caliber size tends to be the handiest for stowing an assortment of small accessories. But the .30-caliber ones still fill a role, especially if space is at a premium. The best part: Ammo cans are found nearly anywhere. But these gifts provide a great opportunity to shop local and support your neighborhood military surplus store. Price: Varies, but cheap
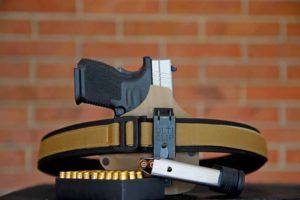
UtilClip’s locking belt loop has been around for a while and is a slick system. But the company has improved on a great idea with the XL, not only providing rock-solid and covert carry retention, but also a little extra. Integrated into the spring-steel clip is a multi-tool, complete with a screwdrivers and multi-stage wrench — perfect for fixing or fine tuning a malfunctioning holster on the go. Similar to the older iterations of the UtilClip, the XL delivers the same versatility to a carry system, facilitating inside and outside the waistband carry, with or without a belt. Price: $14.99
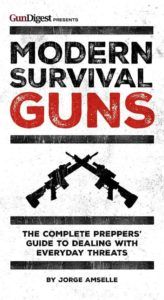
This book is every bit as important as your shooter’s bug-out bag. Jorge Amselle presents more than 600 pages on the guns, gear and practical know-how to survive almost any eventuality. The most comprehensive book on the subject in the past quarter century, Modern Survival Guns covers every aspect of living ready, including: firearms, optics, ammo, emergency supplies, knives, tactics and much more. You aren’t just giving someone a book with Modern Survival Guns this Christmas, you’re giving them a future. Price: $29.99
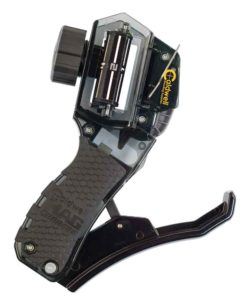
Juicing magazines isn’t how your favorite shooter wants to burn a day at the range. Thanks to Caldwell’s Mag Charger, they’ll spend more time throwing rounds down their lane, not reloading. Compatible with 9mm, 10mm, .40, .45 and most .380 magazines — both single and double stack — the charger is versatile and easy to use. Simply feed rounds into the groove, squeeze the operating lever and it loads the ammo into the magazine. Honestly, what could be a better gift than more actual trigger time? Price: $47.99
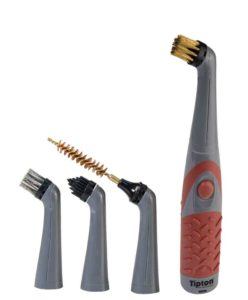
It’s time for your shooter to put away that nasty old toothbrush he uses to scrub away his gun’s grime and join the 21st century. Tipton’s Electric Cleaning Brush makes routine gun care a snap, arming your shooters with a rotating head that knocks away grunge and fouling at 3,600 oscillations per minute. The tool comes with interchangeable plastic, nylon and stainless steel cleaning brushes and reaches areas of a gun other cleaning implements can’t even get close to touching.Price: $47.99
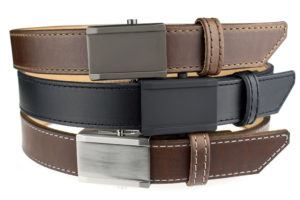
The foundation of any carry rig is a solid gun belt. With this in mind, the concealed carrier on your gift list will go over the moon unwrapping the Crossbreed Crossover Belt. The 1.5-inch wide belt offers extra support with a slide buckle, which allows the user to cinch it snugly each and every time. Additionally, hand-beveled, burnished, edge dyed and stitched, the Crossover Belt is a stylish accessory, tough enough for the woods, but good-looking enough for a night out. Price: $89.95
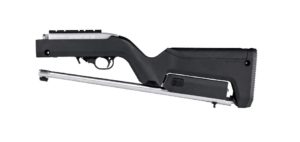
A confession: I hope Santa leaves this under my tree this Christmas. Compatible with the Ruger 10/22 Takedown, the X-22 Backpacker Stock is an ingenious way to take the rimfire anywhere your shooter goes. Once taken down, the barrel stores conveniently in the toe of the stock, making the rifle compact enough for nearly any rucksack. If that were not enough, Magpul has made the stock an entire survival system, with a watertight compartment in the grip and another watertight compartment in comb, designed to stow three 10-round 10/22 magazines. Really, for any shooter who loves the 10/22 and has a takedown version, there isn’t any better gift. Price: $109.95
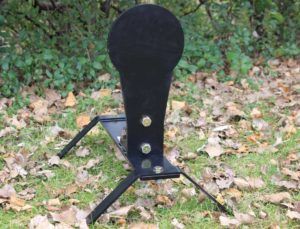
As we all learned from It’s a Wonderful Life, every time copper-jacketed lead bangs steel, an angle gets its precision long-range rifle. Help these celestial beings on their way this Christmas with the Magnum Spring Popper. Designed to take punishment from some of the most powerful calibers in the rifle world (up to .338 Lupua Mag. at 200-plus yards), this gem provides hours of shooting fun. The best part? Your shooter won’t spend any time resetting targets. Utilizing heavy-duty stainless steel springs, the popper sets itself up immediately after you knock it down. What more could you ask for? Price: $199
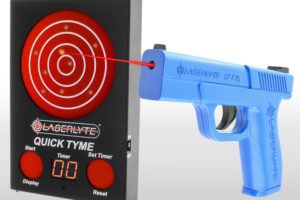
What could be a more fitting gift for the gun nut in your life than giving them the opportunity to shoot when they want? You can with LaserLyte’s slick laser training kit. Complete with laser training pistol and reactive target, the QuickTyme kit comes with everything they’ll need to start shooting out of the box. Additionally, the kit is more than just a mere plinking system, it’s a top-notch training tool. The stopwatch function aids in honing a fast draw, and instant feedback on the target let’s the shooter know if they’re hitting what they’re aiming at. Price: $279
The first .20-caliber produced in a large scale, the .204 Ruger arms shooters with a red-hot varminting round.
The .204 Ruger was the first .20-caliber cartridge produced on a large commercial scale.
Accurate, with a mild recoil, the .204 Ruger also offers excellent barrel life.
The parent case of the .204 is a .222 Remington Magnum.
It is necked down and given a 30-degree shoulder angle.
The .204 performs best when shot out of a 26-inch barrel with a 1:12 twist.
Introduced in 2004 as a joint Hornady-Ruger project for varmint and target shooting, the .204 Ruger became the first .20-caliber cartridge to be produced on a large commercial scale. Remarkably, it also offers excellent barrel life. After shooting approximately 500 prairie dogs with the Ruger and Dakota rifles chambered for the .204 Ruger, a former contributing editor to this book found it to be an accurate, low-recoil round, superbly suited for long-range varminting. The .204 Ruger received the Academy of Excellence 2004 Cartridge of the Year Award.
The .300 Win. Mag. is well-suited for hunting 95 percent of the world’s game. Phil Massaro explains why.
The .300 Win. Mag is based on the .375 H&H case, as are the .458, .338 and .264.
The cartridge is designed to fit a long action and is ballistically close to the .300 H&H.
Eminently versatile, the .300 Winchester Magnum is a true long-range cartridge that hits hard, yet is still manageable in the recoil department.
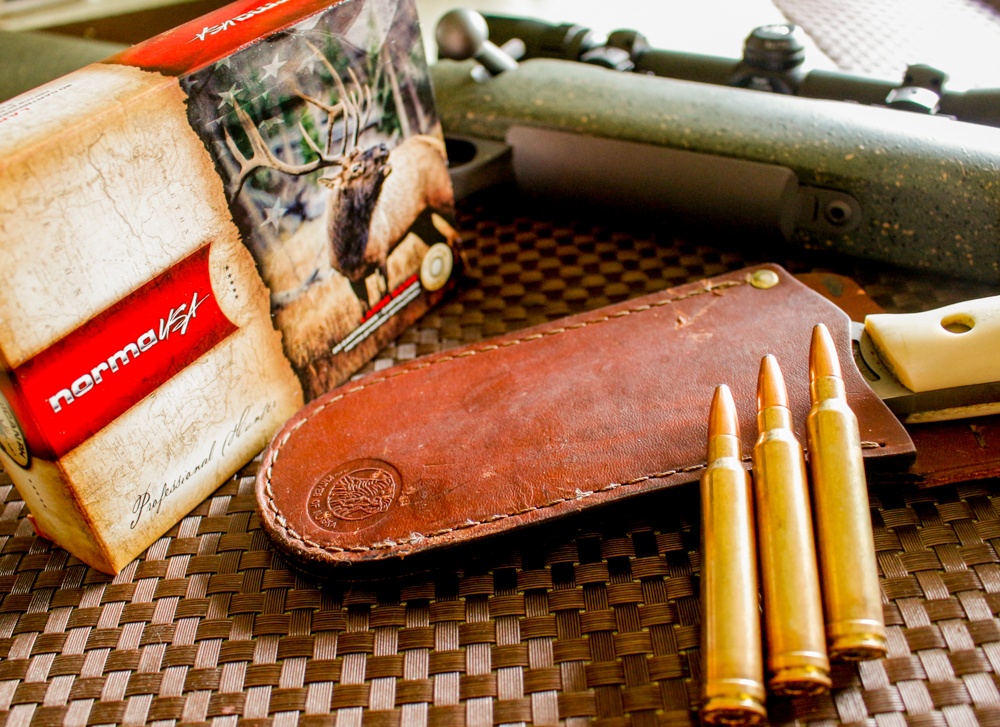
Norma’s .300 Win. Mag. 180-grain Oryx load.
Brought to us in 1963, the .300 Win. Mag. was the fourth cartridge in a series of belted magnums designed to fit in a standard long (.30-’06 length) action. The .458, .338 and .264 were based on the same case — the .375 H&H Mag. — and shared the same shortened case length — 2.500 inch — to maintain a cartridge overall length of 3.340 inch. When Winchester announced the .300 Win. Mag., almost everyone expected the cartridge to be the .338 necked down to hold .308-inch bullets; essentially the .30-338 or very close to the .308 Norma Mag.
The author’s Winchester Model 70 Classic Stainless sports a 26-inch barrel and a Leupold VX-6 2-12×44 with the 30mm tube. There is something inherently accurate about the design of the round. The .300 Winnie just shoots.
What they saw was a different design. The COL of 3.340 inch was held, but the case was elongated to 2.620 inch, and the neck length shortened to 0.264 inch. The result was a belted cartridge that fits in a long-action rifle and is the ballistic equivalent of the venerable .300 H&H, which requires the longer, magnum-length receiver.
It was less, in length and velocity, than the .300 Weatherby Mag., yet it was enough. The initial loading bettered the velocities of the cornerstone American cartridge, the .30-’06 Springfield, by 250 fps or so, giving a decided advantage in kinetic energy values as well.
The many fantastic choices among the already existing and field-proven .30-caliber bullets made for a versatile cartridge. Winchester used the same 25-degree shoulder for the .300 Win. that it used for the .338 and .264, but the added case capacity gave the Winchester cartridge an advantage over the Norma and the .30/338 wildcat. The resulting case holds 81 to 85 grains of water, depending on brand, when filled to the base of the neck.
Detractors immediately criticized the short neck, as it’s generally preferable to have a bottleneck cartridge use a neck dimension of at least one caliber in length. It had no negative effect. I have found there’s plenty of neck tension to keep things in place, even with the longest bullets, and among the myriad rifle cartridges I’ve loaded, the .300 Win. Mag., is among the most accurate.
Not unlike the .222 Rem. and .308 Win., there is something inherently accurate about the design of the .300 Win. — something lovers of ballistics cannot explain scientifically. To use the vernacular, the .300 Winnie just shoots.
Unlike the .308 Win., which will perform just fine in a rifle sporting a 20-inch barrel, the .300 Win. works best with a barrel of at least 24 inches to fully use the powder capacity of the case. I have two .300s. My Legendary Arms Works Professional has a 24-inch barrel, and my Winchester Model 70 Classic Stainless sports a 26-inch pipe. Neither rifle has ever been a handicap to me while hunting, regardless of how close the shots were or how thick the flora.
As they’re hunting rifles I use across the world, I’ve tried to set them up with riflescopes that can handle a variety of situations, from the prairie of Wyoming, to the tioga of Quebec to black bear in the inky hemlock and spruce thickets of the Catskill and Adirondack mountains of New York.
The Model 70 wears a Leupold VX-6 2-12×44 with a 30mm tube, which can focus up close to shoot a bear trying to dine on your lower extremities to caribou or elk at the edge of my self-imposed hunting limits. The Professional wears a Bushnell Elite 4500 2.5-10×40, a trim, bright piece of glass that’s lighter than most and matches the rifle well. Both of these riflescopes are reminiscent of the .300 Win.; capable of getting the job done no matter the range.
Much like the iconic .30-’06 Springfield, the .300 Win. is well-suited for hunting 95 percent of the world’s game. This is, in fact, partly because of the fabulous selection of .30-caliber bullets we have today. Although the recoil is rather severe to make it a good choice for varmint work, I’ve loaded some 125-grain Nosler Ballistic Tips that have printed rather impressive groups, cruising along at a muzzle velocity of 3,400 fps. Let’s just say the varmints didn’t stand a chance.
As a big-game round, however, the .300 Win. shines. From deer and hogs, to distant pronghorn antelope, to moose and elk, and the ungulates of Africa, I really like the .300 Win. as an all-around choice. The bullet choices for big game, with a handful of exceptions, run from 150 to 220 grains, and man, there are some wonderful choices.
I have used many of them in various applications. For most of my hunting with a .300 Winnie, I have found the 180-grain slugs give the best balance of trajectory, energy and accuracy. The lighter bullet choices will work, if of stout construction and if velocities are allowed to slow down a bit.
Whitetails hit with a standard cup-and-core 150-grain bullet at less than 100 yards from full-house .300 Win. ammunition have an exorbitant amount of blood-shot meat, and penetration can be poor because of violent expansion, brought on by impact velocities greater than 3,200 fps.
The standard 165-grain bullets are a bit better and are a perfect choice if you use a premium bullet. Heavyweight projectiles — 200- and 220-grain bullets — are good choices for the largest deer and antelope you would hunt with a .30-caliber, as well as for the bears and other game that can even the score in a hurry.
Most ammunition companies offer a few hunting loads in .300 Win. Mag., and many are very well constructed. The Federal Premium load featuring the 180-grain Trophy Copper Tipped bullet has provided more than satisfactory results from my rifles, and the solid copper construction ensures that premature bullet break-up is no issue.
The .300 Winchester Magnum is a joy for reloaders: There are tons of components available.
ABM ammo makes a great long-range .300 Win. load built around the Berger 185-grain, which leaves the barrel at 3,080 fps and still delivers 2,365 foot-pounds of energy at 400 yards. The .300 Win. has attained the status most rifle calibers dream of: You can find ammunition, of one variety or another, in most back-country gun shops and almost all the box stores that sell ammunition and hunting supplies. It has become that universal.
But, in my opinion, handloading lets you see the true genius of the .300 Win. Mag. design as a hunting cartridge. I’ve received many comments and questions to this effect: “Why would I choose to use the magnum cartridge when there are so many fantastic rifles available in .308 Win. and .30-’06? What is the advantage, when so many of hunting shots are inside 200 yards?” My answer is: First, I shoot my .300 Wins. very well.
They are good rifles; accurate and well-fitted, and that’s very important. Second, I can, via handloading, create ammunition for my .300 Win. that will mimic the performance of the .308 Win. and/or .30-’06, but I can’t get my .308s and ‘06s to give me .300 Win. performance. When I’m on a hunt in unfamiliar territory, where I have the possibility of multiple species and/or distant shots, I’m much happier carrying a .300 and taking a close shot rather than one of the slower cartridges.
Through the years, I’ve developed a collection of pet loads that have given me reliable field performance on two continents and in many hunting situations. The .300 Win. Mag. is best served by a large rifle magnum primer. For most of my loads, I prefer Federal’s Gold Medal Match GM215M. The hotter spark gives a more uniform result, and the deviation of velocities tends to be very low.
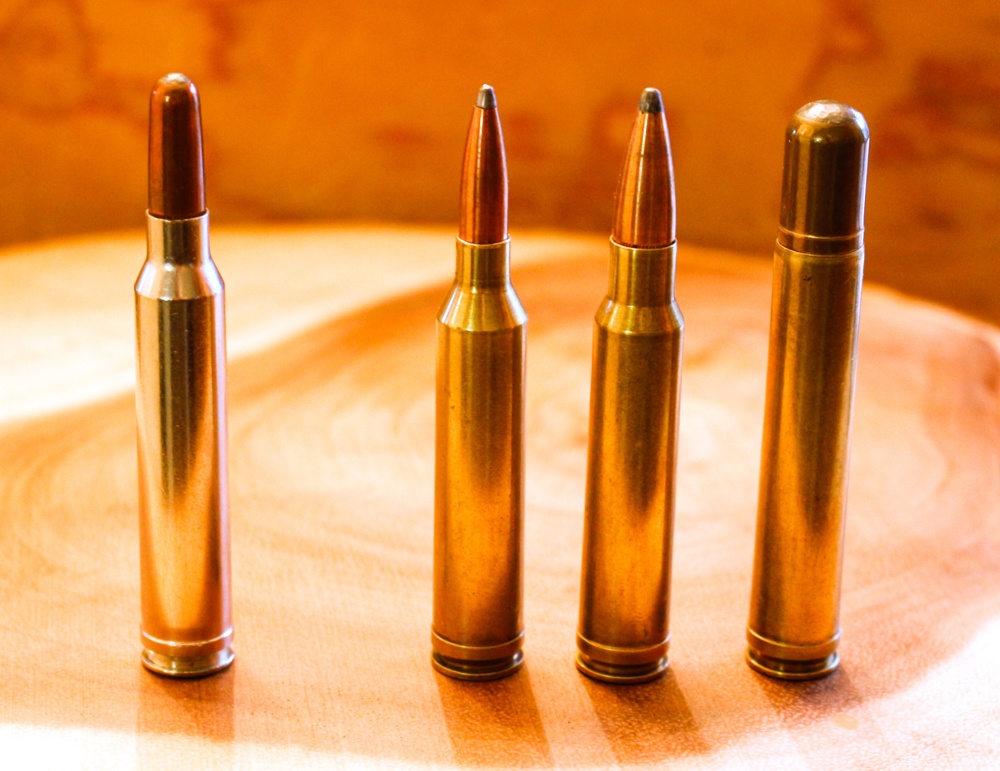
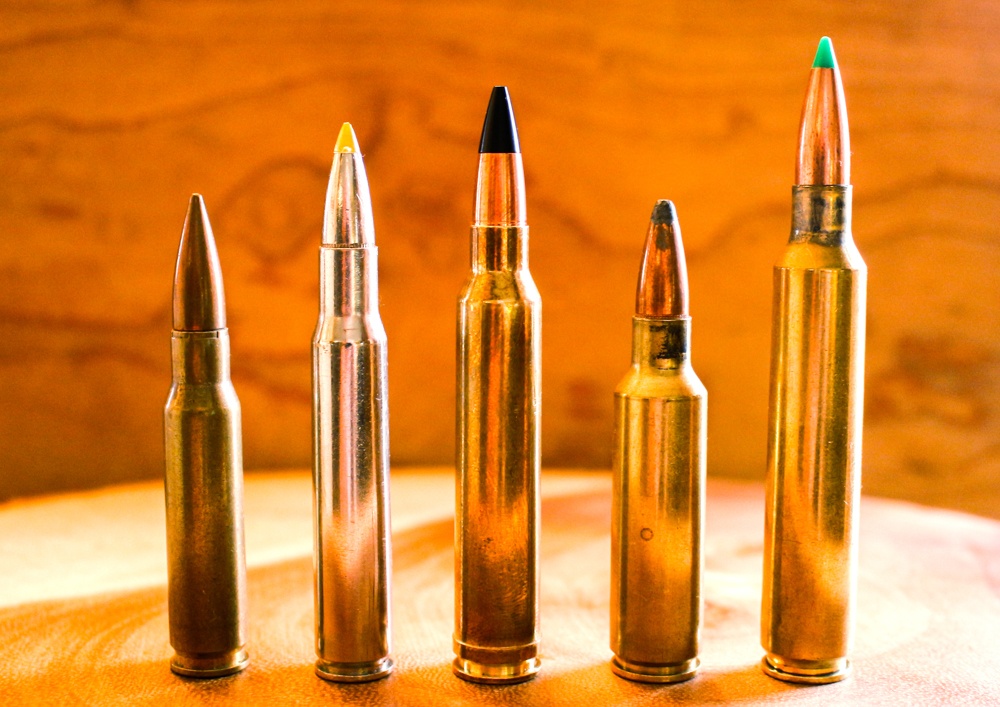
The 300 Win. Mag., left, was the fourth cartridge in a series of belted magnums designed to fit in a standard long action. The other Winchester magnums are, from left to right, the .264, .338 and .458, all based on the .375 H&H Mag. case.
The .300 Win. can be fueled by powders that range from the medium burning IMR4064 and Hodgdon’s VARGET to the slowest burning powders, such as IMR7828 and 7977 to Alliant’s Reloder 25. I like Norma brass and Federal GM215M primers to spark the large powder charges. For an all-around big-game load, I like two bullets: the 180-grain Sierra Game King for a standard bullet and the 180-grain Swift Scirocco II for a bonded-core choice. Both are boat-tail spitzer bullets, the Sierra being a standard cup-and-core, and the Swift a thick jacket, bonded-core polymer-tip design.
The Sierra accounted for my first caribou, taken across a frozen lake in Quebec at minus 15, and the Scirocco accounted for my best pronghorn, taken in Wyoming at the end of September, when the country there is as pretty as any place I’ve seen. Both loads have accompanied me on many local deer hunts in my native New York, and they have worked just fine.
These bullets like the same powder charges. I go back and forth between 68.5 grains of IMR453 and 73.0 grains of Alliant’s Reloder-19, as both have given me three-shot groups of less than ½ MOA, and both produce a velocity of about 2,960 fps, depending on the rifle and temperature. Although these bullets are rather long, there’s no problem seating them in the .300 Win. case and maintaining the SAAMI specified COL.
For my first African safari, I packed a .300 Win. as my light rifle, nicely complementing my .375 H&H Mag. Because kudu and eland were on the shopping list, I wanted a bullet that would not only deliver a decent trajectory but be strong enough to deliver the bone-smashing power that an antelope weighing almost a ton can demand.
I chose the 200-grain Swift A-Frame for this hunt, fueled by 75.0 grains of the slow-burning Reloder-25, for a muzzle velocity of 2,710 fps. This load, which printed 1-inch groups at 100 yards, accounted for my first head of African game: a heavy-horned gemsbok bull that holds a place of honor among my hunting trophies.
That combination, with that strong A-Frame bullet, which retains more than 90 percent of its weight, would easily handle interior grizzly bear and just about any creature shy of cape buffalo and elephant.
New York has a healthy population of black bears, which, although not particularly tough in comparison to grizzlies, can attain weights of 600 pounds or more. When an animal has claws and teeth that can rearrange your anatomy, I prefer to carry a rifle that ends an argument quickly.
I was reading some classic hunting literature in which the author waxed poetically about the virtues of the .30-’06 Springfield and the classic 220-grain round-nose load at 2,400 fps. I figured I could get the .300, with a bit of creative handloading, to perform the same.
Here are the .300 Win. Mag, right, and the .30-338, the latter being a .338 Win. Mag case necked down to hold .308-inch bullets, something very close to the .308 Norma Mag.
It didn’t take long to obtain a box of good Hornady Interlocks and some old data from an aged reloading manual. I used 53.0 grains of IMR 4064 to achieve a muzzle velocity of 2,425 fps; perfect for whitetail and black bears. That load prints at 1 MOA, and has accounted for a New York black bear and my best local whitetail: an 11-point buck that proudly resides on the wall of my dining room.
The kudu bull I mentioned earlier was taken with a special load, built around the 150-grain Cutting Edge Bullets Copper Raptor bullet. The Raptor is a monometal hollow-point with a polymer tip. Upon impact, the skived walls of the hollow-point section break off into small blades for serious impact trauma, and the rear portion of the bullet remains at caliber dimension for deep penetration.
I know, a 150-grain seems awfully light for an animal the size of a kudu, which are often comparable to elk, but my previous experiences with these bullets engendered a bunch of confidence, and my theory that they would handle kudu and the like was proven correct. That bull dropped in his tracks.
That load also accounted for a big waterbuck bull at 215 yards a couple of days later. I used the new Enduron line of powder — IMR 4451 — to arrive at ¾ MOA accuracy and a muzzle velocity of 3,340 fps. According to Chris Hodgdon, president of the Hodgdon Powder Co., which now produces the IMR line, that marked the first use of IMR4451 in Africa. The only bullet base I recovered was from the kudu bull. All the other shots passed through, at ranges from 70 to 215 yards. All in all, it proved to be a thoroughly dependable load with very little recoil.
Among the hunting rounds, there are more powerful .30s on the market. The .300 Weatherby Mag., .300 Rem. Ultra Mag. and the behemoth .30-378 Weatherby will produce higher muzzle velocities and flatter trajectories than the .300 Win., yet that comes at the price of a considerable increase in recoil and barrel wear.
As an example, my dad’s favorite .30-caliber magnum is the .300 RUM, which will drive a 180-grain slug at faster than 3,350 fps but requires just shy of 100 grains of slow-burning powder to do so. My .300 Win. will push the same bullet at 3,050 fps but with fewer than 80 grains of powder, with much more comfortable and manageable recoil. Let’s also compare the trajectory of the two.
Using a 200-yard zero and the same 180-grain projectile, the .300 Win. will be 6 inches low at 300 yards and 18 inches low at 400 yards. The .300 RUM will be just less than 4 inches low at 300 yards and 12 inches low at 400. Although the RUM has an appreciable difference in long-range trajectory, the added case length, longer receiver and significant increase in recoil of the .300 RUM give the edge to the .300 Win., in my opinion.
This puts the 300 Win. Mag. in perspective with some other well-known cartridges. Left to right are the 308 Win., 30-’06 Springfield, 300 Win. Mag., 300 WSM and 300 RUM.
Based on my shooting experiences, off the bench doing load development and in real-world hunting situations, I feel comfortable saying the .300 Win. has a power level the average shooter can accurately shoot without beginning to think about a muzzle brake. Everyone has a different level of recoil tolerance, but I know many shooters who insist on using a .300 Weatherby or bigger caliber and develop a nasty flinch, resulting in poor targets and wounded game.
No matter how big the case is, a .30-caliber bullet placed improperly will not kill game. I believe that among the choices for magnum cartridges, the .300 Win. Mag. (and its ballistic twin, the .300 H&H Mag.) makes the most logical and practical choice for sportsmen.
The .300 Win. is not only a hunting cartridge, though. It’s comfortable on the bench-rest circuit and has been adopted by the U.S. Marine Corps in sniper rifles. Paper-punchers can find many wonderful match-grade bullets that will print tiny cloverleaf groups.
With a 1:10-inch twist rate, the .300 Win. has the horsepower to push the heaviest target bullets, such as the 230-grain Berger Match Hybrid Target, at muzzle velocity of faster than 2,800 fps. With a G1 ballistic coefficient of 0.717, this combination offers the long-range target shooter all sorts of wind resistance — perfect for the 1,000-yard range.
The 168 and 180-grain Sierra Match Kings will also make fantastic choices for accurate target work. Although the recoil of a .300 Win. can be a bit much for extended shooting sessions, in a rifle with sufficient weight, it can be more than tolerable.
When it comes to the actual construction of the case, the belt is unnecessary. Unlike the .375 H&H, .300 H&H and .458 Win., the .300 headspaces off that well-pronounced shoulder. Those other cartridges can exhibit long-term case stretching just in front of the belt, but this effect seems to be minimized in the .300 Win.
The case feeds just fine, unlike some of the feeding issues associated with the Winchester Short Magnum series, and because it shares the same action length as the .30-’06, it’s quite easy to convert a rifle of .30-’06 length action to the .300 Win. Mag. Among the .30-caliber magnums, the .300 H&H owns the nostalgia category, and the .300 RUM wears the horsepower crown among commonly produced rifles, but you can take my word for it: The .300 Win. will hold its title of King Versatile for generations.
Author Phil Massaro used a .300 Win. Mag. to take this big kudu bull. The .300 Win. Mag. splits the difference between the .30-’06 Springfield and .300 Weatherby Mag. It works best in a rifle with a barrel at least 24 inches long. The author used a handloaded 150-grain Cutting Edge Bullets Copper Raptor bullet, a monumental hollow-point with a polymer tip. The new Enduron line of powder, IMR 4451, pushed the Raptor to a muzzle velocity of 3,340 fps.
How does a .300 Win. compare to other calibers with a similar case capacity? Is it anemic when compared to the .338 Win. Mag.? Does the 7mm Rem. Mag. make a mockery of the .300 in the trajectory department? The answer to both questions is an emphatic no. The difference between the 7mm Rem. Mag. and the .300 is so slight that I believe the larger frontal diameter of the .300 — as well as the better selection of bullet weights — gives a definite edge to the .300 Win.
Although the .338 has an even larger diameter, the recoil begins to ramp up significantly. Even though the .338 can use bullets weighing 165 to 250 grains, the .300 can use bullets from 100 to 250 grains. Yes, that’s right; a 250-grain .30-caliber bullet. The 250-grain Barnes Original, which looks about as long as a golf pencil, will attain velocities of 2,500 fps — only 150 fps behind the .338 with the same bullet weight — and group rather accurately. Grab some Cutting Edge Bullets 100-grain Raptors for your .300 Win., and you’ve got as fine a coyote-killing machine as was ever invented.
There have been several cartridges that tried to usurp the .30-caliber magnum crown — such as the .300 Win. Short Mag. — but the .300 Win. still reigns supreme. The blend of flat trajectory, striking power and manageable recoil will ensure its position at the top of the heap.
Will it ever replace the king of all cartridges, the .30-’06 Springfield? Probably not. But although I’ve had some great hunting and shooting experiences with the ought-six, to me the .300 Win. represents a cartridge that delivers just a bit more, and although some folks reading this might deem that velocity advantage unnecessary, for me it engenders confidence in the rifle. I firmly believe that confidence is a huge part of good marksmanship.
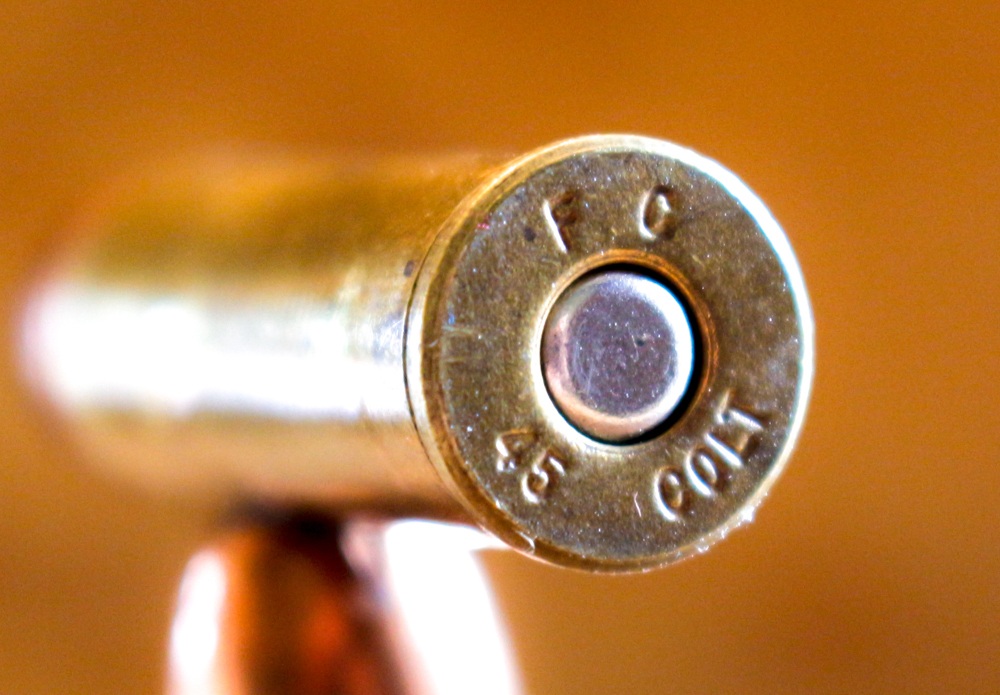
Everyone loves the classic .45 Colt cartridge, and it’s still relevant after almost 150 years.
The .45 Colt can be loaded down to soft-shooting cowboy loads, or pushed to the limit for heavy hunting applications.
There are a wide range of bullet styles and weights available for the cartridge, it’s a delight for any reloader.
An accurate cartridge, the .45 Colt loaded with good 250-grain bullets is no slouch on big game.
Left is the Falcon 230-grain FalCoated hardcast bullet next to a 255-grain cast-lead load. Though the .45 Colt has been criticized for having a thin case wall, the author has never had a problem working with the .45 Colt. He tries not to excessively flare the case mouth.
Still Valid After All These Years
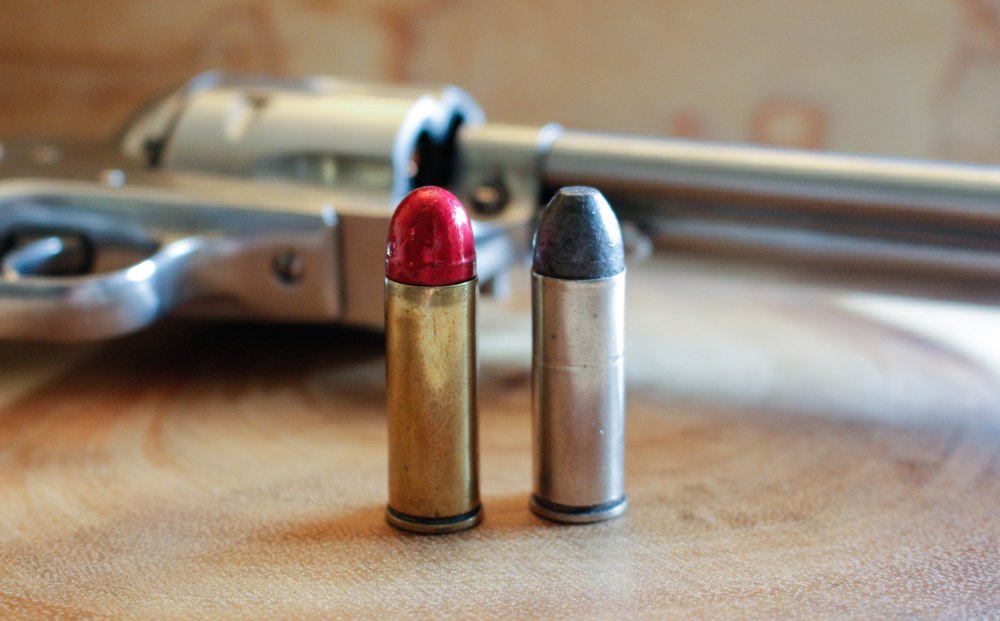
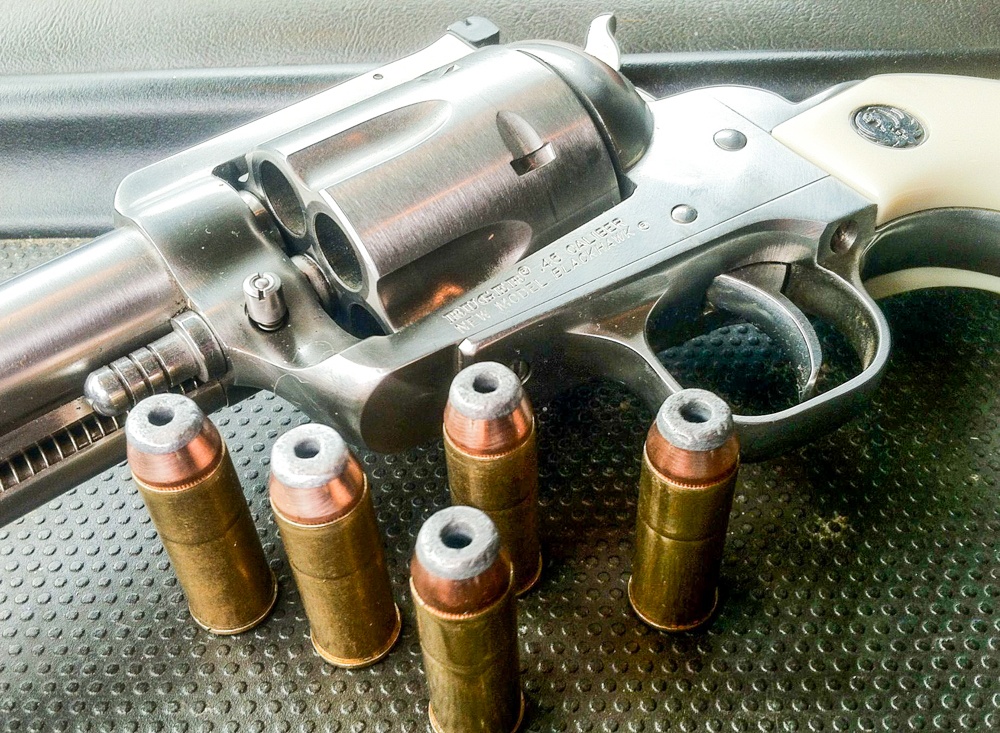
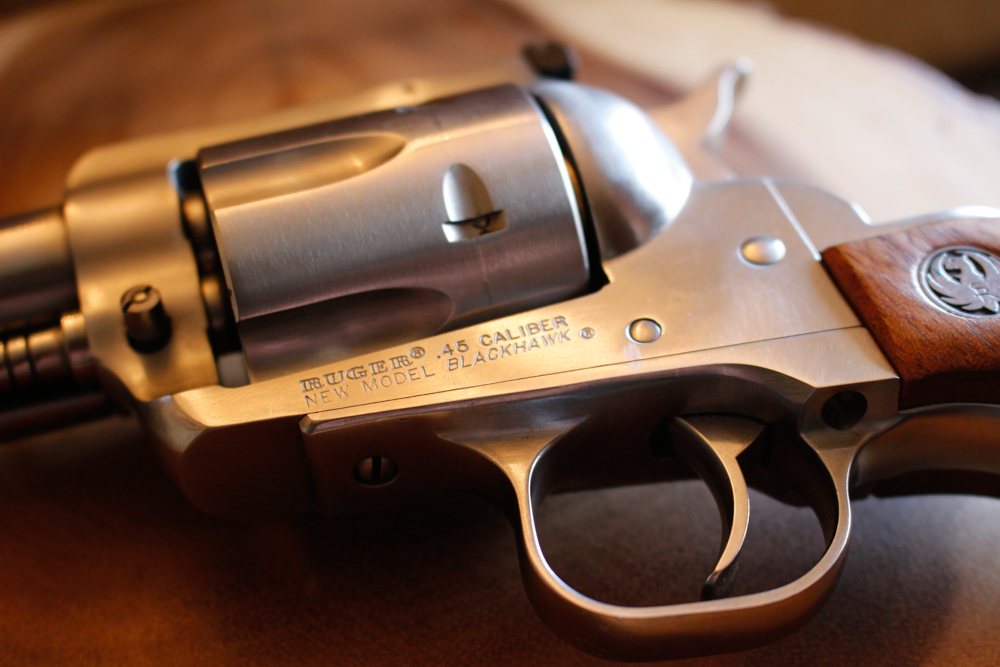
The .45 Colt has hung on for years for several reasons. The cartridge has a sound design: a semi-rimmed configuration — that small rim has been criticized through the decades but has never posed a problem in my gun — that has enough case capacity to drive the .452-inch-diameter bullets to respectable velocities in older Single Action Army revolvers and even higher velocities in modern SAA clones, such as the Ruger Blackhawk I love so much.
The .45 Colt can be an excellent cartridge for sending paper banditos to Boot Hill (in cowboy action shooting) and neatly dispatching big game at sensible ranges. In a modern handgun, the .45 Colt can also be very accurate.
My pistol, a Ruger New Model Blackhawk, has adjustable sights that give me an accuracy edge compared to the fixed sights of the SAA clones. I can keep a full cylinder of shots within a 3-inch group at 45 yards, which is more than acceptable to me with my mid-40s eyes.
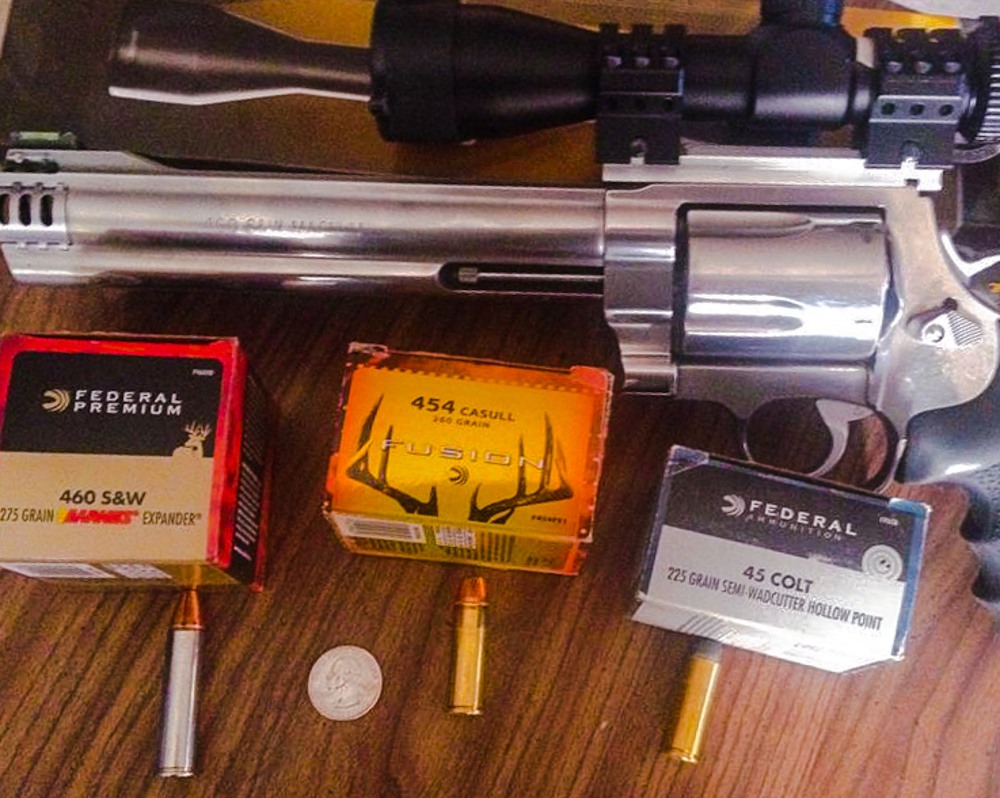
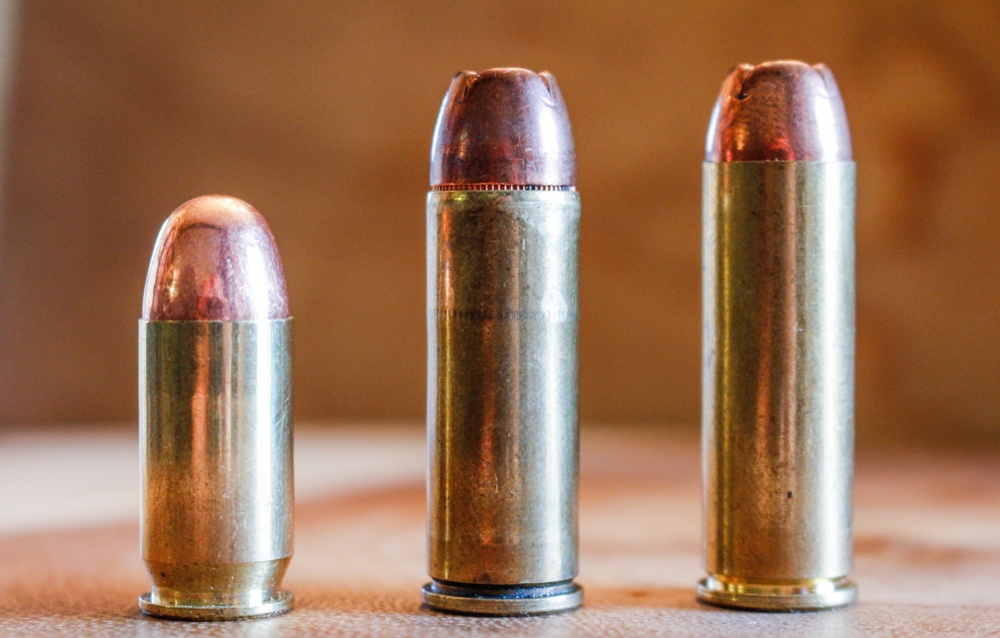
Left to right are three stout wheelgun cartridges: The .460 S&W, .454 Casull and venerable .45 Colt. The .45 Colt is sometimes called the .45 Long Colt, indicating the difference between it and the shorter Smith & Wesson Schofield case. The addition of the word Long irritates some shooters, but ammo companies use both names interchangeably. The .45 Colt is the basis for the .454 Casull, the latter being an elongated version of the Colt cartridge loaded to a much higher pressure. The .460 S&W takes the same rim and body diameter yet uses an even longer case — 1.800 inch for the .460 versus 1.285 for the Colt.
The Blackhawk has a 7½-inch barrel, generating a bit more velocity, but more important to me, giving me a longer sighting radius. My gun performs better with heavier bullets, and I’m fine with that. Anything heavier than 250 grains provides at least acceptable accuracy, with a few heavy slugs being exceptional.
The variation of bullet weights is another desirable feature of the .45 Colt. It can be loaded to purr like a kitten, and those mild loads are excellent for training a new shooter or for fun plinking days. Yet in my Blackhawk, it can launch slugs weighing up to 360 grains for serious big-game work.
Most ammunition manufacturers still offer the original load of a round-nose or flat-point lead bullet of 250 to 255 grains, with a muzzle velocity of about 800 fps, and that formula works as well as it did in 1873.
Yet folks who hunt big game with the old cartridge can find plenty of factory ammunition options, provided you have a pistol or rifle designed to handle the higher pressures. CorBon offers a 335-grain hardcast lead flat-point in the +P designation, which leaves the muzzle at 1,025 fps and produces 820 foot-pounds of energy.
If that’s not heavy enough for you, DoubleTap ammunition produces a 360-grain hard-cast wide flat-point, which produces 1,200 fps from the muzzle for 1,150 foot-pounds.
In a 16-inch-barreled rifle, that will leave the muzzle at just slower than 1,500 fps for more than 1,700 foot-pounds. That load, in a carbine, is approaching the performance of some lighter .45-70 Gov. loads and would handle about all North American game at close ranges.
There have been many modern upgrades to ammunition for the older wheelguns and lever-action rifles in the past decade, and the .45 Colt is no exception. The most popular is the Hornady LEVERevolution line, which includes the company’s proprietary FTX, or Flex Tip eXpanding, bullet, which uses a flexible polymer tip to allow the use of spitzer bullets in a tubular magazine of a lever-action rifle.
At 225 grains, the Hornady LEVERevolution load will leave the rifle’s muzzle at 900 fps, and provides a much flatter trajectory than the round-nose and flat-point bullets. That configuration adds quite a bit of versatility to traditional lever guns and makes a perfect choice for folks who hunt deer and bear in the thickly forested Northeast, as I do.
The .45 Colt, center, can use bullets made for the .45 ACP, left. As with any straight-wall cartridge for a revolver, it requires a good roll crimp on the finished cartridge to keep the bullet in place. The same goes for the .454 Casull, right.
On the Defensive
The .45 Colt is not just a hunting tool, though. Although the rifles and pistols are not the traditional choice of a defensive weapon — especially with today’s plethora of Model 1911 and AR-15 style firearms — they will save your bacon just as well now as they did in 1873.
Many newer handgun bullets designed for autoloaders will function well in the .45 Colt revolvers. My gun loves the Hornady XTP in 250 and 300 grains, as well as the Speer Gold Dot 300-grain slug. Both of those have an impeccable reputation as a defensive bullet (they also make fantastic big-game bullets, but that’s not the point), and they shoot very well from most .45 Colts I’ve shot.
On the other end of the spectrum, Cutting Edge Bullets makes a 150-grain Handgun Raptor bullet that can achieve very high velocities (upward of 1,600 fps) in the .45 Colt case. These modern projectiles have mono-metal construction and use a deep hollow-point for rapid expansion. The wall of the hollow-point breaks into small blades for initial impact trauma, and the base of the copper bullet remains at caliber dimension for deep penetration. The bullets make a good choice for home defense — at least for me.
There was a reason I chose that Ruger New Model Blackhawk as my first handgun: Although the pistol was always securely stored, the transfer-bar design of the Ruger revolver seemed to present the most accident-resistant package I could find. In the hands of an educated shooter, the pistol would operate fine, but if the hammer was cocked and the pistol accidentally dropped, the transfer bar would prevent accidental discharge.
The same goes for trigger pull: The trigger must remain depressed throughout the firing sequence for the gun to fire. Any light touch on the trigger would result in a click rather than a fired cartridge. I also appreciated the nostalgia of the .45 Colt over more modern cartridges — namely the .44 Rem. Mag. — so that combination of traditional appearance and modern safety features made for a package I couldn’t resist.
My good buddy Donnie Thorne, better known as Col. Le Frogg, has a brace of Ruger Vaqueros in .45 Colt, with the classic 5½-inch barrels, that are nickel plated and have the actions slicked up. They are possibly the most accurate .45s I’ve shot, and those pistols have a special affinity for my 255-grain lead-bullet handloads, sitting over a mild charge of Alliant’s Unique powder.
Most ammunition manufacturers still offer an original load of a round-nose or flat-point lead bullet of 250 to 255 grains, at a muzzle velocity about 800 fps, and that formula works as well as it did in 1873. Today’s single-action revolver hunter might want more oomph behind a modern bullet design, such as these 300-grain Sierra hollowpoints.
The Vaquero is set up with the same transfer bar as my Blackhawk, so you can carry it confidently with a full cylinder. However, I was trained to always carry a single-action revolver on an empty chamber, and old habits die hard. Le Frogg and I thought long and hard about the cartridge choice for our revolvers, and though we bounced back and forth between classics — .44-40, .44 Mag. and .45 Colt — you know what we ultimately chose.
Compare and Contrast
Let’s address the classic comparison between the .44 Mag. and .45 Colt. On paper, you’d think the .44 Mag. would be the hands-down choice in a hunting revolver. I mean, the .44 Mag. was developed by Elmer Keith (please pause for a moment of silence) and made famous by detective Harry Callahan, so it had the cool factor.
But the .45 Colt has appeared in countless Western movies and was carried across Europe by some dude with a bunch of stars on his uniform named Patton. Famed lawman Bat Masterson ordered a Colt .45 directly from Samuel Colt.
The great controversy around Wyatt Earp’s Buntline Special will continue to rage, but if it existed, it was chambered in .45 Colt (tongue planted firmly in cheek). Needless to say, the .45 Colt’s cool factor rivaled that of the .44 Mag. The fact that Keith (cue angelic music) sang the praises of the .45 Colt, relating tales of mad cows being neatly dispatched and mean broncs having to be put down quickly as they tried to stomp him into the ground, sealed the deal for me.
The .44 Mag. is a fantastic hunting round, fully capable for big game. It can push bullets of similar weight, albeit at a higher pressure and with a bit more recoil. The better sectional density of the .429-inch bullets might penetrate a bit farther, when of the same weight, but a couple of features of the .45 Colt really appealed to me.
First, the .45 Colt can use the many component bullets for the uber-popular .45 ACP, and that’s good. The vast amount of .45-caliber FMJ projectiles manufactured each year make the .45 Colt a wise decision from an economic standpoint as well as availability.
The stout hunting bullets in .452-inch caliber also let the Colt shine as a hunting round. Second, although the .44 Mag. and .45 Colt can produce performance so similar that no animal could tell the difference, the Colt can do so at a much lower pressure.
The .45 Colt is a semi-rimmed configuration that has enough case capacity to drive .452-inch-diameter bullets to safe velocities in older Single Action Army revolvers and to higher velocities in the Ruger Blackhawk. The variation of bullet weights is another desirable feature of the .45 Colt. The .45 Colt runs on a standard large pistol primer, and the primers need to be seated flush with the case head or slightly recessed.
That translates into easier case extraction, longer case life and less recoil, all of which are important to me. So, being a handloader who appreciates the points of the cartridge, I couldn’t wait to start the loading process and find those sweet combinations that make a cartridge shine.
At the Reloading Bench
The .45 Colt isn’t a difficult cartridge to load. You’ll need a good set of reloading dies, with the best roll crimp you can get. As with any straight-wall cartridge for a revolver, you’ll need a good roll crimp on your finished cartridge to keep the bullet in place and prevent it from extending out of the case during recoil.
Especially in the hard-kicking cartridges — such as the full-house .45 Colt loads, as well as the .454 Casull and .44 Mag. — this is very important, as the bullet can pull out of the case and prevent the cylinder from rotating, as well as pose a dangerous situation if the bullet isn’t properly aligned to the bore, which could result in catastrophe or death. I like the Redding Profile Crimp die, as it has produced the most uniform roll crimp I’ve experienced.
I also like the Redding Dual Carbide Sizing dies, as they give the exact dimension I want for proper bullet tension yet don’t overwork the body of the case, extending case life. Carbide dies don’t require lubrication during resizing and won’t allow the case to stick in the die, which is a nice feature when you consider the smaller rim of the Colt case.
The .45 Colt runs on a standard large pistol primer, and I prefer the Federal GM150M for its consistency and reliability. Be sure your primers are seated exactly flush with the case head or slightly recessed to prevent malfunctions and to let the cylinder rotate properly.
Although the .45 Colt has been criticized for having a thin case wall, especially in comparison to the younger magnum pistol cartridges such as the .44 Mag. and .454 Casull, I’ve never had a problem working with the .45 Colt. I try not to excessively flare the case mouth, giving just enough to allow the bullet to seat properly yet not overworking the brass.
In respect to load data, the .45 Colt is really three cartridges in one, and if you intend to reload it, you must be aware of the differences. Look at it this way: There is one set of data for the Colt Single Action Army revolver and its clones, held to a lower velocity and pressure limit. Then, there’s the data for the stronger revolvers and single-shot pistols, which allow the pressures to climb much higher while still performing safely.
Last, there’s the data developed for the lever guns — an entirely different animal.
The author’s Blackhawk likes a Hornady 300-grain XTP-Mag bullet seated over 16.5 grains of Accurate Arms No. 9 powder. The recoil is considerably more than what cowboy loads produce, but it’s manageable in the 7½-inch-barreled revolver.
For SAA-class loads, I invariably prefer Alliant’s Unique powder. It burns a bit dirty but has given me fantastic accuracy with many types of cast lead bullets. My favorite combination in this class is the Falcon Bullets Co.’s 230-grain round-nose FalCoated lead bullet over 8.0 grains of Unique. It’s an affordable bullet and plenty accurate for plinking and smaller game.
For my Blackhawk, as a hunting/defense load, I like the Hornady 300-grain XTP-Mag bullet seated over 16.5 grains of Accurate Arms No. 9 powder, at 1,120 fps. This is my favorite load for early-season black bears, because that Hornady bullet will provide consistent expansion and penetration.
The recoil is considerably more than the cowboy loads described earlier, but it’s more than manageable in the 7½-inch-barreled revolver and has proven to be the most accurate of the hunting loads I’ve developed. I limit my distances to 35 to 40 yards, and although Mr. Bruin and I haven’t met when I’ve carried the Blackhawk, I’m confident the venerable cartridge will get the job done.
For lever guns, I like the Hornady FTX bullet. It requires some special treatment from a reloader’s point of view, because the tapered ogive of the FTX bullet demands that the brass case of the .45 Colt be trimmed from 1.285 inch to 1.215 inch so the case mouth aligns with the shank of the projectile rather than sitting upon the ogive. Load that shorter case with 11½ grains of Alliant’s Blue Dot powder, and you’ll have an even 1,100 fps out of your rifle.
Conclusion
The face of cartridge development is ever changing. There’s no denying that. Projectiles continue to be made stronger, cases are modified to produce faster velocities and powders are developed to provide the most uniform results possible.
Many hunters and shooters will flock to embrace the newest technologies, yet others are content with their grandfathers’ cartridges, embracing the nostalgia and romance of yesteryear. I tend to float between the worlds, enjoying the classic combinations that have wonderful reputations but not afraid to put a modern spin on a classic. The .45 Colt epitomizes that idea for me, and I’m happy to have carried one for more than a decade.
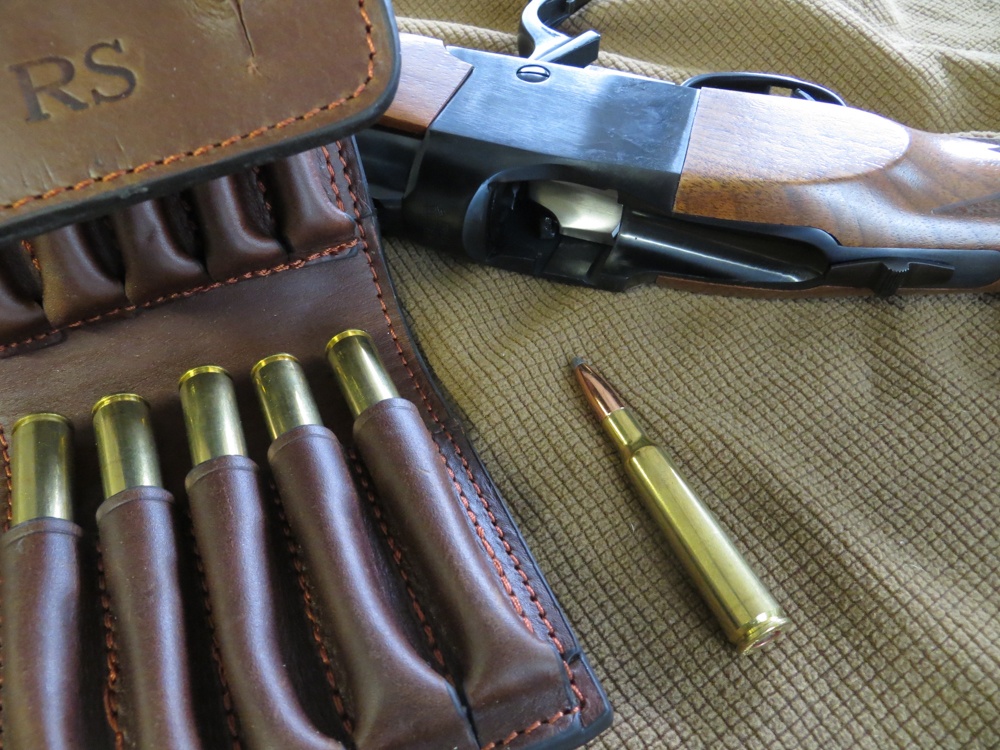
The 7mm Mauser, aka the 7X57mm Mauser, broke ground in the military and remains a top hunting choice today.
The 7mm Mauser is also known as the 7X57, 7mm Spanish Mauser, and .257 Rigby.
The over 100-year-old military cartridge is still useful for today’s sportsmen, and there’s plenty of components for reloaders.
A mild-recoiling cartridge, the 7mm Mauser packs enough punch for long-range work on big game of all sorts.
As a hunting round, the 7mm Mauser excels for deer, black bear and wild pigs. W.D.M. “Karamojo” Bell used the 7mm surgically to take down elephants in the early 1900s.
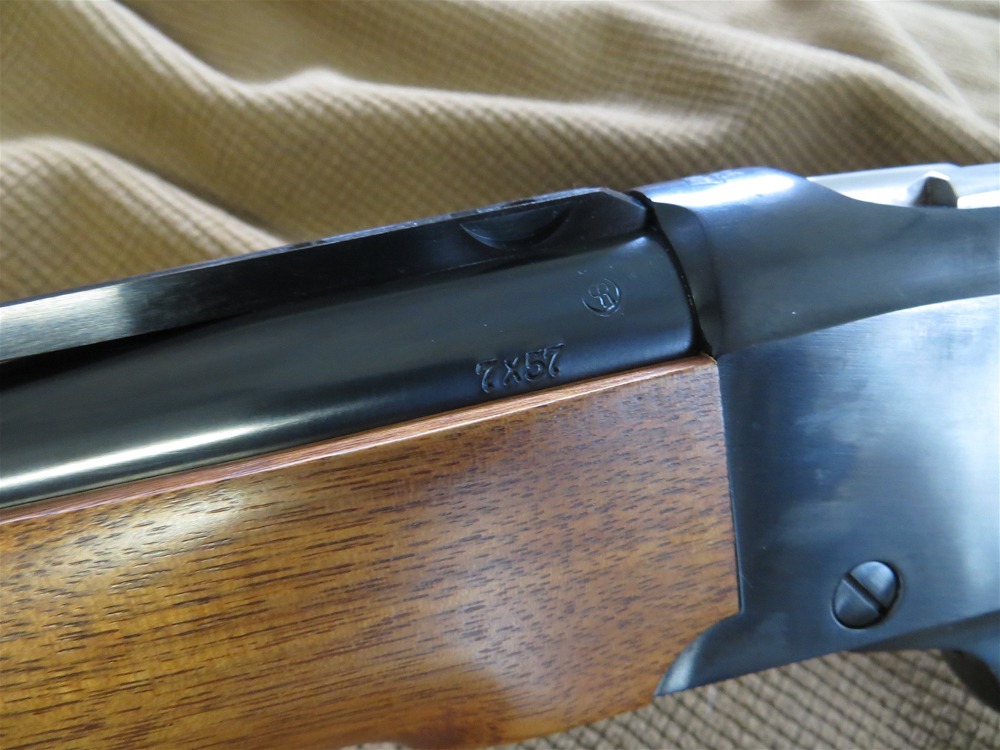
The 7mm Mauser — also known as the 7x57mm Mauser, 7mm Spanish Mauser and .275 Rigby — was originally designed as a military cartridge and chambered in the then-new Mauser Model 1892 and Model 1893 rifles. Armies found the round was accurate at long range with moderate recoil. Hunters discovered the round offered good killing power with deep penetration and minimal recoil in lightweight rifles.
By today’s standards, the 7x57mm Mauser is in the same league, albeit slightly less powerful than the .270 Win., .280 Rem., 7mm-08, and .284 Win. Sure, the 7mm Mauser is an old-timer, but this older round can keep up with newer ones. Even though this cartridge is 124 years old, there’s no question the 7mm Mauser makes an excellent all-around big-game round for all except big bears and perhaps moose.
All major ammunition manufacturers produce the 7mm Mauser, though foreign-made ammo typically has more bullet weight and type selections.
But as has been demonstrated, the round has been used quite effectively on the biggest game animals — elephants. For handloaders, manufacturers make a wide variety of excellent 7mm bullets, allowing it to be loaded with bullets weights from 120 to 175 grains.
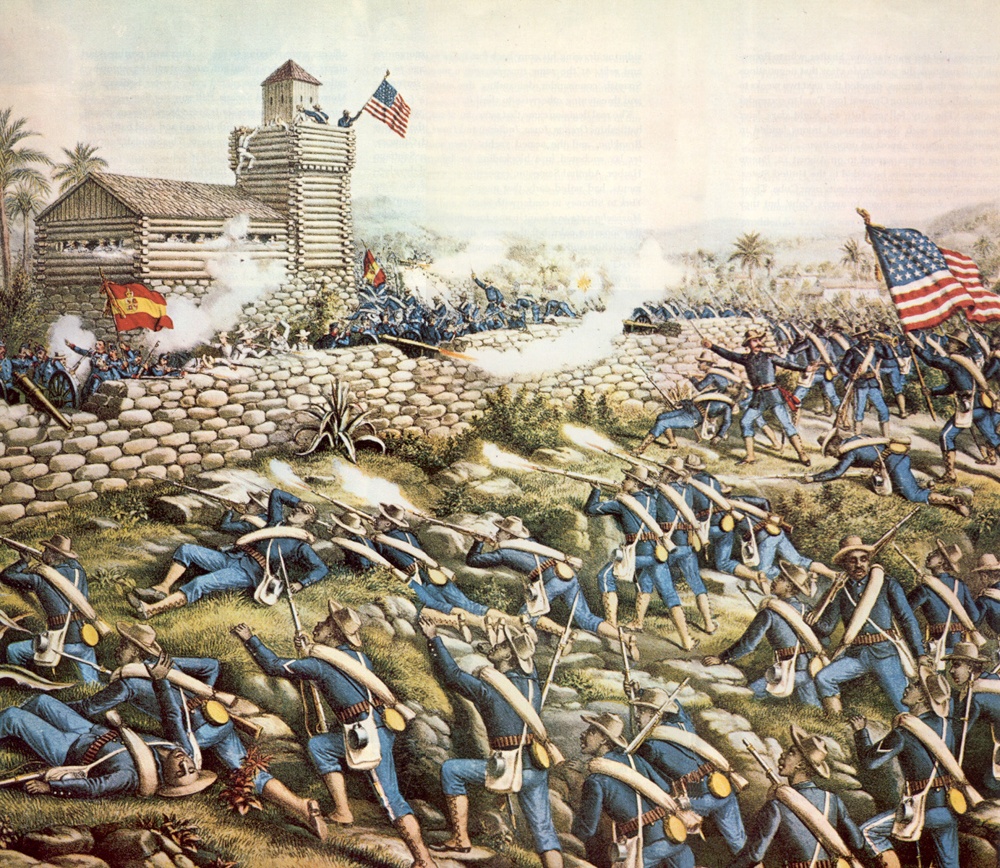
The 7x57mm Mauser was a game changer in military and hunting cartridges. America’s first exposure to the 7x57mm Mauser was in Cuba in 1898, during the brief Spanish-American War. It was brutally clear that Spanish forces were better equipped than American soldiers.
More than 15,000 U.S. troops attacked about 760 entrenched Spanish forces in Santiago de Cuba. San Juan heights protected the city. The only way to the city was up two hills American troops called San Juan Hill and Kettle Hill.
In the tropical heat on July 1, American troops attacked. About 200 U.S. soldiers were killed and more than 1,000 wounded from the fire laid down by the Spanish troops with their Mauser 1893 rifles chambered in 7x57mm Mauser.
Spanish losses were minimal considering the size of the attacking American force. About 115 soldiers were killed and 366 wounded. The Spanish troops’ 1893 Spanish Mauser rifles gave them an edge. Not only was the Mauser quicker to reload via a stripper clip, but the 7x57mm cartridge had a farther effective range and was more accurate.
The U.S. Model 1898 Krag-Jorgenson rifle was no match. The slow-loading Krag rifle and its caliber, .30-40 Krag, were outclassed. In the aftermath of the Spanish-American War, the United States quickly developed a better bolt-action rifle and caliber so it wouldn’t be caught flat-footed again. The rifle was a modified Mauser rifle called the M1903 Springfield, chambered in .30-06.
The 7mm Spanish Mauser really pushed U.S. military commanders to re-evaluate the country’s weapon and caliber at the time.
The 7x57mm cartridge was developed by Paul Mauser in 1892, and subsequently adopted as a military cartridge by Spain in 1893 for the M1892 Mauser rifle and the new M1893 rifle, which soon replaced the ’92. That’s why the cartridge is sometimes called the 7mm Spanish Mauser.
This is Charge of the 24th and 25th Colored Infantry, July 2nd, 1898, depicting the Battle of San Juan Hill, from an 1899 lithograph by Chicago printers Kurz and Allison.
Other European and Latin-American countries — Brazil, Uruguay, Colombia and others — also adopted the cartridge and rifle for military use. It was a turning point in modern cartridge design. The 7x57mm was cutting edge at the time and used new (in the late 19th century) smokeless powder.
The original military bullet was a round-nose, 173-grain full-metal jacket. The case measured 57 millimeters long, which is why the cartridge is also called the 7x57mm. That original military bullet fired from the M1893’s 29.1-inch barrel with a 1:8.6-inch twist rate had a muzzle velocity of about 2,296 fps and a muzzle energy of 2,025 foot-pounds.
At the time, those ballistics were impressive. The round was also fairly flat shooting, and offered excellent penetration and modest felt recoil. Part of the success of the cartridge was the long, heavy bullets used. They have a high sectional density.
Sectional density, according to the Hornady Handbook of Cartridge Reloading, is “the ratio of a bullet’s weight in pounds to the square of its diameter in inches. Bullets of the same shape but with more weight in relation to their diameter retain their velocity and energy better.” The longer bullets in the 7mm Mauser gave the round its long-range capabilities and good penetration.
The 7x57mmR is like the 7x57mm Mauser. It’s a rimmed cartridge developed from the 7x57mm Mauser soon after its debut for use in break-action rifles and combination guns such as drillings and other multiple-barrel hunting guns. Suffice to say, the 7x57mmR is rare today and is mainly encountered in European break-action guns. The only modern guns I know that are chambered for the 7x57mmR are the Blaser K95, B95/97, BD14 and D99 break-action, single-shot or combination guns.
The accuracy and effectiveness of the 7x57mm Mauser was further proven in South Africa during the Second Boer War from Oct. 1, 1899, to May 31, 1902. The British were armed with the .303 British cartridge, which still used cordite as a propellant. They were overwhelmed by the Boer sharpshooters’ long-range ability with Mauser M1895 rifles chambered in 7x57mm. Maximum effective range on paper was farther than 3,500 yards, but actual use was closer.
Boer sharpshooters could easily hit man-sized targets in the 700- to 1,000-yard range effectively using open sights. Remember, at that time, optics were rare on military and sporting guns. W.D.M. “Karamojo” Bell joined the Canadian Mounted Rifles and took part in the Boer War. After the war, in the early part of the 20th century, Bell went on to use the 7mm Mauser to kill literally tons of elephants in Africa, building his fame as a big-game and ivory hunter.
On the Ruger No. 1 International, the caliber 7mm Mauser is signified by 7×57. The 7mm Mauser has numerous names, such as 7x57mm Mauser, 7mm Spanish Mauser and .275 Rigby.
The effectiveness of the round was not lost on hunters. Sportsman discovered the 7mm Mauser made an excellent overall hunting cartridge. At the time, Mauser rifles ruled the roost with military forces, and Mausers for hunting, with lighter-taper barrels and more graceful cut-down sporter stocks, were the darlings of hunters in Europe and Africa.
Starting in 1899, prominent British rifle maker John Rigby had the importing license for Mauser rifles and crafted exquisite sporting rifles, chambering some in 7x57mm Mauser but renaming the round .275 Rigby. The dimension of a 7mm rifle bore measures .275 inches across the lands, so the caliber was given the .275 Rigby moniker. The name change helped sell rifles to English hunters.
Bell used a Rigby-Mauser Model 98 when hunting for ivory. His tally of elephants was 1,011. Of that total, about 800 were killed using the Rigby-Mauser chambered in .275 Rigby with 173-grain round-nose military ammunition. The caliber is hardly considered a dangerous-game round, but Bell was surgical with the 7mm. It was also the most reliable cartridge at the time. When hunting elephants, Bell wanted the cartridge to fire when he pulled the trigger.
The 7mm Mauser round was also light to carry and less expensive than traditional dangerous-game ammunition. Shot placement was the key to Bell’s success. On average, it took him 1.5 shots to kill an elephant. Bell took extensive notes and collected data on his kills, so he knew the details. A quick, accurate shot to an elephant’s brain stopped the beast while not alarming a herd.
His elephant kill count for one day was 19. He also shot elephants from relatively close range — 30 to 40 yards — and developed what is known as “the Bell shot,” a rear-angled shot through the neck muscles into the brain. The 7mm Mauser suited him quite well. It recoiled less than traditional dangerous-game rounds, so flinch did not hinder accuracy.
Another famous big-game hunter also used the cartridge with effect. James Edward “Jim” Corbett, who tracked down infamous man-eating tigers and leopards, used a .275 Rigby-Mauser rifle to put down the man-eating Leopard of Rudraprayag in May of 1926. Other hunters across the pond also liked the performance of the 7mm Mauser. American hunter and writer Jack O’Connor liked the 7x57mm, and in fact, his wife used the caliber extensively. O’Connor’s enthusiasm for the .270 Win., however, overshadowed his affection for the 7mm Mauser.
By 1913, the 7mm Mauser increased its range and effectiveness with the introduction of spitzer-style bullets. The French and German armies had been experimenting and adopted pointed-tip, or spitzer, bullets, which greatly reduced air drag on the bullet compared to the more common flat-nose or round-nose bullets used by militaries at the time.
The Mauser M1893 was chambered in the 7mm Mauser and adopted by Spain, Mexico and countries in South America. It proved a decisive weapon during the Spanish-American War.
The performance of the 7mm Mauser shifted into high gear with the new spitzer bullets, which weighed 139 to 173 grains. The 139-grain bullet, the military load for Brazil and Columbia, had a muzzle velocity of 2,950 fps and a muzzle energy of 2,580 foot-pounds from a typical 23-inch military bolt-action rifle of the time. Maximum effective range was slightly farther than 4,000 yards.
At one time, numerous surplus Mauser rifles and surplus 7mm Mauser ammunition were abundant. Pallets of rifles from South American countries were available at low cost to shooters. In the United States, the round was fairly common east and west of the Mississippi River.
Many surplus Mausers became sporters. American firearms manufacturers also produced rifles in the caliber. Around 1897, Remington chambered its single-shot Rolling Block rifle and the Remington-Lee M1899 sporting rifles in 7mm Mauser. Between World War I and World War II, Remington also chambered the Model 30 in 7mm Mauser.
The Model 30 was a sporting rifle based on the military P14/M1917 Enfield rifle action, which Remington manufactured for the British and American governments during World War I. With bolt-action rifles becoming more popular with American hunters, the Winchester Model 54 debuted.
The Model 54 was a new rifle design made specifically for the sporting market and is considered the first successful production bolt-action rifle for civilians. It was also available in 7mm Mauser. Today, 7mm Mauser rifles are produced in limited runs, but ammunition is quite common and easily obtained.
All of the big four U.S. ammo factories load the cartridge. Hornady, Federal, Remington and Winchester produced 7mm Mauser ammo. Most U.S.-made 7mm Mauser ammunition is loaded with bullets in the 139- to 145-grain range. European ammo uses 139- to 175-grain bullets. Hornady loads a 139-grain GMX or SST bullet in its Superformance line, which has a velocity of slightly faster than 2,700 fps — more velocity than other 7mm Mauser factory ammo. I have had excellent results with this ammo.
Winchester loads a 145-grain Power Point bullet in its Super X line of hunting ammo with a muzzle velocity of 2,600 fps. Remington loads its rock-solid Core-Lokt in 140-grain bullets to a 2,660 fps muzzle velocity. Federal loads three bullets under its Vital-Shok and Power-Shok lines: a 175-grain soft-point round-nose at 2,390 fps, a 140-grain Speer Hot-Cor soft-point and a 140-grain Nosler Partition. Both the 140-grain loads have a muzzle velocity of 2,660 fps.
Famed ivory hunter W.D.M. Bell, shown here in the 1950s, used a Rigby modified Mauser bolt-action in .275 Rigby to kill about 800 elephants with 173-grain military grade ammunition.
Nosler also offers a 140-grain with an AccuBond bullet that clocks 2,700 fps at the muzzle. European ammunition manufacturers such as PPU Prvi Partizan in Serbia load a 139-grain soft-point at 2,657 fps. Czech-made Seller & Bellot offers a 139-grain soft-point, 140-grain full metal jacket and a 173-grain soft-point cutting edge.
The 139- and 140-grain bullets have a muzzle velocity slight faster than 2,600 fps. The 173-grain soft-point cutting-edge bullet has a muzzle velocity of 2,379 fps and leaves crisply cut holes in paper, like you fired a wad cutter, because of the cut-through edge built into the bullet’s jacket. I have also had excellent results with PPU and Sellier & Bellot ammunition. Plus, it’s typically less expensive than U.S.-made ammo.
The ballistic coefficient of the 7x57mm Mauser is high, which means it’s more efficient when flying through air. BC is a measure of a bullet’s slipperiness or air drag. In essence, it’s the ratio of the bullet’s sectional density to its coefficient of form.
The bigger the BC number, the more easily the bullet flies through the air. The 7mm Mauser is slick when it flies, so it has a flatter trajectory. When comparing the 7mm Mauser to other more modern cartridges — such as the 7mm-08, .270 Win., .280 Rem. and .284 Win. — in similar bullet weights, you’ll see the 7mm Mauser lags behind the newer cartridges by a few hundred fps and foot-pounds. (Of course, those cartridges aren’t really new. The .270 Win. was developed in 1925, the 7mm-08 in 1980, the 284. Win. in 1963 and the .280 Rem. in 1957.).
The 7mm Mauser is most like the 7mm-08 of those compared, and it would be fair to say the 7mm Mauser paved the way for 7mm-08 and all the other 7mm cartridges developed by Remington and Winchester. For me, there’s a bit of nostalgia firing the 7mm Mauser. Deer don’t seem to notice a difference, nor would, I think, wild pigs, black bear, speed goats and the rest. For moose and elk, take a cue from Bell. A surgical shot from a 7mm Mauser means you’ll be processing meat.
You can still find Winchester Model 70 and Ruger M77 rifles, older European sporters that range from a few hundred dollars to a king’s ransom depending on the rifle manufacturer, and older surplus military rifles from Brazil, Chile and other South American countries. You can also find many older Model 98 Mausers in 7mm Mauser sporterized and trimmed up for hunting. I use the round in a Ruger No. 1, and it’s a sweet rifle/cartridge combination for deer.
My Ruger No. 1 International is basically a standard No. 1 with shortened barrel and full-length Mannlicher-style stock. The falling-block action is Ruger’s modified version of the Farqharson-style action with an internal hammer and has been around since 1967. Ruger and Lipsey’s usually come out with unique calibers yearly in the rifle. I snapped up a 7mm Mauser when I had the chance and have always regretted it. I should have bought two.
A lever that locks into the trigger guard is pressed down to drop the stainless-steel block and load the rifle. Rounds easily slide into the chamber, and when the muzzle is pointed to the ground, gravity accelerates the process, and the chamber is accessible even when a scope is mounted. The action comes from the factory set to eject cartridges, but you can remove the forearm and back-off on the ejector spring strut so cartridges extract instead.
W.D.M. Bell’s book, The Wanderings of an Elephant Hunter, was published in 1915, recounting his hunting adventures in Africa from 1897 to 1922. Using mostly small-caliber rifles — the 7mm Mauser in particular — he killed more than 1,000 elephants.
The barrel and receiver are deeply blued, and Ruger’s proprietary quarter rib and rings allows mounting of a scope. The rear sight is also mounted on the rib and folds down to accommodate large objectives. The front sight is a tiny gold-colored bead. The barrel is free-floated along the Mannlicher forearm through the steel end cap. The wood has nice figuring, and the checkering is crisp and neat, with a plastic grip cap and a gold Ruger logo.
The solid yet soft recoil pad is mated nicely to the stock. It’s nice to handle a traditional wood and blued-steel rifle. Traditional, for sure. This Ruger, because of the type of action, is also very compact even with a 20-inch barrel, making the little rifle feel lively in hand. I mounted a Leupold VX-3 3.5-10x40mm on my No. 1 International for hunting, which seems to suit it fine.
When a friend wanted to buy the scope, I obliged him and never replaced it. The open sights are adequate, and most of my shots are 100 yards or closer in the brush I hunt. It’s also a dream in the confined space of a tree stand or ground blind.
Knowing the barrel on my No.1 International was not the length used to collect factory data, I wanted to see what, if any, velocity was siphoned off because of the missing 4 inches of barrel. I found on average about 100 fps is lost in the little Ruger Mannlicher compared to factory data. Not surprising. Shooting the 7mm at 100 yards was a real chip shot. The cartridge has minimal recoil, making it ideal for beginning shooters or those of petite and small statures. The little Mannlicher is also easy to carry. And not that I like sharing my ammo with hunting buddies, but I also don’t have pals asking to borrow a few rounds. Unique calibers make good hunting companions.
The 7mm Mauser takes well to reloading. There’s a slew of 7mm bullets in all weights and types available. Bullet weights from 120 to 175 grains are effective in the 7mm Mauser. Bullet types from ballistic tip boat-tails to inexpensive round-nose bullets are available.
Powders with a medium to slow burn rate — such as Win 760, Hogdon H414, Varget and IMR 4064 — yield good accuracy. I keep it simple and load 139-grain or 140-grain bullets and load to just past 2,600 fps. The Ruger No.1 action is strong, so at times I’ve also loaded up to 2,700 fps. I have found the round performs well at 2,600 to 2,700 fps. In surplus Mauser rifles, I would keep velocity at 2,600 fps. It’s not that those older Mauser are not strong. You just don’t know how they’ve been treated through the years.
The 7x57mm Mauser, by whatever name you want to call it, was an excellent, ground-breaking military round, and as an all-around hunting round, it’s superb.
Handgun trainers typically come from a variety of shooting backgrounds. But do these backgrounds necessarily make them the best trainers for armed citizens?
What are the typical backgrounds of most handgun trainers?
Handgun trainers have three main backgrounds: military, law enforcement, competitive.
A military trainer must make a successful transition to instructing civilian gun owners.
LE trainers have experience in dealing with interpersonal violence.
But, LE trainers also are sworn to confront violent situations when they see them.
Competitors can teach speed and accuracy, but might miss self-defense nuances.
Ideal trainers are those who understand the proper application of self defense.
For the purposes of this discussion, our mission will not be military operations nor uniformed police patrol duties. Our task will be to ensure our ability to protect ourselves and our loved ones from death or grievous bodily harm at the hands of an unlawful, predatory criminal attacker. With our end goal well defined, we can look at different training paradigms and see how they fit our needs.
Most firearms trainers in this country will come from one of three backgrounds: military service, police work, or competitive shooting. Some have experience in two of these fields, and a smaller number have experience in all three. This, of course, forms the basis of their curriculum and training methodology.
If they came from the police or military world they usually had entry-level training, such as a police academy or military basic training. They went on to more advanced training, with periodic in-service training. If they worked for an enlightened agency or unit, they were sent to outside schools for more training. If not, the best went to outside schools on their own dime and their own time. Coupled with field experience, this forms the core of their training philosophy. Let’s look at the three major trainer groups separately.
Trainers with a military background
Let’s start with the military paradigm. There are a lot of trainers coming out of the military right now, especially former Special Operations soldiers with a lot of field experience. Unfortunately, a lot of that experience is totally unrelated to domestic, U.S. self defense, both as to circumstance and to operating under U.S. criminal and civil law. I would caution the civilian concealed carrier to take pains to select a military background trainer who has successfully made the transition to training American citizens operating in U.S. cities. Here are some of the key points that make much military-based training inadequate or even improper for the citizen with a carry permit.
First, the soldier is almost always armed with a long gun, with the handgun relegated to the backup-gun role. This very rarely applies to the private citizen, especially away from his home. In your case, the concealed handgun on your person is the only gun you will get to use in self-defense. You can’t go get anything better once the action starts. If you could go, why would you come back?
Next, the military operator works in teams, not alone. He has friends with long guns with him, each with specific duties and areas of responsibility. Not so for the lone defender.
If your plan involves losing one of your children while the rest of the family escapes, I can tell you now, Mom is not going to go for it.
Once contact is made, the soldier can radio for additional support, ranging from more troops to an air strike. You cannot.
There are two factors, however, that really separate the military world from that of an armed citizen. First, the soldier understands and accepts the concept of “acceptable casualties.” In planning any military operation, from platoon level to corps level, you have to figure in casualties from enemy action, equipment failures, and bad luck. You have to start out with enough men to lose some and still accomplish the mission. In our world, the acceptable level of friendly casualties is ZERO. If your plan involves losing one of your children while the rest of the family escapes, I can tell you now, Mom is not going to go for it.
The other issue is that the soldier understands and accepts the concept of “collateral damage.” This includes the injury or death of uninvolved non-combatants. This is inevitable in warfare, and unavoidable. In our world the acceptable percentage of non-involved bystanders killed or injured is ZERO.
Finally, especially in Special Operations, use of firearms is almost always OFFENSIVE in nature, not DEFENSIVE. One ex-mil trainer for whom I have utmost respect has not really been successful at making the transition to civilian training. I recently saw an ad from his school saying in bold letters, “We will make you the aggressor!” The problem is, in U.S. criminal and civil law, “the aggressor” is a synonym for “the defendant.” Remember that your training resume will follow you into court in any criminal or civil action that may arise from your defensive use of deadly force.
Trainers from law enforcement
The full investigations that result from police-involved shootings also provide the most accurate and complete information on how various types of ammo performs in real-world situations.
The next group would be trainers from a purely law enforcement background. They typically have a lot of experience in managing chaos, and usually have a lot of experience investigating violent crimes. Thus, they tend to have a pretty good idea what interpersonal violence involves. This does, not, however, ensure that they have made a good transition to teaching private citizens. Here are some key points to consider.
First, the police officer has a sworn duty to seek out, confront, and arrest very bad people for doing very bad things, and to press forward in the face of armed resistance. This is the opposite of what the citizen should be doing, namely avoidance, deterrence, de-escalation and evasion. Using the firearm is a last ditch, desperate measure, as a last resort for the armed citizen.
Other differences include the fact that the officer will usually have a full size service pistol and lots of spare ammo, body armor, armed and trained partner(s), a long gun in the car, and direct real-time radio contact with armed friends. The armed citizen often has none of these advantages. In fact, even if you could call for help on your cell phone (you won’t be able to until the action is over), the average response time to priority one calls in major American cities is eleven minutes! In eleven minutes, responding officers will have absolutely no impact on the outcome of the fight, they will simply take a report about it.
Also, most police officer-involved shootings in the U.S. involve uniformed patrol officers, who operate in a world vastly different from that of a legitimate private citizen. The circumstances are radically different, which requires radically different training. Contrary to what you see in movies and TV shows, SWAT officers in this country fairly rarely shoot suspects. Their job is to contain the suspect safely and get him out and into custody. SWAT really stands for “Sit, Wait, And Talk.” Detectives also rarely shoot anyone. They mostly shuffle paper and talk to people in a controlled environment. The vast majority of police shootings involve uniformed patrolmen doing a fairly short list of duties.
Most shootings involving uniformed police officers will take place during the conduct of one of three activities: traffic stops, bar enforcement and domestic violence calls. Patrolmen will stop a car for rolling through a stop sign, believing they will be writing a “routine” ticket. They may be unaware that the driver has a kilo of cocaine in the trunk, a stolen pistol on the seat next to him, and a few warrants for his arrest on file. As the officer walks up, he is suddenly confronted with an armed assault. As a private citizen you should not, under any circumstances, be making traffic stops. That eliminates a huge danger area for you.
Police trainers tend to have a distorted view of engagement distances, because of their duty to arrest.
Cops also have to go into seedy dive bars on a regular basis to enforce a laundry list of statutes. They have to look for violations of liquor laws, gambling laws, drug laws, prostitution, parolees, etc. Seedy dive bars are often full of career criminals who are violating their probation or parole, are illegally armed, are holding drugs and so on. The predictable outcome is that cops are often involved in a fight for their lives in these dark, cramped, crowded spaces.
I have done a fair bit of research in this matter, and it appears that over 99% of bar fights occur in bars. Stay the hell out of bars and you will probably never be involved in a bar fight. This eliminates the second major source of police shootings.
The third group involves calls regarding domestic violence complaints. Officers go inside the houses, apartments and trailers of people who are already drunk and enraged. What a shock—they are then involved in a lot of shootings. I do some training periodically for a small rural Sheriff’s Office that only has a dozen deputies. In the last few years they have been involved in three shootings, and all three began as domestic disturbances. You should not be going into other people’s homes and sorting out their marital problems while they are drunk and fighting. That eliminates the third major danger area.
Next issue. Police trainers tend to have a distorted view of engagement distances, because of their duty to arrest. Whether the arrest is for impaired driving or First Degree Murder, at some point in the process the officer has to physically put his hands on the offender. This is the suspect’s last chance to assault the officer and escape, and the moment of physical contact is the most dangerous for the officer. We have tried for decades to find a way to put handcuffs on a suspect by telekinesis, but it just doesn’t work. This is why such a large percentage of police line of duty deaths occur at a distance of 0-5 feet from the assailant. That’s not where the incident began, but it is where it ended.
Competitive shooters as trainers
Then there are trainers with only a competitive shooting background. They may be able to teach you a lot about fast, accurate shooting, and you would be well served to seek out a proven champion shooter in IDPA, USPSA or Steel Challenge shooting to polish up your shooting skills.
Be careful, however, about nuances that may not serve you well in real life self-defense. For instance, we see ready positions in competitive shooting that muzzle everything downrange, all of the time. In many shooting sports, there are penalties for shooting non-threat targets, but not for muzzling them. On the street, muzzling innocents can get you charged with various felonies, from Reckless Endangerment to Aggravated Assault, depending on the jurisdiction. Even if you are acquitted, you lost. Attorneys, bondsmen, and so forth are not free. We see gunhandling that would facilitate getting disarmed in the real world, but not on a shooting range. We also see highly specialized guns and holsters that could not be used on the street.
Lost time measured in scant hundredths of a second mean nothing in a fight.
If you choose to shoot in competition, that’s great. I’ve been involved in small-bore rifle competition in school, PPC competition early in my law enforcement career, and as noted, both IPSC and IDPA matches. You must be careful, however, to mentally separate match shooting and preparation for actual armed conflict.
Finally, the major problem with competitive shooting is a preoccupation with inconsequential increments of time. Lost time measured in scant hundredths of a second mean nothing in a fight, but accumulate and become significant in a match with 10-12 stages. For self-defense, we want the most robust techniques, meaning they work reliably over a broad range of circumstances and under sub-optimal conditions. They may not be the very fastest techniques under optimal match shooting conditions, where you have a clean gun, clean ammo, clean magazines, and are uninjured.
So, in summary, we need trainers who understand the realities of criminal predation against private citizens and understand the criminal and civil legal framework under which we must function.
After a rough start, the powerful 10mm Auto has found its way into the hearts of many shooters.
The 10mm Auto is designed to run hot—with a max. pressure of over 44,000 psi, more than the .44 mag.
Designed for semi-auto handguns, the 10mm is roughly equivalent to the .41 magnum, ballistically speaking.
A favorite of handgun hunters, the big round is gaining favor with the self-defense market.
The Leupold Delta Point reflex sight extends the Glock G20’s effective distance with the 10mm Auto, making it better for hunting applications.
The 10mm Auto, or just plain 10mm, is an example of a cartridge that was a good idea but had a rough start. Designed to best the external ballistics of the .45 ACP, the 10mm easily surpasses the venerable round and the .357 Mag. and closes in on the power of the .41 Mag., and does so in a service-sized semi-automatic pistol.
Initial 10mm pistols were plagued with production delays and malfunctions. The round loaded as originally intended produced 44,440 psi, which is enough to shake the blueing off any pistol. The round battered pistols, which yielded poor accuracy, shadowing the 10mm early on.
The author’s 10mm hunting setup includes a Glock G20 Gen4 SF with a 6-inch barrel and Leupold Delta Point reflex sight.
If not for a disastrous FBI gunfight, the 10mm might have faded from memory. That shootout and the fans of the cartridge did not allow the round to die. In fact, Glock and SIG have recently debuted new pistols chambered in 10mm Auto, and ammunition manufacturers such as SIG Sauer, Buffalo Bore and Double Tap are loading the cartridge as it should be — to its full potential.
The 10mm Auto is going through a renaissance of sorts. There is no doubt the 10mm Auto is a powerful round with substantial recoil, and it’s well suited for hunting and combat scenarios.
Jeff Cooper is considered the father and the creator of the modern technique of handgun shooting. His tool of choice was the 1911 platform chambered in .45 ACP. If Cooper’s chosen tool had a weakness, it was the .45 ACP’s external ballistics.
The heavy bullet pushed at a slow velocity rapidly sheds power across distance. Cooper envisioned a combat pistol round that had more power. From 1982 to 1983, Cooper and his cohorts — John Adams, Whit Collins and Irving Stone — designed a round and used a .30 Remington case cut down to .992 inch and loaded with a .40 caliber bullet like the ones used in the .38-40 WCF cartridge. The ammunition manufacturer, Norma, ironed out the cartridge design and was the first ammo maker to produce the 10mm Auto.
The initial load debuted in 1983 and used a 200-grain full-jacketed truncated-cone bullet. The bullet was similar to 9mm and .45 ACP bullets of that time. The muzzle velocity was 1,200 fps, with 635 foot-pounds muzzle energy. This load had a mean working pressure of 37,000 psi with a maximum pressure of 44,400 psi.
The Bren Ten was the first production handgun chambered in 10mm Auto. It was adapted from the CZ-75f and manufactured by Dornaus & Dixon Enterprises Inc.
For comparison, the 9mm has a maximum pressure of 35,001 psi, and the .45 ACP has a maximum pressure of 21,000 psi. The .357 Mag. and .41 Mag. have a max of 35,000 psi. Even the .44 Mag. pressure at 36,000 psi is less than the 10mm. It’s safe to say the initial 10mm Auto was hot. But remember, the 10mm Auto was designed to be a hot, powerful cartridge. At that point, the missing piece to the 10mm Auto cartridge was a pistol.
In 1979, a separate group of similar-thinking firearm enthusiasts, Thomas Dornaus and Michael Dixon of Dornaus & Dixon Enterprises Inc., began developing a semi-automatic pistol to address the power gap between magnum revolvers and semi-automatic pistols.
They made contact with Cooper in about 1980 and found he and his group were working on a new cartridge design. They threw in together to develop the pistol and cartridge, and the result was the Bren Ten pistol. Although the Bren Ten was adapted from the CZ-75, it’s highly modified, meaning it was beefed up to hold up to the pressure the 10mm Auto unleashed.
The Bren Ten was a semi-automatic pistol that used a selective double-action trigger system. It had a 5-inch barrel, high-profile visible sights, an 11-round magazine and a stainless frame and slide. The pistols were produced from 1984 to 1986, and perhaps about 1,500 total were made. Issues arose with the magazine, and the recoil caused the pistols to not function properly.
Initially, the 10mm was not considered an accurate round. Here is an eight-shot group fired from 25 yards out of the Rock Island Armory Tac Ultra FS, a 1911-style platform.
It seemed the only time the pistol functioned properly was when Sonny Crockett, the lead character on the TV show Miami Vice, fired his trademark Bren Ten. The show helped elevated the gun into cult status, but in reality, the pistol was released too soon. More testing should have been done. Dornaus & Dixon Enterprises filed for bankruptcy, and it appeared the 10mm was dead. Obviously, popularity of the round and the defective pistols began to wane with law enforcement and civilian shooters. The aforementioned gunfight in Florida changed perceptions.
In 1986, the FBI was involved in a shootout in Miami-Dade County. The battle involved eight FBI agents and two suspected bank robbers. The event lasted less than five minutes, and although agents outnumbered the suspects, who were ex-military, and even though the suspects were hit numerous times, they returned fire and pinned down law enforcement.
The agents were armed with 12-gauge shotguns, 9mm semi-automatic pistols and .38 Special and .357 Mag. revolvers. One suspect was hit six times, and the other was shot 12 times. About 145 shots were exchanged. In the aftermath, two FBI agents were killed, along with the two suspected bank robbers. An ensuing investigation by the FBI placed partial blame on the death of its agents on the lack of stopping power of the agents’ service handguns.
Soon after the shootout, in 1987, the FBI tested 9mm and .45 ACP ammo and found both calibers lacking. The agency began studying wound ballistics and concluded that a bullet that penetrated vital organs creating a larger wound channel would be most effective — a conclusion that seems obvious today. By 1988, the FBI had developed a protocol for testing ammunition for penetration on soft targets through various barriers.
The 10mm Auto is a beast of a round with substantial recoil. Here the SIG P220 Elite Match is captured in full recoil. All 10mms exhibit similar recoil.
Tests are conducted at set distances with a block of 10 percent ordnance-grade ballistic gel, which simulates human flesh. According to the protocol, a cartridge has a minimum requirement to meet, which includes a minimum penetration into ballistic gelatin of 12 to 18 inches, expansion of the bullet to at least 1.5 times original diameter and 100 percent weight retention of expanded bullet.
Bullets are fired through various barriers, including steel, wallboard, plywood, heavy clothing and automotive glass at 10 feet and 20 yards. The 10mm Auto excelled in the tests and offered a compromise between a larger caliber and low magazine capacity, such as the .45 ACP, and the high magazine capacity of a less powerful round such as the 9mm.
The FBI approved adoption of the 10mm Auto cartridge in 1989 but needed a pistol. An RFP was issued, and pistol manufactures such as Colt and Smith & Wesson submitted guns for testing. Smith & Wesson was awarded the contract for about 9,500 Model 1076 semi-automatic pistols.
Colt offered a 1911 pistol in 10mm, but the RFP specs for the new 10mm pistol design were detailed, and some requirements excluded a 1911-style pistol, such as the requirement for a DA/SA trigger and 11+1 magazine capacity. Besides, early on, when the 1911 was chambered in 10mm, it performed like it was off its meds. The classic platform needed tweaking.
Cartridges loaded with 180-grain JHP bullets make an excellent defensive round. The Federal 180-grain Hydra-Shok are loaded to a lower velocity — about 1,030 fps depending on the barrel length — compared to the SIG Sauer 180-grain JHP, which is loaded to a hot 1,250 fps. The Buffalo Bore load clocks at 1,350 fps.
The Model 1076 was a full-sized stainless-steel pistol built to take the abuse the 10mm doled out, with a 4.25-inch barrel, no manual safety, a bobbed hammer, a nine-round single-stack magazine and a frame-mounted decocker like SIG-Sauer pistols. Extended magazines of 11 and 15 rounds were also part of the FBI’s new pistol requirements. The FBI went all in on the 10mm and also chambered some ancient Thompson Model 1928 submachine guns in the cartridge. It also contracted with Heckler & Koch for its MP5 submachine in 10mm, calling it the MP5/10. The issue then was recoil.
Many agents could not control the 10mm Auto, even in the heavy Model 1076 pistols. The term used was “unmanageable recoil.” The FBI then decided to continue testing, with a 180-grain Sierra JHP bullet to a muzzle velocity of 980 fps. This load reduced recoil enough for agents to tolerate it.
The FBI requested Federal ammunition to duplicate that reduced load, which became known as the “FBI-lite” round.
Other ammunition manufacturers followed the light loading, and some shooters found their 10mm pistols did not function properly with the reduced-power load. The light load also defeated the purpose of the 10mm, which was meant to offer better penetration and more power. It was a similar experience the .41 Mag. received when it was offered to law enforcement as an alternative to the .38 Special and .357 Mag — too much recoil.
The 180-grain FMJ are good all-around training rounds or if you need extra penetration on your target. A variety of ammunition makers produce this go-to load.
Because there was extra space in the 10mm Auto cartridge case because of the light load, Smith & Wesson cut the case from .992 inch to .850 inch to create the .40 S&W. The .40 S&W is essentially the 10mm Auto light load in a more compact cartridge.
The .40 S&W debuted in 1990 and was immediately popular with law-enforcement agencies because it could be chambered in 9mm-sized guns and had ballistics that nearly matched the 10mm Auto light load. Plus, recoil was much more controllable. It would seem the 10mm Auto was again in its death throes, but die-hard fans of the caliber remained.
Even before the .40 S&W hit the scene, other firearms manufacturers saw potential in the 10mm Auto. Again, the powerful round experienced fits and starts. In 1987, Colt debuted the Colt Delta Elite, a 1911-style platform chambered in 10mm Auto. The Delta Elite pistols were well made, but again, more testing with the round should have been conducted. The 10mm beat up the 1911 design.
The 10mm Auto (center) is flanked by the .357 Mag. (left) and .41 Mag. (right). The 10mm Auto exceeds .357 Magnum ballistics and has nearly the same ballistics of the .41 Mag.
The flaw in the Colt 10mm was the recoil system. A shock-buffer was needed to lessen the battering the pistol received from the round. Some receivers cracked as a result. Colt redesigned the recoil assembly to better withstand the recoil and added a slot cut into the receiver or frame to alleviate stress. Current Delta Elites function flawlessly.
Issues with the Bren Ten and early Colt Delta Elites did not endear the 10mm to accuracy. In fact, the round was thought of as inaccurate. Not so with current guns. Glock offered a full size striker-fire pistol the G20 in 1990 in 10mm Auto.
Subsequently, compact, sub-compact and long-barrel Glocks were offered in 10mm. In 2015, SIG redesigned the legendary P220 to handle the round. Probably the heir apparent to the Bren Ten is the full-sized Tanfoglio Witness, built in Italy and imported by EAA Corp. Like the Bren Ten, the Witness is based off the CZ-75 and is a heavy-duty version with features such as an SA/DA trigger, extended beavertail frame and exposed knurled hammer.
Kimber, Para, Dan Wesson and custom 1911-platform builders such as STI also chamber pistols in the caliber. In 1990, Smith & Wesson even chambered a revolver in the 10mm: the Model 610, a six-shot N-frame. It used moon clips to fire the rimless 10mm round and could also fire the .40 S&W cartridge.
The Rock Island Armory TAC Ultra FS is chambered in 10mm Auto. Expect excellent accuracy in this tricked-out 1911 platform.
Handgun hunters have found a lot to like with the caliber, and that’s the section where my seat is in the 10mm fan club. I have liked the round since the Colt Delta Elites hit dealer shelves, and I tend to like it even more every time I fire the round out of various platforms, such as the Glock and SIG. For a serious hunting semi-automatic pistol, nothing really comes close to the 10mm Auto. There are three platforms I tend to lean toward: Glock, 1911 and SIG — and that’s in no specific order.
If you think 1911 pistols can’t hunt, you haven’t fired the 10mm through one. Buffalo Bore and Double Tap push 200-grain wide flat-nose hard-cast bullets at speeds of 1,300 fps with about 750 foot-pounds of muzzle energy — big medicine in such a handy-sized pistol.
The 10mm offers good penetration when you need to collapse a wild pig quick or fill the freezer with venison. All the major ammo manufacturers offer loads, but specialty manufacturers such as Buffalo Bore and Double Tap load the cartridge to its maximum potential.
These 200- and 220-grain hard-cast bullets are made to punch holes through flesh and bones with ease. I keep my shots at less than 50 yards when hunting pigs and deer, though I’m sure others have pushed the round much farther. I’m sure the rounds would do well from tree stand on a black bear with a sweet tooth.
I’ve achieved my best accuracy with the 1911 platform, which I attribute to the pistol and my comfort with shooting it. A few years ago, I had the pleasure of running an RIA TAC Ultra FS in 10mm. I’m still running it. This is an inexpensive 1911-style pistol that shoots like a tight-fitting custom pistol. The TAC Ultra FS uses a Series 70 system along with a one-piece guide rod and bull-barrel design that dispenses with the traditional barrel bushing. This setup aids accuracy.
The SIG Sauer P220 Match Elite takes SIG’s legendary P220 frame and slide re-engineered for the 10mm Auto. Accurate and smooth, reliable operation is the result with the 10mm.
The flared bull barrel locks up tight at the muzzle. The barrel is stainless steel with a feed ramp, like a Clark Custom barrel. The integral ramp fully supports the case, so there’s no gap between the frame and barrel for bullet noses to snag on. The weight from an extra-long dust cover helps a bit with recoil, as do the serrations on the front strap and the checkered polymer main-spring housing. All aid in gripping and controlling this beast.
In the case of the Glock, the polymer frame makes recoil feel lighter. It flexes when the pistol is fired, so it absorbs some of the felt recoil. I’ve set up a Glock G20 FS Gen4 with a 6-inch hunting barrel and a Leupold DeltaPoint reflex sight especially for boar and deer.
The longer barrel helps squeeze out more velocity and, therefore, energy, and the red-dot increases my effective distance with the pistol. With 180-grain JHP loaded heavy by Buffalo Bore, I averaged 1,161 fps velocity with 539 foot-pounds of energy.
The G40 Gen4 MOS is set up like mine, except it doesn’t have an inch or so of barrel sticking out of the business end of the slide. The Glock 10mm pistols, in my opinion, are the softest shooting of the 10mm Autos I’ve fired. At first, I was prepared for the Delta Point reflex sight to fly off, but it has not — additional proof modern pistol designs have tamed the 10mm.
The iconic P220 has recently been re-chambered in 10mm, similar to how custom gun builder Gray Guns has been doing it for years. With Bruce Gray’s success at converting P220s to 10mm Auto, SIG approached him when it decided to go big bore with the P220.
“The 10mm creates an enormous volume of high pressure and a really fast acceleration rate of the bullet,” Gray said. “Lock-up systems take a beating like what was experienced initially with 1911 platforms chambered in the round.”
The frame of the SIG P220 pistol is very durable, and through some engineering, SIG used a combination of slide mass and recoil-spring system to tame the round. The P220 10mm pistol uses a multi-wire, stranded cable-style recoil spring to manage slide movement. Glock employs a flat spring configuration in its 10mm pistols.
The Colt Delta Elite 1911 uses a double-nested spring system to manage the recoil. Firing the 10mm out of a P220 Elite Match with its DA/SA trigger system, along with the grip shape and texture, allowed me to get back on target fast without the pistol shifting in my grip during recoil. It’s about time SIG chambered its P220 with a serious caliber.
Whether choosing the 10mm Auto for hunting, concealed carry or combat situations, remember to choose an appropriate load. As a concealed-carry pistol, it makes sense to load rounds that have less penetration. Remember, you are responsible for the bullets you fire. You do not want to defeat your assailant only to have the bullet pass though to accidentally kill a bystander.
Then again, if you like to go fly-fishing and share the stream with the locals, meaning bears, the 10mm Auto offers a lot of negotiating power in an easy-to-tote package.
The Delta Elite was Colt’s first pistol chambered in 10mm Auto. Initial models suffered from cracked receivers. Current models are rock solid.
Because the .40 S&W caliber is so popular — thanks in part to the 10mm — there are numerous bullet weights and styles from which to choose. For a reloader, the sweet spot for bullet weight is a 180-grain or 200-grain bullet, though lighter bullets work, too.
These weights prove to be most accurate, along with a powder that has a fast to fast-medium burn rate, such as Alliant Blue Dot, Accurate Arms No. 7, Accurate Arms No. 9 and Winchester 231. Your .40 S&W dies will load 10mm Auto, so there really is no reason not to have a 10mm. The history of the .40 S&W and 10mm Auto can’t be pried apart. The two cartridges will forever be entwined.
The rough start for the 10mm proved to make it a better round. Die-hard 10mm fans have numerous pistol platforms to choose from, and the round is being loaded to suit the use: full potential or “lite.”
One of those fans is Ted Nugent, who uses the round to hunt and for concealed carry. He Tweeted a while ago, “10mm is the best damn pistol cal, period. If ya ain’t got 1 get 2 asap.” Listen to Uncle Ted, who is not too particular on the platform as long as it fires 10mm Auto.
Who knows, perhaps the Bren Ten and 10mm will be resurrected. In 2010 to 2011, Vitor Mfg. started to manufacture the Bren Ten, but it also ran into issues with the pistol. But why wait when there are plenty of SIG, Glock and 1911-platform pistols available for the 10mm Auto beast?
Concealed carry of small handguns, a.k.a. micro guns or pocket pistols, is controversial. But sometimes it makes sense for self-defense, if you know how to make the most of it.
The subject of a .22, .22 magnum or .25 Auto for defense is controversial. They are not stoppers, period, end of story. However, these so-called “micro guns” are still lethal weapons. The reason they exist is twofold: compactness and low recoil. The smallest handgun to be had is an ultra-compact .22LR, or a .25 Auto. The lowest-recoiling handgun you can shoot is a standard-sized .22 pistol, like one of the smaller-sized Ruger Mk I, II, III or IV.
The .25 ACP/auto is not much different from the .22LR, with the exception that the bullet, almost always a full metal jacket, can be counted on to feed more reliably than the lead-bullet .22LR. But, that can also be a matter of maintenance (a lint-choked pistol isn’t going to feed anything reliably) and handling.
.25 ACP
I will just pass right over the .25. Despite the compactness of some of the pistols that use it, it offers nothing the .22LR doesn’t, ballistically, and does so at greater cost, less availability, and fewer options for pistol choices.
The .25 ACP is ultra compact, but also ultra-unpowerful. Yes, it can kill, and no, I wouldn’t want to be shot with one. But that doesn’t make it a good choice for a defensive caliber.
.22LR
The standard .22LR offers only a straight, bullet-diameter permanent wound, with a depth of 14-15 inches. There may be some expansion with hollowpoint bullets, but that comes at the expense of a couple of inches of penetration. Also, some bullets may yaw and end up stopping base-first in the wound track. When traveling sideways, it does create a marginally larger permanent wound than a simple cylinder, but hardly something to boast about.
The .22LR is not a big stick when it comes to defense, but it is better than a knife or a club, especially for someone who can’t handle heavier recoil.
The trick to its use in defense is to realize two points. First, you will have to depend on more than one shot. In fact, the standard response when shooting in defense with a .22LR should be to empty the magazine and immediately reload. Second, placement matters. The hits have to be high center of mass or else the effort is wasted.
This combination of needs does not make the .22LR a high-percentage option, even in the handgun realm. But, for those with no other choice, there is no other choice.
The .22LR bullet, compared to a .32 and a .380 JHP. This is not the Hammer of Thor, so don’t expect miracles.
.22 Magnum
Stepping up, you have the .22 Magnum, which is a longer case than the .22LR and designed to contain the bullet inside the case. The jacketed bullet offers the promise of expansion, but not always the realization. You see, a .22 Magnum out of a rifle generates plenty of velocity. Out of a handgun, it is often no faster (or not enough faster to matter) than a .22LR.
The expansion of any of these bullets is not a reliable outcome. Even if they do expand, the degree is not great. An expanding .22LR, all 40 grains of it, could bump up to .27-inch in diameter.
Hornady has lead the way here, offering a defensive-use .22 Magnum loading, with a bullet designed to expand at velocities the .22 Magnum can deliver. Called their Critical Defense, it gives 9-10 inches of penetration in ballistic gelatin out of a handgun.
Speer also makes its Gold Dot line of ammunition in the .22 Magnum. If you want as much performance as you can get, in a pistol that isn’t going to kick much, then the .22 Magnum can be a good choice.
Combined with a handgun such as the Kel-Tec PMR-30, someone who can’t handle a larger caliber can reasonably expect a good outcome. Part of that is the improved performance of the .22 Magnum over the .22LR, and the other is capacity. A standard .22LR pistol has a 10-round magazine. The PMR-30 magazine holds 30 rounds.
Nine to 10 inches isn’t FBI-passing performance, but it also doesn’t offer anything like the recoil of an FBI-compliant load. This is part of the compromise with using so-called “micro guns.”
5.7X28 FN
The outlier here is the FN 5.7×28 cartridge. This centerfire cartridge uses a jacketed bullet, longer than a .22LR or .22 Magnum. Out of the firearms for which it was intended it works reasonably well. That is, out of an SMG-sized firearm like the P90, with a 10.4-inch barrel, it can generate enough velocity to work. The PS90, with its 16.1-inch barrel, really delivers the goods, but that isn’t a handgun. Put into a handgun, it comes in a bit ahead of the .22 Magnum in velocity.
There is not a lot of data for the 5.7. It has been adopted by some law enforcement agencies, and has been used in shootings by them. Getting information out of those sources is difficult. The only one we have that offers a reasonable data set is the shooting at Fort Hood. There, Major Nidal Hasan fatally shot 13 people and wounded 32 more. He used an FN FiveseveN pistol and two ammo types: the FN SS192 and SS197SR. The SS192 is (or was, FN stopped making it in 2004) a jacketed hollowpoint with an aluminum core. Not much expansion, and not armor-piercing. The SS197SR is loaded with the Hornady V-max bullet, using a blue polymer tip to indicate a slightly higher velocity than the SS196SR.
The .22LR bullet, compared to a .32 and a .380 JHP. This is not the Hammer of Thor, so don’t expect miracles.
The ability of the rounds to stop fights was out of proportion from what one would expect with such a small cartridge. Three of the victims valiantly charged the shooter, attempting to stop him. They were shot for their efforts, were stopped and subsequently died. They charged from close range (the incident happened indoors, so there were not long distances to cover) and yet failed to close the distance due to the gunshot received.
Those wounded with hits to the extremities were unable, in many instances, to flee or fight, due to broken bones. When a “mere” .22 handgun cartridge can break a femur, there’s something going on that must be explained. That shot was received by one of the first responders, an in-base civilian security person. She took a hit to her wrist which made that arm unable to function, and a hit to the upper leg that broke her femur.
The .22LR bullet, compared to a .32 and a .380 JHP. This is not the Hammer of Thor, so don’t expect miracles.
The drawback to the FiveseveN approach to low-recoil defense is cost. A FiveseveN lists for around $1,180, compared to the Kel-Tec PMR-30 at $455. The FN pistol holds 20 rounds (optional extensions make it a 30-round magazine) compared to the Kel-Tec at 30 rounds standard. An FN magazine is $35, with the extension costing another $18-20, while the Kel-Tec is $31.
5.7×28 ammunition costs (at the moment) $28 per box of 50 rounds, while .22 Magnum can be had for as little as $10 per box of 50 practice FMJs, up to $15 for a box of Hornady Critical Defense.
The last hurdle for the 5.7 is size. The grip is a bit larger than that of the Kel-Tec, and even if the recoil is mild, if you (or the person you are coaching in this situation) can’t get a hand or hands around it, it isn’t a good choice.
Recommendations
If you already have a .22 pistol and need it for defense, then use the most accurate, readily available .22LR ammunition to be found. Practice getting as many hits out of a full magazine, on a playing-card-sized target at 7 yards, as quickly as you can. Volume and accuracy need to be your focus here.
A better choice would be either Hornady Critical Defense or Speer Gold Dot in .22 Magnum in the Kel-Tec. The PMR-30 isn’t going to cost much, if anything, more than a good .22LR pistol. Use whichever of these two loads shoots reliably and accurately out of your Kel-Tec. As with the .22LR, practice hitting a playing card at 7 yards, as quickly as possible, and train yourself to keep shooting on the target until it (he, she, they) goes down.
If you have the hands and the budget, but not the recoil resistance, for something bigger in caliber, then go for the FN FiveseveN in 5.7×28, the 40-grain FMJ. The V-Max is accurate, but is designed as a varmint-level bullet. I’d be much more confident with an FMJ in this situation, than with a readily expanding bullet of only 40 grains.
While the effect is likely to be better than the .22LR or the .22 Magnum, the process should be the same: playing card accuracy, 7 yards, continuous fire until the bad guy goes down.
Caveats
There will be those who want to throw me under the bus for recommending the various .22s for defense. I have attempted to be clear: rimfire “micro guns” are better than anything not a firearm; and for those who cannot handle more recoil, these are perhaps the only choice. I would rather someone who needs a firearm for defense have a weak one than none at all, as long as they realize the limitations of the tool they are using.
There are no .25s I can recommend. For the cost, you can easily acquire .22LR or .22 Magnum ammo that will perform better. And since you have to depend on volume and speed of fire, the ultra-compact .25 “micro guns” are poor choices, as clever as some of the designs might be.
Springfield has upped the ante with its XD-E, releasing the hammer pistol in the hard-hitting .45 ACP.
What to know about this new Springfield XD-E model:
Springfield has expanded the XD-E line, adding a .45 ACP option along with 9mm.
The pistol is among the most compact and lightest .45 ACPs the company offers.
The double-action/single-action trigger and hammer offers shooters a level of safety.
And the XD-E’s trigger also gives shooters the ability to carry in a variety of ways.
Springfield Armory has certainly proven its chops when it comes striker-fired and 1911 pistols. Over the years, the Illinois company has churned out a healthy selection of the popular styles of handguns in its XD and 1911 lines, arming shooters with pistols perfect nearly every situation — from concealed carry to competition.
But this year, Springfield took a much different turn, expanding one of its most popular lines with a type of pistol most certainly not associated with the brand. The XD-E might be the first example of a company evolving a striker-fired pistol into a double-action/single-action hammer-fired pistol. And while some might cry foul this is more of a regression from the line’s current trajectory, there is a certain method to Springfield’s madness.
There’s a case for DA/SA semi-autos versatility and safety — not to mention second-strike capabilities. And for those curious if it fits their style of carry, Springfield has made it easy to get behind the trigger of this style of handgun, with the XD-E’s MSRP well below the $600 mark.
They’ve also gone one better recently, especially for those who tend toward a big-bore for their self-defense gun with the addition of the XD-E in .45 ACP. Presently, the new release gives shooters two calibers of the pistol to choose from, with the XD-E initially released in 9mm. Time will tell if ‘Mama Bear’ .40 S&W is on the horizon, but it would make sense, given a majority of the XD series’ models are offered in the three popular self-defense calibers.
The new XD-E is a whisker larger than a couple existing XD models in .45 ACP (MOD.2 Sub-Compact, XD-S), but the single-stack still comes in among the most demure pistols Springfield offers in that chambering. The 3.3-inch barreled semi-auto has a 5-inch height with its flush-fit magazine (5.25 with its grip-extension mag) and weighs in at a manageable 23 ounces unloaded. Given the tale of the tape, the XD-E .45 should prove extremely manageable for any carry style, even if concealment boarders on skimpy.
The barrel length and weight of the 6+1 capacity pistol (7+1 with grip extension) does bring up the issue of controllability in .45 ACP, something potentially compounded with the transitioning trigger pulls. But like so many challenges in the shooting world, dedicated practice to master the firearm mitigates many of the control issues.
Like much of the XD series, the XD-E is purpose-built for concealed carry and Springfield has configured it thus. The polymer-framed pistol comes with low-profile combat rear sights, designed to facilitate a clean draw stroke. The front fiber-optic sight creates a lightning fast and clear sight picture. And, the grip is aggressively textured like the XD MOD.2, which makes it ready for any environmental conditions, as well as adding a level of controllability to the pistol.
The double-action/single-action trigger gives shooters the best of both worlds — a manageable, yet long first shot, trailed by quick and snappy pulls on follow-ups. This adds a level of safety to a self-defense pistol, making it more forgiving of a sympathetic reaction that might result in a negligent discharge. If that was perhaps not enough, Springfield has added a manual ambidextrous thumb safety/decocker — though there could be an entire debate about whether that is a help or a hindrance.
In addition to safety, the XD-E also offers flexibility in carry method. Armed citizens can holster the pistol from cocked-and-locked all the way down to Israeli (hammer down, unchambered).
While still competitive in regard to the rest of the concealed-carry pistol market, the XD-E .45 ACP does run a bit more than the 9mm version. But with a MSRP of $568, it definitely is in range for anyone out for a concealable DA/SA pistol or those curious if this option fits their profile.
Anyone with a lick of sense knows that a 12 gauge shotgun is the best weapon for home defense. Fans of the AR rifle platform and various handguns generally howl like banshees when this is brought up, but like cream in your coffee, the truth will rise to the top.
When we say we are going to use a weapon for home defense, we are defending our home and hearth, everybody and everything most precious to us. For this reason, I believe in using the weapon that will give me the most advantage over my adversaries. Nothing about a gunfight should be “fair.” Any semblance of fairness goes out the window when someone breaks into my house. Therefore, I want to be armed with the firearm best suited for this work, and that my friend is a 12 gauge shotgun loaded with buckshot.
Why the shotgun? In a nutshell, it’s the distance between you and your enemy. Most home defense situations are going to happen in the length of a room. If we take the fight outside, usually we are talking less than 50 yards. This is where the shotgun shines in performance. No other weapon will deliver as much firepower in the brief time that most gunfights occur. Three rounds of 12 gauge 2¾-inch loads with 00 Buckshot delivers 24 .33-caliber pellets to the bad guy. Most of us cannot deliver this much carnage upon our foe in the same amount of time with a rifle or handgun.
A state trooper friend I worked with some back in the day was a great advocate of the shotgun. When it looked like things were about to get real, he would always pick up the issued 870, which he called “The Hammer of God.” Enough said.
There is an abundance of 12 gauge shotguns and various aftermarket upgrades out there designed and perfectly suited for home defense. Here are a few out-of-the box options to consider, as well as some aftermarket accessories to trim out your scattergun to your personal preferences.
Service, Straight From The Box
Home defense shotguns, Mossberg 590 ATI Scorpion, Remington 870 Tac-14, Mossberg Shockwave, Remington 870.
If you don’t want to add on to your current shotgun, the Mossberg 590 ATI Scorpion comes already dressed for the party. In short, Mossberg took the time-proven Model 500 action, added several ATI (Advanced Technology International) accessories and gave us a very well equipped defensive/tactical shotgun ideal for home defense.
The best feature here might be the ATI T3 shotgun stock, which allows for quick adjustment to the individual shooter. Most of us need a shorter stock with less length of pull on the defensive shotgun as opposed to what we would use to shoot clays or waterfowl. The ATI cushioned pistol grip on this stock allows for good control of the weapon while firing, but it’s necessary to break your grip to operate the tang mounted safety located on the back of the receiver. The ATI heat shield covering the 18.5-inch barrel has two Picatinny rails, one on each side, which would serve to mount a light or a laser. The forearm on the Scorpion is the ATI Akita, which is comfortably textured and easy to grasp.
Mossberg also attaches a machined, anodized aluminum, ATI Halo Side Saddle to the 590’s receiver. This mount allows for a shell holder on either side of the gun with a Picatinny rail on top, on which you can mount whatever sight or optic you might choose. With this setup, you could carry up to nine extra loads on the gun — six on the left and three on the right. While I’m not a big fan of a shell carrier on the same side as the ejection/loading port, if you train with this and are comfortable with it, more power to you.
“I believe in using the weapon that will give me the most advantage over my adversaries. Nothing about a gunfight should be ‘fair.’”
I really took the time to get to know this gun and attended the Gunsite Academy 260 shotgun class with the Mossberg 590 ATI Scorpion, and other than being a tad heavy at 8.4 pounds, I have no complaints.
If you should decide to upgrade your current shotgun, the good news is that all of the above items found on the Scorpion are available individually from ATI — the T3 adjustable stock, the Akita fore end, Halo heat shield, Halo side saddle and shell carriers … the whole shootin’ match. ATI makes these to fit the Mossberg 500 and 590s, the Remington 870, the Winchester 1200 and 1300, and others.
A New Breed Of Protection
Mossberg 590 Shockwave
OK, so we won’t call them shotguns even though they are both built on revered shotgun actions — the Remington 870 and the Mossberg 500 — and both shoot shotgun ammo. The Bureau of Alcohol, Tobacco, Firearms, and Explosives (BATFE) has confirmed the 500 Shockwave as a “firearm” — same for the Remington Tac-14 — per the Gun Control Act (GCA), but not a Class 3/NFA firearm.
Both of these guns sport a 14-inch barrel and the Shockwave Technologies “birds head” Raptor Grip stock. I had some misgivings about the Shockwave and the Tac-14 at first. I believed these guns would be a good choice for home defense, but I felt they needed some help and here is why.
Although both fit the need for a compact weapon in tight places, there’s a problem with how these guns are fired. Neither the Shockwave nor the Tac-14 should be fired from a shoulder or eye level position, which means they must be shot from the hip. This brings up a problem with accuracy because even with a cylinder bore barrel you will find shot patterns to be surprisingly tight at short ranges.
Most defensive shotgun instructors would agree that you need a light on your shotgun. When things go bump in the night, identifying your target is critical. The Remington Tac-14 and the Mossberg Shockwave both need a way to be aimed and fired accurately, and the Crimson Trace Rail Master Pro provides both.
The Rail Master Pro attaches to any shotgun that you can get a M1913 Picatinny rail or a Weaver-style accessory rail on. This is a compact, durable light-and-laser combination with instant tap-on and tap-off activation, and controls for windage and elevation adjustments. The Rail Master Pro has four different operational modes for the light and the laser, and it’s powered by a CR2 Lithium battery. The green laser diameter measures a half-inch on target at 50 feet, and the white light projects 100 lumens.
I like the Rail Master Pro because it’s a two-for-one deal with the light and the laser. On top of that, it’s very compact, and most importantly, it works.
Simple Brilliance, More Firepower
OPSol’s Mini Clip helps the Mossberg Shockwave properly feed Aguila’s Mini Shells, giving the shotgun a capacity boost.
Some innovations are so simple they’re brilliant.
A few years ago, Aguila Ammunition gave us the Minishell, a 12 gauge shotgun shell 1.75 inches in length. The shorter length of the shell allows for more ammo to be loaded in the magazine than with traditional 2.75-inch shells. The problem is that many pump guns and semi-autos will not feed the Minishell. After ejecting the empty, the next round will turn within the action or, in the case of the Mossberg, simply fall through the receiver before it can be fed into the chamber.
OPSol of Texas devised a simple “rubber plug” that fits into the rear of the loading port of the Mossberg 500. The Mini Clip serves as a stop, captures the Minishell and allows it to be fed into the chamber. The Mossberg 590 Shockwave can now be loaded with nine rounds of Aguila Minishells, which are available in buckshot, 7½ birdshot or slugs.
A Short-Stock Solution
The Mesa Tactical Stock features a multi-position configuration that also reduces felt recoil.
Here’s the deal: We don’t shoot a defensive shotgun the same as one for breaking clays or hunting. Our stance is (or should be) different, and we’re not swinging on moving targets. Unless you’re 7 feet tall and have arms long enough to play in the NBA, you need a shorter stock, which gives us a shorter length of pull. This prohibits you from “crawling up the stock” to maintain control of the gun.
The Mesa Tactical LEO Telescoping Stock Conversion Kit allows you to grab the adjustment lever and run the stock down until you’re nice and snug on the gun.
This stock also helps with that old demon … felt recoil. It’s no secret that shooting full house buckshot or slug loads is about as much fun as going to the dentist. The Mesa Tactical LEO stock has an optional Crosshair hydraulic recoil buffer available. Mesa Tactical will tell you this feature reduces felt recoil up to 70 percent. No doubt such things are hard to measure, but I can tell you that the reduction in recoil is substantial.
This is important. Less felt recoil means most shooters will not be afraid of the gun, which will translate to better accuracy and getting back on target quicker after the shot.
A Sight Built For Speed
Trijicon MRO on a Mossberg 590 ATI Scorpion
We can only shoot any firearm as well as we can see and acquire the target. On most shotguns, a simple front bead fills the bill, but many of us can use all the help we can get. When I went through the Gunsite shotgun class, I didn’t believe the Trijicon MRO (Miniature Rifle Optic) could be faster for target acquisition than a plain front bead. I was wrong.
The MRO is a sealed reflex sight intended for use on rifles, carbines and shotguns. The large aperture and tapered light path maximizes the viewing area and allows for better situational awareness and fast target engagement — from any shooting position. You fire the shotgun with both eyes open while using this optic. Mount the shotgun to firing position, see the red dot on the target and pull the trigger. It’s that fast.
The 25mm objective lens makes for a huge field of view, and when you learn to shoot with both eyes open, the tube of the optic seems to disappear. The red dot goes on the target, boom, work the action, and then move to the next target.
Trijicon optics are manufactured with military and law enforcement needs in mind. This optic is rugged, has a 7075 aircraft-grade aluminum housing, with sealed lenses waterproof up to 100 feet. I didn’t run over this sight with my truck, but I didn’t baby it either. The MRO will take anything you dish out.
Parting Shot
Unless you’ve been living under the proverbial rock, you know this is not a complete list of possible home defense shotgun upgrades, but it will give you a good idea of some of the best choices available. In my mind, there’s no doubt that the 12 gauge shotgun is the best home defense weapon, but hopefully, you will never have to wield The Hammer of God.
This article originally appeared in the November 2017 issue of Gun Digest the Magazine.
Looking to go armed, but are stuck in the weeds as to what to arm yourself with? Here are 20 of the best concealed carry gun options that will keep you on the defensive.