The box magazine-fed shotgun is nothing new and has always stirred heated debate. Here are a few points to know before you decide for or against them.
What you need to know about box magazine fed shotguns?
AK-style shotguns have utilized detachable magazines for decades.
Pump-action shotguns are the newest addition to the box-magazine shotgun family.
Detachable magazines excel in tactical situations, making reloads faster.
Box magazines put the weight of the gun at its middle.
Balanced, they are quicker pointing and more stable.
They cut down on reload time compared to tube-fed magazines.
Box magazine-fed shotguns transition between different ammunition more quickly.
A detachable box magazine on a shotgun is a lot like Sasquatch, Moth Man and the Easter Bunny. Some of us believe in them; many of us don’t. Much like the Glock vs. the 1911 debate and other inane gun arguments, this topic can make things lively in the barbershop and the lunchroom, and it keeps gun writers from starving to death.
The concept of a box magazine fed shotgun is not new, and has actually been around for quite a while. Still, for many all this remains too unconventional and should not be talked about in polite company, like the time your Uncle Ed got drunk and fell into the Christmas tree.
The box magazine fed shotgun comes from a different side of the universe compared to a rifle. Rifle cartridges are metallic, slender and usually pointed, ideal for sliding out of the confines of a magazine and into the chamber of a rifle. Shotgun shells are the opposite in that they are blunt, heavy and made of plastic, which can become dented and deformed — not exactly perfect for making the gun function well.
Here are some of the arguments on tube versus the detachable magazines fed shotgun that you might hear around gun club benches, gun store counters, Internet forums and other institutions of higher learning.
• A box magazine fed shotgun is not practical. Shotgun shells are large and take up a lot of room, so a magazine that will hold a sufficient amount of ammo has to be big and bulky. This makes the shotgun unwieldy and hard to balance, and the magazine might catch on something during a fracas.
• A shotgun with a tube magazine is OK for hunting, but in tactical situations, reloading is too slow and difficult under stress, and you might be limited on magazine capacity.
• For tactical situations, a shotgun with a tube magazine works well, as the shooter can perform the “shoot one, load one” discipline (tactical reloading) and keep the magazine topped off.
• Tube-fed shotguns carry the majority of the weight forward. This helps with felt recoil and makes the gun easier to control while firing.
• The box magazine fed shotgun bear the weight of the ammo roughly in the middle of the gun. This stabilizes the weapon and makes it easier to point and get on target.
Even before the recent unveiling of the box magazine fed pump shotgun, such as the Remington 870 DM and Mossberg Mag-Fed 590, there was a small selection of this style to choose from, albeit all semi-autos. Utilizing the AK-47’s long-stroke piston operation, guns such as the Molot Vepr 12 and Saiga 12 have become popular tactical shotgun options in some corners of the shooting world.
As their fans are more than familiar, the guns are fast and powerful, offering overwhelming firepower and fast reloads. Additionally, they transition loads as quickly as you can change magazines. Ideal, however, the system still draws its share of detractors. Though, their disapproval, in many cases, could be classified as unwarranted.
Critics of these guns like to point to problems with failures to feed causing malfunctions. If a gas-operated semi-auto shotgun is having trouble, the problem is often the ammo, not the gun. Inexpensive, low-brass shotgun shells might not have enough power to make the shotgun cycle properly. So, before you dismiss the new shotgun you just acquired as a “cheap Russian-made piece of junk,” you should take a look at the cheap shells you might have just picked up at Wally World.
Obviously, this is not an issue with magazine fed pump shotguns, perhaps opening their versatility. The 870 DM and 590 will happily chew through light field loads at the trap range and ask for seconds. Then, with nary a burp, gnaw on 3-inch buckshot loads. A bit more tactical-practical.
Pro or con, the magazine fed shotgun is here to stay, namely because it’s already been around for a spell.
This article originally appeared in the February 2018 issue of Gun Digest the Magazine. Article expanded.
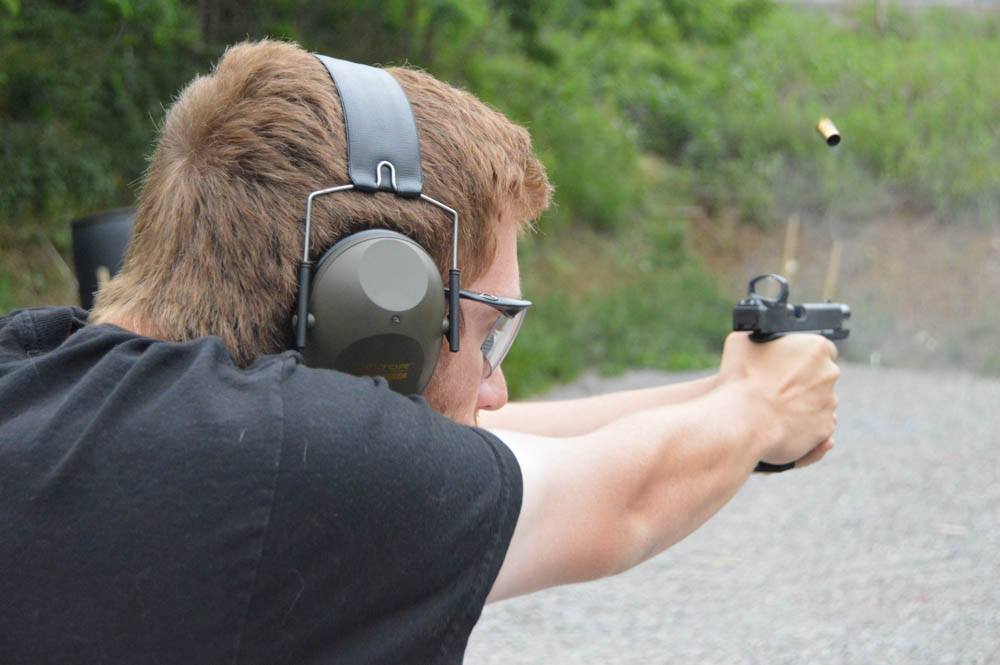
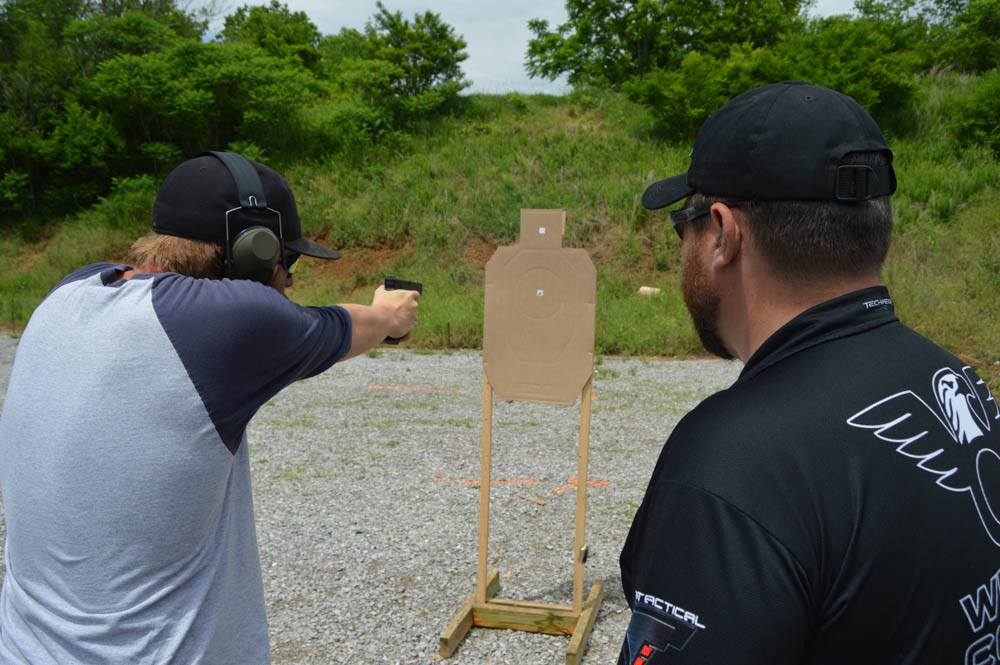
This shooter controls the recoil in the Glock G35 with good fundamentals of Stance, Position and Grip.
Seven fundamentals of handgun training apply whether you’re training for self-defense, competing at a match, on the silhouette range or plinking with a .22 pistol.
The seven fundamentals of basic pistol marksmanship are:
Step 1 is the stance. The stance as it applies to the handgun is nothing more than the position of feet and body relative to the target. It sounds simple, but it’s actually one of the most critical and also one of the most often overlooked aspects of pistol shooting. The reason it’s so important is that the stance is the foundation upon which all of the other fundamentals are built. If the shooter’s stance isn’t solid, then the delivery of the shot or shots to the target won’t be at their optimum.
The stance for a bullseye shooter is going to be much different than that of a person firing in one of the action shooting sports. For the bullseye shooter, assuming a right-handed shooter, the stance will be standing at about a 45-degree angle to the target, with the feet approximately shoulder width apart, and about 60 percent of the weight out on the balls of the feet. Always keep the knees flexed a little, and keep the non-firing hand in the pocket. Why? Because if the non-firing arm is not anchored with the hand in the pocket, or at least with the thumb hooked into the pocket, the arm will swing slightly during firing, and will act as a counter-balance to the firing hand, causing is to sway slightly and making it difficult to stay on target.
For an action shooter, there are two basic types of stances: the Weaver and the Isosceles. The Weaver stance is very good for managing recoil of some of the sharper recoiling handguns. It does this by using isometric tension between the firing and non-firing, or support, hand. Basically the shooter is creating a push-pull arrangement in the arms. The firing arm is pushing slightly forward, and the support hand is pulling back. It’s a very effective way of firing a powerful handgun accurately, and is still taught at the Gunsite Academy, Jeff Cooper’s iconic shooting school.
In the classic Weaver stance, the body is at an angle, the weak side elbow bent, and the strong-side arm is straight. The firing arm should be pushed forward, and the weak side arm should be pulled back. This helps lock in the upper body and is a great way to control recoil.In the Isosceles stance, the body faces straight on to the target, with the arms pushed out, shoulders rolled forward, and the upper body leaning forward with 60% of the weight on the balls of the feet.
Position
The second fundamental is position. This is nothing more than taking the stance and introducing a target. With the stance, we are not yet factoring in the target, we are just trying to establish a good foundation. Now, with position, we are attempting to take the stance and make sure that we are positioned naturally toward the target, or, put another way, we are trying to find our natural point of aim.
On the range, a good way to practice this is to get into a comfortable stance, then, take the pistol in a good firing grip with both hands, close the eyes, and raise the pistol toward the target, open the eye and the pistol should be aiming at the center of the target. If it isn’t, close your eyes, lower the pistol and pivot on the left foot and move the right foot slightly forward or backward while holding the pistol out at arm’s length to move the pistol left or right relative to the target. Raise the pistol and open your eyes, the pistol should be pointing at, or close to the target.
The best method is the one you feel most comfortable with. Talk to different shooters and get their opinion, try different techniques and then decide what works best for you.
Grip
The next fundamental is grip, and this part sounds easy, simply pick the pistol up, and you are gripping it, right? Not so fast. There are several do’s and don’ts when establishing the proper firing grip. Two of the main aspects of establishing a proper grip are consistency and tension.
Also, the firing hand and arm need to absorb the recoil and be an aid to a quick recovery, especially when firing the timed and rapid fire stages.
As I mentioned, one of the key aspects of the grip is consistency, not only in the application of the grip but also in the tension applied. Too loose of a grip, and the pistol will shift in the hand during firing. Too tight, and two things happen: the hand will tremble, and the trigger finger is partly immobilized.
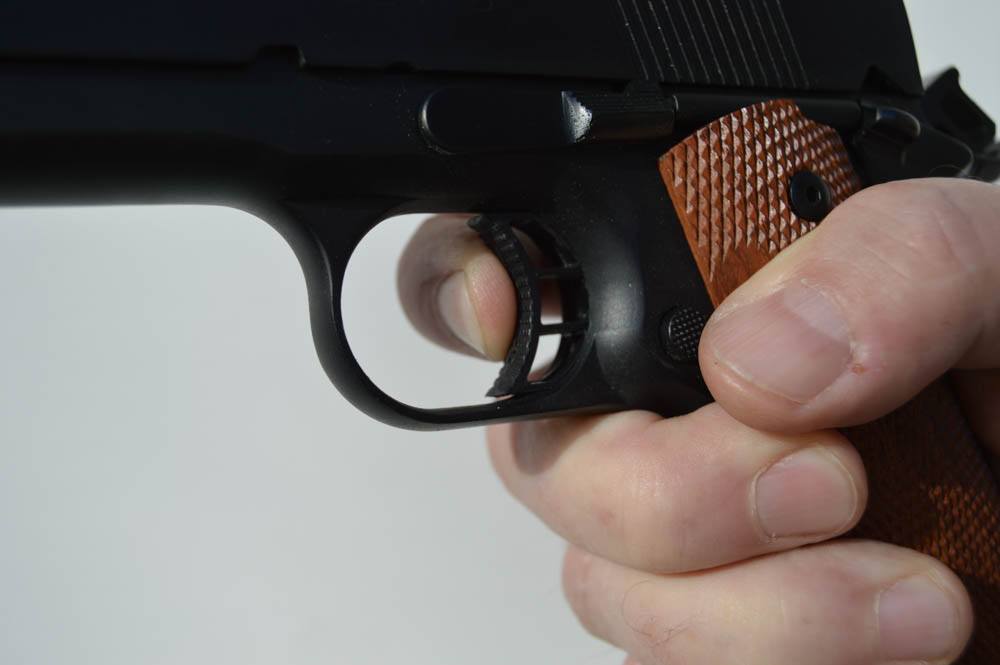
Another aspect of the grip that many shooters discuss is placement of the trigger finger. The two most common ways are the pad of the finger and the first joint. Both are used by many champion shooters, so decide which one is more comfortable and go with it.
The next feature about the grip is that it needs to allow a natural point of aim. This means that when the pistol is brought up to the target, the front and rear sights should be in natural alignment, and there should not be any need to shift the pistol in the hand in order to get proper sight alignment.
Another aspect of the grip is the thumb of the firing hand. Make sure that the thumb does not drag on the slide, as this can strip energy from the recoiling slide and cause failures to feed and eject.
I’ve talked about aspects of the grip that you’ll want to do, now here are a couple of don’ts. Don’t use what’s called a “teacup” grip. This is where the non-firing hand acts as a “saucer” to the pistol’s “teacup.” This type of grip offers little countering to the effects of recoil. The pistol will twist right out of the non-firing hand with this grip.
Also, don’t fail to use the proper amount of tension in the wrist and forearm. This is really important, especially with semi-auto handguns, which need a solid platform for the gun to properly feed, chamber extract and eject.
Although you don’t want to fire a string with a grip that’s too loose, having a grip that’s too tight has its own issues. If the grip is too tight and there’s too much tension in the firing hand, it has a tendency to cause the trigger finger to freeze up, and not be as nimble and quick. This can cause all sorts of trouble when trying to fire off a quick string of shots.
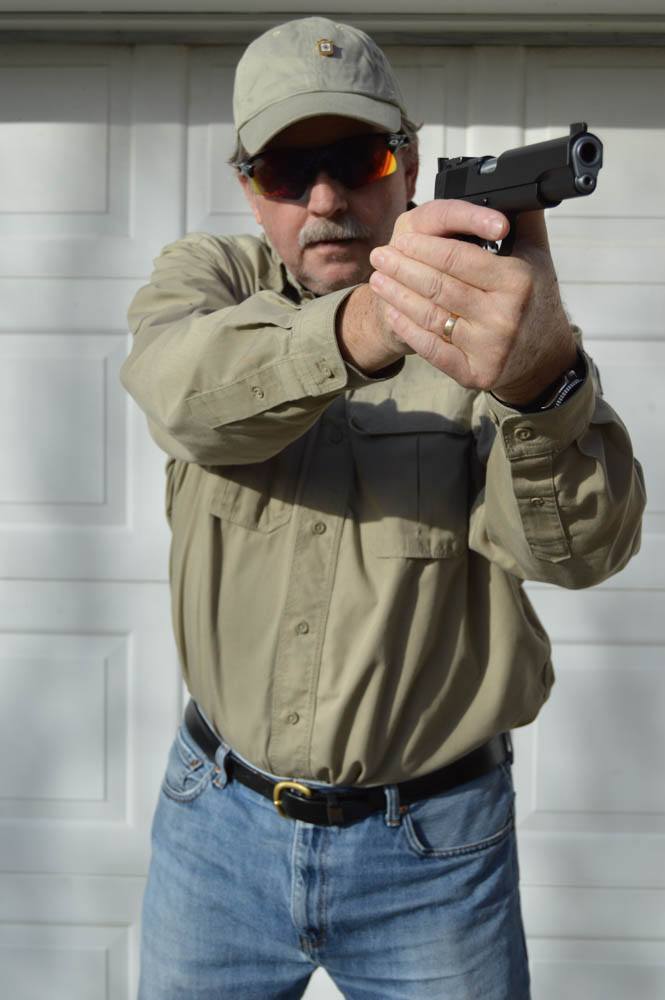
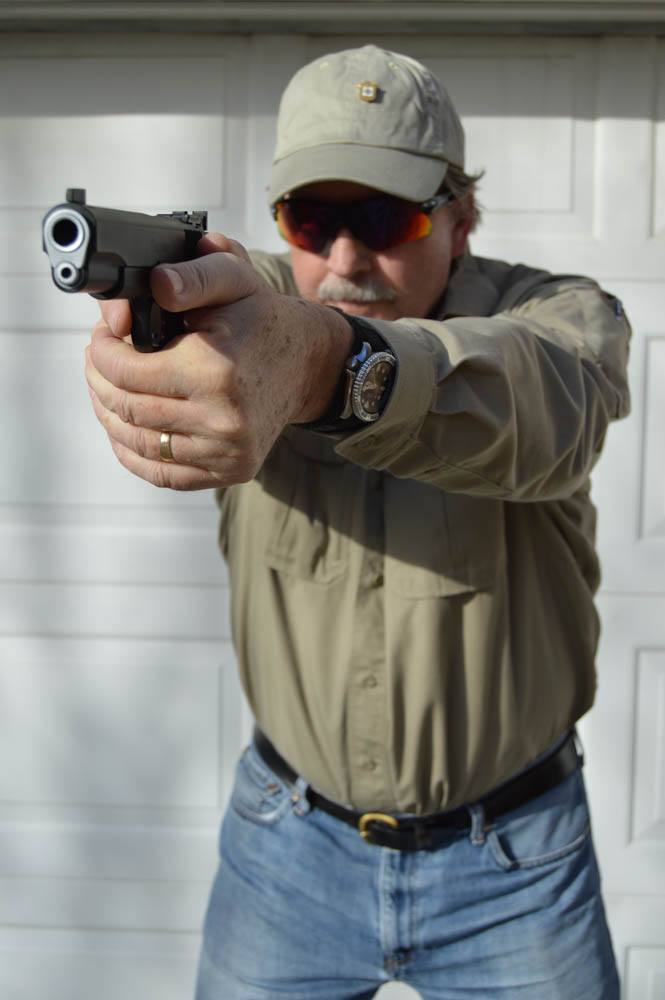
This shooter shows good form with a high grip on the gun, shoulders rolled forward, with elbows with good tension but not stiff, and his upper body leaning forward to control the recoil of the G35 in 40 S&W.
Sight Alignment
The next fundamental is sight alignment. In order to shoot a handgun with any accuracy, the pistol’s sights need to be in alignment, but what does that mean? Sight alignment is nothing more than the front sight post centered within the rear sight notch, with equal daylight on both sides of the front sight post, and the top of the front sight level with the top of the rear sight. The shooter then has to maintain that good sight alignment when the hammer or striker of the handgun falls and the cartridge is fired. The better the sight alignment is when the bullet exits the barrel, the better the results on the target will be.
It’s important to understand the difference between sight alignment, and sight picture. Sight alignment is nothing more than the relationship of the front and rear sights to each other. This is what the shooter should be focusing on, and more importantly, the focus should almost always be on the front sight specifically. Bullseye shooters, weekend plinkers, or any shooter who is trying to deliver a deliberate, aimed shot or series of well-aimed shots, needs to focus on pure sight alignment, and must have pinpoint focus on the front sight as the shot or shots are delivered. The target should be slightly blurry, and the rear sight should also be blurry. The front sight needs to be in sharp, crystal clear focus during the delivery of the shot for best results.
So how does sight alignment square with the use of red dot sights? Since we don’t have a front or rear sight, there is no sight alignment, so we have to focus more on sight picture.
In the paster drill, try to keep all of the shots on a single paster at 3 yards. This demonstrates good sight alignment and trigger control.
Trigger Control
The next fundamental is trigger control. The smooth release of the trigger mechanism of any firearm is a critical factor is the delivery of an accurate shot. On the face of it, it’s a very simple act. Simply apply steady building pressure with the trigger finger to a small strip of metal or polymer, until the amount of force needed to overcome the friction of the mechanism is achieved and the tension contained in the sear or striker spring is released. But within that simple act is a complex series of events that have to take place.
The interesting aspect of trigger control that shooters must understand is contained in the words “steady building pressure.” It’s the part of trigger control that high-level shooters have mastered, and new shooters struggle with. New shooters do not yet understand that the trigger must be pressed straight to the rear, with steady building pressure, while at the same time trying to maintain as near to perfect sight alignment as possible. The better the sights are aligned when the sear disengages the striker or firing pin hits the primer and the bullet exits the barrel (which by the way, is a lot longer process than most people think), the better the shot will be.
Think of firing a series of well-aimed shots like wheel that’s spinning. The wheel represents the steady application of trigger pressure. Now imagine a fixed point on the wheel is where the sear releases and the gun fires, but the gun only fires when the fixed point reaches the top of its revolution. The wheel spins at a steady rate, and can turn slowly or quickly, but when the fixed point reaches the top, the gun fires. So in this analogy, no matter the speed of the wheel, the trigger pressure is applied at a steady rate. This is trigger control; being able to apply steady building pressure to the trigger until the pistol fires without disturbing the alignment of the sights. It’s these kinds of analogies that shooters use to visualize different shooting concepts.
Trigger finger placement is very important no matter what shooting discipline you are engaged in. Here, there is too little trigger finger applying pressure. This finger position will likely cause the pressure on the trigger to be applied to the left side, and not straight to the rear as it should be.
Breathing
The next fundamental is breathing. Good breathing techniques are extremely important in all types of shooting, from the slow fire match in bullseye, to speed shooting steel targets, which typically is over in less than two or three seconds.
Breathing oxygenates the blood, which sharpens your vision and enhances the visual acuity. It also helps you relax and that makes it easier to overcome the dreaded “match nerves.”
All shooters, and especially handgun shooters, will have a small amount of movement while holding a pistol at arm’s length. It doesn’t matter is the shooter is using one hand, two hands, or even in the laying down in the Creedmore position on the pistol silhouette range. The pistol will be moving around. Rifle shooters call this the “wobble area.” Pistol shooters, being the sophisticated, dashing and debonair marksman we are, call it the “arc of movement.” The key to delivering an accurate shot (and remember, if we can deliver a single accurate shot, delivering multiple shots just requires speeding up the trigger finger) is reducing the amount of movement to the smallest level possible, and that’s where proper breathing techniques come in. The key is to get the arc of movement, or wobble area at its smallest, at the point where enough trigger pressure is applied to fire the pistol.
When delivering a string of shots, be it on steel or some other type of action shooting, taking a few deep breaths will relax the muscles and remove much of the tension, ease the match nerves and help you compose yourself prior to the sound of the buzzer. Dry fire really helps with this and good dry fire routines will definitely help lower scores.
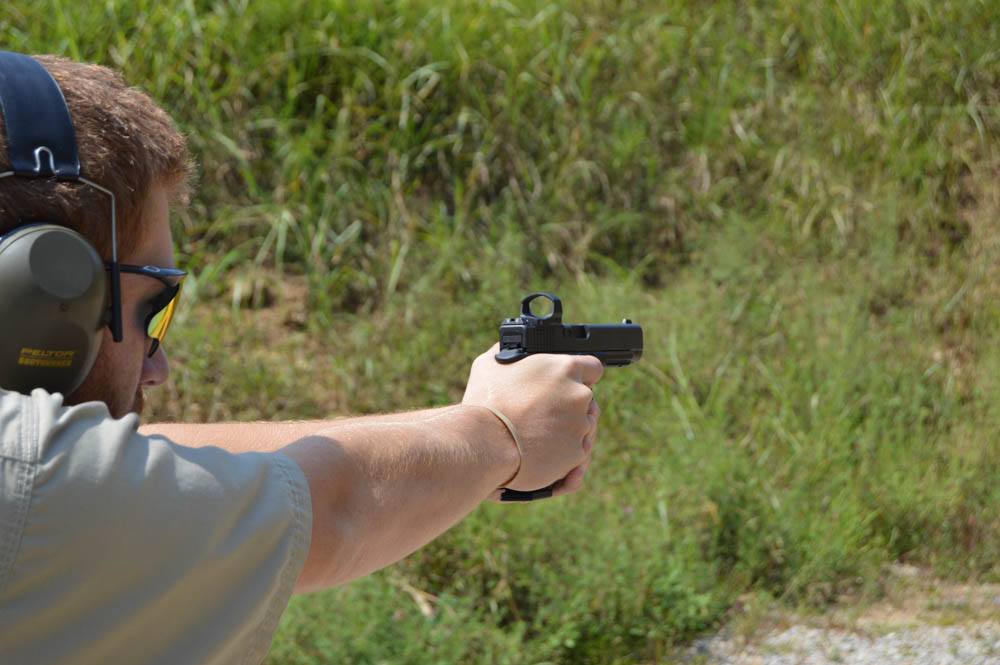
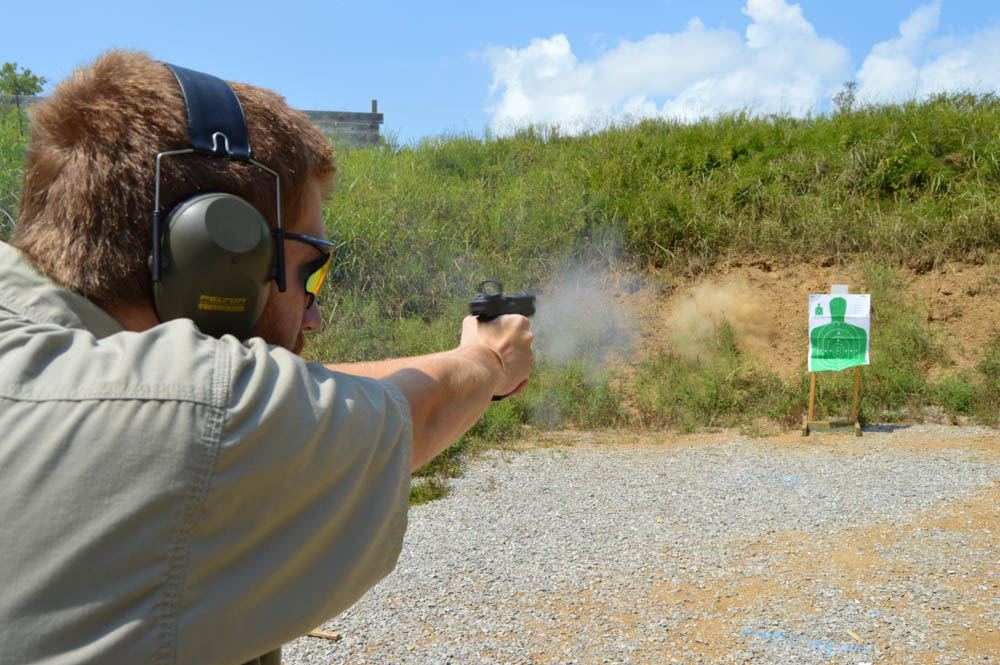
In this drill, the shooter fires into the berm, focusing on trigger control without a target and getting used to applying a steady rhythm to the application of trigger pressure. This drill can also be performed indoors, with a blank target and dry firing the pistol, and focusing on the sights without a target.
Mental Discipline
The last fundamental of marksmanship is mental discipline. Shooting is both a physical and a mental game, which is one reason why I enjoy competitive shooting so much. The ratio of physical versus mental depends on the level of expertise of the individual shooter.
A good example of this is to compare the level of shooter that competes at the Olympic level, and the new weekend shooter learning how to shoot with their first pistol. With the Olympic shooter, especially in a discipline like free pistol, the shooter gets two hours to fire 60 shots at a very small target at 50 meters. For these shooters, the game is 95% mental and only about 5% physical.
Compare those shooters to the new, weekend shooter with their first firearm. Hopefully, they’ve been taught at least the basics of marksmanship, so they understand about stance, position, grip, but probably not. They are focused on aiming the pistol and trying to get a hit somewhere on the target. For these new shooters, the ratio is 90% physical and 10% mental.
Whether firing a single shot or a string of shots, there are steps you can take to be successful. One of the most important points is to have a routine. Almost all athletes have a pre-game routine and shooters are no different. The fundamental of mental discipline comes down to developing a plan that comprises several steps or a routine, and it starts with preparation. This includes all of the details prior to the match such as making sure your range bag or gun box is ready, and that you have enough ammunition to shoot the match, including additional for alibis or malfunctions.
Next step in planning is to decide in advance how you are going to shoot the day’s match, how you are going to shoot a particular string or even a single shot. Determine when and where the best place to reload is while on the move, how you are going to handle the wind at Camp Perry, or what is the best sequence to engage multiple targets in a steel match. Remember, having a plan is a very good way to reduce match nerves, because you are focusing on how you are going to approach the stage or string, not focusing on fear of failure, which is the primary cause of pre-match nervousness.
The next important phase of mental discipline is to relax and focus. The shooter needs to approach the shot or series of shots relaxed and ready to shoot.
The next part of mental discipline is to analyze. If a shooter cannot analyze a shot or a string of shots, they will never be able to improve and will just keep making the same mistakes over and over.
The last element involved with the mental game of shooting is correction. After you’ve done all of the previous steps, step back and see if the plan you developed actually worked. If not, what happened and why? This mental aspect of the game can be applied whether you are an IPSC competitor, silhouette shooter, Cowboy Action or a weekend plinker.
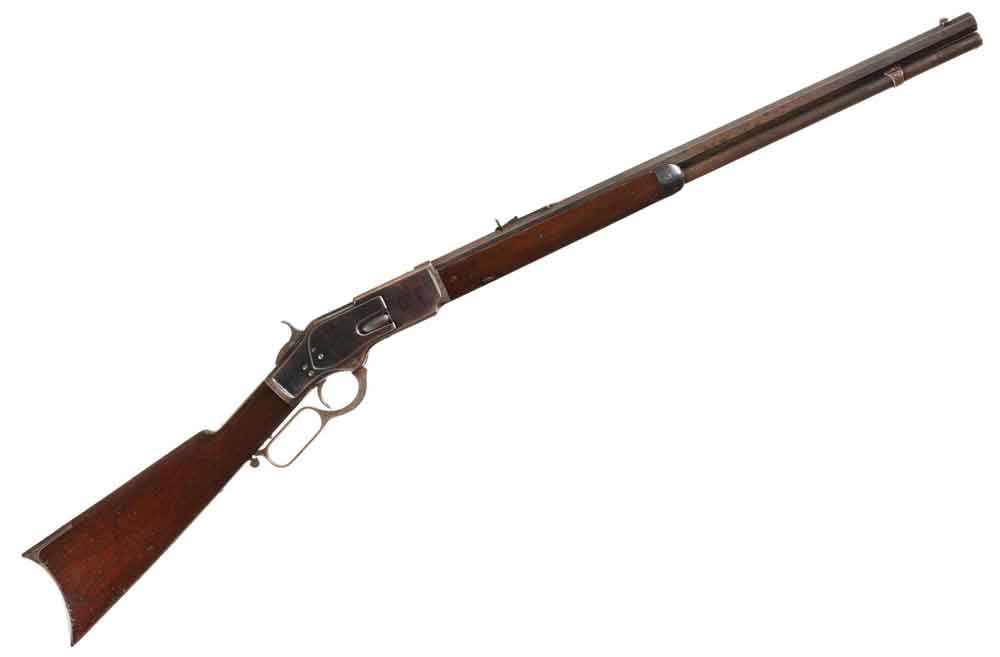
Certainly, in popular history, the Winchester Model 1873 is given this distinction. While the trusty ol’ lever-action shooting iron more than earned its stripes in military conflicts, range wars and protecting the Back 40, it far from single-handedly tamed the vast American frontier.
In reality, no one gun can make the claim. It was a vast arsenal of different revolvers and rifles and shotguns of every conceivable design, make and model that carved this nation from coastline to coastline.
Even if there was no single gun that won the West, there are certainly some six-shooters, repeaters and other great guns that more than pulled their share of the weight during this era. With that in mind, here are the 10 guns you have to know from the Old West. While there were many other firearms that left their mark on this time, these were among the most important.
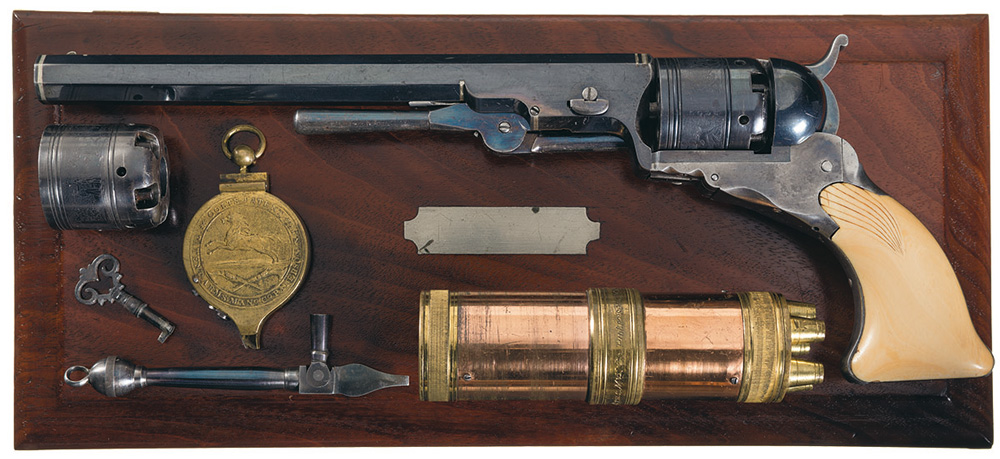
While not as storied as some Colts, the first commercially successful repeating firearm, nonetheless, left its mark on the West. Patented in 1836 and produced until 1842, just a little more than 2,000 of the cap-and-ball revolvers were manufactured. Despite their limited numbers, the Colt Patersons found their way into a number of definitive conflicts in the mid-1800s.
Among the most storied was the Battle of Bandera Pass, which marked the turning point of the Texas-Indian wars. In the early 1840s fight, 50 or so Texas Rangers, led by legendary Captain John “Jack” Hays, routed a vastly superior force of Comanche, thanks in large part to their five-shot Colt Patersons.
This wasn’t the only time Hays prevailed against overwhelming odds due to the revolver. Previously in the Battle of Walker Creek and his Big Fight at Enchantment Rock, the Paterson proved its worth. While the revolver came in many calibers, the .36-caliber No. 5 became known as the “Texas Patterson” for its use by the Rangers.
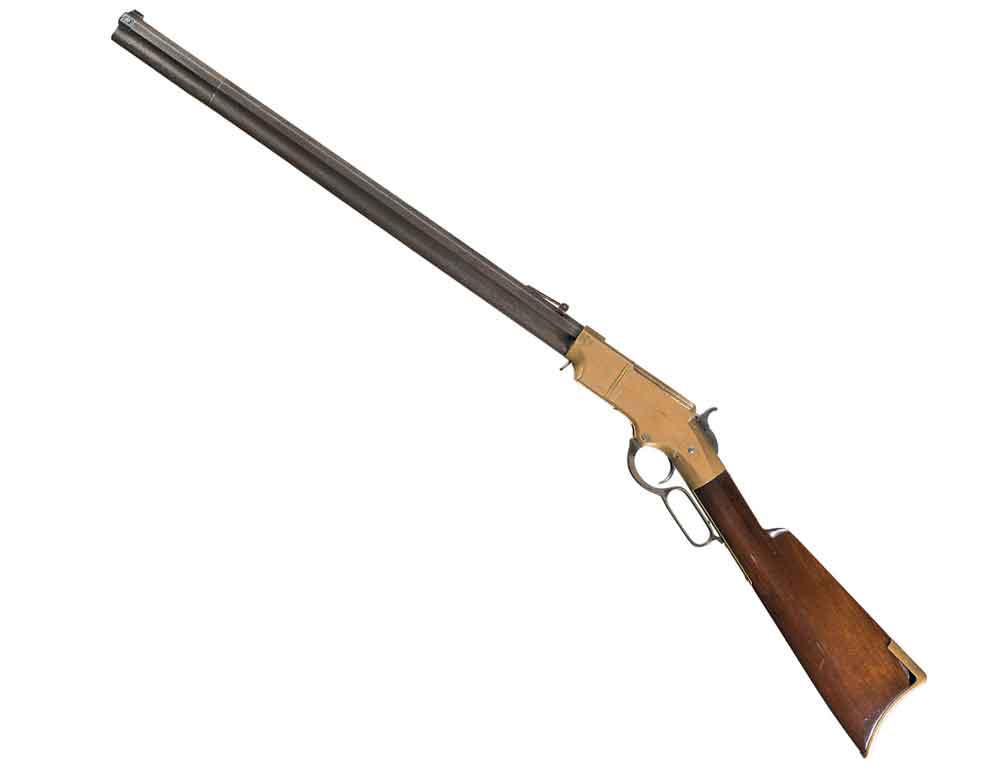
Though limited in use, the 1860 Henry proved itself a wicked weapon in the Civil War. But its devastating effect was perhaps best demonstrated in another heralded American battle — the Little Bighorn.
Armed with the brass-receiver beauties, among other repeaters, Sioux and Cheyenne Warriors utterly devastated the 7th Cavalry. Some archaeological evidence points to 134 firearms in the hands of the Indians, 62 of them Henrys.
The cavalry, on the other hand, was armed with single-shot Springfield Model 1873 rifles firing the now-notorious copper cartridges — known to expand and jam the breech. So it seems George Armstrong Custer and his men weren’t only outnumbered that late June day, they were also vastly outgunned.
Beyond formal conflict, the Henry was a mainstay among many pioneers during westward expansion. Its 15 rounds of .44 Henry rimfire not only proved adequate for protecting a homestead or scaring off cattle rustlers, but also bagging the odd deer.
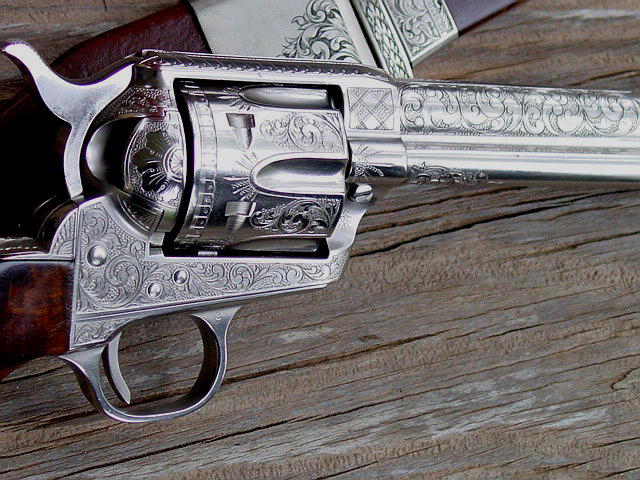
Colt Single Action Army
No other gun sums up the Wild West like this Colt. Introduced in 1873 originally as a Cavalry revolver, the Single Action Army spread across the frontier like a prairie fire.
Perhaps no single gun hung off the hips of more cowboys, lawmen and outlaws than this revolver. The likes of Wyatt Earp, John Selman, John Wesley Hardin, Bat Masterson and many others all favored the Colt and for good reason. The revolver was well balanced, provided a fast rate of fire and superior ergonomics. To the last two points, the six-gun’s design allowed it to rock back in the hand upon firing, setting the shooter up to cock the hammer for his next shot. On top of that, the Colt SAA packed a wallop, particularly in its most prominent chamberings — .44-40 WCF and .45 Colt.
The Colt SAA wasn’t infallible, however. Slow on the reload and only able to be safely loaded with five rounds (unless an hombre wanted to lose a pinky toe), the gun could quickly be out of the fight and slow to reenter. But in competent hands, and there were many, there was no deadlier weapon on the American frontier.
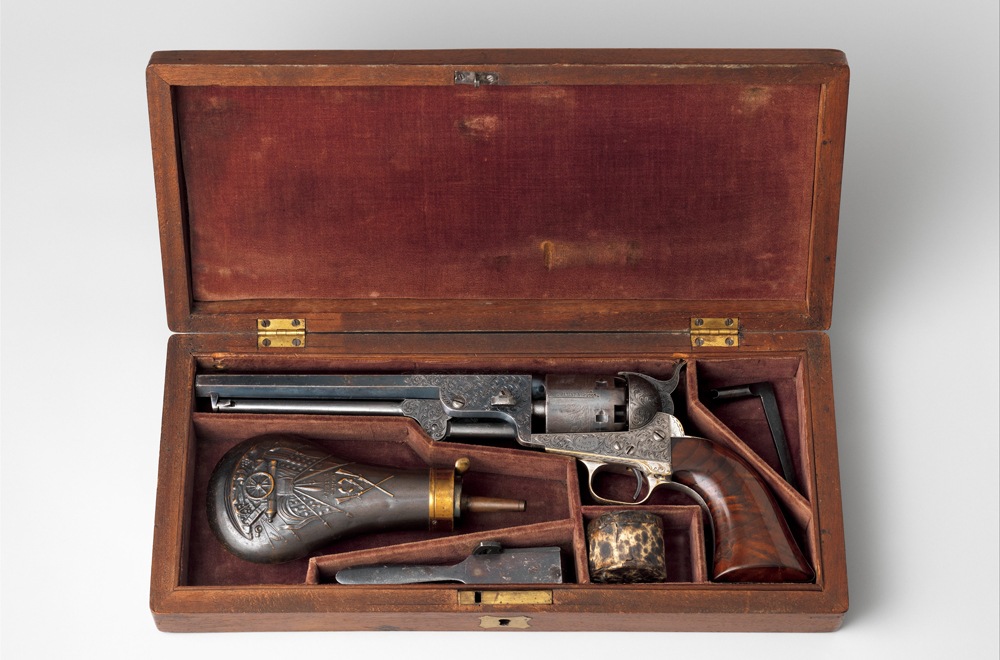
Colt 1851 Navy
Named for the Republic of Texas Navy, ironically, this gun saw little action on the high sea. But on the vast American frontier, the handsome six-gun was among the most prolific cap-and-ball revolvers. Some quarter of a million were made between 1850 and 1873.
Though on the surface it doesn’t appear so, what made the gun so desirable, aside from its smooth handling and potency, was its portability. Designed as a sidearm, the 1851 Navy was much lighter than similar revolvers — the Walker Colt and Colt Dragoon. In turn, an hombre could easily keep this peace of mind at hand out of the saddle.
In its cap-and-ball form, the Navy was a .36-caliber gun, but toward the 1870s a number of the revolvers were converted to accept .38-caliber metallic cartridges. The 1851 saw prolific use in the Civil War and across the West. Robert E. Lee carried a Navy while serving with the 2nd Cavalry in Texas, and it was the preferred revolver of no less than James “Wild Bill” Hickok.
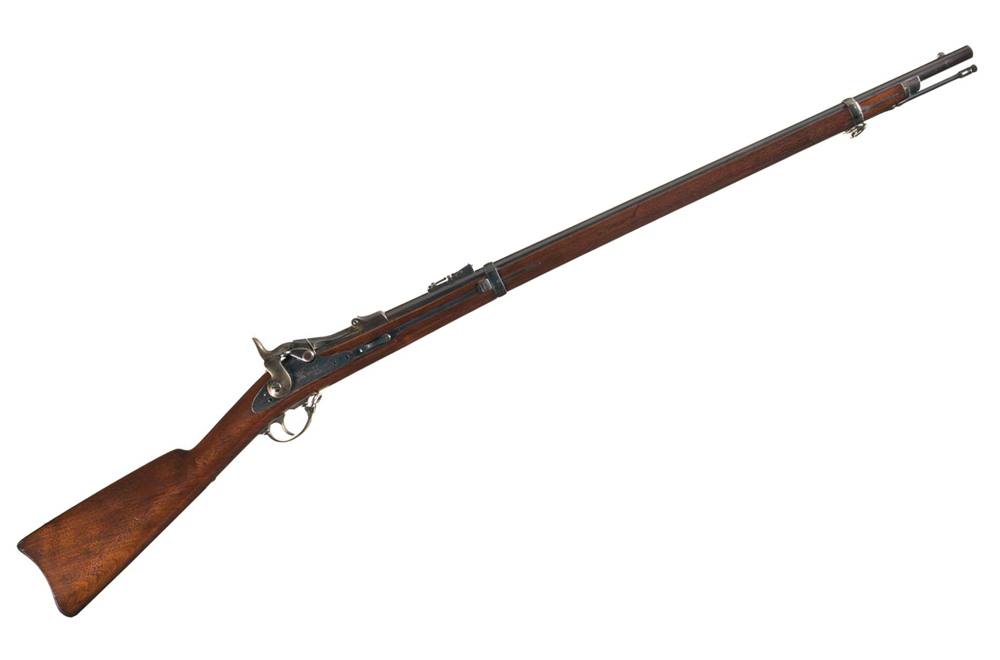
1873 Springfield Trapdoor
In an age filled with some of the most iconic repeaters to ever drop a hammer, the Springfield Trapdoor seems downright frumpy. The single-shot rifle, however, was among the most plentiful firearms out West.
This is primarily due to it being the U.S. Army service rifle for the better part of the American age of expansion (1873 to 1892). It was a mainstay for both sides of the intermittent conflict known as the Indian Wars and a fairly solid rifle once the bugs were worked out.
Its main sticky point, literally, was the rifle’s early ammunition. The Trapdoor initially shot .45-70 Government ammo loaded in copper cases, which, when heated, expanded and had a tendency of jamming the breech with devastating consequences. Many blame this flaw as one of the reasons the 7th Calvary was routed at the Little Bighorn.
Custer’s last stand prompted the Army into action and eventually to adopt brass cases, which made all the difference in the world. The .45-70 round itself was more than enough to handle anything a soldier set his sights on out to 1,000 yards. And given this potential, the Army began to emphasized marksmanship. Shooting practice and, eventually, competitions became a more regular part of training, preparing soldiers to use the rifle with crack-shot accuracy on the open prairie.
Arguably the most famous and recognizable rifle of the Old West, the 1873 is a true icon of the frontier. The iron-framed, lever-action rifle was ideal in a saddle scabbard or at the homestead, ready to take care of any chore a revolver couldn’t handle. And plenty of good and bad men had chores for the 1873, with the likes of William F. Cody, the Texas Rangers, Billy the Kid, Butch Cassidy and a long list of other Western notables employing the rifle.
In addition to its ease of use and low maintenance, what made the 1873 a success was Winchester chambering it for a number of its proprietary pistol ammunition — .44-40, .38-40 and .32-20. This took a load of burden off a buckaroo during a period when logistics were not at the top of their game. A fella never knew when a desperado might highjack the latest ammunition delivery heading to the local general store thus leave a pistol or rifle high and dry.
The rifle was also awash across the West, with some half-million manufactured before the turn of the 19th Century. Honestly, no self-respecting lawman, rancher or outlaw would be caught without one.
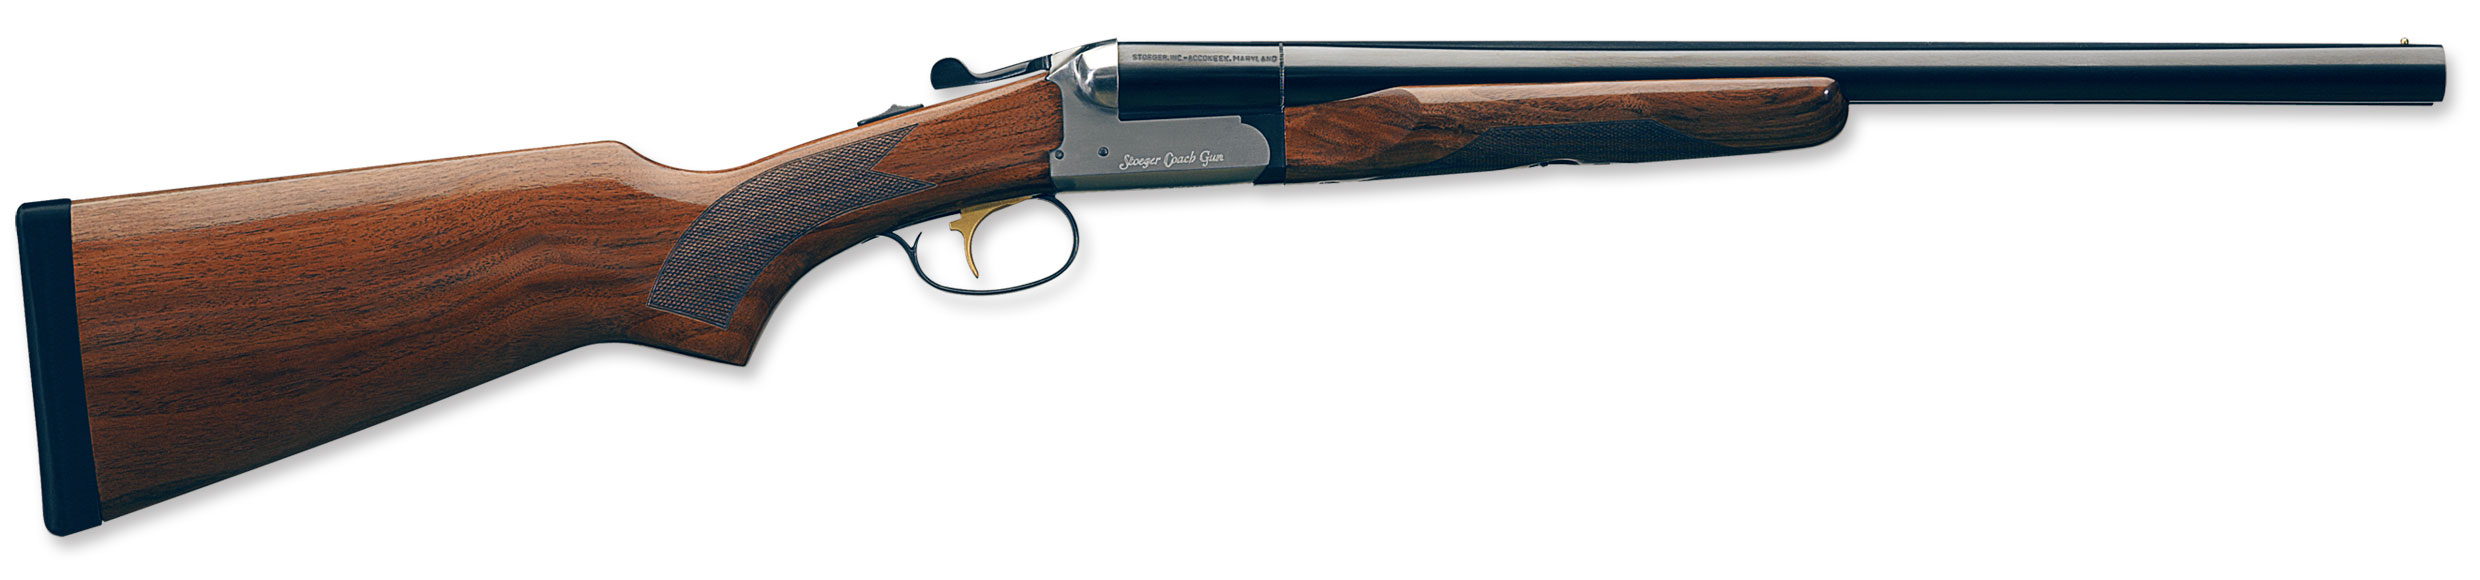
Double-Barreled Shotgun
New take on the old gun. The Stoeger Coach Single Trigger Supreme.
Certainly, the 1873 Winchester Rifle and Colt Single Action Army were as abundant as tumbleweeds out West; but they most likely paled in numbers to the simple double-barreled shotgun. The firearm was ubiquitous, brought in droves by pioneers heading for new lives in the West.
Double-barreled shotguns came from all corners of the globe, many rolling out of local blacksmith shops. And they made a lot of sense as a tool to tame the land, given their flexibility. Capable of bagging nearly any game known to man — be it covered in fur or feather — the shotgun also doubled as one of the most notorious defensive arms ever to bare a trigger.
There was a good likelihood every lawman had one at hand and they were heavily utilized to guard stagecoaches in their shortened coach gun variation. But the double-barrel shotgun was also the stock-in-trade for some of the wickedest men to roam the West. “Deacon” Jim Miller, for one, cottoned to the brutal instrument and used it to devastating effect on a number of occasions.
Sharps Rifle
Uberti USA’s take on the 1874 Sharps. Photo: Uberti
While it saw its share of military battles and the odd lawman might have one at hand, the venerable Sharps left its mark on the West in a much different fashion than many of this era’s storied firearms — hunting. During the hide-hunting era of the American frontier, the powerful single-shot rifle felled more buffalo than perhaps any other firearm. It was ideal for the task.
Chambered for powerful rounds such as .50-90, .50-110 and .45-70, the falling-block rifle was reasonably accurate, allowing hunters to harvest buffalo at relatively long ranges. This is a black mark against the rifle today, with commercial hunting typically blamed for pushing the prairie behemoth to the brink of extinction.
Even with the ballistics to drop a buffalo more than 1,000-yards out, there is modern research that points more to disease than the Sharps and other big-bore rifles in the animal’s disappearance. Either way, the rifle still had an impact — be it large or small — and today is considered by many as iconic in the West as the Colt SAA and Winchester 1873.
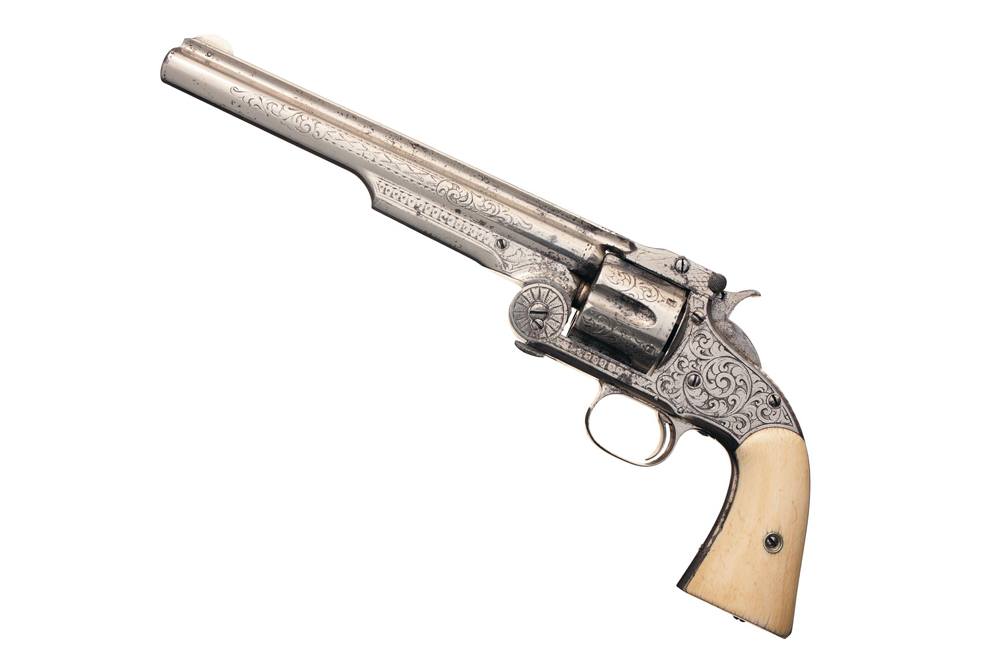
The first revolver that fired metallic cartridges adopted by the U.S. Military, it didn’t take long for this break-top beast to catch on with good and bad men alike. From lawmen like Pat Garrett to outlaws such as John King Fisher, the Model 3 delivered the goods.
Chambered originally in .44 S&W — later in other .44-caliber variants, as well as .38 — the six-shooter offered more than enough power to take care of even the most stubborn adversary. On top of that, it was fast to reload. Opening from the top to expose all six cylinders, a gunslinger could quickly get the single action back into a fight.
This was a distinct advantage in an era where old cap-and-ball revolvers were still prevalent. Even the beloved Colt Single Action Army couldn’t beat out the Model 3 since it had to be reloaded one cartridge at a time.
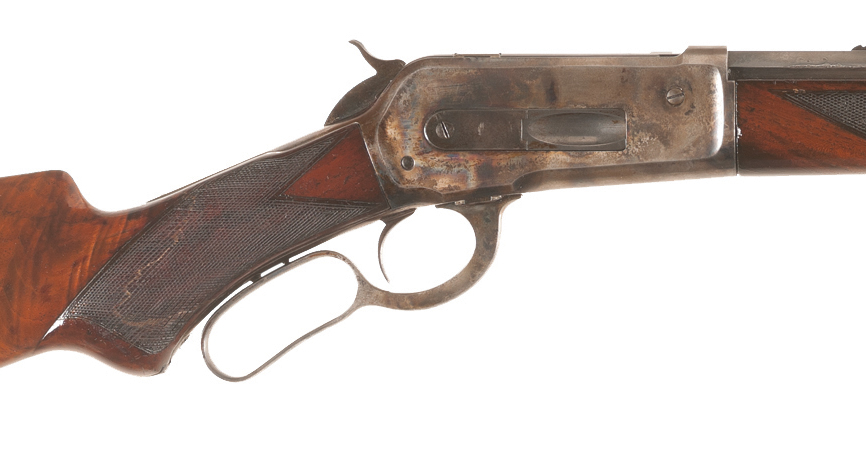
John M. Browning, of course, left a mark on the Old West, perhaps no more so than with his first repeating rifle with Winchester. A stronger rifle than the Model 1876, with vertical locking bolts, the ’86 was also sleeker and easier to handle. And it vastly outgunned the majority of repeaters of the day, shooting some of the most powerful big-game cartridges around (and well) — .45-70, .45-90 and .50-110.
Perhaps best of all, it added a dimension of firepower to the equation with the lever action’s nine-round tubular magazine. In one fell swoop, the single-shot rolling-block rifles were outclassed and obsolete on the hunt. But it wasn’t only hunters who saw the benefit of the massive and powerful Model 1886.
Bob Dalton of the notorious bank and train robbing Dalton Gang is reported to have carried the lever action. And a number of the hired Texas killers — known as the “Invaders” — utilized the rifle in Wyoming’s Johnson County War.
With five new riflescopes and three red-dot optics, Bushnell’s Tac Optics line is designed to get shooters on target no matter their range.
What does Bushnell’s new Tac optics line bring to the table:
With prices from $360 to $1,446, the Tac Optics line has options for every budget.
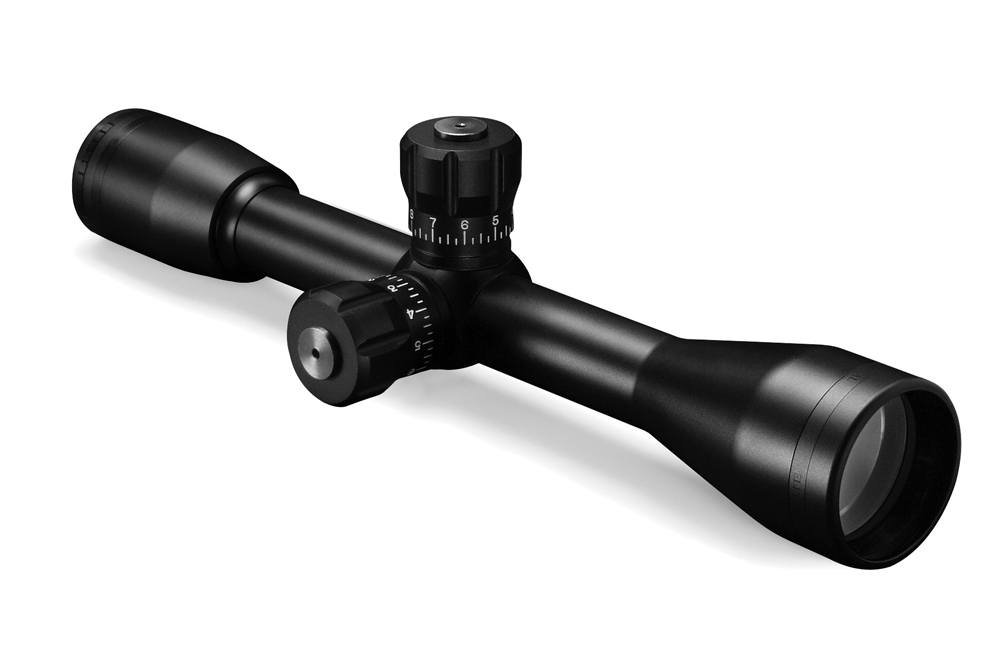
The riflescopes have power range options including 10x, 5-15x, 6-24x and 4.5-30x.
They are outfitted, depending on model, with 40mm or 50mm objective lenses.
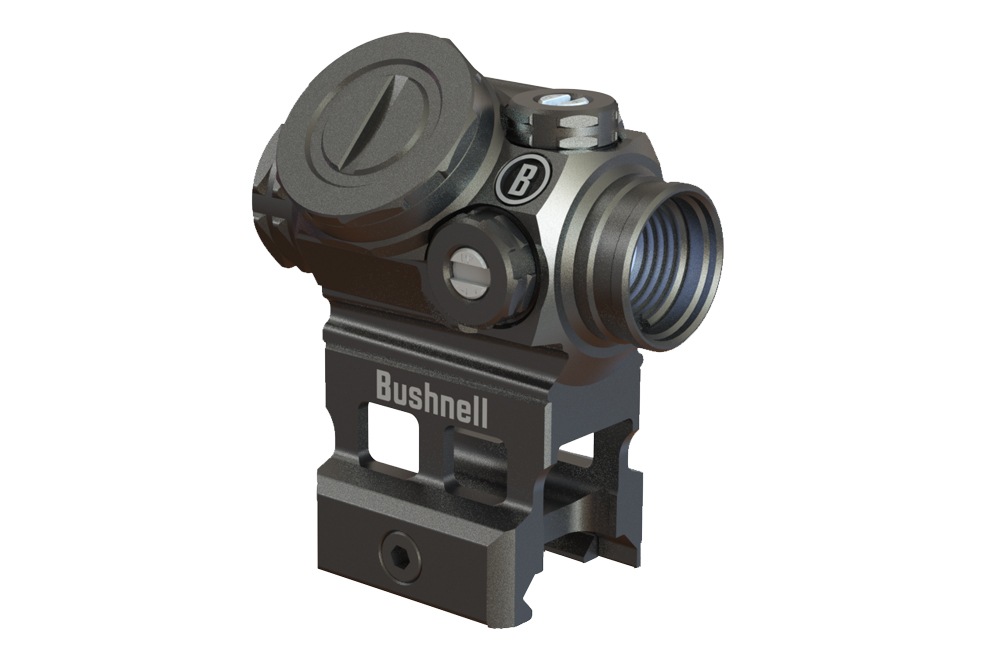
There are three Tac Optics red dots: Mini Cannon, Lil P(rism) and Big D(ot).
The Mini Cannon offers four reticles, the Lil P(rism) is among the smallest prism sights available, and the Big D(ot) offers an extended field of view.
Iron sights… it’s tough to beat them. They are ready for action the moment a shooter is and provide practical accuracy and speed to those who know how to handle them. But even with the advantages the rock-solid and age-old aiming solution offers, modern technology has enhanced the shooter’s ability to hit a target or targets, more precisely and with greater rapidity than ever before.
Photo: Bushnell
Optics, in every shape and size, have revolutionized modern shooting, making marksmen — whether close or long range — more efficient. This is especially true when it comes advancements in optics tailored to get the most out of AR-15-style rifles and other tactical arms. Bushnell Optics has turned an especially studied eye to this corner of the shooting world in 2018, introducing a new scope and red-dot optics line engineered to milk the most out of today’s most popular semi-automatic rifles.
The Tac Optics line is a full-spectrum family of eight aiming solutions, covering every conceivable shooting situation and range. And with prices ranging from around $360 to $1,446, the line has an option to fit nearly every budget.
For the most part, Tac Optics riflescopes are adjustable power, with 5-15x, 6-24x and 4.5-30x options. The company ensures each optic has the ability to keep pace with its magnification, outfitting them with generous 40mm and 50mm objective lenses and multi-coating all lens surfaces to enhance image delivery. And they are set up with, depending on the model, standard Mil-Dot reticles.
The exceptions are the 6-25x50mm Tac Optics scopes, which come with the option of an illuminated Mil-Dot reticle or an elaborate G2 reticle. These scopes are ideally set up to take full advantage of their reticles, given both have them placed on the first focal plane, and are thus usable no matter the magnification. Uniquely, the new line also boasts a fixed-power option (10x) with a 40mm objective lens that is ideal for those who embrace a much simpler system.
Photo: Bushnell
Each Tac Optics scope features well-sized turrets with ample adjustment for windage and elevation — 50 to 120 MOA. And weighing from 15 to 27 ounces, the scopes aren’t overburdening even on the lightest rifle setup.
Bushnell has also released three new red-dot optics in the Tac Optics line: the Mini Cannon, Lil P(rism) and Big D(ot). Each is designed to deliver superior battery life and bring a little something different to the table. The Mini Cannon offers the versatility of four reticle options at the push of a button. The Lil P is one of the industry’s smallest prism sights now available. And the Big D delivers an extremely large field of view with its massive 37mm objective lens.
The TAC Optics red dots are shockproof and feature adjustable brightness settings to adapt to whatever lighting conditions a shooter might face. The 1x optics are also unobtrusive, weighing in at 7 to 13 ounces.
Specifications:
Tac Optics 10x40mm Magnification/Objective: 10x 40mm Reticle: Mil-Dot Focal Plane: N/A Elevation Travel: 85 MOA Windage Travel: 85 MOA Elevation Per Revolution: 10 MOA Tube Diameter: 1 inch Eye Relief MAX Power: 3.4 inches Field of View: 10.5 inches at 10x Weight: 15 weight Length: 11.8 inches MSRP: $361.95
Tac Optics 4.5-30x50mm Magnification/Objective: 4.5-30x 50mm Reticle: Mil-Dot Focal Plane: Second Elevation Travel: 120 MOA Windage Travel: 70 MOA Elevation Per Revolution: 12 MOA Tube Diameter: 30mm Eye Relief MAX Power: 3.8 inch Field of View: 22 inches at 4.5x/4 inches at 30x Weight: 21 ounces Length: 13.4 length MSRP: $1,352.45
Tac Optics 5-15x40mm Magnification/Objective: 5-15x 40mm Reticle: Mil-Dot Focal Plane: Second Elevation Travel: 50 MOA Windage Travel: 50 MOA Elevation Per Revolution: 12 MOA Tube Diameter: 1 inch Eye Relief MAX Power: 3.4 inches Field of View: 21 inches at 5x/7 inches at 15X Weight: 21 ounces Length: 14.3 inches MSRP: $650.95
Tac Optics 6-24×50 Illuminated Mil-Dot Magnification/Objective: 6-24x 50mm Reticle: Illuminated Mil-Dot Focal Plane: First Elevation Travel: 80 MOA Windage Travel: 80 MOA Elevation Per Revolution: 5 Mil Tube Diameter: 30mm Eye Relief MAX Power: 3.4 inches Field of View: 17 inches at 6x/4.5 inches at 24x Weight: 27 ounces Length: 13.8 inches MSRP: $1,446.45
Tac Optics 6-24×50 G2 Magnification/Objective: 6-24x 50mm Reticle: G2 Focal Plane: First Elevation Travel: 80 MOA Windage Travel: 80 MOA Elevation Per Revolution: 5 Mil Tube Diameter: 30mm Eye Relief MAX Power: 3.4 inches Field of View: 17 inches at 6x/4.5 inches at 24x Weight: 27 ounces Length: 13.8 inches MSRP: $1,408.45
The dream of many hunters is testing their skills, and nerves, against some of the world’s most dangerous game. But such a potentially harrowing endeavor isn’t something a greenhorn just jumps into — unless they have a death wish. That’s where FTW Ranch comes in. Nestled in the Texas Hill Country, the expansive facility hones hunters to face game of the most treacherous type.
This week, Modern Shooter goes on safari to the premier shooting school to get a first-hand lesson on the shooting and decision-making skills required to take aim at the world’s most deadly creatures. And the team quickly picks up that the FTW method is much more intensive than simply dropping rounds on photo-realistic targets in a controlled range environment.
In the above clip, Phil Massaro gets behind the business end of a Krieghoff.458 Win. Mag. over/under to participate in a simulated Cape buffalo charge. Though a seasoned African hunter, the Gun Digest author, and custom ammunition manufacturer shows exactly how perilous tangling with these critters can be. Certainly, it’s not as real as Africa, but it’s as close as you’ll get here in the states.
Constantly evolving, now available is the Magnum Research BFR .444 Marlin. It’s a heavy hitter with a classy-looking bisley grip.
What to know about the new Magnum Research BFR:
Magnum Research’s latest iteration of its BFR is chambered in the potent .444 Marlin.
The BFR has an excellent trigger, which breaks around 3 pounds.
BFRs come drilled and tapped for optics mounting.
The gun comes equipped with an excellent, Bisley-style grip.
It’s available at pretty good price: $1,184.
I noted some years back that the long-framed BFR (Big Framed Revolver) possessed “comic book proportions.” Some folks took exception to my remark as being somewhat derogatory, no matter how I meant my comment to be interpreted. It looks like the revolver was grabbed by the barrel and by the grip and stretched to accommodate a host of long-cased rifle cartridges. Hence the previous comment.
What I didn’t tell you then, but I’m compelled to tell you now, is that the long-framed BFR, irrespective of chambering, is a well thought-out, well-executed and exceedingly accurate precision hunting revolver that balances surprisingly well.
There have been some subtle yet significant refinements over the years, and this latest version is the best one ever. Previous iterations utilized a number of Ruger-sourced internal parts, but those days are behind Magnum Research as they are now producing all BFR parts locally. The trigger guard has been lowered and moved forward approximately 1/8 inch to allow for more room for a gloved trigger finger, and the increase in space between the shooter’s middle knuckle and the trigger guard during recoil makes for a much friendlier shooting experience.
You might also notice the new hammer profile, allowing easier gloved manipulation and decreasing the chances of your glove getting pinched between the hammer spur and the frame. Note that these are Minnesota cold weather concessions! The steady evolution of the BFR indicates that the Magnum Research management is actually listening to the consumer.
A Mission For The .444 Marlin
When it comes to hunting revolvers, my preferences have always leaned toward compact size and pack-ability (that’s a technical term). For me, this has always been a big part of the allure of handgun hunting. While I’ve dabbled occasionally deliberately in the long-framed BFRs in the past, I recently went to the Dark Side and ordered up a long-framed BFR in .444 Marlin, a cartridge that’s not nearly as popular now as it was years ago. But this was no ordinary test I was conducting. No, I wanted a revolver for plains game hunting in South Africa, where my shots would likely be at longer range, benefitting from a flatter shooting cartridge in a platform that could better take advantage of the .444’s attributes.
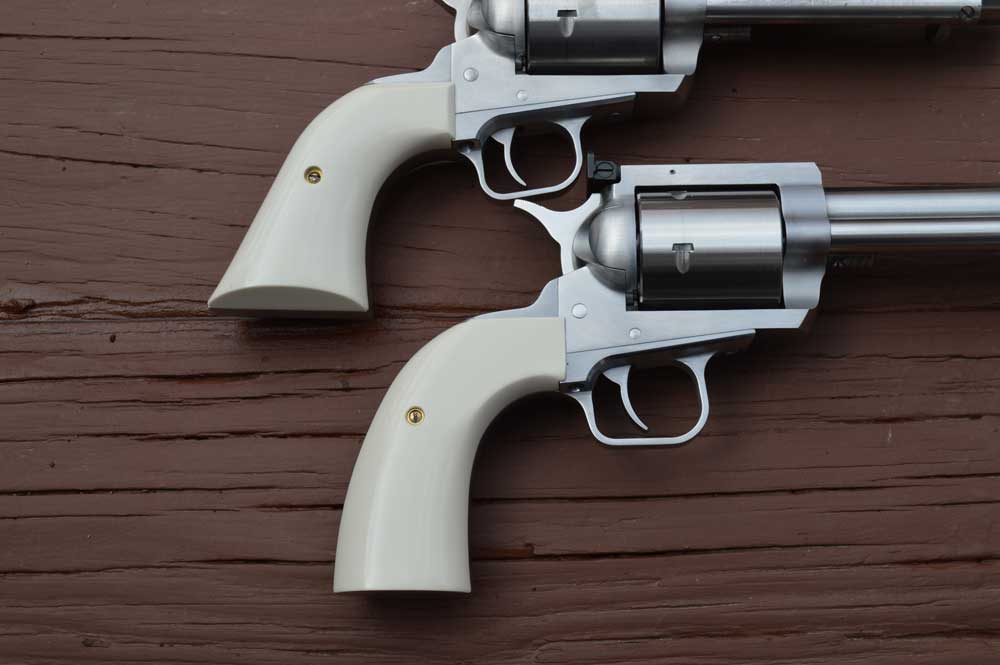
I specified a 10-inch barrel to get the most of the high-velocity potential of the .444 Marlin, along with Magnum Research’s new Bisley grip frame, a recent addition in response to all of the requests for a Bisley-type grip. I also specified black Micarta grips to hang on to, a tough yet attractive grip material that’s perfect for the less-than-ideal conditions one often encounters in the field, as they are impervious to inclement weather, blood, chemicals, etc.
A Bisley By Any Other Name
A note about Magnum’s Bisley: I have heard grumblings from some on the Internet that the BFR Bisley is not a true Bisley as far as the design is concerned. I would remind critics that the more well-known Bisley by Ruger is also an interpretation of the design that originated with Colt as a target-style grip named after a range in England. They’re both interpretations of the original design and a better execution in this author’s opinion.
As with Ruger’s version, Magnum’s Bisley was designed to better control and mitigate the effects of heavy recoil. Unlike Ruger’s Bisley, however, Magnum Research has provided ample room between the shooter’s knuckles and the trigger guard, all but removing the threat of busted knuckles and the potential for developing a flinch as a result. In separate testing, I offered my abusive .500 JRH BFR to a couple of novice shooters to try, and they were impressed with the ease with which they handled the heavy recoil due to the Bisley’s superior design. Yes, it’s that good.
Custom Care
The revolver came from Magnum Research’s custom shop, the Precision Center, and arrived with the fit and finish I have come to expect from them, but the most pleasant surprise was the creep-less, glass-rod-like break of the Precision Center-tuned trigger. When tested, it broke at precisely 3 pounds. The man who does the action tuning for Magnum Research deserves a full commendation for such a smooth and pleasure-inducing action, and it’s by far the best trigger I have ever received from a revolver manufacturer. I cannot overstate the importance of a good trigger to build confidence and competent shooting.
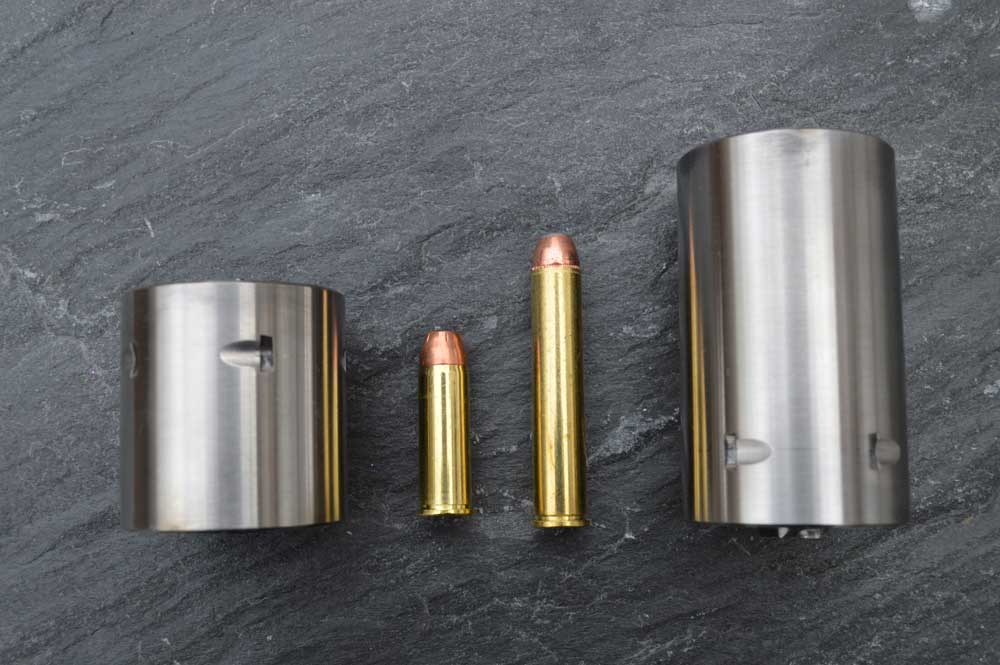
The entire revolver is constructed from tough 17-4PH stainless-steel and, like all BFRs, comes with a five-shot counter-bored cylinder — a nice detail that allows for a partially loaded cylinder to be safely shot without fear of frame/loading gate damage from unsupported case heads. Another nice feature is the freewheeling pawl, which allows for easier loading and unloading, as the cylinder will rotate in either direction when the loading gate is open. This is an invaluable feature, particularly in the field where sometimes you need to top your revolver off in a hurry.
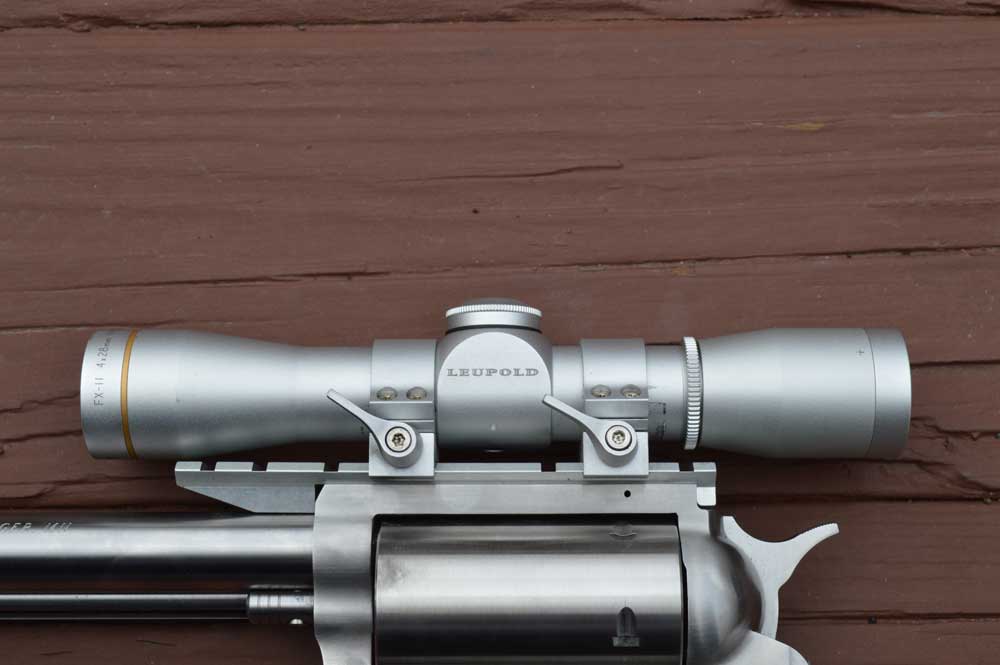
Optics-Ready Options
Because my intent was to perhaps shoot at ranges previously treated by me as outside of my comfort zone, I planned on equipping my new BFR with a scope of some sort. A fixed four-power Leupold handgun scope got the nod, mounted on the Magnum Research-provided scope base. BFRs all come drilled and tapped for optics if the owner so chooses. The excellent Weaver-style base comes with the three necessary mounting screws and is a snap to affix. Attaching the scope to the base are a pair of Leupold quick release rings.
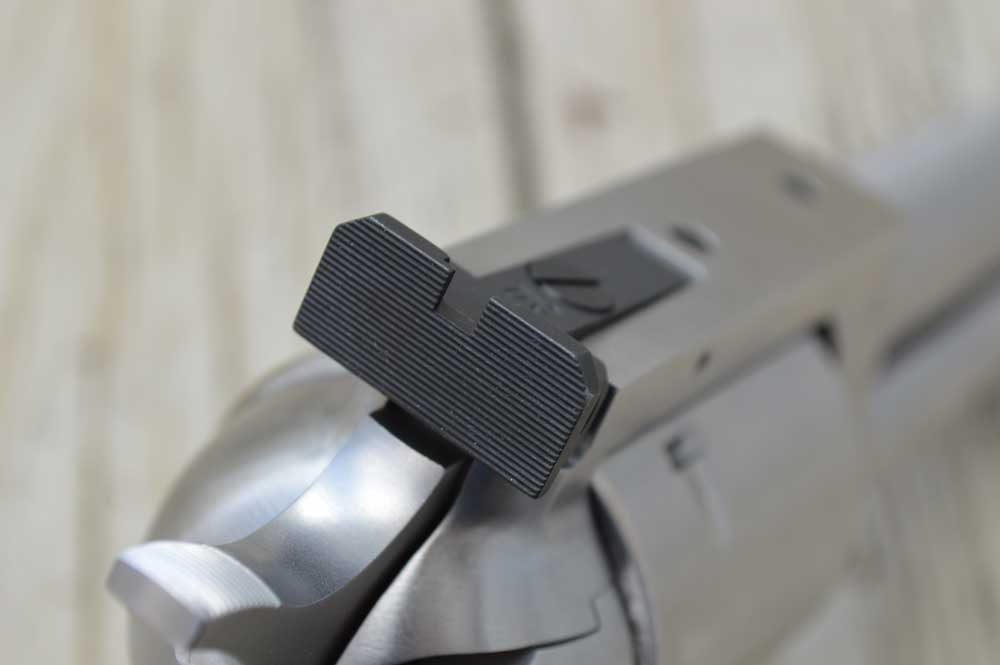
Despite my optical enhancements, the BFR comes with an excellent adjustable rear sight sourced from LPA that is a vast improvement over the old Ruger piece and provides a sharp sight picture. I chose a four-power scope to give me significant magnification without exaggerating my wobbles more than necessary! Though, truth be told, it took me some time to get really comfortable shooting with the glass installed.
A Cartridge Of The Kings
If you are unfamiliar with the .444 Marlin, this is a cartridge that was designed by the powers that be at Marlin for use in lever-action rifles. In essence, the .444 Marlin is a .44 Magnum on steroids. The case is straight-walled and was lengthened nearly a full inch over the relatively diminutive .44 Mag. case and is rimmed like the .44 Mag.
While the maximum allowable pressure ceiling for the .444 Marlin (44,000 CUP) is considerably higher than that of the .44 Magnum (36,000 PSI), the .444 features a WHOLE lot more case capacity. Combine the two and you have the recipe for pretty impressive velocities. Like the .44 Mag., the .444 uses a .429-inch diameter bullet. A consideration with regards to bullet selection is that the velocities the .444 is able to generate require a much tougher bullet than the .44 Mag. It’s a fact of life.
Next on the agenda was gathering the limited number of factory loads available in this relatively eclectic cartridge. Due to the .444 Marlin’s limited popularity, I was only able to source a few different loads. However, I wouldn’t be discouraged or dissuaded from getting a BFR in .444 Marlin, as the few loads we were able to get our hands on did not leave us feeling like we needed something more.
Hornady offers LEVERevolution 265-grain FTX loads, and I sourced two different loads from Buffalo Bore Ammunition, a 335-grain hardcast load and a 270-grain JFP load. Keep in mind that Hornady does not recommend its .444 Marlin ammunition be used in a revolver because the thicker rifle primer cup might compromise ignition. That being said, I never experienced anything but reliable ignition with any of the above listed loads.
To fully exploit the capabilities of Magnum’s .444 Marlin BFR, one needs to handload. There are a number of powders available that are well suited to the relatively short barrel and cylinder gap such as IMR 4198 and Reloder 7. Monometal bullets, such as those from Barnes, Cutting Edge Bullets and Lehigh Defense, are well suited for this application and can withstand high impact velocities.
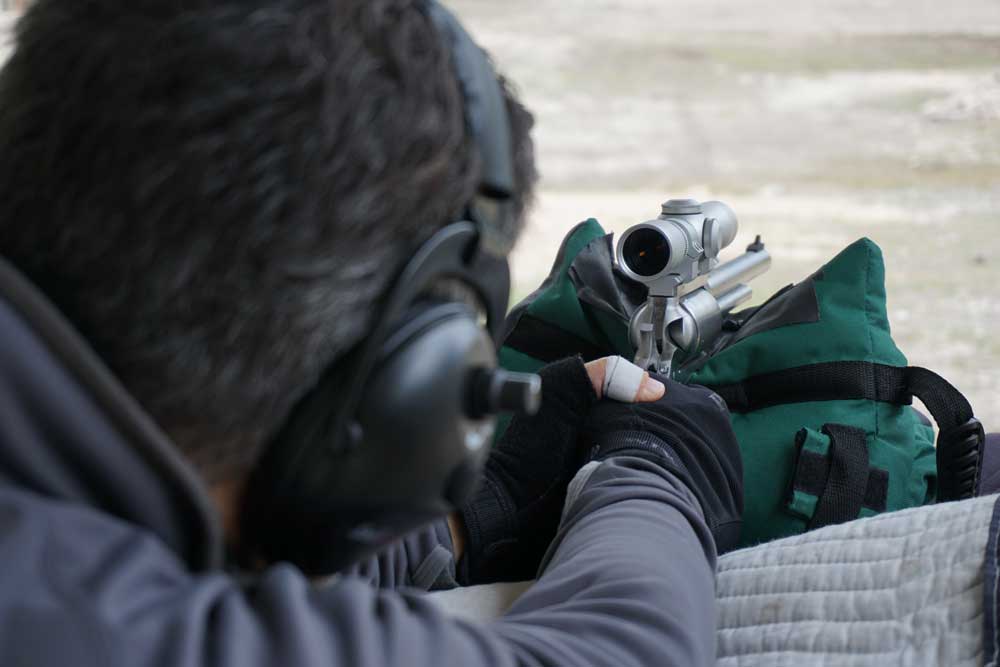
Amazing Accuracy
My first trips to the range netted great accuracy. Once I got the scope on paper, I pushed the targets out to 25 yards, then 50, and lastly, at a later date, 100 yards (see accuracy table). As long as I did my part, the BFR delivered. Because this revolver was slated to be my plains game firearm, I was pleased with the accuracy displayed and also surprised by the lack of recoil, particularly compared to the .45/70 BFRs I have shot rather extensively. The kick is there; it’s just not objectionable.
So what’s next? Practice, practice and some more practice. Also, I’m planning on stretching the .444 BFR out to 200 yards and even beyond. For a no-compromise, high-quality primary hunting revolver, look no further than Magnum Research’s latest BFR. This is a really tough combination to beat, offering performance and reliability at a pretty affordable price-point. Price is listed at $1,184.
Editor’s Note: This article is an excerpt from the January 2018 issue of Gun Digest the Magazine.
Remington revamps a classic with its new 870 DM line of mag-fed shotguns.
How has Remington revitalized one of the most popular shotguns of all-time with its new 870 DM?
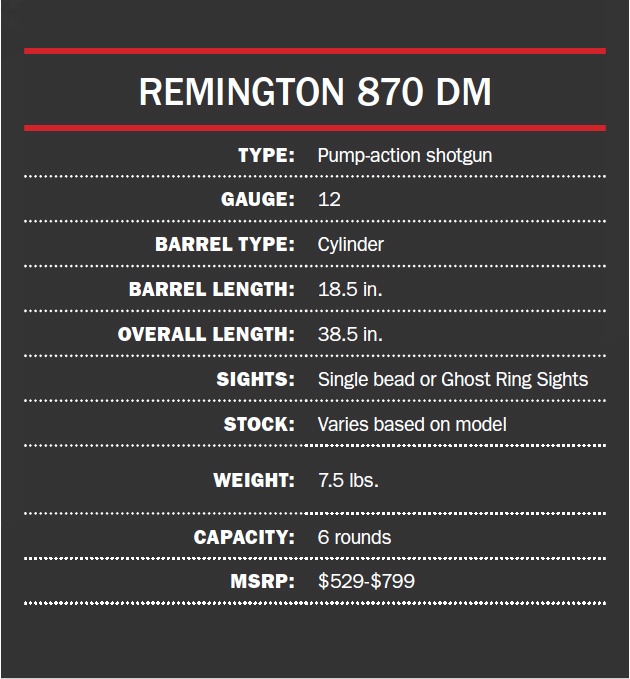
The 870 was introduced in the early 1950s and is the best-selling shotgun of all time
The newest variation — the 870 DM — features a detachable magazine.
The tested shotgun loaded easily and fed without flaw.
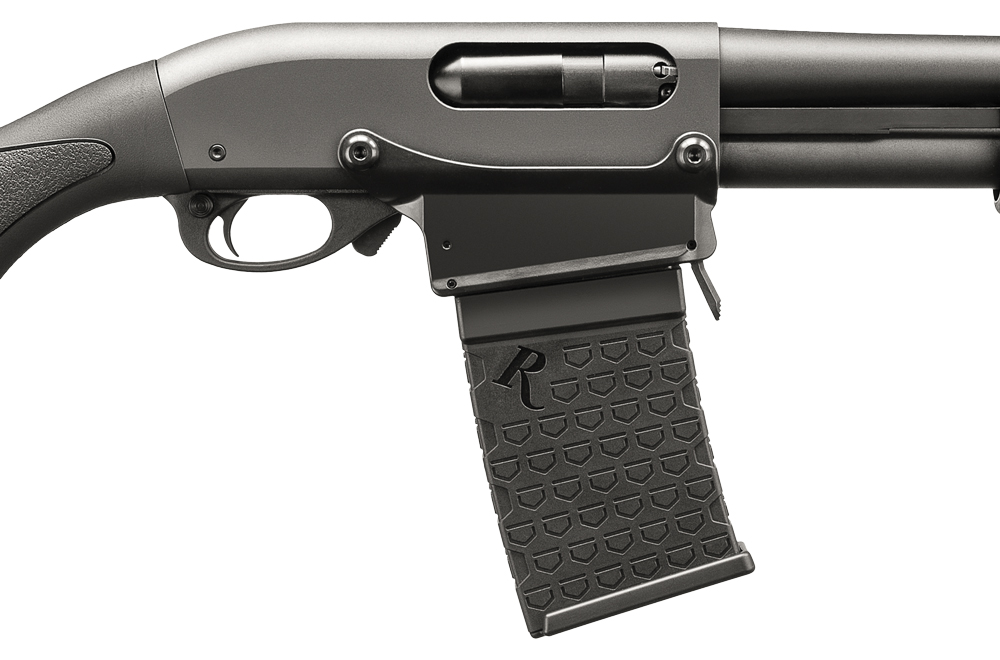
The magazine releases via a lever situated at front.
There are five models available ranging from basic to tactical and hunting models.
Anybody who knows anything about art knows about the Mona Lisa. Leonardo da Vinci’s most famous painting is recognized by most people on the planet and is reportedly insured for 800 million dollars. Most of us don’t know much about art, but we know what we like, and we like the Mona Lisa.
Likewise, anyone who knows anything about scatterguns is familiar with the Remington Model 870 pump-action shotgun. The Model 870 came to us in 1950 (some will tell you 1951) and went on to become the best-selling shotgun of all time, now numbering more than 11 million sold. American shotgunners know what they like, and they like the 870.
The Ever Popular 870
There are Remington 870 pump guns sitting in closets, gun cabinets and bedroom corners all over America. We’re on our third generation of hunters and shooters that grew up on an 870, and they have used it to shoot almost anything that walks, crawls or flys, from big bears to bobwhite quail. In fact, I would like to see all the ducks and geese in one pile that have been taken with a Remington 870!
Like most iconic firearms, the Model 870 has its own posse of fiercely loyal fans. I’m pretty sure there are devotees who light candles at an 870 shrine every night and probably think there’s no reason to ever change the basic design of this shotgun.
Or is there?
Why Would You Change An Icon?
Remington recently announced something most of us thought would never happen: They changed the basic design of the Model 870 and put a detachable box magazine on the most beloved shotgun since the Winchester Model 12. I didn’t hear about the sky falling anywhere, and I don’t think the earth tilted on its axis. The new version is called the 870 DM (detachable magazine).
“The 870 DM is a concept that came about during discussions on how we could advance the pump-action shotgun in some meaningful way,” said Daniel Cox, shotgun product manager at Remington. “We quickly found most people agreed the pump-action shotgun was one of the most reliable and versatile defensive firearms we have today. In these discussions, it became clear there was only one real opportunity to improve the pump shotgun as a defensive firearm. Pump-action shotguns have limited capacity and can sometimes be slow to reload under stress when compared to other common defensive firearms used today.”
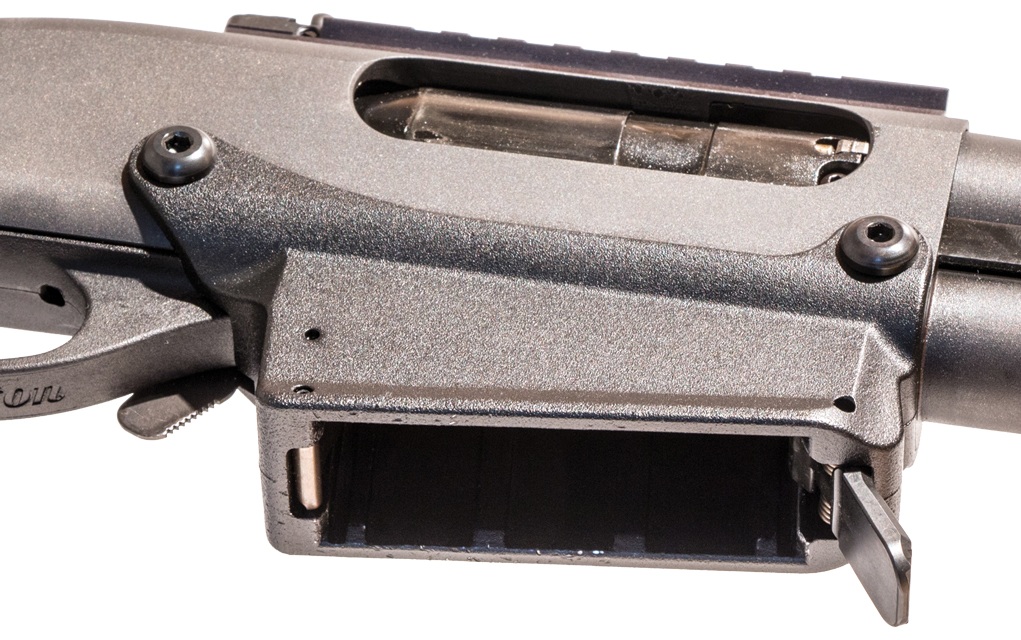
The 870 DM is more than just a conversion kit to permit the use of detachable magazines. Remington has been working on this project for years, and the action is definitely different than a standard 870’s action.
Cox went on to tell me Remington saw this as an opportunity to step out of the box and innovate to improve the pump-action shogun by offering a legitimate solution to this concern.
“The 870 DM is a pump-action shotgun that was designed to feed from a detachable magazine and not just a conversion kit on an existing gun,” he said. “This feature takes the venerable pump-action shotgun and allows users to load and reload it much faster and much more effectively right out of the box.”
Cox saying the new 870 DM is a pump gun that was designed to feed from a detachable magazine is important. Remington didn’t start this project yesterday; it has been going on for a few years. As far as making the existing 870 action convert to a detachable box magazine, don’t think for a minute that was easy. One engineer at Remington told me it was like “teaching a horse to fly.” Internally, the action of the gun is different, so there won’t be a conversion kit for the 870 you already have.
On The Range
Under full disclosure here, when I took the 870 DM to the range, I would’ve not been surprised to have some small glitch in the ammo feeding and functioning department. By that I mean it’s a new shotgun with a new concept with respect to the magazine — I expected there to be problems. This was not the case, and these may be words that I have to digest later, but to date I’ve not had a malfunction with the 870 DM. This has been through testing with several types of shotgun ammunition, including Remington, Aguila, Federal and Winchester.
When you fire the 870 DM and work the action, you will notice little difference in that of your Dad’s 870 Wingmaster. The magazine itself loads easier than I thought it would, and after a brief wearing in process the magazine inserted and released easily from the magazine well.
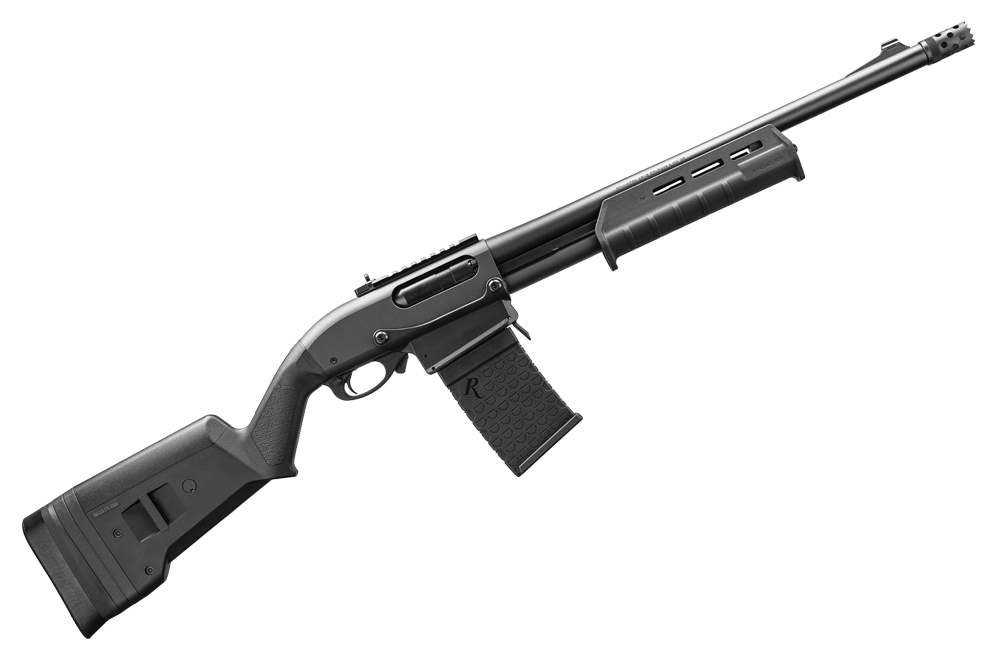
There are a total of five 870 DM models, each with varying furniture and designed for different purposes. Shown here is the Magpul variant, which features that manufacturer’s ergonomic SGA stock.
A word here on extraction of the 870 DM’s magazine: At first blush, I assumed the mag would drop out when the release lever was engaged, but the release lever is depressed and the magazine is stripped from the gun with the shooter’s support hand. Remington engineers had to deal with a gremlin: The pounding recoil in a 12-gauge shotgun (think 3-inch magnum loads) while keeping the magazine inserted in the gun for feeding and extracting concerns, and all the while having the magazine well with tolerances to easily insert and dump the magazine. An internal spring in the magazine well to hold the magazine in the proper position was the answer.
The furniture on this gun is by Magpul and features its ergonomic SGA stock, which means it feels good in your hand, is “grippy” and easy to hold on to, and the shape tends to get you down on the gun and into the sights quickly. The SGA stock is adjustable as to length of pull, which can be important for a defensive shotgun.
The sights on this first model of the 870 DM (there will be five models available: a Base Model, the MagPul model, a Kryptek Camo hunting model, a Base Hardwood model, and a Tactical Model with pistol grip and including an XS Sights Ghost Ring rear sight and a standard dot tritium front. The rear sight is mounted on an XS Sights Shortrail Picatinny-style rail. Target acquisition with this sight is very fast.
The Final Tally
There will be those who will say putting a detachable magazine on the 870 is a terrible idea. For a defensive shotgun, they will say the long magazine is in the way when things turn lively and you can hold just as much ammo in an extended magazine tube. Maybe so, but you can start the fight with seven rounds of buckshot in the gun (six in the mag, one in the chamber) and you can definitely reload a second magazine of six rounds faster than a standard tube-fed shotgun. These sort of arguments, like the Ford and the Chevy discussions, will be going on long after I am gone.
Defensive shotgun aside, some dyed-in-the-wool 870 fans will simply think it heresy to put a box magazine on this shotgun. They may think Remington painted a mustache on the Mona Lisa. I stand on the side that doesn’t see it that way.
This article originally appeared in the February 2018 issue of Gun Digest the Magazine.
From handguns to long guns, and from ARs to lever-actions, manufacturers have recently introduced a number of great new rimfire guns sure to satisfy any shooter.
I’ve never asked any successful shooters — of any discipline — how often they shoot a .22 LR without getting some form of overwhelming praise for the lowly “little” .22 LR cartridge. Developed in the late 1800s, the popular .22 LR is chambered in everything from low-priced utilitarian guns to precision target rifles and pistols costing several thousand dollars. It’s been used in Olympic shooting competition since 1924, and almost everyone who shoots has a portfolio of fond memories of shooting a .22 LR.
One of the most important attributes of the .22 LR is its utility as a training vehicle. Low cost, low noise and mute recoil make learning to shoot with a .22 LR fun and without intimidation. The utility is enhanced when the training firearm looks, feels and operates like the full-sized firearm that will eventually be a part of the program. In recent years, we’ve been blessed with all kinds of useful .22s, and I have my doubts this trend will slow anytime soon.
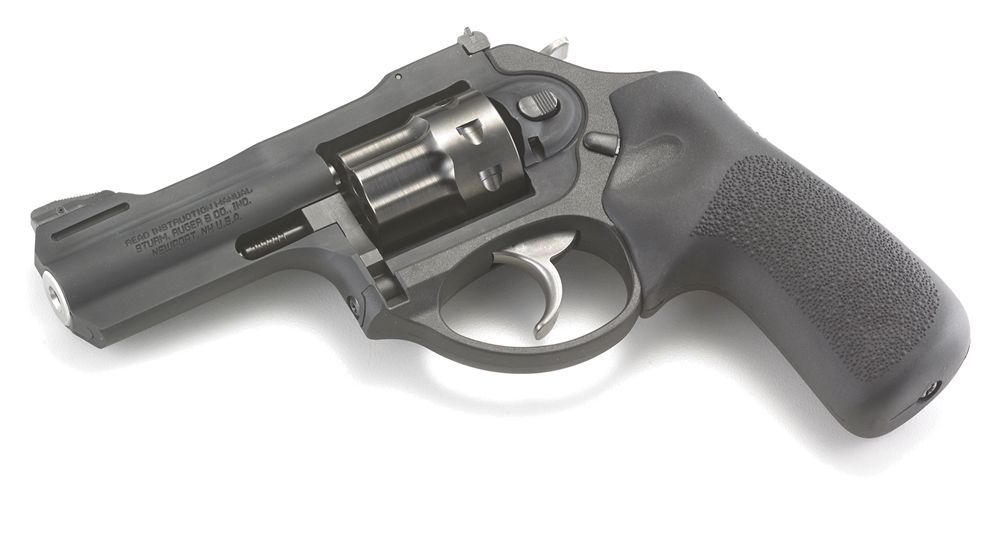
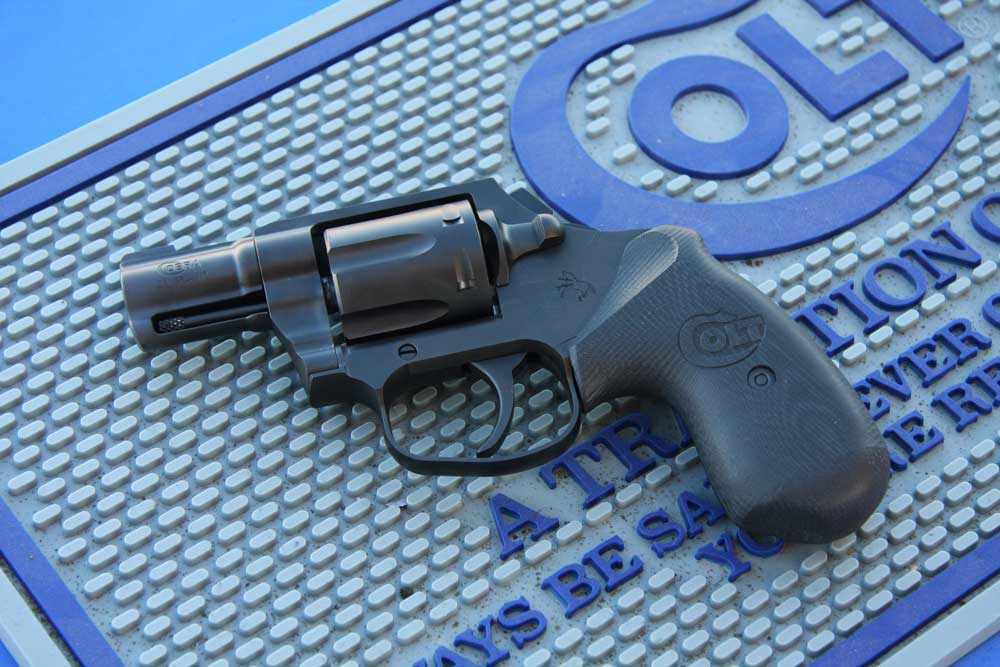
Ruger LCRx 3-Inch .22 Revolver
One of the first handguns I ever owned was a Smith and Wesson Model 34 Kit Gun. Released in 1953, the Kit Gun was a small-framed rimfire designed for carry any time adventure called, hence the name, “kit gun.” It was small, lightweight and available with a 2- or 4-inch barrel and adjustable sights, and Smith and Wesson recently put the Kit Gun back into the line as the eight-shot 317.
Ruger has now introduced its version of a personal adventure companion revolver in the form of the LCRx 3-inch in .22 LR. I was excited when I shot the LCRx 3-inch .38 Special a few years ago, and at that time I asked Ruger to do it in .22 LR. Apparently, I have more swing with the folks at Ruger than I thought, because it’s here.
While the Kit Gun it mimics had classic lines, the LCRx 3-inch is modern with a polymer/alloy frame and stainless-steel cylinder and barrel. The Hogue Tamer grip is comfortable and offers a pleasant grip in any weather condition. The rear sight is adjustable, as it should be, with a pinned ramp front sight. Capacity is eight rounds and the weight, at just over 17 ounces, is light enough to be unnoticeable on your hip or in your kit bag. MSRP is a reasonable $579.
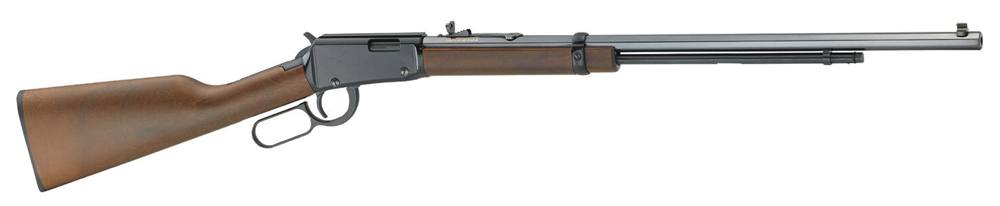
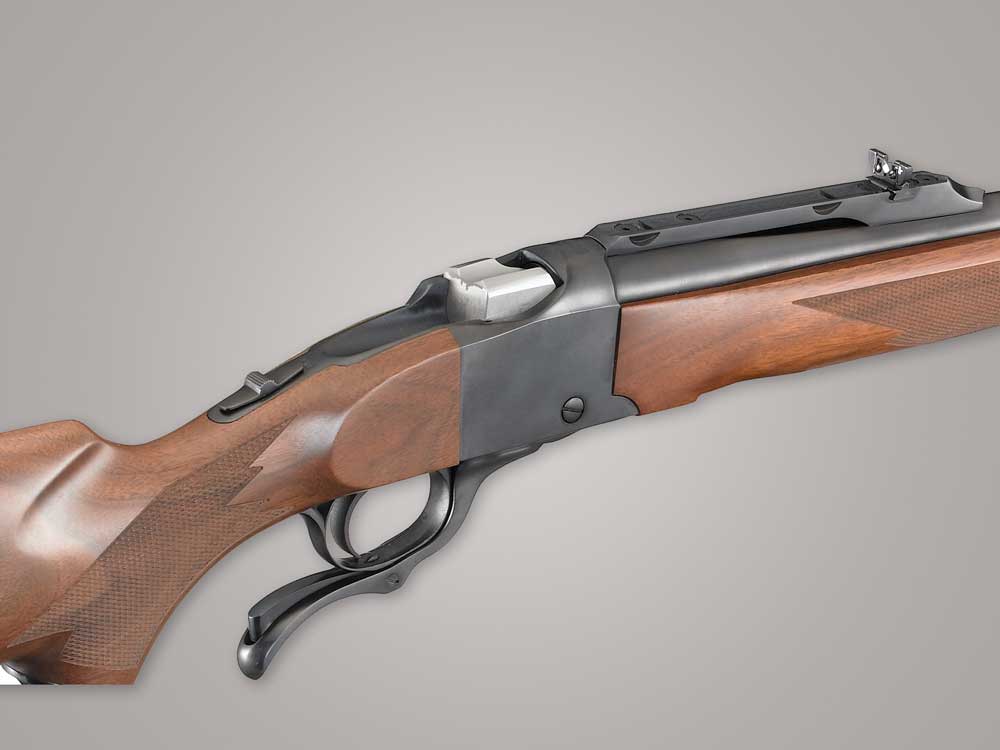
Henry Frontier Long Barrel 24”
Henry has been a smashing success in the modern firearms world. Beginning in 1996 with a couple of lever-action .22s reminiscent of the Winchester Model 92s I admired as a kid watching countless black and white westerns, the line expanded into centerfires and now includes a replica of the original Henry lever action that inspired the Winchester 66. The company has now grown into one of the most popular firearms companies in the United States … and for good reason.
In a world of high-tech tactical replica rimfires, the Henry Frontier 24” represents a simple and solid rimfire version of the kind of gun that truly won the West, and a lot of the Midwest to boot. The octagonal 24-inch barrel is slim and adorned with a post front sight and an adjustable semi-buckhorn rear sight. The black finish and satin-finished American walnut stock are unpretentious, but blend perfectly with the classic Model 92 lines. MSRP is $470.
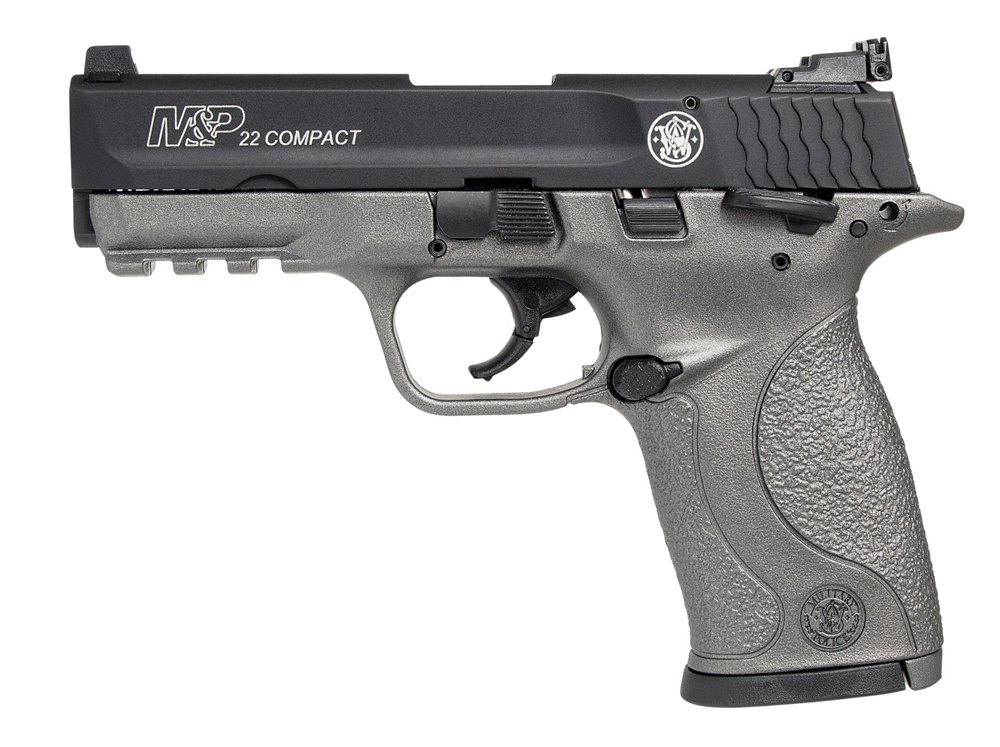
Smith & Wesson.22 Compact Tungsten Gray Cerakote
Since its introduction, the S&W .22 compact M&P has been one of my favorite training pistols for concealed carry. The common controls, size and weight are similar to centerfire, polymer, striker-fired defensive pistols, and the low recoil, noise and low cost of rimfire ammunition means new shooters can learn fundamentals without the stress and noise of a centerfire. Simply put, the M&P rimfires are pleasant for any new shooter to learn with, regardless of past experience.
The three-dot sight system is adjustable at the rear for both windage and elevation. I equipped one with a Crimson Trace rail laser in green for diagnosing problems with new shooters. The new Tungsten Gray Cerakote finish on the frame gives them a serious big gun look, and the manual safety allows training new shooters who will be using either manual safety guns or standard striker-fired guns without manual safeties. Best of all, they’re fun for anyone to shoot, and with an MSRP of $409 for the Tungsten Gray Cerakote version and $389 for the standard, they’re affordable as well.
Ruger 10/22 Target Lite
Ruger’s 10/22 has been a world changer since its inception. It’s reliable, reasonably accurate and the popularity it’s generated has created an entire industry of accessories and aftermarket parts. With the 10/22 Target Lite, Ruger has built many of the most popular aftermarket options into a complete gun.
It comes with a lightened black laminate thumbhole stock and the new BX trigger system that finally puts a light and crisp trigger under the index finger of the 10/22 fan right out of the box. The tensioned, cold hammer-forged barrel resides in an aluminum alloy barrel sleeve and ends with a ½-28 threaded muzzle cap that facilitates fitting a suppressor.
The weight of the 10/22 Target Lite is just 5 pounds, and the combination scope base adapter allows the mounting of either Weaver style rings or standard .22 tip-off mounts. The combination of its reduced weight, a good trigger and a stable and comfortable stock that’s adjustable for length of pull makes the 10/22 Target Lite a great candidate for the popular Rimfire Steel Challenge matches right out of the box. The MSRP is very reasonable for a gun that comes from the factory already tricked out, at $649.
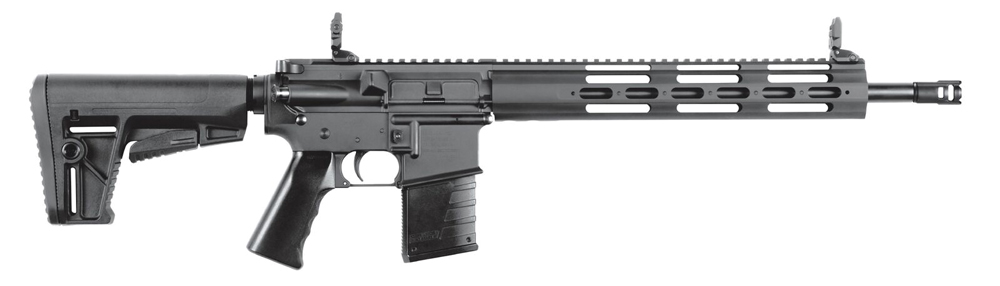
KRISS USA DMK22C
With the AR-15 being the most popular firearm system of all time, it’s inevitable that there will be .22 rimfire clones. Most of those clones look and feel like a full-sized AR, but few operate on the same manual of arms, and none offer the level of customization of the AR firearm system. Many of the clones allow using AR triggers and furniture, but up until now, no one has offered the ability of choosing other barrel options. The KRISS DMK offers a locking bolt, 4140 chrome molly barrel, functioning forward assist, a full-sized dust cover and forged aluminum receivers — but the most innovative feature is a patent-pending interchangeable barrel adapter.
The system allows use of any aftermarket 10/22 barrel, opening up a myriad of choices to the shooter who wants to create the ultimate rimfire AR. It uses popular .22 AR magazines and comes well equipped with a floating handguard, six-position stock, a full-length top rail and flip-up sights. Based on the fact that it’s the only clone that operationally works just like a full-sized AR, including forward assist, it’s impressive, but adding the capability to upgrade barrels in almost any configuration makes it remarkable. MSRP is reasonable at $799.
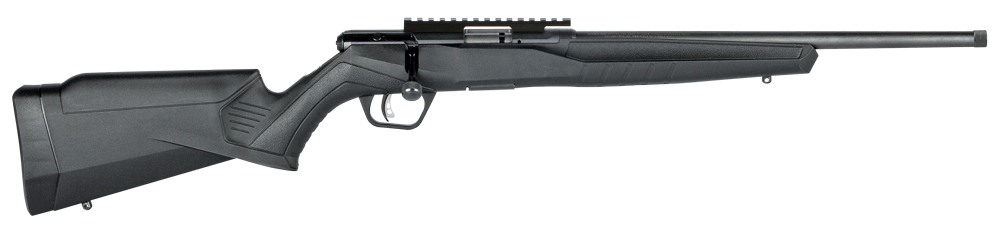
Savage B22 FV-SR
Savage has taken the world by storm with its much-copied AccuTrigger system, which allows an extremely light and crisp trigger pull without fear of accidental discharge. This is accomplished by putting a blade that serves as an inner trigger within the main trigger. If the sear is jarred out of engagement, the inner trigger catches the sear before it can discharge the rifle. When shooting the AccuTrigger, the blade is disengaged with the shooter’s finger before engagement of the primary trigger begins. The end result is a trigger that can be adjusted to be remarkably light, while still remaining totally safe.
The addition of the AccuTrigger to a heavy, short barrel and a stock designed for precision creates an economical yet surprisingly accurate rimfire rifle. The FV-SR sports a stock that promotes accuracy with a vertical pistol grip and high comb for good head position with a scope. It comes with a forward bridge mount for an optic and a rigid 16.25-inch barrel that’s threaded for a suppressor. It uses a 10-shot rotary magazine and weighs 6 pounds. Based on Savage’s reputation for accurate and economical rifles, the FV-SR promises to be a serious performer with an MSRP of just $344.
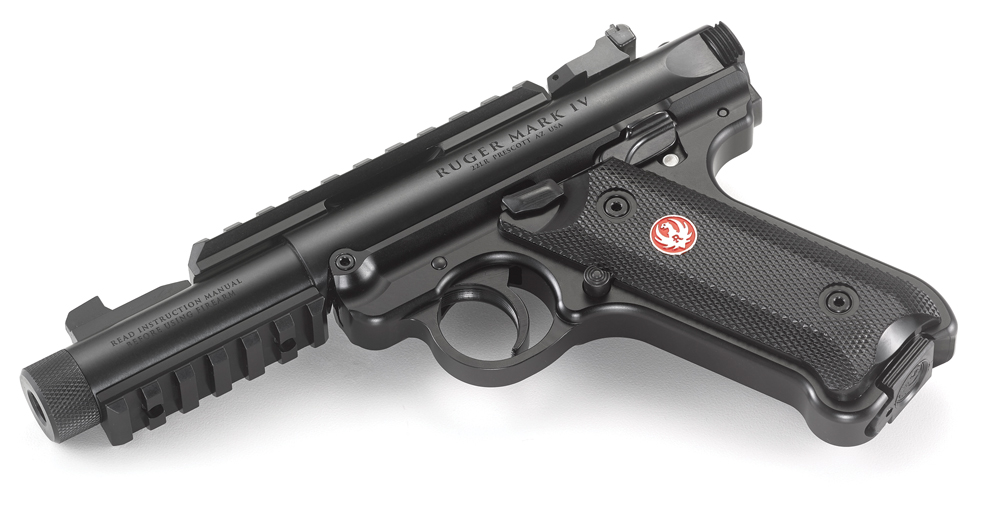
Ruger Mark IV 22/45 Tactical
Ruger’s Mark series of .22 rimfire pistols has been the standard of rimfire pistols since the ’50s. The new Mark IV series was the most drastic design change since the introduction in 1949. The Mark IV series disassembles with the press of a button on the rear of the frame, making the pistols much easier to maintain than previous models. The 22/45 models, introduced in 2004, utilize the more familiar grip angle of the 1911 pistols and locates the controls in much more familiar locations for those more used to modern pistols.
The Mark IV 22/45 Tactical comes with a threaded muzzle, an adjustable rear sight and a Picatinny rail on the frame for mounting optics. Weight is just over 33 ounces, making the Tactical Mk IV perfect as a training pistol with accuracy, reliability and familiar controls. To add further appeal, the MSRP is only $529.
Keystone Sporting Arms 722 ‘PT’
While the .22 rimfire cartridge has utility for hunting and pest control, its greatest utility is training. Most .22 LR ammunition is low in cost, noise and recoil, making it the perfect round for training both new and experienced shooters. Keystone is known for its Cricket and Chipmunk rifles, sized and designed as the first gun of young shooters, but the Cricket line also includes some adult-sized rifles as well.
The manufacturer’s most recent offering is the 722 “PT”, a compact rimfire trainer for the aspiring long-range shooter in a chassis stock with guaranteed accuracy of one MOA. It features a seven-round magazine, an AB Arms Mod X aluminum chassis stock, a target chamber and an adjustable length of pull. With a weight of 6.3 pounds, it comes optics ready with a threaded 20-inch barrel and has an MSRP of $599.96.
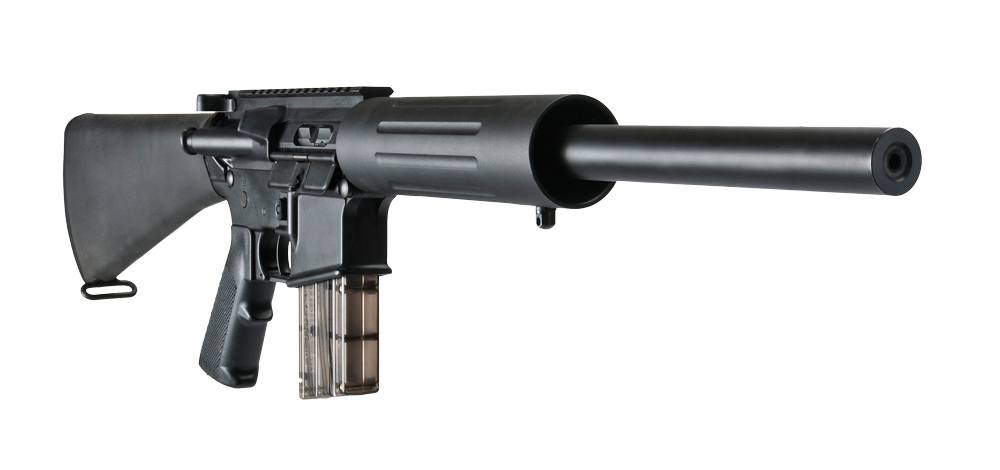
DPMS RFA2-22LR
Currently, there are multiple .22 rimfire clones of the M16/AR-15. I’ve shot most of them, but the one both my grandsons trained on is the DPMS .22 upper I’ve had for several years. My grandson, Phoenix, learned to shoot with that original upper, and his rimfire training with it translated into him winning a Junior National Championship in his first match, the now discontinued National Defense Match. It was also the first time he fired a centerfire AR-15.
Originally marketed as an upper only, the RFA2 is a complete rifle offered in either M4 clone configuration or as a 16-inch bull-barreled version with a floating forend tube. Both versions use aluminum upper and lower receivers, and almost any AR option you can imagine fits and works. The only exceptions are magazine, barrel and interior parts. Any AR trigger will drop right in. The end result is a training firearm that looks and feels just like the original, but offers low-cost, low-impact shooting with an MSRP of $1,029.
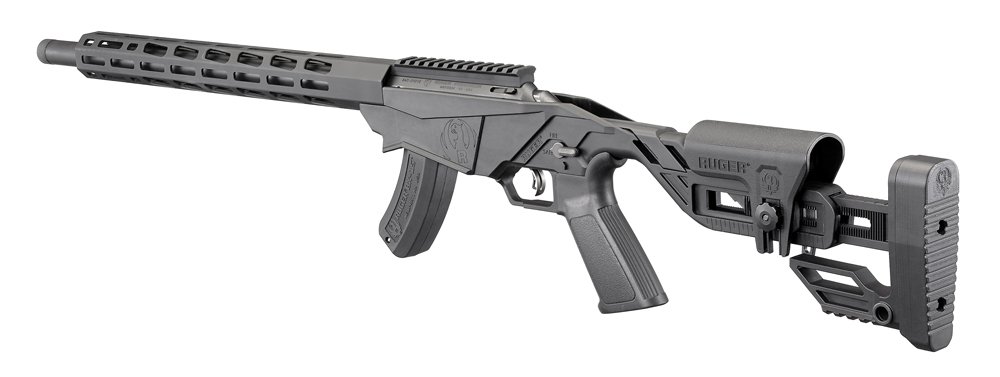
Ruger Precision Rimfire
One of the fastest growing shooting sports is precision rimfire shooting with .22 rimfire rifles, shooting targets at distances of up to 200 yards. Ruger isn’t about to miss the boat on this and has introduced the new Ruger Precision Rimfire rifle to meet the demand. A scaled down version of the centerfire Precision Rifle, it uses a glass-filled nylon chassis-style stock that’s quickly adjustable for both length of pull and cheekpiece height using a single cam lever. The ventilated 15-inch M-LOK forearm tube extends almost all the way out to the end of the hammer forged and threaded 18-inch barrel.
Designed as both a competitive rifle and a trainer, it features an extended 3-inch bolt throw to replicate shooting a centerfire, or you can set it for a standard 1.5-inch bolt throw. The 30-minute elevation scope rail allows getting a zero for really long shots; there’s even an attachment point for your squeeze bag. With a weight of 6.8 pounds, it has an MSRP of $529.
The list above dictates the overwhelming love the shooting public still has for the .22 LR. From handguns to long guns, and from ARs to lever-actions, the diversity of firearms currently being chambered for this mini yet mighty cartridge is immense — so much so that a little bit of research should find you the exact .22 LR to suit your needs and wants.
Editor’s Note: This article originally appeared in the February 2018 issue of Gun Digest the Magazine.
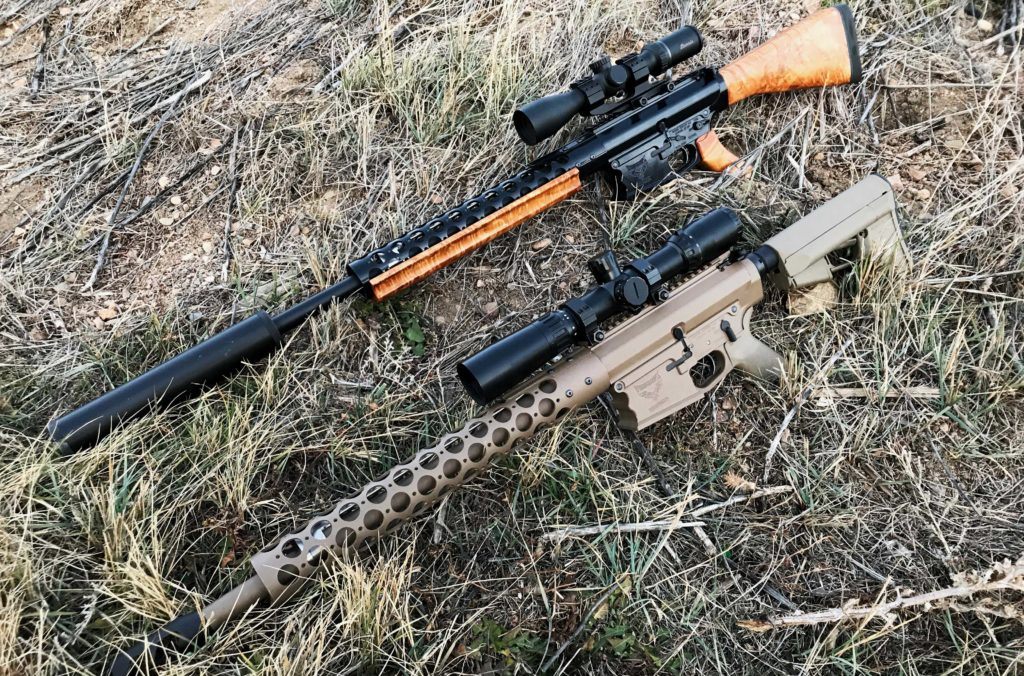
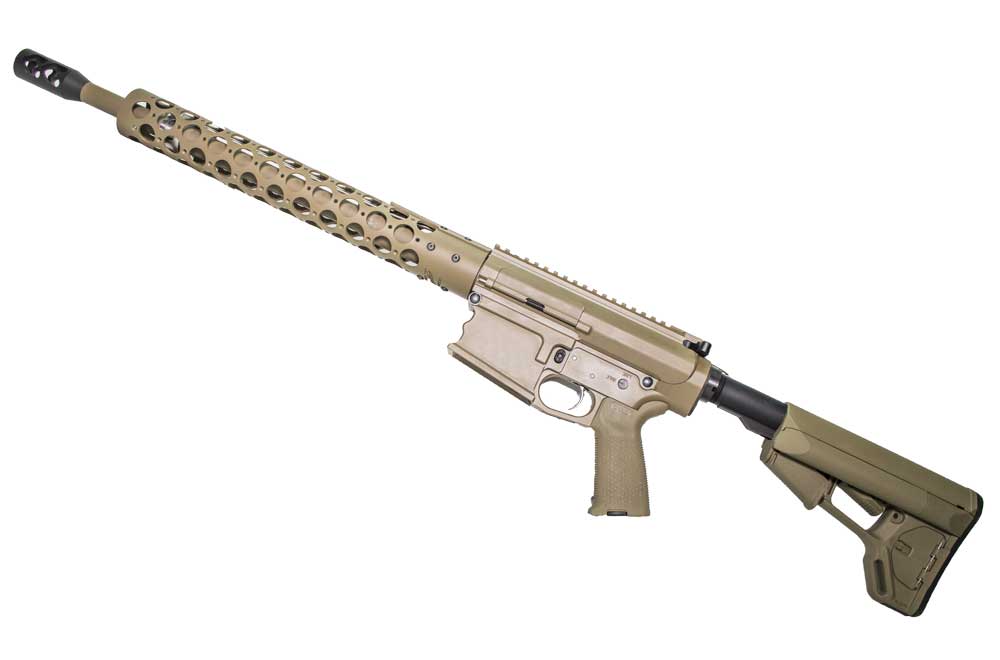
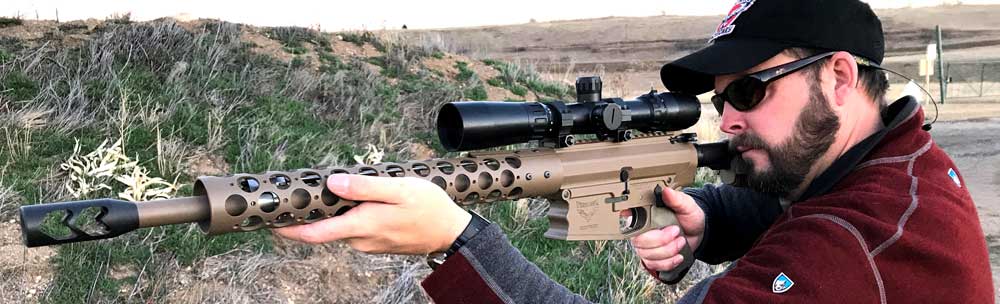
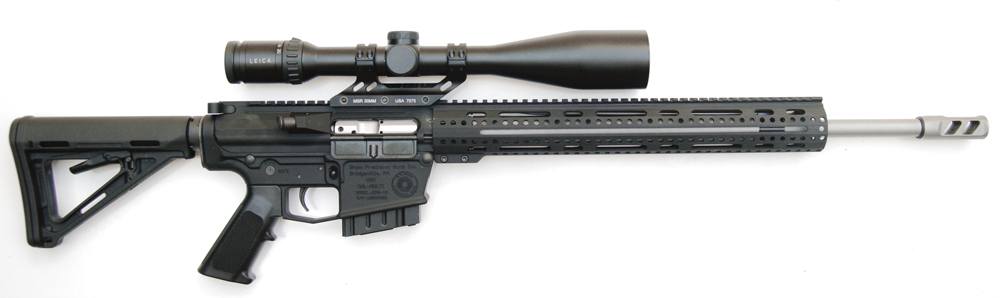
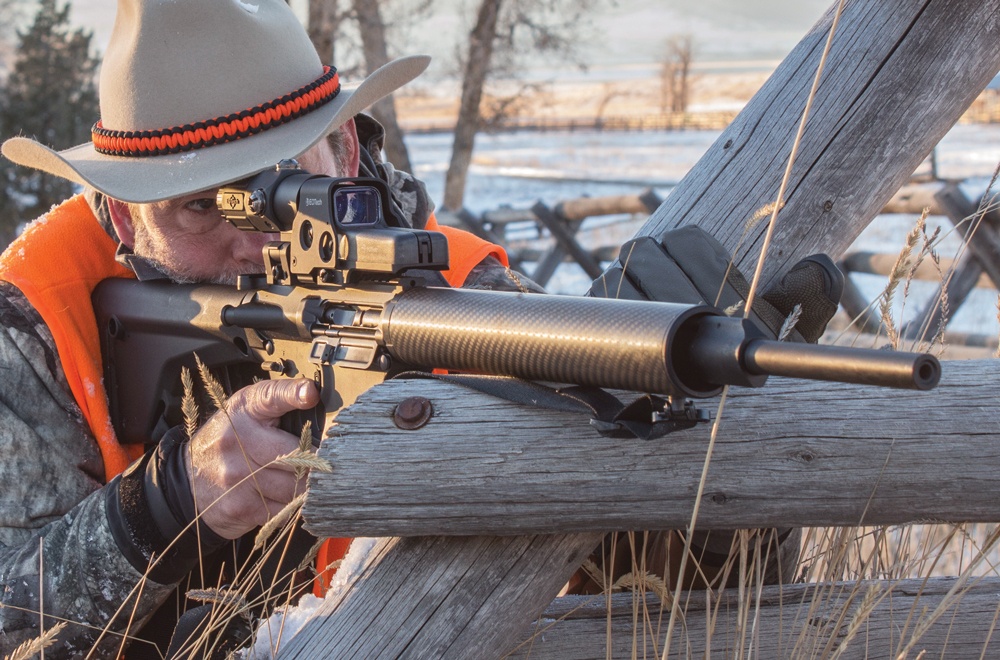
Shooting a modified version of the powerful and classic straight-walled cartridge, Phoenix Weaponry’s 45-70 Auto Christine rifle can tangle with nearly any game on earth.
How did Phoenix Weaponry take the .45-70 Government and make it the semi-auto-compatible 45-70 Auto?
Phoenix rebated the .45-70 Government’s rim to make it function in the rifle.
The modification allowed the use of standard .308 AR-10 parts.
The rifle boasts a Douglas barrel with a 1:14 twist rate, perfect for heavier bullets.
The 45-70 Auto Christine has Phoenix’s custom trigger, set to 3 pounds.
Cost is prohibitive for many shooters, with a price of $4,800.
The .45-70 Government conjures up thoughts of a bygone era of boundless buffalo herds and the equally limitless American frontier. And, against odds, the powerful straight-walled cartridge continues to elude becoming a footnote in history books as some novel relic of yesteryear. It is still alive and well today, a favorite of shooters who prefer slower, heavier rounds that can handle nearly anything that treads upon hoof, paw or foot.
Photo: Phoenix Weaponry
There are plenty of modern-day rifles chambered for the .45-70, from classically inspired single shots to the most up-to-date lever actions. But if Phoenix Weaponry has its way, shooters will look at the more than century-old cartridge in an entirely different light from here on out. That’s because the Colorado-based AR manufacturer has its sights set on reinventing the large-bore round as fodder for a semi-automatic rifle.
In one of the more unique moves in the AR market in recent years, Phoenix Weaponry has introduced an AR-10-style rifle chambered for the classic round (or at least a version of it) — the 45-70 Auto. Also lovingly known as Christine, the rifle represents perhaps one of the greatest leaps for the cartridge since it transitioned to smokeless powder. Although, getting the good old Government up to speed for a modern rifle platform did take some doing — not to mention a smidgen of ingenuity.
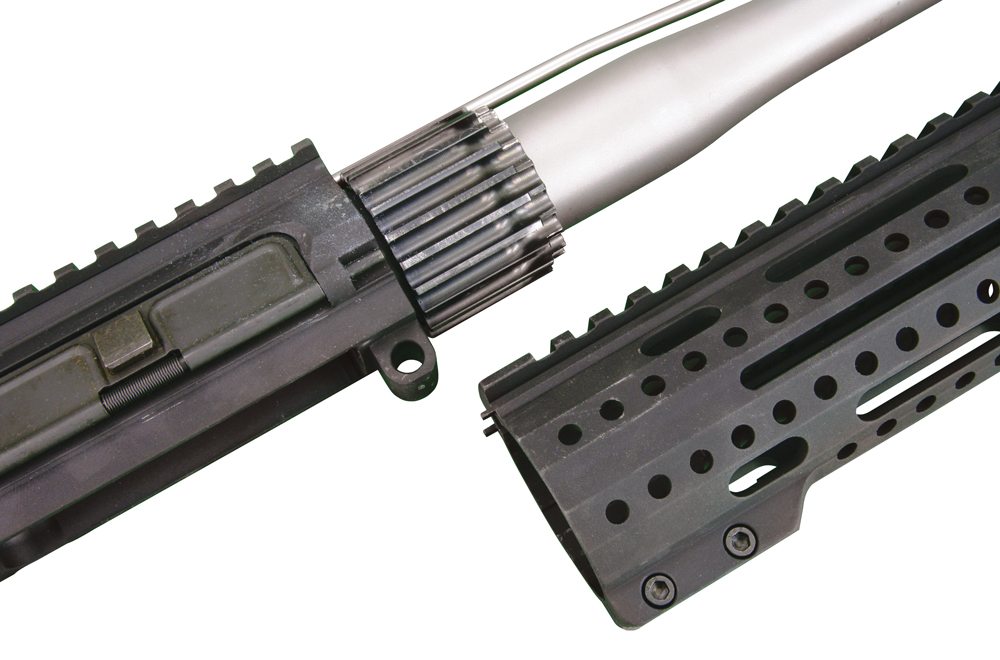
The obvious hurdle to cross was the .45-70’s rimmed case. While not impossible, it would take some intensive re-engineering to modify an existing semi-automatic to reliably chew through this style of cartridge — from bolt to magazine and what have you. Phoenix opted for the easier option, and instead of tinkering the rifle around the cartridge, it re-designed the brass to the gun.
What they came up with is elegant in its simplicity. The company merely rebated the rim, essentially making the cartridge rimless, thus highly compatible with the AR-10 platform. The results were right on the money, with the modified .45-70 cartridge so in tune to the rifle Phoenix was able to utilize it’s everyday .308 Win. bolt head, carrier and receivers.
Photo: Phoenix Weaponry
And the company didn’t have to sacrifice any of the cartridge’s performance shoehorning it into an AR-10. Phoenix claims the rebated case is reloadable with existing .45-70 data — based on Ruger No. 1 loads — and standard dies. The only thing that changes in the process is the shell holder. One compatible with a .308 is required.
Ammo, as expected in a specialty set up such as the .45-70 Auto, is a concern. Your local shooting supplies store isn’t going to be brimming with .45-70 with rebated rims anytime soon. Phoenix foresaw this issue and includes 50 introductory cases with a new rifle and the option to buy more factory-modified brass straight from the company. But Phoenix hasn’t turned its back on dyed-in-the-wool D.I.Y. folks — at least ones with lathes. Cutters are available from the company. So motivated shooters with access to a machine shop can turn off-the-shelf .45-70 Government brass on their own.
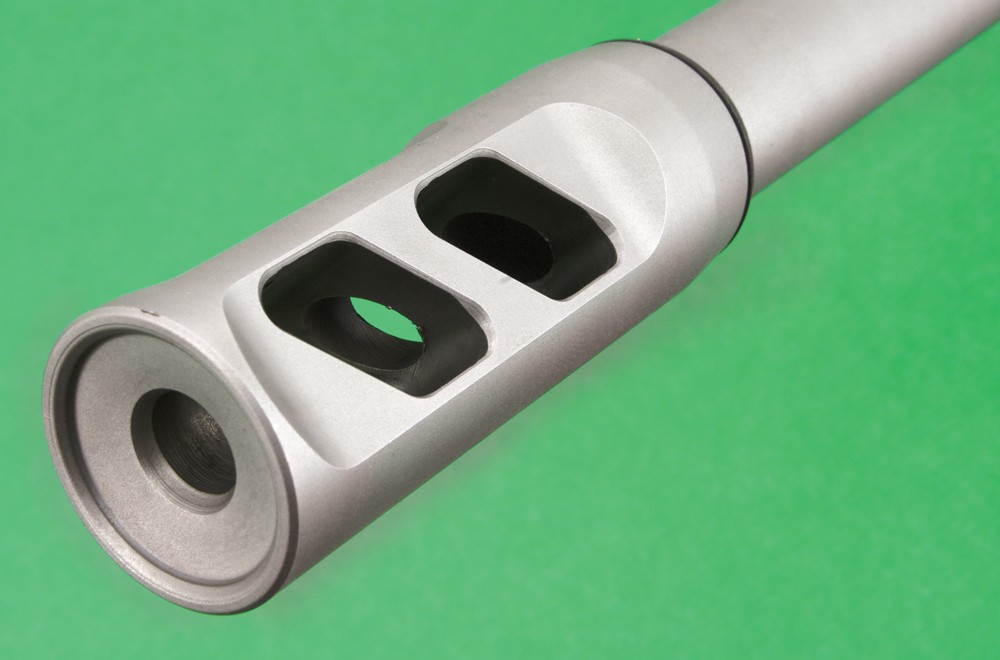
The 45-70 Auto itself appears stoutly built, constructed around Phoenix’s RFL upper and lower receivers, originally designed for the company’s .308 builds. The company turned to Douglas Barrels out of West Virginia for the chrome-moly number on the 45-70 Auto. It is attached with custom bushings, is 18 inches in length and is a custom profile — very much bull. The barrel is button rifled with a 1:14 twist, which is quite fast for the caliber and opens heavier bullet options to shooters. The barrel is topped off with Phoenix’s Chevron muzzle brake, designed to keep the line of sight free and clear shot to shot.
Christine utilizes a rifle-length gas system with a low-profile adjustable gas block. It is outfitted with Phoenix’s 15-inch, free-floating modular aluminum handguard that features in-house manufactured Picatinny rail sections for the quick addition of QD sling mounts, and what have you. And it boasts the company’s custom trigger, tuned to a crisp 3 pounds.
Finally, the 45-70 has a Magpul adjustable ACS stock and MOE pistol grip. And the nearly 10-pound rifle is Cerakoted in Flat Dark Earth and comes with a 10-round Magpul magazine, modified to hold six rounds.
Photo: Phoenix Weaponry
There is a rub to getting a 45-70 Auto in a gun safe, however — price. An AR unique as this doesn’t come cheap; Phoenix has a hefty $4,800 basement on the behemoth and will customize as far as a shooter’s wallet can handle. It’s definitely not an ‘Everyman’s’ rifle, nor does it appear Phoenix intended it to be.
Like all special ladies, Christine is one of a kind. She’ll most likely attract shooters as unique as her. And they could be well served with the investment. Up to and including dangerous game, there’s little on God’s green earth she can’t handle.
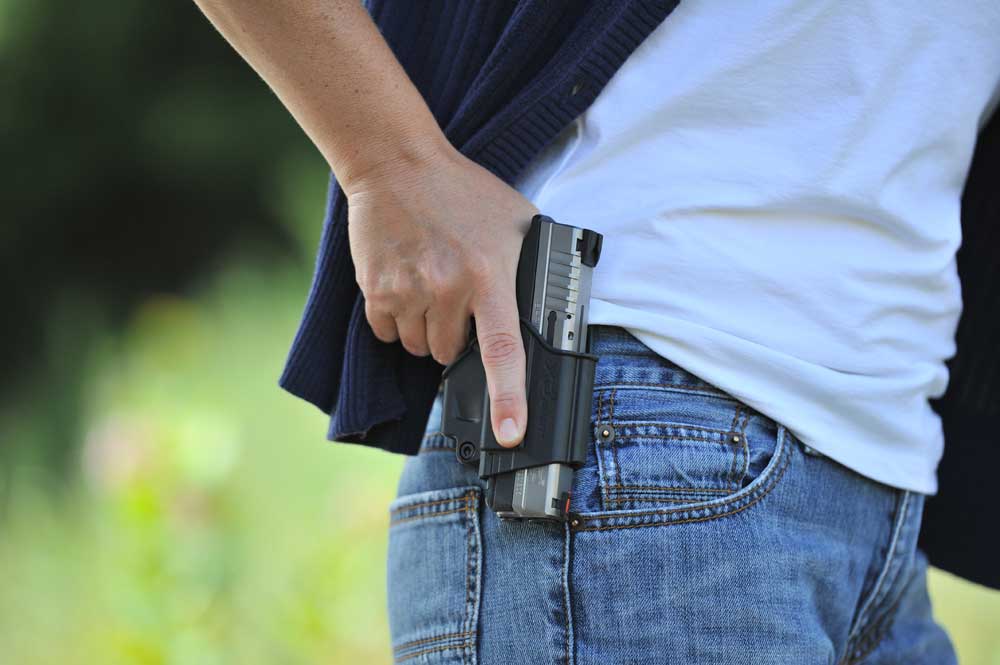
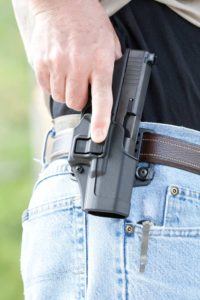
Procedural tactics regarding the safe holstering of a handgun have changed dramatically over the years. Here are some things to know.
Shooters should of course keep their fingers off the trigger when holstering.
Another trick is to place the thumb on the hammer of hammer-fired guns.
If the hammer is up on a 1911-style pistol, it prevents it from falling.
If it is down on a double-action pistol, it prevents it from rising and then falling.
The author suggests looking the gun into the holster at the learning stage.
Later, a more experienced shooter should be able to holster without looking.
There have been some new trends in the past few years on safe holstering doctrine.
In the old days, when holsters left triggers and trigger guards exposed and it was the custom to put one’s finger on the trigger as soon as the hand hit the holstered gun, any snag in the draw could result in the practitioner shooting himself, usually in the leg. Eventually, the gun world learned to demand holsters that covered the trigger guard area to prevent that. The change was good as far as it went, but in a sense it simply redistributed the nature of the negligent discharge. Now what happened was, when the finger was carelessly left on the trigger, the gun went back into the holster and the trigger finger stopped on the edge, and the gun kept moving and – BANG! A self-inflicted gunshot wound remarkably like the one from the old holster days.
The mantra of “keep your booger hooker off the bang switch” turned out not to be enough. I’ve seen cops who kept their belt-mounted key ring in front of the holster where, with movement or even previous strenuous activity, a key could wind up on the edge of the holster in line with the incoming trigger during holstering. There was one famous case of an old, soft leather holster bending enough that when a man inserted his Glock into it, the fold of leather hit the center of the trigger and the pistol discharged.
One of the biggest offenders is the drawstring found on warm-up jackets, hoodies, some winter coats and similar garments. We are seeing those get fouled between trigger guard and holster every year! DRAWSTRINGS ARE INCOMPATIBLE WITH HOLSTERED GUNS AND UNSAFE TO WEAR WITH THEM! IF YOU CARRY A GUN, REMOVE THE DRAWSTRINGS!
It only makes sense when we are dealing with deadly weapons to put safety net after safety net in place. One that I learned early was THUMB ON HAMMER WHEN HOLSTERING. If something trips the trigger, the thumb on the hammer of a cocked 1911 or similar pistol holds that hammer back, and prevents it from firing the shot. If the hammer is down on a double-action weapon, the thumb holds it down, so it cannot rise and fall and crack off a shot. Even with an unmodified striker-fired pistol, the thumb holds the slide forward so a tight-fitting holster can’t push it out of battery, and guarantees that when the gun comes out, it is ready to fight for you.
During this same process, the trigger finger should be straight. The index finger is known colloquially as the “pointer finger,” and this helps get the gun smoothly into the holster. It also, of course, guarantees that the finger wasn’t left on the trigger during the holstering process.
As I said, I’ve been practicing and teaching this since the 1970s, and published it in 1984 in my book StressFire. No one who has followed this protocol has shot himself yet. Enough said.
Latest Re-Holstering Doctrine Because some people have shot themselves holstering, a new mantra has emerged: Look the gun into the holster, so you can see what you are doing. Another mantra is, “You never need to holster quickly, just to draw quickly. ALWAYS holster slowly and carefully.”
By and large, that’s good advice…but “always” can be a bigger word than it looks. We need to talk.
Full time police work only 40 hours a week not counting overtime, and there are 168 hours in a week, so every cop is off duty more than he or she is on. (As a part time cop for 43 years, I was off duty even more.) Off duty cops, or plainclothes officers, or armed citizens when they’ve had to pull a gun on the street against criminals, will be unidentifiable as Good Guys and Gals when the uniformed cops pull up. Those cops have been told “Person with a gun, there now.” The Good Guy or Gal is “Person with a gun, there now”! It behooves them to get that gun put out of sight quickly and smoothly, without taking their eyes off the person present who was so dangerous they had to pull a gun on him in the first place.
If the Bad Guy goes for a gun at that moment and you are “looking your gun into your holster,” the gun and holster may be the last thing you see before your world goes dark forever. And that doesn’t take into account the situation many cops have faced: they have the bad guy at gunpoint, the bad guy gets physical, and they decide not to shoot him but need both hands to restrain him. That gun has to be put away swiftly and surely and rather quickly, without taking the eyes off the threat.
So…this writer suggests that you look the gun into the holster ALWAYS in the learning stages, because the eyes tell the hands what to feel, and that’s the shortcut to being able to do it by feel. Don’t do it fast so much as you do it smooth, and when the proverbial “need for speed” comes, you’ll more likely be able to do it quickly by feel, even in total darkness. You DO want to be able to holster one-handed by feel. It’s an important tactical skill.
More Tips For Safe Re-holster My colleague and friend, master instructor David Maglio, popularized the technique of clicking one’s heels together when holstering at the hip. It keeps the gun side leg out of line of the muzzle.
I like to step forward with my holster-side leg, or back with the off-side leg, for the same reason when I holster.
When holstering on the front of the body (i.e., AIWB), cantilever the upper body back at the hips, so the muzzle will at least point forward past genitalia and femoral arteries.
Editor’s Note: This article is an excerpt from Gun Digest Book of Concealed Carry, Volume 2: Beyond the Basics.
Colt is continuing its expansion into revolvers, bringing out the upgraded Night Cobra for 2018.
What you should know about the new Colt Night Cobra revolver:
It is an upgraded version of last year’s Cobra tailored for concealed carry.
The Night Cobra has a bobbed double-action-only (DAO) hammer.
The revolver features a matte black DLC coating for corrosion resistance and durability.
It features a Tritium front night sight for shooting in low light and new VZ G10 grips.
Its MSRP is stated as $899, $200 more than the standard Cobra.
Last year Colt revived its double-action revolver line with the introduction of its Cobra, a six-shot revolver chambered in .38 Special. At this year’s SHOT Show, Colt has given revolver fans even more reason to be happy by debuting the Night Cobra, which features a few upgrades designed to make the revolver even more suited for concealed carry.
Namely, the new Night Cobra has a stainless steel construction with a matte black DLC coating, a new set of VZ G10 grips, a front night sight and a bobbed double-action-only (DAO) hammer. And the Night Cobra is built to handle the hotter +P defensive loads that some prefer for protection.
I had a chance to shoot the new Colt Night Cobra at the 2018 Industry Day at the Range a day before SHOT Show, and I came away mostly impressed, which makes sense seeing as I found the standard Cobra pleasant to shoot last year before it was released. Obviously, the Night Cobra is a DAO affair given the lack of hammer spur, so I was limited to the double-action pull, which, with regard to concealed carry, is not necessarily a bad thing. Double-action revolvers are among the safest firearms to carry, and because the Night Cobra has the bobbed hammer, it is pretty unlikely to snag on clothing on the draw.
I also found the Tritium front night sight to be quite serviceable. Of course, a night sight on a gun designed for carry, and which may be employed in low light, is always an appreciated feature. For those who prefer a different sight, however, it looks like the front sight is also interchangeable and can be swapped out for other options.
The VZ G10 grips were comfortable and offered plenty of support and purchase. They felt a bit larger than the original grips on the standard Cobra, which actually seemed to help in terms of fit and feel. I didn’t think anything was necessarily wrong with the earlier grips, but I did feel like I was shooting better with the new VZ G10 grips.
It looks like shooters will of course have to pay a bit more for these upgrade features. The stated MSRP seems to be $899, which is $200 more than the standard Cobra. But for those searching for a good double-action revolver for carry, the new Night Cobra might be just the ticket.
The new E. R. Shaw ERS-10 splits the crosshairs exactly where exceptional performance and exceptional value meet.
What to know about the new ERS-10:
The ERS-10 is an AR-10-style rifle chambered in 6.5 Creedmoor or .308 Win.
The test gun weighed in at 9.62 pounds and had a 20-inch stainless 1:8 twist barrel.
The bolt and bolt carrier are 9310 alloy steel and are Nickel-Boron coated.
During testing, the largest group was 1.5 inches, the smallest .5 inch.
The ERS-10’s MSRP is $995.95.
In early 2017, E. R. Shaw, America’s largest independent gun barrel manufacturer based in Bridgeville, Pennsylvania, introduced through its Shaw Precision Guns division its own version of the AR-15. Dubbed, appropriately enough, the ERS-15, Shaw Precision Guns (SPG) became one of many sources of AR-platform rifles. It was really a no-brainer for the company because, for decades, it had been producing tens of thousands of AR barrels in every configuration for dozens of OEMs and gunsmithing supply houses.
As tested the ERS-10 chambered in 6.5 Creedmoor with a Leica ER5 4-20×50 scope in a Weaver MSR mount weighed 11 pounds, 6 ounces.
If that made sense, then the manufacturer’s announcement this past September that it was adding an AR-10 platform to its product line should not have surprised anyone. Predictably, the new gun is designated as the ERS-10, and it’s being offered initially in 6.5 Creedmoor and .308 Win. chamberings.
With the “Creed” basking in what has turned out to be far more than its 15 minutes of fame, how could I not opt to request that flavor for my T&E? What drew my interest as much as anything was that its MSRP is $995, which for an AR-10, is very attractive.
From The Ground Up
The first thing I always do upon taking a new rifle from its box is to weigh it and see how close it comes to the nominal spec, which SPG claims is 9½ pounds in the .308 Win. chambering — sans the 20-round magazine it comes with. As it came from the box, my ERS-10 test gun weighed in at 9.62 pounds, so when you consider the thicker walls of a 6.5 barrel, this claim is right on the nose. I’ve yet to receive a test gun that weighed less than claimed, but I have seen many that weighed more — as much as a half-pound in some cases.
The muzzle brake is of E. R. Shaw design, having a solid bottom, vented top and angled side ports. All in all, it’s about as good looking as a muzzle brake can be.
Anyway, one of the first things I noticed — and it’s but a minor detail — is that the left side of the lower receiver, where all the identifying roll markings are usually found on the side of the magazine well, is absolutely void of any such information; it’s all on the right side. As for the buttstock, there’s not much you can say about it other than it’s the familiar Magpul MOE Carbine mil-spec six-position job, of which there are several variations. This stock is compatible with MOE and other sling attachments and accommodates 1.25-inch sling loops.
The upper and lower receiver measurements of the ERS-10 are about a half-inch longer and a half-inch deeper than Gen II versions of the AR-10 — as exemplified by the current DPMS and Remington R-25. Both are machined from 7075-T6 aluminum forgings and hard-coat anodized. One feature I particularly like is that the shell deflector houses the bolt assist, so you have both functions integrated into one relatively small unit, thus saving an ounce or two in weight.
It’s but one of several variations seen in various AR-10s and AR-15s in that some designs call for the bolt assist at the rear of the receiver, some at the front, some with no bolt assist, and with or without a shell deflector. Others still don’t have a bolt assist, shell deflector or dust cover. The integral Picatinny rail up top has 18 T-Marked slots for a wide assortment of scope and accessory mounting positions. When mated with a cantilever-type scope mount, you have all kinds of mounting latitude. My choice was Weaver’s MSR.
Ample Features Abound
On the lower receiver, the magazine well is machined using the precision wire EDM process, which precludes distortion, and the entrance to the well is flared to help align magazine insertion. The lower receiver hosts an A2-style grip, which is fine unless you have very large hands.
A multi-finned barrel nut serves to anchor the free-floating handguard.
The bolt and bolt carrier are beautifully machined from 9310 alloy steel and are Nickel-Boron coated, which provides a high degree of lubricity and wear resistance. It’s also easier to clean. Just holding the bolt assembly in your hand it actually feels slippery, and, of course, it looks great — with its stainless-like finish contrasting the black anodized receivers. Its slick surface also makes it easier to clean.
The 20-inch stainless-steel barrel, which has a 1:8 twist, is of course an E. R. Shaw premium grade; it measures 1.180 inches at the receiver, then it tapers down to a straight section measuring .875 inch in diameter to where it meets the low profile gas block of the rifle-length gas system. From the front of the block to the muzzle brake, the barrel measures .735 inch, and it, along with the brake itself, carries a non-reflective matte finish, which again contrasts nicely with the black anodized handguard.
Carl Behling Jr., president of E. R. Shaw, and Matt Challis, factory manager, designed the brake. For a muzzle brake, it exhibits some rather complex machining compared to most. It of course has a solid bottom and is vented at the top, the combination of which reduces muzzle rise. There’s a forward rake to the two different vented slots at either side, which overall makes it as attractive as a muzzle brake can be. This brake is available as an accessory item — the stainless version goes for $59.95; the stainless variant with black Melonite finish is $65.
A multi-finned barrel nut serves to anchor the free-floating handguard.
The free-float handguard is 15 ½ inches long and extends some 1½ inches beyond the front of the low-profile gas block, which qualifies it as being of “extended rifle length.” Three continuous M-LOK slots occupy the 3, 6 and 9 o’clock positions, with the other 10 flats (facets) hosting either round or elliptical cooling/weight reduction vents. A multi-finned barrel nut serves as the base for the handguard, which slips over it and tightens with a clamshell or C-Clamp arrangement using transverse Allen-headed machine bolts. Up top, the Picatinny rail takes up where the receiver’s 18 slots ends, going from a white T-marked T-20 position to T-54.
Performance, In Spades
To ready the test gun for a little range work, I used the already mentioned Weaver MSR mount to secure a Leica ER5 4-20x50mm scope. Talk about a great piece of glass! A tactical-type scope might have been more appropriate, but I’ve used this scope, which has a simple Duplex-type reticle, for other gun evaluations, and it proved to be such a stellar scope that I take any opportunity to use it again.
With Hornady having developed the 6.5 Creedmoor back in 2007 and now offering 10 different loads for it, I thought it appropriate to use at least three of them in testing. As it turned out, I actually used four. Besides, Hornady fodder has proven to be so damn accurate in every other of the 9 or 10 6.5 Creeds I’ve tested over the years. I also learned in late September that Sig Sauer had just introduced a match load, and I was able to get a sample of it in time as well.
As evident from the accuracy results, when the largest among 25 three-shot groups measures 1½ inches, you could say the test gun performed very well indeed. There was one failure to feed among the very first shots fired, but none after. The trigger pull was a bit hitchy, but being a mil-spec trigger you can only expect so much. It did, however, break predictably at 6 ½ pounds, so it was better than most. The fact that the two 140-grain match loads proved to be the most accurate was no surprise, but the 120-grain A-Max almost matched them. It seems all 6.5 Creedmoor ammo is uncannily accurate, but in my experience, the heaviest bullets usually shoot the best. I should mention that, with the bolt carrier being Nickel-Boron treated, I ran the test gun bone dry just for the hell of it. No problems whatsoever. That of course is not advisable, and less than 100 rounds fired this way doesn’t mean much, but a Nickel-Boron-treated bolt carrier obviously doesn’t hurt!
The Parting Shots
All in all, I have to give the ERS-10 high marks, especially when you consider its attractive price, as there are not a lot of AR-10s out there for less than a grand. Moreover, this gun carries the same limited lifetime warranty that covers all E. R. Shaw rifles, including the Mark VII and Mark X bolt-action rifles, both of which offer the highest level of customization for the money.
SIG Sauer has introduced the LIMA365 and FOXTROT365, low-light accessories that light up the night, while keeping the P365 pistol as compact as ever.
What do the LIMA365 and FOXTROT365 from SIG Sauer offer?
The LIMA365 and FOXTROT365 give the P365 low-light functionality.
They do this while also maintaining the pistol’s compact size.
The LIMA365 boasts a 5 MW red or green laser that has 8 hours of runtime.
The FOXTROT365 produces 100 peak lumens and has 60 minutes of runtime.
There are many aspects a gun is built around — barrel, fire control, cartridge. But SIG Sauer turned to a much different feature in conjuring up its latest-and-greatest concealed carry pistol — the magazine.
Focusing on and actually re-engineering this facet, the company whipped up what was once a pipe-dream of armed citizens, a double-stack micro-pistol with the silhouette of a single stack. With 10+1 rounds of 9mm on tap in a minute package, many in the shooting and self-defense world have already deemed the P365 the Holy Grail. Given its firepower and 1-inch width, 4-inch height and 6-inch length, they may not be too far off.
A conundrum arises, however, when shooters consider outfitting the P365 for low-light operation. Exactly how do you preserve the striker-fired pistol’s greatest asset — concealability — while outfitting it with the tools to excel in the dark? SIG Sauer has apparently considered this problem and has come up with a solution.
The company recently unveiled the LIMA365 Laser Sight and FOXTROT365 Rail Mount Flashlight, specifically designed to increase the P365’s function, while retaining its compactness.
Where SIG has turned an especially studied eye on the two accessories is not only their size, but also their external designs. The LIMA365 and FOXTROT365 have each had every potential snag point shaved away and streamlined to ensure a draw stroke is clean, even in the tensest situations and heaviest of cover. And they have made both accessories nearly a second thought to operate, eliminating any guesswork in getting them into action.
The intuitive operation of the LIMA365 and FOXTROT365 is primarily achieved through the ingenious situation of their power switches. Designed to become nearly integral with the grip, the laser sight and flashlight activate immediately upon gripping the P365. The devices can also toggle on and off through the pressure-sensitive button, giving users ultimate control.
The LIMA365 is available with a 5 MW red or green laser and can run up to 8 hours on a 1/3N battery. The FOXTROT365 features the latest generation Cree LEDs that produce up to 100 peak lumens and has 60 minutes of runtime.
The laser sight has an MSRP of $179 for the red version and $239 for the green. The flashlight has an MSRP of $179. Definitely, this runs at the pricier end of the market for these accessories, but they could be well worth the money for shooters looking to maintain the overall compactness of their P365.
As armed citizens, we spend innumerable hours sharpening our marksmanship skills, understanding the laws and mentally preparing to protect our lives and the ones we love. But when the rubber meets the road, will we make the right decisions in a life-or-death situation? Double Eagle Tactical Training aims to make certain we do, providing some of the most rigorous situational training available today. Armed citizens won’t confront anything more true to life outside of an actual self-defense scenario.
Modern Shooter travels to the heart of New York’s Catskill Mountains to get a first-hand look at the Double Eagle system. And as the above clip shows, the trainers absolutely put their students through the wringer — both mentally and physically. The simulated backyard disturbance Gun Digest author and custom ammunition manufacturer Phil Massaro confronts is filled with ambiguity and danger, forcing him to make split-second decisions that are a matter of life, death and potential legal tumult.
When it’s all over and he and the trainers break down his judgment, it’s easy to see how taxing these scant few seconds were, even on a shooter as seasoned as Massaro. The guns and ammo might have been fake, but the adrenaline was real.
Catch the rest of the action of this heart-pounding episode of Modern Shooter 10:30 p.m. EST Friday on the Pursuit Channel. The episode rebroadcasts Monday at 12 p.m. EST and Tuesday at 11:30 a.m. EST.
Ruger’s fantastic No. 1 single-shot rifle has been a favorite among hunters and shooters since its introduction in the 1960s.
What to know about the classic Ruger No. 1 rifle:
The No. 1’s design is based heavily on the old Farquharson single-shot design.
It’s a falling-block action actuated by a lever just behind the trigger guard.
It’s been offered in almost every popular American caliber, and several European ones.
Since 2014, the No. 1 has been produced in only one caliber each year.
This fact, along with the many different versions made, makes the No. 1 very collectible.
In 1966, Ruger invited a select group of gun writers to a meeting at the NRA convention in Chicago to unveil a new rifle. It was a classic-style single-shot based on John Farquharson’s falling-block design that was patented in Scotland in 1872. The rifle was designed to appeal to the traditional sportsman who appreciated and understood the challenge — as well as the advantages and disadvantages — of having one shot.
In the 1967 edition of the Gun Digest Annual, the late Roger Barlow wrote a review of the new Ruger rifle and eloquently described the appeal of the single shot.
“The man with a single shot rifle, stalking his game skillfully, thoughtfully calculating his range, not just shooting at his quarry but selecting the most effective shot to place that bullet, then carefully aiming and making that one shot count — that man surely is more of a hunter than is the fellow having half a dozen shots available in his repeater.”
Originally, the rifle was going to be named the Victorian, due to its 19th century styling, but not long after it went into production, the name was changed. From the beginning, the actions were stamped “No. 1” and that became the official name. This Ruger model should always be referred to in print as “No. 1” and not “Number One” or “Number 1.”
Photo by Stan Trzoniec.
Forever ‘No. 1’ The design is not merely a replica of the Farquharson, but it’s a modern take on the action. The falling block is operated with a lever located just behind the trigger guard. This action is much shorter in length — about 4.5 inches — than those of the various repeating rifle designs, which provides one of the No. 1’s major advantages: It can have a longer barrel than a repeating rifle with the same overall length, and therefore achieve a higher velocity.
When the rifle was introduced, the original calibers were the .222 Remington, .22-250 Rem., .243 Winchester, 6mm Remington, .308 Winchester, .30-06 and .458 Winchester Magnum. All were offered with either a 22- or 26-inch barrel, except the .458 Win. Mag., which had a 24-inch heavy barrel. The very first No. 1 was chambered in .308 Winchester and is in the private collection of the Ruger family. The No. 1 has been offered in virtually every popular American caliber, ranging from the .204 Ruger to the .480 Ruger, including several European rounds.
The earliest production rifles were referred to as the S22L, S26M and S24H. These variants were later known as the Light Sporter, Medium Sporter and Tropical Rifle. Other variations, such as the Standard and International, were later added along with many more calibers. The earliest No. 1 models were marked with serial numbers with no prefix, and these models will bring a premium. This serial number range goes from 1 to approximately 8437 for rifles produced through the end of 1969. Beginning in 1970, a prefix was added starting with 130-xxxx.
Beginning in 2014, the No. 1 has been made in a limited range of calibers. Each variation is chambered in only one caliber each year, and that caliber changes every year. Most current models are distributor exclusives available only from Talo Distributors or Lipseys.
The descriptions below cover most regular models in production through 2014. Estimated values are from the 28th edition of Standard Catalog of Firearms (Gun Digest Books, 2017.)
The Light Sporter Model has long been a favorite variant of the No. 1 family. Some of the more interesting chamberings include the .22 Hornet, 7×57 Mauser and .303 British.
No. 1-A Light Sporter This model features a checkered American walnut stock with an Alexander Henry style forend, barrel band with sling swivel, and a 22-inch barrel with a quarter rib with a folding rear and a ramp front sight. Like all No. 1 variations, it has a shotgun-style tang safety, pistol grip cap and rubber recoil pad. Average weight is 7¼ pounds. Previously offered in .204 Ruger, .22 Hornet, .222 Rem., .223 Rem., .22-250 Rem., .243 Win., 6.5 Creedmoor, .270 Win., 7×57 Mauser, 7mm-08, .280 Rem. (2014 only), .308 Win., .30-06, .300 RCM, .303 British. For serial numbers without a prefix, add a premium to the following prices of 25 to 50 percent, depending on the condition of the rifle.
NIB Exc. V.G. Good Fair Poor
$1,050 $900 $750 $550 $350 $200
No. 1-B Standard The stock on this model has a semi-beavertail fore-end with swivel studs in the buttstock and fore-end. Barrel length is 22 or 26 inches with the quarter rib equipped with the well-known Ruger integral scope mount bases with rings. Average weight is 8 to 8¼ pounds. This model was in production from 1966 to 2010 and at various times was chambered in .204 Ruger, .218 Bee, .22 Hornet, .223 Rem., .22-250 Rem., .243 Win., 6mm Rem., .257 Roberts, .25-06 Rem., 6.5 Rem. Mag., 6.5 Creedmoor, .270 Win., .270 Weatherby Mag., 7×57 Mauser, 7mm-08 Win., .280 Rem., 7mm Rem. Mag., .300 Win. Mag., .300 Weatherby Mag., and .338 Win. Magnum. For serial numbers without a prefix, add a premium to the following prices of 25 to 50 percent, depending on the condition of the rifle. Also add a premium of 40 to 50 percent for rare calibers including the 6.5 Remington Magnum, 7×57 Mauser and 6mm Remington.
NIB Exc. V.G. Good Fair Poor
$950 $800 $675 $450 $300 $150
No. 1-H Tropical Rifle This model is chambered for several big-bore cartridges and was designed primarily for use on dangerous game. The heavy contour 24-inch barrel has adjustable open sights and a barrel band. Other features are similar to other No. 1 models. Calibers have included the .375 H&H Magnum, .405 Win., .416 Ruger, .416 Remington, .416 Rigby, .450/.400 NE, .45-70 Govt., .458 Lott, and .458 Win. Magnum. For serial numbers without a prefix, add a premium of from 25 to 50 percent, depending on the condition of the rifle. Also add a premium of 75 percent for .404 Jeffery and 250 percent for .45-70 Govt.
NIB Exc. V.G. Good Fair Poor
$1,050 $900 $750 $550 $350 $200
The Mannlicher-style stock and 20-inch barrel on the RSI International Model appeal to many collectors and hunters.
No. 1-RSI International The full-length Mannlicher-style stock and 20-inch barrel set this one apart from other No. 1s. It’s equipped with adjustable open sights and an American walnut checkered stock with a complete sling swivel mounted on the forend. This model was limited to the following calibers: .243 Win., .257 Roberts (2014 only), .270 Win., 7×57 Mauser, .30-06 and .300 RCM. As with the other early production models, add a premium to the following prices of from 25 to 50 percent for a non-prefix serial number, depending on the condition of the rifle.
NIB Exc. V.G. Good Fair Poor
$1,100 $950 $800 $600 $400 $250
No.1-S Medium Sporter Similar to the Light Sporter with a 22-inch medium-weight barrel and open sights. This model was chambered in these cartridges: .218 Bee, 7mm Remington Magnum, .300 Win. Mag., .300 H&H Mag., 9.3×62 (2014 only), 9.3x74R, .338 RCM, .338 Win Mag., .375 Ruger, .38-55 Winchester, .45-70 Govt., .460 S&W Mag., .480 Ruger/.475 Linebaugh. Weight varies depending on caliber from 7 to 8 pounds. As with the other early production models, add a premium to the following prices of from 25 to 50 percent for a non-prefix serial number, depending on the condition of the rifle. A limited edition run of 1,500 rifles marking Ruger’s 50th anniversary was made in 1999. These models featured a high-grade Circassian walnut stock with gold inlays of William B. Ruger’s signature and 50 Years logo. Chambered in .45-70 Govt. only. Add a 100 percent premium for this model.
NIB Exc. V.G. Good Fair Poor
$1,000 $850 $700 $500 $300 $200
No. 1-V Varminter Introduced in 1970, this model has a 24-inch heavy barrel with no sights and target scope blocks. Weight is 8¾ to 9 pounds. It has been chambered in the following calibers: .22 PPC, .223 Rem., .22-250 Rem., .220 Swift, .243 Win., 6mm Rem., 6mm PPC, .25-06 Rem., 6.5-284 Norma, 6.5 Creedmoor, 7mm Rem. Mag., .280 Rem., .300 Win. Magnum.
NIB Exc. V.G. Good Fair Poor
$1,100 $950 $800 $550 $350 $200
No. l Lyman 1878 Centennial Rifle A commemorative Ruger No. 1 series celebrating the centennial of the Lyman Products Company, a manufacturer of reloading tools and other equipment for shooters, was manufactured in 1978. The Grade 1 rifle, of which only 101 were made, is hand engraved with gold accents and a high-grade walnut stock. It has a 28-inch barrel with a 30-inch long tubular 4X Lyman Century scope. The Grade II series, of which 1,000 were made, has photo engraving and not as fancy wood. All models came with a walnut presentation case for the rifle, scope and accessories, including a set of loading dies, bullet mold, a framed letter of authenticity, and a centennial journal like the one that was issued in 1878.
Grade I
NIB Exc. V.G. Good Fair Poor
$2,500 $2,000 $1,500 $1,000 $600 $400
Grade II
NIB Exc. V.G. Good Fair Poor
$1,900 $1,400 $900 $650 $400 $300
No. 1 Stainless Series In production from 2000 to 2010, the stainless series was offered in four variations and in many calibers. Features and specifications are similar to the blue-finish models. On all variations listed below, the actions and barrels are stainless and the receivers have a quarter rib and no sights. The stocks are all black laminated.
No. 1 K1-B-BBZ Sporter. Chambered in .45-70 Govt. or .375 Ruger with 22-inch barrel.
No. 1 K1-B-BBZ Tropical. Chambered in .375 H&H Mag., .405 Winchester, .416 Ruger, .416 Rigby, .458 Win. Mag., .458 Lott, with a heavy 24-inch barrel. Weight is approximately 9 pounds.
No. 1 K1-B-BBZ Varminter. Chambered in .204 Ruger or .22-250 Remington only with a 24-inch bull barrel. Weight is approximately 9 pounds.
Never heard of the 1/3 Second Zerotechnique to zero in a rifle? Read on: It will improve your hit success forever.
The ins and outs of the 1/3 Second Zero:
The 1/3 Second Zero is similar to Point Blank Range but is based on bullet flight time.
The method works because all bullets drop at the same rate over a given time.
This method also gives shooters a zero that perfectly matches their rifle/ammunition.
Determining a 1/3 Second Zero requires a chronograph, the bullet’s ballistic coefficient and a ballistic calculator.
1/3 second corresponds with the maximum effective range for the zero.
Properly zeroing a big game rifle is critical to making shots in the field. There are a variety of zeroing methods, but the Point Blank Zero (PBZ) might be the most practical. As the great gun writer Jim Carmichel once pointed out, “In some shooting circles, ‘point blank’ means up close and very personal … but in the lingua franca of ballistics, the point-blank range of a cartridge is the maximum distance out to which the bullet will hit a target of a specific size.”
Let’s see if I can simplify the PBZ concept. With PBZ, you sight your rifle in so the bullet will never rise or fall more than half the diameter of your target out to a certain distance. That distance is determined by the velocity and ballistic coefficient of your bullet, fired from your rifle.
For example, if you were shooting baseballs with a .223 Remington, theoretically the ballistics would allow you to hold dead on and hit the 3-inch target out to about 240 yards. In other words, from the muzzle to that distance, the bullet would never be more than 1.5 inches above or below your line of sight. To make this work, you’d have to zero your rifle at about 205 yards. That’s how PBZ works.
TOP: A regulation-size soccer ball has a diameter of roughly 8.65 inches. This is very similar to the size of a big game animal’s kill zone. If you can always hit a soccer ball, you can also effectively place your bullet within the kill zone of most big game animals. BOTTOM: If we sight our rifles in so the bullet never rises or falls more than three inches above or below our line of sight, we are set to hold dead on while big game hunting out to our maximum effective range (MER).
With big game hunting, our target is a bit larger, about the size of a soccer ball. However, you want to allow some wiggle room for shooter error, so working with a maximum target size of 6 inches makes more sense. After spending about a week with a calculator and a lot more time than that at the range, I came up with a zero method for big game rifles I call the 1⁄3 Second Zero. It’s similar to PBZ but is based on bullet flight time, and it works with any rifle cartridge.
Watching The Time
By using time as a parameter, the 1⁄3 Second Zero works because over a given time, all bullets drop the same distance. In fact, in 1⁄3 of a second a bullet — all bullets — will drop about 20 inches. We never see these 20 inches of drop in the field or on the range because we zero our rifles to offset it.
With the 1⁄3 Second Zero, you have a zero that perfectly matches your rifle/ammunition combination, establishes a maximum effective range, and takes the guesswork out of the shot. You simply zero your rifle so your bullet will never be more than 3 inches above or below the line of sight, out to any distance that is no more than 1⁄3 of a second away. The key is in establishing how far 1⁄3 of a second is, because it’s different with every rifle and every load.
1. The first step is to chronograph your hunting ammunition. Fire five shots over a chronograph to establish an average velocity. 2. Next, you’ll need the ballistic coefficient of your bullet. 3. And finally, you’ll need a ballistics calculator. Any program providing time of flight will work. Enter the data for your load and don’t forget to include the height of the riflescope above the bore because it’s a critical element of trajectory calculation. Look at the program like you look at your tax guy; you provide the numbers and he — the program — gives you the good or bad news.
Once you have the data, find the distance corresponding with a flight time of 0.333 or 1⁄3 of a second. This will be your maximum effective range (MER) and you’ll be able to zero your rifle so the bullet will never be more than 3 inches above or below the line of sight out to this distance.
Notice the trajectory difference between gravitational drop, a 100-yard zero, and the 1⁄3 second zero (also known as the soccer ball zero) for this cartridge. The 1⁄3 second zero allows for a dead-on hold out to 300 yards in this instance.
Out to this distance, you’ll also not have to worry about drift in winds of less than 10 mph, and you’ll not have to wonder if your bullet will expand. All big game bullets will deliver reliable expansion out to any distance they can reach in 1⁄3 of a second or less. Finally, at only 1⁄3 of a second away, a small step taken by the animal at exactly the time you pull the trigger is unlikely to move its kill zone out of the path of your bullet.
Calculating Your 1⁄3 Second Zero
The trick is establishing at what distance your rifle should be zeroed, or maybe more easily accomplished, how high you should zero your rifle at 100 yards. There are a couple gun writer-driven myths with regard to establishing a PBZ. One is that you should zero your rifle at 25 yards. Another is that your rifle should be zeroed so the bullet strikes 2 inches high at 100 yards. While neither method is ideal, both can get you close. As a South African professional hunter friend likes to say, “The big thing is,” we’re not playing with horseshoes or hand grenades, so close is not good enough.
For example, my wildcat 2Fity-Hillbilly cartridge — a 6.5 Creedmoor necked down to .257 caliber — has a 1⁄3 second flight time, or MER, of 300 yards. If I zero the rifle at 25 yards, my bullet will be almost 5 inches high at 175 yards. That’s well outside my 3-inch, above or below the line of sight, allowance. If I zero the rifle 2 inches high at 100 yards, I’m 4 inches low at 300 yards — again, this is outside my target window. But, if I apply the 1⁄3 Second Zero where the rifle is essentially sighted in 3 inches low at my MER — I can hold dead on out to that range and always hit a soccer ball.
Knowing your maximum effective range and being able to hold dead-on at that distance can make shots in the field easier.
The simplest way to sort out the 1⁄3 Second Zero is to sight your riflescope in so the bullet strikes 3 inches low at your MER. This can be tricky because your group size and shape at that distance makes confirmation iffy. So, monkey with your ballistics calculator until you see the bullet’s trajectory never rises or falls more than 3 inches above the line of sight out to your MER. This can take some time, but it will save ammunition.
For starters, divide your MER by 10 and enter that as a zero distance. With my 2Fity-Hillbilly cartridge, I would start with a zero distance of 30 yards. This puts the bullet 3.2 inches above the line of sight at 155 yards and 2.44 inches below the line of sight at 300 yards. It’s close, but not ideal.
By adjusting my sight-in distance to 31 yards, my bullet is 2.95 inches above the line of sight at 150 yards and 2.93 inches below at 300 yards. This is about as close as you can get. But, sighting a rifle in at such a close range never really seems to work out. Fortunately, the trajectory data provided by the ballistics program tells me I need to sight in my riflescope so the bullet will strike 2.44 inches high at 100 yards or dead on at 257 yards. Now, I can go to the range, sight my rifle in as indicated, and confirm on targets all the way out to my MER. You might need to tweak your zero slightly due to atmospheric conditions and the personality of your rifle.
Tweaking Your Game Plan
Pragmatically, it makes sense to utilize the 1⁄3 Second Zero and to never shoot at an animal beyond your MER. I know there are a select few hunters who have the tools and skills to shoot much farther, and I’ve got no issue with that. However, the 1⁄3 Second Zero can be beneficial to them, too. While you’re hunting, it’s a good idea to be ready for an animal that might present you with a fleeting opportunity. If that happens, it will more than likely be at a range within the distance your bullet can cover in 1⁄3 of a second.
Even long-range hunters can benefit from the 1⁄3 second zero. While hunting they should keep their elevation dial set to their MER for shots that might suddenly develop.
For long-range hunters, I suggest they set the target turret to their dead-on 1⁄3 Second Zero distance. (With my 2Fity-Hillbilly, that distance is 257 yards.) That way, if an opportunity comes inside their MER, they simply hold dead on and pull the trigger, with no ranging, dialing or holding over or under. It’s just point and shoot, and you’ll hit that soccer-ball-sized kill zone.
The 1⁄3 Second Zero is the solution to a complicated problem. The postulate it proves is that if you sight your rifle — any rifle — in so the bullet strikes 3 inches low at the distance it can travel in 1⁄3 of a second, you can hold dead on a soccer ball out to that distance and get a hit. For a hunter, that’s a big deal and it’s why the 1⁄3 Second Zero is the best approach to sighting in a big game rifle.
Looking to go armed, but are stuck in the weeds as to what to arm yourself with? Here are 20 of the best concealed carry gun options that will keep you on the defensive.
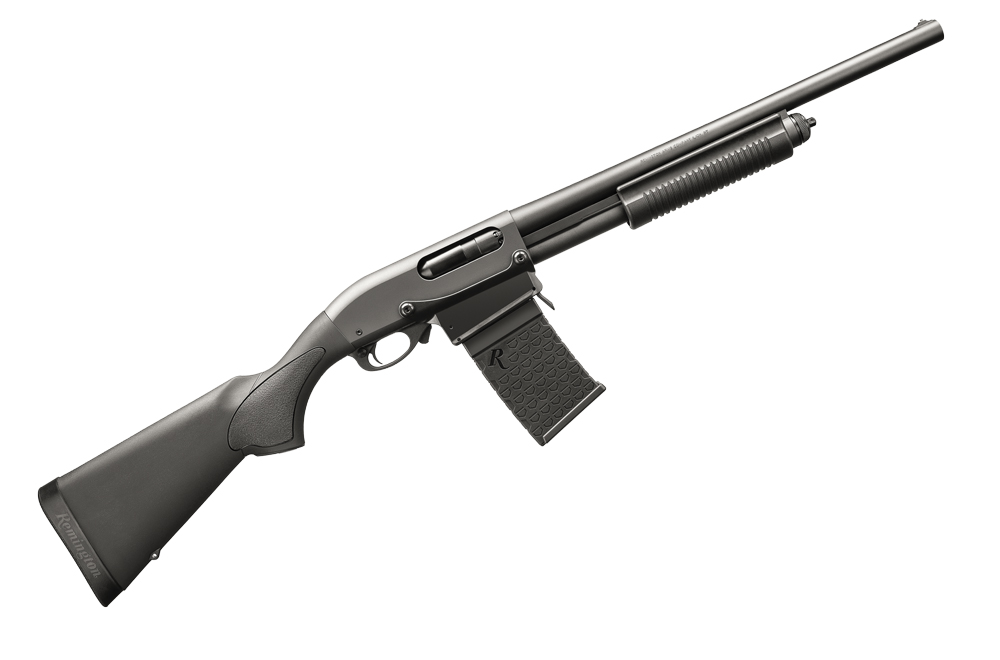
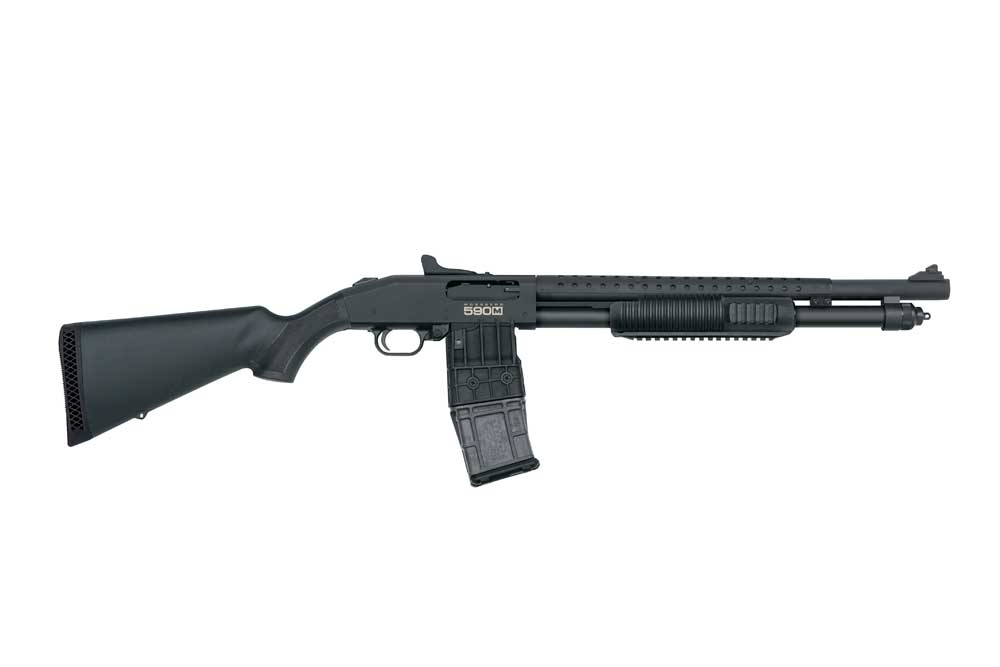 Here are some of the arguments on tube versus the detachable magazines fed shotgun that you might hear around gun club benches, gun store counters, Internet forums and other institutions of higher learning.