
Seven fundamentals of handgun training apply whether you’re training for self-defense, competing at a match, on the silhouette range or plinking with a .22 pistol.
The seven fundamentals of basic pistol marksmanship are:
Stance
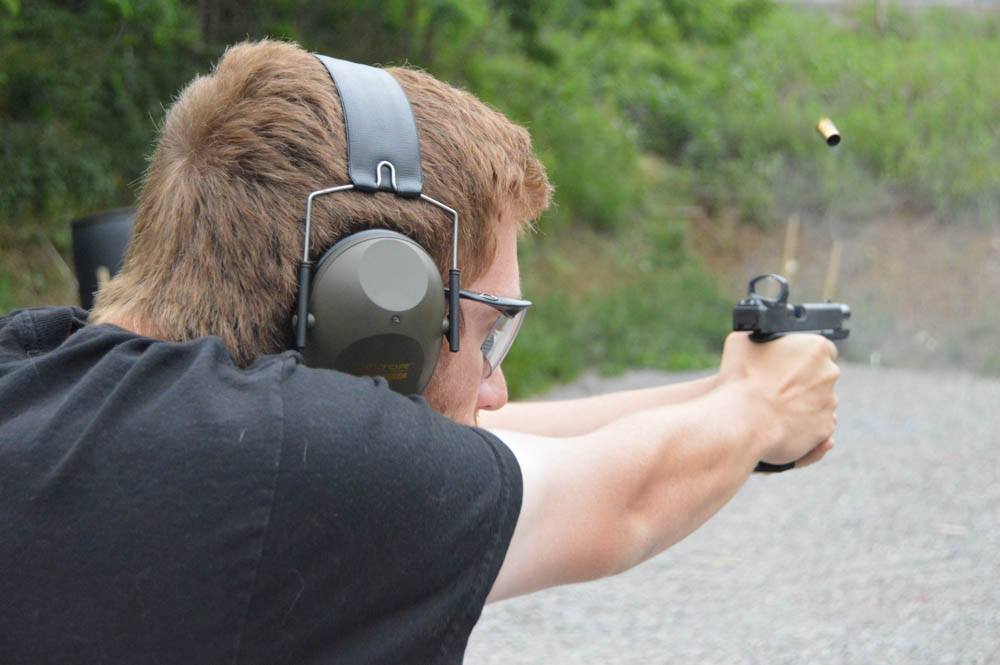
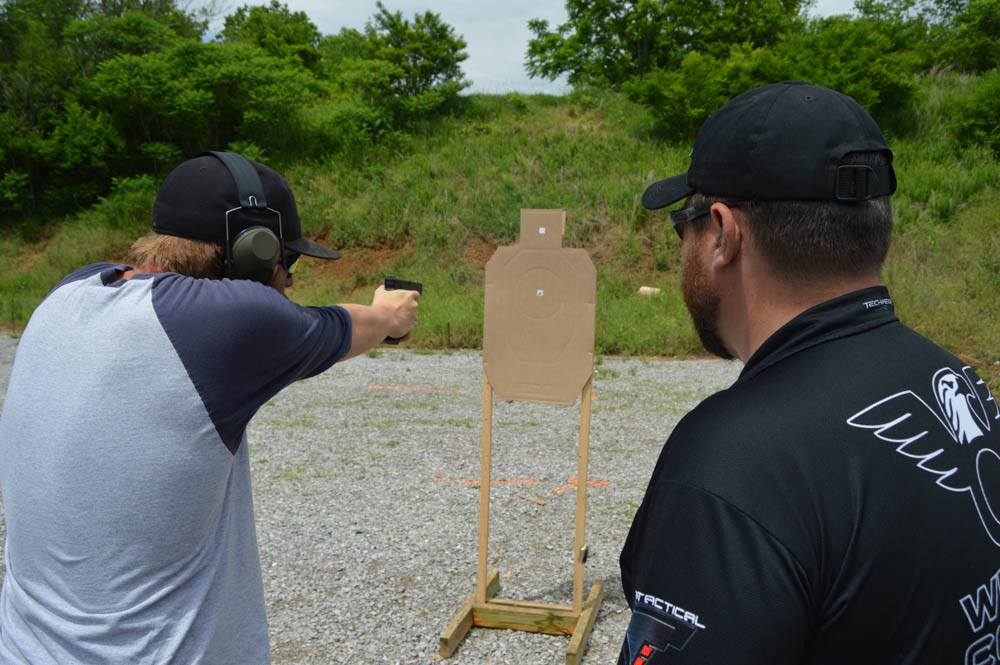
Step 1 is the stance. The stance as it applies to the handgun is nothing more than the position of feet and body relative to the target. It sounds simple, but it’s actually one of the most critical and also one of the most often overlooked aspects of pistol shooting. The reason it’s so important is that the stance is the foundation upon which all of the other fundamentals are built. If the shooter’s stance isn’t solid, then the delivery of the shot or shots to the target won’t be at their optimum.
The stance for a bullseye shooter is going to be much different than that of a person firing in one of the action shooting sports. For the bullseye shooter, assuming a right-handed shooter, the stance will be standing at about a 45-degree angle to the target, with the feet approximately shoulder width apart, and about 60 percent of the weight out on the balls of the feet. Always keep the knees flexed a little, and keep the non-firing hand in the pocket. Why? Because if the non-firing arm is not anchored with the hand in the pocket, or at least with the thumb hooked into the pocket, the arm will swing slightly during firing, and will act as a counter-balance to the firing hand, causing is to sway slightly and making it difficult to stay on target.
For an action shooter, there are two basic types of stances: the Weaver and the Isosceles. The Weaver stance is very good for managing recoil of some of the sharper recoiling handguns. It does this by using isometric tension between the firing and non-firing, or support, hand. Basically the shooter is creating a push-pull arrangement in the arms. The firing arm is pushing slightly forward, and the support hand is pulling back. It’s a very effective way of firing a powerful handgun accurately, and is still taught at the Gunsite Academy, Jeff Cooper’s iconic shooting school.
Position
The second fundamental is position. This is nothing more than taking the stance and introducing a target. With the stance, we are not yet factoring in the target, we are just trying to establish a good foundation. Now, with position, we are attempting to take the stance and make sure that we are positioned naturally toward the target, or, put another way, we are trying to find our natural point of aim.
On the range, a good way to practice this is to get into a comfortable stance, then, take the pistol in a good firing grip with both hands, close the eyes, and raise the pistol toward the target, open the eye and the pistol should be aiming at the center of the target. If it isn’t, close your eyes, lower the pistol and pivot on the left foot and move the right foot slightly forward or backward while holding the pistol out at arm’s length to move the pistol left or right relative to the target. Raise the pistol and open your eyes, the pistol should be pointing at, or close to the target.
The best method is the one you feel most comfortable with. Talk to different shooters and get their opinion, try different techniques and then decide what works best for you.
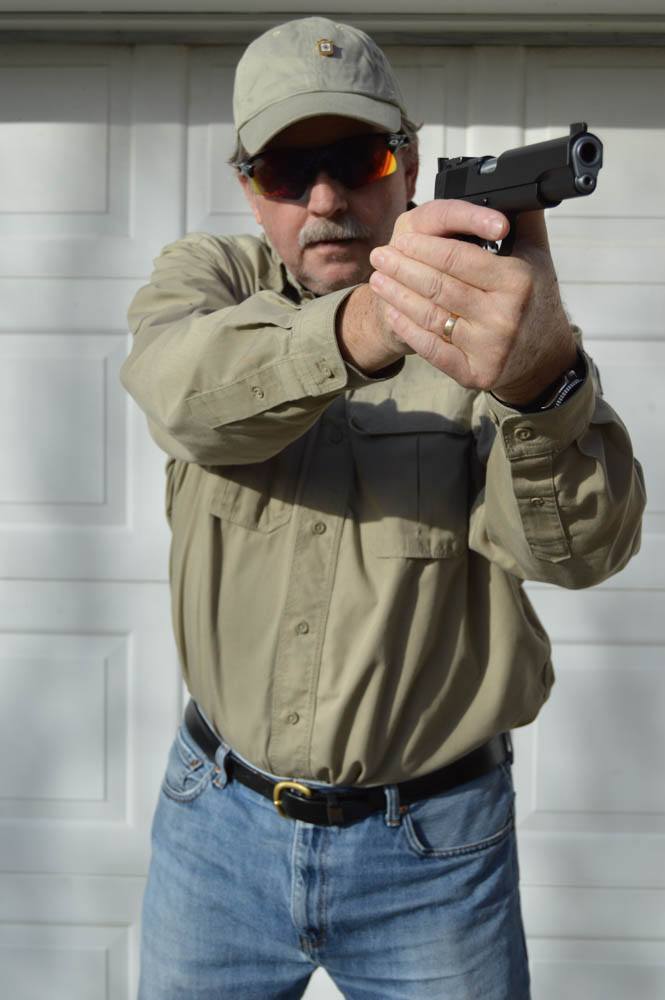
Grip
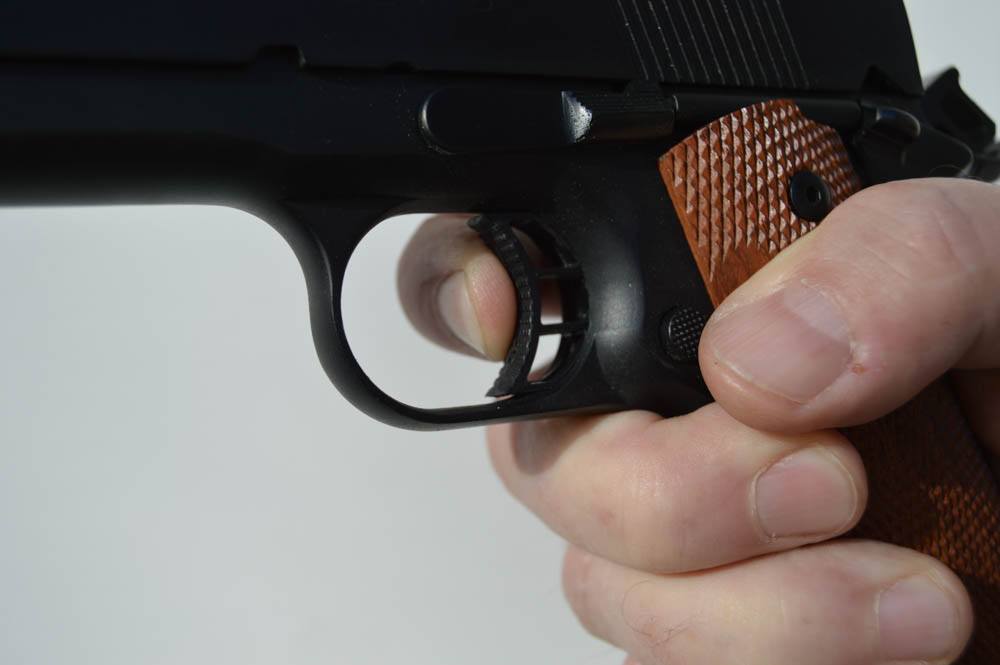
The next fundamental is grip, and this part sounds easy, simply pick the pistol up, and you are gripping it, right? Not so fast. There are several do’s and don’ts when establishing the proper firing grip. Two of the main aspects of establishing a proper grip are consistency and tension.
Also, the firing hand and arm need to absorb the recoil and be an aid to a quick recovery, especially when firing the timed and rapid fire stages.
As I mentioned, one of the key aspects of the grip is consistency, not only in the application of the grip but also in the tension applied. Too loose of a grip, and the pistol will shift in the hand during firing. Too tight, and two things happen: the hand will tremble, and the trigger finger is partly immobilized.
Another aspect of the grip that many shooters discuss is placement of the trigger finger. The two most common ways are the pad of the finger and the first joint. Both are used by many champion shooters, so decide which one is more comfortable and go with it.
The next feature about the grip is that it needs to allow a natural point of aim. This means that when the pistol is brought up to the target, the front and rear sights should be in natural alignment, and there should not be any need to shift the pistol in the hand in order to get proper sight alignment.
Another aspect of the grip is the thumb of the firing hand. Make sure that the thumb does not drag on the slide, as this can strip energy from the recoiling slide and cause failures to feed and eject.
I’ve talked about aspects of the grip that you’ll want to do, now here are a couple of don’ts. Don’t use what’s called a “teacup” grip. This is where the non-firing hand acts as a “saucer” to the pistol’s “teacup.” This type of grip offers little countering to the effects of recoil. The pistol will twist right out of the non-firing hand with this grip.
Also, don’t fail to use the proper amount of tension in the wrist and forearm. This is really important, especially with semi-auto handguns, which need a solid platform for the gun to properly feed, chamber extract and eject.
Although you don’t want to fire a string with a grip that’s too loose, having a grip that’s too tight has its own issues. If the grip is too tight and there’s too much tension in the firing hand, it has a tendency to cause the trigger finger to freeze up, and not be as nimble and quick. This can cause all sorts of trouble when trying to fire off a quick string of shots.
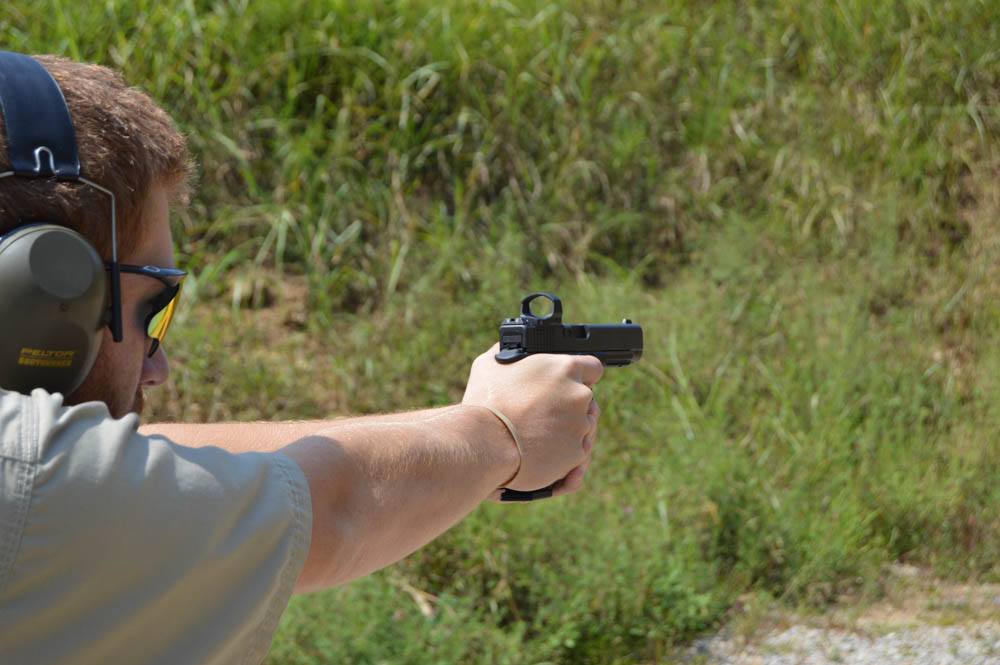
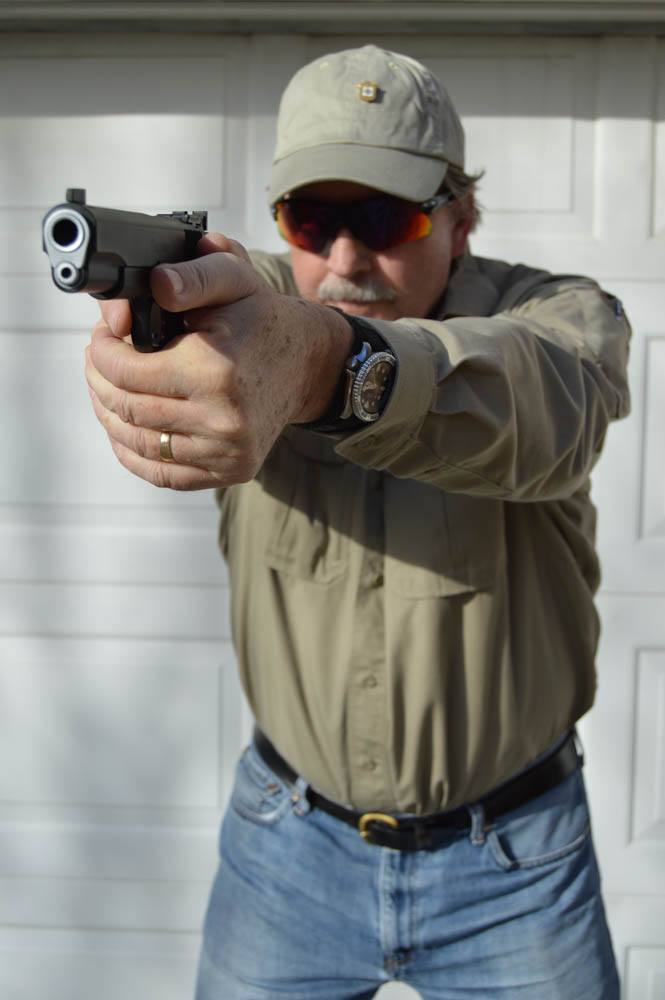
Sight Alignment
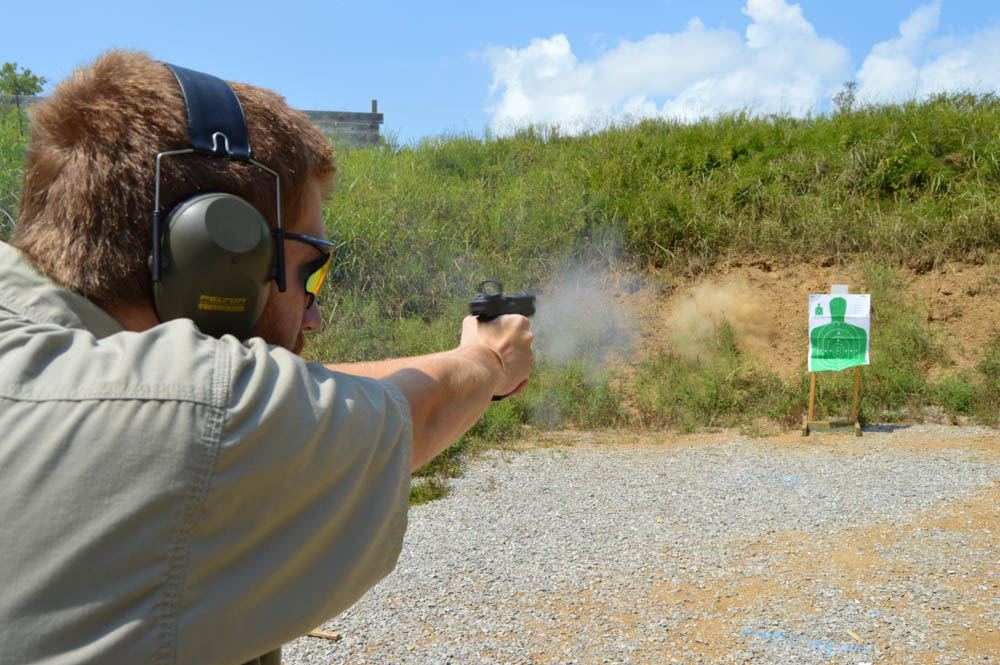
The next fundamental is sight alignment. In order to shoot a handgun with any accuracy, the pistol’s sights need to be in alignment, but what does that mean? Sight alignment is nothing more than the front sight post centered within the rear sight notch, with equal daylight on both sides of the front sight post, and the top of the front sight level with the top of the rear sight. The shooter then has to maintain that good sight alignment when the hammer or striker of the handgun falls and the cartridge is fired. The better the sight alignment is when the bullet exits the barrel, the better the results on the target will be.
It’s important to understand the difference between sight alignment, and sight picture. Sight alignment is nothing more than the relationship of the front and rear sights to each other. This is what the shooter should be focusing on, and more importantly, the focus should almost always be on the front sight specifically. Bullseye shooters, weekend plinkers, or any shooter who is trying to deliver a deliberate, aimed shot or series of well-aimed shots, needs to focus on pure sight alignment, and must have pinpoint focus on the front sight as the shot or shots are delivered. The target should be slightly blurry, and the rear sight should also be blurry. The front sight needs to be in sharp, crystal clear focus during the delivery of the shot for best results.
So how does sight alignment square with the use of red dot sights? Since we don’t have a front or rear sight, there is no sight alignment, so we have to focus more on sight picture.
Trigger Control
The next fundamental is trigger control. The smooth release of the trigger mechanism of any firearm is a critical factor is the delivery of an accurate shot. On the face of it, it’s a very simple act. Simply apply steady building pressure with the trigger finger to a small strip of metal or polymer, until the amount of force needed to overcome the friction of the mechanism is achieved and the tension contained in the sear or striker spring is released. But within that simple act is a complex series of events that have to take place.
The interesting aspect of trigger control that shooters must understand is contained in the words “steady building pressure.” It’s the part of trigger control that high-level shooters have mastered, and new shooters struggle with. New shooters do not yet understand that the trigger must be pressed straight to the rear, with steady building pressure, while at the same time trying to maintain as near to perfect sight alignment as possible. The better the sights are aligned when the sear disengages the striker or firing pin hits the primer and the bullet exits the barrel (which by the way, is a lot longer process than most people think), the better the shot will be.
Think of firing a series of well-aimed shots like wheel that’s spinning. The wheel represents the steady application of trigger pressure. Now imagine a fixed point on the wheel is where the sear releases and the gun fires, but the gun only fires when the fixed point reaches the top of its revolution. The wheel spins at a steady rate, and can turn slowly or quickly, but when the fixed point reaches the top, the gun fires. So in this analogy, no matter the speed of the wheel, the trigger pressure is applied at a steady rate. This is trigger control; being able to apply steady building pressure to the trigger until the pistol fires without disturbing the alignment of the sights. It’s these kinds of analogies that shooters use to visualize different shooting concepts.
Breathing
The next fundamental is breathing. Good breathing techniques are extremely important in all types of shooting, from the slow fire match in bullseye, to speed shooting steel targets, which typically is over in less than two or three seconds.
Breathing oxygenates the blood, which sharpens your vision and enhances the visual acuity. It also helps you relax and that makes it easier to overcome the dreaded “match nerves.”
All shooters, and especially handgun shooters, will have a small amount of movement while holding a pistol at arm’s length. It doesn’t matter is the shooter is using one hand, two hands, or even in the laying down in the Creedmore position on the pistol silhouette range. The pistol will be moving around. Rifle shooters call this the “wobble area.” Pistol shooters, being the sophisticated, dashing and debonair marksman we are, call it the “arc of movement.” The key to delivering an accurate shot (and remember, if we can deliver a single accurate shot, delivering multiple shots just requires speeding up the trigger finger) is reducing the amount of movement to the smallest level possible, and that’s where proper breathing techniques come in. The key is to get the arc of movement, or wobble area at its smallest, at the point where enough trigger pressure is applied to fire the pistol.
When delivering a string of shots, be it on steel or some other type of action shooting, taking a few deep breaths will relax the muscles and remove much of the tension, ease the match nerves and help you compose yourself prior to the sound of the buzzer. Dry fire really helps with this and good dry fire routines will definitely help lower scores.
Mental Discipline
The last fundamental of marksmanship is mental discipline. Shooting is both a physical and a mental game, which is one reason why I enjoy competitive shooting so much. The ratio of physical versus mental depends on the level of expertise of the individual shooter.
A good example of this is to compare the level of shooter that competes at the Olympic level, and the new weekend shooter learning how to shoot with their first pistol. With the Olympic shooter, especially in a discipline like free pistol, the shooter gets two hours to fire 60 shots at a very small target at 50 meters. For these shooters, the game is 95% mental and only about 5% physical.
Compare those shooters to the new, weekend shooter with their first firearm. Hopefully, they’ve been taught at least the basics of marksmanship, so they understand about stance, position, grip, but probably not. They are focused on aiming the pistol and trying to get a hit somewhere on the target. For these new shooters, the ratio is 90% physical and 10% mental.
Whether firing a single shot or a string of shots, there are steps you can take to be successful. One of the most important points is to have a routine. Almost all athletes have a pre-game routine and shooters are no different. The fundamental of mental discipline comes down to developing a plan that comprises several steps or a routine, and it starts with preparation. This includes all of the details prior to the match such as making sure your range bag or gun box is ready, and that you have enough ammunition to shoot the match, including additional for alibis or malfunctions.
Next step in planning is to decide in advance how you are going to shoot the day’s match, how you are going to shoot a particular string or even a single shot. Determine when and where the best place to reload is while on the move, how you are going to handle the wind at Camp Perry, or what is the best sequence to engage multiple targets in a steel match. Remember, having a plan is a very good way to reduce match nerves, because you are focusing on how you are going to approach the stage or string, not focusing on fear of failure, which is the primary cause of pre-match nervousness.
The next important phase of mental discipline is to relax and focus. The shooter needs to approach the shot or series of shots relaxed and ready to shoot.
The next part of mental discipline is to analyze. If a shooter cannot analyze a shot or a string of shots, they will never be able to improve and will just keep making the same mistakes over and over.
The last element involved with the mental game of shooting is correction. After you’ve done all of the previous steps, step back and see if the plan you developed actually worked. If not, what happened and why? This mental aspect of the game can be applied whether you are an IPSC competitor, silhouette shooter, Cowboy Action or a weekend plinker.
Editor’s Note: This article is an excerpt from Gun Digest Shooter’s Guide to Competitive Pistol Shooting.

Next Step: Get your FREE Printable Target Pack
Enhance your shooting precision with our 62 MOA Targets, perfect for rifles and handguns. Crafted in collaboration with Storm Tactical for accuracy and versatility.
Subscribe to the Gun Digest email newsletter and get your downloadable target pack sent straight to your inbox. Stay updated with the latest firearms info in the industry.


I like your Blog, it’s one of the Best blogs online
The section on Breathing tells you about what breathing does! But not how to breathe. i.e. do you inhale and squeeze the trigger or exhale and squeeze the trigger…?