When it comes to carry guns, are red dots really that much better than iron sights? I hit the range to find out.
Just 13 years ago, when I authored the book, Handgun Training for Personal Protection, I included a chapter on red dot sights, where I wrote, “The future is coming. When it gets here, we will all shoot better and faster.” In some ways, reflex-style red dot sights have come a long way in the past 13 years, and today, many believe a self-defense handgun without one is unsuitable … or even antiquated. I’ve spent a good part of the past five years becoming proficient with reflex sight-equipped handguns, and I wanted to explore just how much more effective they might make a self-defense pistol.
There’s a lot to consider when comparing a red dot sight to fixed sights, such as the size they add to a pistol, as well as the red dot sight’s durability and electronic dependency. All those considerations are mute, however, if we cannot—like I predicted 13 years ago—shoot better and faster with them. Most everyone will tell you they feel like they shoot better with a red dot sight—I feel like I am more accurate with one—but are the advantages of a red dot sight a measurable fact for most shooters?
Even if you perform equally well with a red dot sight, you must weigh the concerns of potential failure that comes with them.
What I wanted to learn was pretty straightforward: Can a shooter shoot better and faster with a red dot sight?
A Fair Fight
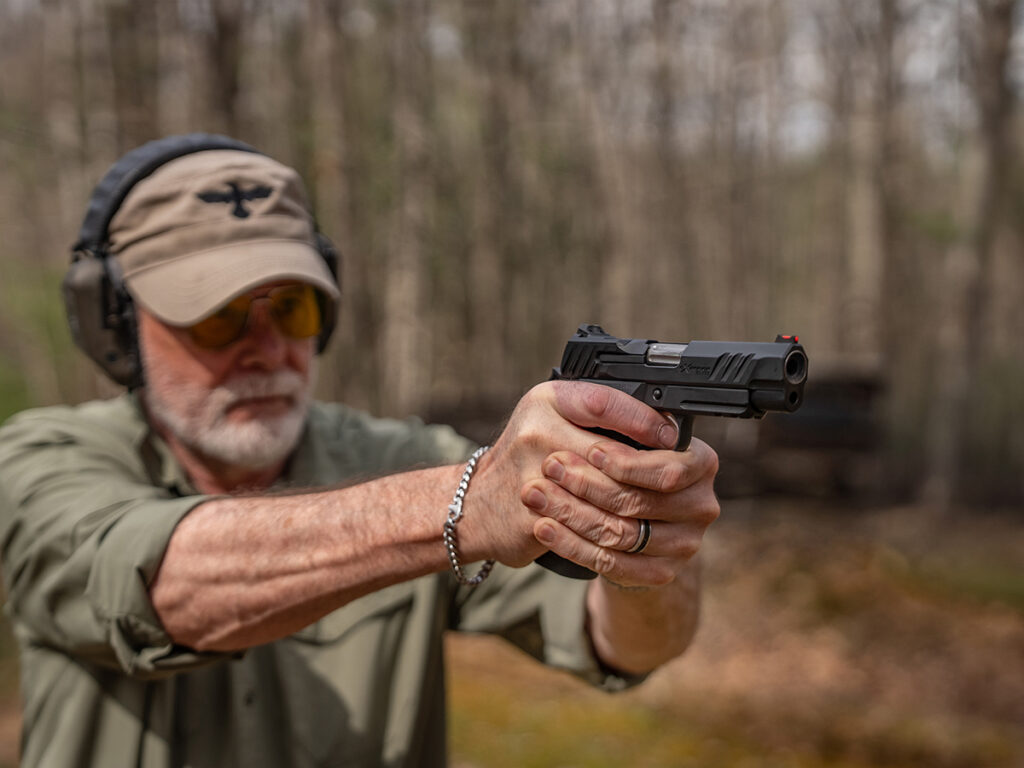
To conduct a test like this, some parameters must be established to make it fair. First, all the shooting must be conducted with the same or identical handguns. Second, the shooters cannot be permitted to substantially familiarize themselves with the handgun or sight system before testing. And finally, the shooters should represent a varied skill set comprised of a shooter who predominately uses a red dot sight, a shooter who predominately uses fixed sights, and a shooter who uses both about an equal amount. Each shooter should conduct the same drills with each sight system without more than just a few familiarization shots.
The Pistol
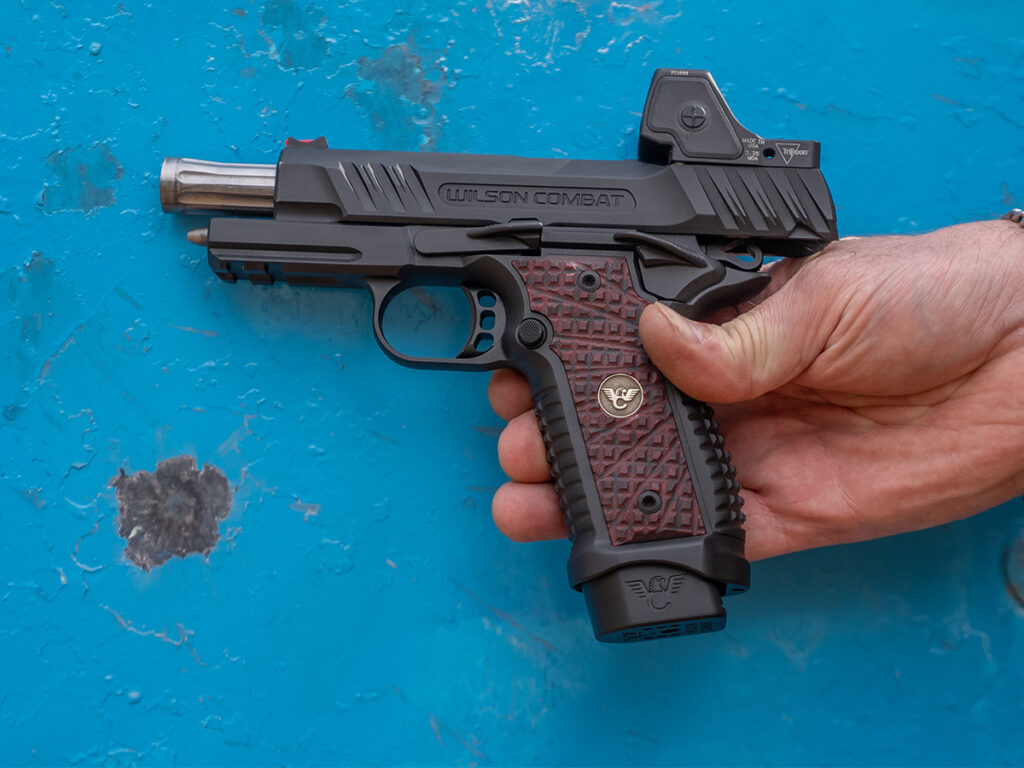
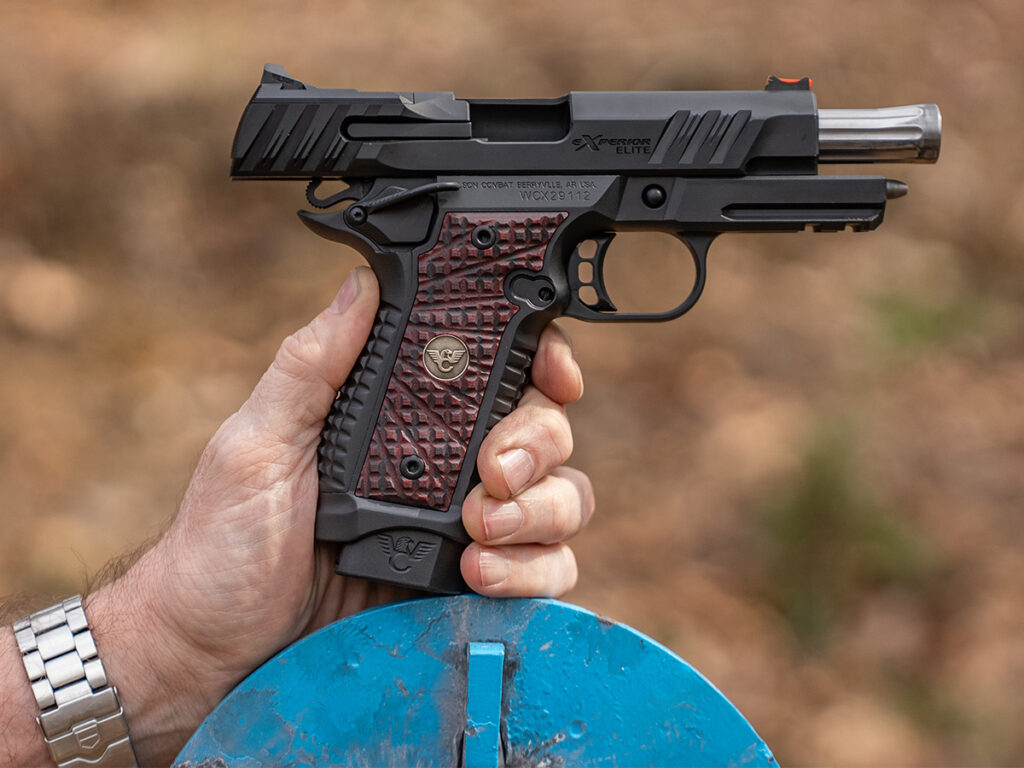
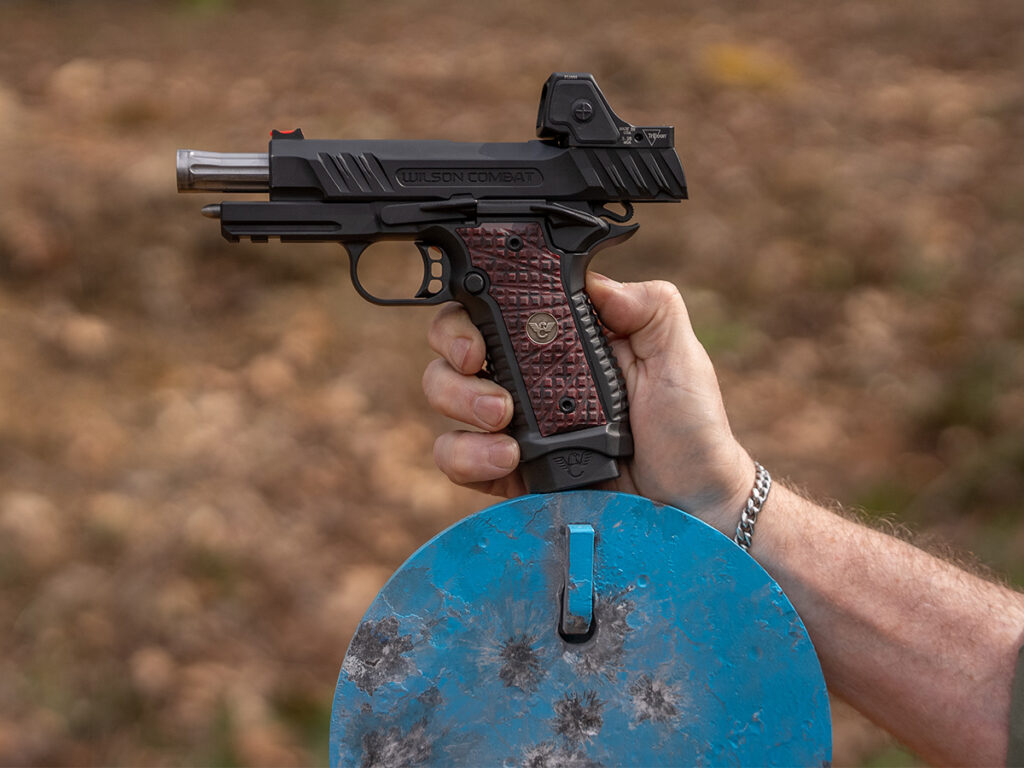
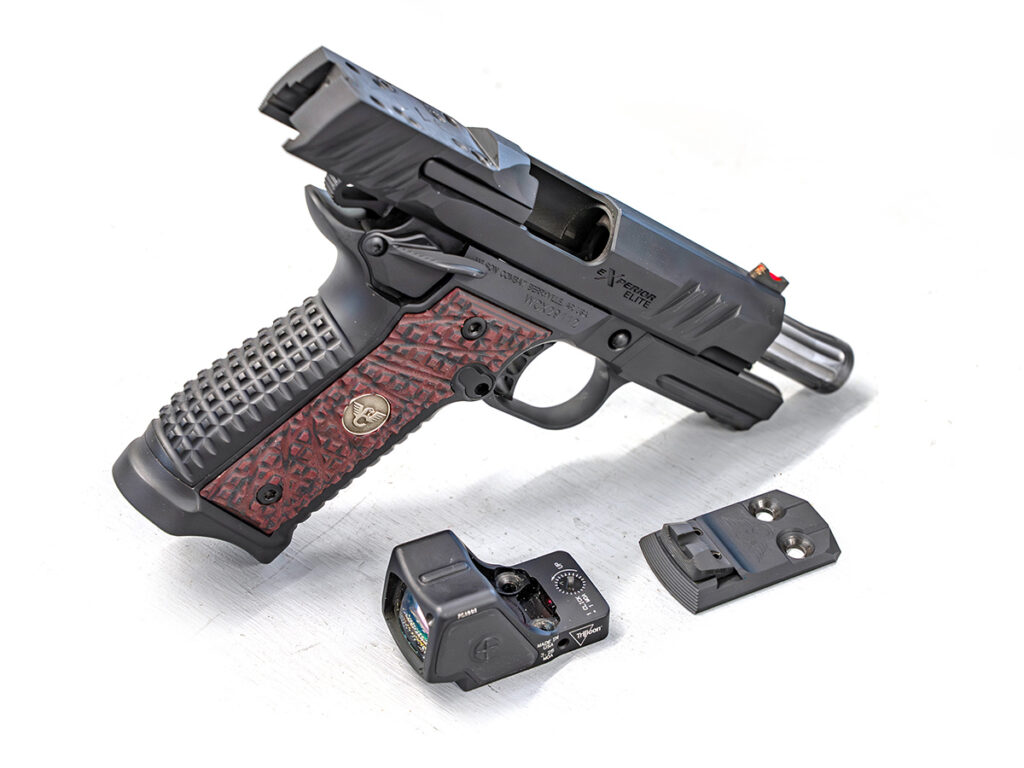
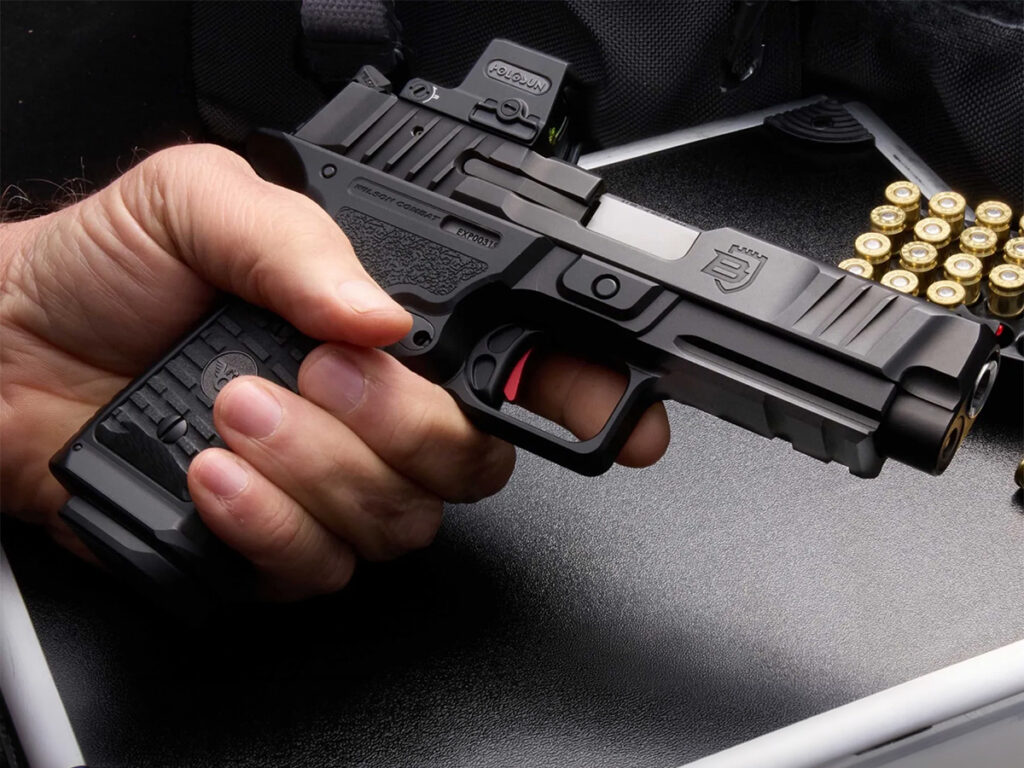
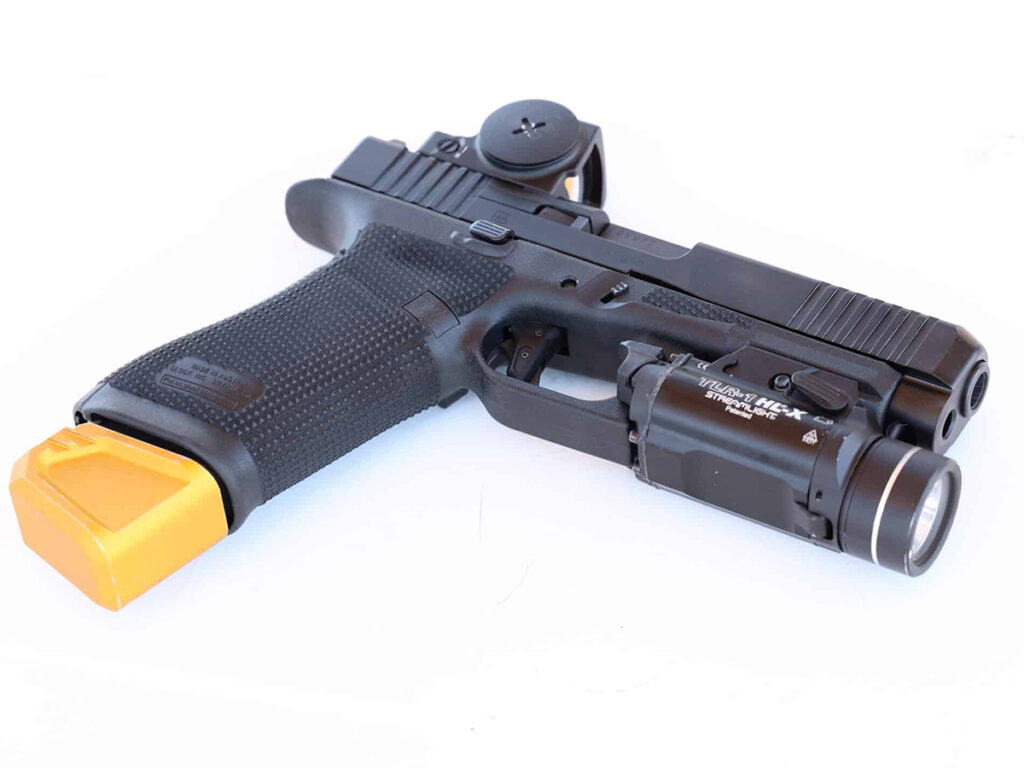
The handgun chosen for this test was actually somewhat responsible for the conduct of the experiment. Wilson Combat just introduced their eXperior Elite pistol, which is an optics-ready Commander-sized pistol. The optics plate on this pistol is fitted with a fixed rear sight, and when the plate is removed for red dot installation, there are no co-witnessing sights. This meant that a shooter could not cheat during the test because only one sight system would be available at any given time.
The Shooters
Three shooters were chosen based on their preferred or most practiced sight system, but also with the knowledge that they could perform—on demand—each drill to its par time standard, with no misses, using their preferred sights system.
Shooter 1 spends about as much time shooting a red dot-sighted pistol as a fixed-sighted pistol. Shooter 2—a police officer—carries a pistol with a red dot sight as a duty gun. And Shooter 3 has limited experience with red dot-sighted pistols.
Irons Vs. Red Dots: The Test
Three drills were chosen. The first involved shooting three, five-shot groups—slow fire—from a sandbag rest at 10 yards using the red dot sight and the fixed sights.
The second was the Step Back Drill, which required drawing from the holster and engaging an 8-inch steel plate with two shots at 5, 10, 15, 20 and 25 yards, with each two-shot string timed separately. Par time for this drill is less than 20 seconds when the times for all five stages are added.
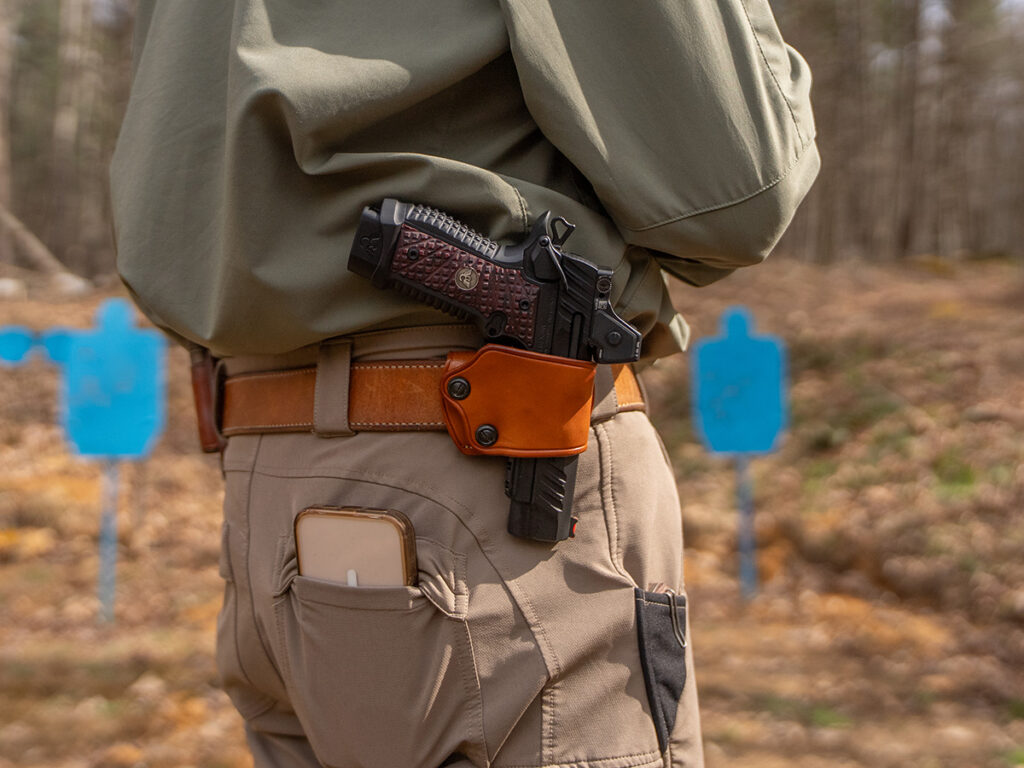
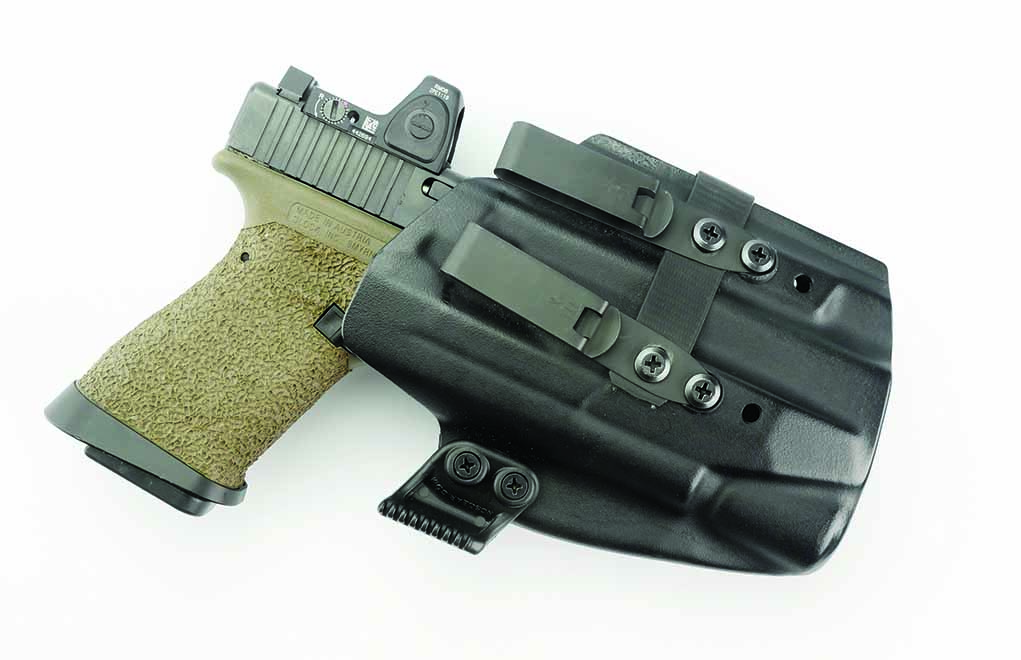
Tests 2 and 3 were all conducted from the Galco Yaqui Slide holster.
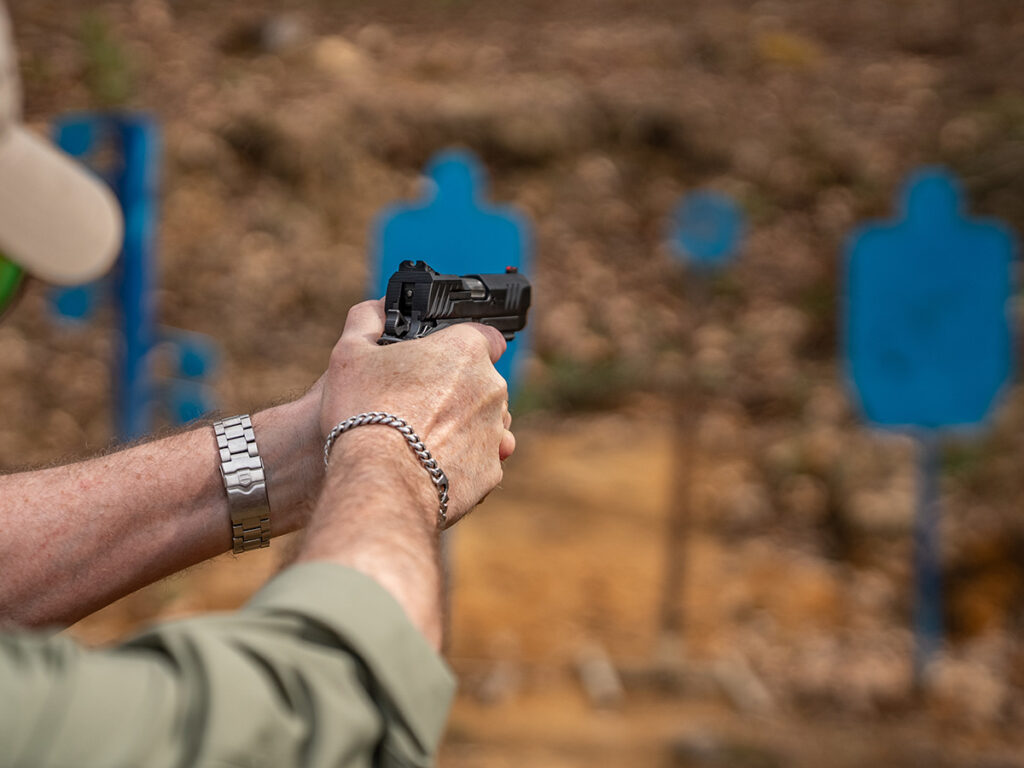
The final test was similar to half of the common El Prez Drill. The shooter started holstered and engaged three steel silhouette targets with two shots each from 15 yards. The guidance for each shooter on drills two and three was to shoot only as fast as you felt you could hit with every shot.
Test 1: Precision
To really experience the shooting advantages a red dot sight can provide, you need to extend the distance to—or reduce the size of—the target.
This test was designed to see which sights system could be used to deliver the most precision on target, and the results here were not surprising. Groups fired with the red dot sight were substantially smaller, on average by 39 percent. Additionally, Shooter 1 and Shooter 2 shot so similarly with both sights systems; Shooter 3 did not conduct this test. The performance gap here was substantially in favor of the red dot sight. However, it should be noted that the five-shot groups at 10 yards, still averaging less than an inch that were fired with fixed sights, demonstrate more than necessary precision for any self-defense handgun.
Precision (10 Yards)
Fixed Sights
Red Dot Sight
Group 1 (Avg.)
0.91
0.49
Group 2 (Avg.)
0.97
0.56
Group 3 (Avg.)
0.84
0.60
Average:
0.91
0.55
Test 2: Step Back Drill
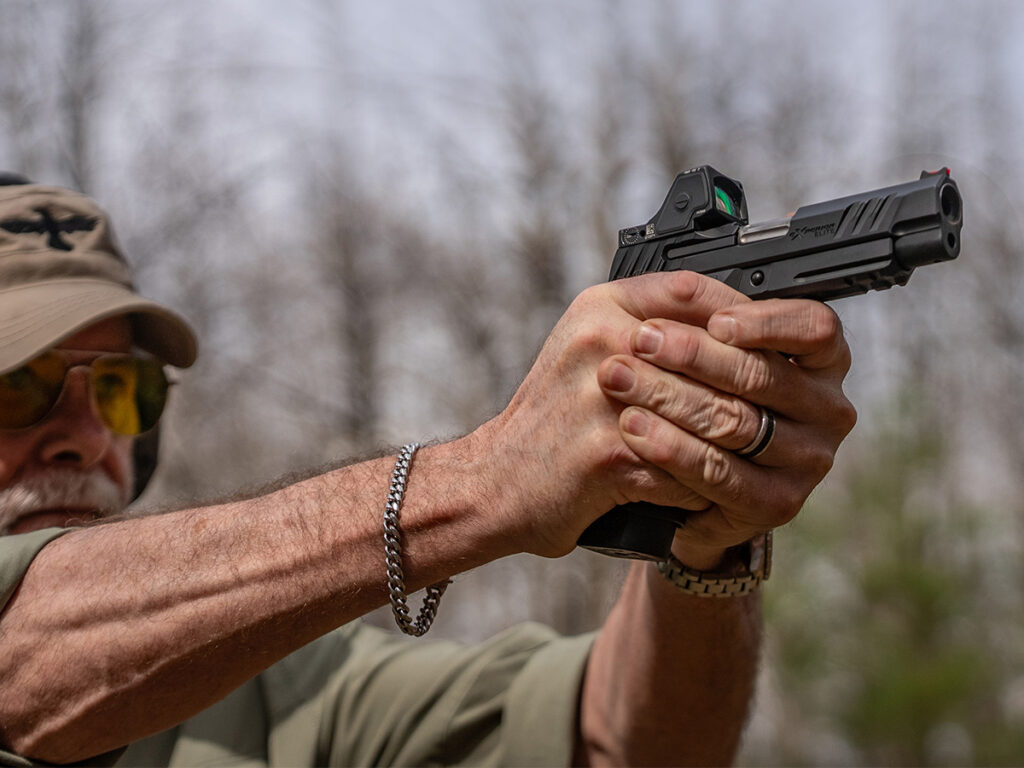
For the testing, a Trijicon RMR HD 2 with a 3.25 MOA dot was used by all three shooters.
With this test, the waters began to cloud. All three shooters obtained hits with the fixed sights faster than with the red dot sight, on average by almost 14 percent. Surprisingly, at 20 yards, Shooter 2 and Shooter 3 were faster with the fixed sights. As expected, at 25 yards all three shooters were faster with the red dot sight by almost 20 percent. However, when the overall times to complete all five stages was compared, fixed sights proved to be about 2 percent faster. The average time for each drill with the red dot sight was 3.31 seconds, and the average time with the fixed sight was 3.25 seconds. The fixed sights were faster up close, and the red dot sight was faster at maximum distance, but when all five distances were considered, it was realistically a tie.
Step Back Drill (5, 10, 15, 20, 25 Yards)
Fixed Sights
Red Dot Sight
5 Yards
1.75
2.01
10 Yards
2.40
2.59
15 Yards
3.02
3.85
20 Yards
4.19
4.14
25 Yards
4.91
3.98
Average:
3.25
3.31
Total:
16.26
16.56
Test 3: Multi-Target Drill
On the multiple target drill, every shooter performed better in every way with the fixed sights.
Where Test 2 required a measured balance of speed and accuracy, Test 3 was less demanding from an accuracy standpoint. Hitting a silhouette-sized target at 15 yards is not difficult. By the numbers, all three shooters shot faster with the fixed sights than they did with the red dot sight. The fixed sights won the drill by about 9/10ths of a second. Split times between shots on the same target were 4 percent faster with the fixed sights, and transition times between targets were 5 percent faster with the fixed sights. The fixed sights were even faster out of the holster for the first shot by—on average—a quarter second or 13 percent.
Multi-Target Drill (15 Yards)
Fixed Sights
Red Dot Sight
1st Shot
1.85
2.14
2nd Shot
2.18
2.61
3rd Shot
2.84
3.34
4th Shot
3.10
3.73
5th Shot
3.64
4.47
6th Shot
3.91
4.80
Average Split Time:
0.46
0.61
Average Target Transition Time:
0.60
0.74
Average Total Time:
3.91
4.80
Lessons Learned
What I can tell you, with some degree of confidence, is that you can make more accurate shots with a red dot sight than you can with a fixed sighted pistol at any distance. Also, if you’re capable of performing the drills in Test 2 and Test 3 to standard with any pistol, you can probably perform them the same, if not faster, with a pistol that has fixed sights. This, of course, goes against the common narrative that red dot sights are better for concealed carry. Fixed sights performed the same or better during these two tests and do not have the failure potential of red dot sights.
However, I think there are exceptions. If you’re an extremely high-level competitive shooter who only—or mostly—uses a red dot sight, and who conducts hours of frequent practice with a red dot-sighted pistol, I’m confident you can shoot a red dot-sighted pistol more accurately and faster, especially as distances increase. Also, anecdotally, I can tell you that new shooters respond to red dot sights better than fixed sights. I’ve proven this numerous times working with new shooters to include my two daughters. Learning how to manage a trigger press and keep three planes of focus in tune with fixed sights is difficult.
So, Do You Do the Dot?
I still believe, as I predicted in my book, that dot-sighted handguns are the future and will lead to better and faster shooting. However, based on this experiment, what I’ve witnessed with other shooters and what I’ve learned from other instructors, I don’t think the future is here just yet. Granted, this was a very limited test, and there are a lot of variables left to be examined, like the best dot size, color and brightness for speed, and the best window size and shape for target acquisition. Maybe more importantly, for the red dot sight to commonly outperform fixed sights at realistic self-defense distances, we might have to progress to a generation raised on dots and not fixed sights.
I shoot dot-sighted pistols about as much as I shoot fixed-sighted pistols. At realistic self-defense distances, and in practical scenarios, I shoot fixed sights better. But, if I had to make a precise shot at 25 yards and beyond, I’d damned sure want a red dot sight. The results of this test and the potential failure possibilities with a red dot sight further support my decision to not use them on carry guns.
However, I’m not trying to convince you to do the same.
What I hope this article does do is convince you to conduct your own testing. You might come to the same conclusion, realize you need more practice with a dot or fixed sights, or discover the red dot sight works better for you all the time.
Mostly, I hope you don’t just drink the Kool-Aid, because doing what all the cool kids are doing should not be the deciding factor in your weapon platform.
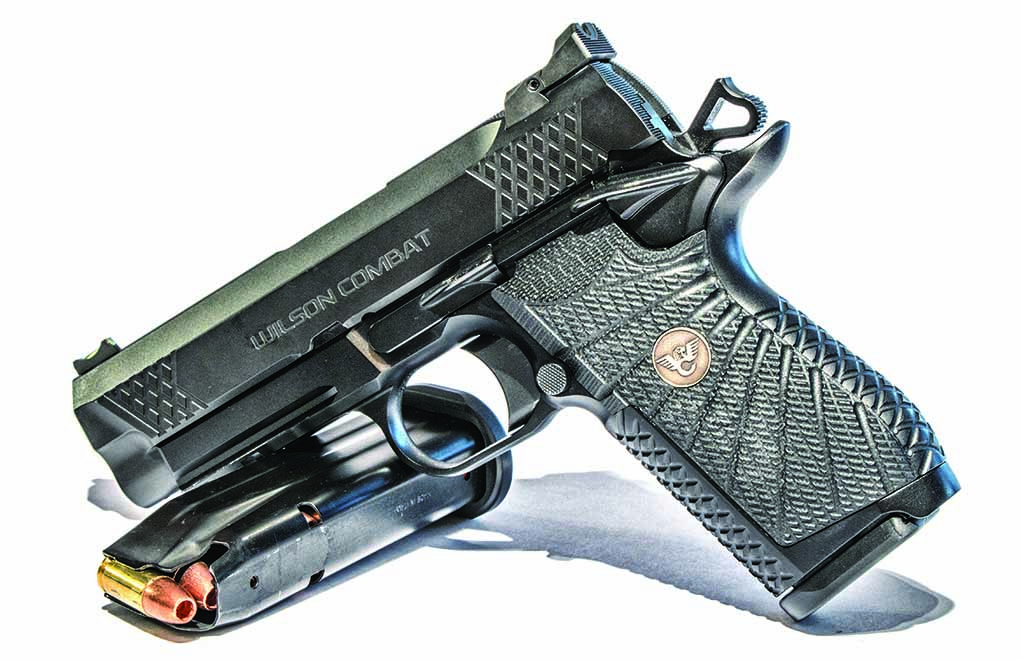
Gun Notes: Wilson Combat eXperior Elite
The eXperior Elite pistol from Wilson Combat is their newest and arguably best rendition of their X9 platform. It was the perfect pistol for this test; when a red dot sight is mounted, there is no provision—without aftermarket accessories—for co-witness fixed sights. This is because Wilson Combat uses the same slide cut and pin mounting system on the eXperior Elite that they developed for their Division 77 P1 pistol. This prevented the shooters from cheating either way.
The P1 optics sights pin system on the Wilson Combat eXperior Elite pistol provided the perfect testing platform with a reflex sight and fixed sights.
Additionally, being a brand-new pistol, none of the shooters had any prior experience with it. Also—though unrelated to the experiment—it’s worth noting the extreme level of precision this pistol delivered, which is undeniably a product of its new double locking lugs. And finally, there were no stoppages of any sort experienced by any shooter during this experiment. The eXperior Elite pistol is available now from Wilson Combat with a base price of $3,999.
Wilson Combat eXperior Elite Commander Armor-Tuff Armor-Tuff
We shot and carried a ton of concealed carry guns. Here are the handguns we find fit to cover your six.
Finding a handgun you can confidently use and comfortably carry every day is crucial. With countless options available, navigating through the various sizes, styles, calibers, and price points can be overwhelming. That’s where I come in—to guide you through some of the the best concealed carry gun options currently on the market.
How I Chose The Best Concealed Carry Guns
I’ll start by saying that selecting these concealed carry guns was a team effort. Each of these guns was shot, tested and carried by myself, Gun Digest staff or long-term and trusted freelancers. This avoids myopia, a one-person perspective on each of the firearms, and allows us to take into account different body types and backgrounds to give these guns a square day in court. Our experience ranges from certified handgun instructors to law enforcement and military. Oh yeah, there’s a master gunsmith in the mix too. Of all the pistols and revolvers carried, these were the ones that proved head and shoulders above the rest in the concealed-carry market when it came to reliability, comfort and accuracy.
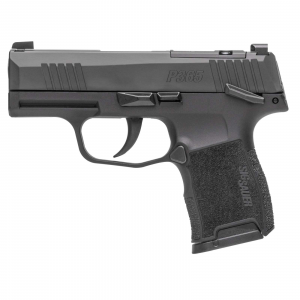
Next to capacity, the real advantage of the P365 is carry comfort. It’s easily concealed and comfy to carry.
Pros
Great sights
Excellent Capacity
Optics-ready options
Cons
Ships with only one pinky extension
P365 Specs
Caliber: 9mm
Capacity: 10+1
Barrel Length: 3.1 inches
Overall Length: 5.8 inches
Overall Height: 4.3 inches
Overall Width: 1.1 inches
Weight: 17.8 ounces
Sights: XRAy3 Day/Night Sights; Optics Ready
MSRP: $600
Is it fair to say this is the pistol that changed the face of concealed carry? Honestly, it’s not too much of a stretch. The Sig P365 has proven among the most monumental handguns to hit the market in a spell, serving up what many consider the perfect on-person self-defense package. That is a tall boast, but one the demure 9mm more than fulfills.
Above all, what makes the P365 such a spectacular heater is its size. The 3.1-inch barreled pistol is a mere 1 inch in width and tips the scales at a scant 17 ounces or so, creating one of the most concealable and easy-to-carry pistols out there. Sure enough, there are concealed carry guns, but in nearly every case they’re a compromise in power or capacity. Not so with the P365. Shipping with two 10-round magazines, the mighty mite has a payload identical to many compact models that come in nearly twice its size. Not enough on tap? Simply solved, given there are 12- and 13 or 15-round extended magazines available to improve your firepower.
Shooting-wise, the micro-compact shocks for a pistol its size. An abbreviated sight radius provides a challenge for those unfamiliar with the touchiness of small guns, yet Sig arms shooters with the tools to keep it steady. In addition to aggressive grip texturing, the striker-fired’s respectable trigger ups the gun’s accuracy potential. To boot, the 9mm is also quite easy to manipulate—an often overlooked asset.
Another point that sets the P365 apart from the rest of the micro nines and concealed carry guns in general is its modularity. The gun’s fire control unit is interchangeable, in turn, you can upsize or downsize the grip. Furthermore, this feature allows you to swap parts from other P365 models–of which there are many–to create your perfect pistol. However, we can promise the outcome will look good.
As for nits to pick, the gun is stout in recoil, but no more so than any other micro-compact. And Sig only includes one pinky extension with the pistol. Even with medium-sized hands, I find the P365’s grips too short for comfort.
These points aside, there’s little arguing Sig cooked up a game-changer with the P365.
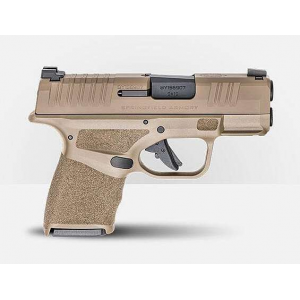
As pointed out, the Sig P365 is a game-changer. The Springfield Armory Hellcat is proof. Quickly embracing the micro-compact concept, the Illinois concern cooked up a direct competitor to the popular Sig. In many respects, it produced a concealed carry gun option that runs neck and neck with the original.
No larger than a compact .380 ACP, the striker-fired is among the smallest 9mm options available today. By the tape, it measures 1 inch in width and 6 inches in length and weighs in at 18 ounces. Pretty dang concealable and easy to carry by anyone’s standards.
At the same tick, the Hellcat offers everything you’d expect out of a much larger concealed carry pistol—especially capacity. Out of the box, the 3-inch barreled pistol boasts more firepower than nearly anything in its class, shipping with an 11-round magazine. Invest in a 13-round extended-capacity magazine, well folks, you’ll holster an iron flirting with a full-sized pistol’s capacity.
Outfitted with adaptive grip texturing, the Hellcat offers a positive grip when you need it, yet the ability to reposition your hand when you need to. A flat-faced trigger combined with a featherweight break and short reset ups the pistol’s accuracy resume, as well as allows it to run when needed.
Breaking from the herd, Springfield opted for a slightly new sighting system, jettisoning the traditional three-dot sights for a U-notch. Similar in concept, the execution differs in that shooters place the fiber-optic front pipe in the white outlined U-notch. A fast and intuitive system, few will miss the old way of building a sight picture. Additionally, the OSP model offers a slide cut for mounting optics, if a red dot is more your cup of tea.
The Wilson Combat EDC X9 offers a great balance of features; this is indicative of a quality carry gun. It fits the author well, but if it doesn’t fit you, find a different gun.
Pros
Superior build quality
Sublime trigger
Factory customizable
Cons
Expensive
Heavy
EDC X9 Specs
Caliber: 9mm
Capacity: 15+1, 18+1
Barrel Length: 4 inches
Overall Length: 7.4 inches
Overall Height: 5.25 inches
Overall Width: 1.4 inches
Weight: 29.09 ounces
Sights: Tactical Adjustable Battlesight with fiber optic front sight
MSRP: $3,3210
If you were to build a race gun to a concealed carry pistol’s specs, you’d likely come out with the EDC X9. This is the most highly tuned and performing pistol of our picks—with a price tag to match. But for the uncompromising souls looking to protect their six, the pistol is a perfect match.
At its core, Wilson Combat’s 9mm is a 1911, but one upgraded for modern self-defense. To the traditional side of the design, the hammer-fired gun inherits the exceptional 1911 trigger, which is light and fast. Unlike the original, Wilson has stripped the grip safety—though, for obvious reasons, the gunmaker has kept the thumb safety.
The EDC X9’s ergonomics are impeccable with the gun fitting the hand perfectly and Wilson’s XTAC pattern grips further enhance the comfort while ensuring a firm hold. Its aluminum frame adds a bit of heft to the compact pistol, but it’s far from prohibitive—comparable to a Glock 17. And the weight is a blessing of sorts, making the X9 extremely mild-mannered.
Despite a terse 4-inch barrel, the pistol can accurately fire well past typical defensive ranges. At close quarters, it’s lights out. Not only does the trigger and heft of the gun aid with this but also its Wilson Combat Battlesight and fiber-optic front, which provide quick and clear target acquisition.
In testing, the EDC X9 proved highly reliable, handling a wide range of 9mm ammunition without issue—it chewed through everything from 115-grain ball to 147-grain hollow point without a hitch. Much of this is thanks to Wilson Combat’s Enhanced Reliability System, a proprietary system designed to optimize functioning with the varying power levels of 9mm ammunition.
We lay out a pretty good case in our EDC X9 review of why this pistol is money well spent.
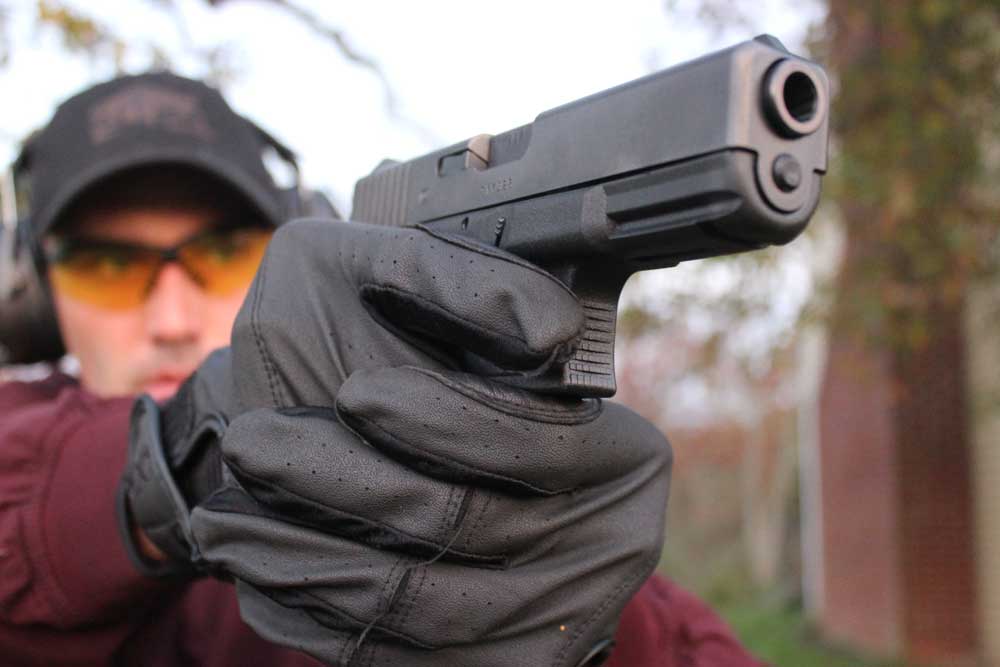
Proven in military and law enforcement use, the G19 has plenty of defensive credibility.
Pros
Accurate
Reliable
Aftermarket parts
Ease of maintenance
Cons
Grip angle
Plastic sights
Mushy trigger
Glock 19 Specs
Caliber: 9mm
Capacity: 15+1
Barrel Length: 4.02 inches
Overall Length: 7.36 inches
Overall Height: 5.04 inches
Overall Width: 1 inch
Weight: 21.16 ounces
Sights: Polymer white dot front, outline rear
MSRP: $600
It’s difficult to knock off the king. And certainly, the Glock 19 still has its place on the throne of best concealed carry guns.
While a larger option than many of the modern sub-compact options, I find it difficult not to love how this momma-bear option operates. It’s still very concealable, at the same tick, large enough to make it extremely manageable and accurate. Of the guns tested, this G19 provided some of the best groups at even longer engagement distances.
Not to mention, the pistol is almost boringly reliable. Perhaps this is one of the greatest achievements of the pistol, no matter what you feed it the gun will chew through it. Much of this is thanks to a painfully simplistic design that offers few opportunities for malfunctions to occur. The other bonus to this is facet, the gun is extremely simple to upgrade—if you happen to find what rolled out of the factory unsatisfactory.
Sights, I’d say are one of the areas many consider must-change—though the factory set isn’t unusable. Trigger is another one that can use some pepping up and upgrades are legion in this area. I’ll admit, I don’t hate the G19 trigger and it’s more than passible for a self-defense gun, but there are much better options out there.
One last point, while the Glock 19 is concealable—folks have been keeping it under wraps for decades—it is large by today’s standards. It’s 21 ounces unloaded and 1.26 inches in width and has a height of 5 inches. A bit of a load if you go jogging in your jorts.
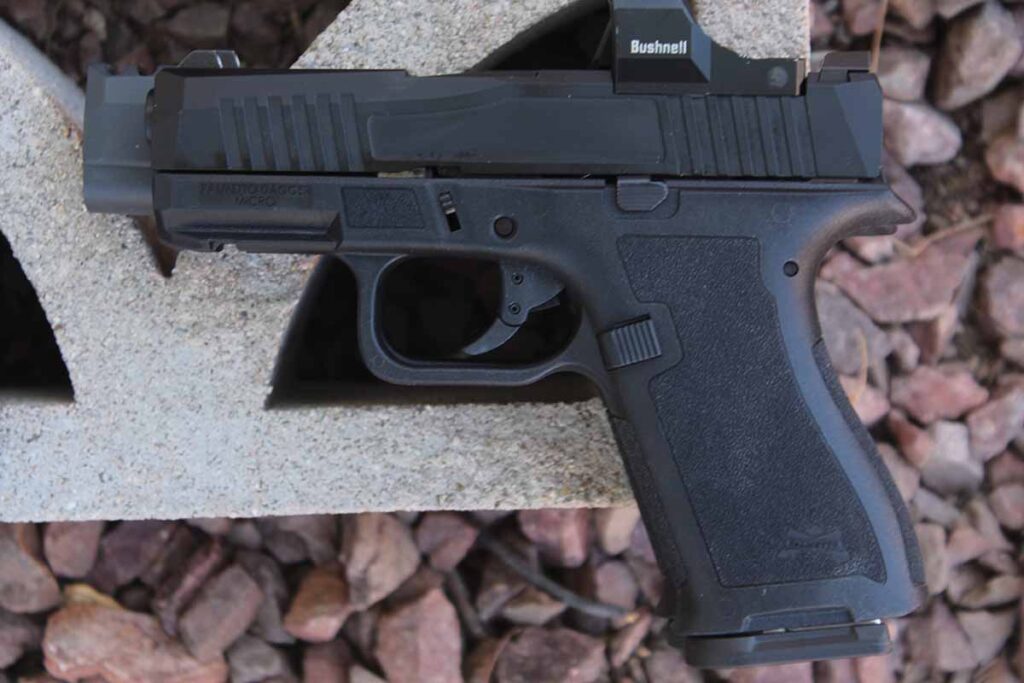
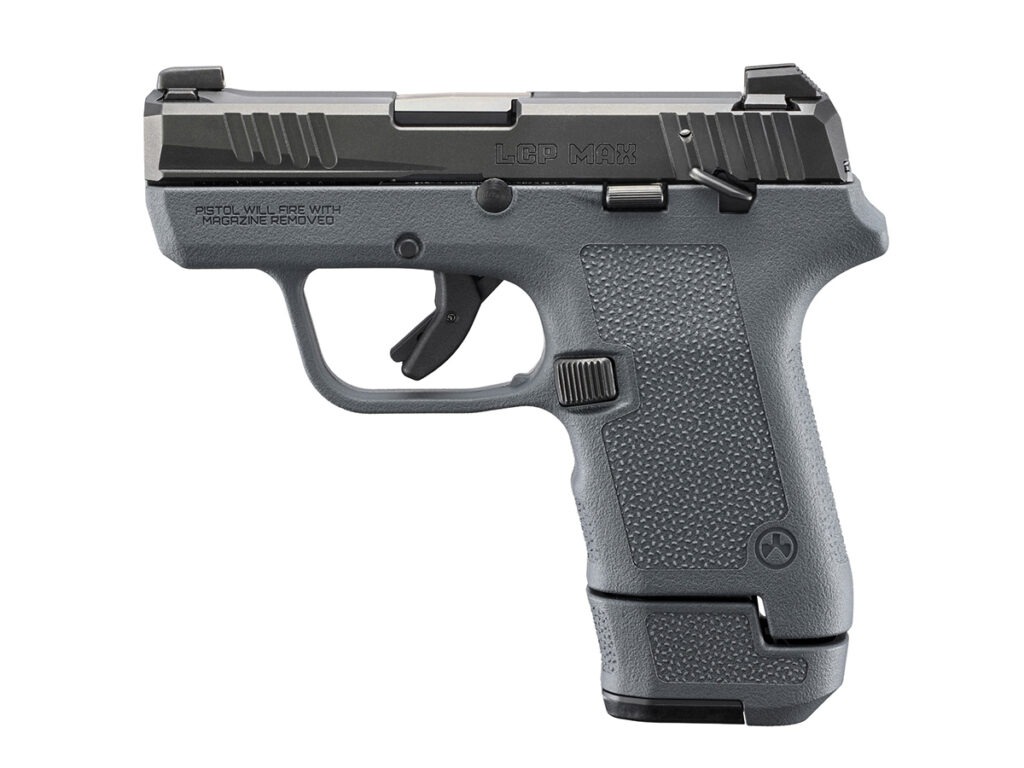
On the affordable end of concealed carry guns, the Dagger Micro stands nearly alone.
Pros
Affordable
Glock 43 compatibility
Durable
Cons
Ships with one magazine
Few holster options
Dagger Micro Specs
Caliber: 9mm
Capacity: 15+1
Barrel Length: 3.41 inches
Overall Length: 6.5 inches
Overall Height: 4.7 inches
Overall Width: 1.1 inches
Weight: 15.9 ounces
Sights: Three-dot
MSRP: $300
A remarkable blend of affordability, compactness and practical features, the PSA Dagger Micro hits a lot of the right notes. Surprising, given it’s the South Carolina concern’s first foray into this end of the market.
First off, as a budget concealed carry gun—one with a sub $400 price tag—don’t expect any originality. The Dagger Micro is what it is and that’s a Glock clone. Still, there are advantages to playing copycat, such as compatibility with G43, G43X and G48 pistols. And for those who have shot Glocks, well, by golly, the PSA carry gun should prove very familiar.
Overall, the pistol is fairly refined for the price point, with nice ergonomics, beveled edges and aggressive cocking serrations for enhanced manipulation. The trigger leaves a little to be desired—especially given the hinged bottom—but is responsive. And the grip is just right, with a sandpapery texture that keeps the gun where it should be—your hand.
Nicely, the gun ships with 15 round magazine, a significant upgrade over many in the compact class. Yet, PSA only gives you one. I suppose they needed to save money somewhere. And anyone familiar with the 3-dot sight system will know what to do when they pick up a dagger. Additionally, the pistol has an optic cut that accommodates Shield RMSc footprint optics for those who prefer red dot sights on their carry gun.
Reliability is another strong point for the Micro Dagger, it digested everything we fed it in testing. When it comes to a concealed carry pistol—no matter the price—this facet is priority No. 1.
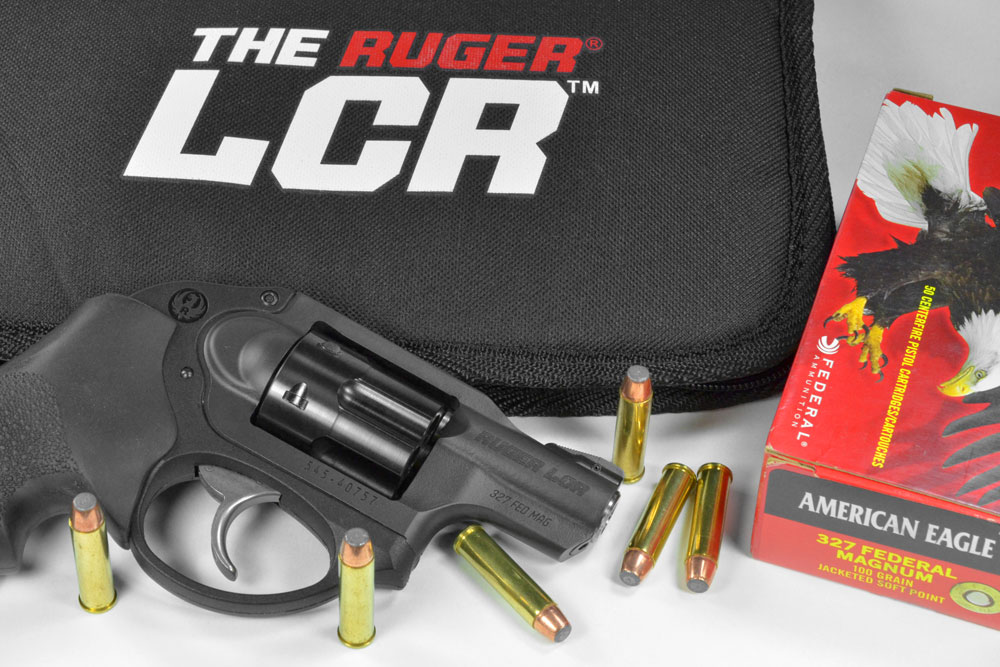
Best Carry Revolver: Ruger LCR
The LCR made concealed carry revolvers relevant again.
Pros
Highly concealable
Reliable
Good double-action trigger
Cons
Integral sights
Double-action trigger not great for begginers
LCR Specs
Caliber: .327 Federal Magnum; other calibers .22LR, .38 Special, .357 Magnum
Capacity: 5-8 depending on caliber
Barrel Length: 1.87 inches
Overall Length: 6.5 inches
Overall Height: 4.5 inches
Overall Width: 1.28 inches
Weight: 13.5-17.1 ounces depending on caliber
Sights: Ramp front, integral rear
MSRP: $739-$859
Despite rumors otherwise, the self-defense revolver isn’t dead. Or it hasn’t been since Ruger introduced its LCR (Lightweight Compact Revolver).
The minute snub-nose nearly single-handedly breathed life back into the flagging defensive revolver market when it hit the scene in 2009. And why not? At 13 to 17 ounces in weight and 6.5 inches in overall length, it is among the most concealable guns on the market today. This, in some respects, also gives it a dual purpose—not only is it a capable primary concealed carry gun, but it’s also svelte enough to serve as a backup.
Aside from concealability, the Ruger has also enhanced one of the key drawbacks of the double-action-only revolvers—its trigger pull. The gun utilizes a friction-reducing cam that lightens the trigger pull considerably and makes it surprisingly smooth. Even so, it’s still a stout 8 pounds to trip the hammer, which might not prove ideal for those brand new to shooting. Also, the sights—an integral rear and blade front—aren’t the easiest to master for more precise shooting. But at defensive range in defensive scenarios are more than adequate.
Ruger offers a bevy of chambering options for the LCR, from .22 LR up to .38 Special and 9mm. Though it’s a bit of an oddball, we liked the gun in .327 Federal Magnum, a hard-hitting compromise that is forgiving in recoil.
Our Ruger LCR review show why this revolver is such a hot-shot (especially in .327 Fed Mag).
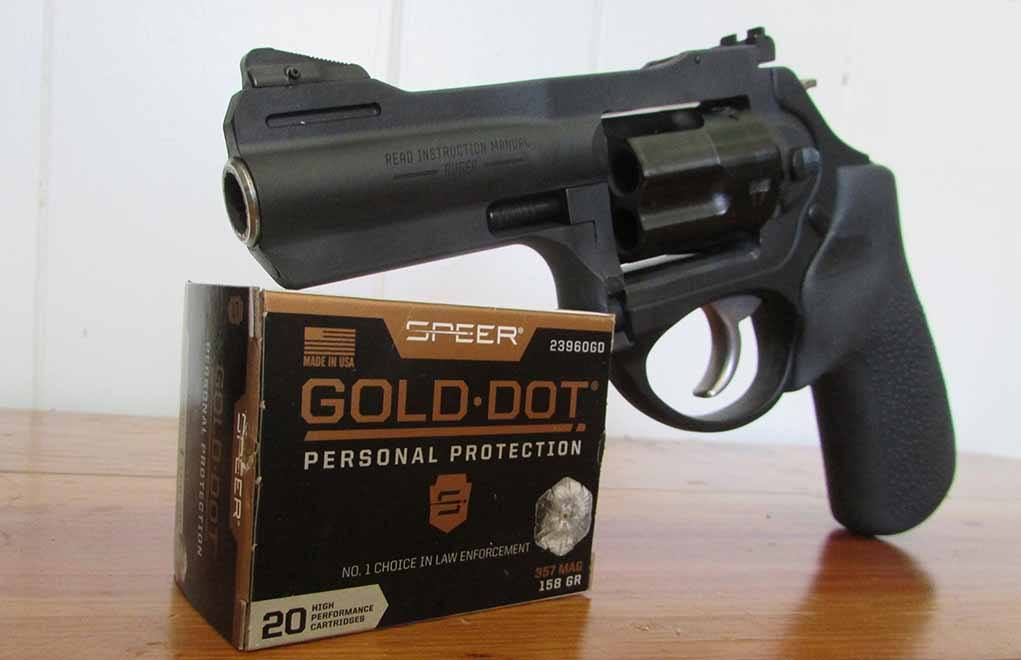
While it doesn’t quite get everything out of the .357 cartridge, it certainly makes it more of a magnum than terser concealed carry revolvers.
Pros
Good ballistics
Accurate
Cons
Limited capacity
Double-action trigger not for beginners
LCRx 3-Inch Specs
Caliber: .357 Magnum; other calibers 9mm, 22 WMR, 22LR, .38 Special
Capacity: 5-6 depending on caliber
Barrel Length: 3 inches
Overall Length: 7.5 inches
Overall Height: 5.8 inches
Overall Width: 1.28 inches
Weight: 17.3 ounces depending on caliber
Sights: Ramp front, adjustable rear
MSRP: $859
The LCRx is the absolute mamma bear magnum for concealed carry revolvers, offering shooters everything they want in a .357 Magnum—especially the power. The secret sauce here is the gun’s 3-inch barrel that milks the ballistic potential out of the magnum cartridge.
While the snub-nose .357s have more pop than a .38 Special, even a +P .38, it falls considerably short of the cartridge’s normal performance standards. In return, you get more muzzle blast and pain. However, in my chronograph testing, the LCRx is just off a 6-inch .357 Magnum and dang near identical to a 4-inch model. All while being quite a bit more concealable.
The 5-round revolver is heavier than its little brother LCR, coming in at 21 ounces. This isn’t only due to the extra bore, but also the stainless steel frame—required for the more powerful cartridge. Despite this, it remains very concealable.
The trigger is similar to the LCR, making the gun manageable and accurate—though it still isn’t an option for those who haven’t mastered the double-action trigger pull. There are other aspects shooters should keep in mind with the revolver, as well. It has adjustable target rear sights, providing more accuracy. And its hammer has a spur. While I haven’t found either to pose a problem, each are a potential snag point and might prove uncomfortable for some, depending on how they carry. At 5 o’clock outside the waistband, it wasn’t an issue for me.
Does the extra inch matter? Check out our LCRx review to find out.
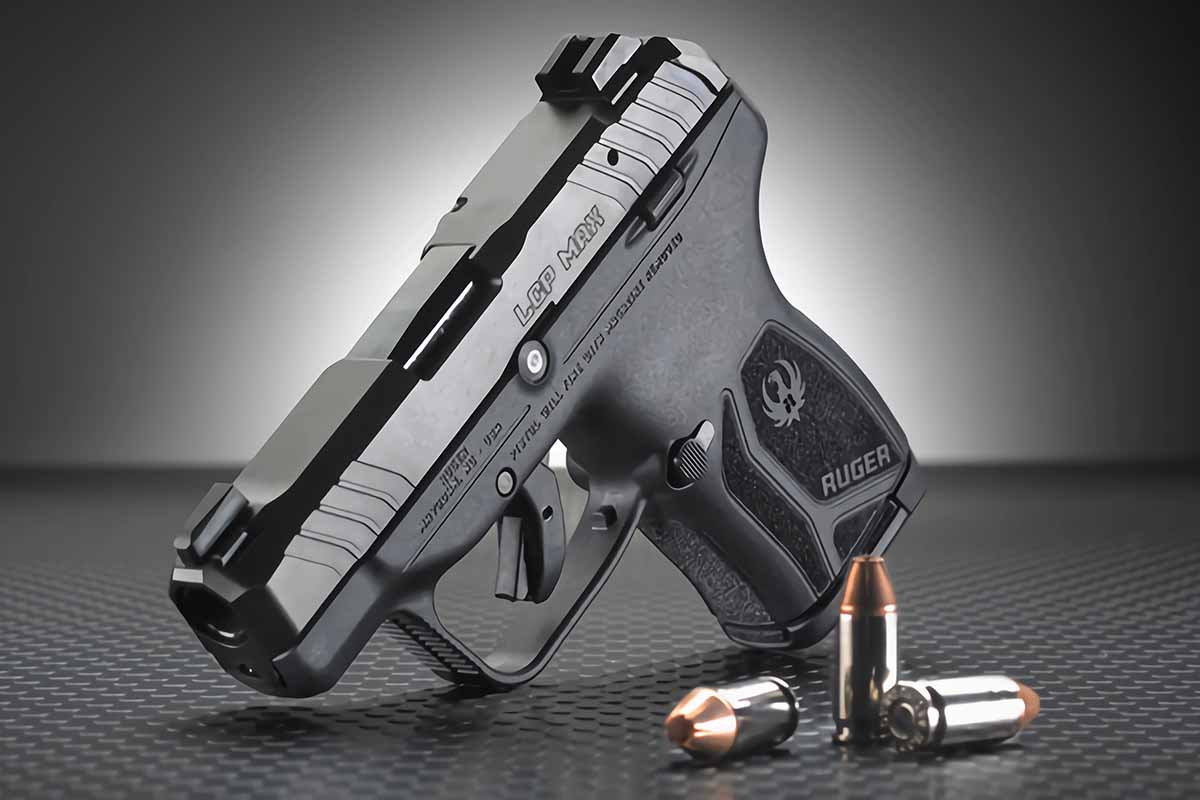
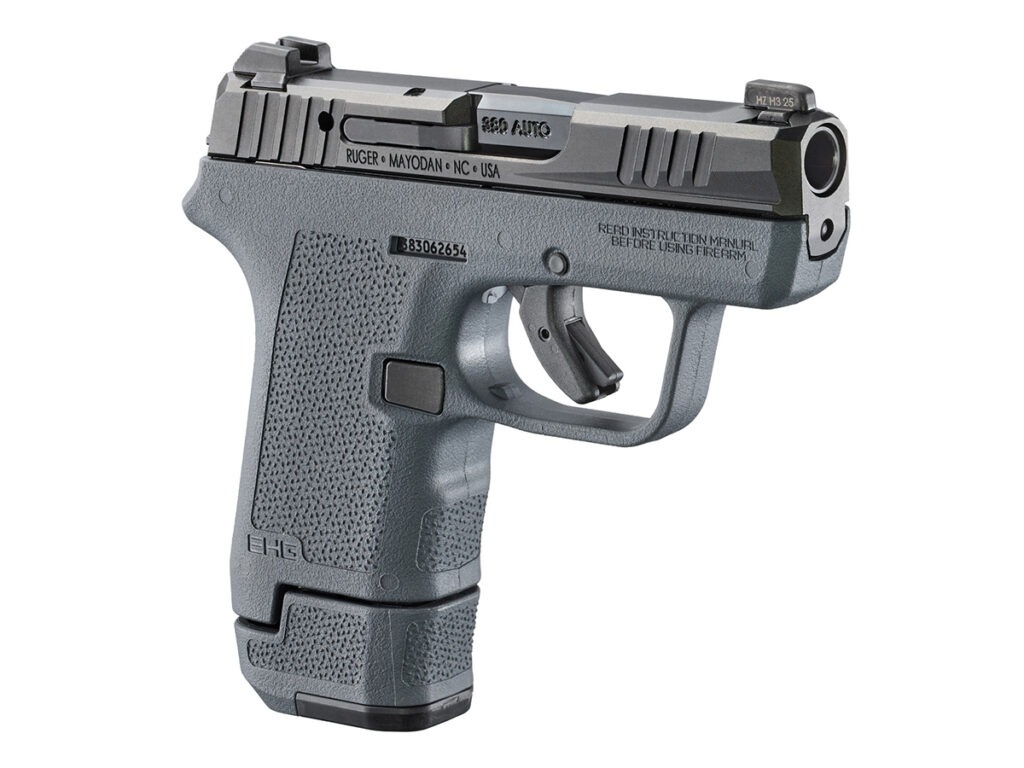
Best .380 ACP: Ruger LCP Max
It has the chops to hold down primary and backup carry duties.
Pros
Extremely concealable
Capacity for size
Good holster selection
Cons
Short sight radius
Small grip
LCP Max Specs
Caliber: .380 ACP
Capacity: 10+1
Barrel Length: 2.8 inches
Overall Length: 5.17 inches
Overall Height: 3.6 inches
Overall Width: .82 inch
Weight: 10.6 ounces
Sights: Tritium front, u-notch rear
MSRP: $479
The third version of this iconic .380 pistol finally delivers what shooters have asked for, particularly its sights. I can’t say enough how much I disliked the integral sights on the LCP II (now a .22 LR in Ruger’s catalog). Not only do I not care for fixed systems, but they provided only a rudimentary sight picture. On the other hand, the white outlined rear sight of the Max and tritium front creates a very usable and intuitive system.
One of the best features of the Max is its excellent capacity for what is certainly a pocket pistol. With 10+1 on board with its flush-fit mag and 12+1 with its extended, shooters should feel comfortable with its firepower. However, Ruger slightly widened the LCP’s grip to expand it to a double stack. Not that this is a bad thing. With a little more meat on the handle I found the pistol more comfortable in the hand; add the extended mag and even my medium-sized hand could fit almost completely on the grip.
I had no issues hitting center mass out to 10 yards with the Max, even so, I wouldn’t classify the pistol as a tack driver. I don’t think this surprises anyone with a 2.8-inch barreled gun, weighing all of 12 ounces loaded. And while it’s not a beast to shoot by any stretch of the imagination, it’s also not one I figure most folks will take to the range for fun.
All of that said, what the gun lacks in shootability it more than makes up for in concealability. I toted the Max around via a pocket holster and an IWB holster, both are more than feasible and comfortable. Short Speedos, you can carry the Max confident you won’t give yourself away.
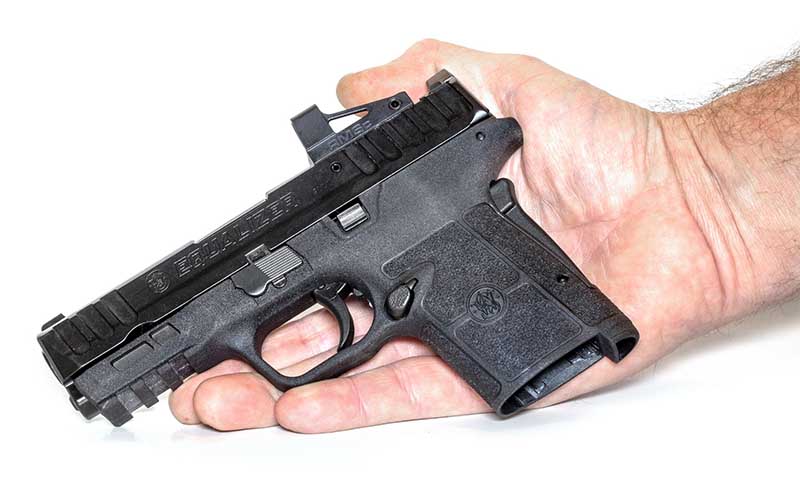
Tailored to those who may not have as much hand strength, the Equalizer acquitted itself well enough as a concealed carry pistol that it’s more than fit for those who don’t need an easy-to-rack slide.
Pros
Easy racking slide
Optics ready
Low recoil
Cons
Grip Safety
Reset not very audible or tactile
Equalizer Specs
Caliber: 9mm
Capacity: 10+1, 13+1, 15+1
Barrel Length: 3.68 inches
Overall Length: 6.75 inches
Overall Height: 4.5 inches
Overall Width: 1.04 inch
Weight: 22.9 ounces
Sights: White dot, optics read
MSRP: $599
Easy-to-manipulate semi-auto concealed carry pistols have earned a much-needed niche in the firearms world. There are plenty of folks—through age, infirmity or just plain hand strength—who find semis difficult to manipulate. Smith & Wesson took a hard look at this class of pistol and developed the best example yet.
OK, so emblazing its name—Equalizer—across the slide is about as attractive as tailfins on a Corvette. That, however, is a rare chink in the 9mm pistol’s armor. Living up to its name, nearly anyone can operate the slide and get the gun into action.
While it appears just another striker-fired compact, the design point that makes the pistol so manipulatable is that it’s hammer-fired. Essentially, it’s a Shield EZ—long-time S&W favorite—but a double stack, shipping with 10-, 13- and 15-round magazines. Aiding the pistol’s operation externally are large and aggressive cocking serrations and cocking tabs at the rear.
Honestly, I have to admit, the pistol is a shockingly nice one to shoot. Accuracy-wise, I found it on par with S&W’s popular M&P line, but with a much crisper trigger—one of the benefits of a hammer. Certainly, the gun is on target enough for defensive action. The Equalizer also lives up to its billing with its highly manipulatable slide that able hands can run lighting fast.
A drawback I found to the system is holstering the pistol. Too much tension on your holster, the gun can rack when put away. I found counter pressure on the back of the slide with my thumb eliminated this issue.
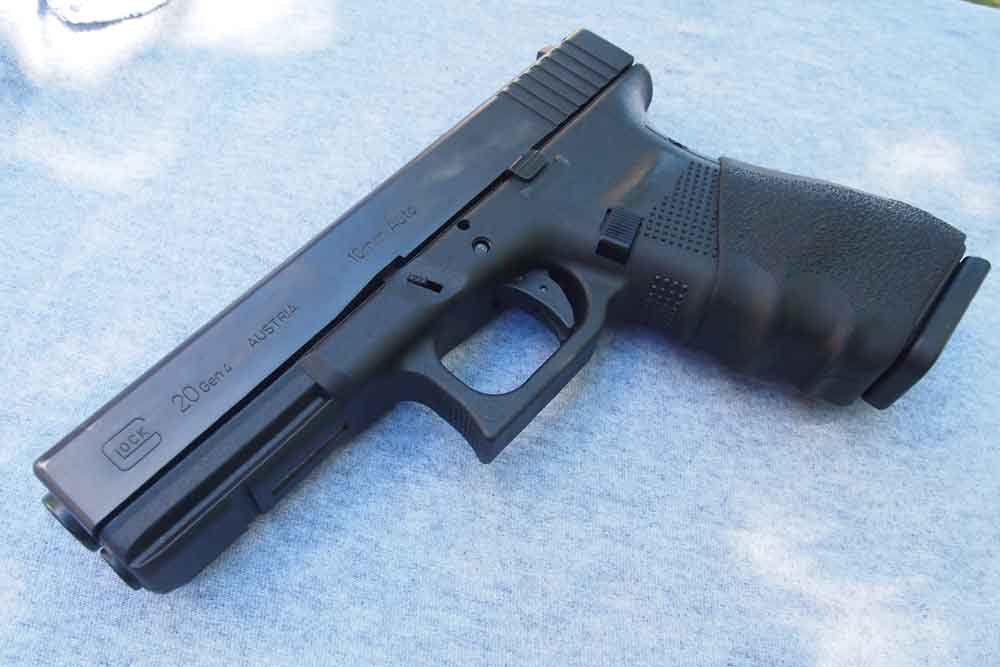
It’s a beast, but that’s what you need for the backwoods.
Pros
Powerful chambering
Reliability
Versatile
Extended range
Cons
Large
Longer trigger reach
Recoil
Glock 20 Specs
Caliber: 10mm
Capacity: 15+1
Barrel Length: 4.61 inches
Overall Length: 8.07 inches
Overall Height: 5.51 inches
Overall Width: 1.12 inch
Weight: 39.86 ounces
Sights: White dot front, white outline rear
MSRP: $599
Most only consider two-legged predators when shopping for concealed-carry guns. Certain circumstances call for a pistol that can handle more than upright threats. For backwoods protection, the Glock 20 exceeds nearly all others.
A 10mm, the pistol provides enough punch to batter your way out of the tightest situations and take everything down short of coastal brown bears. Even there it’ll likely make them think twice. At the same time, it is feasibly concealable, particularly in garb you’d wear into the hinterlands. That said, it’s no lightweight by carry pistol standards—weighing in at a hefty 30 ounces unloaded. A good gun belt and perhaps an OWB holster go a long way in making the G20 a more manageable CCW gun.
Surprisingly, the G20 is a very manageable pistol, even with pitching hot loads. The weight does its part in taming the 10mm’s jump, but so do the grip’s ergonomics. Get past the Glock rake—of which I’m no fan of—and the standard model fits medium to large hands well and offers enough texturing, including the front and back straps—to keep the gun in place. I can take or leave the finger grooves.
It’s also lights-out accurate, particularly the MOS model outfitted with a red dot. With practice and a good trigger squeeze, the gun can consistently hit well past most defensive ranges. However, for many, tight and accurate splits may take some practice.
Hogs, cougars, two-legged threats—the G20 has you covered.
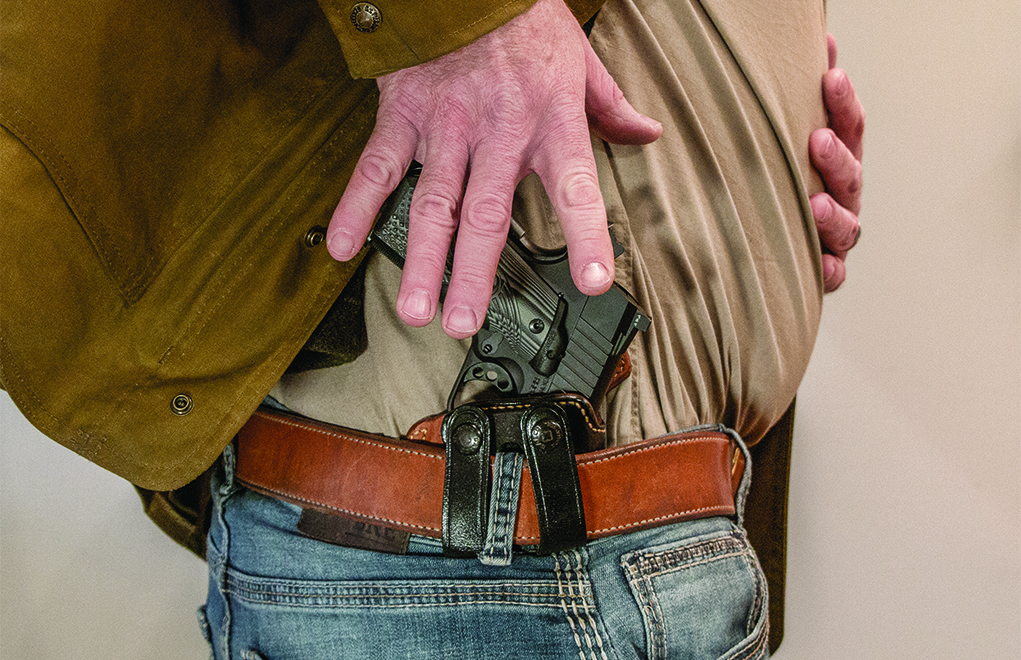
Above all, becoming an armed citizen is a lifestyle choice. By this we mean, your life will conform around your concealed carry gun. Don’t let this scare you off. It’s less daunting than it seems, yet it merits comment.
It takes more than a gun and a holster to become ready to carry.
After purchasing a concealed carry gun, plan on finding a reputable firearms instructor and enrolling in his or her classes. Generally, they’ll offer different levels of training, from basic pistol courses many states require to procure a concealed carry permit, to instruction on advanced concepts such as dynamic shooting, low-light engagements and mindset. Legal education is a must as well. America is a patchwork of self-defense laws, so be certain you find something tailored to where you live and travel so you have a well-formed idea of when, where and how you can justifiably use lethal force.
The greatest demand going armed makes is mastery of your firearm. Just like buying a guitar doesn’t make you a musician, purchasing a concealed carry gun doesn’t make you an expert in self-defense or the use of lethal force. You must educate yourself, practice and continue doing so. Essentially, it’s a lifetime undertaking. Don’t throw up your hands, because it’s the hardest work you’ll ever love with a side benefit of a lot of range time.
Once you have basic instruction under your belt, plan on refresher courses in the future. In the meantime, practice. We won’t prescribe a particular regimen here, because it will differ for each armed citizen. Your training should result in knowing your concealed carry gun inside and out, from muzzle to butt and all the quirks in between. Range time is the most obvious arena for learning and excelling with your pistol or revolver. But a solid routine of dry-fire drills at home works miracles on a learning curve and doesn’t cost a thing.
The other lifestyle aspect that comes with a concealed carry gun is clothing. Yup, that wardrobe is going to need updating … most likely. Unless you’re still mired in the baggy days of the grunge movement, it’s a safe bet much of your wardrobe won’t keep your gun concealed. Or, if it does, you’ll feel plum uncomfortable. Again, we won’t touch on the fine points here—there are loads of them. Just expect to make a clothing investment along with your concealed carry gun.
Concealed Carry Holsters
Hand-in-hand with clothing is a holster. You didn’t think you were going to tuck that baby in your waistband naked, did you? This is a vast topic, given the numerous types of concealed carry holsters on the market today:
IWB
OWB
Shoulder
Ankle
Belly Band
Pocket
Various Off The Body
Each has pros and cons and fit certain armed citizens, but not all of them. However, essentially all of them do the same job: retain the gun, cover the trigger (among the most important), protect you and the gun, enhance concealability, make carrying comfortable, and facilitate a smooth draw and re-holster. That’s a mouthful.
Get ready, because you’ll try many holsters before you find the right system for you.
Stick with Kydex for your AIWB holster. Leather will become soft over time … which is a bad trait for an appendix rig.
Kydex is almost always a solid choice for holster material.
Unfortunately, we don’t have the magic bullet so that you hit the perfect holster your first time out. Nobody does. All we can say is, expect plenty of trial and error—and a closet shelf of rejects—before you find the ideal hanger for your concealed carry gun.
CCW Gun Fit
No two concealed carry guns are alike nor are two armed citizens. In turn, the pistol that works for you might be unwieldy to your friend. What this comes down to is fit, and there are two basic factors pertaining to concealed carry guns.
How the gun fits your hand
How the gun fits your style of carry
Most new shooters tend to think all guns are alike. They pick a trustworthy name and assume all is right with the world. Nothing could be further from the truth.
Concealed carry guns need to fit your hand properly, facilitating a fundamental high grip, otherwise, there can be control issues. Even the relatively mild-mannered 9mm is jumpy if oversized compared to a particular shooter. Gunmakers have engineered some wiggle room into their guns; most new polymer-framed pistols come with replaceable backstraps and palm swells of different sizes allowing for a level of customization. Take the time to find the make/model that fits you best. A good tactic is to go to a range that has a good selection of guns for rent, and give the ones you’re interested in a test drive. The proof is in the pudding, as they say.
Figuring out which one out of the many concealed carry guns to choose from takes a close examination of yourself and your lifestyle.
As to carry fit, the whole idea behind a concealed carry gun is to keep it concealed. Depending on who you are, how you carry and your particular lifestyle, not every gun will fit the bill. While a 250-pound trucker might easily keep a Government-size 1911 under wraps with no problem, a 98-pound lady business executive might find it more challenging. Think hard about your usual attire (yes, you’ll update some of it), daily routine and potential carry methods as you go through the buying process. These will provide guide marks steering you to the ideal choice out of all the concealed carry guns.
The Best Caliber For Concealed Carry
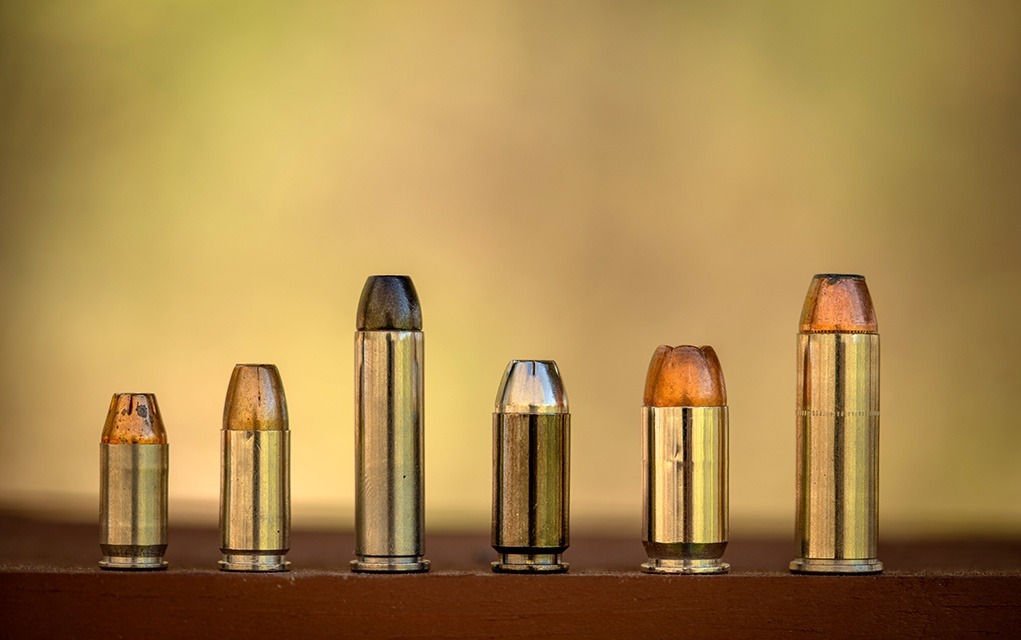
Hoo boy … here’s a can of worms. Ask 100 people the best caliber for a concealed carry gun and you’ll get 100 answers—probably including 8.5 Mars, .455 Webley and some other oddballs. The topic is so divisive friendships have been lost and gun forums burned to the ground arguing what’s top dog. Presently, the most popular concealed carry calibers are:
.380 ACP
.38 Special
9mm
.40 S&W
.45 ACP
10mm
.357 Magnum
So, which one is right? The dirty secret is, all of them.
Given ammunition advancements over the past 20 years, particularly bullet design, every one of the cartridges can save your life. The rub is, some of the smaller and lower velocity options—.380 ACP and .38 Special, we’re looking at you—require more homework to find acceptable self-defense loads. The big boys—10mm and .357 Magnum—require more skill to wield effectively. Don’t let either factor turn you off any of those if the particular concealed carry gun that fits you is chambered thusly. Just expect to spend more time making them work.
Is there a right choice?
That leaves us with 9mm, .40 S&W and .45 ACP. These are the most popular self-defense calibers on the market. Again, we can’t choose for you, only point out each that is an effective option, capable of neutralizing a threat, and are widely available. You need to find what you shoot best and that comes in a make/model that fits your lifestyle. A range that rents guns is invaluable for puzzling this out. Take each for a spin before you buy!
What about a .22 LR and other small fries? While inadvisable for most armed citizens, if that’s all you can get or effectively shoot, it’s better than nothing.
What Is The Best Length For A Concealed Carry Gun?
Compact pistols have a 4-inch barrel and micro compacts a 3- to 3.5-inch barrels. We find these lengths the easiest to carry. However, the longer the barrel of a gun the more accurate it is due to a longer sight radius. In turn, the best length for a pistol is one that facilitates the most accuracy, while being easy to conceal.
What Is The Best Caliber For A Concealed Carry Gun?
There is no consensus on which caliber is the best, though, the 9mm is the most popular. For the most part, .380 ACP is considered the minimum caliber for self-defense.
What Is The Best Concealed Carry Handgun Holster?
One that completely covers the trigger, for starters. Aside from a way to carry your concealed carry gun, a holster is a safety device. From there, much of it is a personal preference. I personally prefer inside the waistband (IWB) holsters, because they provide the most concealment. However, in the colder months, I will use an outside the waistband (OWB) holster for comfort.
What Is The Best Concealed Carry Gun For Women?
While many gun salesmen push small and light revolvers, my choice for most women would be a compact or micro compact pistol. The trigger pull is lighter and more predictable. For women concerned about being able to manipulate the slide, the Smith u0026amp; Wesson Equalizer would be my first choice; for those looking for less recoil, the Springfield Hellcat with a compensator would be an excellent option.
Mapgul has just released three new M-LOK handguard accessories: the Index Stop, the Thumb Shelf and the SVG Grip.
The premier polymer accessory manufacturer, Magpul, has just dropped three cool new handguard accessories for you to throw on your M-LOK handguard: the Index Stop, the Thumb Shelf and the SVG Grip.
The Index Stop is a minimalist reference point for your index finger, designed to provide consistent indexing for your grip to improve your control, comfort and safety without adding too much bulk.
The Thumb Shelf gives you thumb support right where it’s needed on the handguard, designed to increase your muzzle control while firing as well as provide support when bracing against a barrier.
The SVG, which stands for Short Vertical Grip, is exactly what it sounds like. Sporting serrated front and rear straps as well as texturing on its sides, the grip provides more vertical surface area for your support hand so you can shoulder your rifle tighter. And it does it without being too bulky or snag-prone.
All three new Magpul M-LOK accessories are designed to be used on octagonal aluminum handguards and are available in black, FDE, ODG and Modified Coyote Brown (MCB). MSRPs range from $17 to $23.
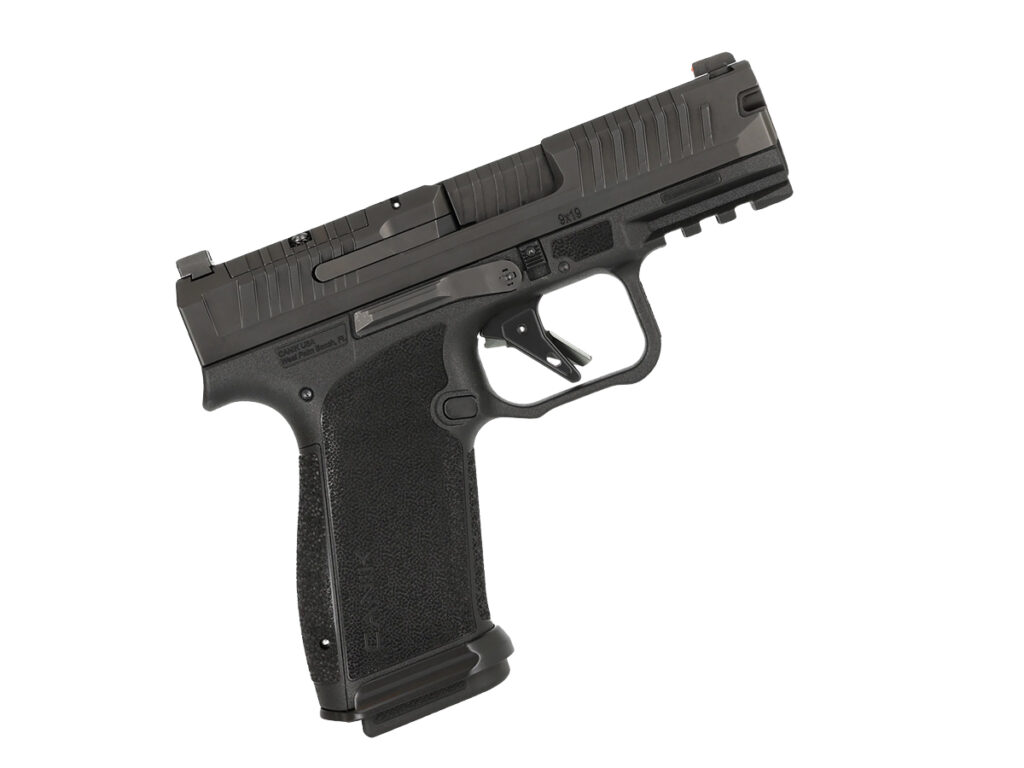
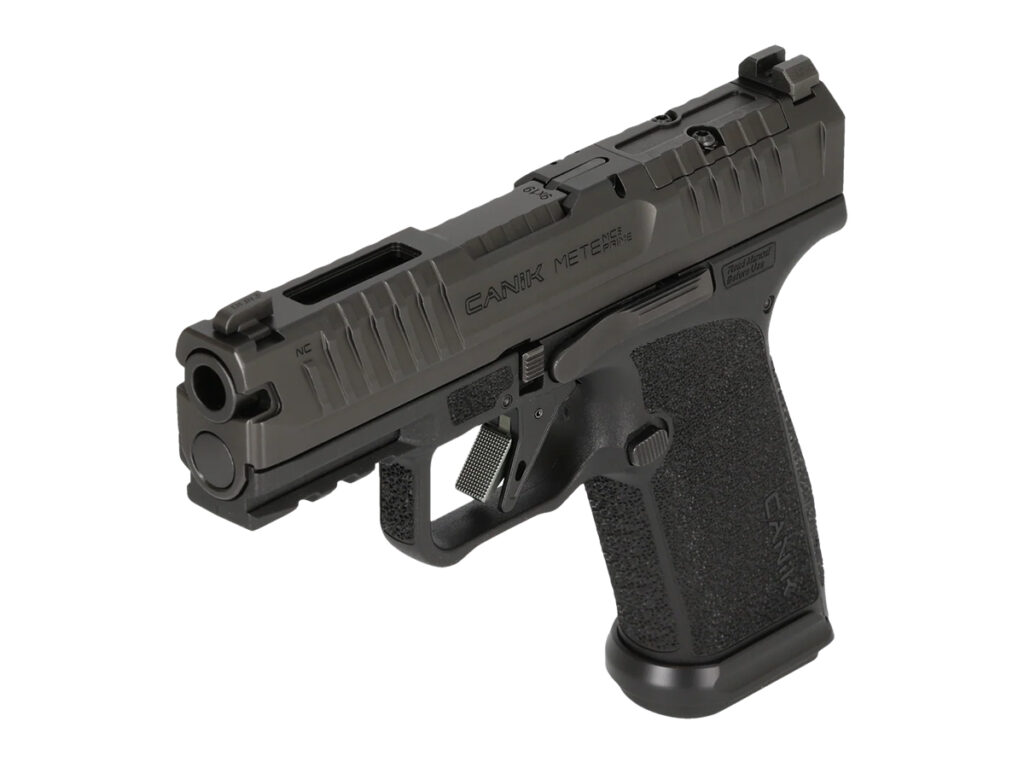
Canik has just announced a non-compensated METE MC9 Prime variant called the MC9 Prime NC.
Compensated pistols are incredibly popular at the moment, but that doesn’t mean that everyone wants one. While they offer advantages when it comes to shooting performance, they have some disadvantages as well, especially in the context of concealed carry and defensive use. Namely, increased muzzle flash, noise and concussion that could be detrimental if shooting in low-light conditions or from inside a vehicle. Comped pistols are more particular about ammo, too. For those who prefer to control muzzle flip the old-fashioned way through training, Canik has just announced the METE MC9 Prime NC.
The NC in METE MC9 Prime NC stands for non-compensated, as the standard, original version features a ported barrel and slide for reduced muzzle flip. The new NC version offers all the same features as the original, minus the integral compensator. Those features include a large grip texture area, deep front and rear slide serrations, an aluminum 90-degree flat-face trigger, Night Fision Tritium sights and an optics-ready slide. It also has an accessory rail, a magwell and 17-round capacity magazines, all in a carry-friendly size.
Jeff Rose, Canik’s Director of Marketing, said this about the new non-comped pistol:
The METE MC9 PRIME has been overwhelmingly well-received for its balance of size, capacity, and optics-ready capability … With the new METE MC9 Prime NC, we’re giving customers exactly what they’ve asked for — the same outstanding ergonomics, trigger, and sight package in a non-compensated version that maintains the lightweight, slim profile our customers love.
The METE MC9 Prime NC has an MSRP of $650, and while the pistol’s webpage doesn’t specify this, it’s safe to presume that it ships with the usual Canik extras like a holster and different backstrap sizes.
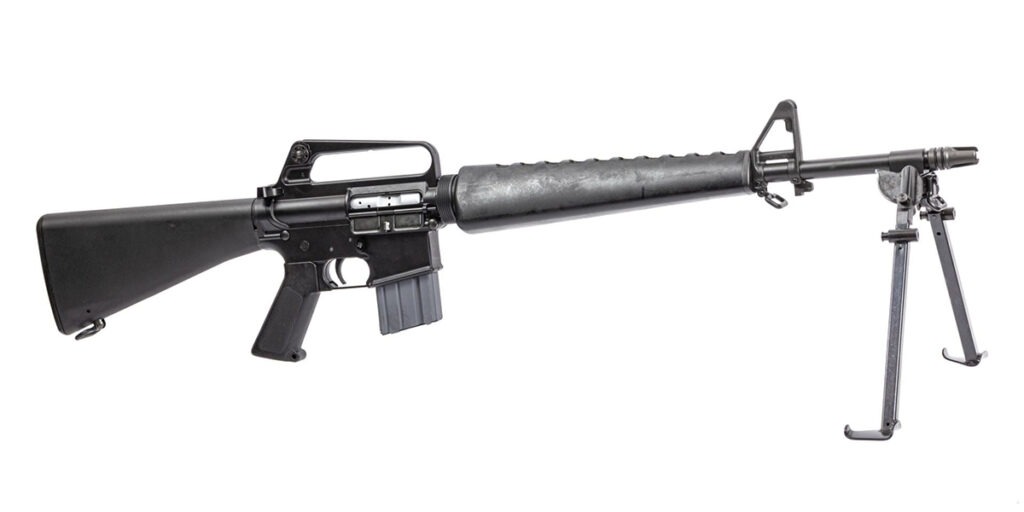
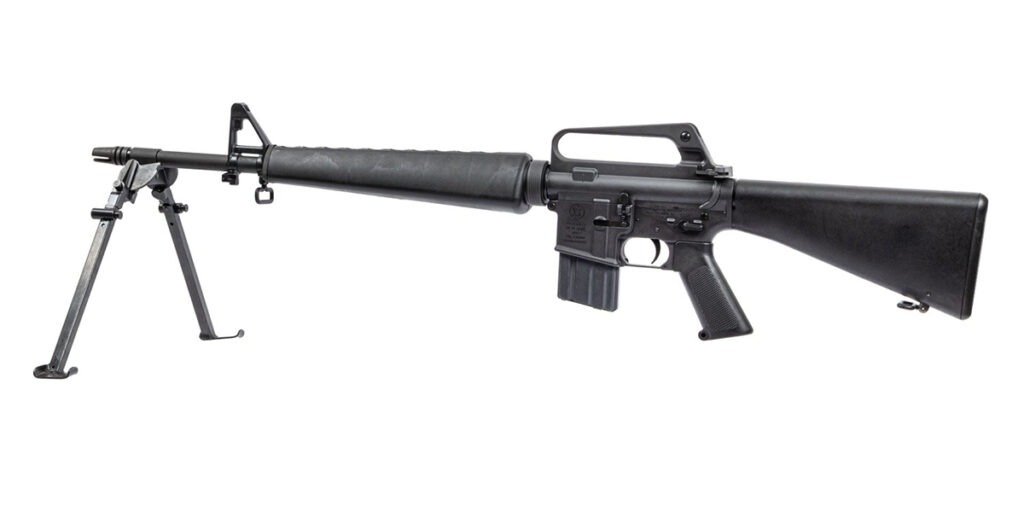
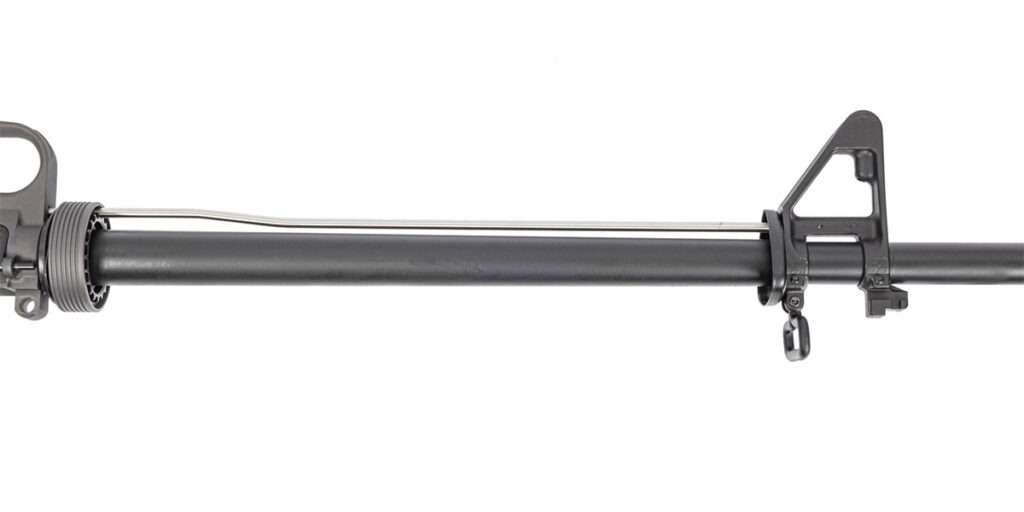
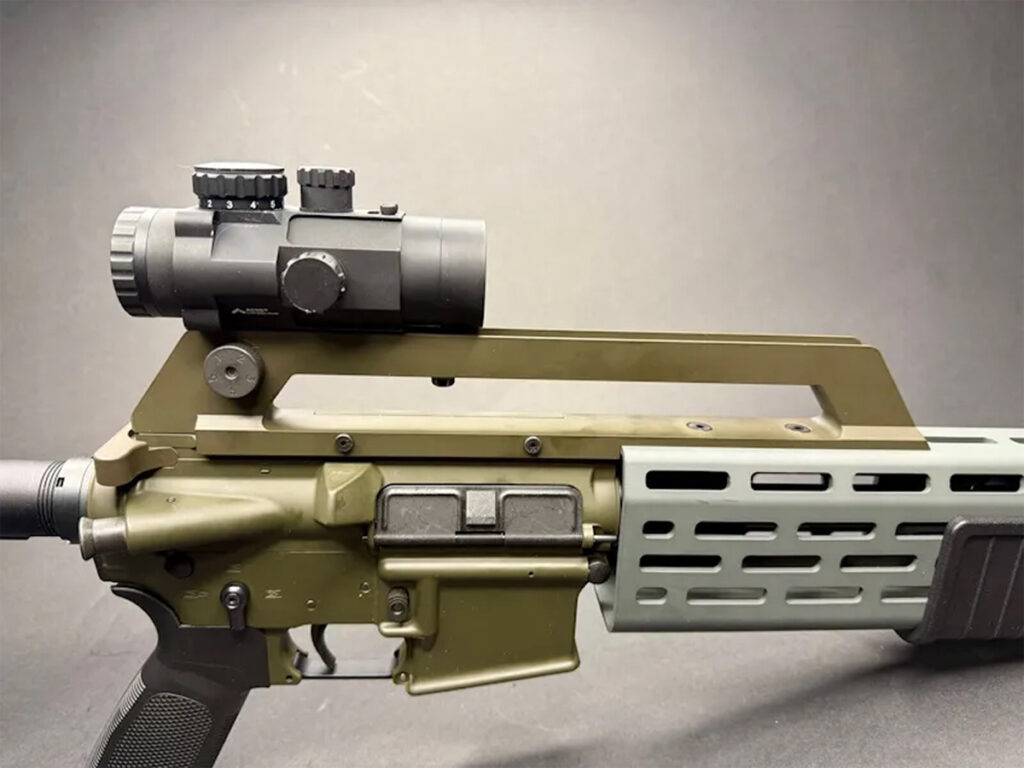
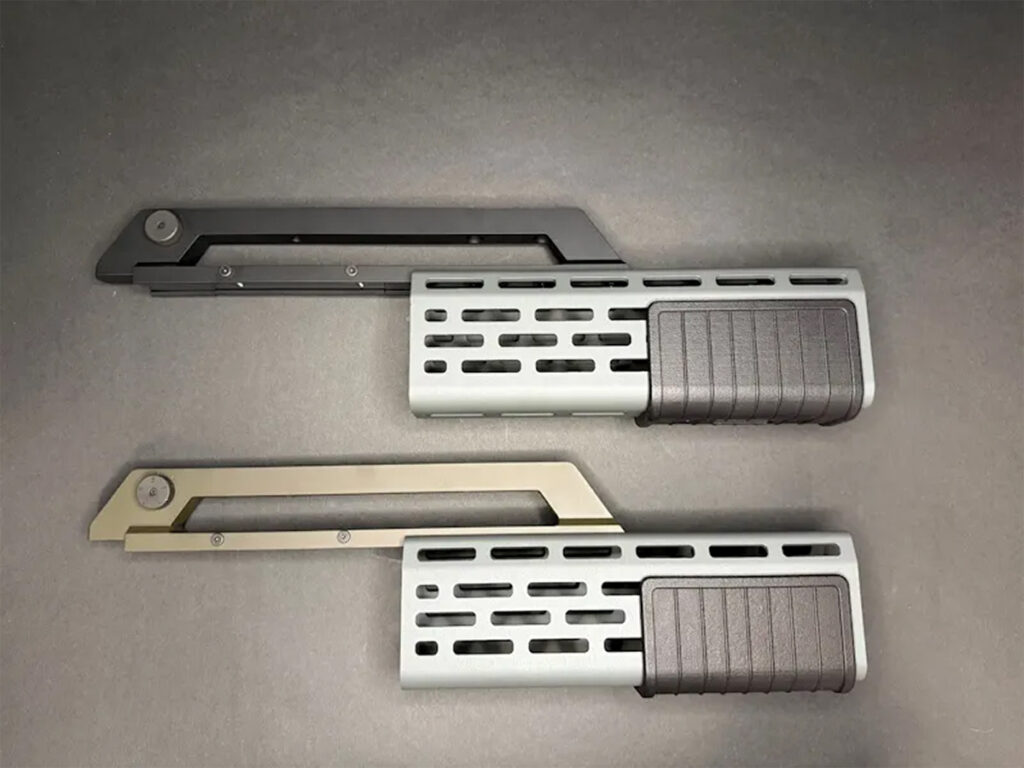
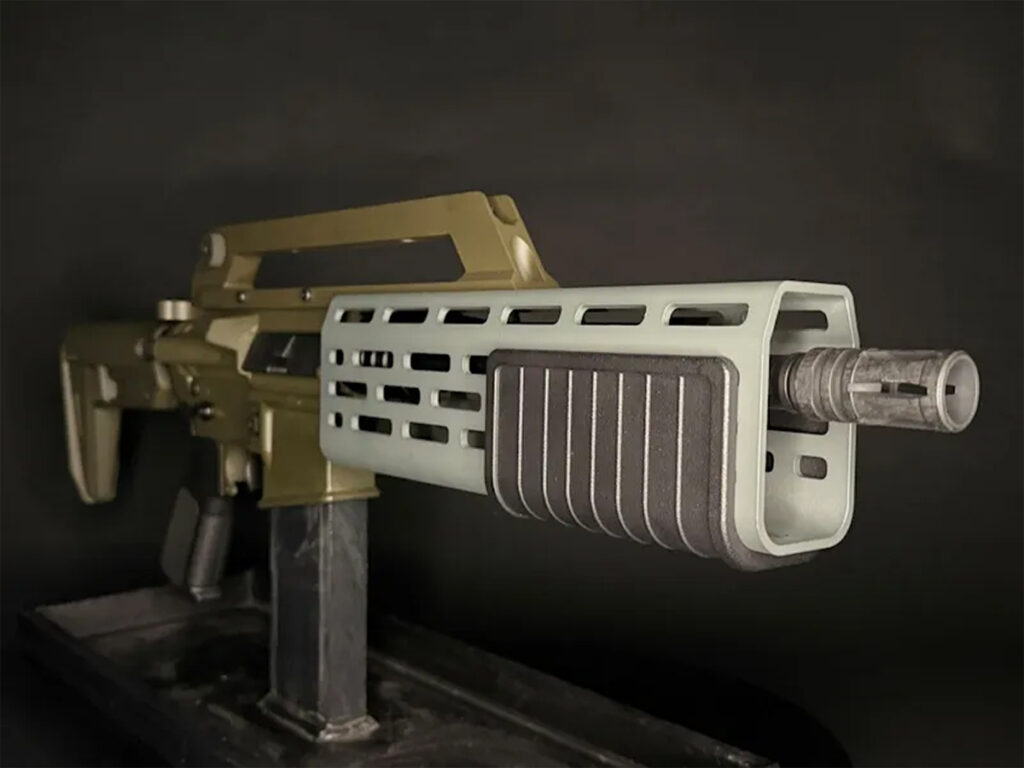
Harrington & Richardson has just launched its reproduction of the Model 606 squad automatic weapon.
Harrington & Richardson keeps churning out cool reproductions of classic retro AR-15 models, and the latest is the Model 606. Based on the Colt Model 606 Heavy Assault Rifle, H&R’s version is naturally semi-automatic, but it has all the cool features of the original that would make it a great host for a forced reset trigger.
At its core, the H&R Model 606 is a 20-inch AR-15 in 5.56 NATO with early M16-style furniture. The features that make it more useful for sustained fire include its heavy HBAR-profile barrel and its M2 M14-style bipod that’s been pinned in place. Its upper receiver is M16-pattern with a fixed carry handle and no forward assist, and it has an M16-marked partial fence lower receiver. Other details include its old-school 3-prong flash hider, its 1:7 twist barrel (a good practical update over the original’s 1:12 twist rate), its chrome-lined barrel and its chromed BCG. Despite the heavier barrel and pinned bipod, the package still comes in at a relatively scant 9 pounds.
The Harrington & Richardson Model 606 is available with either a black or grey finish and has an MSRP of $1,250.
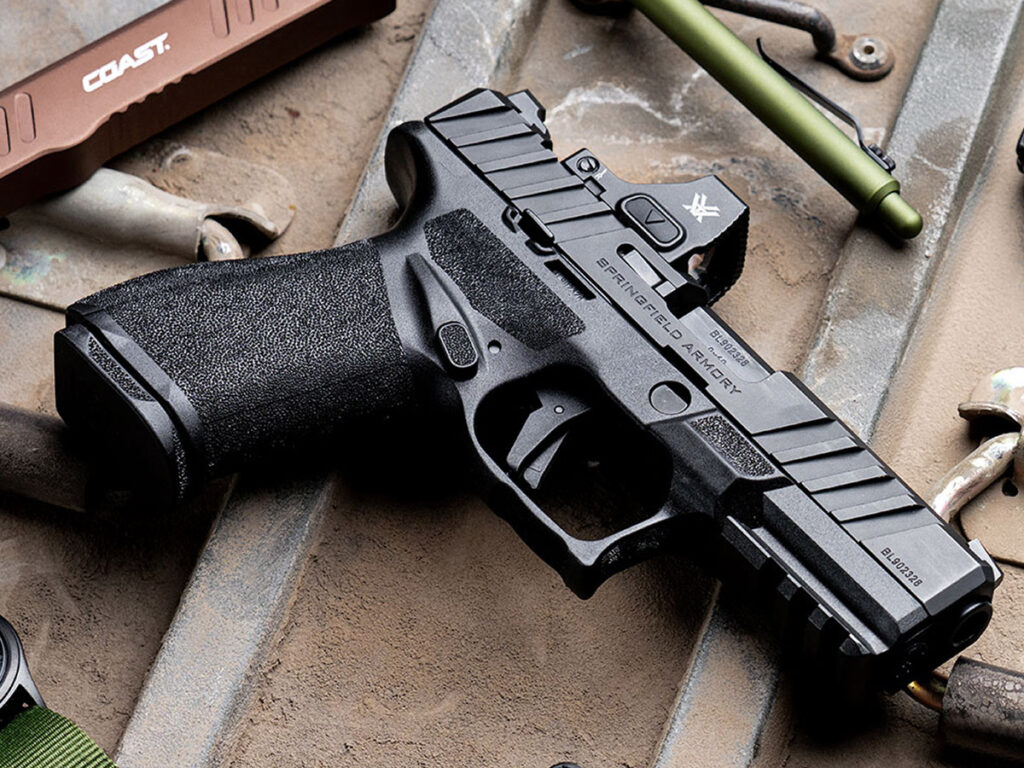
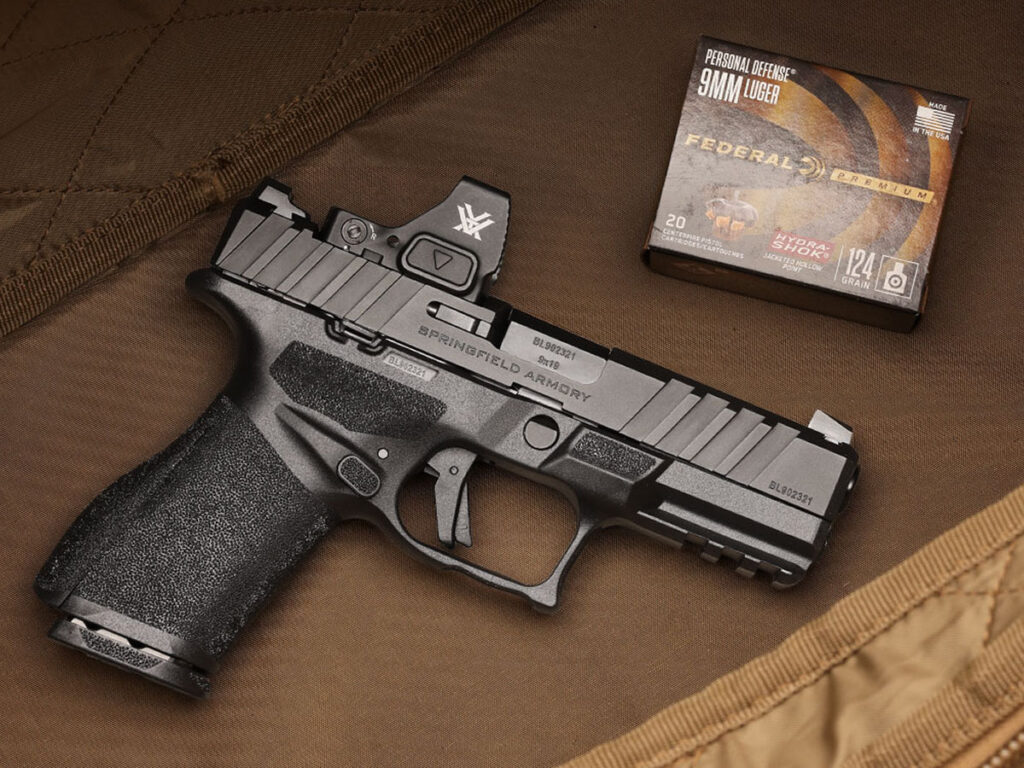
Springfield Armory has just launched the Echelon Alpha, a more affordable version of the Echelon 4.0C.
The Springfield Echelon 4.0C is one of the top concealed carry pistols currently on the market, but with an MSRP of $710, it’s pretty pricey. To make the 4.0C more accessible and affordable, Springfield Armory has just introduced a more budget-friendly version called the Echelon Alpha 4.0C.
Thankfully, at its core, the Echelon Alpha is the same great pistol as its full-priced counterpart. That includes its serialized Echelon Central Operating Group that allows for interchangeable grip modules, its interchangeable backstraps, its Variable Interface System optics-ready slide, its 4-inch hammer-forged barrel and its 15-round capacity magazines. So, what did Springfield change to bring the price down? Not much. Namely, it has a simpler slide that deleted some of the aesthetic profiling of the original, and it ships with one magazine instead of two. Don’t worry, the slide still features aggressive forward and rear slide serrations.
Steve Kramer, Vice President of Marketing for Springfield Armory, said this about the new pistol:
At its launch in 2023, the Echelon immediately established itself as a top-tier, duty-grade 9mm … This new compact Alpha model expands accessibility to the modular Echelon ecosystem to an even broader range of users.
The standard and Lo-Cap (10-round) Echelon Alpha models both have an MSRP of $600, while the California-compliant version has an MSRP of $650. Also, keep an eye out for more Echelon models to join the Alpha line in the future.
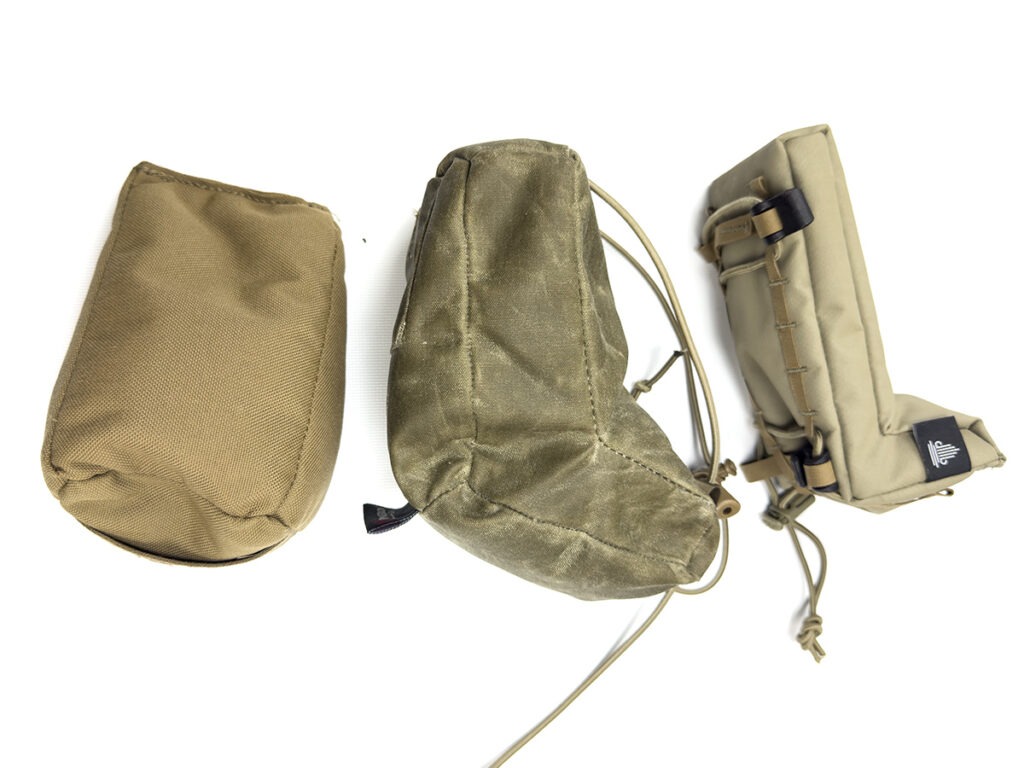
The suppressor-ready JP-5 PDW Package is purpose-built for compact performance.
Personal defense weapons, or PDWs, were originally designed for second-line troops who needed more firepower than a pistol could provide, but didn’t want the bulk of a full-sized rifle. Compact carbines were the perfect bridge for that gap. Guns like the FN P90 submachine gun, SR-2 Veresek and the H&K MP7 are some of the early versions of military guns used in the PDW capacity.
The evolution of compact firearm platforms has increasingly emphasized portability, modularity and refined shooting performance, opening up a market for civilians. Some notable PDWs that have gained traction are the Sig Sauer MPX and the Daniel Defense DDM4. And, of course, JP Enterprises‘ JP-5 PDW.
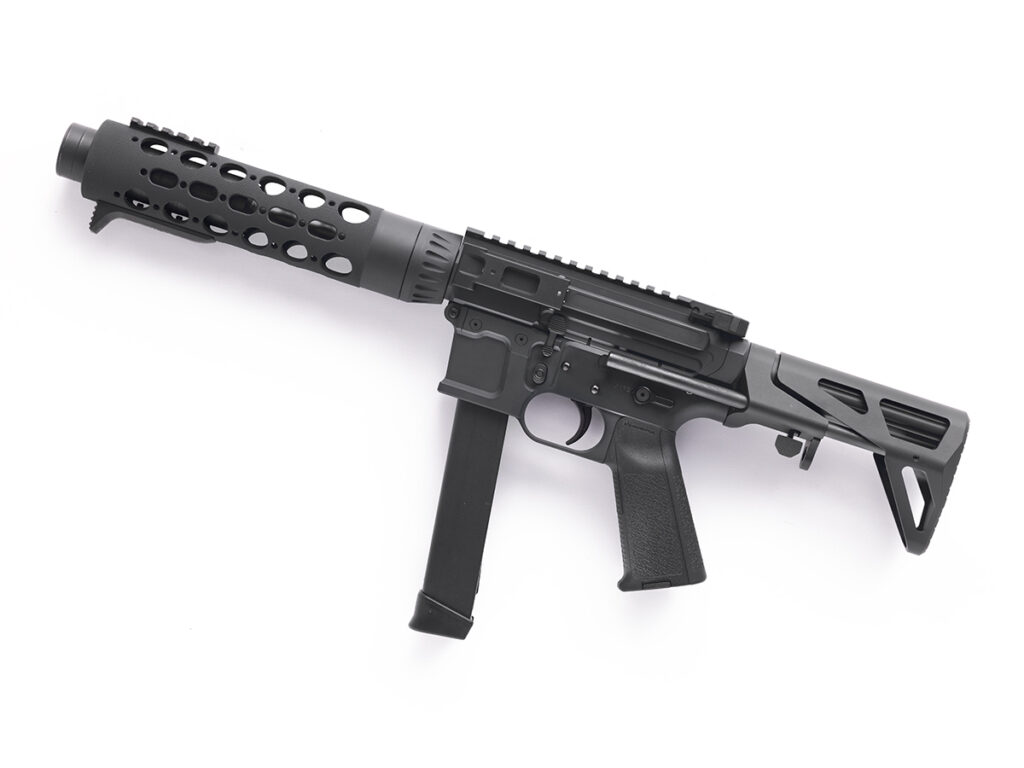
Few modern systems embody the PDW shift as clearly as the JP Enterprises JP-5 PDW. When JP saw an opportunity to get into the civilian home defense market, they created the Suppressor-Ready PDW Package. Built on the company’s flagship roller-delayed platform, this configuration is designed not just as a firearm, but as a complete, low-profile system optimized for discreet carry and suppressed use.
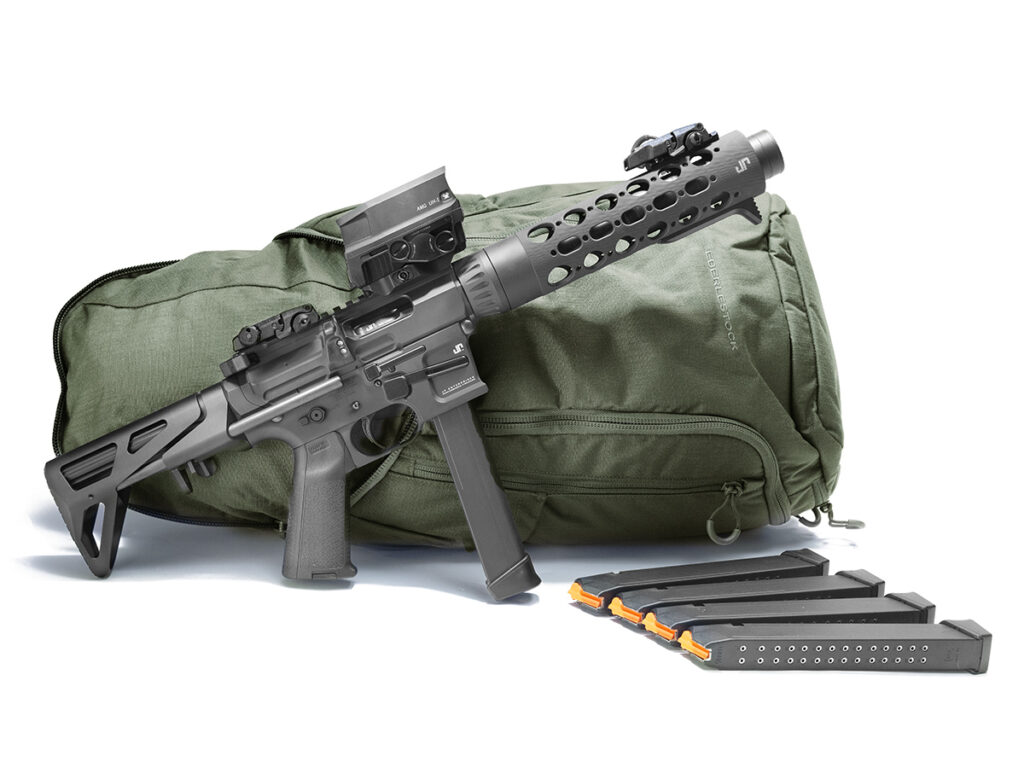
When paired with a purpose-built bag like the Eberlestock Little Trick backpack, it illustrates how modern pistol-caliber carbines (PCCs) are evolving into integrated solutions. This package is the perfect truck or backpack gun and might be the best PDW package available.
Built with Pride and a Purpose
At its core, the JP-5 platform represents a significant engineering leap in AR-style PCC design. Unlike traditional direct blowback carbines, the JP-5 uses a roller-delayed blowback system, an operating mechanism inspired by classic submachine gun designs but modernized for precision shooting. This system slows the rearward movement of the bolt, reducing felt recoil and improving shot-to-shot control.
The Suppressor-Ready PDW Package takes that foundation and tailors it for compact, discreet deployment. One of its defining features is a short 6-inch Supermatch light contour barrel recessed beneath a 9.125-inch MK III Rapid Configuration handguard. This design allows a suppressor to be partially tucked inside the rail, maintaining a streamlined profile while keeping overall length at a very compact 22.5 inches.
Rather than being purely a competition firearm, this configuration is explicitly geared toward low-visibility use. It is offered either as a short-barreled rifle with a CQB stock or as a pistol variant with a Maxim Defense PDW pistol brace, emphasizing maneuverability in confined environments.
Despite its small size, the JP-5 PDW maintains premium features expected from JP Enterprises with fully ambidextrous controls, match-grade 3.5-4-pound trigger, Glock-pattern magazine compatibility, a custom JP Silent Capture Spring and a precision-machined proprietary receiver set. The upper is a JP-5 top charging upper, and the lower is a JP-5 machined billet. Chambered in 9mm, the PDW package comes with five 31-round Glock mags.
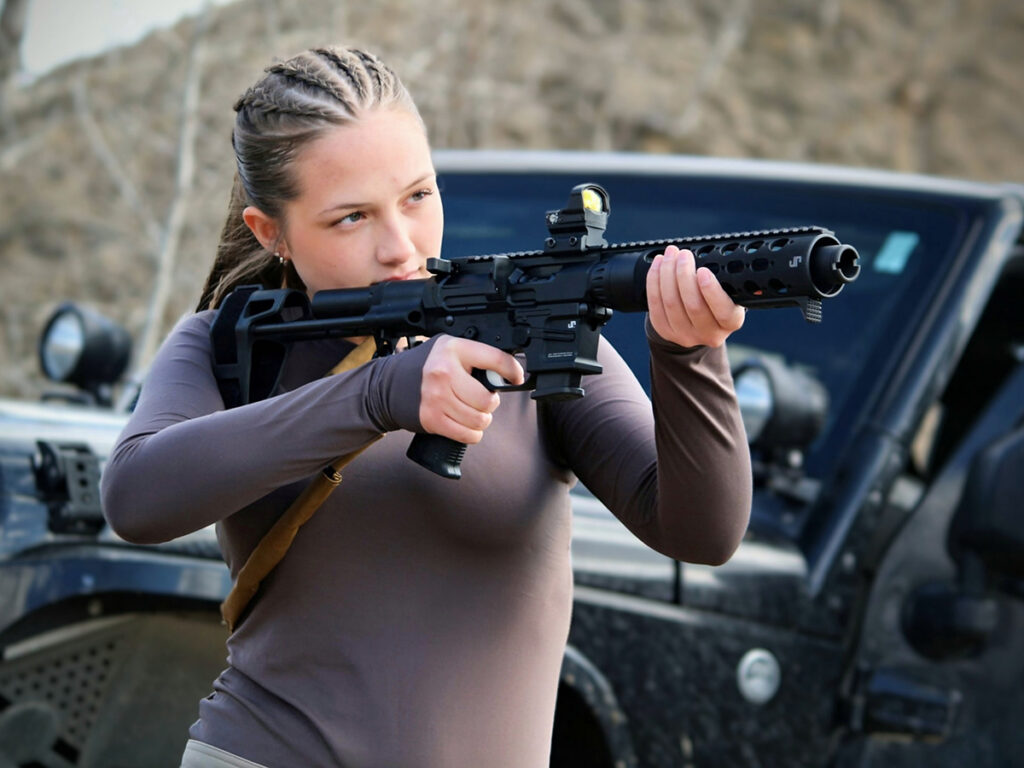
These characteristics combine to produce what many consider one of the smoothest-shooting PCCs available today. At just 5.7 pounds, the JP-5 PDW is extremely pleasant to swing and maneuver. The recoil impulse is notably softer than traditional designs, allowing for faster follow-up shots and improved accuracy under rapid fire.
In the field, the JP-5 PDW felt a lot like the JP-5s I’ve become used to shooting: low recoil, lightweight and buttery smooth. Mine took six different 9mm variations in stride. The most pleasant shots were with Federal’s 9mm Syntech PCC. But the CCI Blazer 115-grain brass FMJs felt equally nice. On the heavier side, Federal’s Personal Defense 135-grain Hydra-Shok Deep felt incredibly smooth with almost no extra recoil. Barnes Tac-XPD in 115-grain was very smooth, and Fiocchi Defense Dynamics 147-grain JHPs fed well, too, and didn’t make me feel like I was having to put forth any extra brace effort.
I was able to get back on target extremely quickly. I just threw a Leupold DeltaPoint Pro with an AR mount on it, and that made it pretty fun to tinker with. It kept the profile small but allowed me to instantly find a target. With a decent-length mount and the MK III Rapid Configuration handguard, a person can throw a myriad of optics and accessories on the gun with ease.
Suppressed Shooting and System Integration
The “suppressor-ready” designation is not just marketing; it reflects deliberate engineering choices. The roller-delayed system naturally lends itself to suppressed shooting, because it manages pressure more efficiently than direct blowback systems. This results in less gas blowback to the shooter and more consistent cycling.
The recessed barrel design further enhances this capability. By allowing a suppressor to sit partially inside the handguard, the system maintains balance and avoids excessive front-heavy weight. This is particularly important in a PDW format, where compactness and handling are critical.
In practical terms, this means the JP-5 PDW Package is optimized as a cohesive system rather than a collection of parts. Every component, from the operating system to the barrel length and handguard, is designed to work together for suppressed, close-range performance.
I chose not to throw a suppressor on it for testing, as I was interested in how it felt out of the bag. I ran the included and installed KAK Industry Flash Can, which was aesthetically pleasing and definitely helped move gases away from me. Something so simple really makes a difference whilst shooting something so compact.
The Role of the Eberlestock Little Trick Backpack
A compact PDW system is only as effective as its ability to be transported discreetly. This is where the Eberlestock Little Trick backpack becomes an essential part of the equation.
Designed as an everyday carry (EDC) pack, the Little Trick blends a civilian appearance with tactical functionality. It avoids the overt military look of traditional gear, making it suitable for low-profile environments such as urban settings or travel. It’s the perfect pack to have with you anywhere and is a great bag for the truck.
One of its standout features is a concealed carry compartment equipped with loop lining, allowing users to configure holsters or secure gear inside the bag. Magnetic closures provide rapid access while maintaining a clean exterior appearance. Additional features include dual interior sleeves for laptops or gear organization, durable construction for daily use, compact size that complements PDW-length firearms and thoughtful compartmentalization for accessories.
The Little Trick is particularly well-suited for PDW systems like the JP-5. Its dimensions and layout allow a compact firearm to be stored discreetly, along with magazines and other essentials. This transforms the firearm from a stand-alone tool into part of a broader, portable system.
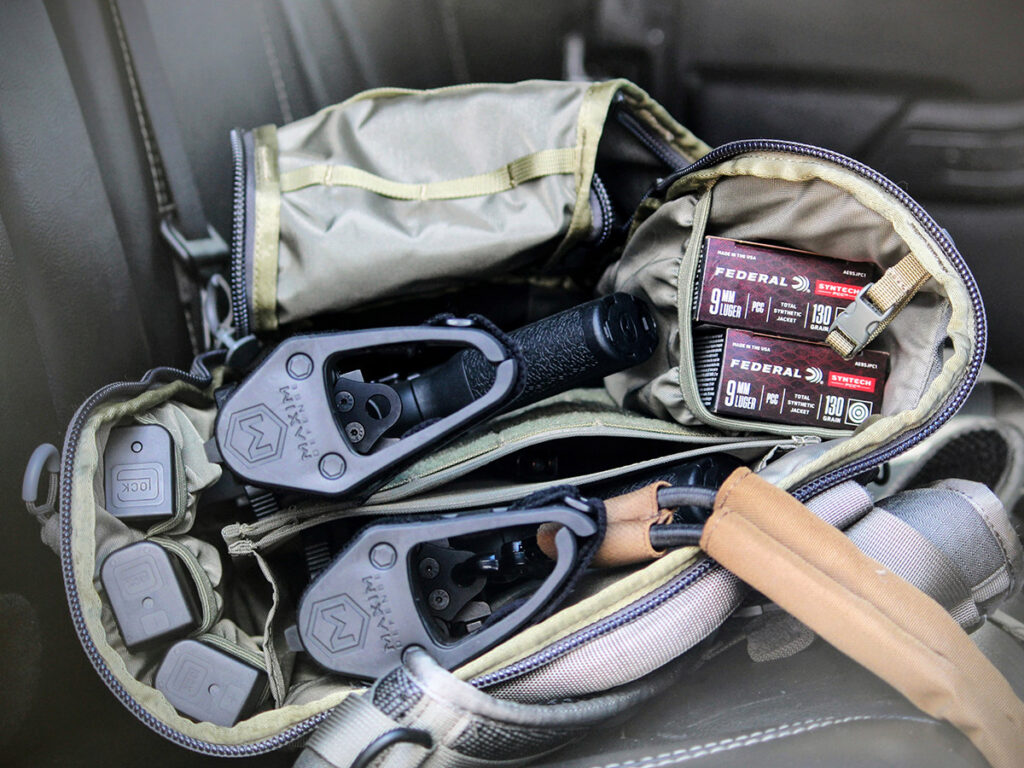
The Little Trick might be one of my favorite parts of the package. I’ve never used a bag that makes so much sense. I put it to the ultimate test, holding a dozen magazines, eight boxes of ammo, a JP-5 PDW, and a GMR-15 PDW. Despite packing it with a ton of gear and two PCCs, I felt like I still had room for more.
Each compartment makes sense, and the bag felt so good on the shoulders and back. It’s very ergonomic, and the straps are all adjustable and simple to use. As one could imagine, getting the gun out of the bag while it’s on your back is a bit tricky, but with each try, it became more natural. Staring at it in the back seat of my Jeep, it looked natural and very discreet.
The Complete System: Firearm and Carry Solution
When viewed together, the JP-5 Suppressor-Ready PDW and the Little Trick backpack represent a shift toward integrated solutions. Rather than focusing solely on firearm performance, this approach considers how the system is carried, deployed and used in real-world scenarios.
This combination supports several practical uses, including discreet transport, close-quarters defense, control in tight spaces, recreational and range use at a lower cost than most AR platform rifles, and it’s just plain fun. It’s honestly just an enjoyable package to look at, practice with and have at the ready.
Affordable Alternative: GMR-15 9mm Carbine
For shooters seeking a more budget-conscious option, the GMR-15 9mm Carbine offers a compelling alternative.
Before the JP-5 was dominating the PCC world, the GMR-15 was the bee’s knees. It helped establish JP Enterprises as a force in the PCC comp market. The GMR-15 uses a traditional direct blowback system, which is simpler and more cost-effective to manufacture. While this design generally produces more recoil and bolt movement, JP mitigates these effects through careful tuning and high-quality components such as the JP Short Stroke 9mm Silent Captured Spring, Radian Raptor-LT charging handle and a black 9mm EnhancedBolt bolt assembly.
If you’re looking for a home defense option, the GMR-15 excels. The reliability of the GMR-15 means you’ll never have to worry about the gun not firing. The GMR-15 has long been known on the 9mm carbine market as “the one that works.” The flared mag well and compatibility with Glock magazines make it appealing to those in law enforcement, too. It ate everything I threw at it in testing, from Federal’s Syntech PCC to Fiocchi Defense Dynamics 147-grain JHP.
The trade-offs do exist. The GMR-15 is heavier at 6.5 pounds, longer when collapsed at 32.5 inches, and then there’s the feel. Direct blowback systems tend to be harsher, with more noticeable recoil impulse. In contrast, the JP-5’s roller-delayed action offers a smoother, more refined experience. That said, the GMR-15 was still extraordinarily pleasant to shoot. The extra overall length actually made it more comfortable to shoulder out of the gate.
Even so, the GMR-15 remains highly capable. For many users, especially those focused on range use, home defense or entry-level competition, it delivers excellent performance without the premium cost associated with the JP-5. While it does lack the advanced operating system of the JP-5, it remains reliable, accurate and widely respected. For many users, it provides all the capability at a significantly lower price.
9mm Carbine FAQ
What is the effective range of a 9mm carbine?
The maximum effective range where a 9mm carbine is both accurate and the bullets it fires have the velocity to function properly is generally pegged at 50 yards with a maximum range of 100 yards. However, the 9mm cartridge is lethal much further than the maximum range.
What is the point of a 9mm carbine?
It depends on what the shooter is looking for in a 9mm carbine. For home/personal defense, the 9mm carbine is much easier to control and place accurate shots than a pistol. Given the cost of ammunition, it is a more affordable option for competition. For the casual shooter, they’re just plain fun and inexpensive to shoot.
What grain is best in a 9mm carbine?
The most common loads for 9mm are 115 and 124 grains, which perform well out of carbines in defensive and competitive circumstances. However, when shooting suppressed, a 147-grain subsonic load would be more appropriate.
Are 9mm carbines CA Legal?
Yes, 9mm carbines are legal in California, as long as they meet the state’s laws about the gun’s features and capacity. You should check California gun laws before purchasing a 9mm carbine to ensure it complies.
Are 9mm carbines Short Barreled Rifles (SBRs)?
Not necessarily. Most 9mm carbines have 16-inch or greater barrels, classifying them as rifles. However, there are SBR 9mms and AR-style pistols. The former requires a tax stamp and federal registration to purchase, while the latter does not. Furthermore, modifying a firearm originally manufactured as a pistol with a stock or vertical forward grip makes it an SBR. Note, possession of an unregistered SBR is a felony under federal law. Please refer to ATF guidelines to ensure your gun is in compliance, particularly if you build one yourself.
Editor’s Note: This article originally appeared in the June 2026 issue of Gun Digest the Magazine.
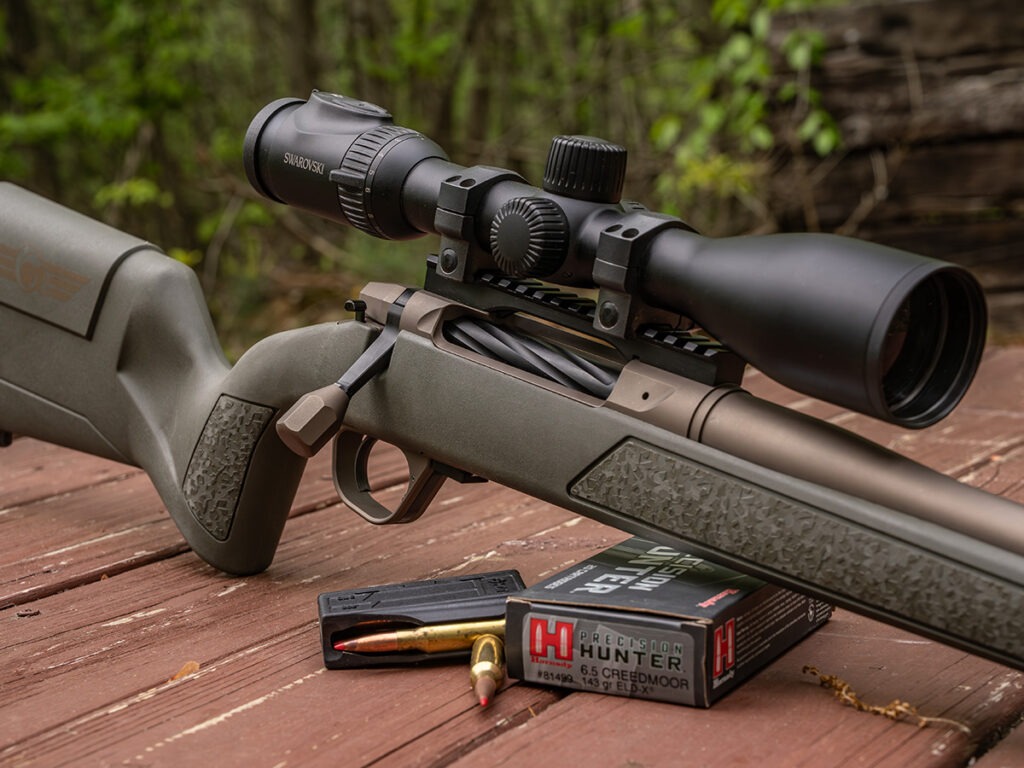
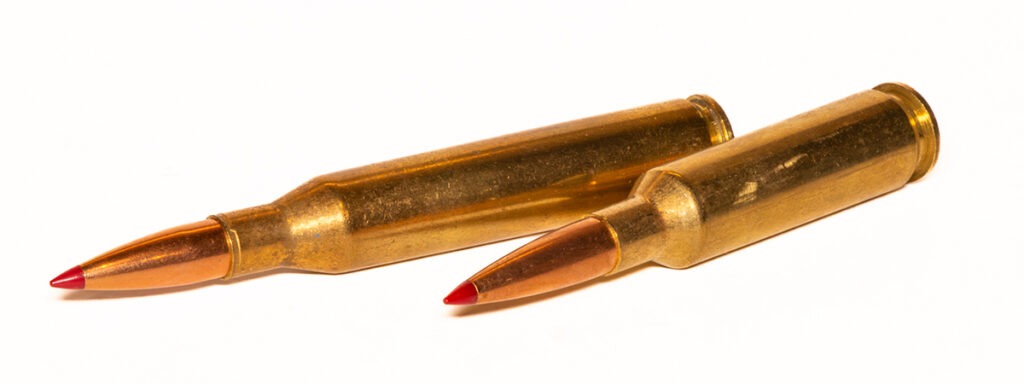
Bullets with a fast velocity or a high BC are good, but those with both are even better.
Since the introduction of the 6.5 Creedmoor, shooters and hunters have become infatuated with bullets that have a high ballistic coefficient (BC). This is understandable because, given the same velocity, the bullet with a higher BC will fly flatter and resist the wind better. Of course, for you to shoot a bullet with an extremely high BC you must have a rifling twist rate capable of stabilizing that bullet at the muzzle velocity you’ll be launching it at. This creates somewhat of a conundrum for shooters, because many older rifles/cartridges do not have rifling twist rates capable of stabilizing modern high BC bullets.
The 6.5 Creedmoor rifle cartridge started the high BC bullet craze.
The High BC Advantage
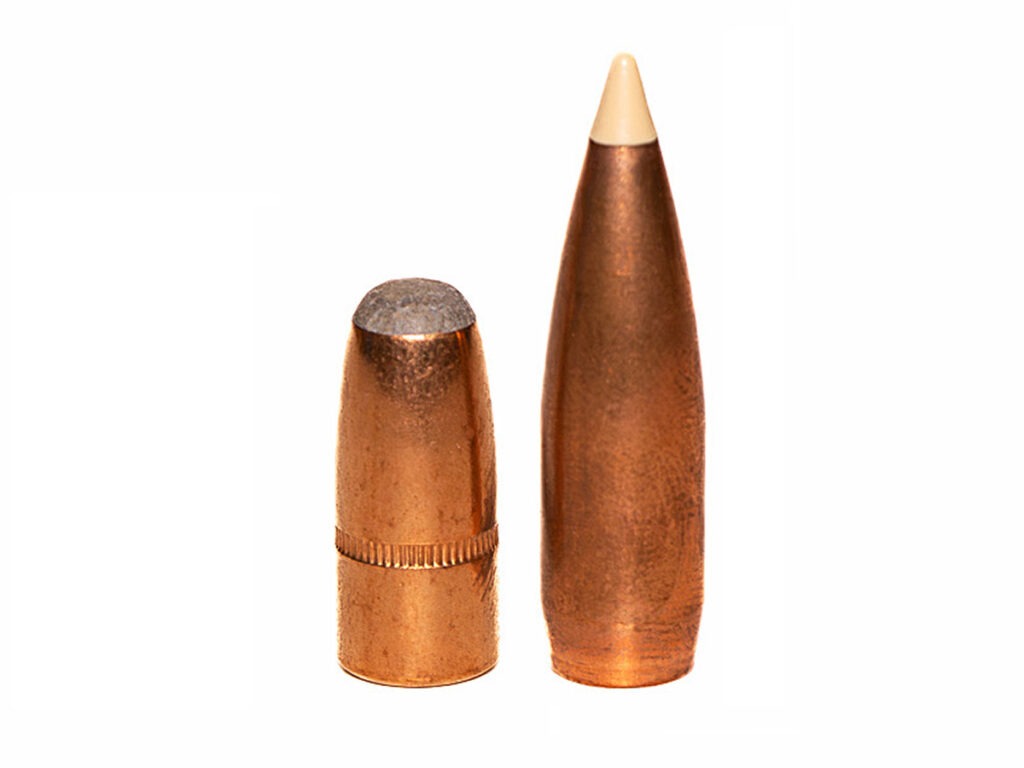
To get an idea of the advantages offered by bullets with high BCs, let’s look at a comparison between a Sierra Pro-Hunter 180-grain round-nose bullet and a 180-grain Sierra Tipped GameKing bullet in 0.30-caliber. The round-nose Pro-Hunter bullet has a G1 BC of 0.240 and the Tipped GameKing bullet has a G1 BC of 0.543. Using Hodgdon’s online load data resource, we can see that from a .308 Winchester both bullets can be pushed to a reasonable muzzle velocity of about 2,600 fps from a 24-inch barrel.
Round-nose bullets have terrible ballistic coefficients compared to modern bullets. However, with most modern rifle cartridges, out to about 200 yards it is of little consequence.
The chart below depicts the trajectory of both bullets given a 100-yard zero and the wind drift given a 90-degree 10-mph crosswind.
BULLET
BC
MV (fps)
200 yards Drop/Drift (in.)
300 yards Drop/Drift (in.)
400 yards Drop/Drift (in.)
500 yards Drop/Drift (in.)
RN Pro-Hunter
0.240
2,600
-5.47/6.73
-20.47/16.33
-48.75/31.40
-95.57/52.77
Tipped GameKing
0.543
2,600
-4.34/2.75
-15.36/6.35
-34.02/11.64
-61.45/18.80
As you can see, beyond 200 yards the bullet with the substantially higher BC flies much flatter and drifts a lot less in the wind. If you plan on shooting at targets or animals beyond 200 yards, the higher BC bullet is the obvious choice. However, most deer and other big game animals are taken inside 250 yards. This means that, for most hunters, a high BC bullet is probably not a necessity.
The Velocity Advantage
Velocity is the driving force behind any bullet, and the more velocity a bullet has the flatter it will shoot and the less it will drift in the wind. This is because of time of flight, which is a ballistic aspect few pay much attention to. Time of flight matters because the longer it takes a bullet to reach the target, the more time gravity and wind will affect it.
The only way to gain more velocity—a substantial amount of velocity—from your rifle is to reduce bullet weight. If you want a flatter trajectory but your rifle/cartridge cannot stabilize bullets with seriously high BCs, reducing bullet weight is a viable option.
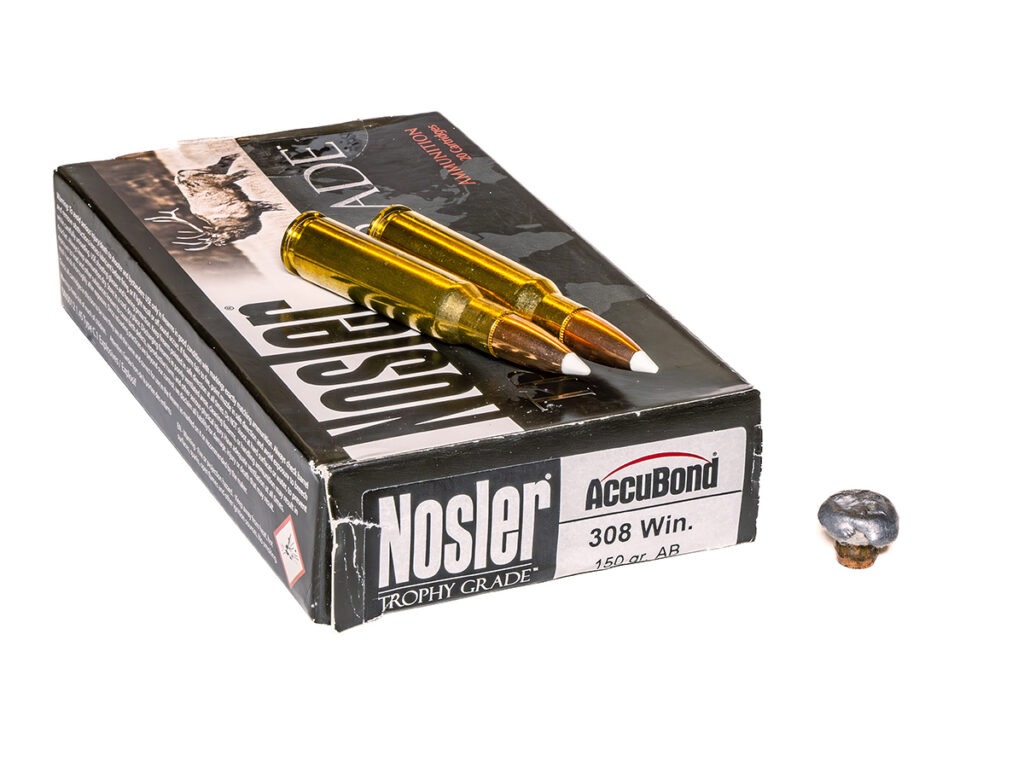
Let’s look at the difference between the Tipped GameKing bullet—which has a reasonably high BC—at 2,600 fps and a 150-grain Nosler AccuBond at 2,950 fps with a BC that’s almost 20 percent less.
The 150-grain Nosler AccuBond is a great big game bullet and compares favorably in terms of trajectory to heavier higher-BC bullets in 0.30-caliber rifles.
In this comparison, the faster, 150-grain bullet drops substantially less than the higher BC and heavier bullet, and wind drift is very similar. This is because it takes the 150-grain bullet 0.62 of a second to get to 500 yards, and it takes the 180 bullet 0.68 of a second to travel that distance. Here, it looks like the lighter-weight lower-BC bullet is a better option, but some hunters might be concerned about kinetic energy—thinking the heavier bullet will hit harder.
BULLET
BC
MV (fps)
200 yards Drop/Drift (in.)
300 yards Drop/Drift (in.)
400 yards Drop/Drift (in.)
500 yards Drop/Drift (in.)
AccuBond
0.435
2,950
-3.16/2.91
-11.78/6.74
-26.79/12.44
-49.37/20.24
Tipped GameKing
0.543
2,600
-4.34/2.75
-15.36/6.35
-34.02/11.64
-61.45/18.80
At 100 yards, the 180-grain bullet has 2,379 foot-pounds of kinetic energy, and the 150-grain bullet has 2,491. At 300 yards, the kinetic energy of the bullets is about the same, and at 500 yards the higher BC 180-grain bullet has a slight (6 percent) kinetic energy advantage, which is not enough to fret over.
As a final point of comparison, let’s look at recoil. From an 8-pound rifle, the 180-grain load will generate 18.68 foot-pounds of free recoil energy, and the 150-grain bullet will generate 18.41 foot-pounds.
Though this is a comparison with the .308 Winchester, you would see similar performance by reducing the weight of the bullet with other cartridges as well. For hunters, inside 500 yards, lighter-weight fast-moving bullets can compete favorably with heavier but slower-moving high-BC bullets.
With most rifle cartridges, you can outperform a heavy high-BC bullet out to around 500 yards by going with a lighter bullet that the cartridge can push faster.
This Cartridge Vs. That Cartridge
Of course, most of the BC and velocity comparisons modern shooters and hunters consider often deal with different cartridges of the same caliber. A shooter or hunter with an older cartridge is trying to decide if he needs a newer—fast twist—cartridge. This is where the real conundrum of BC versus velocity often comes into play.
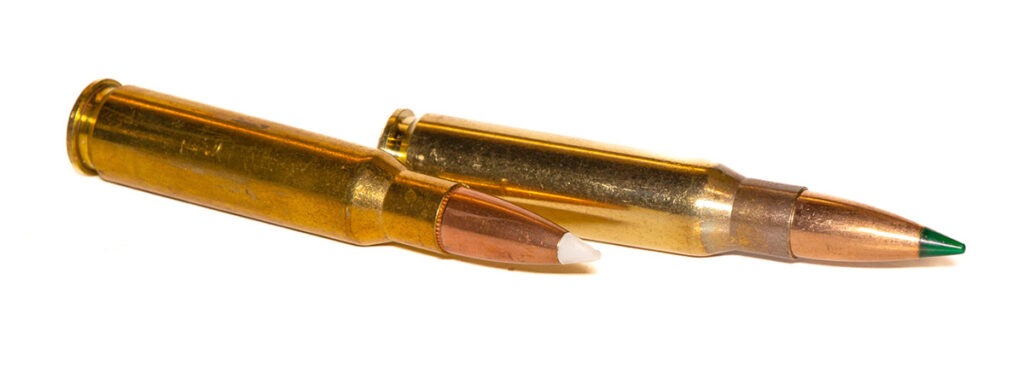
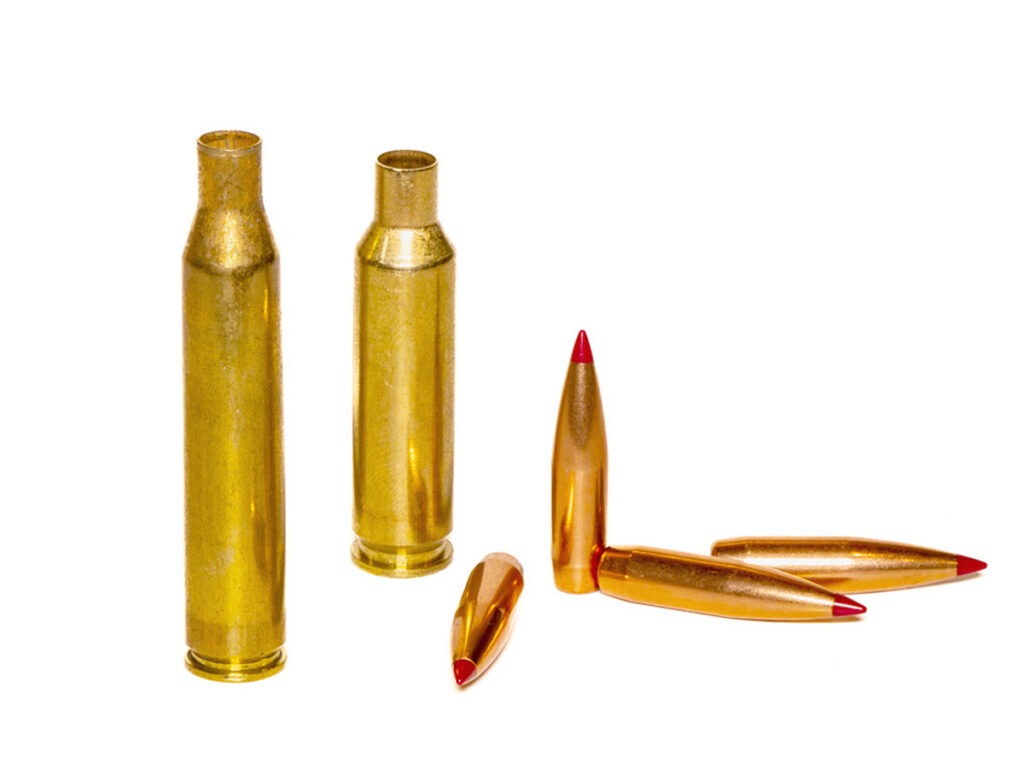
For example, imagine you have a .25-06 Remington, which was introduced in 1969 with a 1:10 twist, and are considering the new .25 Creedmoor with a 1:7.5 twist that was introduced last year.
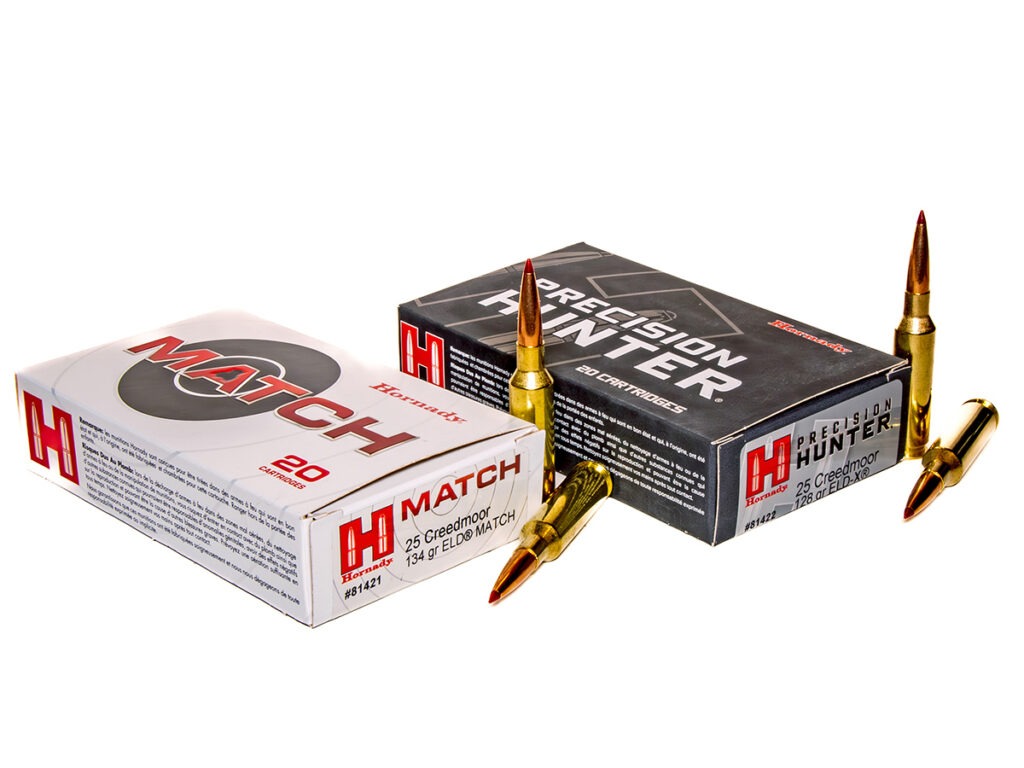
First, let’s look at these two cartridges with the same Hornady 110-grain ELD-X bullet, which has a G1 BC of 0.465. Out of a 24-inch barrel, the .25-06 will push this bullet to about 3,150 fps, and out of the .25 Creedmoor, it will have a muzzle velocity of about 3,050 fps. As expected, since both cartridges are shooting the same bullet, the bullet with the faster muzzle velocity has the advantage at every distance.
BULLET
BC
MV (fps)
200 yards Drop/Drift (in.)
300 yards Drop/Drift (in.)
400 yards Drop/Drift (in.)
500 yards Drop/Drift (in.)
.25-06 Remington
0.465
3,150
-2.54/2.48
-9.73/5.72
-22.9/-10.50
-41.11/16.99
.25 Creedmoor
0.633
3,050
-2.82/2.59
-10.61/5.98
-24.17/10.98
-44.44/17.79
Of course, the advantage the .25 Creedmoor has over the .25-06 has nothing to do with velocity and everything to do with twist rate. The .25 Creedmoor can stabilize bullets with a higher BC. In this next comparison, the .25 Creedmoor is shooting a 128-grain ELD-X bullet with a G1 BC of 0.633 at a muzzle velocity of 2,850 fps. For the .25-06, we’ll stick with the same 0.465 BC 110-grain ELD-X bullet, which is one of the best performing in this cartridge.
The only advantage the .25 Creedmoor has over the .25-06 Remington is the fast twist barrel that .25 Creedmoor rifles come with and that can stabilize higher BC bullets.
Here, even though the .25-06 is shooting a lower-BC bullet, it still has a trajectory advantage all the way out to 500 yards. On the other hand, the heavier bullet from the .25 Creedmoor does have a slight advantage in kinetic energy and wind drift. However, neither is of enough consequence to really matter.
BULLET
BC
MV (fps)
200 yards Drop/Drift (in.)
300 yards Drop/Drift (in.)
400 yards Drop/Drift (in.)
500 yards Drop/Drift (in.)
.25-06 Remington
0.465
3,150
-2.54/2.48
-9.73/5.72
-22.9/-10.50
-41.11/16.99
.25 Creedmoor
0.633
2,850
-3.25/2.06
-11.81/4.70
-26.28/8.56
-47.36/13.72
But let’s take this comparison out to a longer range. This table shows where high-BC bullets—even when launched at slower velocities—can outperform bullets with a lesser BC but with a faster velocity. At these distances, we’re beyond what would constitute an ethical shot at a big game animal.
Hunting is not about taking the long shot; it’s about using skill to get close enough for a sure shot. This is a concept largely lost by many modern hunters infatuated with high BC bullets.
However, those who compete in long-range competitions or just enjoy long-range shooting recreationally will especially appreciate the wind drift advantage the high-BC bullet delivers at extreme distance.
BULLET
BC
MV (fps)
700 yards Drop/Drift (in.)
800 yards Drop/Drift (in.)
900 yards Drop/Drift (in.)
1,000 yards Drop/Drift (in.)
.25-06 Remington
0.465
3,150
-101.92/35.94
-146.75/48.90
-203.60/65.54
-274.76/83.18
.25 Creedmoor
0.633
2,850
-112.23/28.45
-159.02/38.27
-215.99/49.93
-285.06/63.56
It’s still worth noting that, from a trajectory standpoint, the lower-BC bullet from the .25-06 at 3,150 fps shoots flatter than the higher-BC bullet from the .25 Creedmoor all the way out to 1,000 yards. Should you trade in your .25-06 for a .25 Creedmoor, or maybe your older cartridge for a newer cartridge compatible with high-BC bullets? Practically speaking, only if you’re going to shoot at extreme range.
If you load the .25-06 Remington and the .25 Creedmoor with the same bullet, the .25-06 with its faster velocity will perform better.
Apples to Apples
As a final comparison, let’s look at ballistic coefficient and velocity to see which would give you the most advantage with a 10 percent increase. If we bump the velocity of a .25 Creedmoor load by 10 percent to 3,135, and if we increase the bullet’s ballistic coefficient of another .25 Creedmoor load by the same percentage—from 0.633 to 0.696—which load would provide the best ballistics?
With its 1:7.25 rifling twist rate, the .25 Creedmoor is one of the newest and fastest twisted rifle cartridges.
Here you can see that when the same percentage of increase is applied to velocity and ballistic coefficient, velocity wins out regarding drop and wind drift. It also wins out in terms of kinetic energy. The only advantage the load with the higher-BC bullet has is that it will recoil about 17 percent less.
BULLET
BC
MV (fps)
250 yards Drop/Drift (in.)
500 yards Drop/Drift (in.)
750 yards Drop/Drift (in.)
1,000 yards Drop/Drift (in.)
.25 Creedmoor
0.633
3,135
-5.23/2.84
-37.76/11.98
-108.06/28.78
228.73/55.01
.25 Creedmoor
0.696
2,850
-6.74/2.93
-46.28/12.33
-130.08/29.54
-271.89/56.21
And the Point Is …
The point is actually two-fold.
First, unless a bullet has a substantial BC advantage, you will not see very much increase in performance except at extreme distance. Second, given like in kind increases, an increase in velocity is better than an increase in BC. Modern cartridges with fast rifling twist rates are marvelous creations. However, when it comes to rifle cartridge performance, you might need to spend some time with a ballistics calculator and do some math before you spend the money necessary for a new rifle chambered for a new wonder cartridge.
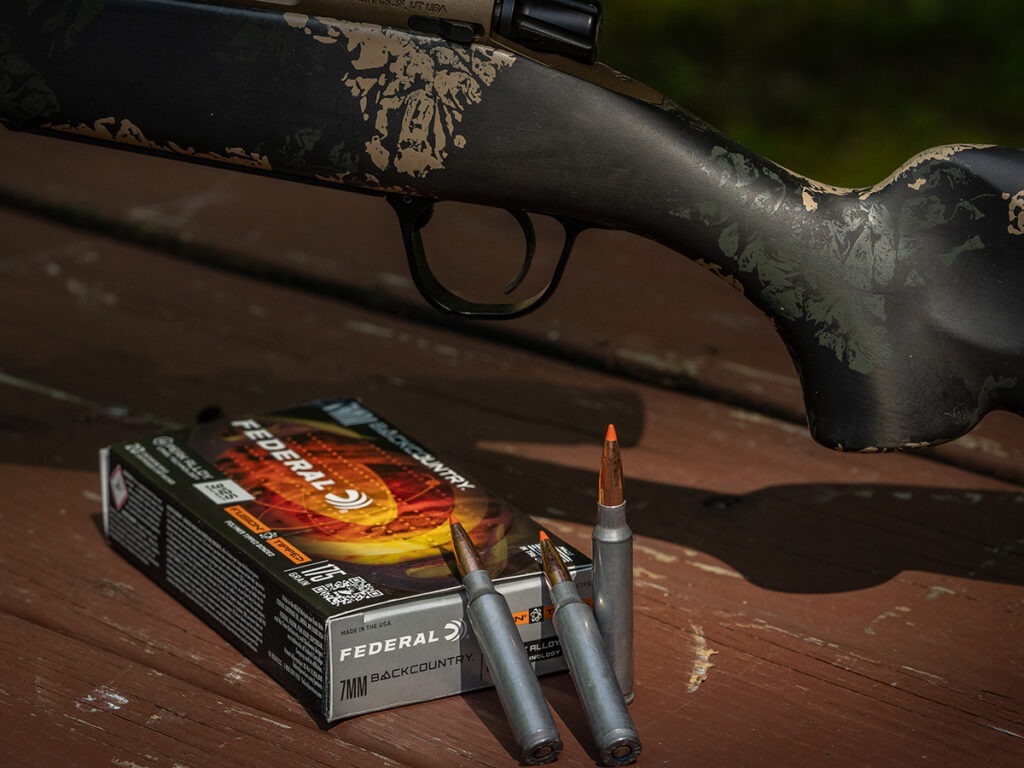
The 7mm Backcountry cartridge not only offers the ability to shoot high BC bullets, but it also has a velocity advantage over most other 7mm rifle cartridges.
Your old cartridge loaded with a lighter weight bullet with a decent BC might perform just as well. On the other hand, if a new cartridge offers a faster velocity and a faster twist barrel, you’ll get the best ballistics possible in a given caliber.
High-BC bullets and fast twist rates are great, but velocity will always be king.
Look at it this way: A bullet with a muzzle velocity of 0 fps is worthless, no matter how high the bullet’s BC might be.
Editor’s Note: This article originally appeared in the June 2026 issue of Gun Digest the Magazine.
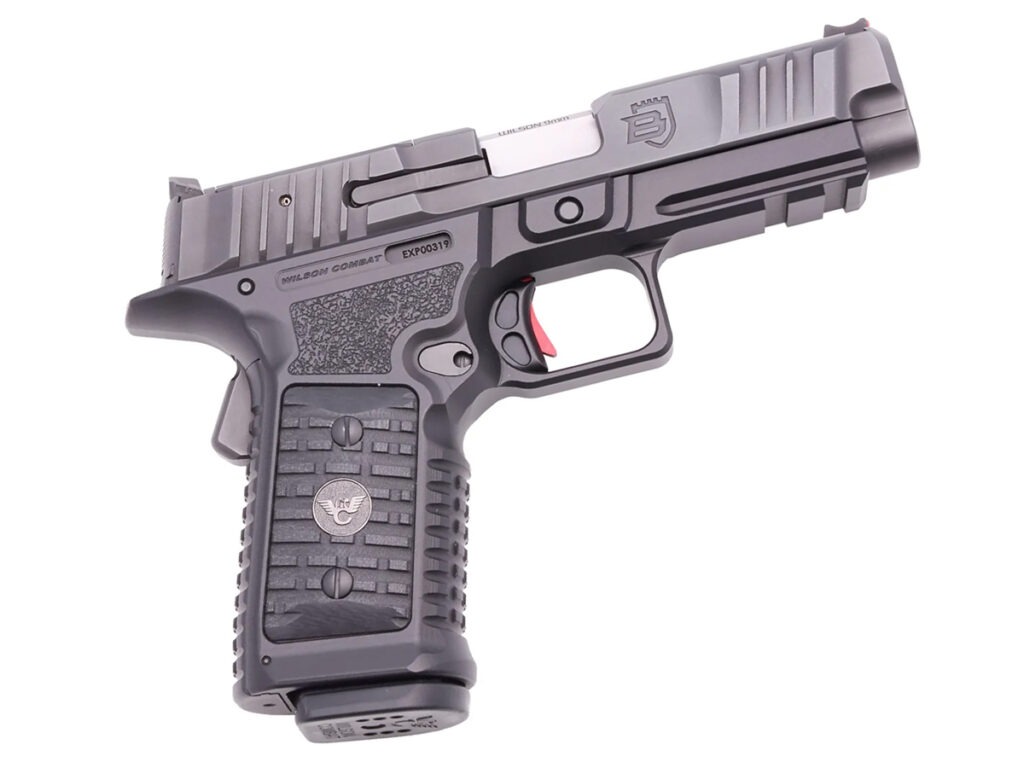
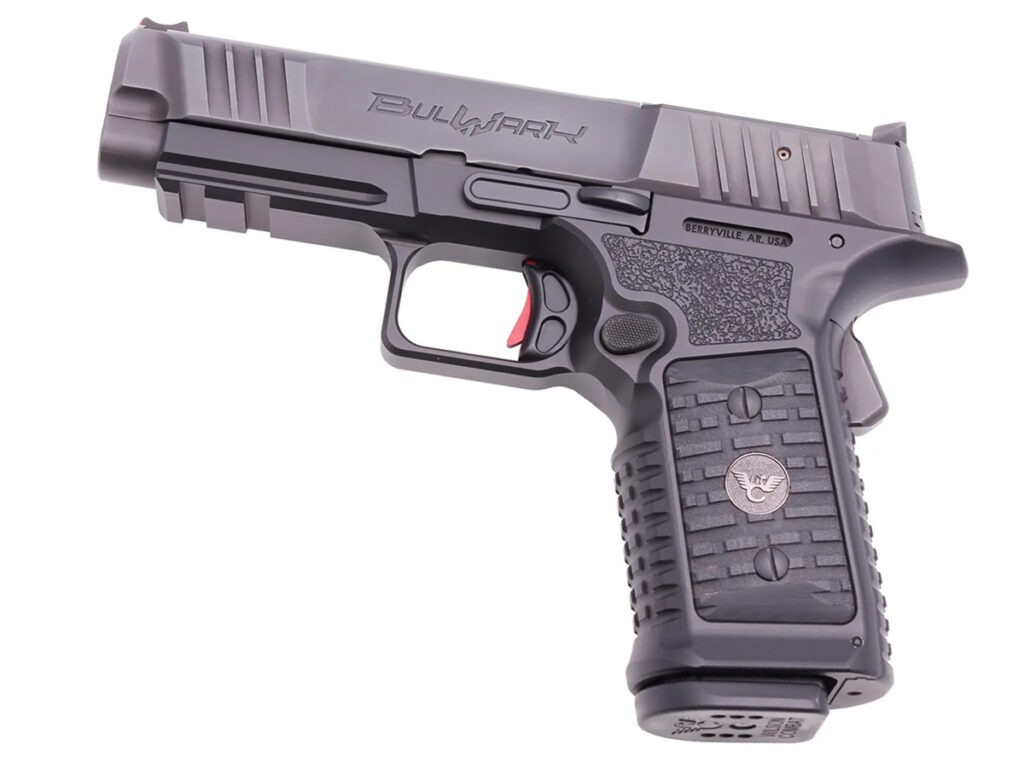
Wilson Combat has just launched the BULWARK, the company’s first internal hammer pistol.
Wilson Combat’s staple product has always been 1911-style handguns, which, naturally, featured traditional external hammers. Now, the company has made a great departure from its norm with the new BULWARK, a double-stack 9mm midsize pistol that utilizes an enclosed internal hammer-fired operating system.
Wilson Combat says the thought process behind the BULWARK’s internal hammer was to get the best of both worlds: the excellent trigger of hammer-fired pistols with the snag-free profile and protected action of striker-fired pistols. Speaking of triggers, the BULWARK features a 1911-style sliding trigger with a 3.75- to 4.25-pound pull. It also features four independent safety mechanisms, including a grip safety that blocks the sear and trigger until disengaged, a firing pin block safety and a trigger pad safety.
Other features of the BULWARK include its optics-ready slide (Wilson Combat Pin Technology system), black G10 grips, aggressive BRICK-pattern grip texture, a Battlesight rear sight/red fiber optic front sight, an accessory rail and front/rear slide serrations. Wilson Combat also says that the pistol is compatible with many Glock 19-pattern holsters.
The BULWARK’s 15-round magazine is unfortunately proprietary, and each spare will run you $55, but the pistol at least ships with two. An MSRP has not been published, but online retailers are currently listing them for $1,900.
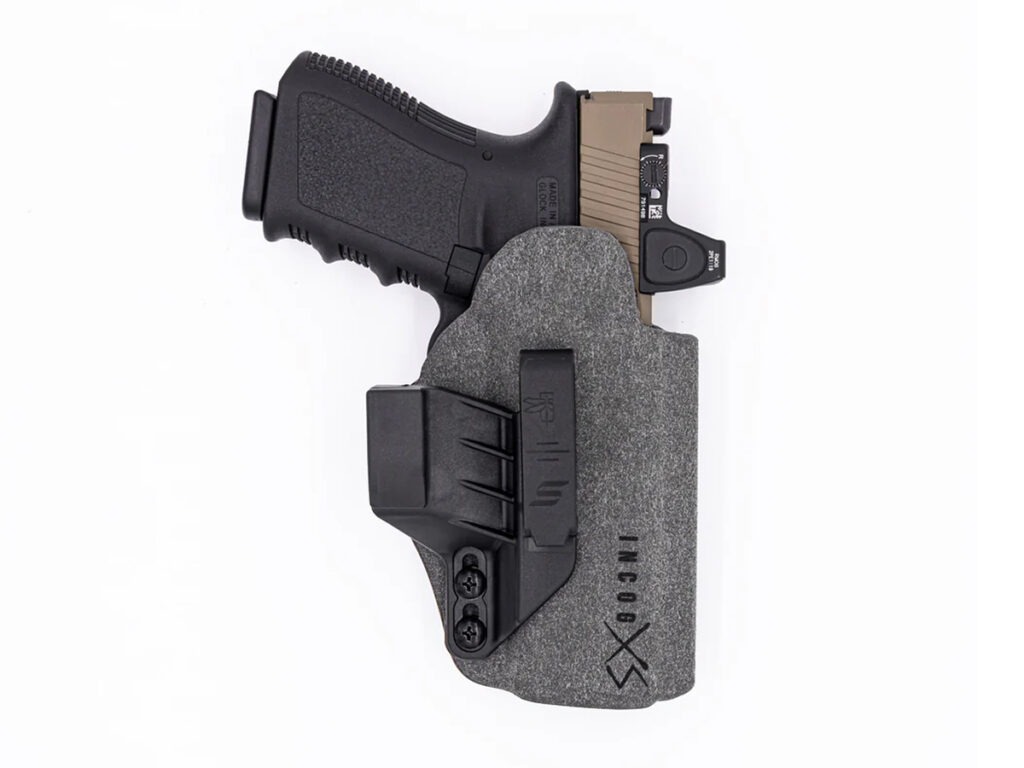
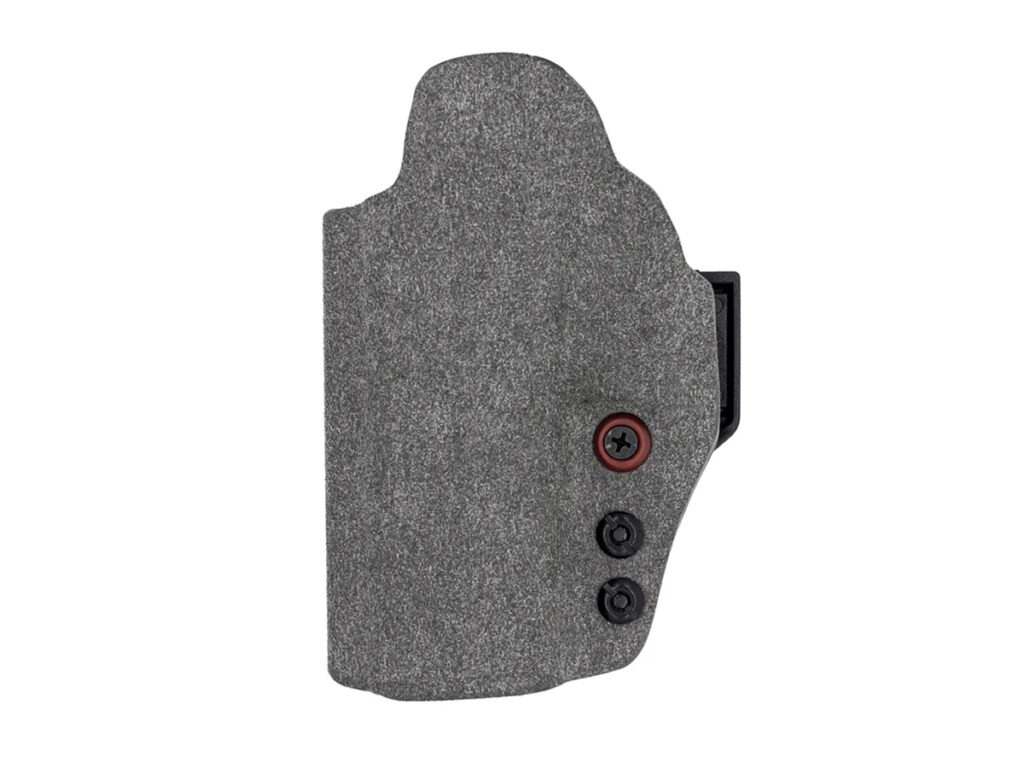
Safariland and Haley Strategic Partners have collaborated to launch the Incog XS IWB holster.
From Safariland and Haley Strategic Partners comes the new Incog XS, a streamlined, minimalist concealed carry holster with some interesting features. Engineered with subcompact and micro-compact pistols in mind, but with some full-size fits available as well, the Incog XS is a single-clip, deep concealment inside-the-waistband (IWB) holster designed to reduce printing while still facilitating a good draw.
The Incog XS features a microfiber suede-wrapped Boltaron holster body that should be comfortable on the skin, wick away moisture and easily wipe clean. It also comes with three sizes of clip strut shims for adjusting its concealability. Other features include red dot sight compatibility, an extended sight channel for front sights up to 0.406 inches, an ambidextrous body for easily converting between right- and left-handed configurations and the LinXS Attachment System that supports 3-6 o’clock carry positions.
Travis Haley, CEO and founder of Haley Strategic Partners, said this about the new holster:
From the beginning, our focus with Safariland was simple: build a holster that disappears when you need concealment, but performs without compromise when it matters most. The Incog XS reflects that mindset, minimalist in footprint, adaptable in configuration and built for real-world carry. Whether you’re running appendix or strong-side, it gives you the ability to dial in comfort, concealment and access without unnecessary complexity … Safariland’s ethos is “together we save lives,” and that’s not just a statement, it’s a responsibility we share in everything we build. This is a streamlined solution for those who take every day carry seriously.
MSRP for the Incog X is $102.50, and it’s available for several models of Glock, Shadow Systems, Sig Sauer and Zev pistols.
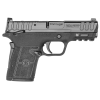
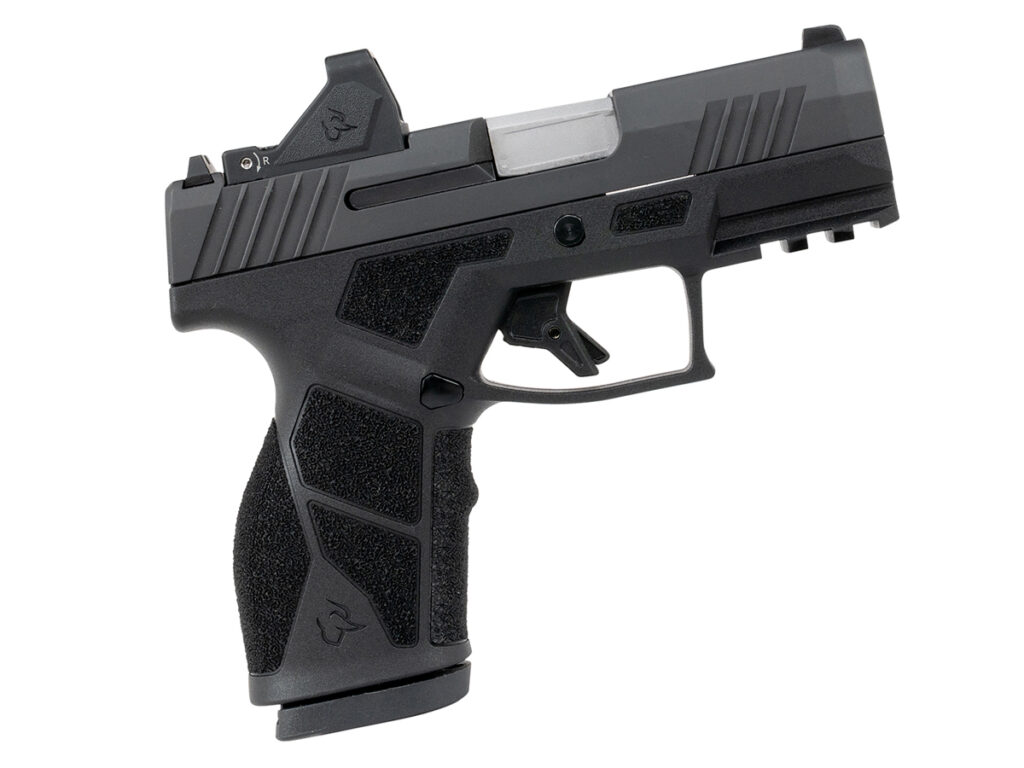
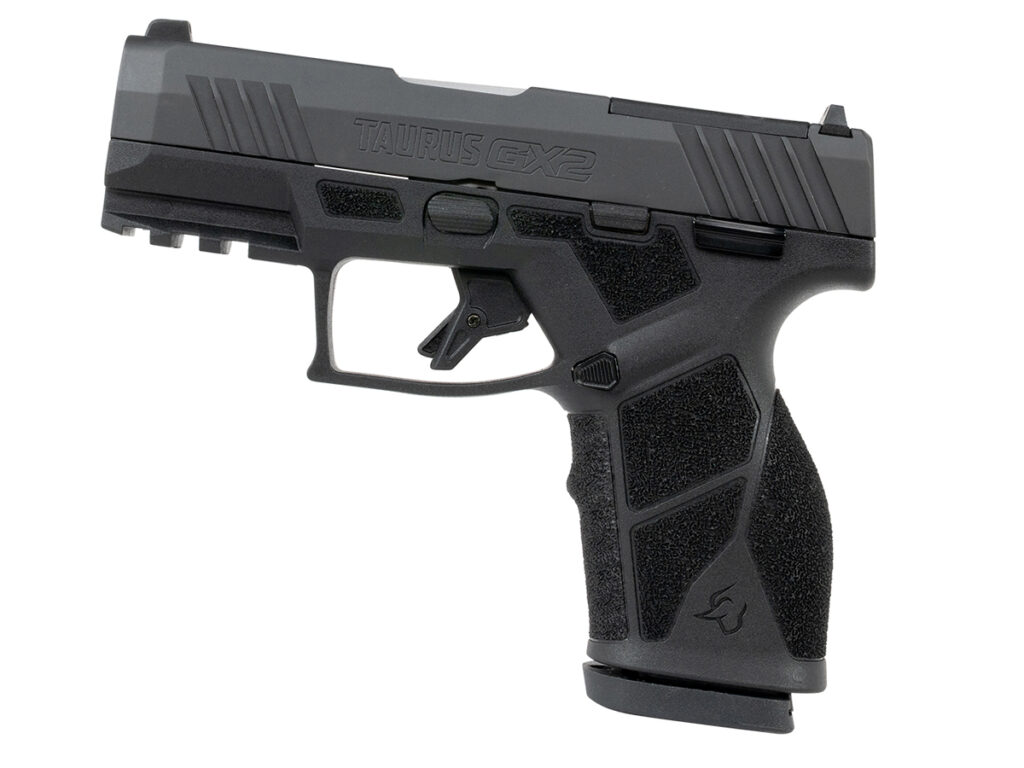
Taurus has just made the affordable GX2 optics-ready with the GX2 TORO.
Red dot-equipped pistols used to be expensive and niche, something that only serious shooters spent the money to have, but now they’re more accessible than ever. There’s a slew of good pistol optics on the market that don’t break the bank, as well as affordable optics-ready pistols, and one of the latest is the Taurus GX2 TORO.
At its core, the pistol is the same as the original Taurus GX2, but the new TORO model allows you to easily direct-mount red dot sights with the popular Shield RMSc footprint straight out of the box. Features like its 3.38-inch barrel, 13-round capacity of 9mm, manual safety and white dot front/drift adjustable rear sights are all unchanged.
Justin Porlier, VP of Sales for Taurus USA, said this about the new upgraded pistol:
The GX2 reset expectations for what a pistol at this price point should deliver, establishing itself as a leader in value for everyday carry … With the GX2 TORO, we’re raising that bar again—adding capability without sacrificing what made it so accessible.
The Taurus GX2 TORO has an MSRP of $300 and it ships with one magazine.
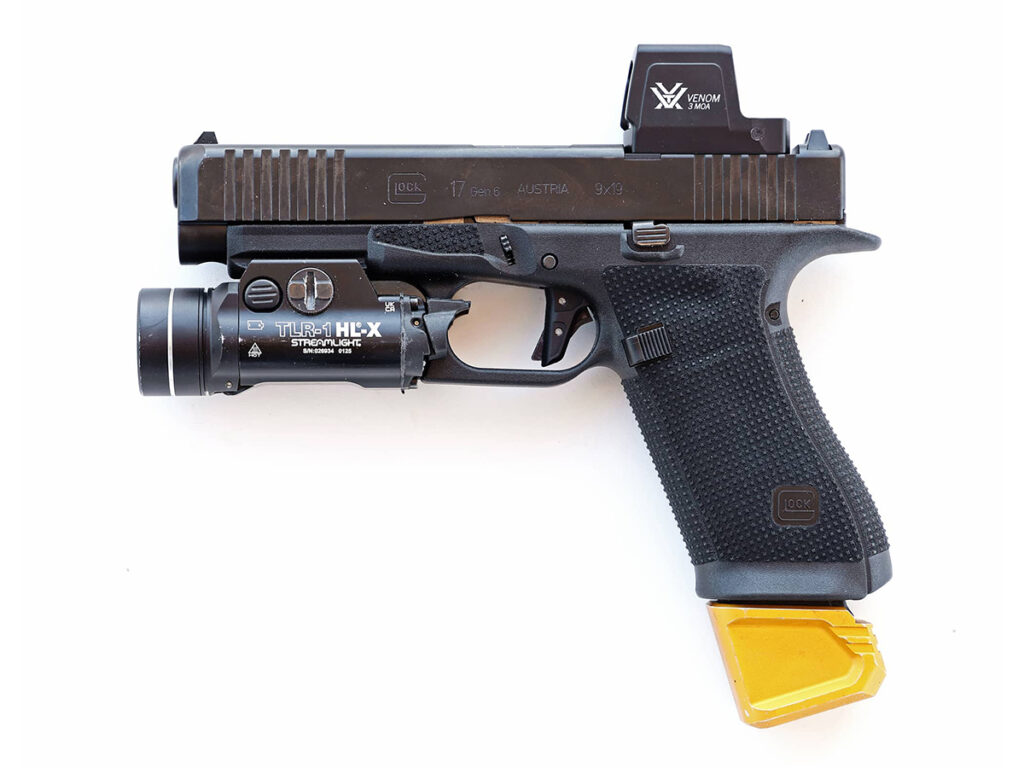
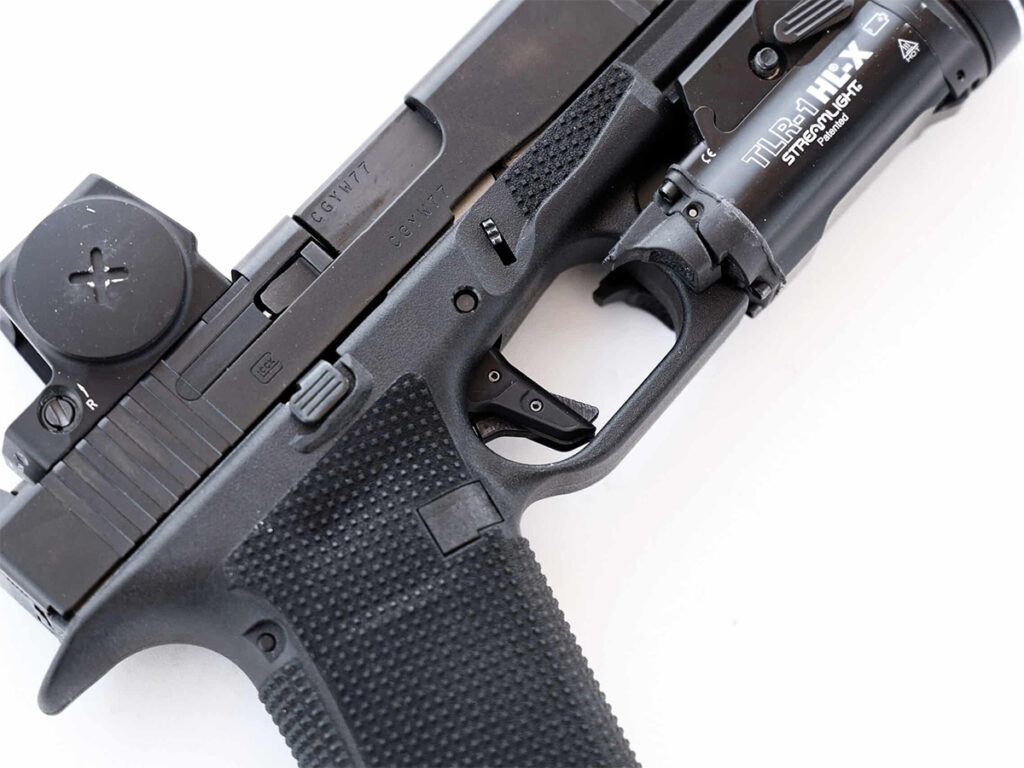
I hit the range to test out a Glock Gen 6 G17 ORS, and I found out it’s the best Glock generation yet, but has one glaring flaw.
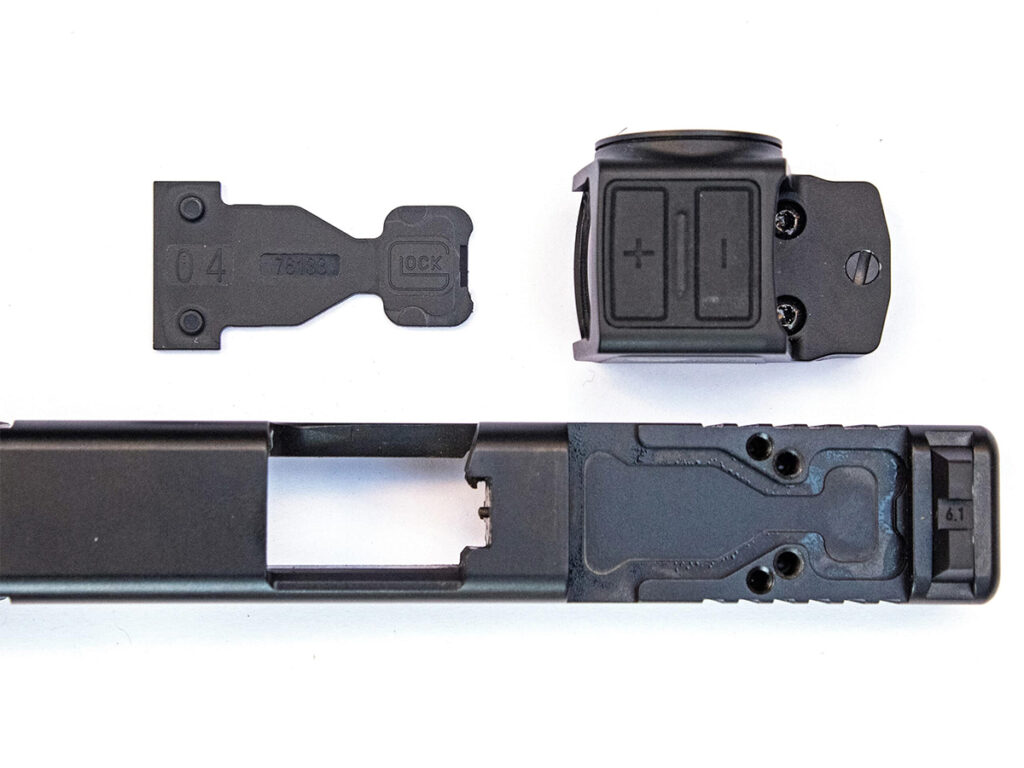
Glock has been the gold standard duty pistol for generations. From world champions to tier 1 operators, Glock is the trusted name that everyone defaults to. Now we’re hands-on with the brand-new sixth generation, and, spoiler alert: for the second time in a row Glock can’t figure out how to deliver an optics system worthy of their name.
There is a lot to like about the sixth generation of Glock — the grip texture, the palm swells, the more comfortable ergonomics. Setting aside the optics for now, this is my favorite generation of Glock pistol and the only generation that hasn’t met a Dremel within an hour of being in the house.
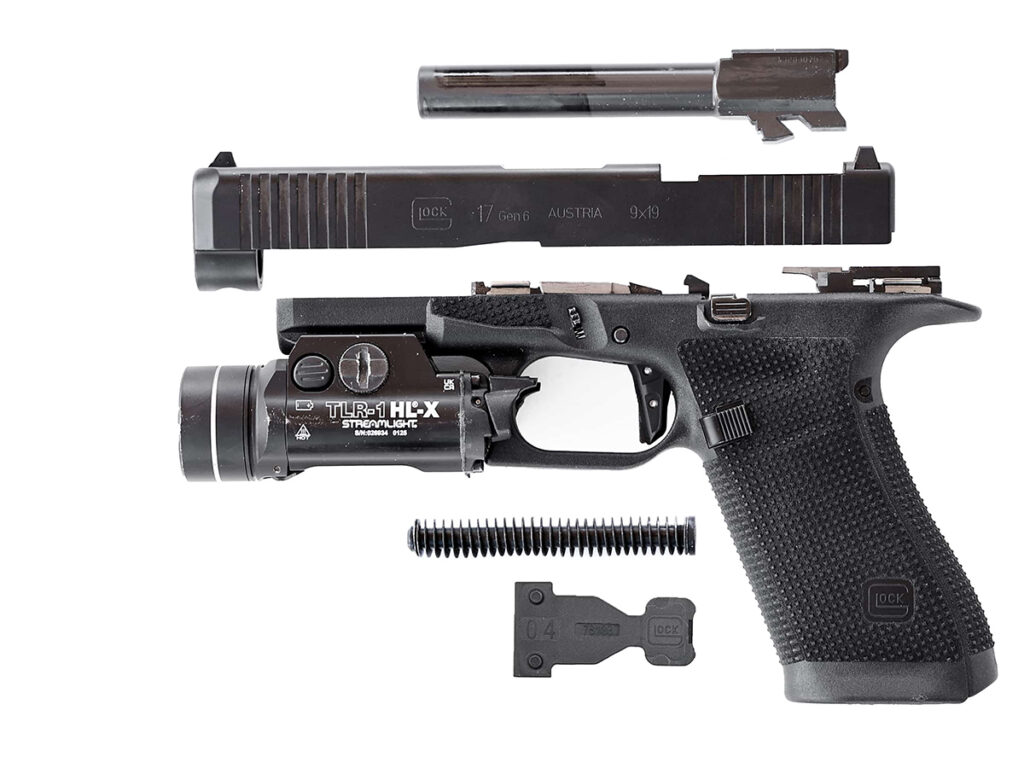
Gen 6 is without doubt the most different Glock generation to date, with external and internal changes. Some of these matter a lot more than others.
Important changes include:
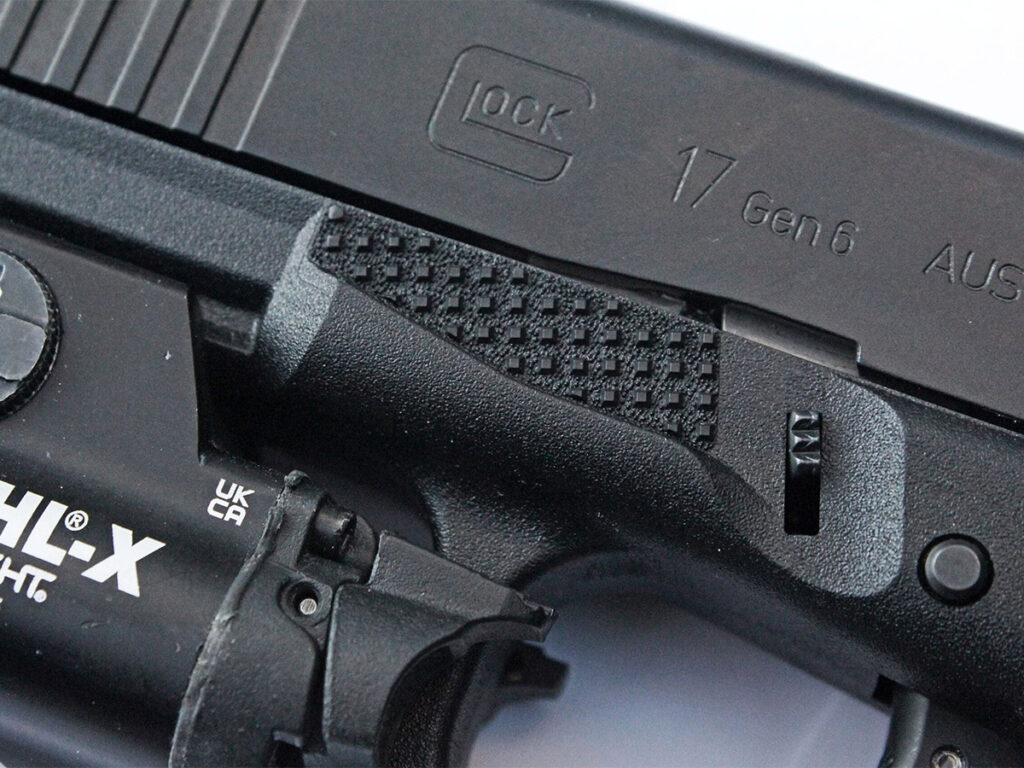
Redesigned grip that offers both a new texture and a new shape featuring small palm swells
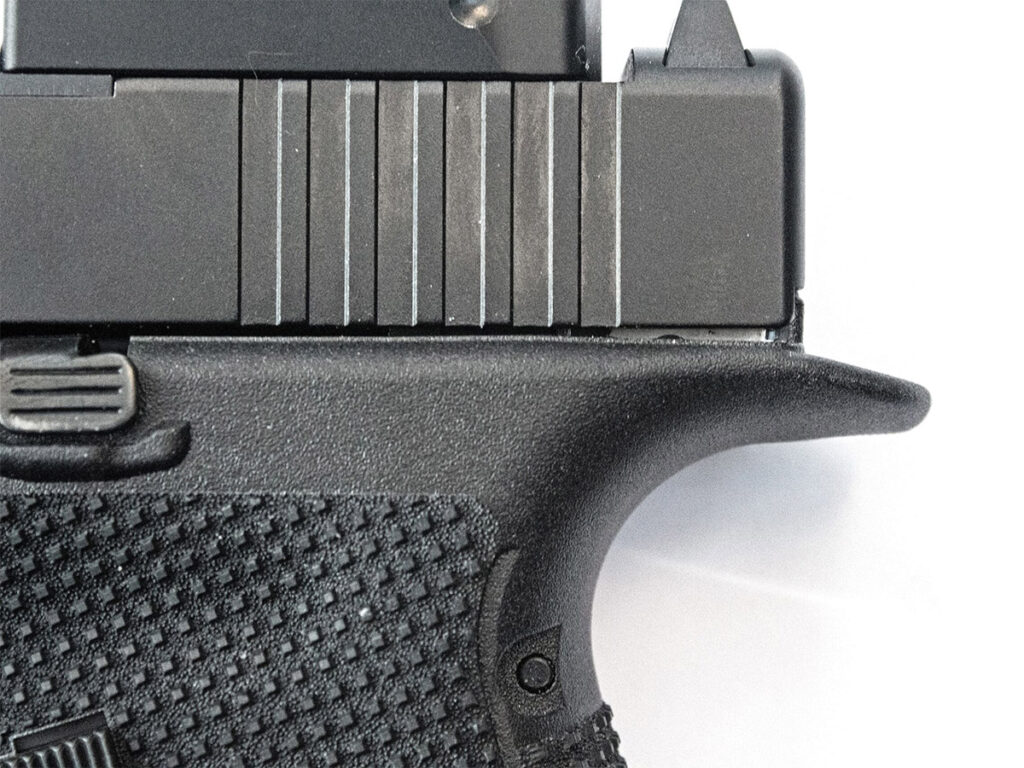
Extended beavertail
Higher trigger guard undercut alleviates the cause of “Glock knuckle”
Gas pedal-style thumb rests forward of the takedown lever (if you have the thumbs to make use of them)
A completely redesigned optics mounting system that gets rid of the long-hated Glock MOS.
Updated recoil spring system
Internally there is a fairly long list of small changes, but what they amount to is Glock trying to at least pretend to have tried their best to prevent their product from being illegally modified to accept full-auto conversions. As anyone with two working brain cells to rub together predicted, like the “Gen V” that shortly preceded this release, it took less than a week before people figured out how to defeat Glock’s changes.
For the vast majority of people, none of that really matters. The good news is that the changes made don’t actually impact the user in any meaningful way …except for the fact that many parts that have been standardized since Gen 3 now won’t fit Gen 6. (Things that make you go hmm.)
Gen 5 and Gen 6 still maintain a lot of compatibility on the outside, such as iron sights, holsters, magazines, and some minor internal parts like the slide release. But what exactly fits and what doesn’t is a mixed bag.
Thumb shelf for those that want it.
MOS Vs. ORS
Glock’s first attempt at an optics system was the MOS, released in 2015. The idea was decent but the execution was lacking. The OEM plates are cheap, prone to being warped or bent straight from manufacturing, and plagued with breakage problems and shearing screws. Breakage like flinging the dot right off your pistol. Upgrading the plates and the fasteners (and upping the end-user aftermarket cost of the pistol) became the standard fix.
Gen 6 introduces the Optic Ready System (ORS). It uses a polymer spacer/plate/washer between the optic and Glock’s direct mounting cuts. The system raised concerns from the jump. Why plastic? Why undersized recoil bosses? Why no optic fencing? But they are the multi-billion-dollar company, and surely, surely they wouldn’t make the same mistake twice.
Cautiously optimistic, a Vortex Venom was carefully installed before heading to the range. Thread locker was used on the screws, a torque wrench ensured they were tightened to spec, and witness marks were applied.
On The Range
Shooting the Gen 6 is much like shooting a Gen 5, but better. For me, the ergonomics of Gen 1-5 never worked. No beavertail, Glock knuckle-inducing trigger guard, and a hot spot on my finger from the trigger safety. Gen 6 solves all of these problems.
That being said, the Gen 6 still feels like a Glock. The recoil is the same, the vibes are the same; it’s a Glock. Is it kind of boring? Sure, but reliable is boring.
Glock claims the sixth generation has an improved trigger, but that seems to be luck of the draw. Fondling other sixth-gen Glocks has shown the trigger to be overall inconsistent — not uncommon with a mass-produced duty gun, but annoying. Some felt substantially better than fifth gen; some felt moderately worse. The Glock 17 bought for this review had a not-great example of the trigger, and it felt like a slight downgrade from Gen 5 in terms of pull, smoothness, and weight. Gen 6 has a new flat-faced trigger shoe that is an upgrade over the classic Glock shoe, but that was the only improvement.
Thus, after 350 rounds, the factory trigger was pulled and replaced with a Johnny Glock VEX 6 trigger. While the stock trigger is fine for what it is — a bare stock trigger — the VEX 6 improves everything about it.
Shooting a local pistol match, the Gen 6 didn’t surprise me. It wasn’t the most high-speed thing on the range, it didn’t malfunction, and accuracy felt great for a production plastic pistol. It does all the things it needs to do: It’s a Glock.
New Name, New Look, Same Problem
The wheels came off not on the range, but at the workbench. Doing a final series of inspections and cleaning to see how the Gen 6 is faring after 1,000 rounds of fire, the optic twisted noticeably in my hand. Witness marks on the screws appeared unmoved, and checking the torque, it was still at 18 inch-pounds. I removed the optic and remounted it just in case to check. After torquing it again, the optic feels solid.
A quick range trip to throw a couple hundred down in practice, and the optic can now shift again. Witness marks were maintained, torque was maintained, but the optic again can shift. Both times the screws were installed using thread locker, both times they were properly torqued, both times they were witness marked.
Losing zero is bad enough, but losing zero with almost no external sign is much, much worse. At least with MOS, you knew when it failed because your optic went flying.
People concerned that this would happen started planning to manufacture metal plates almost the same day that Gen 6 was announced. Now that Gen 6 is here and people are seeing the problem firsthand, it seems like those aftermarket plates will be the way to go. Or not, because the problem is weird? Time will tell.
Glock ignored the problems with MOS — why should anyone have any expectations that Glock will do anything different with the Gen 6?
Worth The Upgrade?
The internal base of the Gen 6 is great — there’s a reason this now-middle-aged striker system has become standard. So, other than the optic system failures, the Gen 6 is a good pistol. Apart from that, Mrs. Lincoln, how was the play?
Those stuck in the 20th century with iron sights will like the ergonomic upgrades and likely will suffer no problems. However, until the optic issues are reliably solved, the Gen 6 gets a hard pass.
For the sake of discussion, let’s pretend the ORS works perfectly, what then?
If you already have an older generation Glock and are happy with it, upgrading to Gen 6 ORS probably doesn’t net you a lot of benefits. Especially if you’ve already improved your older-generation Glock a little with an aftermarket slide or non-Glock MOS plate, stippling the grip, or swapping the trigger.
If you’re not already invested in a Gen 3-5, then the Gen 6 is the clear winner because it’s a great step forward in ergonomics and feel. At that point, the main reason to choose something else is for the extremely robust aftermarket that is mostly based on Gen 3.
For a tinkerer/customizer, one of the best things about Glock is that it provides a platform for other brands to build on. But if that’s your goal, it’s probably better to go with a non-Glock Glock a la Ruger RXM or PSA Dagger instead. At least you can buy several for the price of one.
Johnny Glocks VEX Six
The OEM Gen 6 trigger is pretty solid for a factory Glock trigger and a major upgrade over Gen 3, but only a minor upgrade (if that) over Gen 5. Sadly, the Gen 6 OEM trigger is not as good as the Gen 5 Glock Performance Trigger, but it’s at least closer. The Gen 6 flat-faced trigger shoe is a big deal to some people, but for me, it only mattered in that it didn’t leave a hot spot on the pad of my finger after an extended range day.
Gen 6 is different enough that much of the aftermarket built up for Gen 3-5 simply won’t work with Gen 6, but that didn’t stop Johnny Glocks from jumping on adapting their triggers to work with Gen 6. Released only about a month after Gen 6 hit the market, Johnny Glocks VEX 6 was available within a couple of days of when my Gen 6 G17 arrived. Perfect timing.
Installing the VEX 6 is nearly the exact same as any other Glock trigger. If you can detail strip a Glock, you can install the VEX 6 with ease.
Offered in two flavors, Defensive and Competitive, the VEX 6 cuts weight off the trigger pull and makes it a lot less mushy than the OEM. While the factory trigger is decent, VEX 6 is a nice improvement.
Loose Rounds
Glock’s failures with the MOS system were partly forgivable since optics were still non-standard in 2015, and it was an impressively progressive step for them at the time. But for Glock to launch a new generation of essentially their only product, with a ground-up rebuild of the optic mounting system, only to come out with something so fundamentally flawed as this, is nothing short of embarrassing.
We now stand a few months after the release of the Gen 6, and it’s obvious that our plate problem isn’t exclusive to us. Many others are having the same issue, but there are also people who aren’t. There doesn’t seem to be any discernible pattern to the successes and failures. The fact that this might all come down to random luck between the plastic plate, optic, and mounting only makes it more frustrating.
Everything else about the Gen 6, gold stars. We’ll revisit the Gen 6 ORS with a new aftermarket optic plate. Until then, this gun is going on the shelf of shame to be ignored.
More On Glocks
Glock 17 Review: How The Full-Sized Striker-Fired Set The Standard
The steadier your rifle, the tighter your groups. Good shooting support gear will help with that.
Shooting support gear is an interesting topic. As of right now, there are more companies producing more shooting accessories than ever before, and a good number of them are unfortunately poorly made … or just downright snake oil. Not every sling is equal, not every tripod is equal, and there are certainly a lot of bipods out there.
So, let’s look at where the need for support gear started and see where it takes us.
An (Abridged) History of Sights and Slings
If we go all the way back in history, to when firearms were first adopted, you will see that they were typically large and required a lot of material support to get them into position to use. As guns were miniaturized, attempts began to emerge that made them lighter, more portable and more ergonomic. It could be argued that the quintessential shape of the modern rifle emerged as early as 1700, but it could also be argued that it wasn’t until at least the 1850s that we saw what could be truly considered early modern rifles.
But, the most important part of the story of stability is the precision in which we can aim.
Marksmanship on our side of the Atlantic has always had a history of being much more individual, whereas European armies during these formative years were much more concerned with fighting gentlemanly warfare. The vast majority of European shoulder arms lacked proper sights, entirely preferring instead massed volley fire.
Though it is true that many soldiers and hunters used crossed sticks or even primitive monopods, none of these things offered much utility until rifled barrels and adjustable sights extended effective distances. Smoothbore flintlocks were versatile weapons that could load and handle fast but were not generally very accurate at longer distances requiring steady support.
The barrel length of these arms at the time had more to do with the infantry idea of bayonets than accuracy or projectile velocity. American flintlock rifles at the time were pinnacle weapons and ushered in the truth that aimed fire was the future.
American sighting quality continued to advance into the Industrial Revolution, with Westward expansion seeing great strides in what rifles could do at long range. This is an interesting point because, over time, it became evident that the European armies entering the 20th century had a conspicuous lack of individually adjustable sights on their rifles, as opposed to what has existed and continues to exist on individual American weapons.
The advanced rear sights of the era, from Vernier to the M1903, showcased the emphasis placed on an individual’s ability to minutely adjust their sights for precision, where the average European soldier could perhaps only crudely adjust elevation off a zero established by an armorer.
Individual marksmanship became a high priority for American forces. This is when we first saw widespread use of accessory support attached to the rifle entering the mainstream: the sling. The American use of slings as crucial to stability went beyond the common sandbags and rolled blankets or backpacks used for centuries as improvised support. It was indeed revolutionary to make what amounts to a carry strap into an adjustable field support that could dramatically improve hit likelihood.
This dynamic changed a great deal of things, although slowly at first, but it could be said that the sling as a stabilization mechanism was the first of our modern stability advances.
Slings, Then and Now
The popular USGI sling is both easy to use and inexpensive. Here it is on three National Match legal rifles: the CMP’s new M1 Garand, the new CMP 1903A3, and Brownells M16A1.
It’s common in our shooting culture to use slings as support items—although not every sling out there is cut out for the task. There are still a great number of simple, two-point slings that are used as carrying straps, and it should be noted that not all stock designs and even rifle designs benefit from the tension of a sling being used as a support.
On most of our modern guns, especially those of military pedigree, we find that they do pretty well snuggled up, even as just a “hasty sling” style. For much of American history, two very common sling styles have dominated the conversation and the competition line. They are still around today, and I personally use both of them for national match competition.
First and older of the two is the classic 1907 sling. This is the iconic “hook“ sling that is one of the most functional sling designs ever created. The sling consists of two pieces, and I will be heavily debated if I call one the front loop or the back loop. We can simply refer to one as the long loop and the other the short loop.
Everybody has a different way of attaching this sling; there is no real correct way, except for getting the results you want. The 1907 sling uses a two-prong hook to engage equidistant holes in the straps to provide what amounts to a consistent set of adjustments. Many of these slings have numbers along the holes, very similar to what you would find on your Picatinny rails for mounting optics or accessories. They give you a consistent and repeatable location depending on your shooting position.
There are plenty of great manufacturers of this style of sling, among them are excellent, heavy competition leather versions like the ones featured in this article by J. Berlin. And an all-weather version, and again a modern classic, is made by Turner Saddlery. Other versions of this sling are available through companies like Brownells, as well as replica military companies. It should be noted that not all of these leather slings are created the same. It’s advisable to get versions that are made of stronger leather with high-quality rivets for a real competition use.
Another one of the best types of slings out there, for adjustability and competition use, is the World War II era US G.I. cotton web sling. I use these slings on a great number of my military competition rifles. They are lightweight and, while not as permanent in terms of adjustment, are very easily adapted to a cuff style on the upper arm quickly. These things can be made very tight, almost to tourniquet level, and offer a great deal of rigidity for accurate shooting. They are also quite fast to use as a hasty sling and detached from the rifle very easily. They are fairly common to find at surplus stores, gun shows and online. The versions that you see in this article are around $25 on Amazon. I have been competing with these for years, and they have held up extremely well for the price.
Now, making a jump to the far more modern, we have slings here from Short Action Precision. This company has been making slings for years. These slings are very popular and common in the PRS sports, although they have a great deal of utility for general field use and hunting. They are not, however, legal for all shooting sports, as some types of shooting explicitly exclude slings with an integrated cuff.
This type of sling is fast to use and fast to get out of. It has a wide range of adjustability and comes in a number of colors. It can be easily adapted to use modern QD swivels and can be used as a cinch for barricades, against trees and a number of other field expedient uses. I’ve even used one as a makeshift sling for a tripod in the past. While there are certainly other slings available on the market, out of all of those that I have tried over the years, the SAP slings are one of the few that actually increases stability while in use.
Bipods, the Tried and True
Bipods are available in a variety of forms to fit your needs. Here we have (top down) Harris, Magpul and two Atlas.
Bipods have been heavily in use on standard small arms since the Cold War era. Up until then, it was vastly more common to find them on machine guns and heavier weapons, but in the modern era they have become distinctly more popular across the board. The recent past has seen bipods moved from barrel-mounted fixtures to stock-mounted fixtures, and in our current era, they typically mount to the variety of rails that we have. As we have come to understand that putting adverse pressure on a barrel certainly affects accuracy, it’s rare to see any small arms outside of historical replicas that have them barrel-mounted.
Just like everything in our modern era, modularity is the name of the game. Classic bipods, such as the Harris, typically mount to the sling studs on common rifle stocks. Harris models are still very common (and so are their cheap knockoffs) and have never lost reliability over the years. I would argue that they are still some of the best bipods available and still some of the fastest and easiest to use. You really can’t go wrong with one of them, and they are available in quite a few different lengths for whatever use you may have.
However, just like anything, a size penalty comes into play, and I’ve never really been a fan of them in extended length because they aren’t quite as stable or offer as much adjustability as tripods, which we will be covering in a moment. In my opinion, the BRM swivel model is the best of the bunch.
Other excellent modern bipods that I’d highly recommend are from Magpul and Atlas. These are on opposite ends of the price scale, but both offer benefits to shooters with ARCA or Picatinny rails on their stocks or handguards. Magpul offers a variety of mounting interfaces, but my favorite is adjustable to fit both rail sizes instantly. A knob on the side controls how wide the jaws open to grab your chosen interface. Magpul bipods are rugged, but like the Atlas, have a bit more adjustability than is often necessary in the field; in particular, they can be shifted out of line with the centerline of the rifle and can get “floppy” if not tightened up when moving.
The Atlas bipods are some of the best in the industry for modularity and durability, but they are categorically heavier and a bit harder to use in some ways. Set up for a QD lever, they are very fast and easy to get on and off the rifle but are also the slowest to deploy as compared to Harris or Magpul bipods. I use them in the field, but they usually end up hanging out in my backpack unless I know I’m going to be setting up on a ridgeline overlooking a game trail.
Tripod Considerations
Tripods by Two Vets.
Tripods are one of the most popular field accessories to emerge in the shooting public’s consciousness over the past few years. Actual field shooting rarely takes place at ground level, making bipods somewhat less effective than you may imagine. Even ankle-height grass can pose difficulties using bipods.
For hunting and field work, most people aren’t doing that prone. Sitting is about as low as I normally go, but even then, I’m only sitting on the ground maybe half the time. I’m usually trying to sit on a milk crate or my backpack unless I’m forced to be in a blind. Point being, a tripod is just flat out the best thing for field shooting as you can adapt it to your terrain and maintain high stability.
There are a range of tripods to consider, and some are of dubious quality. You can get away with the cheap, clamp-style versions that are commonly found at sports stores or online, but if you want the absolute best you’re gonna have to drop some change. Weight is a major consideration, as is transport size. I find that there isn’t much sacrifice going with a smaller tripod, especially if you’re not taking a ton of shots from standing, which is only something I do if I absolutely must.
When it comes to tripods, the lighter and more compact you go the more expensive you get, but the better they are, as weight on a tripod only comes into play when carrying it, not really shooting with it as it should be fully stable on three legs. Some guys do add some extra weight here and there for standing, but I don’t like carrying that into the field.
The only brand of tripods I use—and have for years—is Two Vets. That isn’t to say you won’t have good luck with other brands, but as far as my own experience, Two Vets tripods have been the ones that have held up for me for dozens of hunts and pack-ins, and have been dropped, exposed to freezing rain and snow and never failed to work. I have used their older “The Kit” model for years, and the new Voyager more recently, which I find to be even better in form, function and weight. The weight factor for tripods is big for me, and it fits nicely in an Eberlestock backpack without any fuss.
Tripods are quite adaptable to not just rifle use, they can be used for spotting scopes, and I have even adapted an astral telescope to use the interface because it’s more solid than the cheapo photography tripods in common use. More than ever now tripods are being treated as little bases for both shooting and even as makeshift shelters. Yes, you read that right. Certain models can be fitted tent material, and even Two Vets makes what they call the Tripod Teepee, literally a compact tent that can be used with a tripod to make an experiment blind or emergency shelter.
Tripods are also being used as field hubs to carry gear, notes and as a “desk” of sorts. Armageddon Gear’s Tripod Caddy is an excellent example of this concept. Not only can you carry a variety of gear, including magazines and ammunition, but it also allows you to relax a bit and get your gear off your neck and shoulders. It works as a convenient location to place binoculars, thermal monoculars, rangefinders, your phone and more. Using accessories like this allows the field hunter to remain mobile and, in the event you need to quickly detach your rifle to stalk, you can leave your gear in a safe location
Arca Interfaces and Accessories
The ARCA interface is something that is becoming more common on rifle stocks and forends as the days pass. While it is another article to explain how and why this interface has become popular, it’s pretty much the go-to solution for anybody looking to get the most out of their tripods and other accessories that do best on a smooth, uninterrupted surface.
The beauty of the ARCA is how versatile it is and how it benefits pretty much every modern rifle it can be integrated into. I find that it’s the best interface for a tripod, as opposed to the old-style clamp. It offers quick detachment and consistent tension. Black Slate Industries, a company that I have come to enjoy, offers a solution to the most annoying problem associated with the ARCA rail: the annoying hard edges.
The best positioning for an ARCA interface is near the magazine well. This is also where most people carry the rifle in the hand while moving. The squared-off surface is not very comfortable, and on competition rifles it can be downright painful. Black Slate makes excellent ARCA rail covers, and they are surprisingly one of the only ones available in the industry. What this tells me is that people using ARCA rails on their rifles aren’t spending much time with them in the field; the range is one thing, but carrying these guns is another thing. They are comfortable and offer just the right amount of texture.
Bags and More
Bags take a variety of shapes. Top down: Stoic, Armageddon and Triad.
Gun-mounted shooting bags are becoming increasingly popular as well for added stability. Some of these are able to mount to ARCA rails, but since the vast majority of existing guns don’t use ARCA (yet), other solutions needed to be implemented. My favorites are again from Armageddon Gear, which makes a huge variety of bags, but I wanted to spotlight another company that has a truly awesome product: Stoic Solutions. They make a little, L-shaped bag that lashes on with elastic cable directly to a rail of a riflestock.
What I really like about their barricade bag is that it lets you get the gun wedged in where it wants to be, not awkwardly resting on the front of the stock. I used this bag for my entire last hunting season and found that it was really nice shooting out of blinds. Not only that, but it also does extremely well as a substitute for a tripod when in dense wood; it makes snuggling up to tree limbs very stable and removes the bounce upon firing.
Is every rifle benefited by a mounted bag? Probably not; there are reasons to not use one, but since it is so light, the Stoic Solutions product here easily stores in a pocket when not in use. I find it really nice on rimfire rifles when squirrel hunting.
Closing Thoughts
Despite how many products are currently available for us today, we are still somewhat in an unregulated era of these products; there are a lot of de facto standards, not true standardization. As you might notice, I have slings designed over a century ago adorning modern match rifles featuring the most modern ARCA rails. A lot of this will come down to user preference and intended use, and each offers its own benefit.
Editor’s Note: This article originally appeared in the June 2026 issue of Gun Digest the Magazine.
Ruger has just launched a new LCP MAX variant sporting a Magpul Enhanced Handgun Grip.
The Ruger LCP MAX in .380 Auto is one of the most popular pocket pistols on the market, and Magpul just helped make it better. At its core, it’s the same LCP MAX you know and love, but now with a greater capacity and improved shootability.
Now sporting a Magpul Enhanced Handgun Grip in Stealth Gray, the new LCP MAX features Magpul’s 3/4-scale TSP texturing on the grip for improved control. It also ships with a flush-fit 10-round mag as well as an extended 13-round magazine with a matching integrated Magpul grip extension. This not only increases your capacity, but it also allows you to get a better grip on the pistol to enhance its shootability. Aesthetically, the slide has also been slightly redesigned to resemble that of the 9mm RXM’s. Despite the change in looks, the slide serrations are still crisp while facilitating a snag-free draw.
The rest of the LCP MAX Magpul EHG variant is the same as the standard model. That includes its tritium front sight/U-notch rear sight, improved internals and reversible magazine release. It also has both a manual thumb safety and Ruger’s Secure Action fire-control system that uses a bladed-safety trigger.
The Ruger LCP MAX with the Magpul Enhanced Handgun Grip has an MSRP of $450 and each pistol ships with a soft pocket holster and a magazine loader.
A quick look at .222 Remington, the parent case of the ubiquitous .223 Remington.
The .222 Remington was introduced by Remington in 1950 for the 722 bolt-action rifle, which was later superseded by the current 700 series. For a short time, the Remington Model 760 pump-action repeater was also available in this cartridge. Much of the credit for the .222 is due to Mike Walker, a longtime Remington employee. The cartridge became very popular with benchrest competitors in the 1970s, and varmint hunters also found its performance excellent. But, by the early 1990s, the .222 Remington had lost much of its popularity to the .223 Remington.
The .222 Remington is in about the same class as the older 219 Zipper but is rimless and adapted to modern bolt-action rifles. It’s not based on any older case necked down but is of original design. It’s a more-or-less scaled-down version of the .30-06 and fills the gap between the .218 Bee and the .220 Swift. It’s well suited to the needs of the average person who desires a high-velocity .22.
A great many benchrest matches have been won with the .222 Remington, and it has a reputation for superb accuracy. It’s an excellent 200-yard cartridge for many varmint, small game and some big game animals including deer, with appropriate bullets. For bigger animals, bullets such as Nosler’s .224-caliber 60-grain Partition bullet, Barnes’ Triple Shock bullet and Swift’s 75-grain Sirocco bullet are adequate for animals up to 250 pounds or so, as long as impact velocities are high enough to ensure complete expansion, about 2,300 fps or so.
However, these bullets are often too long to work with standard twist rates common to the .222 Remington cartridge, so to find acceptable accuracy, a new barrel with a faster twist rate is often needed. Big game hunters should check their state regulations to ensure .22-caliber rounds are legal to hunt with, though most do allow the hunting of deer with a centerfire .22-caliber round.
.222 Remington Loading Data and Factory Ballistics
Want a Colonial Marine Corps M-41A Pulse Rifle at home? You can get pretty close with the Manticore Arms Ripley Rail.
If you’re a fan of the Alien movie franchise, there’s a good chance you’ve thought about owning the iconic M-41A Pulse Rifle used by the Colonial Marine Corps in Aliens and Alien 3. Sure, replicas are available for purchase, and some enthusiasts have even gone the extra mile and built models capable of live fire using a Thompson as the base (like the original movie props did), but that’s difficult and expensive. If you want an easy shortcut lookalike, you need to check out Manticore Arms’ Ripley Rail.
The Ripley Rail can be mounted to just about any standard AR with a Picatinny rail upper receiver, and it will instantly transform your carbine into something that looks suited for space combat against xenomorphs. Well, at least the front half of the gun.
Made of 6061 T6 aluminum, the Ripley Rail features an integral carry handle with front and rear iron sights as well as the hole for mounting AR carry handle scopes. The aluminum forend also features plenty of usable M-LOK slots on its sides, top and bottom for mounting accessories as well as just helping to match the aesthetics of the Pulse Rifle. A ribbed polymer foregrip helps with that, too, and it gives you something to hold on to. The forend sports a Platinum Cerakote finish, and the carry handle is available in either OD Green or Carbon Black Cerakote.
Manticore Arms says the rail is designed for use with rifle caliber barrels 10.3 inches or longer and blowback pistol caliber barrels 11 inches or longer to ensure the muzzle clears the handguard, although shorter barrels can be used in conjunction with a suppressor as long as its diameter is 1.5 inches or less so it fits inside the forend.
The Ripley Rail won’t magically convert your AR to fire 10mm caseless armor-piercing ammunition, but it will make it look pretty damn cool. MSRP is $495.
Looking to go armed, but are stuck in the weeds as to what to arm yourself with? Here are 20 of the best concealed carry gun options that will keep you on the defensive.