The triple-barreled Luftwaffe Drilling is proof that the German air force took its survival guns very seriously.
Beginning in World War I, there was a serious debate over how to arm aircrews. Many pilots carried a sidearm before planes were even armed, and the apocryphal story concerning the beginning of aerial combat is that the first “dogfight” was with pistols from passing pilots. This then quickly evolved into rifles—rifles with extended magazines, multiple pistols and then finally (and thankfully) machineguns being usefully mounted on aircraft.
As aerial warfare evolved, aircraft were armed with an array of machineguns, cannon, rockets, bombs and eventually air-to-air missiles. However, all of these armaments generally did the pilot little good if he or she was shot down. Space constraints meant, and still mean, that everything carried by aircrew must be compact, and it all has to have a use. There is no room for superfluous equipment.
Most pilots during World War II had little more than perhaps pistol, a compass and an escape map. Some U.S. naval aviators had sealed kits with trade goods in them including gold coins that would theoretically allow them to bribe their way to safety, along with life rafts and some basic survival gear. Following World War II, there was a concerted effort to expand useful survival gear. Most pilots in most nations now have an array of survival gear to help them cope when shot down. The United States and other countries experimented with survival rifles. Soviet cosmonauts even had shotguns in their survival gear to help cope with an unforeseen threat—(ironically) bears upon landing in often primitive areas of the Soviet Union.
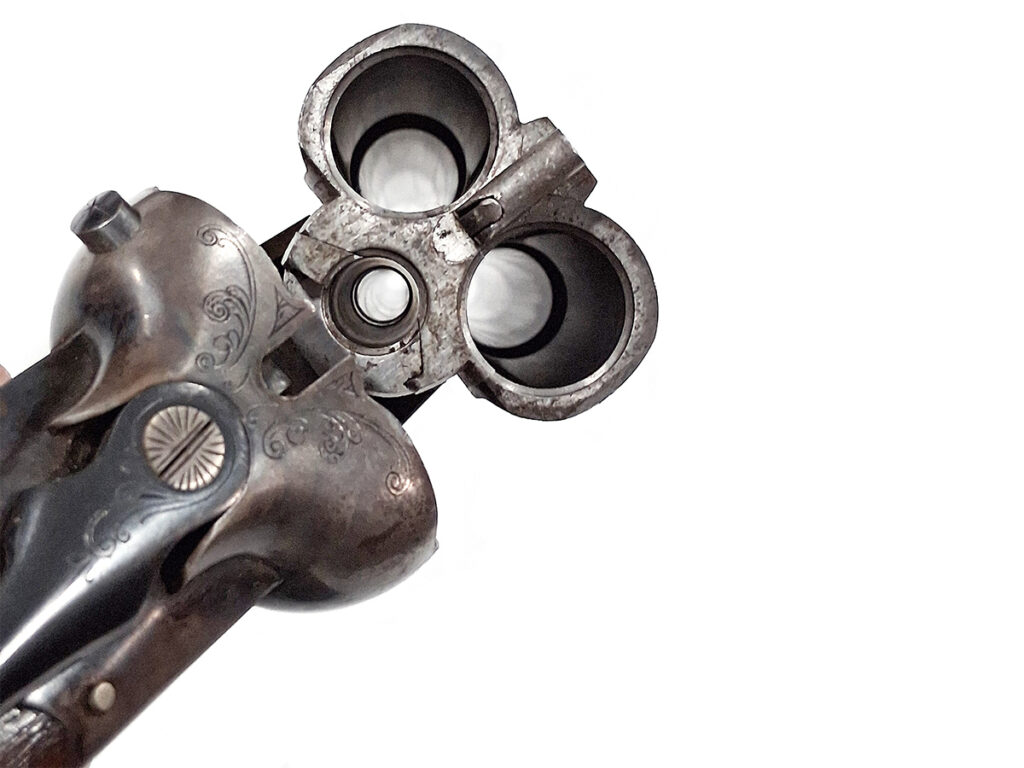
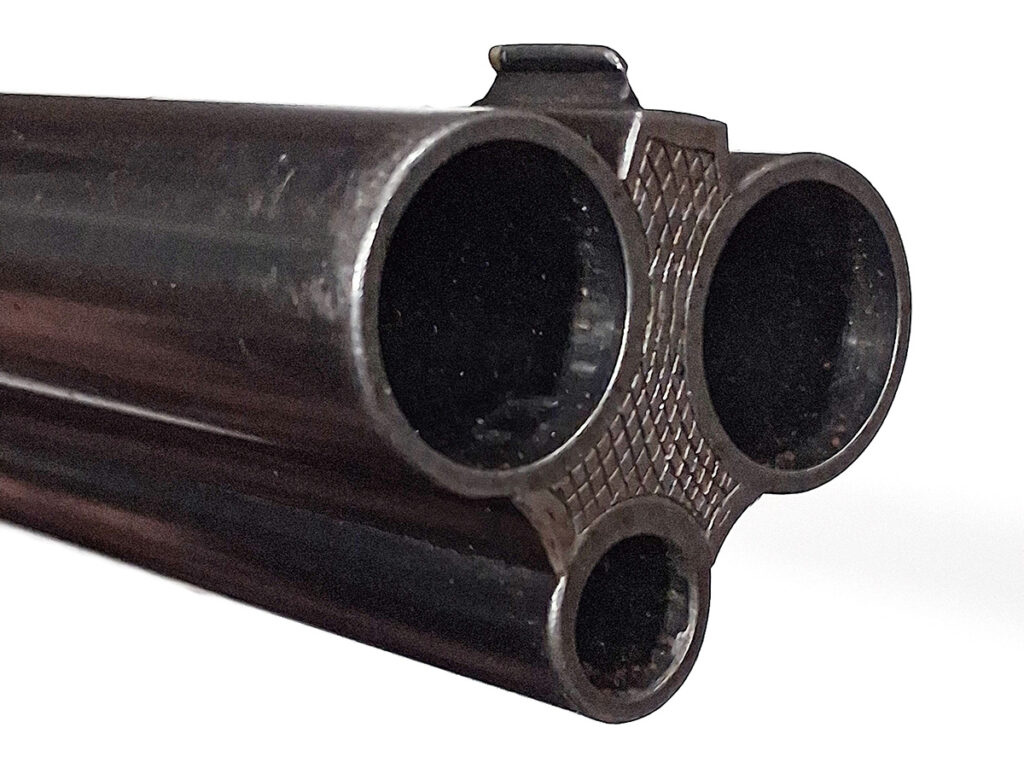
Perhaps the most handsome of all survival weapons ever issued to any pilot, and certainly the most expensive of those available on the U.S. market is the Luftwaffe Drilling from WWII. For those of you unfamiliar with a drilling, it is usually a German three-barreled hunting gun with two shotgun barrels and a rifle barrel. These are often found with differently choked shotgun barrels, and a rifle barrel in a caliber considered to be appropriate for the game in the area where the gun was to be used. The differently choked barrels were a necessity in an age when removable chokes were yet to be invented. It was a “one gun” solution for most hunting needs.

The Luftwaffe Drilling is set up in a traditional method. It has two 12-gauge shotgun barrels, with the left barrel being unchoked for use with slugs, and the right barrel being fully choked for birdshot. The rifle barrel is 9.3x74R caliber. The 9.3mm rifle round was considered more than powerful enough for medium game, and in many instances suitable for large game. The theory of this setup was simple. The unchoked shotgun barrel can accommodate slugs. The fully choked barrel is useful for hunting birds. The rifle barrel useful for larger game.
The Luftwaffe Drilling seems to have been issued only in the Mediterranean Theater and North Africa, but it would not be surprising to find evidence they popped up elsewhere. The reasonable theory behind their issue is that downed pilots would be able to hunt game and possibly protect themselves against dangerous wildlife (or even Allied ground troops) if downed in this admittedly hostile environment. Unlike Western Europe, in North Africa one can walk hundreds of miles and find no trace of civilization. However, the combination of calibers could seem excessive for this use in North Africa. While 12-gauge is acceptably fine for any sort of wing shooting, 9.3mm is a bit excessive for almost all of the game in the area, making one wonder whether it was added with the intent of possibly moving further afield.
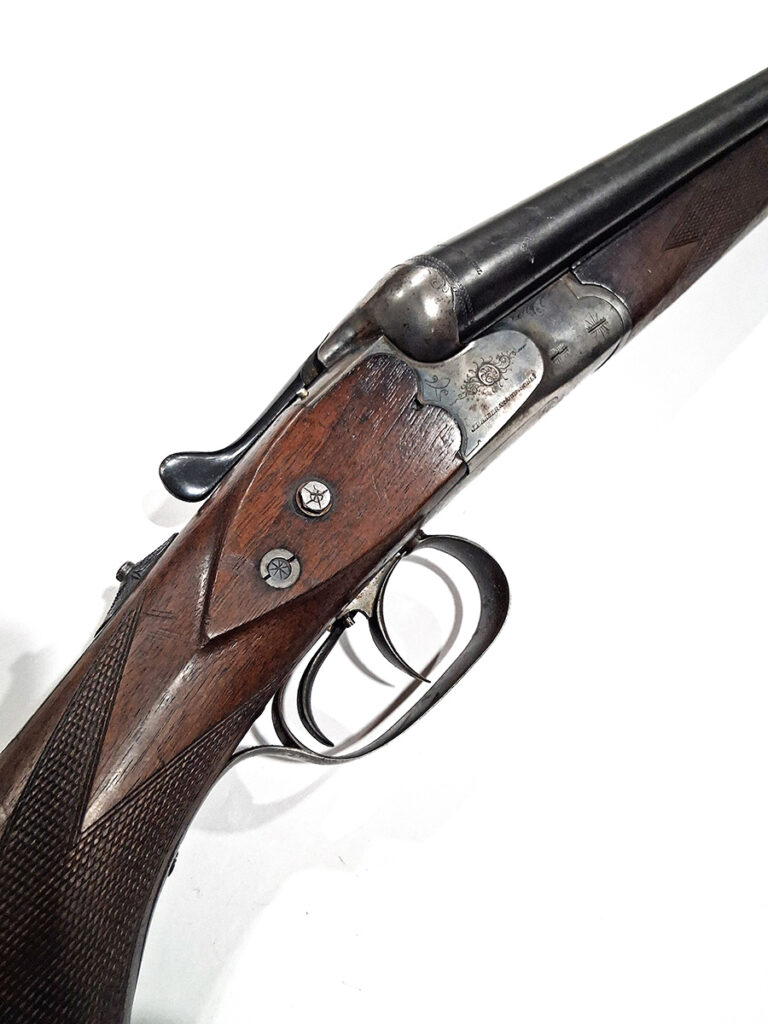
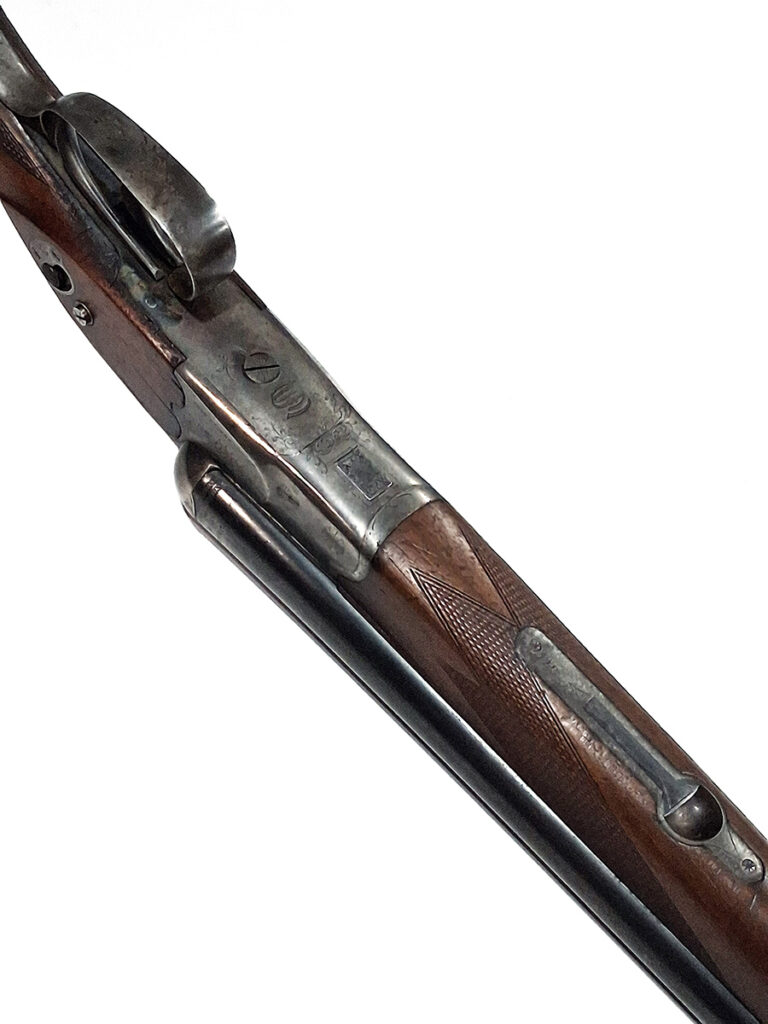
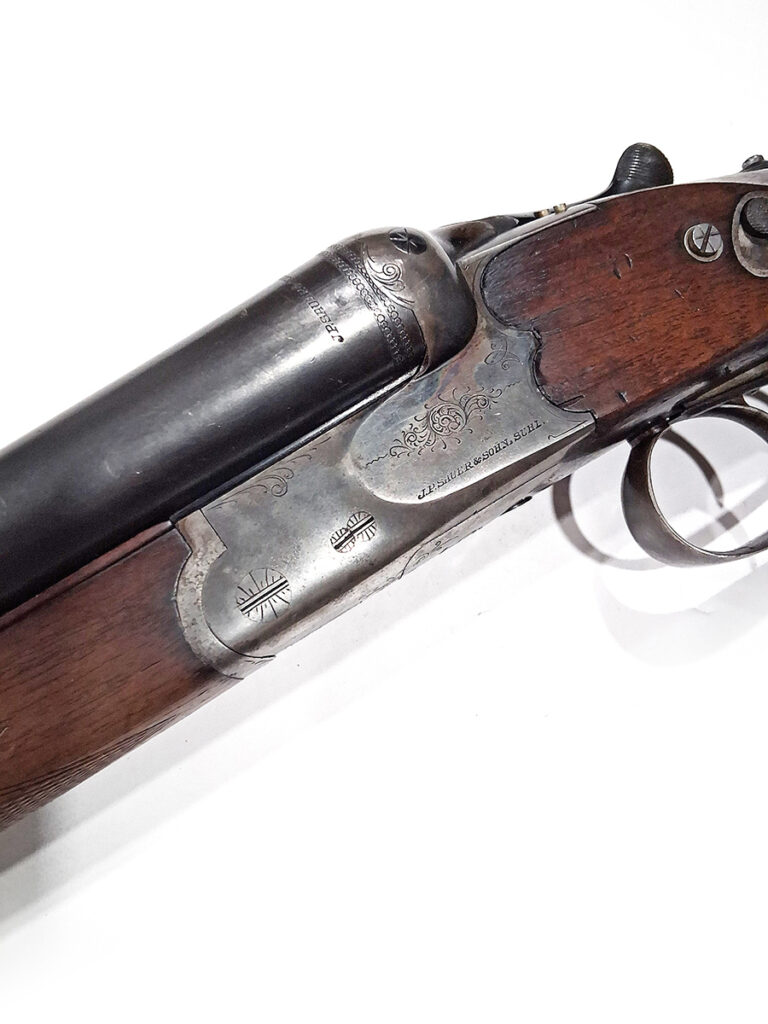
There is no denying that the Luftwaffe Drilling is an exceptionally handsome firearm. Even this example, which had been used in the field extensively after WWII, still retains its charm. Traces of case hardening remain on this gun, but from the factory, the case hardening work, created with a method little used in the modern world, produced an exceptionally vibrant finish, a product to be expected from J.P. Sauer, the sole producer of the Luftwaffe Drilling. Although Sauer made large number of small arms for the Wehrmacht during World War II, it was and remains primarily a sporting arms corporation.
It’s perhaps not surprising that the Luftwaffe Drilling found its way into Luftwaffe aircraft. It was not a bad solution to a complicated problem before the advent of better search, rescue, and location methods. However, Göring’s tastes show through in this firearm. Göring was a dedicated hunter who even went so far as to carve out sections of Nazi occupied territory to turn into his personal hunting preserves. He was well-known for giving firearms as gifts to people he admired or found worthy, and the Luftwaffe Drilling seems to fit his M.O. even though it was an issue piece.
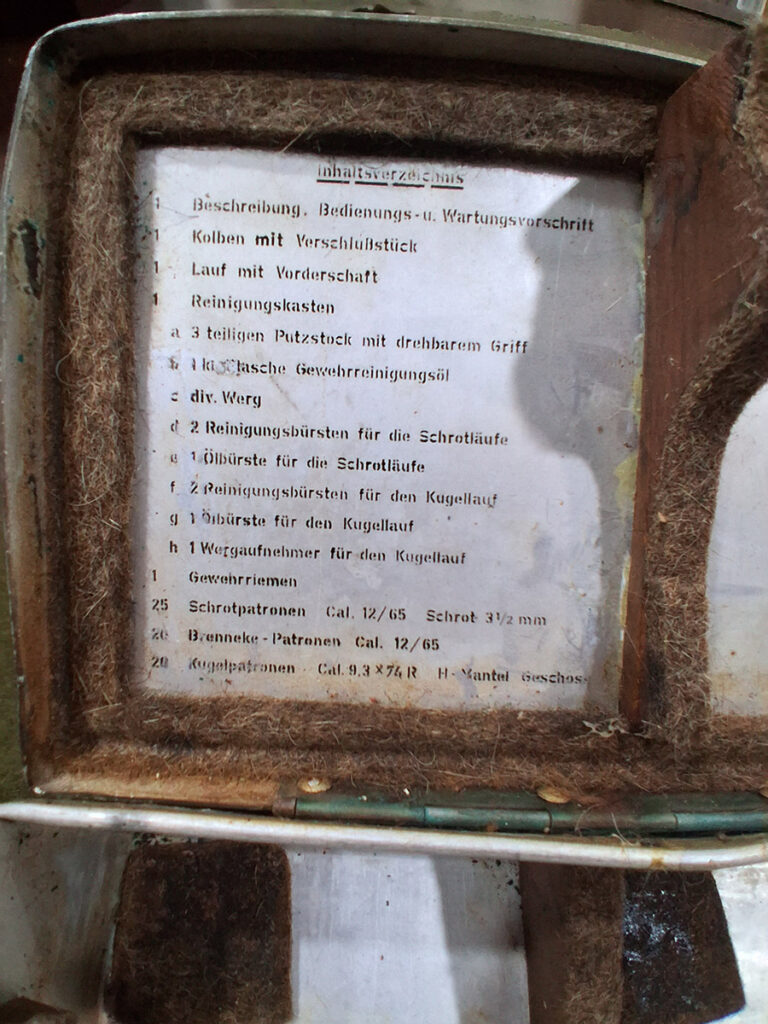
As issued, the Luftwaffe Drilling came with a case that contained the firearm, ammunition, a sling and a cleaning kit. This example is missing the contents of the kit, and finding one intact is far rarer than finding a drilling, which is arguably the rarest of all issued German arms from WWII that was not experimental or part of the ad hoc attempt to maintain logistics at the end of the war. There is little record of these being used during wartime beyond recreational use by the pilots and aircrew for wing shooting and perhaps clays.
Luftwaffe Drillings have been faked, and for such a valuable gun, it shouldn’t be surprising. All of the Luftwaffe Drillings were produced by J.P. Sauer, and they were all case hardened on the receiver. Forged markings tend to be irregular and uneven when applied later on. Also, watch for differences in the patina around the markings. Keep in mind the sole caliber combination and the choke setup of the shotgun bores as well.

Note there are more registered German-produced WWII machineguns, and even K98 sniper rifles and Krieghoff Lugers than there are Luftwaffe Drillings in the U.S. market. Prices will vary greatly depending on condition and completeness of kit. A complete Luftwaffe Drilling with the case and the contents is an extremely expensive find indeed and rare enough to not make the market with any frequency.

The obscurity and the fact that it was not a combat weapon keeps its value a bit in check. A very nice example without the kit in the 90 percent range will easily exceed $5,000. With the kit, the value is probably best determined by following the auction market when they appear—which is rarely. Because of the utility, many like this one will have been used as field guns after the war. Utility is the great killer of military collectibles. If it was useful after a conflict, it was used—just ask a U.S. Civil War collector how difficult it is to find an original haversack. This example was rescued by Jay Cobb who had to clean the dirt out of the pad on the stock and from under the foregrip where it was used as a both a game gun, a walking stick, and climbing aid in rural West Virginia.
Editor’s Note: This article originally appeared in the July 2026 issue of Gun Digest the Magazine.
More Historical Military Firearms
- The StG 44: Father Of The Modern Combat Rifle
- The Karabiner 98k: The Best Combat Bolt-Action Rifle Ever Made
- SKS: Collecting & Identifying The Simonov
- All About The Mosin Nagant
- The Gewehr 43: The Road To Germany’s Garand
- Fusil Automatique Leger: Everything You Want To Know About The FN FAL
- Lee Enfield: The Right Arm Of The Empire
- The Rise And Fall Of The AR-10
- The M1 Garand: America’s Original Battle Rifle