Home Blog Page 145

6 Areas To Focus On To Ensure Your Semi-Auto Pistol Runs Right

0

Semi-Auto Pistol Drills Skills 6

Want to make certain your pistol goes bang each time you pull the trigger? Then home in on these six vital facets that ensure your gun runs like a top.

What Factors Ensure A Properly Functioning Pistol:

With the limited time we all have available, what skills and drills do you practice?

Well, you practice the basics, of course; even a simpleton should know that. No use practicing multiple target engagements and shooting from unconventional positions unless you’re performing the basic skills acceptably. Just like working with a hammer, you wouldn’t try driving two nails at once or hammering from the reverse position if you simply can’t effectively drive a single nail straight on.

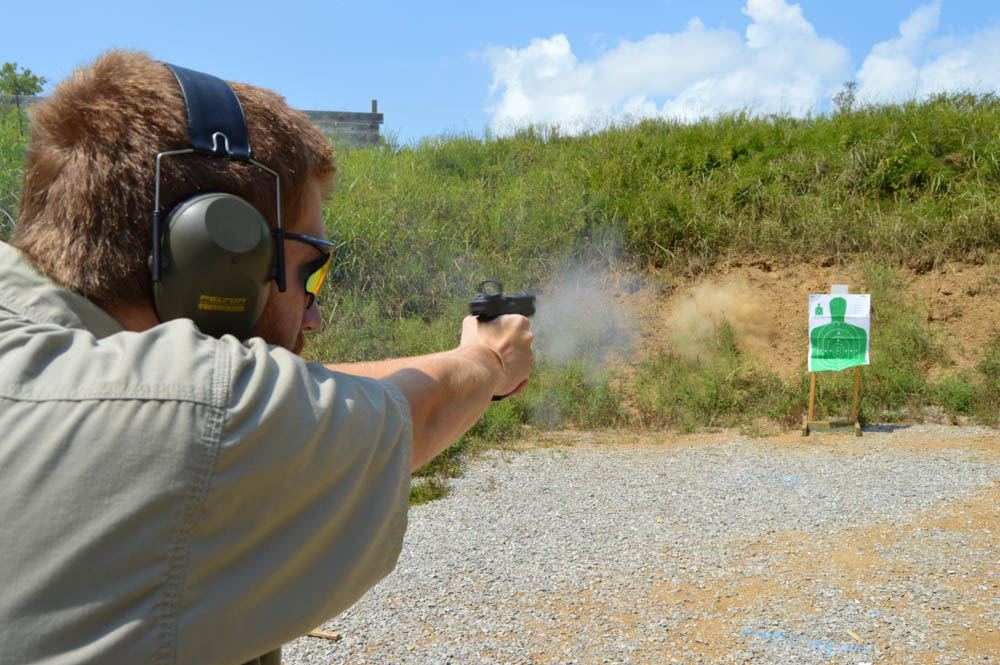
When I speak of basic skills, I’m talking about drawing the handgun from the holster safely, swiftly and efficiently. I’m talking about lining the sights up on the target and pressing the trigger and putting a bullet where it’s supposed to go.

But let’s assume you’re smarter, or at least, better trained, than the average bear. If so, what other skills should you practice, and which drills should you perform? Your time is valuable; no use wasting it when you have it.

1. Ammunition Compatibility

One of the most critical things to sort out with your pistol is reliability. Unlike revolvers that tend to reliably fire any ammunition they’re chambered for, semi-automatic pistols can sometimes be finicky when it comes to ammo they’ll reliably cycle all the time. The only thing worse than having unreliable ammo on the range or during a shooting match is having unreliable ammo during a gunfight.

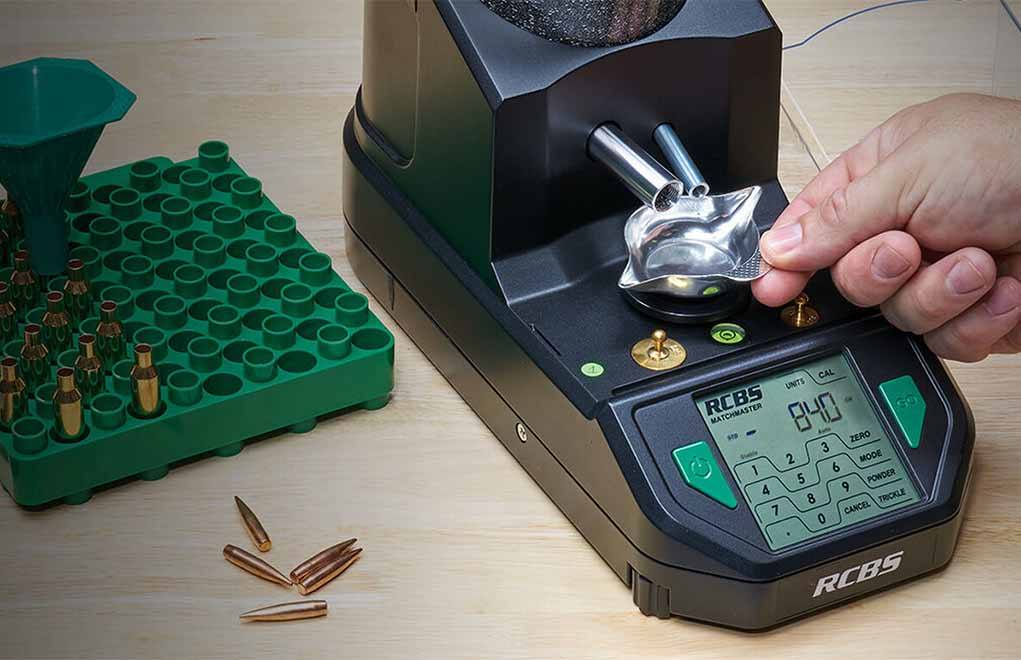
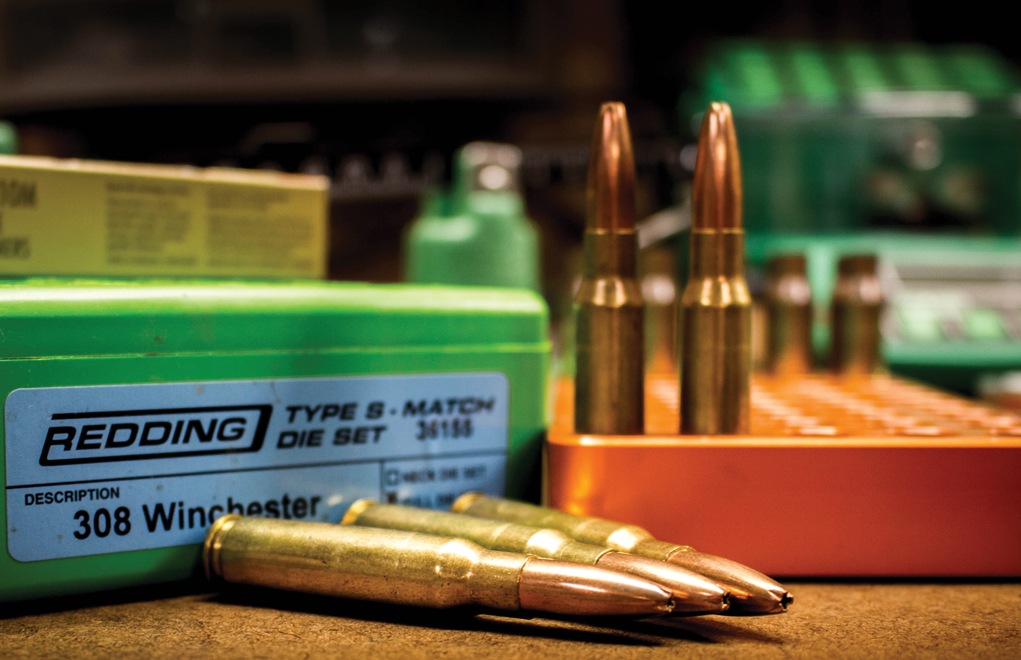
Select quality practice and defensive ammunition from a reputable manufacturer. I’ve seen case-head separations and guns almost come apart due to using poor-quality or remanufactured ammunition. Some manufacturers even offer practice and defensive loads that offer the same recoil impulse and point of impact on target. This can be a good idea. Regardless of the ammunition you purchase, run at least 100 rounds of the defensive ammunition through your pistol in whatever condition of “clean” you intend to carry it in before you ever trust your life to it.

Of course, some like to handload to save money, and if you shoot a lot, you can, indeed, see a savings—although I wouldn’t suggest using handloads for defensive purposes. This isn’t because of liability reasons but because few of us can handload ammunition that is as reliable as the major manufacturers offer. Sure, a squib load, failure to fire or a cartridge stuck in the chamber can be sorted on the range, but you won’t have the time to do it when some goblin is trying to hammer you into a blood puddle.

2. Mitigating Stoppages

Speaking of jams or stoppages: If you shoot enough, you’ll experience them. This is a reality of shooting—and it doesn’t matter how reliable you think your Glock or whatever pistol might be. Some stoppages are caused by the gun, some by ammo and some by the shooter. No matter how you end up with one, it’s a good idea to know how to sort it out in a hurry.

Some trainers classify stoppages in different categories, such as a “class I,” “class II” and “class III.” I don’t. I figure the problem is that the gun will not go bang! and my job is to fix it as easily and quickly as possible.

Learn More About Handguns:

When I was training police officers, I kept it really simple, because police officers did not train nearly enough. The protocol was that if your gun stopped shooting, reload it. By ejecting the magazine in the gun, inserting a new one and racking the slide, you’ll instantly clear just about any type of stoppage, and you don’t have to do any investigating to figure out what “type” of stoppage you have.

Another facet of reloading that’s important is the way you release or cycle the slide. Lots of shooters like to use the slide lock as a slide release. On some handguns with proud slide locks—such as the Walther CCP—that’s easy to do. However, consider that you might need to cycle the slide to sort out a stoppage or to reload if the slide lock fails to work. That’s why I always taught, and continue to suggest, releasing or cycling the slide by hand. That system always works; and, keep in mind that you might find yourself using a handgun that is not equipped with a slide lock.

3. Mastering Trigger Reset

Working with trigger reset is a drill that too few shooters practice enough. When you pull a pistol’s trigger, it will travel all the way to the rear and cause the pistol to fire. As you ease the trigger forward, it will reset for the next shot. When this audible and tactile reset occurs, there’s no reason to let the trigger travel any farther forward. Stop the relaxation of the trigger finger at that point and assess to see if another shot is needed. If so, begin the trigger-pull sequence again.

A good way to work this drill is to start by slow firing and working with the trigger reset between every shot. Once you get comfortable doing this, increase the speed between shots while maintaining a focus on resetting the trigger correctly. Ideally, you should spend about 50 rounds working with trigger reset during each practice session.

4. Cognitive Shot Cadence

As you decrease the time between each shot, you’re speeding up your shot cadence. At each distance you engage targets, you will have a set cadence (that is, the time between shots) that will allow you to still get accurate hits on target. As the distance to the target increases, so does your time between shots. You’ll learn this cadence with practice.

Where cadence becomes important is when you’re transitioning between targets at different distances. You might be able to hammer three or four shots center mass on a hostile target at 5 yards, but at 10 yards, you’ll likely have to slow to controlled pairs. To practice shot cadence, set up targets at 5, 10 and 15 yards. Then, work to put about three or four rounds on each target as fast as you can to keep all the shots in a 5- or 6-inch circle. Soon, you’ll be able to transition between distances and adjust your shot cadence accordingly.

5. Maintenance Musts

I mentioned chainsaws and hammers earlier. Like pistols, they are tools, and the more moving parts a tool has, the more frequently it needs to be serviced. Hammers don’t need a lot of attention, and I’ll bet few ever get as much as a wipe down. Chainsaws, on the other hand, need constant attention. Pistols fall somewhere in the middle of these two extremes.

Fortunately, performing maintenance on a pistol is relatively easy. After field-stripping, it’s a good idea to use an air hose to blow away all debris from all the parts and magazines. Then, apply some lubricant—something such as Mil Comm is ideal—to the hood of the barrel where it locks up with the slide and to the muzzle end where it contacts the slide or barrel bushing. Beyond that, pistols don’t need a lot of attention, and some lubricant along the slide rails is about the only other place it’s needed.

How often do you service a pistol? There is really no set time frame. In the military, they make soldiers clean firearms after every range trip. This is not so much because it’s necessary; it’s a method to help soldiers learn/train to care for their weapons. If you want to clean your pistol after every range session, go ahead. If you only want to clean it when it’s necessary, I’d strive for at least a field-strip, wipe down and lube about every 500 rounds. Of course, if you have reliability issues before you get to 500 rounds, you might want to consider a more frequent cleaning.

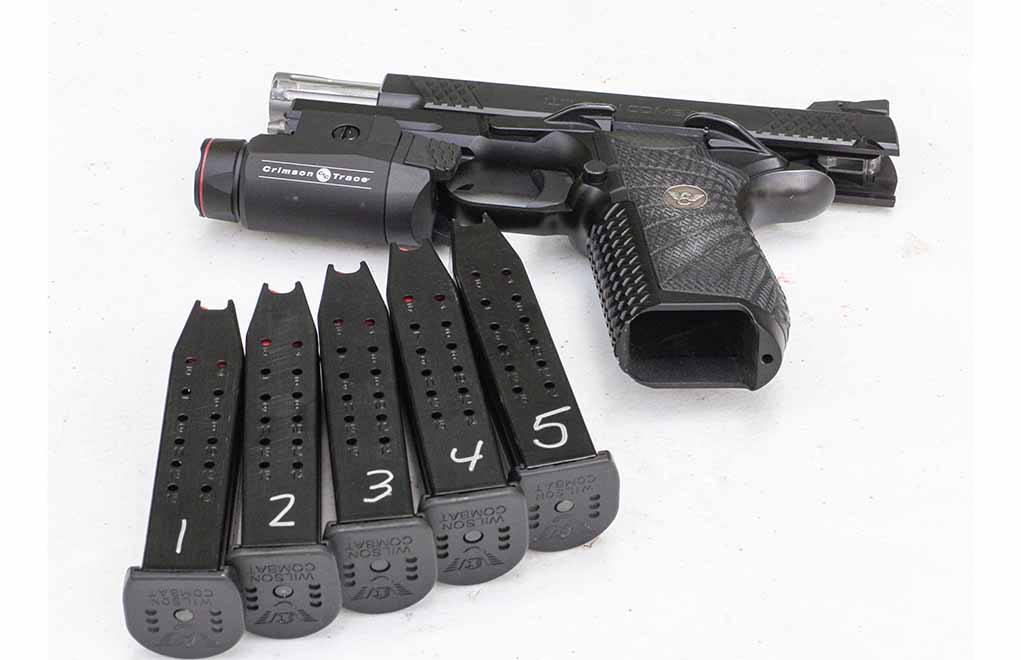
6. Maintaining Magazines

A final note relates to pistol magazines: They’re often neglected and taken for granted. Magazines are more than just ammunition delivery devices. They are, in fact, a very critical part of a semi-auto pistol. Without them, you have a single-shot that’s not very easy to operate.

Take care of your magazines. Field-strip and inspect them regularly. Wipe them down after every range session—but avoid oil and/or lubrication; these only serve to attract debris and dust to a mechanical device that doesn’t like debris and dust.

The other thing you can do with your magazines is number them. This will allow you to keep track of them and identify one or more that might be causing feeding issues. If you’re having reliability issues that appear to pop up infrequently, it could be a magazine. If you don’t have yours numbered, you’ll have a hard time identifying where the problem might be coming from.

There you go: a half-dozen skills and drills you might have been overlooking when it comes to developing proficiency with your defensive pistol. Too often, I think folks find a few hours to spend at the range or mess with their pistol. And even though they might have fun, during the process, they effectually waste time by not engaging in constructive drills or skill development.

Time is too precious to waste … and so is your life. Best prepare accordingly.

The article originally appeared in the September 2019 issue of Gun Digest the Magazine.

Optics: Slide-Cut Ready Sig Sauer Romeo 1 Pro Reflex Sight

0

ROMEO1-PRO-FRONT-RIGHT (1)

Compatible with any pistol boasting a Sig slide cut, the Romeo 1 Pro offers a low-profile and rugged red-dot aiming solution.

How The Romeo 1 Pro Out Does Other Reflex Sights:

  • Compatible with pistols with a Sig slide cut.
  • Available with 3 or 6 MOA red dot.
  • Features TruHold lockless zeroing system.
  • Housing made from durable aluminum with protective steel shroud.

Sig Sauer’s staggering rise in the optics world is enough to take your breath away. Behind it all, there’s been a simple ethos in the company accent to the top of precision aiming solutions—innovation. That even goes for the goods they’ve already got on the shelf.

The company’s Romeo reflex sight line is the latest to get a workover; for those who favor a rugged yet practical red-dot option for their pistol this is good news. Now mountable on any pistol with a Sig slide cut, Romeo 1 Pro is lower profile and more stable than ever before. And you better believe the gunmaker is offering plenty of options in the handgun catalog to slap it on to, including the P226 Legion, P229 Legion RX Compact, P320 Compact and, of course, the P365.


Scope Out More Optics Info:

  • 8 Revolutionary Reticles For Long-Range Accuracy
  • Buying the Perfect Precision Scope
  • The Best Tactical Red-Dot Performance-to-Price Option?
  • Shifting Winds: SIG BDX Changing Shooting For The Better

Available with a 3 or 6 MOA red dot, the reflex sight has 12 brightness settings, TruHold lockless zeroing system, molded glass aspheric lens and 20,000-hour battery life. It’s also tough as rolled steel. An aircraft-grade aluminum housing and steel protective shroud slough off even the most thoughtless abuse. Price-wise, the Romeo 1 Pro doesn’t break the bank—but Sig’s not giving them away, either—with an MSRP of $519.

More From Sig:

NEWINGTON, N.H. – SIG SAUER Electro-Optics is pleased to introduce the all-new ROMEO1PRO Open Reflex Red Dot Sight. The ROMEO1PRO is capable of mounting to any pistol with a SIG SAUER PRO slide cut, and is crafted for durability, and for use in harsh environments.

“The ROMEO1PRO is the latest evolution of the ROMEO1 sights and brings a new level of durability and performance to the open-reflex red dot sight,” said Andy York, President, SIG SAUER, Electro-Optics. “The adoption of a red dot sight on pistols is becoming the standard in the commercial, law enforcement, and military markets, and the ROMEO1PRO is the ultimate solution for fast, responsive target acquisition and accuracy combined with the easy mounting option of the PRO footprint.”

The SIG SAUER Electro-Optics ROMEO1PRO is a miniature open reflex red dot sight, available with either a 3MOA or 6MOA red dot. It comes with 12 brightness settings for a full range of lighting conditions, and the TruHold™ Lockless Zeroing System designed to endure recoil and return to zero shot after shot. The ROMEO1PRO features a molded glass aspheric lens with high-performance coatings for superior light transmittance and zero distortion, a new upgraded point-source emitter for increased brightness in day or night conditions, MOTAC, a 20,000-hour battery life, and an IPX-7 waterproof rating. The ROMEO1PRO is housed in aircraft grade aluminum to ensure corrosion resistance, includes a ruggedized steel protective shroud in the box for extreme durability, and is available in black or FDE.

For more information on the Romeo1 Pro, please visit www.sigsauer.com.

Video: When And How To Execute A Tactical Reload

0

The tactical reload might be the most misunderstood reload, but is essential to maximize your firepower potential.

Administrative and speed reloads are both fairly cut and dry, where shooters generally get a bit hung up is the tactical reload. The concept is straightforward enough, switching out a partially spent magazine for a fresh one, thus ensuring maximum firepower. Confusion generally coalesces around the when and how to execute this defensive pistol fundamental. The short and long of it, one of these points has a direct bearing on the other.

Tactical reloads are the slowest of the reloads since you are manipulating two magazines with one hand—among other operations. Above, instructor and gun writer Richard man covers the finer points of how to fundamentally perform the reload. Blood pumping and adrenaline in overdrive, getting the switch done efficiently is a challenge, one with dire consequences for failure. Those moments might be all an assailant requires to gain the upper hand. Bare-bones basics, the tactical reload is only attempted if there is no immediate threat.

For more information on Walther, please visit www.waltherarms.com.

For more information on Panteao Production, please visit www.panteao.com.

Learn How To Run Your Defensive Pistol:


The Shot Timer And Defensive Handgun Training

0

Shot Timer 6

Not simply a tool of competitive shooters, the shot timer is the ideal instrument to sharpen life-saving handgun skills.

How Can A Shot Timer Help You Train To Defend Your Life?

  • Isolates and creates a baseline to work from on a number of defensive shooting aspects … reloads, draw, shot-to-shot performance.
  • Effectively measures the time it takes to solve a dynamic shooting problem.
  • Shows how much and how quickly shooters improve.

In 1924, Ed McGivern set a world record by firing six accurate shots from a double-action revolver in 4/5ths of a second. An elaborate timing contraption attached to the revolver verified the event. Because of the wires, McGivern’s gadget did not lend itself to real-world application, so shooters continued to use stopwatches, sometimes even attempting to read 1/10th second divisions with a magnifying glass, erroneously assuming their reaction time was good enough to push a button that fast. This of course is impossible and results were not only a guess, but they were very dependent on the man running the watch.

The father of the “Modern Technique of the Pistol” and Gunsite Academy founder, Jeff Cooper, espoused the importance of speed in his motto: “Diligentia, vis, celeritas” — shortened to DVC — which is Latin for “accuracy, power, speed.” We measure accuracy on targets, power with mathematical calculations and speed with time. As it relates to shooting, time measurements are so small that a specialized device is necessary.

Shot Timer 2

In 1982, Ronin Colman, a shooter who attended the first American Pistol Institute (API) class ever held at Gunsite, created the PACT Championship Timer. Colman said that when he first introduced his timer to competitors at the World Shoot, all they wanted to do was try and break McGivern’s record. Since then, shot timers have become so trustworthy and prolific that they’re used to decide the outcome of shooting matches worldwide. Not only that, but they’re now very compact and affordable.

That said, competition is one thing and self-defense is another. In a life-or-death situation, time matters — but there will be no beep to signal when to draw, start shooting or reload. So, how can a shot timer help you train to defend your life?

Shot Timer 3

In the early ‘90s, when I became a police firearms instructor, the standard timing device was still the stopwatch or turning targets. As a competitive shooter, I realized the versatility offered by a shot timer and picked up a PACT Club Timer for about $100. It changed the way we trained, and officers soon began shooting better and faster because of it.


Get More Concealed Carry Information:


We could effectively measure the time it took an officer to solve a dynamic shooting problem. But, more importantly, we could isolate every aspect of an officer’s performance. We could tell how long it took him to get his first shot off, the time between the first and second shot — actually the time between any and all shots — and we could even see how long it took them to conduct a reload or solve a stoppage. The important part was not that the officer necessarily met a par time, but that with practice their times improved. With the shot timer, it could all be measured and you can do the same during your training.

Shot Timer 4

It really goes back to Cooper and DVC. Any attempt to sort out a problem with a firearm is nothing more than the measure of accuracy, power and speed. A shot timer lets you maximize your ability to balance this equation. Every portion of a second you save — while still maintaining accuracy with a powerful firearm — will increase your odds of survival. As Barrett Tillman, a Gunsite graduate and good friend of the late Colonel Cooper has said, “You will not rise to the occasion, you will default to your level of training.”

Can you draw your handgun from concealment, deliver a lethal shot on a human-sized target, at a distance of 7 yards, in 1.5 seconds? Can you draw and place two shots in the torso and one in the head in 3 seconds? Can you work to improve on these times and know you’re actually progressing? Can you do all of this alone, without the help of a training partner? There’s only one way to know for sure and only one tool that will help you do it: If you’re a serious shooter, you need a shot timer!

Shot Timer 1

I typically rely on the PACT Club Timer. It tells me everything I need to know about my shot string at a glance. The shot number and total time are highlighted, with first shot and last split time displayed instantly at the end of a shot string. I can review individual shot times and splits, and the unit tells you if it’s set to delay or instant go. It’s designed to fit your hand and weighs 7.2 ounces. The microphone and buzzer are located on the side away from your hand, and it’s loud enough for even old gun writers to hear. All of the waterproof controls are recessed so there’s no chance of accidental activation. It has a suggested retail price of $129.95 with a lifetime warranty. I cannot imagine going to the range — or even conducting dry-fire practice — without it.

The article originally appeared in the April 2019 issue of Gun Digest the Magazine.

RCBS Picks Up The Pace With The MatchMaster Powder Dispenser

0

RCBS MatchMaster 3

Twice as nice, the RCBS MatchMaster powder dispenser’s twin-tube design makes for faster, more accurate reloading.

How The MatchMaster Speeds Up Measuring Precise Powder Charges:

  • Large main charge tube quickly dispenses the body of a powder charge.
  • Small trickle tube metes out fine measurements of powder, accurate within 0.10 and 0.04 grains.
  • Dispenser is programable and controlable from RCBS’s smart-device app.

High-volume rifle ammo reloaders learned a long time ago the benefits of automatic powder dispensers. Eminently more precise than volumetric measurement, the handloading tools also do a number on load time. Throwing charges is generally a bottleneck, one for a long time with no easy way around it when it came to rifle cartridges.

RCBS MatchMaster 2

While things have been good in these quarters, they’re getting a whole bunch better. Introducing an entirely new concept to the system, RCBS’s MatchMaster finds an extra gear in automatic powder dispensers. The difference from what’s already come down the pike, the device’s twin-barrel design. It’s almost a head-slappingly simple improvement.

Essentially, the MatchMaster has a large main charge tube that spits out the main measure of power. Then, a smaller-diameter tube trickles out the fractions of a grain your perfect load requires. Pretty slick and something that should make RCBS’s next-generation dispenser all the more useful … especially to those with itchy trigger fingers.


Load Up On Reloading Info:


RCBS doesn’t appear to compromise speed for precision, with the MatchMaster delivering between 0.10- and 0.04-grain accuracy on every charge. Furthermore, the device makes it all the more simple to program—at least, for the mildly tech-savvy. The powder dispenser is Bluetooth ready and links up with RCBS’s loading app, which gives reloaders complete control from their smart device. Not that display screens were all too taxing, but this certainly frees you up from hunching over it while you dial in a load.

A surprise to no one, technology comes with a price tag, which is fairly large for the MatchMaster. With an MSRP of $899, newbie handloaders might not jump at the cutting-edge gadget. But old hands, with a backlog of pet loads on their to-do list, will more than certainly see the value.

More From RCBS:

OVERLAND PARK, Kansas – October 10, 2019 – RCBS, the leading manufacturer of ammunition reloading equipment for rifles and pistols, announced today that it has released the company’s fastest and most accurate powder dispenser with the launch of the new RCBS MatchMaster. Featuring precise 0.04 grain consistent measurements and a new patent pending dual tube dispensing technology for enhanced speed, the new RCBS Matchmaster saves users precious time on the reloading bench while promoting maximum accuracy.

RCBS MatchMaster 1

Among its many design enhancements, the one-piece Matchmaster unit features an LCD touchscreen display that is Bluetooth compatible with the new RCBS app. This exclusive compatibility provides complete user control to calibrate scales and dispense powder in auto or manual modes. With pre-configured powder types readily accessible, handloaders now have the ability to create and or modify their own customized powder configurations in order to easily fine tune their favorite loads.

Through the MatchMaster’s patent pending dual tube dispensing technology, the dispenser is capable of delivering quick charges, each delivering between 0.10 and 0.04 grain accuracy every time. This consistency allows handloaders to obtain the most reliable performance possible while promoting confidence in each individual round.

The MatchMaster delivers charges in two mode configurations: Standard mode and Match mode. Standard mode drops charges to 0.10 grain accuracy in under 20 seconds while the Match mode drops charges to 0.04 grain accuracy. Other standard features include a patent-pending Bottom Drain function with Open Drain Alert. This exclusive combination ensures users will never experience unwanted powder on their bench when filling the dispenser.

“The new RCBS Matchmaster has taken powder dispensing and weighing to the next level,” said Will Hemeyer, Sr. Product Line Manager for RCBS. “With its user adjustable powder settings, Bluetooth compatibility, and revolutionary dual tube dispense technology, the Matchmaster reduces reloading time and simplifies the entire operation all while maintaining zero impact to charge accuracy.”

For more information on the RCBS MatchMaster, please visit www.rcbs.com.

What Factors Do You Need To Consider In An AR-15 Trigger Upgrade?

0

There is a slew of aftermarket AR-15 trigger upgrades out there, each offering a little something different. How do you choose?

What Factors Do You Need To Consider In An AR-15 Trigger Upgrade:

The AR’s modular design makes it easy to swap out parts, even for components like the entire trigger group. However, this is a double-edged sword: Yes, anyone with some mechanical sense (and sometimes a few specialty tools) can configure the AR to their liking, but parts such as the trigger group should be chosen carefully.

A good trigger must have three distinct attributes: smooth to cycle, crisp at the break and light throughout. Smooth and crisp are constants; they’re features desired in every trigger of any gun. Lightness or pull weight, meaning the amount of pressure required for the trigger to break, is more subjective. In fact, the proper trigger weight depends on your application. Trigger reset is another factor to consider, but it’s not quite worthy of a Top 3 designation.

Selecting the proper trigger is a critical part of making an AR your AR. So, let’s break this down a bit more.

Oh, So Smooth

A smooth trigger is a great advantage in the quest for accuracy. A crunchy, gritty trigger makes it difficult to get good hits, and it’s more important to consistent accuracy than many people realize. As you apply pressure to a poor-quality trigger, the trigger moves with a jerky motion, and then it stalls. You apply more pressure and the trigger jumps past that spot, causing you to jerk as it moves rearward. This action is repeated until — eventually — the trigger breaks, firing the shot. Every jerk of the trigger finger moves the sights off target due to pressure.

AR-15 Trigger 2
No matter what anyone says, don’t try to polish or hone any of the trigger components. This is a sure way to create a malfunctioning AR, which can misfire or go full-auto. Do the research, spend the money and get the right trigger for your application.

A smooth trigger allows you to press without stops and starts. It’s one uninterrupted pressure motion from start to finish, ensuring the shot is fired with minimal disruption of the sight picture each and every time. A good rifleman can shoot accurately with a heavy trigger as long as it’s smooth.

Extra Crispy

Being “crisp” is another desirable trigger trait. Ideally, pressure is applied to the trigger in a smooth and steady action as discussed above. Without any indication that it’s about to release the hammer, the trigger breaks, thus firing the shot. In a good trigger, there’s no mechanical pause or hesitation between the press and the actual release.

There are two techniques used to fire the shot. One school of thought — which is what I teach — is steady application of pressure to the trigger until the AR decides to fire. This is called a surprise break. Other shooters claim they can tell where the break is, so they press until only a couple of ounces are left, then pressing that off when the sights are perfect, essentially “deciding” when to fire the shot. This can be accomplished consistently, but only by expert marksmen. For the rest of us, especially beginners, making the weapon fire usually ends up with the shooter anticipating the recoil and jerking the sights off target at the last moment.

AR-15 Trigger 3
Trigger design will be based on application. On the left is ALG’s ACT (Advanced Combat Trigger), which is the standard military design but coated with nickel boron for a smooth, crisp release. On the right is a two-stage trigger by Geissele, the G2S, which has a 2.5-pound first stage with a 2-pound release.

No matter what technique is used, a crisp trigger will make firing the shot much easier. This applies to a single-stage military-type trigger, which fires with one smooth press. This also applies to the two-stage trigger, where the first half or so of the trigger cycle requires one pressure, then it lightens up a good bit for the final movement, requiring very little pressure to fire the shot. Regardless of the type of trigger you’re using, it must be crisp.

Wearing The Weight

Pull weight is the most subjective feature among trigger considerations, and it’s almost exclusively dictated by application. An extremely light trigger is used for surgical-marksmanship-type target shooting, which is generally done from a bench. Competition or “match” triggers are just for those purposes. For law enforcement or self-defense use, you need a “combat” trigger.

Target triggers are very light, and they’re used for shooting a very tight group under controlled conditions. For this type shooting, a very light trigger pull is acceptable and recommended. Triggers will often break with a just a couple of pounds of pressure — sometimes only ounces. A target trigger is not to be used for any other application: Under any other type conditions, they’re too light to be safe.


Need More AR Knowledge:


Hunting and competition matches are “field” applications. You can use a match or competition trigger, which is what I call a medium-weight trigger. Usually, match/competition triggers will release at about 3½ to 4 pounds; however, hunting and competitions are still somewhat controlled conditions. It’s nothing like the disorder experienced during a fight. Match/competition triggers are still too light for combative settings. (Light triggers are often not heavy enough to ignite the primer in mil-spec type ammo.)

During a violent confrontation, you’ll be moving, using different firing positions and firing multiple shots. You’re under physical and mental stress because lives are on the line. During such an event, you’ll likely lose dexterity and feeling in the fingers. A trigger that’s too light will cause negligent, unintentional shots to be fired. I’ve seen this happen during training and practice — it will definitely become a problem under actual combative conditions.

I recommend a trigger weight of 5½ pounds for defensive use, but it still needs to be smooth and crisp. I also prefer this pull weight because it’s consistent with the pistols I carry. Fighting is chaotic: The more factors I can control, such as having a uniform trigger weight regardless of the weapon, the less variables I have to think about.

Trigger Reset Considerations

It’s also important to consider trigger reset. After the shot is fired, you relax your finger, releasing the trigger, but only to the point that the disconnector releases the hammer and it’s captured by the trigger — this is trigger reset. Now you’re ready to press through another shot.
Resetting the trigger is the key to firing multiple shots accurately and efficiently. Allowing the finger to lose contact with the trigger wastes time, plus it increases the chance you’ll jerk or slap the trigger on the next shot.

In most triggers, the lighter the trigger’s pull weight, the lighter or softer the reset feels. Reset on a light trigger is difficult to distinguish. If you’re not careful when firing multiple shots with a light reset, it’s easy to fire another round while trying to feel the trigger reset.

A positive trigger reset that’s easy to feel is mandatory for combative/defensive purposes. An advantage of the 5½-pound trigger is that the spring pressure is enough so that all you have to do is relax your finger and the trigger will reset itself.

Choosing Your Trigger

When choosing a trigger for your AR, make sure to carefully consider your intended application. For match/comp triggers, ask other shooters in that discipline what they use. For defensive work, you need a combat type trigger. No matter what the application, do not modify, hone or polish the trigger components. They are hardened, but only to a very shallow depth. Removing material is a sure path to a malfunction or negligent discharge with the fire-control group.

AR-15 Trigger 1
Remember, gear or equipment cannot make up for a lack of skill. Regardless of what you’re shooting with your AR or the type trigger being used, accuracy always relies on applying the fundamentals of marksmanship.

Once you decide what duties you need your trigger to perform, you can narrow it down to a specific type. There are adjustable triggers and drop-in triggers that are housed in pre-assembled, ready-to-install groups. There’s a lot of variety out there, and something will fit your needs perfectly. Do your research and upgrade that trigger now.

Just keep in mind that the proper trigger is a great accessory, but it won’t make up for a lack of skill. As always, practice the fundamentals: aim, hold, press and follow-through.

The article originally appeared in the April 2019 issue of Gun Digest the Magazine.

11 Videos To Get You On Track Reloading Ammunition

2

The author’s favorite deer load for the .308 Winchester, built around IMR 4064 and the 165-grain Sierra GameKing hollow-point boat-tail bullet.

From improved accuracy to saving money, there are a host of reasons to reload ammunition. We’ll kick-start your career at the reloading bench with these 11 videos that take you through the basics.

What Do You Need To Know About To Start Reloading Ammunition:

Fair warning, reloading won’t save you money. Yes, yes, what you’ve heard is correct … each cartridge you turn out from your press costs around half of the factory stuff. But improved accuracy and tailor-made options literally at your fingertips, you’re going to end up shooting more. A lot more. It’s just the nature of the beast. But there’s no more satisfying way to burn (pun intended) your shooting budget.

To help you along this route, we’ve compiled 11 videos that cover each nook and cranny of the discipline. Custom ammunition manufacturer and Gun Digest author Phil Massaro takes you through each step, the tools you need and the supplies you require to start loading on your own. From the outside, handloading might appear a daunting proposition, rife with challenges. But as you’ll see, with patience and a willingness to learn, reloading is a hobby and passion nearly any serious shooter can master.

1. Basics Of Reloading

What goes into reloading ammo? Here are the four basic handloading steps — resizing and removing the primer, inserting a new primer, adding powder and seating a new bullet.

2. Reloading Tools

It’s not uncommon for beginning reloaders to feel overwhelmed by all the gadgets one can buy for handloading. But we relieve some of the pressure with a rundown of the tools you need to get started.

3. Case Resizing

Before anything, you need to get your brass in shape. Here are the finer points to case resizing.

4. Primers

What is the difference between a large rifle primer and a magnum large rifle primer? Can you use magnum primers in standard cartridges and vice versa? Find out.

5. Powders

There’s more than one way to send a bullet flying. Here’s a breakdown of the three main types of smokeless powder for reloading, with insight on the practical uses of each.

6. Bullets

Not every bullet is appropriate for every job. Find out what projectile you’ll need to win a shooting match or put meat on the table.

7. Specialty Cases

Need more brass for reloading? Don’t overlook specialty cases and surplus brass!

8. Reloading Troubleshooting

From getting a case stuck in a die to cracked brass, not everything goes as planned at the reloading bench. Luckily, there are ways to avoid or remedy these dilemmas.

9. Primers and Case Charging

It’s time to make ammo! In turn, it’s the point you seat your primers and charge your cases with powder.

10. Cartridge Assembly

The final step of reloading a cartridge is seating the bullet, but there’s more to it than just pulling your press’s handled. Find out how to precisely measure your cartridges and add a crimp if necessary.

11. Safety

Good reloading is safe reloading. Here are the particulars for keeping a safe reloading environment and an organized bench.

Top 5 Reasons Why You Should Upgrade Your Bolt-Action To A Rifle Chassis

0
Sponsored Content
Rifle-Chassis-mdt-ess
Don’t want a rifle chassis? Then you must have something against accurate shooting.

With the advent of the rifle chassis, the bolt-action has never been a better performer. Here are five reasons why.

Why Should You Upgrade Your Bolt-Action With A Rifle Chassis:

  • Accuracy—vastly improves accuracy potential of a rifle.
  • Adjustability—provides a custom fit to an individual shooter.
  • Versatility—accessory attachment systems tailor a rifle to its application.
  • Magazines—in general, utilzes much more universal ACIS magazines.
  • Applications—born in competition, the rifle chassis is useful for any endeavor where precision is at a premium.

It’s a rock. The bolt-action that is.

For more than 100 years, the basic design of the rifle hasn’t changed making it an ultimate example of, if isn’t broke, don’t fix. What else out there, shot to shot, trigger pull to trigger pull delivers greater accuracy on a more consistent basis? Improve on that, might as well ask for more shine in the sun. Though, in recent years, that’s exactly what’s happened to the tried and true rifle.

Well … kind of.

While the bolt-action in all its forms has remained amazingly unchanged in more than a century of service, in recent years its platform has made an incredible leap forward. One might even say, the rifle chassis has caught the gun’s main interface with the bolt-action itself. A long time coming, but well worth the wait.

Still dubious? Then check out the top five reasons you need to upgrade to a rifle chassis. Get the right platform for your applications and you be dazzled at what these modern marvels can do for favorite turn-bolt.

Accuracy

Hands down, this is itreason No. 1 to choose a rifle chassis. There’s no other system out there that does more to make an average rifle an absolute tack driver. Bantered about in precision shooting circles, the expected accuracy improvement of installing a rifle chassis is somewhere around 20 percent. That is, the average groupings your rifle produces will shrink by that magnitude. That’s incredible. A couple of things are at play in the rifle chassis that deliver such incredible results.

rifle-chassis-lss-xl_gen2
All that metal the MDT LSS Gen2 is made out of isn’t just for deadly good looks. That’s what get you on target.

First, it’s made of metal. In turn, it has much more rigidity than wood, polymer or carbon fiber stocks. This is important because it’s more resistant to flexing under the recoil impulse. Lesser options that buckle send your bullet on an errant trip. This means less accuracy and more frustration.

Next, a rifle chassis offers superior bedding. Take the MDT LSS Gen2 for instance. The lightweight, entry-level chassis has a monolithic V-block bed, which makes metal-to-metal contact on the entirety of your rifle’s action. Most traditional stocks either have little (maybe two points) or no metal-to-metal contact. What this adds up to is a system where an action can move and yawl shot to shot and overtime.

Finally, the rifle chassis free-floats your rifle’s barrel no matter its profile. Therefore, your barrel’s harmonics remain as pristine as first-fallen snow in the middle of the night. It’s astonishing how many modern gunmakers still don’t take the time to integrate this facet into their designs, despite the known benefits.

Adjustability

Metal might form the heart of the rifle chassis and provide its primary advantage, but it’s far from its only asset. The system is also among the most adjustable available, giving shooters a truly custom experience each time they’re behind the trigger.

Rifle-Chassis-hs3
There’s no shortage of attachment points on this MDT HS3.

Standard fare on the rifle chassis is the adjustable buttstock, important, given you can modify your rifle to your frame perfectly. A good example is the MDT ESS. The competition specialist has 1 inch of play in length of pull and comb height. Furthermore, the butt pad is height adjustable, letting you tinker it this way and that to get the perfect fit into your shoulder pocket.

While this is among the most important adjustment systems, it’s not the end of the line for a rifle chassis. Again the ESS. This particular rifle chassis comes with ample M-Lok slots at the one, three, five, seven, nine and 11 o’clock positions of the fore-end. In short, accessorieswhatever you might needare a snap to add.

Additionally, if you need to balance your rifle or add more weight to soak up recoil, most rifle chassis offer ways to adjust the weight of the chassis. MDT’s system, for instance, conveniently attaches via M-Lok slots.

Versatility

Buy a traditional stock and what you see is what you get. Not so with a rifle chassis. Many not all mind youare modular in design, meaning you are free to add different components as you see fit. The MDT LSS Gen2 mentioned before illustrates this point perfectly. The chassis is compatible with any AR-style buttstock and pistol grip on the market today. So, if you’ve had good luck with Magpul’s PRS stock, there’s no reason to switch up. Or if you can’t stand a beavertail grip, there’s no need to subject yourself to one. Much like the AR-15, the only limit to customizing your rifle chassis is your imagination.

Magazines

Certainly, there are traditional stocks that accept removable box magazines. However, there are a lot that stick to a rifle’s proprietary version. A rifle chassis dashes this concept against the rocks and replaces it with universality. ACIS magazine compatibility is the standard, opening the door not only to higher capacity options than found with factory designs, but more affordable ones.


Learn More About MDT Chassis And Gear:

  • 4 Must-Have MDT Chassis Rifle Upgrades
  • MDT ESS Chassis: Redefining The Modern Precision Rifle
  • MDT LSS Gen2 Chassis: Flexible Foundation Of A Precision Rifle

Application

In the world of stocks, the rifle chassis is a thoroughbred. But get it out of your head it purely exists in the realm of competition or professional operation. Like many firearms advancements, it certainly has roots in those spheres, yet has blossomed to the general shooting public.

Rifle-Chassis-mdt_lss_gen2_rock
A rifle in a LSS chassis is as comfortable on the hunt as it is in a match.

With the right rifle chassis, your Sunday-afternoon plinker transforms into a laser-like joy machine. And huntingespecially in the more wide-open Western statesnothing could up your success rate more dramatically than restocking your standby deer or antelope rifle with a chassis. The only prerequisite to upgrade to a rifle chassis is a desire to shoot accurately on a more consistent basis.

For more information on MDT rifle chassis systems, please visit www.mdttac.com

.224 Valkyrie: A Small Fry With Legs

1

224 Valkyrie 1

Maintaining supersonic speed well past 1,000 yards, the .224 Valkyrie has fast become a long-range staple.

What The Secret To The .224 Valkyrie’s Downrange Performance:

  • 6.8 SPC parent case gives the cartridge excellent powder capacity.
  • Many loads remain supersonic well past the 1,300-yard mark.
  • Heavy-for-caliber bullets improve the Valkyrie’s wind-drift characteristics.

The .224 Valkyrie cartridge by Federal came on the scene in late 2017 as a long-range AR-15 round with modest recoil. It’s basically a necked-down 6.8 SPC with a long and skinny .224-diameter bullet that has a high ballistic coefficient. AR-15 shooters should be able to add a new bolt and a new barrel and fire the Valkyrie without a problem. Standard .223 Remington magazines should also work, but they should be function tested to ensure proper feeding.


Get More .224 Valkyrie Info:


General Comments On The .224 Valkyrie

The Valkyrie’s edge comes at long distances. A 77-grain MatchKing .223 Remington drops to subsonic speeds before it hits 1,000 yards. With a similar bullet, the Valkyrie maintains supersonic speed past 1,300 yards. Or, looked at another way, the Valkyrie with a 90-grain MatchKing (ballistic coefficient of .563) delivers 402 ft-lbs. of energy at 1,000 yards, compared to the payload of 158 ft-lbs. a .223 Remington 77-grain MatchKing brings. The amount of bullet drop and wind deflection is likewise much less with the .224 Valkyrie. Ballistically, then, the .224 Valkyrie shoots more like a 6.5 Creedmoor with a 143-grain Hornady ELD-X bullet.

Both for reasons of timing — pairing well with the current long-range precision rifle trend — and of ballistic excellence, the .224 Valkyrie came on strong very quickly and shows no signs of peaking in popularity anytime soon.

224 Valkyrie Load Data

Editor’s Note: This article is an excerpt from Cartridges of the World, 16th Edition.

Video: Developing A Fundamentally Sound Trigger Pull

0

Want to hit what you’re aiming at time and again? Hone your trigger pull.

Trigger pull and sight alignment. mWhen you first get into shooting, you’re bashed over the head with these two concepts until your brain nearly leaks from your ears. There’s a sound reason for this redundancy. In all the ways you interact with a handgun, these two bear the most weight on if you score meaningful hits or fly way off the mark. A little secret, one has a lot of influence over the other.

Sloppy trigger work is the bane of accurate pistolcraft, pushing or pulling your sight alignment off, sending your round up, down, left or right of its intended mark. Ensuring this doesn’t plague you every time you’re at the business end of your pistol is a matter real estate … that is, where you settle down your trigger finger. That is, in short, the center of its pad. Easy as pie, but it’s an aspect that even seasoned shooters wrestle with if they break discipline.


Learn How To Run Your Defensive Pistol:


The breakdown, for the most part, comes with a shooter removing his or her finger from the trigger after taking a shot. Not completely off, but enough the digit loses contact. Over the course of several shots, this causes displacement, thus accuracy decay.

The cure? A more deliberate trigger pull, one that follows the shot all the way through and to the pistol’s reset. Purposeful might sound like slow, but it’s quite the contrary. The reset of most semi-automatic pistols is extremely short … just a few fractions of an inch. Easing the trigger to this point sets up the next shot more quickly because it’s more efficient. Plus, with work it becomes faster.

For more information on Walther, please visit www.waltherarms.com.

For more information on Panteao Production, please visit www.panteao.com.

Ruger PC Carbine Chassis Models Go Online

0

Ruger PC Carbine Chassis 1

A precision pistol-caliber long gun? Ruger shoots for it with the modern feeling PC Carbine Chassis.

What Separates The PC Carbine Chassis From the Rest Of The Line:

  • First in line to feature pistol grip and telescoping buttstock.
  • Outfitted with glass-filled polymer chassis.
  • Compatible with both Ruger SR-Series/Security-9 and Glock magazines.
  • Available in state-compliant configurations.

Ruger struck a vein of gold dusting off a legacy pistol-caliber carbine concept a few years back and continues to mine it for all it’s worth. The numerous configurations of the plucky little PC Carbine are proof enough of the gunmaker’s and gun buyers’ enthusiasm for the 9mm. And its options only continue to grow.

Most recent to the lineup, three PC Carbine Chassis Models, an unusual move given pistol cartridges aren’t known for their leg stretching. This factor aside, the new carbines boast features many pistol-caliber fans will find desirable.

Get More Information On Ruger Guns

Chief among these, the Chassis Models are the first PC Carbine options outfitted with pistol grips and adjustable, folding buttstocks (six-position, telescoping, Magpul MOE). For many, these are worth the price of entry. Though, if you are captivated by the thought of a surgical 9mm long-gun, the line extension brandishes many of the facets found on full-powered precision rifles.

Ruger PC Carbine Chassis 2

Per the name, the most obvious is the chassis, but Ruger’s put a bit of a twist on it opting for lightweight glass-filled polymer over aluminum. Also, the barrel is free-floated inside a CNC-milled and M-Lok compatible handguard.

Despite these tweaks, Ruger kept the features that made the PC Carbine popular in the first place on the new options. Three of the most notable, the takedown feature, action and mag well. The takedown feature has been one of the most popular aspects of the line, simple to boot. Just a lever push and a twist and the barrel assembly separate from the action. Similar to preceding models, the Chassis PC Carbines utilize Ruger’s Dead Blow action, which features a tungsten weight to shorten bolt travel and reduce felt recoil. As to the mag well, they are compatible with both Ruger SR-Series/Security-9 magazines as well as Glock—with the assistance of an insert—making them plum easy to feed.

Concerning the three models of Chassis PC Carbines, their variations are omitted features to meet less enlightened states’ oddball gun laws. Two models come with 10-round magazines, one of them without a threaded muzzle. The full-strength carbine has both a threaded muzzle and ships with one 17-round magazine. Cost, the PC Carbine Chassis models are a bit above the previous iterations with an MSRP of $799 across the board. A small price for those who want a more modern “carbine” feel out of the gun.

More From Ruger:

Sturm, Ruger & Company, Inc. (NYSE-RGR) is excited to introduce three configurations of its new Pistol Caliber Carbine (PC Carbine™) Chassis model. The standard model of this refreshed PC Carbine boasts an abundance of new features, including a glass-filled polymer chassis system; six-position, telescoping, Magpul® MOE® buttstock; flared magwell for improved magazine reloading capabilities; ergonomic pistol grip with extended trigger reach; and a factory-installed, barrel-mounted Picatinny rail. Additionally, two 10-round state compliant models are available. One with an adjustable stock and threaded barrel, and the other with a fixed stock and non-threaded barrel.

Ruger PC Carbine Chassis 3

The new, glass-filled polymer chassis system allows for the use of standard AR pistol grips and collapsible buttstocks. The adjustable ghost ring rear sight of the original PC Carbine has been replaced with a factory-installed, barrel-mounted Picatinny rail, which allows for the forward mounting of optics. These new models utilize a CNC-machined, hard-coat anodized aluminum handguard with Magpul M-LOK® accessory attachment slots on all four sides for easy mounting of M-LOK-compatible accessories.

These models also maintain several hallmark features of the original PC Carbine, including: an easily interchangeable magazine well system that allows the rifle to accept common Ruger and newer Glock® magazines; dead blow action with a custom tungsten weight that shortens bolt travel and reduces felt recoil and muzzle rise; reversible magazine release and charging handle to accommodate right- or left-handed shooters; a simple takedown mechanism to allow for quick separation of the barrel/forend assembly from the action; durable heat-treated, chrome-moly steel bolt; cold hammer-forged chrome-moly steel barrel with ultra-precise rifling; and in some models, a ½” x 28 threaded barrel.

The PC Carbine Chassis model ships with the SR-Series™ magazine well installed and an additional magazine well that accepts newer Glock magazines. A 9mm Luger Ruger American® Pistol magazine well is available separately at ShopRuger.com.

PC Carbine Chassis Specs
Stock: Adjustable, Black Synthetic Chassis with Aluminum Free-Float Handguard
Capacity: 17 (state complient 10)
Barrel Length: 16.12″
Overall Length: 32.25″ – 35.50″
Front Sight: None
Rear Sight: None
Barrel Feature: Threaded, Fluted (non-threaded state complient available)
Thread Pattern: 1/2″-28
Weight: 7.3 lb.
Length of Pull: 10.50″ – 13.75″
Material: Aluminum Alloy
Finish: Type III Hardcoat Anodized
Twist: 1:10″ RH
Grooves: 6
Suggested Retail: $799.00


Get More Ruger Info:


Gun Digest’s 10 Best Shooting Drills And Firearms Training Posts

1

In this drill, the shooter fires into the berm, focusing on trigger control without a target and getting used to applying a steady rhythm to the application of trigger pressure. This drill can also be performed indoors, with a blank target and dry firing the pistol, and focusing on the sights without a target.

Get trigger time with these shooting drills and employ the rock-solid training techniques and you’re certain to see your groups shrink and your skills improve.

What Are The Top Shooting Drills And Training Advice:

Unlike riding a bike, marksmanship isn’t something that sticks with you for a lifetime. Certainly, it’s possible to learn and retain the fundamentals—breath control, trigger discipline and the like. But without regular training these foundational elements evaporate. This why renowned Marine Corps sniper Carlos Hathcock called marksmanship a deteriorating skill. Use it or lose it.

Put in these terms, firearms training takes on a new sense of urgency. Range time and shooting drills are a must, it doesn’t matter if you put a rifle or shotgun to your shoulder or a pistol in your hand. And we’re here to help get you on track to make the most of your next time behind the trigger with 10 of Gun Digest’s best shooting drills and training tips and techniques. Consistently send rounds down range with these drills and employ these experts’ solid advice and you’re certain to see your groups shrink and your marksmanship improve.

1. Video: Practicing Follow Through For Faster Pistol Shooting

Want to shoot fast and accurately? Work on your follow-through.

2. 5 AR-15 Drills To Master Your Rifle

More than just shooting off a bench rest, these AR-15 drills are meant to help you improve the handling of your rifle, along with your marksmanship.

3. 6 Defensive Handgun Drills You Need To Run

Here are six handgun drills that are certain to get you closer to mastering the art of the pistol.

4. Video: Perfecting A Self-Defense Classic: The Failure Drill

Developed by Col. Jeff Cooper, the failure drill prepares you for defensive shooting situations where a center mass shot doesn’t do the job.

5. 7 Critical Aspects of Pistol Shooting

These seven fundamentals of handgun training apply whether you’re boning up with your self-defense pistol, plinking with a .22 or practicing for a match.

6. Dry-Run Drills to Master the AR

Whether you’re new to the AR or are getting acclimated to a brand new rifle, deliberate and mindful dry runs will jump-start command of the carbine.

7. Video: Challenge Your Handgun Skills With The Shadowland Drill

Richard Mann’s Shadowland Drill sharpens important handgun skills in a single course of fire.

8. What Things Do You Need To Practice With Your Defensive Pistol?

Effective handgun shooting drills are designed to provide practice for the tasks most likely required in an actual defensive shooting. What, then, are the things we need to practice?

9. Video: Practicing Your Draw Without Unholstering Your Handgun

You can still sharpen the majority of your draw stroke even at ranges that don’t allow you to pull from your holster.

10. 7 Defensive Handgun Training Myths

There are many myths out there when it comes to proper defensive handgun training techniques. Here, seven of the most common are debunked.

Gun Values: What Makes Some Old Guns Princes And Other Paupers?

0
Gun Collecting 2
This is a Browning Superposed Diana Grade 20-gauge shotgun.

Gun values can sometimes seem esoteric. What makes one firearm worth $100,000 while a similar one can be bought for a measly few hundred dollars? Why is one a collectible antique and another just a used gun?

What Are The Factors That Go Into Gun Values:

  • Condition
  • Origin
  • Historical Significance
  • Provenance (Individual Gun’s Ownership/History)

As with virtually any item, whether antique or merely used, condition is of prime importance. But more than that, origin and history are important, too. Provenance is a convenient word often used to describe an object’s origin, ownership chronology and overall history. It’s a term used to authenticate the true background of a piece of artwork such as a painting, piece of sculpture, book or some other work of art. And who can argue that a firearm cannot be a work of art? I’m not referring necessarily to finely engraved and gold-inlayed guns, although they can be quite valuable. But take a look at a minty Colt Paterson revolver or high-grade Browning Superposed. Are they not works of art?

An item’s provenance (from the French word provenir, meaning “to originate”) can provide such things as the identity of the original owner, date of manufacture, shipping location and price. Several gun manufacturers will provide, for a price, this kind of information on their letterhead: among them, Colt and Winchester.

Learn What Your Guns Are Worth Now!

Another key factor in establishing the value of a firearm is determined by its rarity. I’ve heard gun owners say, “It’s worth that because they only made [fill in the blank].” Or simply, “They aren’t making them anymore.” These comments can be true, but rarity by itself might not be enough to establish a value. A particular model might’ve had a short production history because it wasn’t received well by the gun-buying public and, for whatever reason, never caught on with the masses.

Gun Collecting 1
A Colt 1836 Paterson, which was the first production revolver manufactured by the Colt company.

Who owned the gun and how was it used? This provenance can make the difference between a firearm that’s merely expensive and one that’s worth a fortune. Guns that belonged to famous lawmen and outlaws, military figures or movie stars can demand a significant premium when offered for sale.

When the infamous bank robbers, Bonnie Parker and Clyde Barrow, were killed by a posse of lawmen in 1934, Bonnie had a Colt Detective Special .38 taped to her thigh, and Clyde was carrying a Colt 1911 .45 Auto. These guns were sold at auction a few years ago for a little over a half-million dollars — $264,000 for Bonnie’s revolver and $240,000 for Clyde’s 1911.1
Other celebrity-owned guns have been sold for staggering figures: President Theodore Roosevelt’s F-grade Fox shotgun for $875,000,2 Gen. George Patton’s Colt SAA .45 revolver for $75,000,3 Elvis Presley’s engraved Walther PPK/S .380 for $62,500,4 Wyatt Earp’s Colt SAA .45 for $225,000,5 and Adolf Hitler’s gold-plated Walther PP .32 for $114,000,6 which was reportedly the gun he used to commit suicide.

So, what’s that old gun worth? The real answer: Whatever someone is willing to pay for it. But the record for a single firearm sold at auction, at least for now, belongs to a very special Winchester. See the sidebar at right about The Geronimo Rifle.


More Gun Collecting Info:


Editor’s Note: This article originally appeared in the April 2019 issue of Gun Digest the Magazine.

Video: Finer Points Of Clearing Corners

0

Clearing corners is no time to lose your nerve or go charging into the unknown.

Unless you’re Grizzly Adams, living off the land and sleeping under the stars, you most likely live in some structure. In that structure, there are walls and where those walls meet or open to another room there are corners. And defensively speaking, those corners are plumb deadly. Not knowing what lies beyond them can put you in peril enough to cost you your life.

Plain and simple, this is why learning to clear or pie corners is an imperative skill and not the easiest to master. In addition to demanding the intestinal fortitude to plumb the unknown, it also requires mastery over your nerves to execute it in a slow and deliberate manner. It isn’t a 1980s cop show where you leap out and yell, Stick ’em up!

Quite the contrary, the challenge with clearing a corner is incrementally getting a view of what’s behind the blind spot while limiting how much of your body you expose. Not an easy balance to achieve and a skill that takes time and patience to execute properly (a little professional training doesn’t hurt either). Though there are some initial fundamentals you can keep in mind to better prepare yourself to become fundamentally sound at the matter.


Learn How To Run Your Defensive Pistol:


Much like working behind any cover or concealment, you must fight the natural urge to hug it. Too close and you do yourself a great disservice, limiting your operating space, particularly if you have your handgun fully presented. Furthermore, staying back gives you the ability to move your entire body while maintaining a proper stance. You don’t have dangle out to get a gander.

As important, you need to develop the mindset of clearing slices around the corner. This is the most difficult aspect, with high-octane adrenaline pumping through your veins, but imperative. In addition to keeping your profile to a minimum, working a slice at a time also allows you to process data more clearly. There’s always a chance there’s an innocent behind the corner your working, you want the cognition to recognize this.

Tying it all together, learning to move your handgun with your eyes. If the two work independently, you run the potential of your arms and hands freezing up if you’re taken by surprise. Operating in tandem, you’ll always be sure the moment you spot a threat you also have the means to deal with it.

For more information on Walther, please visit www.waltherarms.com.

For more information on Panteao Production, please visit www.panteao.com.

Punt Gun: Market-Hunting Mayhem With The Legendary Fowling Piece

0

Punt Gun 9

If utilizing a punt gun sounds like a dangerous proposition—firing an oversized shotgun from a fragile craft in frigid conditions at night—it was.

What Exactly Is A Punt Gun:

  • Generally, an oversized blackpower shotgun with a bore from 1½ to 2 inches.
  • Most specimens weight 100-plus pounds and could measure up to 12 feet in length.
  • Typically used in conjunction with a small skiff (or punt) for waterfowling.
  • Used around the heyday of the market-hunting era around the turn of the 20th Century.

Punt guns were oversized black-powder shotguns used by market hunters in the late 1800s and early 1900s. They were capable of downing scores of ducks with a single shot. However, to impugn them is to misunderstand the purpose, economic demands of the time and the world in which market hunters lived.

These were specialty guns, relatively rare, singular and deadly effective in purpose in the hands of skilled hunters plying their trade in a time of flocks of ducks so thick they darkened the sky.

A 1914 listing of “owners of big guns in the vicinity of Susquehanna Flats, Maryland,” listed 16 owners, three of them with two big guns each, for a total of 19 guns.

A description of the guns stated, “These guns are all about the same weight—100 to 125 pounds; length, 12 feet; diameter of bore from 1½ to 2 ins [inches].”

Punt Gun 6
An up-close view of a typical flintlock punt gun. Early flintlock punt guns were usually converted to fire percussion caps as firearms improved. (Photo: Lori
Burskey Bouchelle, Upper Bay Museum)

These guns of awesome dimensions are often associated with Chesapeake Bay and the Atlantic seaboard, where many were employed in feeding the seemingly insatiable demand for wildfowl in the finest restaurants in the East.

The listing of big-gun owners is published in one of two definitive works on marketing hunting. The Outlaw Gunner by Harry M. Walsh (1971; Tidewater Publishers) focuses on the Chesapeake Bay area, home of the market-hunting heyday. The second book, Texas Market Hunting: Stories of Waterfowl, Game Laws and Outlaws by R.K. Sawyer (2013; Texas A&M University Press), covers the rise and fall of market hunting along the Texas coast.

Although the punt gun was more common with hunters on the Atlantic seaboard, some Texas market hunters, quick to pick up on successful tactics of the Chesapeake Bay watermen (shooting from sink boxes was another), manhandled cumbersome punt guns. As Sawyer states, the punt gun “was the most infamous, considered ‘the deadliest weapon known to waterfowl bagging.’”

Walsh said that even in the heyday, around the turn of the century, there were probably fewer than 100 guns in operation around Chesapeake Bay— more than on the list because, undoubtedly, many went unreported.

Market Hunting Heyday

The culinary demand, along with the market hunting trade, picked up after the Civil War, thanks to post-war advances in technology—particularly advancements in rail and water transportation.

Market hunting developed, or at least was perfected, around Chesapeake Bay, located relatively close to large population centers to which rail and water routes provided ready transportation. As rails connected other parts of the country, such as the Texas coast, the market hunting trade sprang up. Hunters filled thousands of barrels with ducks bound by train for northern cities and, with the advent of refrigeration aboard steamships, Europe.

Punt Gun 10
You can see just how huge these punt guns were and how much support they required to do their duck market-hunting job. Pulling the trigger set off a charge that could be heard far and wide, and the boat would be forced backward 40 feet or more. (Photo: Lori Burskey Bouchelle, Upper Bay Museum)

To be sure, when pump and semi-automatic shotguns (many side-by-sides served as well) came onto the scene, market hunters were quick to set aside their muzzleloading fowling pieces: Rapid-firing and rapid-reloading firearms that could be held to the shoulder had obvious advantages over a punt gun.

PUNT BOATS

Many punt boats were brought to the United States from England, where market hunters employed them with similar results, according to Jack Manning, curator of the Upper Bay Museum in North East, Maryland.

The name comes from the type of boat, a sneak skiff called a “punt” in England. It was a shallow-draft, flat-bottom craft designed particularly for getting the big gun in position to kill as many ducks as possible with one shot, he explained.

In his book, Walsh describes these boats. They were usually custom made by the watermen who understood the requirements.

Punts were generally one-man boats (although some two-man boats were used) from 16 to 18 feet long and with a 3½- to 4-foot beam, with boards running the length of the boat to reduce friction. Both bow and stern were sharp, Walsh said, to prevent gurgling in dead water as the hunters silently paddled toward a raft of sleeping or feeding ducks.

If it sounds like a dangerous proposition—firing an oversized shotgun from a fragile craft in frigid conditions at night—it was. “Here, one thin plank and 6 inches of freeboard were all that separated the hunter from eternity,” Walsh wrote.

The Punt Gun

Everything about a punt gun is oversized—the barrel, the hammer, the trigger and the stock. Stocks, Manning said, “were pretty crude, because they were just a tool,” not fine hunting pieces. Many were homemade, but some, such as the one in the Upper Bay Museum, show touches of gunsmith craftsmanship, such as a tapered, 1½-inch barrel and a “pretty well-made stock, with a dip in it; made almost like a real gunstock.”

Punt Gun 5
This front view of a punt boat shows a huge punt gun’s barrel resting in chocks on the bow. Burlap bags filled with sea grass were positioned to absorb recoil and (hopefully) not take the stern out of the boat. (Photo: Upper Bay Museum)

Manning pointed out that they were nicer than many of the crudely fashioned ones. And, he added, stocks often had a drilled hole through which the hunter could run a rope tied to a cork so if a game warden showed up, he could throw the gun overboard. If he wasn’t caught with the gun, he wasn’t charged. The hunter would come back later to look for the floating cork and pull up the gun.

One gunner went a step further to foil game wardens wise to this practice, Manning said. He tied on a heavy block of salt, which kept the cork submerged until the salt melted away. This allowed the cork to bob to the surface a couple days later, when the hunter would row out and retrieve his gun.

Market hunting was legal—a respected profession of watermen who made their living on the bay, fishing and crabbing in season. These men would hunt during the waterfowling months; and many of them guided sport hunters by day and then market hunt at night. Night hunting, however, was illegal. And because punt gunning required carefully approaching a large raft of ducks, it was most effective just at last light, when the gunner would silently slip into range.

“The best time to get on them was just before a storm, because they feed really heavy and don’t hear you sneaking up—because they make so much noise when they’re feeding,” Manning said (not that he knows from first-hand experience; although he did make a non-firing punt gun from patterns of the gun used by a local gunner).

Aiming was accomplished by shifting body weight to lower or raise the muzzle, which protruded over the bow. There was no need to finely sight the gun; just point it in the direction of the thickest part of the flock. There were tricks to get into range for what was mostly likely one shot a night.

Once rowed or push-poled to the vicinity of the resting flock, the hunter lay atop the big gun and, using short hand paddles, worked his way toward the flock, often guided by the sound of thousands of feeding and murmuring ducks. Some hunters used kerosene lamps in a reflective box on the bow, which produced a “duck-in-the-headlights” effect. White was the most effective camouflage, blending better in faded light on the water than a dark silhouette, which would stand out.

The gun muzzle protruded a few inches past the bow, the barrel resting in chocks on the bow and about mid-barrel. Burlap bags filled with sea grass were positioned to absorb recoil and “hopefully not take the stern out of the boat,” Manning said. Kickerboards provided reinforcement to “keep the gun from going out through the side of the boat,” he explained.
When in position, the gunner would slap the side of the boat, causing ducks to raise their heads and some to take wing. Pulling the trigger set off a charge that could be heard across the bay, and the boat would be forced backward 40 feet or more.

Manning cited an example of a punt gunner who once slid his skiff across ice, pulling it forward with ice hooks toward an opening packed with ducks. Upon firing, the recoil of the big gun spun the boat three or four revolutions. The shot killed 80 ducks.

The Load

There are accounts of punt gunners loading their guns with as much as a pound of powder and 2 pounds of shot, but Manning believes this, like many stories of past gunning exploits (such as hundreds of ducks being killed with one shot, when 40 to 60 were more likely), is an exaggeration.

Punt Gun 7
Definetly not a shoulder-fired scatter gun.

“A pound of powder is way more than what you’d put in one of those guns,” Manning pointed out. “More likely, the load was a pound of shot propelled by a like volume of black powder. So, whatever the volume of a pound of shot—usually No. 4s—was the volume of powder; maybe one-third of a can of powder. As big as they were, the guns could take only so much pressure.”

Over the powder, the gunner rammed wadding to compact the powder and build pressure as the powder ignited. Oakum—teased-apart rope fibers—was used, Manning said. (He also heard of cork balls wrapped with oakum being rammed down on the powder charge.) Then came the shot, over which was placed a cardboard disk cut to fit tightly and hold the shot in place.

Early flintlock punt guns were usually converted to fire percussion caps as firearms improved. Some didn’t bother with a trigger and hammer mechanism; they were fired by striking the cap with a common hammer, Manning said.

Ducks were bringing $2 to $3 per pair—except for the highly prized canvasbacks, which would bring $8 to $9 a pair. That was good money for a waterman trying to keep his family fed. (In fact, during the Depression, “The people who made money around here were the market gunners and moonshiners,” Manning said.)

The End Of Market Hunting

The passage of the Migratory Bird Treaty Act of 1918 effectively put an end to market hunting. It was followed by additional conservation legislation well into the 1930s.

Bear in mind, however, that market hunters weren’t the only hunters racking up large daily kills. Sport hunters were also shooting hundreds of ducks a day, many of which undoubtedly were bound for restaurants. The combination of sinkboxes and easily reloaded cartridge shotguns (both pumps, such as Winchester’s Model 1897, and semi-autos, such as John Browning’s Remington Model 11s), was taking an enormous toll in the hands of market gunners and sport hunters alike.

Punt Gun 8
Even though it could bag up to 50 birds with one shot, a punt gun still had to be sighted in for maximum effectiveness.

Manning said sportsmen in New York and other Eastern states first sounded the alarm of declining duck populations, and states began clamping down with limits outlawing the sale of wildfowl and other regulations, but enforcement was sparse.

However, restrictions on bore size meant the end of the punt gun, many of which were confiscated and destroyed (the result was that surviving punt guns became highly sought-after collectables). Sawyer’s book admirably details the fight for game laws in Texas and the push for federal legislation.

And it would take federal legislation, in the form of the MBTA, to put real teeth and resources behind the new laws. “Practically,” Sawyer summarizes, “the most essential part of the MBTA was allocation of federal funds for enforcement.”

Market gunners were forced into an outlaw existence that lasted for years—well through the Great Depression—but the death knell of market hunters and punt guns had sounded.

We haven’t even talked about other market-gunner tools, such as swivel guns, multi-barreled battery guns and pipe guns made of ½-inch-thick boiler pipe … but that’s another story.

Editor’s Note: This article originally appeared in the June 2019 issue of Gun Digest the Magazine.

Reloading: How To Choose The Right Bullet

0
Bullet Selection 2
Peregrine Bullets is a South African ammo company. These BushMasters were recovered from a Zimbabwean Cape buffalo

Bullet options for when aerial ballistics and terminal ballistics matter.

What Are The Bullet Options For Reloading:

If you take a few minutes to scroll through the component bullet section of any major retailer’s website, you can find a near-dizzying array of available projectiles. Which best suits your needs? With modern bullet designs (ballistic coefficient [BC] values keep getting higher), adding more choices to the mix for the hunter and shooter, there’s a huge selection from which to choose.

Target Bullets

For target rifle shooters, there’s much to be excited about. The Sierra MatchKing is still the benchmark, but the Tipped MatchKing gives the option of a polymer tip. Berger’s Extreme Outer Limits Elite Hunter series, although actually designed as a hunting bullet, makes a great long-range target bullet; they’re heavy for caliber and offer unprecedented BCs. They do require a faster-than-normal rate of twist, but for those serious about long-range shooting, they warrant an audition.

Bullet Selection 3
The Cutting Edge MTH (Match Tactical Hunting) bullet is consistent, uniform and devastating. It’s a fantastic all-around bullet that serves a multitude of applications.

Hornady’s ELD Match is still a perfectly viable choice, as is Nosler’s Custom Competition. Cutting Edge Bullets offers its MTAC (Match-Tactical) lathe-turned, all-copper bullets in both standard configurations and a single-feed option for those loaders wishing to exceed standard cartridge overall length and the magazine length constriction.
The point is, with the popularity of long-range shooting, it can be fun to load up some match-grade bullets — just for the price of a box of projectiles.

Hunting Bullets

Hunting bullets continue to evolve, and the component bullets available to the reloader give us plenty to choose from. Don’t get me wrong: Classic bullets, such as the Sierra GameKing, Nosler Partition and Hornady InterLock, still work perfectly in a good number of situations, but there are almost more choices on the market than any one of us would actually have an opportunity to test in a lifetime of hunting.

There are many hunting bullets that will approach the accuracy potential of the match-grade target bullets, and that’s a good thing. I’ve had the Swift Scirocco II print under ½ MOA in some rifles, and the Hornady ELD X has been equally accurate. Nosler’s AccuBond and AccuBond Long Range have printed some amazing groups, as well as giving the terminal ballistics desired across a wide range of impact velocities. I also like the new Sierra GameChanger. While it’s nothing more and nothing less than the Sierra GameKing with a translucent green polymer tip, it has shot very well in my rifles.

Bullet Selection 1
Federal’s Trophy Bonded Tip bullet is now available as a component. That’s very good news for reloaders.

Federal has introduced many of its best designs available in component form, such as the Edge TLR and Trophy Bonded Tip, Fusion, and the Trophy Bonded Bear Claw and Trophy Bonded Sledgehammer solid. South Africa’s Peregrine Bullets has an intriguing lineup, offering a unique design that has served me very well in a number of calibers.
These are just a few of the designs that can make the choice so confusing.

A hunting bullet has to fill several roles. First, it has to be accurate enough to hit the animal where needed. Second, it needs to be tough enough to withstand a wide range of impact velocities. Third, it needs to expand enough to cause massive hemorrhaging, yet not so much that it will be stopped shy of reaching the vitals. The traditional cup-and-core design (a lead core inside a copper jacket) with a certain degree of lead exposed at the meplat to ensure expansion is still in use, and in moderate cartridges at common ranges, it will still work well.

Copper Considerations

The lead-free monometal designs — which started with the Barnes X — are required by law in some areas and continue to gain popularity. When loading these copper bullets, keep in mind that the center of gravity is located rearward in comparison to the lead-core designs, and that will keep the bullet weight on the lighter side. Unless the twist rate is increased, the longest bullets won’t be stabilized properly, especially in those designs with the longer ogives and higher BC values. Shorten the bullet’s length, and that issue can be resolved.

Bullet Selection 6
Nosler’s AccuBond Long Range combines the sleek performance of a match bullet with the bonded-core performance of a strong hunting bullet

For example, the Peregrine BushMaster is an all-copper bullet with a flat meplat, using a brass plunger over a hollow cavity. Because air isn’t easily compressed, the brass plunger causes the bullet’s sidewalls to blow outward upon impact, giving reliable expansion every time. Yet, because of the conformation, Peregrine can usually offer its monometal at standard weights.


Load Up On Reloading Info:


I’ve used this bullet at 400 grains in both the .450/400 3-inch NE and .404 Jeffery, as well as the 500-grain bullet in my .470 double. Because they’re lathe-turned, the consistency is certainly there, and their design gives reliable terminal ballistics. Look at the Peregrine Plainsmaster or a Cutting Edge MTH (both have a boattail/long ogive configuration), and you’ll see the lead-free construction limits the useable weight in a standard-twist barrel. It’s just the nature of the beast.

Federal’s Trophy Bonded Tip and Trophy Bonded Bear Claw designs use a smaller lead core at the front of the bullet and copper shank at the rear, moving the center of gravity forward. The lead core is chemically bonded to the copper jacket, so both of these bullets can withstand the highest of impact velocities; however, especially in the case of the Tip, they will also expand at lower velocities further downrange.

Bullet Selection 4
The Sierra Tipped MatchKing gives the same uniformity as the classic MatchKing, but it sports a green polymer tip for a more consistent meplat.

Federal’s Edge TLR takes the concept of a small lead core up front just a bit further, because it is engineered with the long-range hunter in mind. According to Federal, the Slipstream polymer tip helps give reliable expansion to velocities as low as 1,400 fps. I’ve used the Edge TLR bullet in factory loads, and while my shots were inside 200 yards, I’ve seen some recovered bullets from 400 yards that expanded just fine.

Narrowing the Field

So, for the hunting reloader, which of these designs will best serve you? That’s going to depend upon several factors, including your chosen cartridge, intended quarry and hunting distances. Read the reviews, look at photos of correlative upset bullets that have been recovered from game animals, and base your decision on real-world experiences. Ballistic gelatin will only tell part of the tale, but the hunting fields will show what happens to a bullet when it hits hide, bone and flesh from varying angles.

Find a bullet that meets your needs, research the correlative load data, and I’m sure you’ll have it shooting well before long. As a reloader, I find little else as satisfying as choosing a proper bullet for a particular hunt, developing a load in my rifle and placing it well on the animal I’m hunting.

Editor’s Note: This article originally appeared in the May 2019 issue of Gun Digest the Magazine.

MUST READ ARTICLES