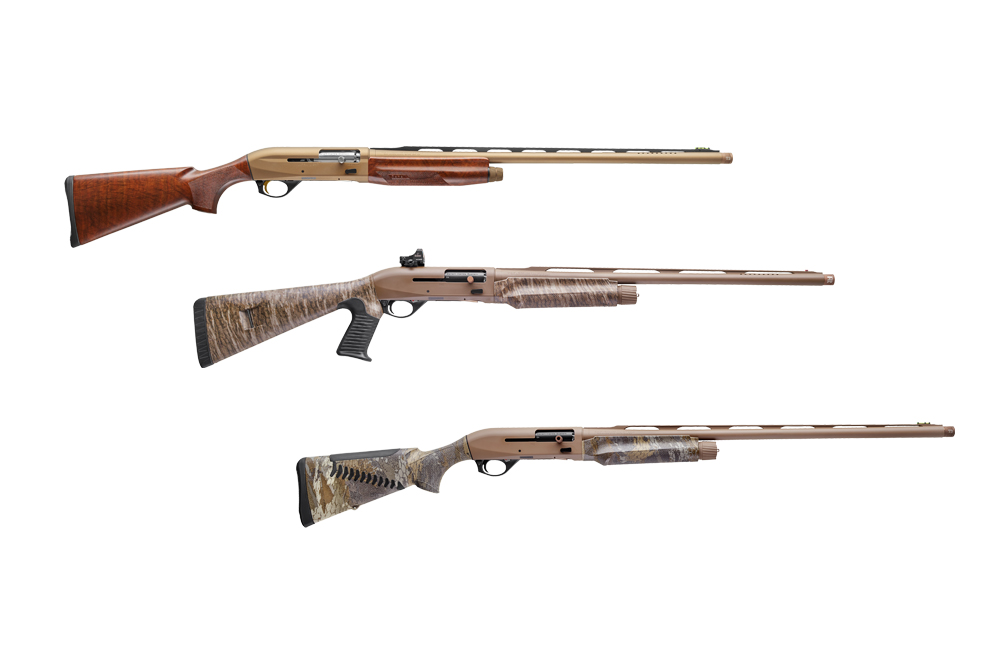
 The Benelli Performance Shop has introduced three new models for 2017 intended to cater to three specific hunting niches.
Benelli has developed a well-earned reputation among the hunting community for its ultra-reliable semi-auto shotguns, which have been used to bring down a whole slew of game birds, ranging from small species like quail and dove up to larger birds such as turkey and Canada goose. And now, for 2017, the Benelli Performance Shop is bringing out three new custom-built models for specific hunting categories.
These three new Benelli Performance Shop models are the Performance Shop Ultra Light Upland, the Performance Shop M2 Waterfowl Edition and the Performance Shop M2 Turkey Edition. As the names suggest, these guns have all been tailored to meet certain hunting niches courtesy of key enhancements from the Performance Shop.
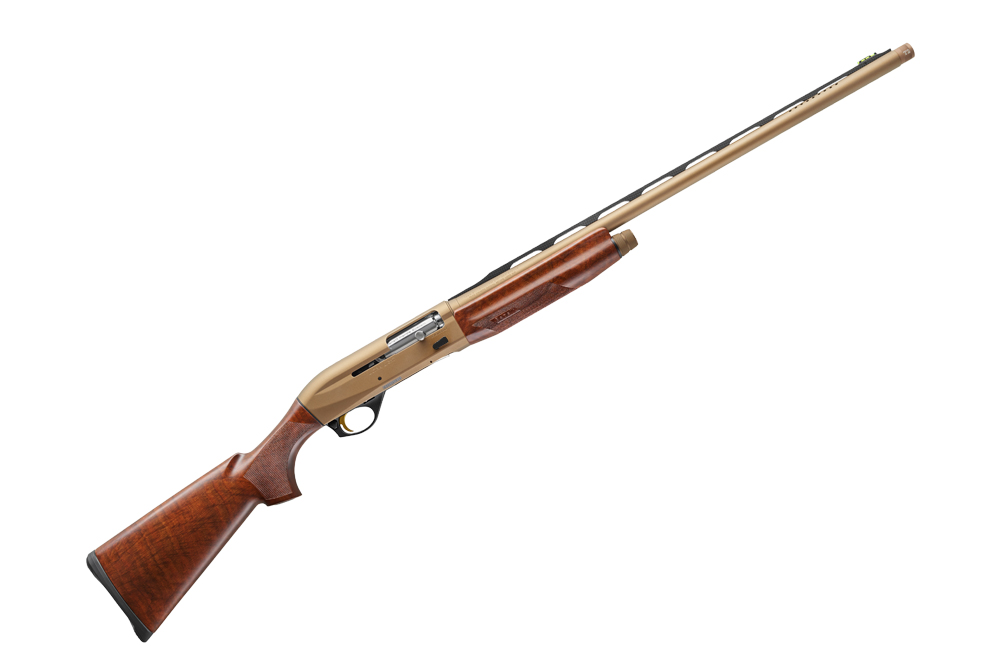 The new Benelli Performance Shop Ultra Light Upland is available in 12 and 20 gauge and is designed to be the lightest semi-auto shotgun in production in both gauges. The gun utilizes a featherweight alloy receiver; a shortened magazine tube; and a strong, lightweight carbon fiber rib across both models. All of these are with weight reduction in mind, and the result is a shotgun that weighs just 5.2 pounds in its 20-gauge format, and an equally svelte 6.1 pounds in its 12-gauge variation.
Added to this are several other functional upgrades, including an enlarged bolt handle and release, a lengthened forcing cone and EDM barrel porting, a Burnt Bronze Cerakote finish and three Rob Roberts Triple Threat extended choke tubes. The reduced weight – as well as all of these upgrades – make this Ultra Light Upland perfectly suited for the long walks and shooting situations upland hunters often encounter. The gun, in either gauge, retails for $2,799.
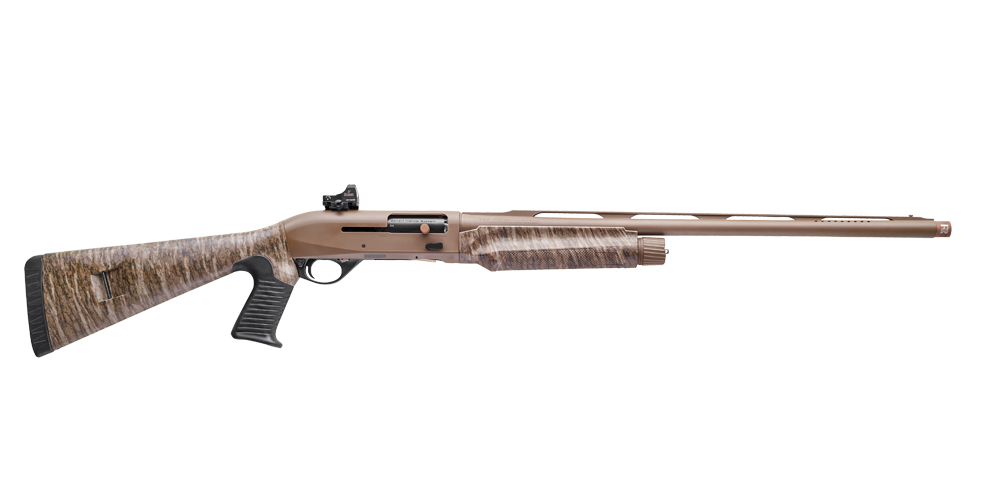
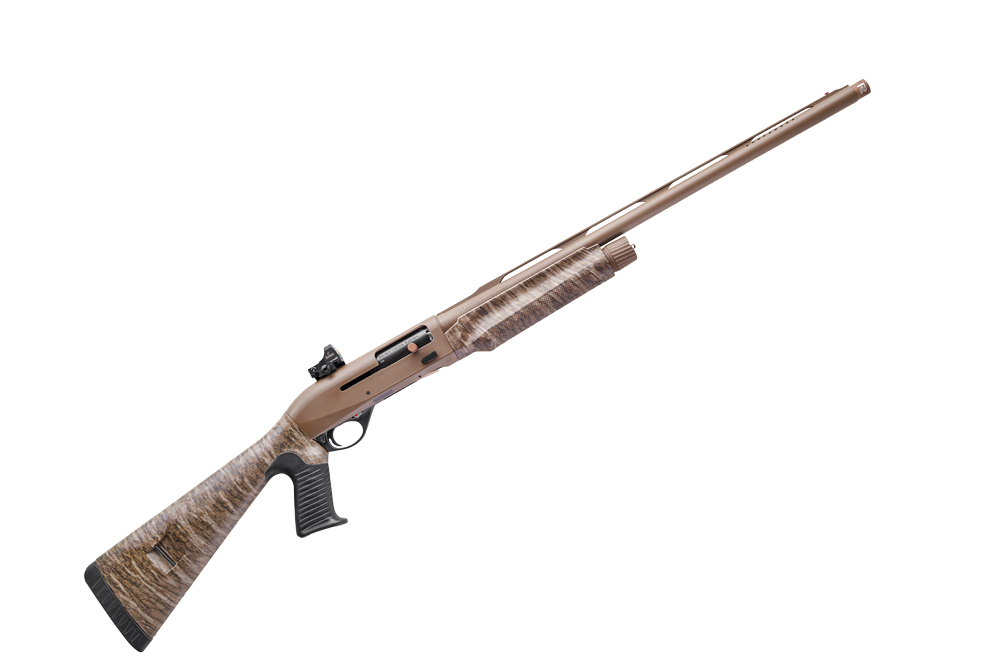 The Benelli Performance Shop M2 Turkey Edition, on the other hand, represents an ideal scattergun for taking down toms. Featuring Performance Shop enhancements from Rob Roberts, a key figure in shot pattern development, the M2 Turkey Edition is everything a hunter could ask for in a turkey gun.
Offered in both 12- and 20-gauge configurations, the Performance Shop M2 Turkey Edition sports a 24-inch, EDM-ported Crio barrel and a Burris FastFire II red dot sight pattern tested using Federal Premium ammunition. In its 12-gauge variation, the gun wears a Patriot Brown Cerakote finish and comes with a ComforTech field stock and SteadyGrip stock decked out in Mossy Oak Bottomlands camo. Meanwhile, the 20-gauge variant has a ComforTech field stock, and the stock, receiver and barrel are finished in Realtree APG. Both feature a lengthened forcing cone, one custom XFT extended choke and five standard Benelli chokes. Prices for the M2 Turkey Edition are $3,399 for the 12 gauge and $2,599 for the 20 gauge.
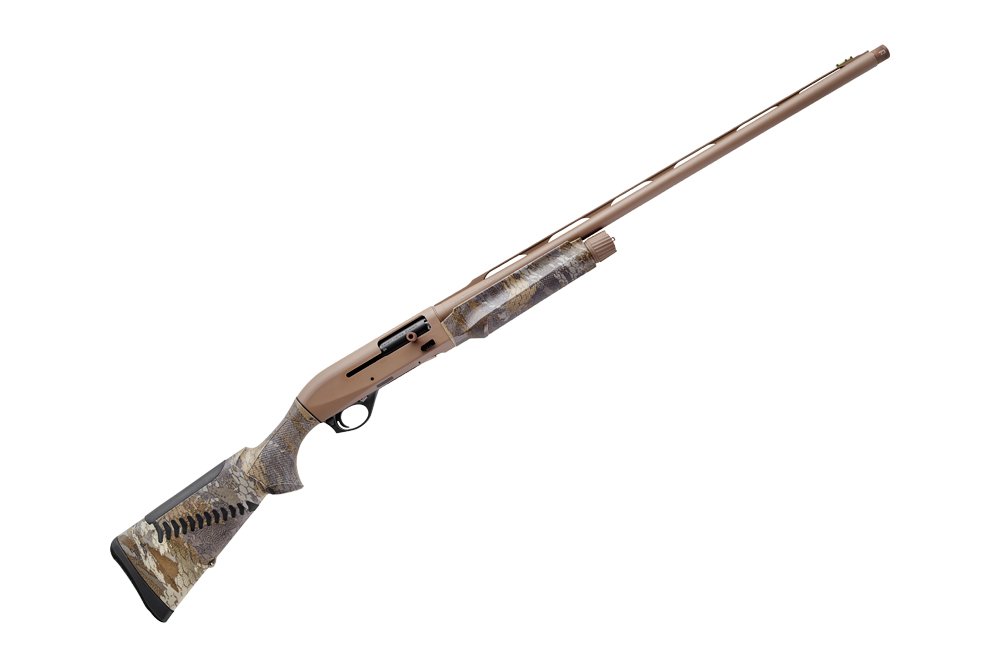 The last new Benelli Performance Shop model is also built off the base M2; however, this one is built completely with waterfowlers in mind. The new Performance Shop M2 Waterfowl Edition takes Benelli’s already time-and-field-proven M2 in both 12 and 20 gauge with a 28-inch barrel and adds custom upgrades such as a honed and polished action, a custom-tuned trigger group, three Rob Roberts Triple Threat chokes, a lengthened and polished forcing cone, a HIVIZ Comp front sight, an oversized bolt handle and enlarged bolt release, and a paracord survival sling.
The 12-gauge version of the M2 Waterfowl Edition utilizes a ComforTech stock dipped in GORE OPTIFADE Waterfowl Timber and Texas Tan Cerakote finish. The 20-gauge variant has a ComforTech stock but wears a Realtree MAX-5 finish. Prices for the new Performance Shop M2 Waterfowl Edition are $2,699 for the 12 gauge and $2,399 for the 20 gauge.
Specifications:
 Benelli Performance Shop Ultra Light Upland
Type: Semi-auto
Gauge: 12, 20
Chambering: 2 3/4, 3 in.
Capacity: 2+1
Barrel: 26 in. (12 gauge), 24 in. (20 gauge)
Stock: Satin Walnut with WeatherCoat
Finish: Burnt Bronze Cerakote
Overall Length: 47.5 in. (12 gauge), 45.6 in. (20 gauge)
Weight: 6.1 lbs. (12 gauge), 5.2 lbs. (20 gauge)
Length of Pull: 14 1/8 in.
Drop at Comb: 1 1/2 in.
Drop at Heel: 2 1/2 in.
Sights: HIVIZ Comp front sight and metal mid bead
Choke Tubes: Crio – C, IC, M – Rob Roberts Custom Triple Threat
Price: $2,799
Manufacturer: Benelli USA
 Benelli Performance Shop M2 Turkey Edition
Type: Semi-auto
Gauge: 12, 20
Chambering: 2 3/4, 3 in.
Capacity: 3+1
Barrel: 24 in.
Stock: ComforTech and SteadyGrip Buttstocks/Mossy Oak Bottomland (12 gauge), ComforTech/Realtree APG (20 gauge)
Finish: Patriot Brown Cerakote (12 gauge), Realtree APG (20 gauge)
Overall Length: 45.5 in. (12 gauge), 45.3 in. (20 gauge)
Weight: 7 lbs. (12 gauge), 6.2 lbs. (20 gauge)
Length of Pull: 14 3/8 in.
Drop at Comb: 1 3/8 in.
Drop at Heel: 2 3/8 in.
Sights: Burris FastFire II
Choke Tubes: Custom XFT Extended Choke, 5 standard Benelli (C, IC, M, IM, F)
Price: $3,399 (12 gauge), $2,599 (20 gauge)
Manufacturer: Benelli USA
 Benelli Performance Shop M2 Waterfowl Edition
Type: Semi-auto
Gauge: 12, 20
Chambering: 2 3/4, 3 in.
Capacity: 3+1
Barrel: 28 in.
Stock: ComforTech/OPTIFADE Waterfowl Timber (12 gauge), ComforTech/Realtree MAX-5 (20 gauge)
Finish: Texas Tan Cerakote (12 gauge), Realtree MAX-5 (20 gauge)
Overall Length: 49.5 in. (12 gauge), 49.3 in. (20 gauge)
Weight: 7.2 lbs. (12 gauge), 5.9 lbs. (20 gauge)
Length of Pull: 14 3/8 in.
Drop at Comb: 1 3/8 in.
Drop at Heel: 2 3/8 in.
Sights: HIVIZ Comp front sight and metal mid bead
Choke Tubes: 3 – Rob Roberts Custom Triple Threat
Price: $2,699 (12 gauge), $2,399 (20 gauge)
Manufacturer: Benelli USA