From the “shot heard around the world” to the decisive victory at Yorktown, America was forged to the sound of musket volley. While some of the firearms used in the American Revolution still capture the imagination and stir the heart, there are some that over time have slipped into the shadows of history. We aim to wake the ghosts from Concord, Trenton and Saratoga with the five guns you need to know from this definitive moment in time.
British Land Pattern Musket
While the American Revolution had more storied firearms, this .75-caliber smoothbore was the workhorse in founding the nation and trying to prevent its foundation. Better known today as the “Brown Bess,” the muzzle-loading flintlock was the most common arm of the war, utilized heavily by both sides of the conflict.
The musket was British in origin and came about during an era when armies began to standardize their firearms. And it was common among the Colonists before the war, who were mandated by the crown to be armed for their own defense. The reliable long gun also had an extensive history, serving the British Army from 1722 through to 1838 and even showing up in later American conflicts, such as the Mexican-American War.
Bess was fairly accurate compared to other muskets of the time, but by today’s standards it would be considered laughably imprecise. By one estimate, less than a quarter of the shots fired by a soldier reached their intended targets. It pays to rifle a bore.
Tactically speaking, Bess was never intended to send a single lead ball at an individual target. Like all muskets, it was fired en mass at opposing forces with volume making up for inaccuracy.
Volume of fire was the reason why the musket was the preferred military long gun of the day. The smoothbore allowed for quick loading — particularly since it was typical to use balls smaller than the bore. By most accounts, a trained solider could get off three aimed shots with the musket in a minute, maybe four if he was steady of nerve and quick with his ram rod.
American Long Rifle
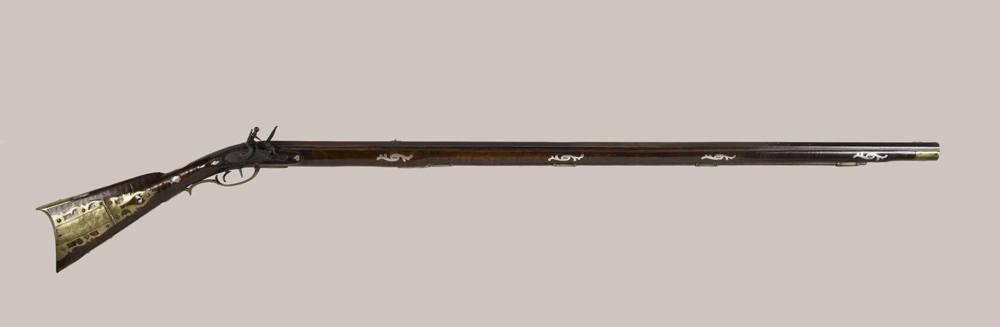
Perhaps no single muzzleloader stirs the American imagination more than the American Long Rifle. Just the mention of what’s better known now as the Kentucky Rifle conjures up images of Colonists picking off Red Coats at distance.
The accurate flintlock did play that role in America’s struggle for independence, perhaps most notably in the Battle of Kings Mountain and Battle of Saratoga. But overall its part was small compared to that of the musket. Typically, it was found in the hands of patriot militia, designated snipers or light infantry units.
Despite extending a soldier’s effective range past 200 yards, accurately mind you, it has a couple of gaping holes that stymied wider adoption as a battle rifle. Compared to muskets, the .40- to .50-caliber rifles were more difficult and time consuming to load, due to the patch, powder and ball all being separate. The grooves could foul after a number of shots and would require cleaning to regain accuracy. And they were incompatible with bayonets, which made a rifleman turn to his knife or tomahawk — undesirably so — upon an infantry charge.
Nevertheless, the American Long Rifle did enough damage during the American Revolution to earn a place in the Nation’s heart and mythology.
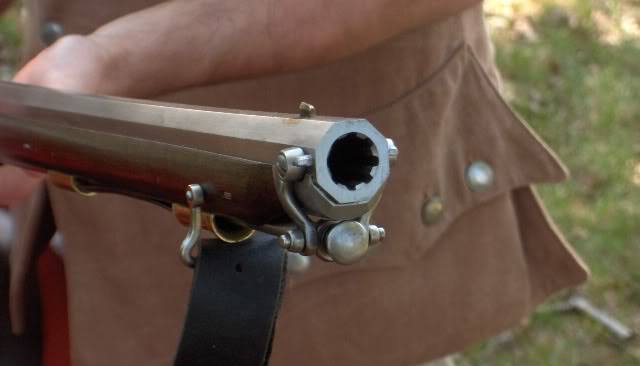
Despite only 1,000 being built for the British Army, this flintlock rifle did see a fair share of action. They were issued to light companies of each regiment, as well as the Queen’s Rangers, and were likely present at most battles in the war. The “turncoat” rifle also shows the impact the American Long Rifle had on the war, with the 1776 being ordered to counter Colonist marksmen.
Designed by William Grice, and manufactured in Germany, the rifle (like the American Long Rifle) was patterned after the German Jäger rifle. Like the American Long Rifle, the Pattern 1776 vastly extended the range of a British soldier, who would could hit a target 200 yards out with the muzzle-loader. The .62-caliber rifles had a swamped octagon barrel 30 inches long and a hooked breech, but did not have a raised cheekpiece like the Jäger.
As a sidenote, if you have a Pattern 1776 hidden up in your attic, take care of it. Given the limited original stock, it is a extremely rare firearm — only nine are known of today.
Ferguson Rifle
Of all the firearms on this list, the Ferguson Rifle saw the least amount of action in the American Revolution. Lucky for us Yanks.
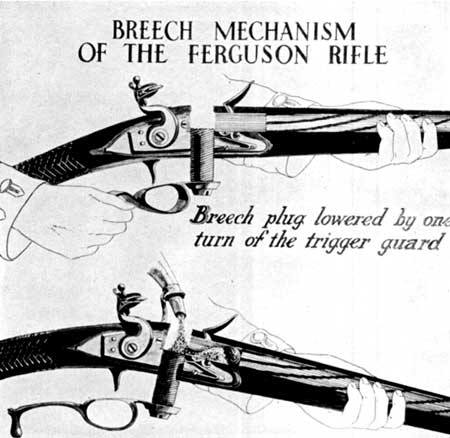
Designed by Major Patrick Ferguson, it was the first breech-loading rifle adopted by any military. While not the first breech-loader of its time, it had a major advantage over its contemporaries. It took one revolution of the .65-caliber’s trigger guard to open the breech, where similar firearms took 11.
This design feature made for an extremely fast-firing and accurate firearm. It could pitch up to six shots per minute to a musket’s three or four. Not to mention it was much more accurate fire, given the Ferguson’s rifling; it could hit a target at 200 yards and a bullseye at 100. Also of note, the rifle could be fired and reloaded from the prone position, as compared to muzzleloaders.
But outside of an experimental military unit formed and led by Ferguson, later disbanded during the war, the rifle saw little action in the American Revolution. It had an inauspicious debut in the Battle of Brandywine, with Ferguson’s rifle corps taking heavy losses.
Its initial performance, however, wasn’t what did the rifle in. It was never adopted because of the manufacturing intricacies and cost, thankfully. With time to master the weapon and put it into wide use, the British had what looks to be a potential game-changer in their hands.
Charleville Musket
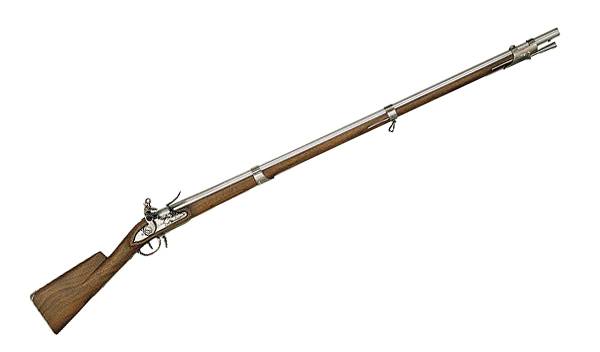
The primary arm of the French Army during the American Revolution, the Yanks also got behind the business end of the Charleville. The long gun is more correctly called the French Infantry or Pattern Musket. But Charleville stuck, since it was manufactured at the French armory in Charleville-Mézières, Ardennes.
The musket was .69 caliber, and performed like most of its compatriots of the time — fairly inaccurately. That’s the breaks of being a smoothbore. But it was considered by some to be superior to the Brown Bess, simply because it was slightly smaller, thus lighter than the British Musket — a function of its smaller caliber. But, honestly, who’s counting ounces on firearms that weigh in at or near 10 pounds?
The Colonists received a total of 48,000 of the Model 1760 Charleville for their struggle against the British.
The Remington 870 pump action has been used as a standard police model for decades. But as good as this gun is, it can always be improved by the application of aftermarket parts and the ingenuity of a custom gunsmith.
Setting up a Remington 870 shotgun for defense is easier than you may think. Keep in mind that this gun can also be used in 3-Gun competition in the Heavy Metal Division, where the only firearms allowed are 12-gauge pump shotguns, .308 rifles and .45 ACP handguns.
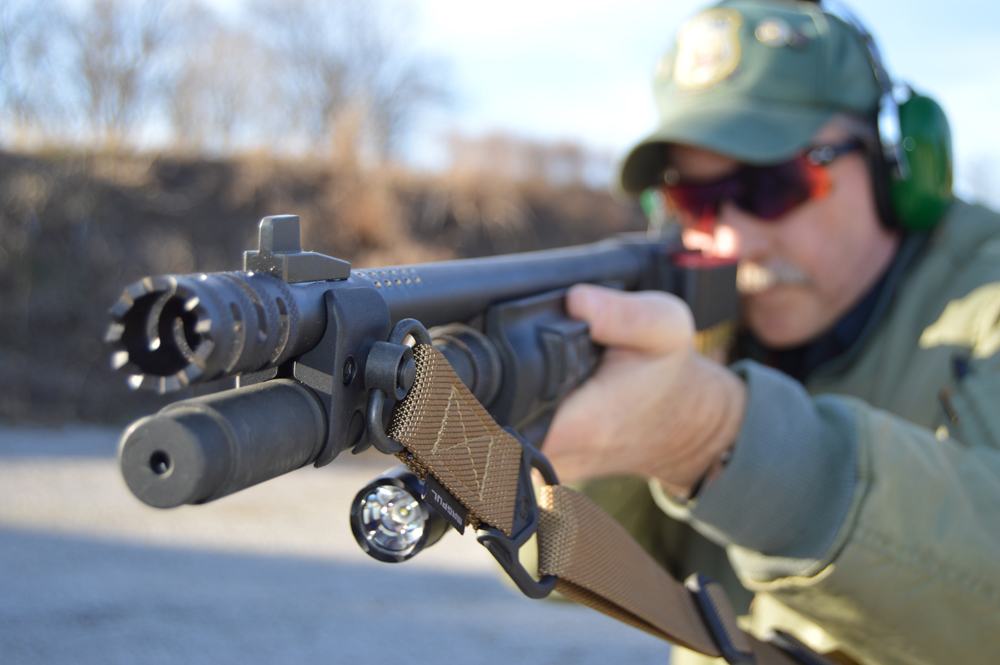
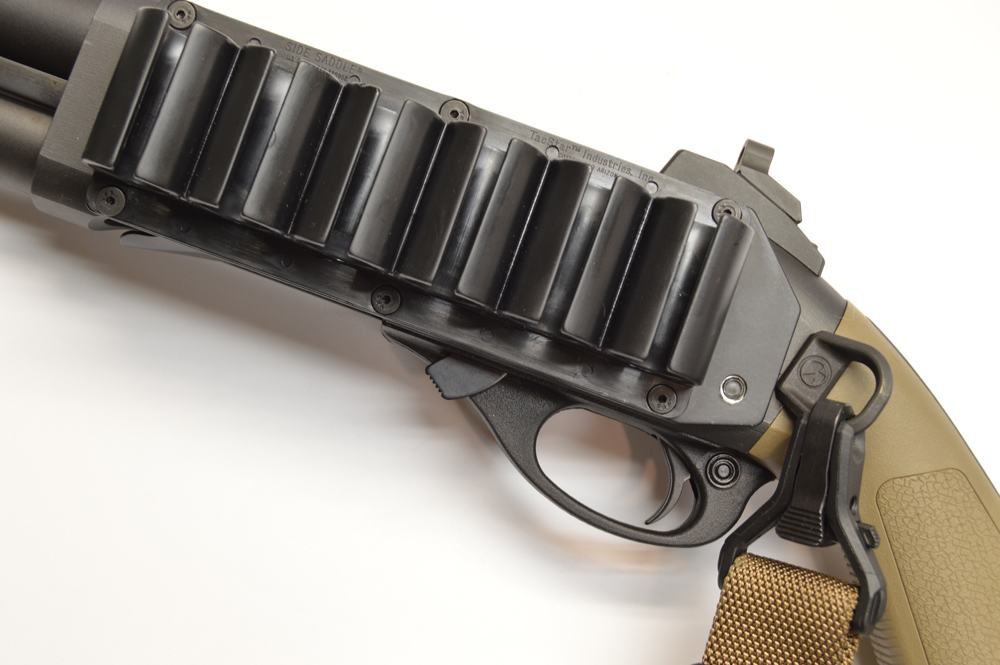
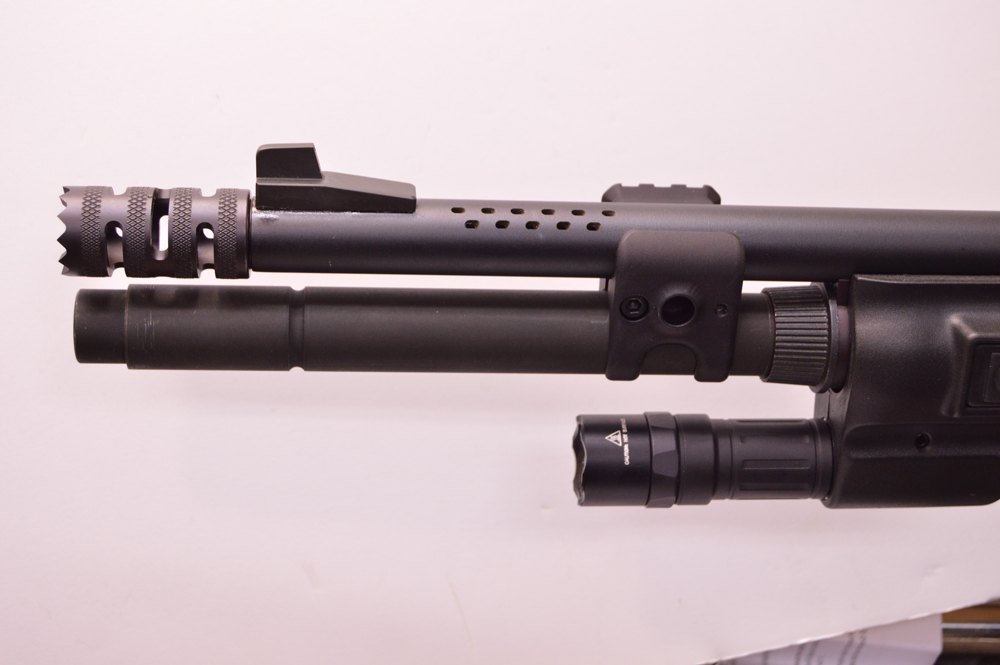
For the project shotgun, I selected the Scattergun Technologies ghost ring sights with tritium inserts, a sidesaddle shell carrier, Timney sear, Vang systems oversized safety button, Magpul buttstock with spacer system and raised cheekpiece and a Surefire 6V tactical forend light. I also selected a Trulock tactical breacher combination muzzle brake and stand-off, an extended magazine tube, Kick-Eez recoil pad and opted to Mag-na-port the barrel and add a Blackhawk! sling.
Since the rear sight on this gun has to be precisely located, I sent the gun off to Accurate Plating to have them drill and tap the rear sight holes on their milling machine. This could be performed on a drill press, but it can get a little tricky, especially with a small bench drill press.
Upgrading The Trigger Group
Once the receiver came back, I turned to the trigger group. I wanted to install the excellent Timney sear unit, which comes with three sear springs to set the trigger pull to the weight desired. I chose the mid-weight spring for a trigger pull of about 3 pounds.
To install the trigger, drive out the two trigger group retaining pins, and lift out the trigger group. Compress and lift out the sear spring, and remove the shell lifter by disengaging the c-clip and pushing out the lifter retaining pin.
Be careful to retain the carrier dog and spring. Then drive out the sear retaining pin.
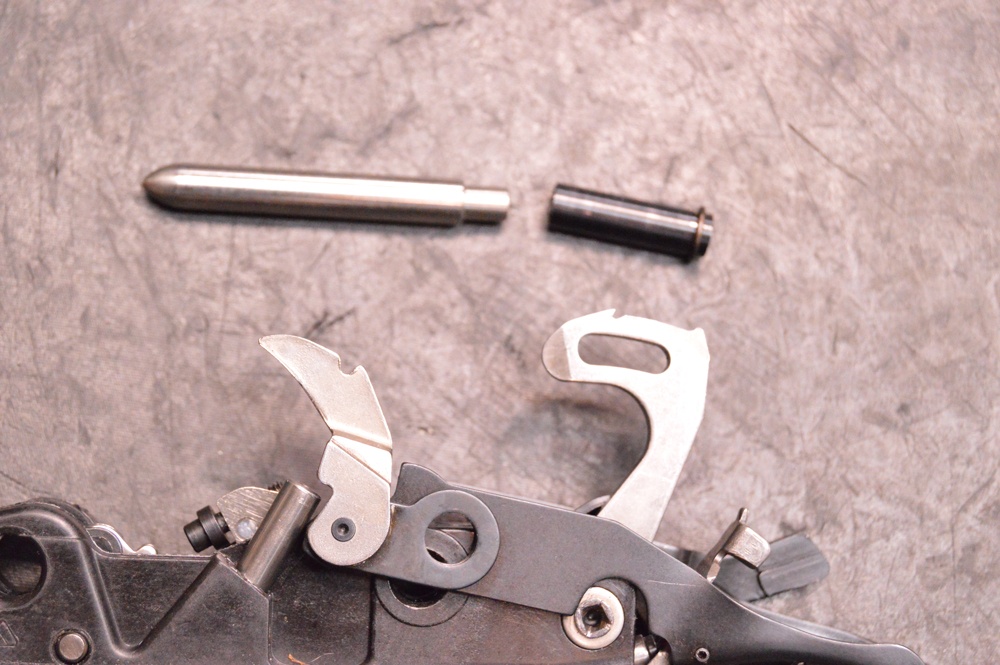
Replace the sear with the Timney unit, and press in the sear retaining pin. Then, using the Silver Bullet, press in the large carrier retaining pin, and replace the c-clip.
Replacing the safety is a simple matter of pushing out the retaining pin and safety, inserting the new safety and replacing the retaining pin. Be careful not to lose the spring and detent. Note that the Timney sear has a set screw that allows for small adjustment in the trigger pull weight once installed.
The sidesaddle shell carrier, ghost ring rear sight and Magpul sling attachment are essential Model 870 upgrades.
Barrel and Front Sight Modifications
To modify the barrel, I opted to lengthen the forcing cone, and install a Rem Choke system so I could install the breacher muzzle brake. I first installed the Scattergun Technologies front sight, which is accomplished by mixing the included epoxy, degreasing the front sight and front sight base on the barrel after removing the front sight bead.
Apply the epoxy, wipe off the excess, and secure with a rubber band. Let it set overnight and you’re done.
Next ream the choke for the choke tube, and lengthen the forcing cone. Lengthening the forcing cone is a very common modification among shotgun competitors to reduce recoil.
Factory forcing cones have a fairly sharp angle from the chamber to the bore, which makes the shot column slam into the forcing cone when the gun is fired. The shot column slows down when it hits this sharp angle, increasing recoil force against the shooter.
Lengthening the forcing cone allows the shot column to transition from the chamber to the bore gradually. This operation can be performed by hand with a spiral flute forcing cone reamer and a tap handle, with a little cutting oil. The job should only take about 30 minutes. Flush out the chips and oil and you’re done.
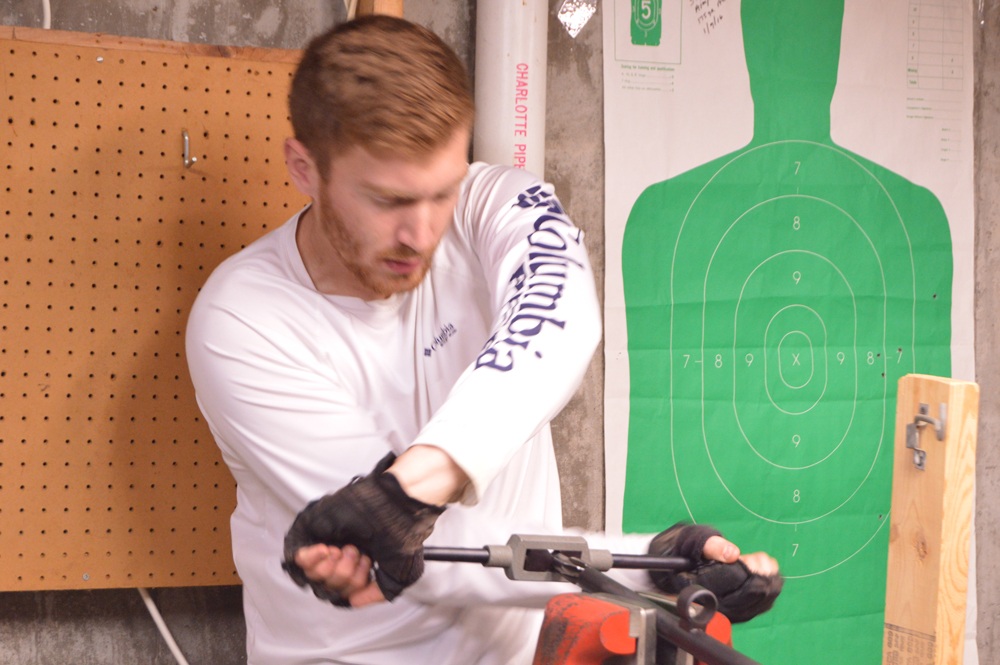
Installing the Rem Choke is a little more difficult. This operation should really be done with a lathe or a floor-mounted drill press. Since this book is about projects for the home hobbyist, I reamed the choke by hand and it took about 13 hours, whereas if I would have reamed it on a lathe, it should only take about an hour.
Ream the barrel until the rear shoulder of the reamer butts up against the face of the barrel. There are calculations that need to be performed in older barrels or barrels of questionable thickness prior to any choke reaming. Be absolutely certain the barrel has sufficient wall thickness before you do any type of choke work.
The Timney sear is a great addition. The Silver Bullet is used to replace the carrier retaining pin. Don’t lose the c-clips or the carrier dog spring.
When performing an installation of screw-in choke tubes on shotguns, and machining the barrel to accept screw-in chokes, measure the outside diameter (O.D.) with a micrometer to determine if there will be sufficient wall thickness after machining. Measure the O.D. of the barrel and the O.D. of the tap for the particular gauge.
Subtract the O.D. of the tap from that of the barrel, divide by 2, and this will give the wall thickness after machining, providing the O.D. of the barrel is concentric with the inside diameter (I.D.). A sample calculation appears below.
Barrel O.D. (12 Gauge)
Tap O.D. (12 Gauge) Win-Choke™
.850-.814=.036 / 2 = .018 Wall Thickness – Anything thinner than .015 wall thickness is not a candidate for screw-in chokes.
Since this is a new Remington 870 shotgun barrel, I knew it was of sufficient thickness for screw-in Rem chokes, but always measure just to be sure before proceeding. Without sufficient wall thickness the end of the barrel could blow out when the gun is fired, causing injury or death.
Before you start to ream the barrel, install the pilot onto the reamer. There are different sizes of pilots, so pick the one that gives the best fit.
Ream the muzzle until the rear shoulder of the reamer just touches the face of the barrel, then — using the same pilot — tap the threads for the breacher. The reamer has two steps, so make sure you understand that the shoulder of the reamer is the rear, or second shoulder, and ream all the way to the rear of the reamer.
Carefully follow the instructions provided by the reamer manufacturer. If performed incorrectly, the barrel muzzle can burst on the first shot due to the choke serving as an obstruction in the bore.
Again, if you are unsure of how to do this, take your gun to a qualified gunsmith and have them install your choke tube.
The breacher, also known as a stand-off, allows you to breach doors — you can press the end of the breacher against the door lock or door hinge, or both, and blow them off using a special breaching round. Fun stuff. The teeth keep the breacher from slipping off the door, and the cutouts serve as a muzzle brake to safely vent the gas sideways.
The choke reamer is used by hand, with some extra muscle from the author’s son. This job should really be done in a lathe, but can be done by hand. Once properly reamed, the tap is used to cut the threads
One caveat with the use of the breacher: Right now, the shotgun has an extended magazine tube that reaches almost to the end of the muzzle. This will make it a little difficult to effectively use the breacher the way it’s supposed to be used.
Since this gun is my house gun, I can leave it like that since I won’t be blowing off locks and hinges in my house anytime soon, and I want the extra rounds that the longer magazine extension provides, but if it were a dedicated breaching shotgun, I would install the shorter, two-shot magazine extension to make sure there was clearance for the breacher to make contact with door hinges without the magazine tube also hitting the door.
Stock And Forend Customizations
After installing the front sight and breacher, turn your attention to the buttstock and forend. There is a special tool to remove the forend retaining ring. Once that’s removed, you can install the Surefire tactical light onto the forend hanger and screw the ring nut down.
Put a small amount of blue Loctite to make sure the forend retaining ring doesn’t loosen up with firing. A steady diet of slugs and buckshot through the gun will generate a significant amount of recoil, and the Loctite will keep the retaining ring in place, but will also allow it to be removed later if needed.
In order to install the extended magazine tube, remove the stop pressed into the tube by the factory. This stop limits the number of shells that can be loaded into the tube.
Brownells sells two tools that can remove this detent: a dent raiser, and a magazine tube swage that both work great. I used the swage to remove the limiter in my firearm. Be sure that the limiter is completely removed, and that by using the swage, it doesn’t raise material on the outside of the tube and cause the forend to bind when cycling the action.
Usually, the swage will raise a small amount of material on the outside of the magazine tube; always check for this. I had to file the outside of the tube, and used my Foredom with a 120-grit sanding drum on the inside of the tube to eliminate the stop completely from both the outside and inside of the magazine tube.
Once removed, install the shell follower, and check to see if it binds around the area of the magazine limiter you just removed. Consider using the fluorescent shell followers that have bright visibility, telling you if the gun is empty.
The breacher, Scattergun Technologies sights, Mag-na-porting, elongated forcing cone, long mag tube and the Surefire light are all installed.
Next up is installing the buttstock and fitting the Kick-Eez recoil pad. Remove the old recoil pad, which will expose the buttstock mounting bolt. Remove the buttstock, and install the Magpul sling attachment, then the Magpul buttstock.
This model has a separate raised cheekpiece that can be added. It’s an important detail because the Scattergun ghost ring sight forces the head a little higher, and the cheekpiece comes in handy to get a good cheek weld when firing the gun, especially with harder kicking rounds.
The buttstock also has a spacer system to adjust the length of pull. Since I’m taller than six foot, with fairly long arms, I installed a couple of the spacers.
The Kick-Eez pad is ground and fitted as covered in the rifle section of the book. Once mounted, the buttstock installation is complete.
Install the bolt assembly and forend back into the gun, along with the barrel. Reinstall the trigger group, and with the cross bolts provided, install the sidesaddle shell carrier onto the side of the receiver.
Install the extended magazine spring into the magazine tube, and screw on the extended mag tube. I used a clamp by Blackhawk Industries that secures the extended tube to the barrel, and also provides a sling mounting point on one side, and a Picatinny rail on the other. I opted to install a two-point Blackhawk sling. Cycle the gun with dummy rounds about a dozen times, and then it’s time to go to the range.
Testing The Customized Remington 870
The combination of muzzle brake, Mag-na-porting, long forcing cones and the Kick-Eez recoil pad makes for the softest-recoiling 870 shotgun I’ve ever shot. My son and I shot the gun with a variety of loads, from #7 1/2 birdshot, to #4 buckshot, to 00 buckshot and Federal slugs in 3-inch shells.
All of them were easy to shoot, and the combination of the light, crisp trigger, Scattergun Tech ghost ring sights, and the Magpul stock made for a quick-pointing, fast shooting gun.
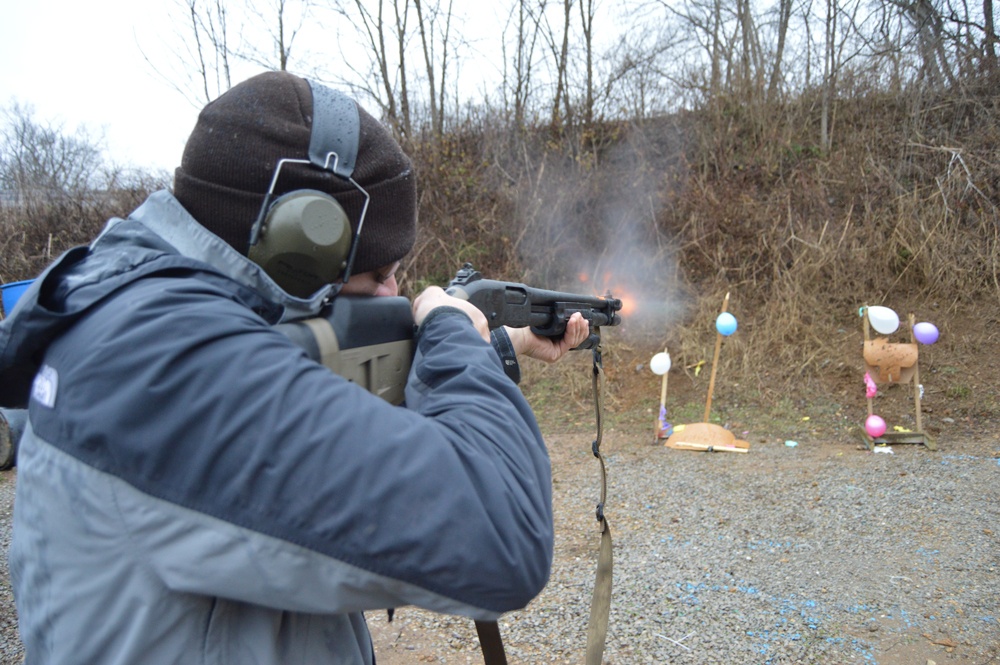
Firing the 870 shows how the porting and muzzle brake and lengthening the forcing cone is really effective for controlling recoil.
I waited for dusk to see if I could see some flame escaping from the barrel ports and the muzzle brake of the upgraded Model 870. I was not disappointed. The Mag-na-porting and the muzzle brake work to redirect the gas, softening and controlling recoil.
The Surefire light was very effective in lighting up targets at dusk. The light has a momentary pressure switch and a permanent on-off switch as well. This shotgun is now ready for tactical, home defense or 3-Gun competition.
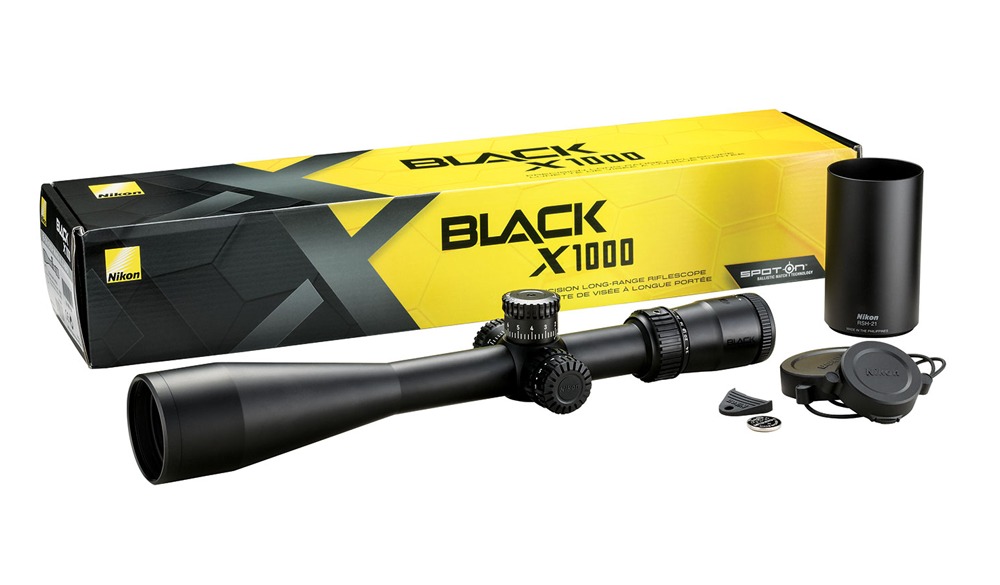
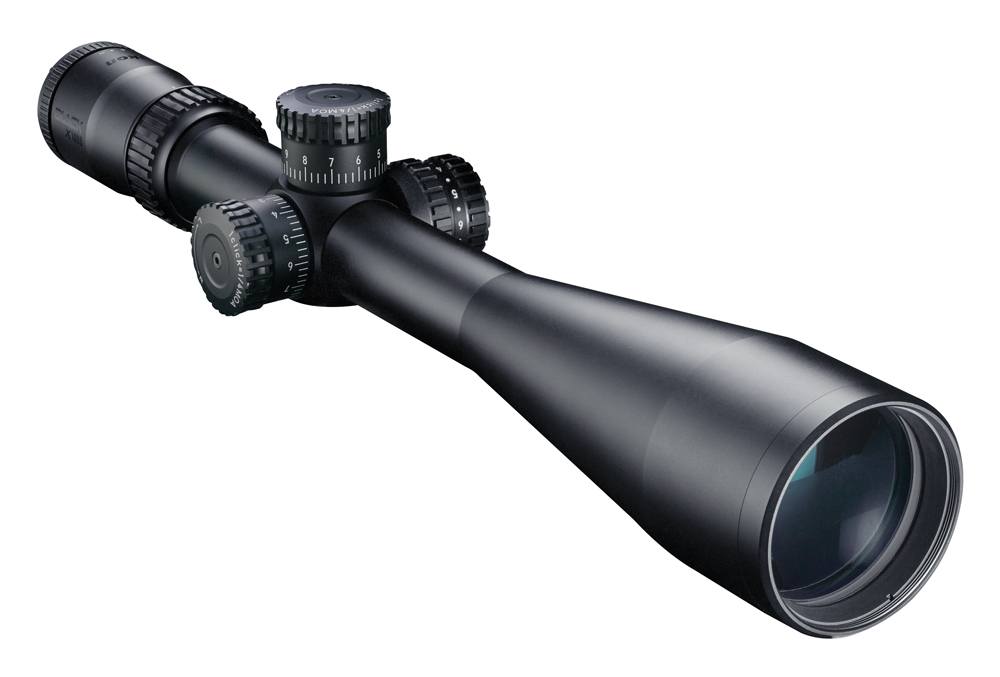
Economically priced and long on features, Nikon’s 6-24x50SF BLACK X1000 IL X-MOA riflescope looks to be an on-target long-range optic.
Whether it’s a precision shooting competition or just banging a steel gong from the next zip code, the long-range shooting game has never been more popular. Of course, those yearning to tap tacks from 1,000 yards out — heck even more — typically have one giant hurdle to get over: cost.
Red ink flows like a river when you’re talking custom stocks, precision actions and cut-rifled barrels. Heck, even off-the-rack dedicated long-distance rifles have price tags that make most everyday shooters wince like they’re shooting trap with a punt gun. Fortunately, there has been some easing of the pecuniary burdens of shooting a country mile, with some of the bigger manufacturers offering relatively more financially sane options in building a dream precision rifle.
Nikon appears to have just this segment of shooters in its sights with the introduction of the latest addition to its BLACK riflescope series. The 6-24x50SF BLACK X1000 IL X-MOA looks to have the chops to get shooters on target from way out, while not sending them to the marksman’s poorhouse in the process. With an MSRP of $649.95, the scope definitely falls at the affordable end of the long-range market, and it doesn’t look to skimp on features and performance along the way.
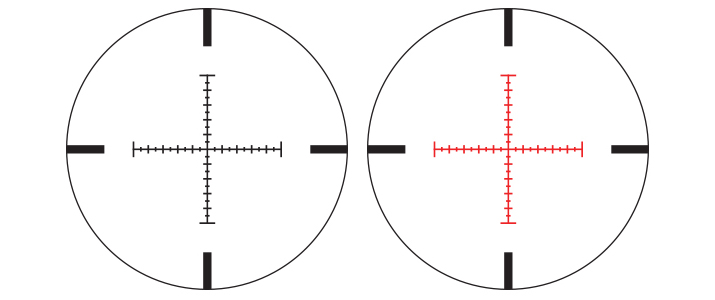
Perhaps the most eye-catching aspect of the BLACK X1000 IL X-MOA scope is its Matte Illuminated X-MOA reticle. The tactical-style reticle has 10 intensities, with an off function between each setting, allowing shooters to adjust to any light conditions.
The .15 MOA crosshairs have five subtensions at 2.0 MOA increments, giving the ability for fast holdover and bullet-drop compensations. However, the reticle is etched on the second focal plane; in turn, accurate ranging and other measurements should be done at a predetermined magnification.
The scope has a total of 60 MOA of adjustments, easily dialed in at ¼ MOA-per-click increments. The scope is reset by simply pulling up on the turret and rotating it to zero. Necessary on a scope destined for long-range work, the BLACK X1000 IL X-MOA also comes with a side parallax adjustment that can be tuned from 50 yards to infinity.
As would be expected on any decent scope, Nikon’s new offering is multi-coated on each lens surface to provide better light transmission. And with a 50mm objective lens, it should provide excellent light gathering capabilities overall, except in the dimmest conditions at the highest magnification. As well, the BLACK X1000 IL X-MOA is ruggedly constructed with a 30mm main body tube made of aircraft-grade aluminum.
The BLACK X1000 IL X-MOA certainly looks to have the bells and whistles to get the job done. And at the same tick, it allows for a little pocket change for ammunition.
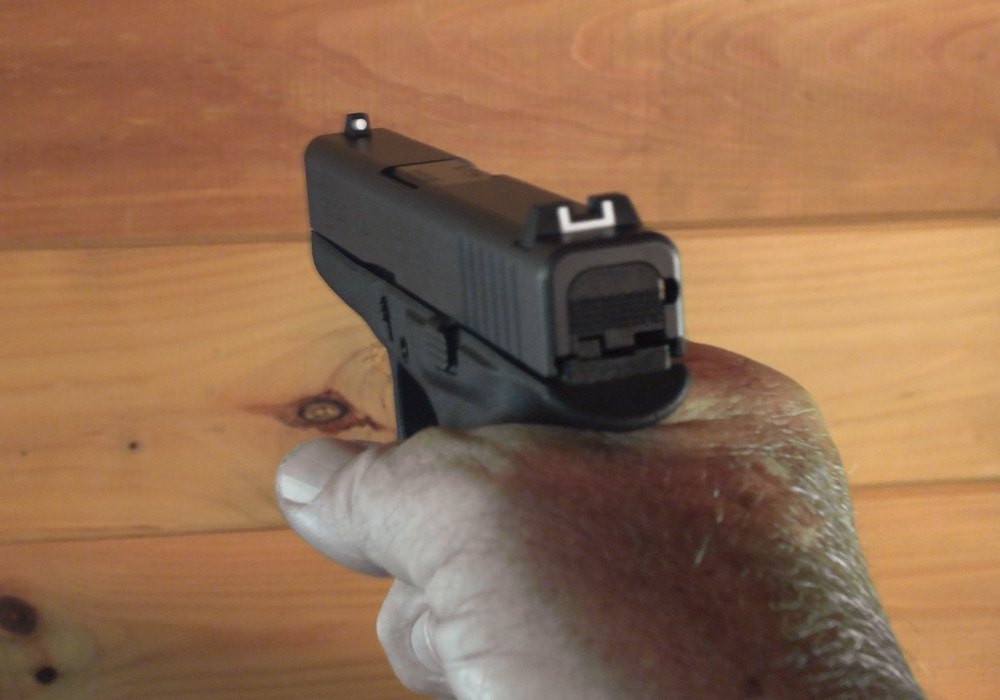
White outline sights offer good visibility even in very low light because they are a bold white shape that catches the eye.
Nothing goes further to ensure you hit center mass than the right sights on your concealed carry handgun. But of all the options, which is the best?
I was in a local gun shop recently when the discussion turned to the viability of lasers for concealed carry guns. One proponent of the laser explained they were the greatest things since sliced bread, something that could allow any novice to shoot like a professional.
The other saw them as the work of the devil, a high-tech contraption that would likely fail at the moment the owner needed it most, leaving the victim standing and staring at a gun that was useless without a laser because it was the only way he could hit a target.
As both a shooting instructor who teaches concealed carry certification and a gun writer, I suffer from a form of double indemnity. For some reason, I seem to get into the center of arguments about what constitutes the best options for concealed carry, and these days this is a hot topic.
Practical Sight Considerations Besides the normal semi-auto versus revolver and high-capacity versus smaller, thinner gun issues, the discussion often turns to sights. After all, the sights are hopefully the only interface between the defender and the assailant.
Before we get too far into the sight issue though, remember that the average distance for a firearm defense occurrence is less than three yards. It should also be remembered that a full extension of the arms to get a proper sight picture at short distance often puts the gun as close to the assailant as it is to the defender.
In really close quarters, extending the arms to get a proper sight picture increases the defender’s level of danger because it can put the gun in easy reach of the attacker. In these situations, conventional sights have no value at all, since they can’t be safely aligned with the eye.
While this obviously leads to thoughts of lasers, lasers shouldn’t be the only viable option available to the concealed carry defender, because lasers are not as effective in bright light conditions. It’s true that 70 percent of defensive situations occur in low light, and green lasers are much more effective in bright light, but conventional sights on a defensive gun shouldn’t be discounted. Even if your gun has a laser, you should do most of your practice with the iron sights.
Lasers are electronic devices, as is the computer I’m writing this on. If your computer never gives you problems, you’ll probably never have a problem with a laser sight because they’re hundreds of times more reliable than my laptop. Still, there’s the potential for the unit to fail or have the light blocked by debris, or for you to fail to properly maintain the batteries.
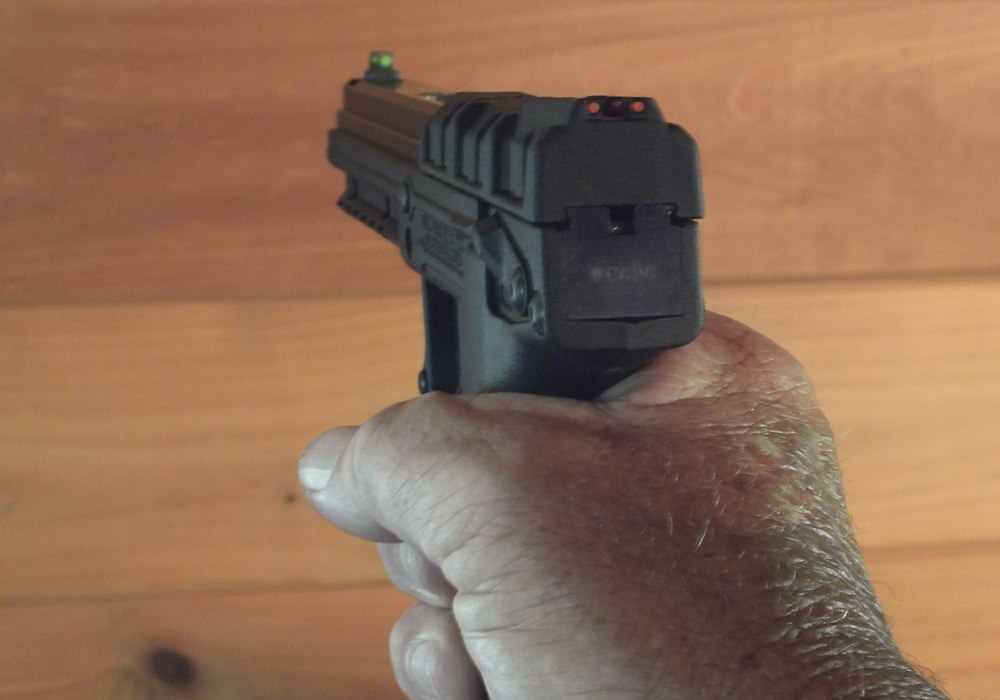
Standard sights on many carry guns involve a simple groove milled across the top of the gun and a ramp front sight at the front. Systems like this are snag-free, a benefit with carry guns that are often in close proximity with clothing.
Comparing Irons Considering the less high-tech methods of sighting a defensive handgun, there are compromises to be made. Good sights that are easy to see and maintain an excellent sight picture are always large.
Large sights don’t generally work well on concealed carry guns because they increase the gun’s profile and increase the chance of snagging on clothing or carry devices. Small, easily concealed sights carry well, but are difficult to see in less-than-optimal light conditions.
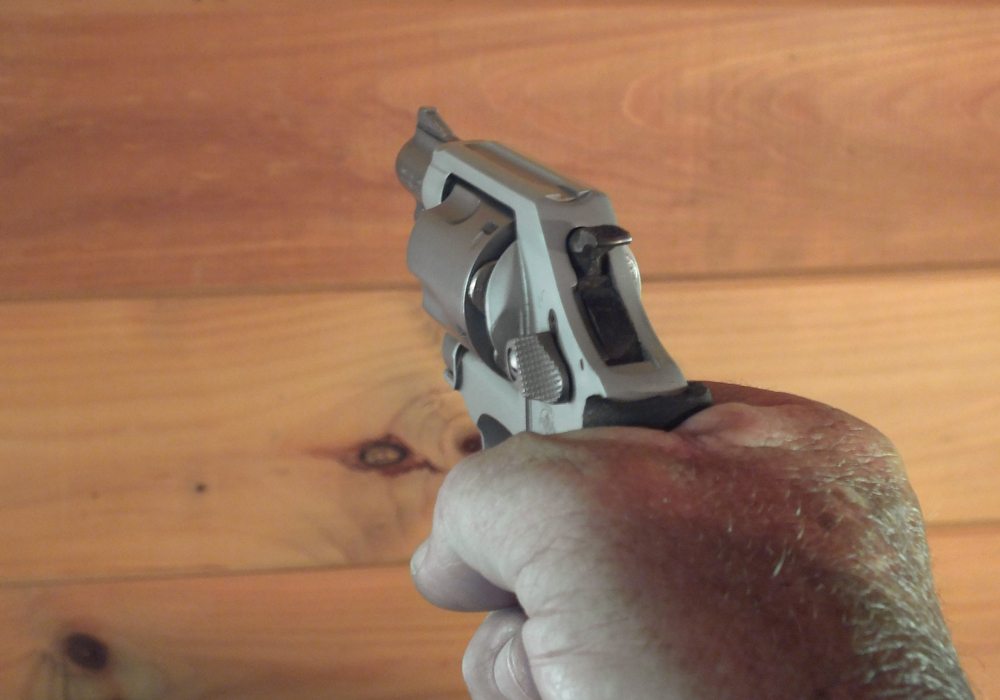
The most unobtrusive sight system for a small gun is a simple trench milled the length of the slide or topstrap. This is the prevailing system for small revolvers as a rear sight; it’s normally paired with a ramp front sight, and it works quite well.
In my Concealed Carry Brushup classes, where all the shooting is done at ranges shorter than seven yards, I like to stop the class if a fly or bee lands on a target. I then use my personal carry gun to shoot the fly.
If it’s less than five yards, I’m almost always successful. Even if I miss at seven yards, the shot is so close the impression remains. You can shoot very well with crude sights if you focus on the front sight and get good sight alignment.
Unfortunately, sometimes point-of-aim and point-of-impact don’t agree, and there are few options when this happens with fixed sights. If a gun has fixed sights and doesn’t shoot where you point it, you have to decide if you’re willing to live with it, but remember; almost all concealed carry defense situations happen within seven yards.
There are some excellent small revolvers with adjustable sights available, but they may not fit your requirements for concealability. There are-high visibility options on some small revolvers, and they have merit. The hi-vis options offer a gain in visibility, but often there’s a slight loss in concealability.
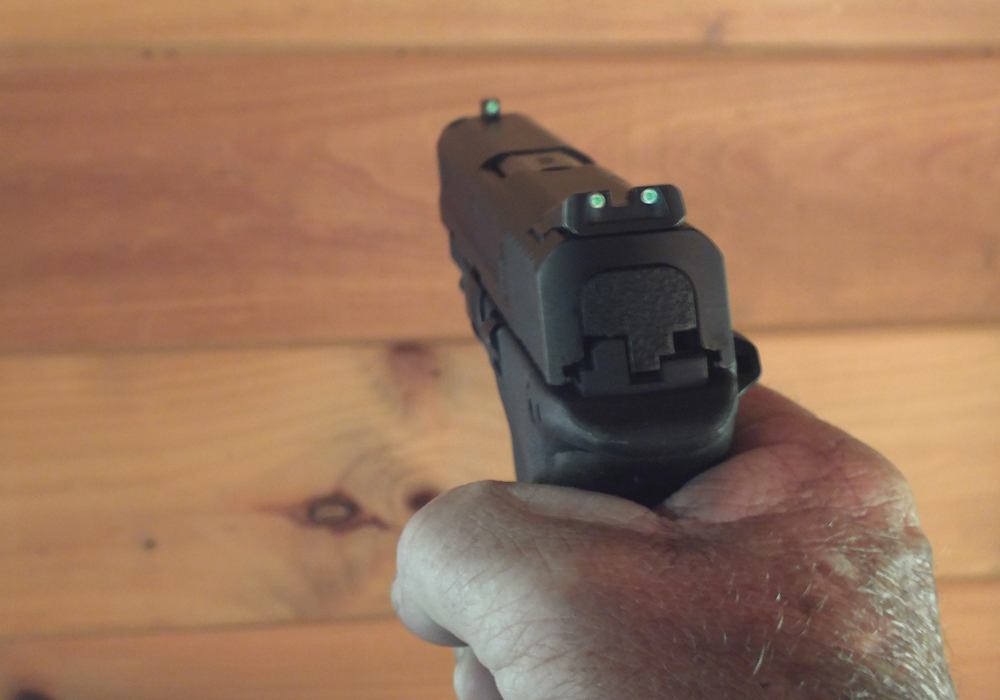
Tritium sights actually glow in the dark, showing up in total darkness. In moderately low-light situations they have little advantage if any, over simple white outline sights.
While I don’t like white outline or dot sights for competition, I like them for defense guns. Competition is generally done in good light, at targets with excellent contrast.
Defensive situations rarely offer these luxuries. Bright white outlines show up in low light and can allow a better sight picture. For guns with dovetailed sight mounting, aftermarket options also include both fiber optic and tritium replacement sights at a very reasonable cost. Fiber optic sights gather light to increase sight visibility.
Tritium sights contain a small amount of tritium. The electrons emitted by the radioactive decay of the tritium cause phosphor to glow, thus providing a long-lasting (several years) and non-battery-powered firearms sight that’s visible in dim lighting conditions. Under bright light, white outline, dot sights and fiber optic sights show brighter than tritium, but under very low light tritium has an advantage, even showing up in total darkness when white or fiber optic sights would be invisible.
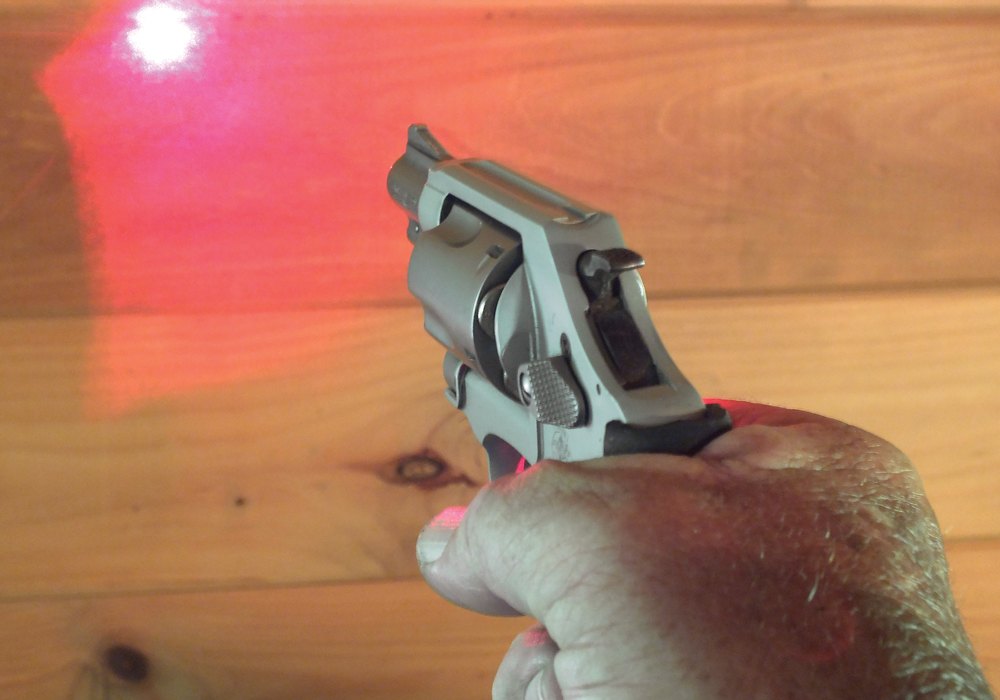
Laser Sights Of course, the other options that work really well in low light are laser sighting systems. My reaction when I first saw lasers was skepticism because I imagined they were a total replacement for standard sights.
For life-and-death situations, I don’t like total dependence on anything that runs on a battery. I have since changed my mind.
While responsible defensive firearms owners need to be able to shoot well with iron sights, a laser offers accurate shooting under the low light that most defensive confrontations involve. They also provide the possibility for accurate shot placement when the defender simply can’t align the sights with his eye because doing so gives the assailant too much access to the gun.
Fiber optic high-visibility sights gather available light to catch the user’s eye. Unfortunately, they do little in really low light situations.
A properly aligned laser can provide a greater level of accuracy than most shooters can muster otherwise. They’re reliable and operate automatically in many cases. There have been arguments that lasers expose the defender to the assailant, but in a very high percentage of defensive situations, the assailant already knows exactly where his victim is. Another argument is that the defender will learn to rely only on the laser and be confused if it fails to operate.
While both are possibilities, the advantages of accurate shot placement under low light, or while the gun is kept close to the shooter, outweigh them. I teach my students to align the laser to shoot just below the point of impact and aim. This prevents them from seeing the laser in practice sessions, yet it’s still there if conditions are bad enough they can’t get proper sight alignment.
I only carry guns equipped with laser grip sights. They are unobtrusive and have no effect on holsters and carry methods.
I use the iron sights in practice and set the laser just under the front sight so I can’t see it in practice. In really low-light situations and in situations where light is low and the shot is rushed, there is nothing better than a laser.
Laser alignment is simple, though the first time might be a bit tricky. After the laser is installed, and everything is correct and tight, focus on a perfect sight picture and move the laser beam to the point of aim at the desired distance. This can be done without shooting the gun, provided the gun shoots where it’s aimed.
Then shoot the gun using the laser to confirm the zero. To check the alignment at any time, simply aim at a point on the target and see if the laser co-witnesses it.
Another thing to remember with lasers is they normally have a substantial offset from the bore. Properly set, a laser sight on a pistol should intersect with the point of impact at about 25 yards.
This will allow accurate shooting beyond that distance yet the difference in point of impact at closer ranges will barely be impacted. With good ammunition and a rest, a carry gun can shoot 3-inch groups at 25 yards using a laser in low light.
In really low light or when there’s no room for an extended sight picture, nothing beats a laser.
There are two primary ways lasers are mounted on handguns. Rail or frame mounts put the laser ahead of the trigger guard, and grip-mounted lasers attach to the gun either as replacement grip panels with the laser and activation button as a part of the grip, or as an over-the-grip unit that wraps around and mounts to polymer-framed integral-grip guns.
When choosing either type, make sure the activation button is easy for you to access. I like the button on the front grip strap because activation is almost automatic, though I can consciously relax my middle finger if I want to leave it off. Rear-mounted activation can be problematic for smaller or thinner hands.
Summary Not only are we blessed with the right to own and carry a firearm in the United States, for the most part, we have the right to choose the firearm we buy and how to accessorize it. Ultimately, no one will argue that a better sight system isn’t an advantage in a defensive situation.
A 27-shot capacity, major-caliber race gun, with a reflex sight would be much better in a gunfight than a small .380, 9mm or .38 Special. A good carbine would be even better, but a race gun or carbine is pretty hard to conceal. The trick is to look at the options, decide where you’re willing to trade off and go with what you like.
My solution for sighting options on my carry guns is to train with iron sights and add a laser sight for low-light conditions. The laser adds little weight or bulk, yet it vastly improves my ability to put the projectile where I want under conditions that are less than desirable.
I know in bright light and with adequate room, a traditional sight picture of iron sights is faster and more effective than a laser. I also know a laser is a much better sighting system in low light. I firmly believe you need to be able to shoot well with iron sights, but I’m a confirmed laser guy for carry guns.
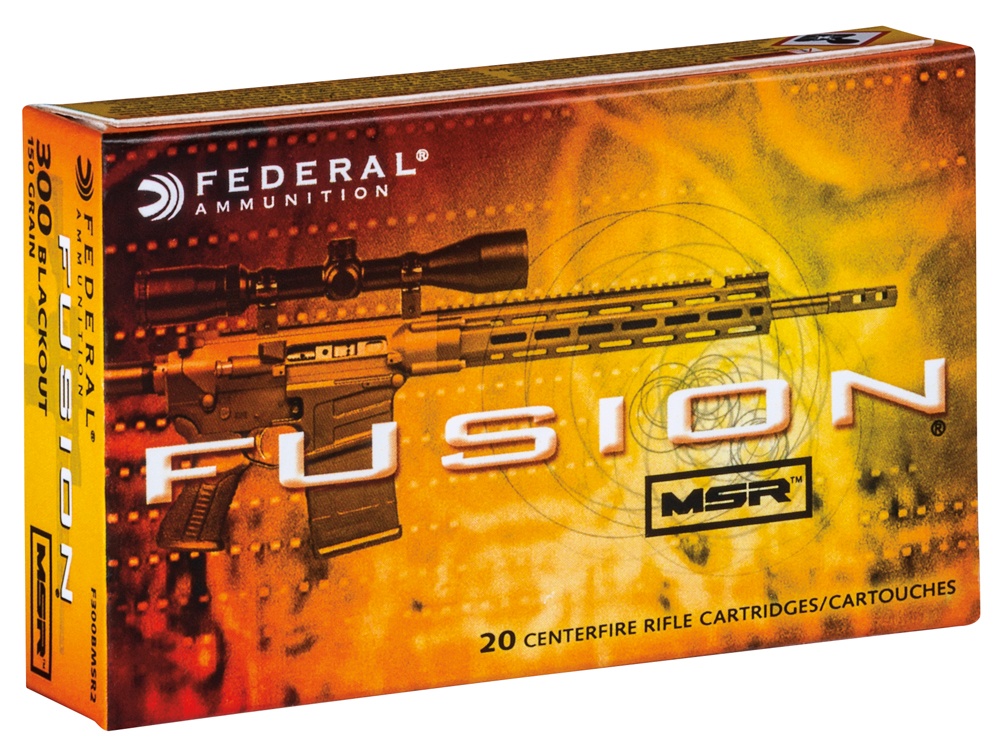
The 150-grain Fusion MSR is Federal Premium’s first hunting-specific round for the .300 Blackout and has everything required to put meat on the table and trophies on the wall.
Once dominated by bolt-action rifles, the deer woods are now filled with a much different style of firearm. More and more hunters have embraced the virtues of AR-style rifles, from their quick follow-up shots to their downright wicked accuracy.
It makes sense then that ammunition makers have responded offering more loads for common AR calibers, each engineered to put meat on the table and trophies on the wall come hunting season. Federal Premium is among the most recent, unveiling a round tailor made for the field in a popular and versatile AR chambering.
The company’s 150-grain Fusion MSR is the first hunting-specific offering for the .300 BLK. And as an added bonus, it has been released in conjunction with an American Eagle target round that is nearly its ballistic twin. This is a nice addition that should make for a bit more affordable tuning up time at the range.
The new Fusion round should offer hunters everything they need to take down deer, hogs and the odd antelope with their .300 BLK. It is loaded to produce more than capable hunting velocities, with its muzzle velocity listed at 1,900 fps at the muzzle. More importantly, it is topped off with a projectile that should ensure an ethical kill on each trigger squeeze.
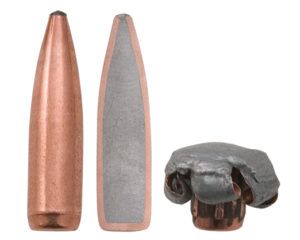
The soft-point bonded-core bullet is designed to retain a maximum of mass upon reaching its target, in turn producing a deeper and more devastating wound channel. On top of that, skiving on the copper jacket ensures full expansion, even as the boat tail’s velocity wanes. This aspect is particularly attractive for the Blackout, given it loses its oomph relatively quickly compared to other .30 calibers due to its demure case capacity
Equally as important as ballistics, at least when it comes to AR-style rifles, is feeding. And Federal has turned a close eye to how its new Blackout round chambers, sizing it to cut down on the likelihood of a misfeed. This should provide peace of mind, given there’s perhaps nothing short of a broken optic that blows a golden opportunity more quickly.
Presently, Federal Premium is offering 20-count boxes of its Fusion MSR in .300 BLK. And, while running more than the average target round, with an MSRP of $25.95, it is a fairly budget-friendly hunting round.
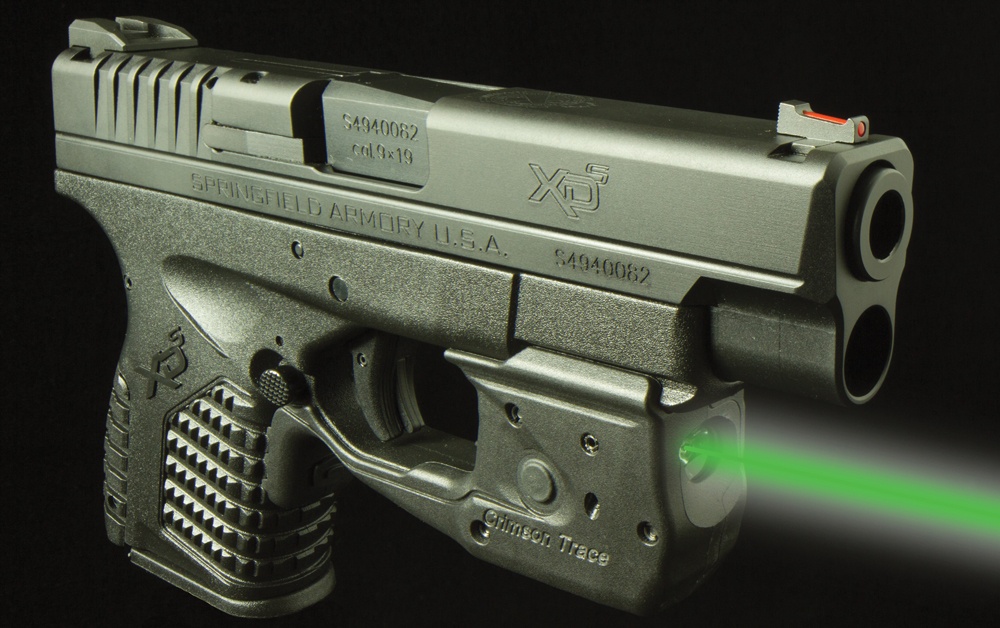
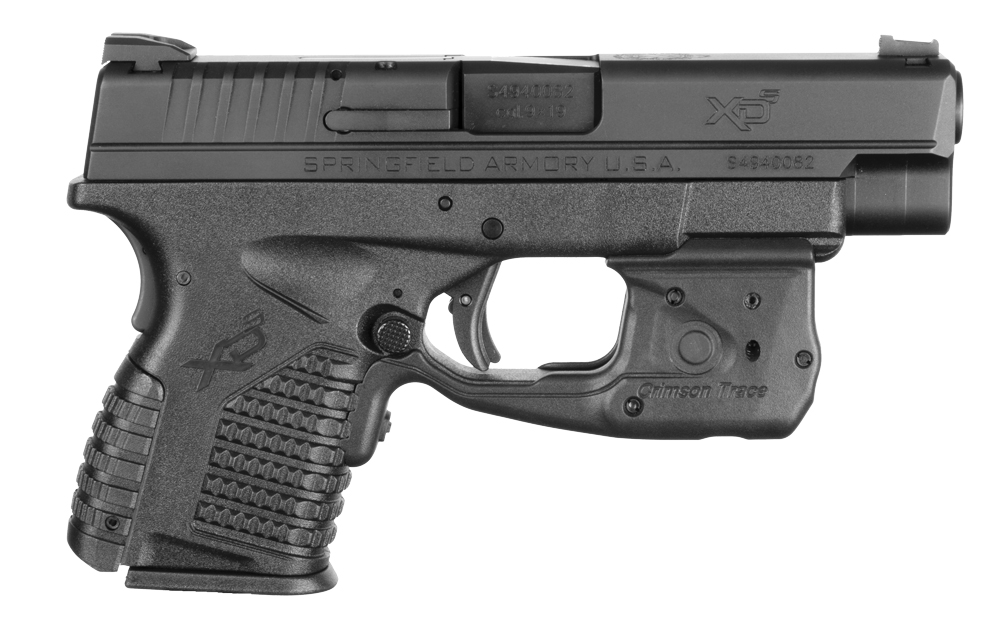
Adding Crimson Trace’s Laserguard Pro and other accessories to a Springfield XD-S makes a good gun great.
Times change, as do consumer preferences. Many, many years ago, the most popular handguns for self-defense were single-action revolvers. They gave way to double-action revolvers with swing-out cylinders that made reloading faster. Then semi-automatic pistols came to be the handgun of choice for many, including some law enforcement agencies. Most fed from a single-stack magazine, while some were single action and others were double action.
In the last half of the 20th century, double-stack 9mm handguns began to be seen everywhere with improvements being made to make them more reliable and user friendly. As concealed carry became lawful in more and more states, consumers tended to want smaller semi-automatic handguns, often chambered in .380 ACP.
Then single-stack, compact and sub-compact 9mm handguns became popular, especially with non-sworn civilians who could legally carry a gun discreetly for self-defense. Many manufacturers introduced their own versions, often based on a larger double-stack design.
One of those was Springfield Armory, which had been producing the successful double-stack XD line for quite a few years. So while no gun is the perfect choice for every shooter, the single-stack XD-S gained a strong following, resulting in the introduction of different calibers as well as a 4-inch barrel version.
Features Although the XD-S is not fully ambidextrous, it does have a checkered magazine release that can be activated from either side. The slide catch is protected by a fence to prevent accidental engagement yet is large enough to activate easily. There is no thumb safety, but the gun is equipped with Springfield Armory’s Ultra Safety Assurance (USA) Action Trigger System that prevents the trigger from moving fully to the rear unless it is first pressed.
The lightweight polymer frame has an accessory rail beneath the barrel on the dust cover, and the backstrap as well as the front and sides of the grip have large vertical and horizontal grooves for positive purchase. Additionally, the backstrap can be removed and replaced with either a large or small version to best fit the shooter’s hand.
The 3.3-inch barrel version is available in 9mm, .40 S&W and .45 ACP, while the 4-inch gun is available in 9mm and .45 ACP. Nine-millimeter stainless steel single-stack magazines can be had in flush-fitting, seven-round capacity or extended eight- or nine-round versions with grip extensions. Magazines for .45 ACP are available in five-, six- and seven-round capacities while six- and seven-round magazines are made for the .40 S&W gun.
The hammer-forged barrel and steel slide have a very hard and corrosion-resistant black Melonite finish, but the slide is also available in stainless steel. The recoil spring assembly cannot be disassembled and consists of a full-length guide rod with dual recoil springs.
The slide has deep cocking serrations at the rear on both sides. Atop, a square notch rear sight with two white dots works with a front sight fitted with a fiber optic to funnel existing light toward the shooter, drawing the eye. Springfield Armory supplies a green and a red fiber optic that can be easily changed by the owner.
An important feature of the XD series of guns is the grip safety. Unintentional discharges happen. And they generally happen when the trigger is moved to the rear.
Sometimes that happens during the act of holstering the gun when an untucked shirt, a strap or even the edge of the holster itself works its way inside the trigger guard and engages the trigger. Then, as the shooter inserts the gun into the holster, the trigger is pushed to the rear, discharging the gun.
However, if the grip safety is not depressed and is working properly, the trigger will not move all the way to the rear, preventing the gun from discharging. A holstering technique taught at some of the best shooting schools has the shooter move the thumb of the gripping hand to the back of the slide when holstering to release the grip safety, blocking rearward movement of the trigger.
Accessories and Improvements No gun is perfect and some gun owners — despite loving the gun — wish that some features could be improved or made a little different. And aftermarket manufacturers are ready to supply the XD-S owner with options.
Crimson Trace, famous for its line of laser sighting systems, recently released the XD-S Laserguard Pro, a combination 150-lumen tactical flashlight and laser. It’s a compact unit that is activated by a pressure switch on the front strap that is instinctively pressed when the gun is held. Modes of operation include light and laser off, light only, laser only, both light and laser on, or laser with strobe light.
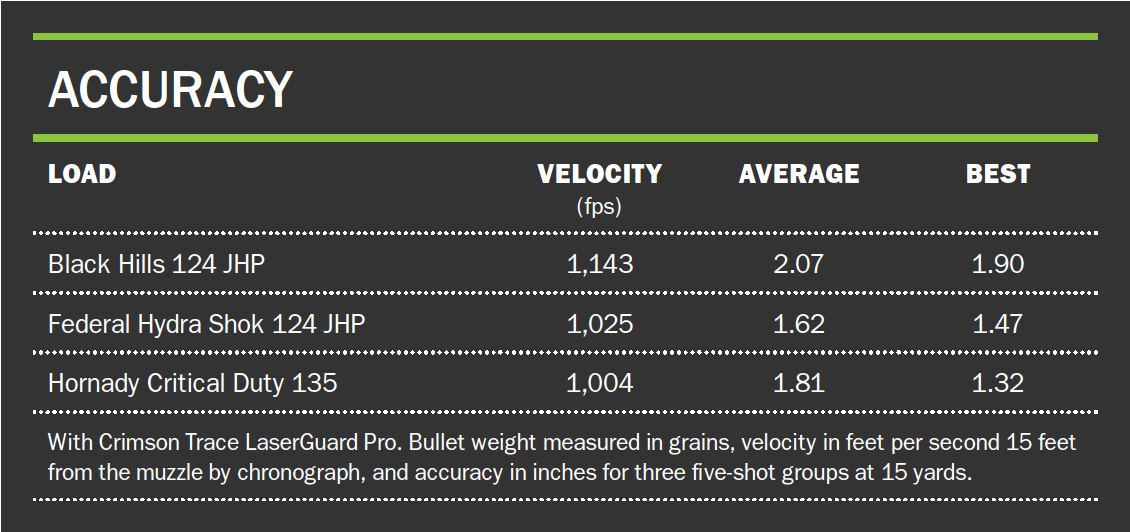
Lights and lasers are not gimmicks, and can be very useful in a life-or-death situation. The Laserguard Pro is available with a red or more easily seen green laser like that used in testing.
Lasers do not take the place of iron sights; even Crimson Trace personnel will tell you that. And while XD-S sights are serviceable, night sights like those from Trijicon that can be seen in low light where most self-defense encounters take place are a valuable enhancement. They are fitted with tiny vials of tritium gas that glow in the dark for many years.
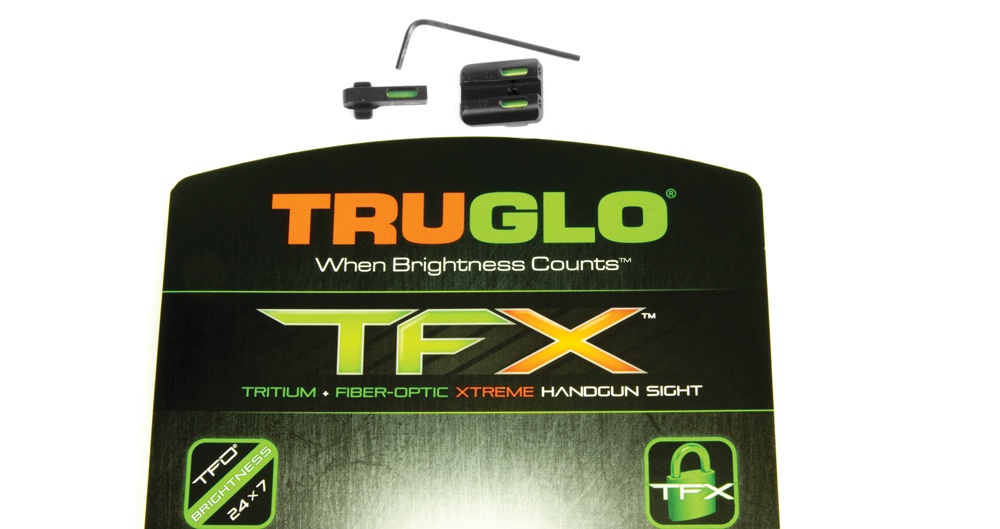
Truglo also makes a set of replacement night sights. The Tritium Fiber Optic Xtreme Handgun Sight is a three-dot setup like the ones from Trijicon, but in addition to tritium filled vials, the sights are fitted with green fiber optics. Not only do these sights glow in the dark, they also pick up ambient light, attracting the shooter’s eye even in bright sunlight.
The XD-S is not known for a great trigger. Both the 3.3-inch and 4-inch test guns had trigger pulls with considerable take-up, followed by spongy resistance, some gritty stacking, and finally a break of between 7.25 and almost 8 pounds.
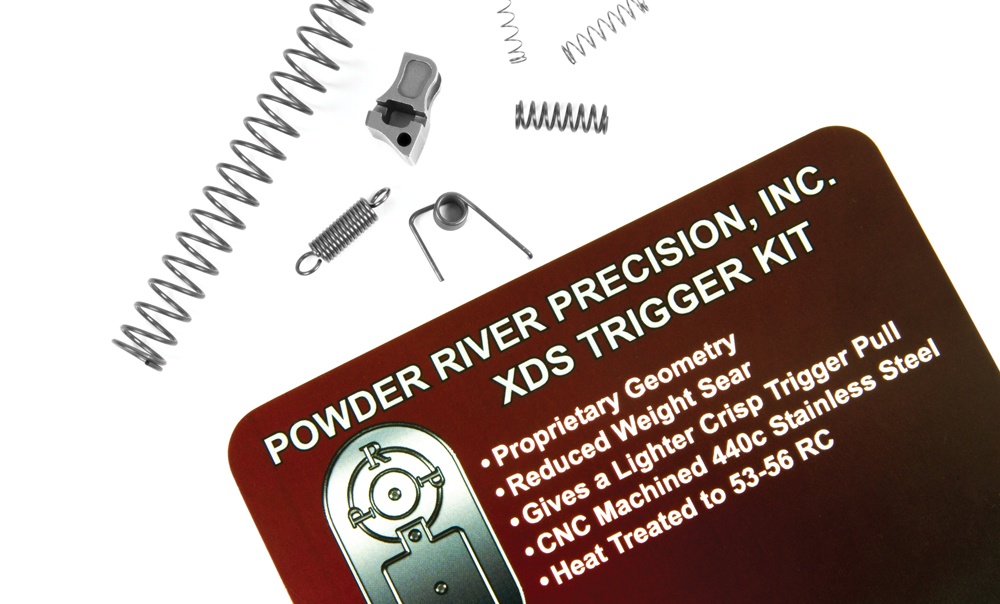
Fortunately, both Galloway Precision and Powder River Precision make trigger kits. Installation is not simple, so some owners may want to use a gunsmith. Both kits reduced the break weight to a little over 5.5 pounds, making trigger control much, much easier.
Incidentally, Powder River Precision also makes an extended grip safety with a palm bump to assure activation, and a magazine release that protrudes a bit further to the left.
But there are shooters who don’t want to deal with buying and adding accessories to the gun, and instead are willing to pay for someone else to do the work. Fortunately, ROBAR Companies has them covered.
The XD-S package includes, among other treatments, an extended beavertail, grip texturing, trigger job, night sights and refinishing with NP3. ROBAR will also take special orders for customizing a gun to the user’s taste.
Whenever a light or other rail-mounted accessory is added to a handgun, finding holsters can be a problem. Crossbreed Holsters is ready though with a variety designed to fit the XD-S equipped with the Laserguard Pro.
Blade-Tech also reportedly has holsters ready. And for those who do not want to use the Laserguard Pro, a variety of makers, including Galco and Alien Gear Holsters have XD-S holsters.
Regardless of the holster, a sturdy belt is a must. A new design by Nexbelt has a unique ratcheting system allowing the belt to be adjusted in ¼-inch increments for more comfort. It not only looks good, it has an internal liner giving it the strength needed to securely support a holstered gun.
When selecting a gun for self-defense, do the research necessary, choose wisely and consider aftermarket accessories to make a good choice even better.
Editor’s Note: This article originally appeared in the March 2017 issue of Gun Digest the Magazine.
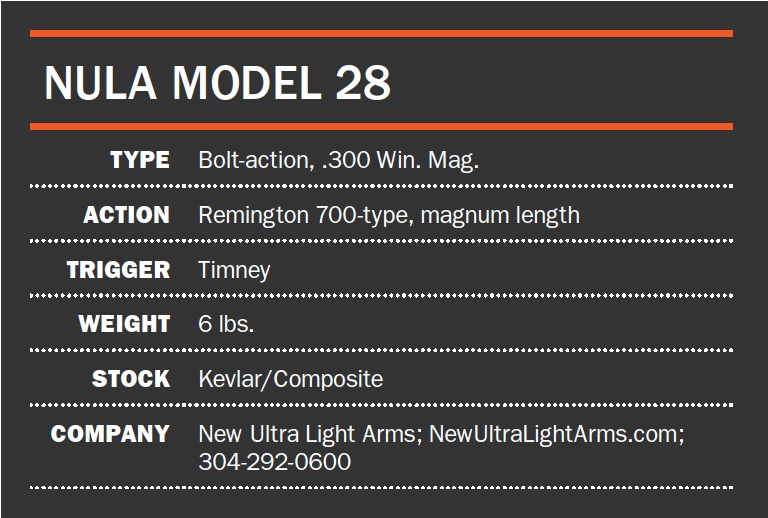
Tailored to fit its user and boasting cutting-edge materials, the NULA Model 28 is at the summit of lightweight rifle designs.
This year marks the 30th anniversary since Melvin Forbes introduced his first ultra light rifle, the Model 20, back in 1985. Since then Forbes has built a formidable reputation as the premiere lightweight rifle manufacturer in the business, thanks in large part to his build-from-scratch approach and groundbreaking stock designs.
That first Model 20, which was based on a Remington 700 action, weighed just under 5 pounds without a scope and was, for several years, most frequently chambered in .284 Winchester. It got its name from the 20-ounce action, which was scaled down from the 700 version to save weight. At the time Forbes started Ultra Light Arms, which he ran until 1999 when he sold the company to Colt. After a bit of a debacle, he got the company back in 2000 and changed the name to New Ultra Light Arms (NULA), which is how it remains to this day.
Forbes now builds a number of different models, each of which is designed around a particular cartridge. By tailoring the action to fit the cartridge, Forbes is able to reduce weight, so even the Model 28 — which is built around medium-action magnums — reviewed for this article weighs just 6 pounds. Each of NULA’s rifles feature a Timney trigger and Talley scope rings.
At the heart of Forbes’ ultra light rifle design is his innovative rifle stock, which weighs just about a pound. As he said, sometimes success comes when you start from scratch and head out against the grain of popular opinion.
“I looked at what other manufacturers in the industry were doing with their stock designs, and I decided there had to be a better way to do it,” Forbes said. “So I march to the beat of my own drum. It really comes down to physics, which a lot of people just ignore.”
Forbes’ stock is a thing of beauty. The initial design came from his collaboration with two friends in the aerospace industry and features Kevlar and graphite composite material with full-length pillar bedding. The stock is extremely rigid and allows for almost perfectly consistent pressure along the entirety of the barrel, thus stabilizing barrel harmonics and creating supreme accuracy.
Interestingly enough, the stabilized barrel harmonics also means that different sized bullets shoot to the same point of impact, which is not the case for other rifles designs. Typically even a change from 165- to 185-grain bullets requires an adjustment on the scope dials, but with Forbes’ bedding technique and stock design those two bullets will shoot to the same point of impact every time. The rifle I reviewed was the Model 28 in .300 Win. Mag., and one of the main questions I posed to Forbes was about how you deal with that kind of recoil out of a 6-pound rifle. My assumption was that it’d be about like getting kicked by a mule.
“Again, it goes back to the physics of recoil and stock design,” Forbes said. “Recoil is the force moving from the center of the bore in a rearward direction. Most stocks fail to deliver that recoil directly to the body because of the angle of the buttstock design, and this makes recoil more severe.”
Forbes’ stock, however, lines the bore up directly with your shoulder, allowing the body to absorb recoil head on, which actually softens the blow. The other major factor is length of pull, which is why Forbes takes your physical build into consideration when making a custom rifle. According to Forbes, proper stock design makes a .300 Win. Mag. feel more like a .30-06 in terms of recoil, which is pretty impressive for a 6-pound rifle. The other concern I shared with Forbes was how difficult so many lightweight rifles are to shoot accurately; even a light breeze makes it hard to keep such a rifle steady. That issue, he said, is really about balance.
“That was the benefit of not starting with someone else’s rifle and trying to force it to work with what I wanted,” Forbes said. “I intentionally built a rifle that would be perfectly balanced in hand. From the action to the stock, barrel and scope, the weight is all distributed so that when you put the gun to your shoulder it’s a natural, solid fit.”
Field Ready As a Western hunter, what intrigued me most about Forbes’ rifle was the promise of a lightweight rifle for mountain excursions that would actually shoot with accuracy. I’ve handled so-called “mountain rifles” in the past that wouldn’t shoot 2-inch groups at 100 yards, and while fine to carry didn’t exactly leave me feeling confident I could make a 250-300 yard shot. Likewise, most mountain rifles are offered in .308 or smaller, which is passable, but for elk and larger game I’d rather have the stopping power of a .300 Win. Mag., even if there’s a bit more recoil.
I also liked the potential of the Model 28 because it’d be equally well suited for any North American big game hunting, including Midwestern whitetails or black bears in the Pacific Northwest. If I was going to buy one rifle to hunt them all—God and my wife both know I could never be a one-rifle man—the Model 28 in .300 Win. Mag. would definitely do the trick. And at $3,900 it’d probably be the only rifle I could afford, so I’d need something that could do it all.
At the range and in the field, Forbes’ rifle did exactly what he said it would. It is by far and away one of the best balanced rifles I’ve ever shot, which makes offhand or shooting from sticks relatively easy. Recoil was really not that bad. I shot 10 rounds consecutively offhand and didn’t want to curl up into the fetal position, so I’d call that a win. Obviously the rifle is great to carry afield because of its slender dimensions.
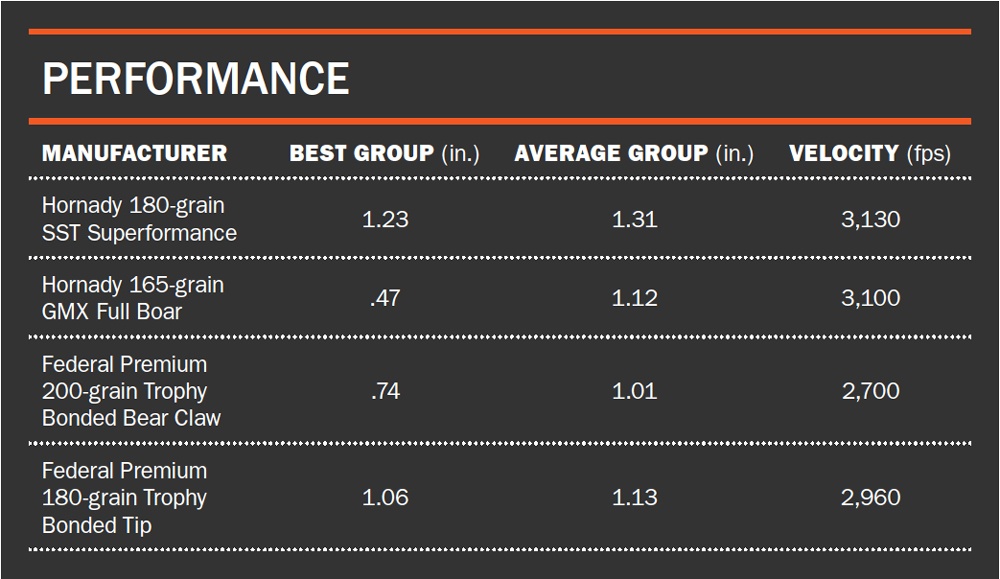
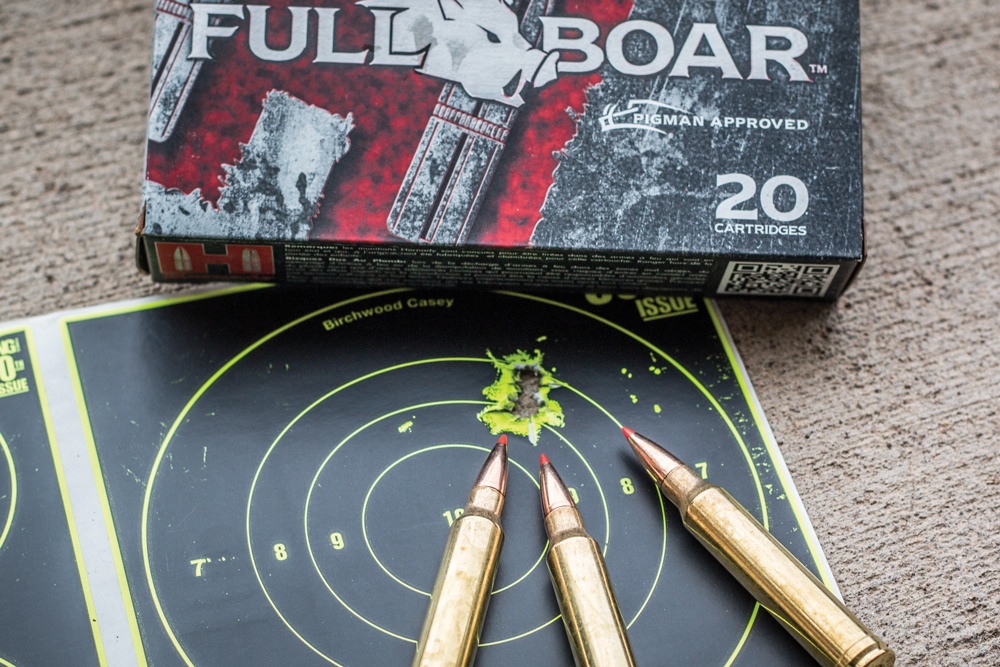
Range Data I tested the Model 28 at 100 yards using four different loads: Hornady 180-grain SST Superformance, Hornady 165-grain GMX Full Boar, Federal Premium 200-grain Trophy Bonded Bear Claw and Federal Premium 180-grain Trophy Bonded Tip. Accuracy was measured from 3-shot groups taken from a Caldwell Lead Sled from Brownells. Winds were generally in the 10-12 mph range. The optic used for testing was a Leupold VX-3 3.5-10x40mm.
The best group of the day came with Hornady’s 165-grain GMX Full Boar, which measured .47 inches with the digital caliper. The same load had an average group of 1.12 inches. The Model 28 also seemed to like the heavier Federal Premium 200-grain Trophy Bonded Bear Claw loads, which had a best group of .74 inches and an average of 1.01 inches. As Forbes claimed, regardless of bullet weight, the loads hit at the same point of impact, so no scope adjustments were made from load to load.
Parting Shots Melvin Forbes has been building rifles for as long as I’ve been alive, and the man knows what he’s talking about. With superior stock design and a production scale that allows for quality over quantity, Forbes’ rifles really are among the best in show. The Model 28 offers a magnum-size action in a platform that weighs right around 6 pounds and delivers MOA accuracy or better, depending on load selection. At $3,900 it’s certainly not the cheapest rifle on the market, but the old adage about getting what you pay for holds true.
Editor’s Note: This article originally appeared in the January 2016 issue of Gun Digest the Magazine.
Ports have been around for some time now, but they have become increasingly popular as a factory-installed option. Just how effective is a ported barrel at reducing recoil and muzzle rise, though?
Gun makers are always changing their product lines to make improvements and, sometimes, to offer something cool that will generate new interest. New colors and new options make the product appeal to a wider range of buyers. Some changes are aesthetic, some are practical, but any excuse for a new gun is a good excuse!
One option becoming more popular in recent years is a ported barrel to reduce felt recoil and muzzle rise, and it is offered on some models by several manufacturers, including Smith and Wesson, Springfield Armory, Glock and Taurus. Ports are practical because they take the bite out of recoil, but they have a coolness factor as well.
They look exotic, and that is part of their appeal. There’s nothing wrong with that.
How They Work Ports are not new. Magnaport has been porting barrels for over 40 years. But they have become more popular recently, and some barrel makers now offer extended barrels with ports as an aftermarket option (e.g. EFK Fire Dragon, Bar-Sto, Storm Lake, Lone Wolf).
Ports work by venting gas that normally contributes to recoil. When the gas produced by the burning gunpowder blasts forward, it produces an equal counterforce to the rear, adding to the recoil force produced by the bullet’s weight and velocity.
This happens via Newton’s Third Law of Motion — for every action, there is an opposite and equal reaction. Redirecting gas upwards reduces felt recoil and muzzle rise.
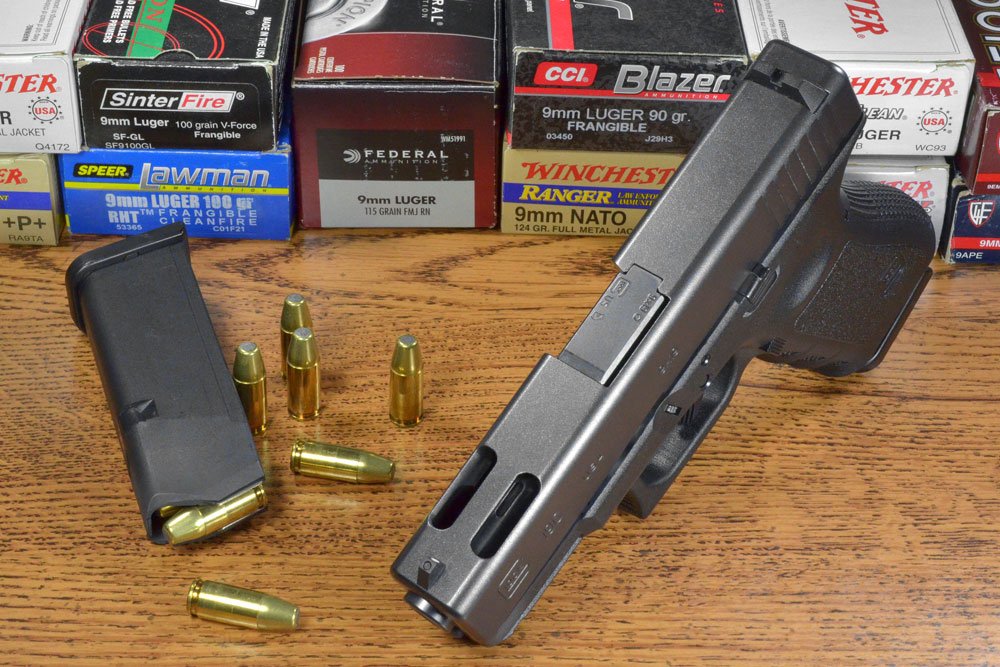
How effective are barrel ports at reducing recoil and muzzle rise? This was tested in a Glock 19C ported 9mm pistol.
The 19C barrel has two small, elongated ports measuring 0.400 inch long and 0.084 inch wide in a “V” configuration that straddle the centerline. Their center is about 1.375 inches from the end of the muzzle.
It’s obvious the ports reduce felt recoil and muzzle rise when fired alongside the non-ported barrel. The question is: How much? The muzzle rise with the ported barrel was compared to the muzzle rise with a standard, non-ported Glock 19 barrel in the same gun.
It’s difficult to quantify differences in recoil and muzzle rise while shooting by hand. Guesstimating differences this way is very subjective, and different people will have different estimates. One person might claim a 10 percent difference while another guesses a 40 percent difference with the same guns.
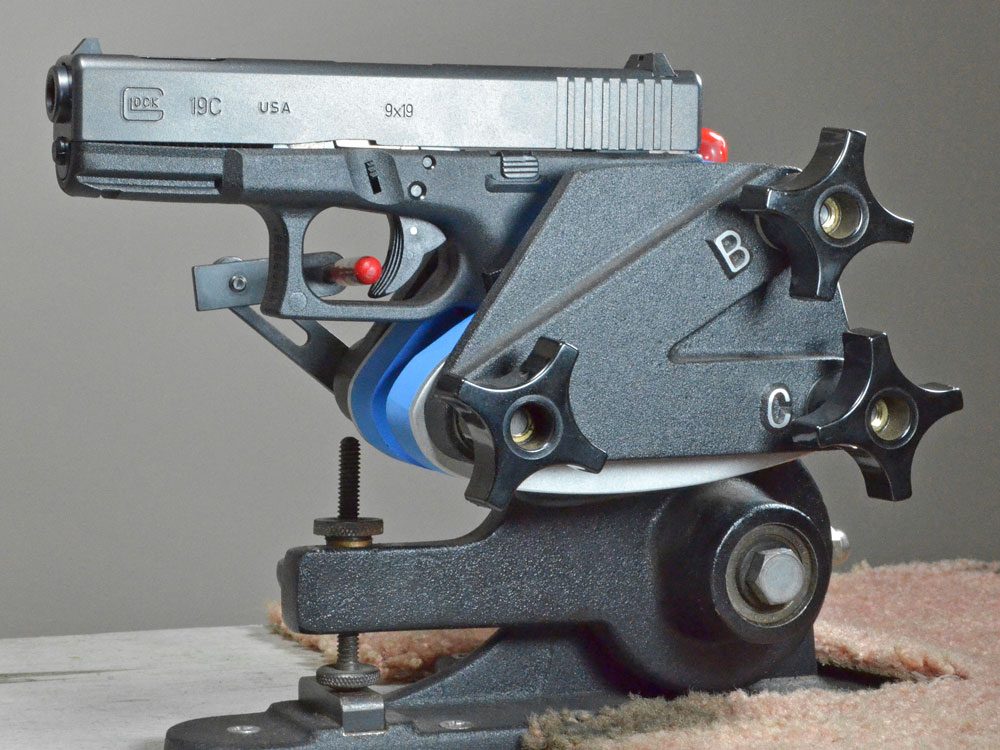
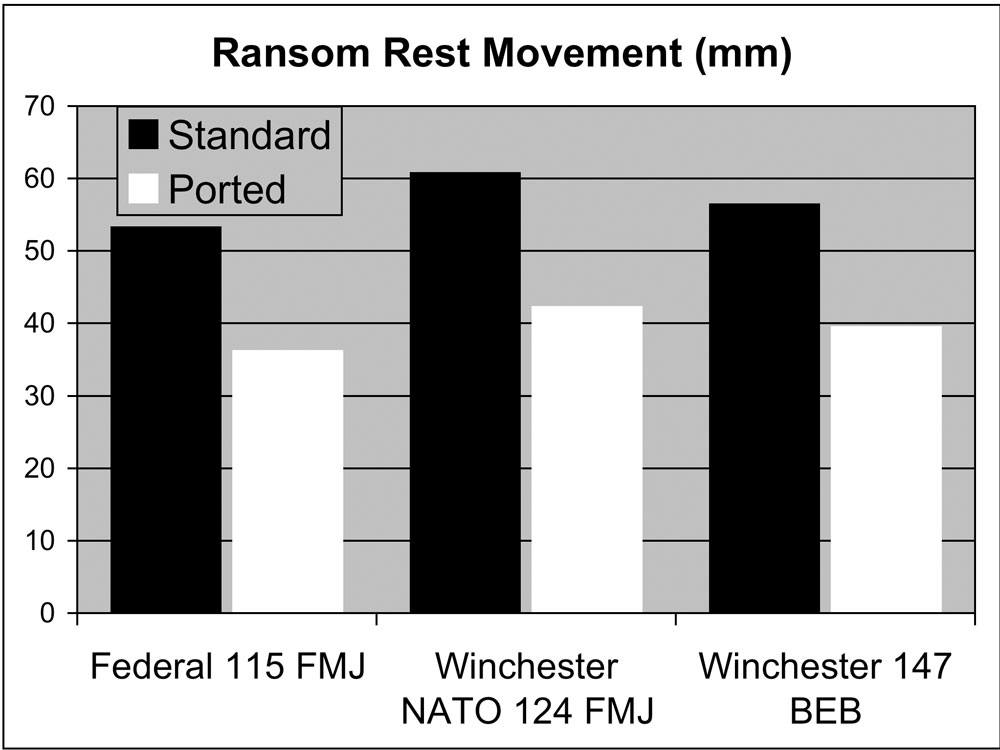
Testing Effectiveness Fortunately, there is a better way. Muzzle rise was measured with a Ransom Rest, where the distance the gun moves indicates relative recoil.
The rocker arm holding the gun pivots upward when the gun is fired, just like when it’s handheld. Since the ports vent the gas upward, the reciprocal downward force reduces how far the gun pivots. Thus, the Ransom Rest is an objective method to quantitatively measure muzzle rise.
Three factory loads were tested: Federal 115-grain FMJ (WM51991), Winchester NATO 124-grain FMJ (RA9124N), Winchester 147-grain WinClean BEB (WC93). A handload was also prepared with a 124-grain Remington JHP loaded with two different charge weights of Winchester 231.
Ten rounds of each load were fired in each barrel. Velocity was measured with a Shooting Chrony chronograph at about 10 feet.
The ported barrel produced an average of 31 percent less muzzle rise than the non-ported barrel with factory ammunition. The 115-grain Federal load produced the greatest reduction at 32 percent, and the 124- and 147-grain Winchester loads both had a 30 percent reduction in muzzle rise.
Barrel ports vent gas while the bullet is still in the barrel. This reduces the pressure accelerating the bullet, so velocity drops a little. The Glock manual indicates a 30 fps loss with the model 19C (1,120 fps) compared to the model 19 (1,150 fps) (ammunition not specified).
Ideally, one would want to know the velocity in the same barrel before and after ports are cut. That was not practical for this test.
Determining The Source The caveat with comparing two barrels is that they can produce different velocities with the same ammunition even if they are identical — if neither had ports. As such, this analysis compares the velocity difference between these two specific barrels, with the presumption that the velocity difference observed is not unreasonable of what one might observe after porting the same barrel.
The ported barrel produced less velocity than the non-ported barrel. The 115-grain load was 78 fps slower, the 124- and 147-grain loads were 55 fps and 53 fps slower, respectively.
Lower velocity reduces recoil force and gun movement in the Ransom Rest. Therefore, some reduction in Ransom Rest movement is due to lower velocity in the ported barrel.
How much reduced muzzle rise is due to the lower velocity and how much is from the gas? This was calculated by doing a little math with the handload data.
The handload was used to analyze Ransom Rest movement at different velocities. Using two charge weights permits the use of linear regression to calculate how much of the difference in muzzle rise was the velocity difference and how much was the gas vented through the ports.
This is determined by calculating the amount of Ransom Rest movement the standard barrel would have if it produced the same velocity as the ported barrel. The difference in movement between the two barrels when they produce the same velocity is due to the force of the gas vented by the ports.
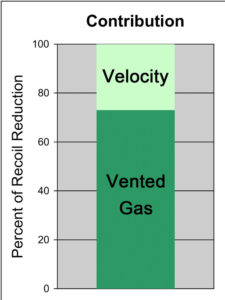
The handload produced 55 fps less velocity and 33 percent less muzzle rise in the ported barrel, similar to the factory ammunition. The math showed that the ports account for 73 percent of the difference in muzzle rise, while velocity accounted for 27 percent.
Thus, nearly three-fourths of the difference in muzzle rise is due to the gas vented by the ports. Therefore, the ports themselves produced a 24 percent reduction in muzzle rise (33 percent x 0.73 = 24 percent).
Summary The Glock 19C’s ported barrel produced at least 30 percent less muzzle rise than the standard barrel. That’s impressive performance for such small ports. Part of this is from the reduced velocity, but the greatest effect is from the vented gas force. How effectively ports work depends on their number, size and location.
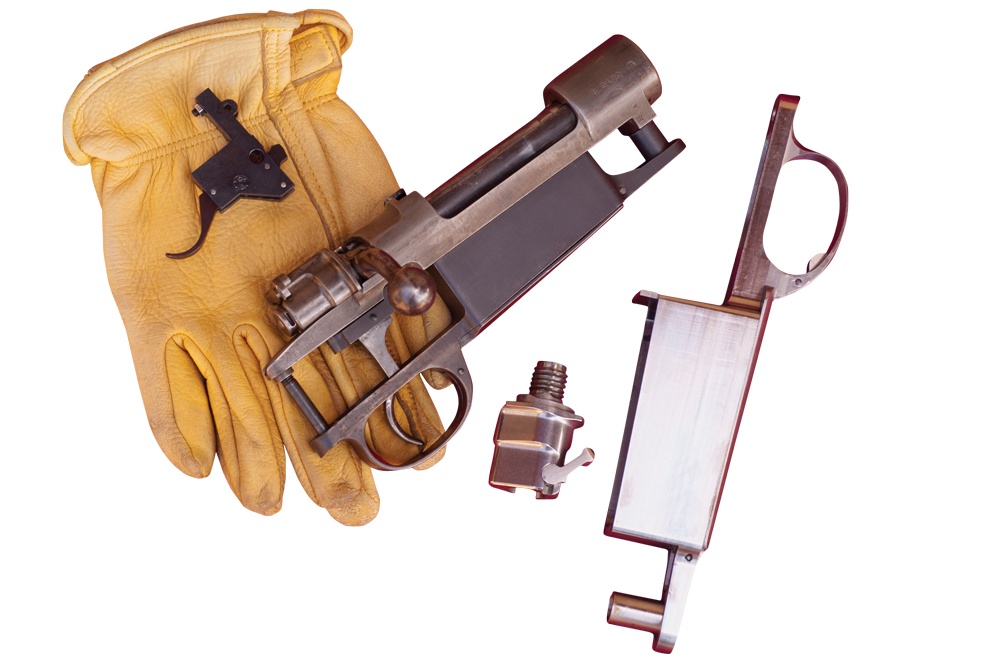
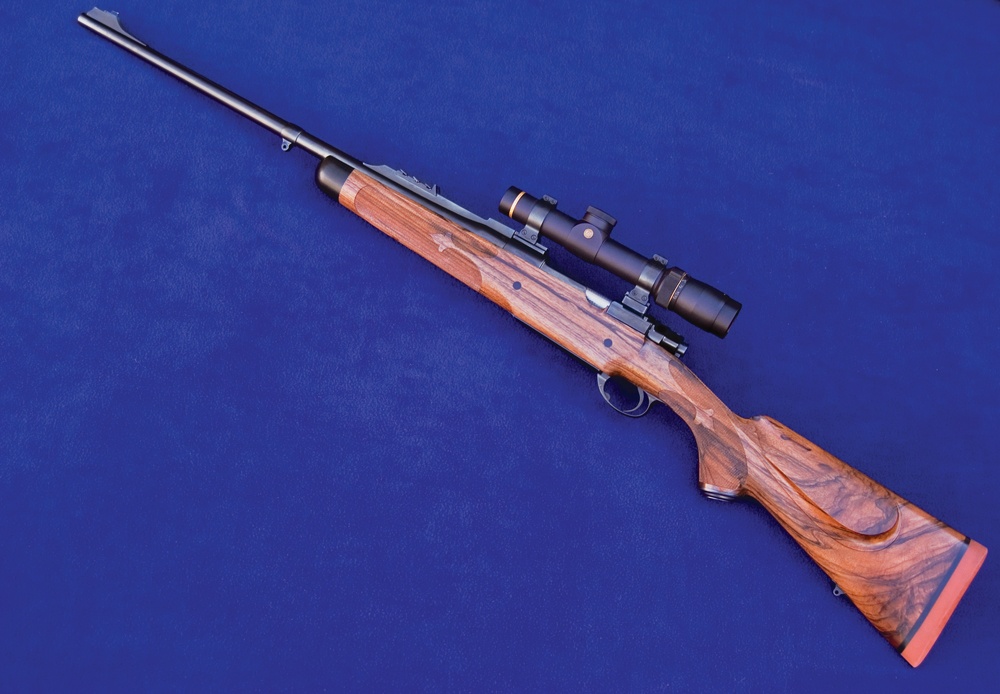
These components were used to craft a lovely hunting rifle chambered for the 9.3×64 cartridge. The DWM-made 1909 Argentine Mauser action was about as pristine as one is apt to find these days. The trigger and bottom metal are from Blackburn-Swift and the three-position safety is from Dakota Arms.
The Mauser Model 98 is a true classic when it comes to bolt-action rifles. And with the company’s return to this iconic design, it is again turning out a highly engineered gem.
What eventually became the Mauser company began in 1811-1812 as a Royal Arsenal in Oberndorf, Germany, a small village in the Black Forest region. The Mauser brothers, Wilhelm and Paul, came on the scene in about 1867 when they invented a vastly improved rotating bolt system for breechloading rifles, and in 1871 their Model 71 rifle was adopted by the German army as its standard rifle.
Between that event and 1898, the brothers developed several different improvements featured in succeeding models, culminating in the development of the standard upon which just about all bolt-action rifles today are based in one manner or the other, the Model 98.
In 1897, the old Royal Arsenal was turned over to the Mauser brothers, becoming Waffenfabrik Mauser AG. In 1898, the German army bought the Mauser design and its 7.92×57 cartridge as their standard combat rifle.
It was the most important arm in the hands of German troops in World War I. It went through a few modifications to eventually become the K98, the main battle rifle of the German army in World War II.
In addition to manufacturing rifles for the German army, Mauser also produced a line of sporting rifles during the period between the World Wars. These rifles, if in original condition, are highly desirable collectors’ items today.
They also made and sold actions to the trade. Mauser’s agent for the United Kingdom for many years was the respected firm of John Rigby. Rigby custom rifles built on Mauser actions became renowned among big-game hunters around the world.
The factory in Oberndorf was gutted after the war ended and the equipment confiscated and much of it moved to France. Most of the records were destroyed, although some were saved by former Mauser employees. Three Mauser engineers, Alex Seidel, Theodor Koch and Edmund Heckler went on to establish the firm of Heckler & Koch, which is still going strong today.
Like most of the German arms companies, Mauser kept going during the postwar period and its prohibition against arms production by producing other products. In the case of Mauser, they made precision measurement instruments and tools such as micrometers. When they were permitted to do so, Mauser resumed producing hunting and sporting rifles.
The author started this fine rifle with a 1909 Argentine Mauser action made by DWM. The stock is by ace stockmaker Gary Goudy.
In 1966, the Mauser plant introduced a rifle to the sporting market of a totally new design. It was not a Mauser design, but rather one by Walter Gehmann, a well-known inventor, competitive shooter and firearms dealer in Germany. Mauser acquired the production rights to the Gehmann design and began production.
The Mauser Model 66 featured a very short action, quick interchangeability of barrels and calibers. It offered many advantages over standard sporting rifles, but – typical of German fascination with engineering – contained a zillion parts, was expensive, overly heavy and was ugly as sin.
That’s my personal opinion of course, but apparently most in the marketplace agreed with me. I don’t know how popular it was on the Continent, but in the U.S. market it went over like the proverbial lead balloon. The few Model 66s that were sold in this country went mainly to guys named Müller, Schmidt, Fenstermacher and the like.
In the mid-1970s, Mauser entered into an agreement with the old German firearms manufacturer F. W. Heym, to produce a series of rifles — the Models 2000, 3000 and 4000 — which were more or less of traditional design. Unlike the controlled-round feed of the Model 98, however, it was a push-feed action.
They were available in a wide variety of calibers and marketed in the U.S. under the banner of Mauser Bauer. These rifles did enjoy a degree of success in the U.S. for Mauser. When the agreement was terminated, Heym made a few modifications and marketed the rifle worldwide as the Heym Models SR-20, 30 and 40.
Mauser introduced a new rifle and a new design in 1977 called, what else, the Model 77. The Model 77 was also pretty much conventional in design. It was a push-feed action that had a few new features.
I had one of these rifles for a while chambered for the .30-06 cartridge. It shot well and was a good, solid rifle. It also did not do well in the U.S. market.
The company was taken over by the Rheinmetall Group in 1995 or thereabouts, and from then until about 2000 or so Mauser built and marketed a series of rifles, namely the Model 96 and 97. In celebration of the 100th birthday of the Model 98 in 1998, they produced a few military Model 98s and also a few original Model 98 sporting rifles.
In about 2000, give or take a year, Rheinmetall sold the civilian arms portion of Mauser production to the Lüke-Ortmeier group of investors who then formed Mauser Jagdwaffen GmbH. The group also owned the firms Blaser, SIG and Sauer.
They moved the company from Oberndorf to Isny, Germany, and co-located it with Blaser and Sauer. It is still a separate company with separate manufacturing facilities, but co-located.
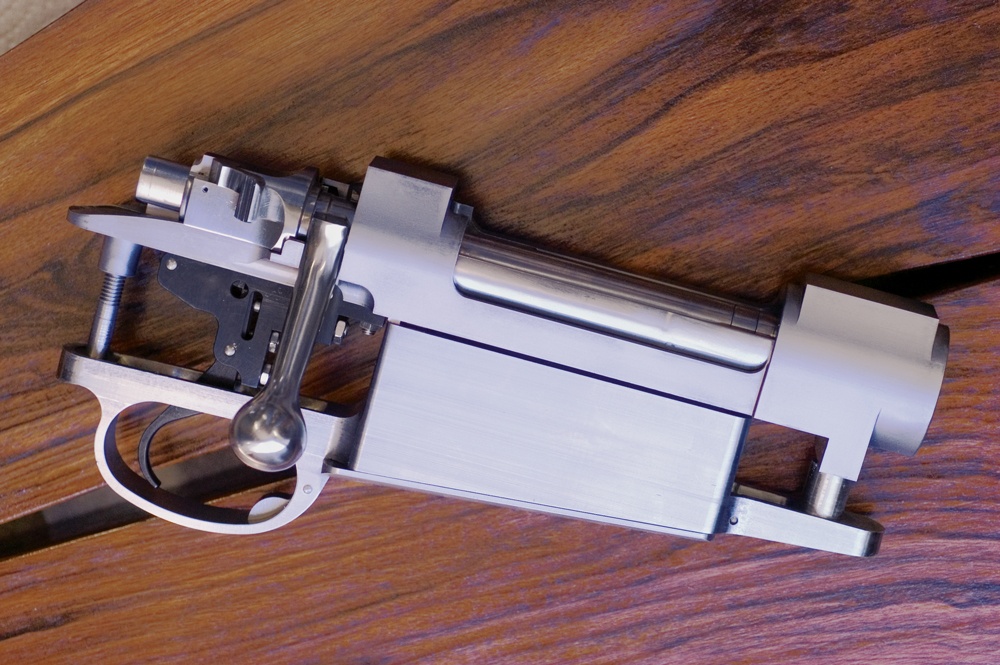
This is a modern representation of the Mauser Magnum Square Bridge action from Granite Mountain Arms. Quite a number of rifles chambered for the massive .505 Gibbs cartridge have been crafted using this action.
In the interim, the company marketed a few very nice Model 98 sporters; however, I believe that these early 98s were produced by someone else in Germany and marketed by Mauser. A couple of companies had been making and marketing copies for a few years.
Two that I’m aware of are Johannsen and Prechtl, and recently I’ve learned of another, FZH. The prestigious firm of Hartmann & Weiss also makes its own actions.
The Lüke-Ortmeier group also introduced the Model 03 in 2003 and the Model 12 in 2013. The M 03 had a suggested retail price starting at around $4,500 and went up from there depending on the variation, and the M 12 starts at around $1,500 and goes up from that figure. The flagship of the Mauser line, the M 98, starts at a base price of $12,495.
The Lüke-Ortmeier group also purchased the old London firm of John Rigby after numerous ownership changes and tremendous confusion about the company, finally consolidating both the company and its historical records under one ownership. Rigby is now, once again, producing rifles in London using genuine Mauser actions from Germany.
I am not a big fan of modern European firearms design in general, but the return of Mauser to its roots, the Model 98 action as the basis for production, was super interesting to me. The Teutonic fascination with engineering apparently above all else has resulted in some interesting designs, to say the least.
I tend to follow the guidelines my dad taught me many years ago. One of his most important lessons was, “if it ain’t broke, don’t fix it.” The 98 Mauser has never been broken, and is in no need of fixing.
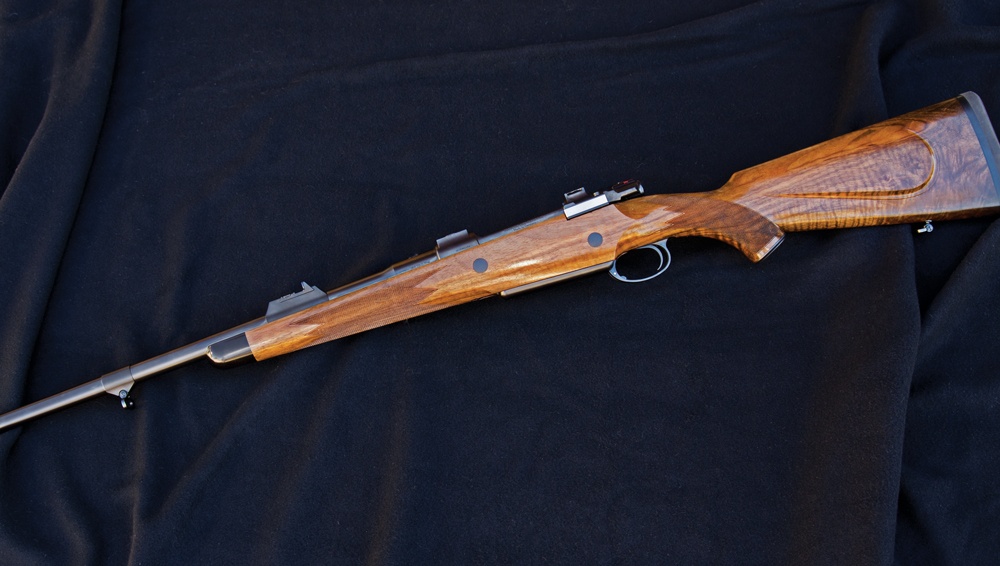
A cheekpiece side view of the Mauser M98 Magnum. Rifle styling just doesn’t get much nicer than this one.
I prepared a wish list to send to Mauser requesting a test rifle. Before doing so, however, I waited a couple years to ensure this was not a pipe dream, but rather a serious effort at resurrecting the previous glory of the name Mauser. It is, and I sent in the request.
The company sent me a Magnum Model chambered for the .375 H&H cartridge. It features all the bells and whistles of a London-built Express rifle.
It has a slightly extended magazine to permit loading an additional cartridge. It holds four in the magazine and one in the chamber. It also features express sights consisting of one standing leaf for 50 yards and two folding leaves, one for 100 yards and the second for 150 yards.
The action features double square bridges, which are milled to accept Recknagel quick release scope rings. It features a banded ramp front sight with a relatively small bead.
My tired old eyes and a small bead do not go well together, so I asked my son Jeff to come along to the range and do the shooting for me. Anytime I have some serious range work, I usually ask Jeff, likewise an avid hunter, shooter and gun nut like his dad, to tag along just in case I have an off day. The older I get, the more off days I seem to have.
It really is a beautiful rifle. The stock is crafted from a very nice stick of European walnut, well figured and with nice pleasing color.
It is styled like a typical English Express rifle, which is to say, pretty near perfect. It is nicely checkered in a point pattern in what appears to be about 24 LPI and is exceptionally executed, some of the best I’ve ever seen on a German-made rifle. It features nondetachable sling swivels, with the front swivel on a barrelband base.
There is a steel grip cap with the Mauser logo, a black fore-end tip, apparently of ebony, and a black recoil pad. It also features two through-bolts to reinforce the stock. On the downside, however, I noticed a fair number of unfilled pores in the wood finish, indicating that the finisher had quit his chore a mite too soon.
The rifle has a three-position wing-type safety that locks the firing pin when on safe. The trigger is fully adjustable, and the test rifle has a fantastic trigger that fits the old saw “releases like breaking glass.” According to my trigger scale it releases at 3 pounds.
The rifle will soon be available in .375 H&H, .416 Rigby, .450 Dakota, .458 Lott and .500 Jeffrey. Plus, it will eventually be offered in standard calibers, I am told, but exactly when I’ve not been able to find out. The best I’ve been able to determine is “next year at the earliest.”
Having said all that, all positive, the rifle is not perfect, at least not by my standards, whatever they might be worth to anyone else. My first criticism is a simple fix.
My test rifle has a stock length of pull of 14¾ inches. That would be about right for Shaquille O’Neal. I’m over 6 feet tall, weigh 205 pounds and wear a 34-inch sleeve length, and my rifles are 137⁄8-inch LOP.
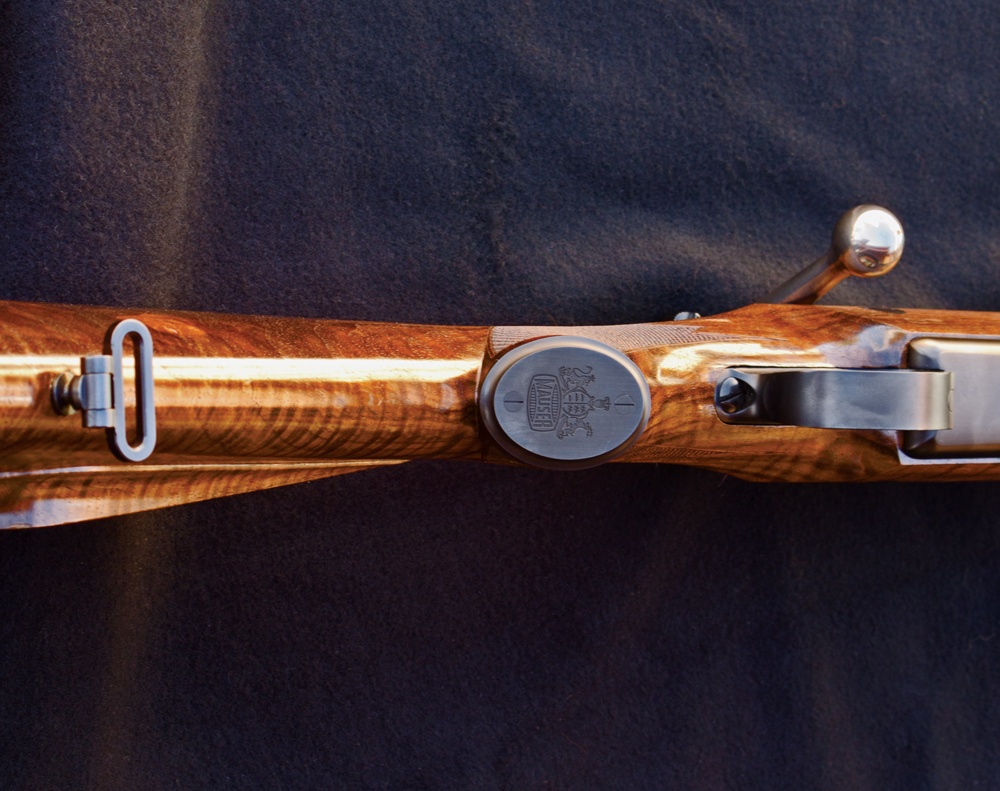
Mauser uses a nicely shaped steel grip cap with the Mauser logo and coat of arms.
Since I lived in Germany for a bunch of years, and have worked with the German firearms industry for about four decades, I understand why this happens. Why are German scope mounts always too high for American shooters?
It is simply that Germans shoot differently than we do. They hunt a great deal from high seats. They usually have lots of time to make their shot. They are taught from an early age to hold their head high when shooting.
Americans, on the other hand, are taught to weld their cheek tightly on the stock. As a result, American shooters demand very low scope mounts, and the German shooters much higher.
That also affects the LOP. The higher the cheek, the longer the LOP required. Simple solution, a hacksaw!
The next problem is also not difficult to solve.
For my use, the barrel is about 2 inches too long. There is no advantage that I am aware of to a 25-inch barrel on a .375 H&H, over one that is 23 inches long.
I can think of a couple disadvantages, in particular. If you’ve ever wrestled through the alders and willows in Alaska, or the mopane scrub in Africa with a long-barrel rifle, you know what I mean.
Some of the ultra high velocity cartridges benefit from long barrels, sometimes significantly so. The .375 H&H, however, is not one of them. This is just my personal opinion though, as some shooters do prefer longer barrels.
Being an ounce or two shy of 10 pounds for a .375 H&H rifle is too heavy by 1 to 1½ pound. It is particularly so when the rifle is empty and unencumbered with a scope and mounts. Scoped, with a sling and fully loaded, it wouldn’t miss the 12-pound mark by much, if any.
I suspect the reason for this is that the magnum calibers that Mauser chambers for are most likely all on the same platform. By that I mean the same action, same barrel contour, etc.
If that is the case, naturally, the .375 would weigh the most, as the hole in the barrel is smaller, thereby causing it to weigh more. That is certainly understandable from a manufacturing perspective, but not from a functional one.
The best group Jeff fired at 100 yards using Federal factory ammo and only the iron sights. The author believes this rifle is ready to go hunting anywhere in the world as is right from the factory.
Another thing that I would change, had I the power to do so, is the finish on the middle of the bolt release, the bolt knob and bolt long extractor. These three items are polished to a high gloss finish and reflect light like a mirror. Aside from aesthetic objections, I suspect the reflections could spook game from a long distance away.
Before leaving for the range with my son Jeff, I went through my stash of ammo. I was working on a very tight deadline and had no time to order in a bunch of new ammo.
I found a couple boxes of handloads, one box loaded with 260-grain Ballistic Tip bullets and IMR 4320 powder, and the other 285-grain Speer bullets, pushed along by IMR 4064 powder. I also had one box of factory ammo, Federal Premium Cape-Shok loaded with Barnes 300-grain TSX bullets.
We first set up at 50 yards since the standing leaf rear sight was adjusted for that distance. We learned quickly that the rifle liked neither of our handloads.
While the groups would have killed any large game at that distance, we knew the rifle could do better. Jeff fired a group with the Federal factory ammo and bingo, we found in short order what this rifle preferred.
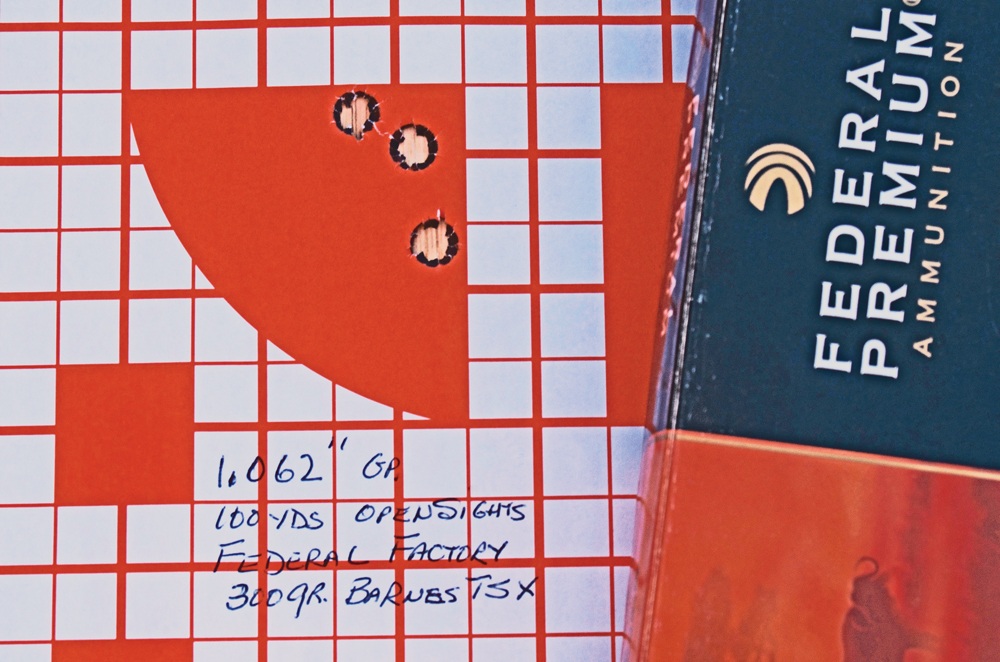
We moved back to the 100-yard range and shot the remaining Federal ammo. Considering we were shooting with open sights, the accuracy was outstanding.
Jeff shot the best group that measured 1.062 inches, a great group shooting with a scope – let alone just open sights. None of the three-shot groups exceeded 2 MOA.
To say this rifle is a shooter is a gross understatement. If it belonged to me, I wouldn’t even waste time developing handloads for it. I’d just lay in a supply of Federal 300-grain TSX ammo and go hunting. A 300-grain slug leaving the muzzle at 2,470 fps is sufficient to lay most anything low.
Welcome back to the fraternity Mauser. Paul and Wilhelm would be proud.
Editor’s Note: This article is an excerpt from Gun Digest 2017.
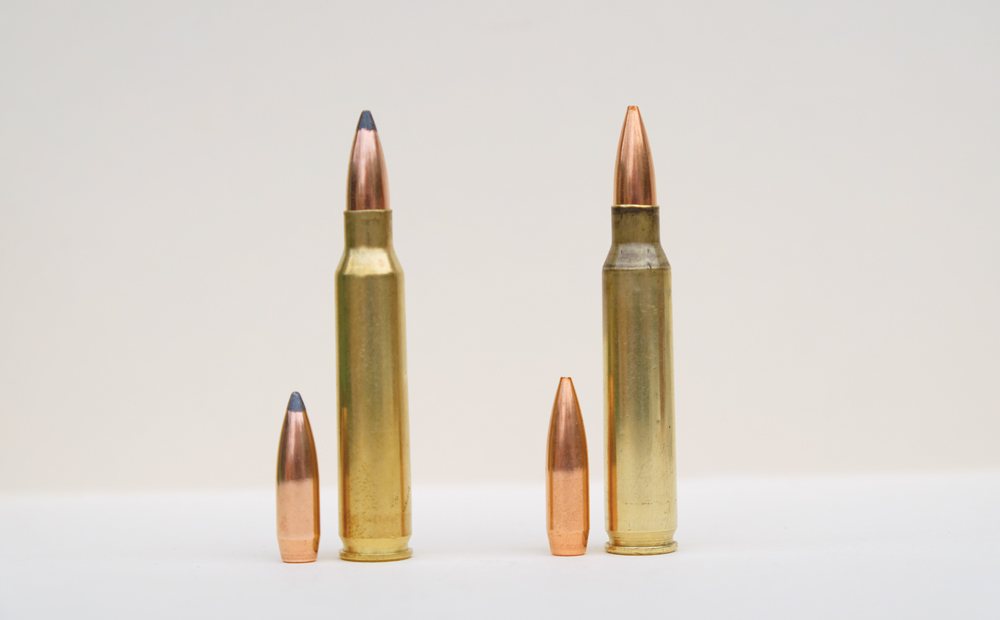
Very good accuracy was achieved in the Colt AR-15s using from left: the Sierra 65-grain GameKing softpoint and the Sierra 69-grain MatchKing hollowpoint.
Handloading for the AR-15 isn’t much different than for other rifles. But given it is a semi-automatic, there are some special considerations that must be taken into account when putting together a round.
Though outside dimensions of 5.56×45 and .223 Remington are the same, there are some important differences for handloaders. Some current handloading manuals show different data for 5.56 and .223, usually with the heavier bullets listed in the 5.56 data. It’s best to obtain at least a couple of “paper” load manuals that contain desired data rather than using data from dubious sources.
Some 5.56 brass is considerably heavier than .223 brass and has less powder capacity. I weighed a number of 5.56 cases and .223 cases. In most instances, the weight difference was negligible.
However, I did find some 5.56 cases that were about 5 percent heavier than other brass. Erring on the side of safety, this would require a slight powder reduction if maximum or near-maximum loads are used.
Many 5.56 cases have primers crimped in place. To seat a new primer, the crimp must be removed. There are a variety of tools available with which this one-time procedure can be performed.
Before I began this project, I asked for advice from longtime Sierra Bullet employee Carroll Pilant. Carroll is an active three-gun competitor and has had much experience with AR-15s and handloading. His first statement with regards to handloading was, “Get a case gauge!”
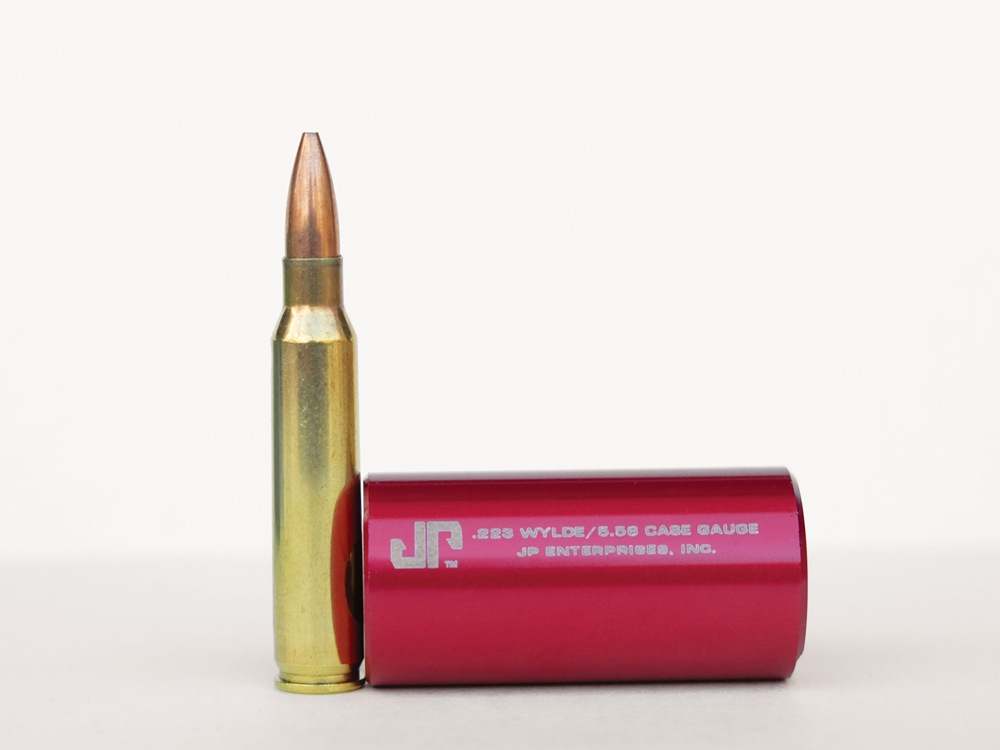
A case gauge is a necessity for anyone handloading ammunition for use in an AR-15. If sized cases and loaded ammunition won’t fit a case gauge, it may not function reliably, and brass may stick in the chamber. Different gauges are on the market; the author purchased the JP Enterprises case gauge from Brownells.
There are a number of case gauges on the market. I bought one manufactured by JP Enterprises and found out quickly the importance of such a tool.
My .223 handloads for the Ruger bolt action I’ve been shooting for 25 years wouldn’t come close to functioning reliably in a Colt AR-15. Brass should be sized to the point (usually full-length) where it will easily fit the gauge.
New brass should be no problem, but once-fired cases might be. With once-fired, I full-length size and check every case after sizing using the gauge.
It’s also imperative to check case length at this point and trim as needed. I discard any case that won’t fit the gauge after full-length sizing. Loaded rounds are also spot-checked with the gauge.
After handloading at least 1,500 rounds for my AR-15s, I’ve experienced no cartridge feeding problems and no empty cases have been stuck in chambers. Get a case gauge.
I’ll also mention some nominal points regarding components:
One hundred percent reliable functioning and accuracy are my biggest concerns with regard to my own ammunition. I have not tried any of the bulk full-metal-jacket boattail bullets, usually of 55 grains. Reports on these vary, but it’s probably best to stay with those made by the big, reputable manufacturers.
As mentioned earlier, the 53-grain Sierra MatchKing and several 55-grain varmint bullets from Hornady, Nosler and Sierra all shot with respectable accuracy in the Colt AR-15s. The same can be said for the Sierra 63-grain semi-point, 65-grain GameKing and the 69-grain MatchKing in both plain and “tipped” versions. Hornady 68-grain and 75-grain Match bullets also shot well.
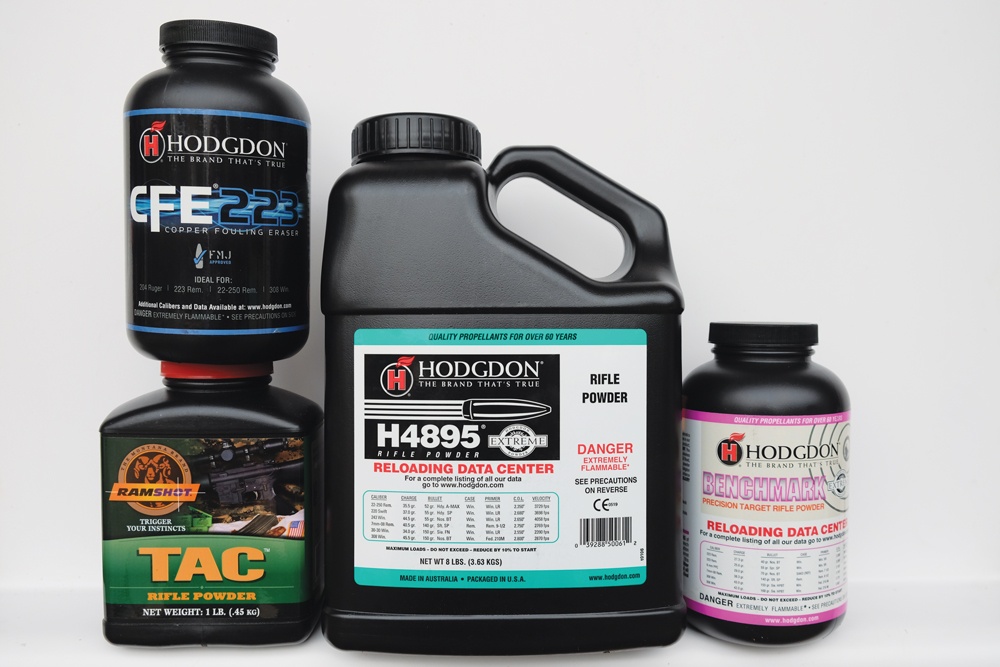
I used four powders, Ramshot’s TAC, and Hodgdon’s CFE223, Benchmark and H4895. Best loads so far include the 65-grain GameKing and 24 grains of H4895 or 24 grains of TAC, and Sierra’s plain (untipped) 69-grain MatchKing with the same powder charges. These loads are near maximum in some published data and powder charges should be reduced for initial load development.
Bullets were seated to just under maximum recommended length of 2.26 inches to assure reliable functioning in magazines. Brass was Remington, and CCI400 small rifle primers were used.
The author used four popular powders for assembling handloads: Hodgdon CFE223, Western Powders’ TAC, Hodgdon H4895 and Hodgdon Benchmark.
Best loads were slightly more accurate than any of the commercial match ammunition I fired, but not by much in some instances. While I was able to shoot some five-shot groups well under 1 inch at 100 yards, I could not do it every time and many groups were 1 inch or larger.
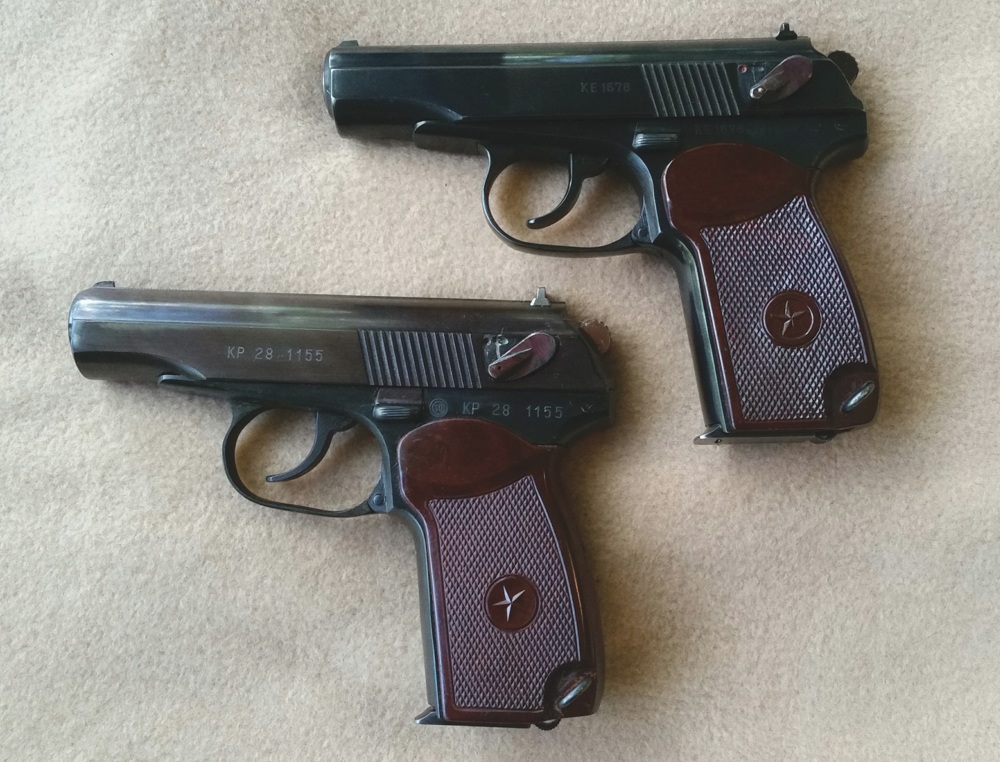
The Makarov 9mm is a Russian-designed double-action, straight blowback pistol.
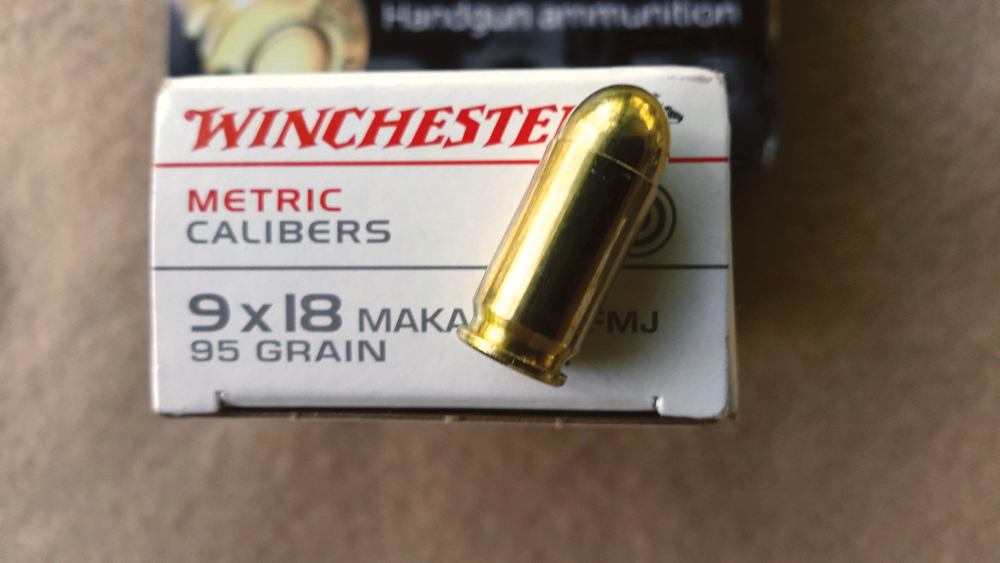
The 9x18mm Makarov cartridge is distinct from the 9mm Luger, uses an odd-sized .365-inch bullet.
Russian Makarov imports lasted only a few short years due to the Clinton import ban.
Bulgarian Makarov copies are available on the surplus market and are a good find.
The East German copy of the Makarov seems to be the most desirable among collectors and shooters given its silky smooth blue finish and black plastic grips. They are readily identified by the “K100” in a rectangle on the left frame along with a triangle cartouche and a circle within. Gun condition and discreet import marks have an influence on current prices. (Photo courtesy the author’s collection)
History of the Makarov 9mm
Manufactured at Russia’s Izhevsk factory, the Pistolet Makarova — Makarov 9mm — was the brainchild of Nikolai Fyodorovich Makarov, who designed his new double-action, straight blow-back pistol around the proven Walther PP/PPK series of pistols.
After World War II, the Russians had access to the Walther factory in Germany and shipped much of its tooling back to the USSR.
Nikolai Makarov opted for a cartridge developed by Boris Semin, who in 1946 developed it from the older Walther 9mm Ultra, an experimental cartridge originally intended for the Luftwaffe. Christened the 9x18mm Makarov, its bullet diameter is an odd .365-inch unlike the typical .355-inch of the 9mm Luger and the .380 ACP (9mm Browning).
The idea behind it was in the case of a supposed contingency where stocks of 9mm Makarov ammunition might be captured by an enemy, that the cartridge could not be used in standard 9mm Luger pistols.
The Makarov semi-automatic pistol incorporates many features of the Walther in that it disassembles identically by grasping the triggerguard, bringing it downward, and pulling back the slide and upward to disengage it from the frame.
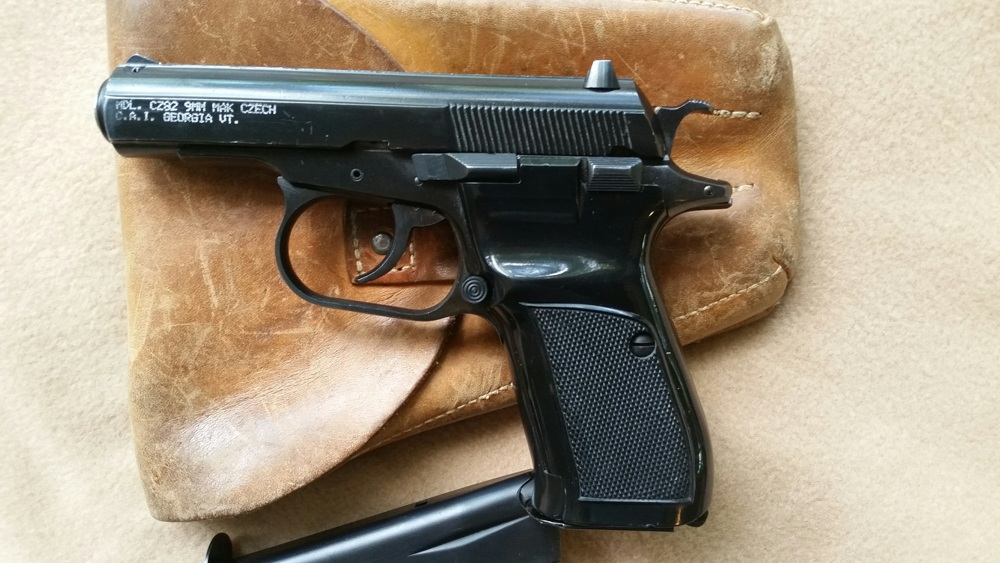
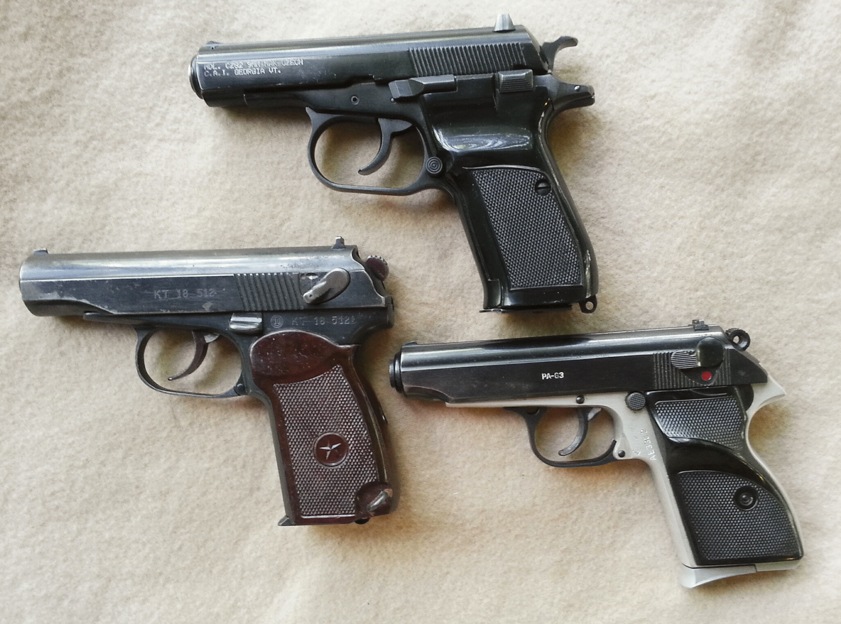
Shown with its original military holster, the Czech CZ 82 is the most advanced of all of the Soviet Bloc 9mm Makarov caliber pistols made during the Cold War. With an ambidextrous safety and magazine catch, and a 12-shot staggered magazine, it is the most highly sought after of all pistols of like caliber. Serial numbers and government ownership marks are located on right frame and slide.
Additionally, its double-action safety features are similar in that a cartridge can safely be carried in the chamber with the hammer down. With the hammer at full cock, thumbing the manual de-cock safety upward allows the hammer to fall and subsequently blocks the loaded chamber by use of a transfer bar on the safety, preventing contact with the firing pin.
The eight-shot, medium-weight pistol with its 3.68-inch barrel uses a single screw in its assembly to secure the rear fastened grip. The checkered red Bakelite grips also have a circled star in the center. Markings on the Russian Makarov 9mm are the serial numbers on the left slide flat and frame with a Cyrillic prefix, and the year of manufacture is at the rear of the left frame.
Russian Makarov 9mm Importation
It is important to reiterate that importation of the Russian Makarov lasted but a few short years between 1992 and 1995 due to the eventual trade restriction on Russian military imports during the Clinton administration. Soon after, this also included military arms from China as well.
Ironically, a number of Russian-made Makarov 9mm pistols inadvertently entered the United States between 1998 and 2009 and have become known as the “sneak” Makarovs.
These pistols were imported from Bulgaria and East Germany and were marked with the country of origin, as each of these nations obtained a quantity of the Russian-made versions in the 1970s and ‘80s as supplementary arms to make up for shortages in their ordnance inventories.
Apparently, some of these Russian versions were mixed in and marked with the aforementioned two countries as the origin of manufacture until close BATFE inspection revealed the Russian Izhevsk Triangle cartouche on some of the pistols. These are rather desirable on the collector’s market because of this import marking error.
A comparison of the CZ 82 (top), the Bulgarian Makarov (left) and the Hungarian PA 63 (right) shows a marked difference in the choice of some Eastern Bloc countries regarding adoption of a 9mm Makarov semiautomatic pistol. Thus Mother Russia didn’t always have the last word
Regarding licensed Eastern European versions of the Makarov, East Germany was the first of the Soviet satellites to manufacture them, beginning in 1958.
Made at the Ernst Thaelmann State Factory, the first two years of production saw some difficulties in getting off the ground, with full-scale manufacture underway by late 1959 and early 1960.
In the United States, the East German Makarov has become one of most highly sought of their ilk given the beautiful dark blued, smooth finish, coupled with jet-black checkered plastic grips.
The East German pistols also have their internal parts marked by electro pencil with the last two digits of the serial number.
Production ceased in 1965. It appears that those with small, unobtrusive import marks together with condition, determine the higher price and overall desirability.
Bulgarian Makarov
The final licensed Makarov in communist Europe was the Bulgarian version. Given the green light for licensing rights in 1970, few were produced until five years later. Actual production took place at the Friedrich Engels Machine Works — known also as “Factory 10.”
The Soviets supervised and trained the Bulgarians to manufacture the Makarov, and remained in charge of all production throughout 1975.
No surplus 9mm Makarov ammunition has yet to be released in quantity by former communist nations. As can be seen, however, there is plenty of commercially available ammo. All appears to be made in Eastern European countries as well as in Russia, with Winchester even offering it in their metric cartridge lineup. Interestingly, Winchester’s high-quality product is made in the Czech Republic
The next year saw the Bulgarians assume control, and they steadily continued production of the Makarov up to 2007, some 15 years after the fall of communism.
Prior to their sale on the U.S. surplus market, Bulgaria sold quantities of Makarov pistols to Slovenia, well past the communist break up. Most from this country were imported to the U.S. following Bulgaria’s and Slovenia’s admission to NATO in 2004.
Identical to the Russian version with the checkered, red Bakelite grips with a circled star along with the Russian dark blue finish, the Bulgarian Makarov is unquestionably a high-quality copy that prior to 1975 used some Russian internal components until the factory became entirely self-sufficient
Marked with an encrypted prefix for the production year, and followed by the serial number on the left slide and frame, quick identification of the Bulgarian variant is the presence of the Circle 10 stamped on the left frame. Surplus Bulgarian Makarov pistols are still available as of this writing from some U.S. distributors.
Editor’s Note: This excerpt is from the article, “Pistols From Behind the Iron Curtain,” which appeared in the Gun Digest 2018 annual.
The Republic Forge Defiant Lightweight 1911 is an elegant gun that’s big on power and small on size.
I am a huge fan of 1911-style pistols, and I use them for hunting (especially 10mm Auto models), home defense (night stand .45) and just punching paper at the range. But I’ve shied away from using a 1911 as a concealed carry handgun. Oh, I’ve tried it. And while others might have a different experience, I’ve found that full-sized 1911s are just too large and heavy for me to carry comfortably under a shirt or jacket.
The last couple years, though, have seen gun makers turning out smaller versions of their 1911s in .45 ACP, specifically with concealed carry in mind. Among the latest entrants into this market—and among the best I’ve used—is Republic Forge’s new Defiant Lightweight 1911.
At 30 ounces unloaded, the Defiant Lightweight is by no means a pocket pistol. But it is still nifty and fairly compact, a pistol that points naturally, is accurate and looks great. It’s a half-dozen or more ounces lighter than other full-sized Republic Forge 1911s. That weight savings is achieved via a frame made from 7075 T-6 Aluminum (also known as “Aircraft Aluminum”) and a 3.6-inch barrel.
All that and, with one in the chamber, the Defiant Lightweight still packs seven rounds of .45 ACP stopping power.
My time with the Defiant Lightweight included a day at the range, as well as a day’s concealed carry of the pistol. Range time came first.
For my testing, I used four brands of .45 ACP ammunition, three of them for accuracy testing: Aguila, 230-grain FMJ; American Eagle, 230-grain FMJ; and Remington UMC, 230-grain FMJ.
Accuracy testing was done at 25 yards from a rest. Next, and to better simulate a concealed carry situation, I shot at 10 yards offhand. In both cases, I was impressed with the Lightweight’s accuracy.
At 25 yards from a sandbag rest, the best five-shot group came with the American Eagle load, and measured 1.46 inches. The largest group was 2.43 inches with the Aguila ammunition. Given the Lightweight’s 3.6-inch long barrel, I’m not sure you could really expect much more from a pistol.
At 10 yards offhand, Remington’s UMC took the top spot with a group right at one inch. The American Eagle held a group of 1.17 inches, while the Aguila hit 1.21 inches. If I took my time? The groups were less than 1.5 inches, no matter which ammo was used.
The only functional problem came after 100 rounds or so had been run through the pistol. With a new magazine inserted, the first round of the American Eagle ammo would not feed into the chamber, the tip of the bullet pressed right against the bottom of the feed ramp.
A quick inspection revealed that the feed ramp was quite dirty. I was without oil or a cleaning spray (I’d left my accessories range bag at home!), so I wet a piece of paper towel with my saliva and wiped the ramp clean. Once that was done, the American Eagle rounds fed easily enough into the Lightweight.
(Of note, the other two types of ammunition I used didn’t have this feeding problem even with a blackened feed ramp. I’m not sure why, but for some reason the end of the bullet on the American Eagle rounds seemed to stick to the feed ramp, while the others slid over the grime and into the chamber.)
Shooting the Defiant Lightweight was a pleasure. The pistol’s weight naturally dropped down and back into the rear of my palm, snug and comfortable.
The ambidextrous wing safety snapped up/on easily with my right thumb and minimal effort, while it snapped down/off just as nicely. The grip safety required firm pressure, but not the undue squeezing needed for some 1911s I have used.
The magazine release is on the left side of the pistol (though it can be moved to either side), and the magazines popped out with one thumb’s worth of pressure.
The Lightweight’s slide works fairly easy; it isn’t 9mm pistol easy, but easier than most 1911s I’ve used. The cocking serrations at the rear of the slide are located at just the right place to assist in pushing back the slide.
The Defiant’s trigger broke at a very crisp 3.5 pounds with no take up. You squeeze the trigger, and the pistol goes off. It resets very quickly, too.
The metal of the front strap is nicely checkered, at 25 lines per inch, providing a superior grip for your bottom three fingers—a great aid to getting back on target after the first shot.
The VZ Grips on the Defiant are amazing. The front halves of the grips, facing the barrel end, are dimpled. The rear halves are crafted from a series of cuts that slant down at about a 45-degree angle.
The dimples grip your shooting hand fingers and the top of the palm of that hand very firmly. Meanwhile, the angled cuts perfectly grip and hold the rear palm of the non-shooting hand, stabilizing the pistol.
Modified Trijicon Night Sights sit atop the pistol, and they line up fast and naturally. According to Jeff Meister, Republic Forge’s Master Gunsmith, the Defiant Lightweight—like all of the gun maker’s pistols—features Republic Forge’s proprietary, patented recoil system featuring a flat wire recoil spring.
“The recoil spring will last for at least 15,000 rounds,” said Meister.
As far as various options like Cerakoting, colors, different grips and sights, etc., Meister noted that the Republic Forge website has a “Build Your Own 1911” feature that lets you select from the company’s full range of accessories and options. The site will also show you what these options look like on the pistol of your choice and provide you with a price per option/accessory, as well as a final total price.
Speaking of price, the Defiant Lightweight comes in at a hefty $2,995. No small change. At the same time, Meister added, each pistol is handmade, one at a time, at the company’s facility in Perryton, Texas. All parts are American made.
The Defiant, like every Republic Forge pistol, also comes with a Full Lifetime Warranty (minus misuse and abuse of course). Yes, it costs a lot of money. But you get a great deal of gun for that cash. You also get a handgun that, I suspect, will be passed down within your family, for generations to come.
Specifications:
Republic Forge Defiant Lightweight Caliber: .45 ACP Action: Single, semi-automatic Weight: 30 oz. (unloaded) Frame: Full-sized Commander, made from 7075 T-6 Aluminum Slide: 4340 Carbon Steel, heat-treated to 38-41 Rockwell Barrel: 416 Stainless Steel Barrel Length: 3.6 inches Trigger: Lightweight, skeletonized Trigger Pull: 3.5 pounds Sights: Republic Forge Night Sights with straight-eight Tritium configuration Price: $2,995 Manufacturer: Republic Forge; RepublicForge.com
One hunter took the Legendary Arms Works Professional rifle on an African safari to see how it performed. The results speak for themselves.
Halloween, 2015 // Steenbokpan, South Africa
The temperature at daybreak was well into the 80s as PH Nick Prinsloo and I climbed into the back of the Toyota Cruiser. He handed up the .300 Magnum, and we set off for the kudu haunts. After an hour spent looking for tracks, my wife hit me in the leg, eyes wide, and threw her hands in the air in two rising spirals.
“Kudu?”
“Kudu!”
She was the only one who saw the bull, and he had apparently beat feet for safer country. Nick and I dismounted and began a stalk of the area.
The terrain was incredible. Marula trees gave way to the rooibos, interspersed with small rocky kopjes the color of rust. The hours went by as we did our best to combat the swirling wind fueled by the now over 100-degree temperatures, but there was no sign of the bull.
We had actually given up for the morning when we finally caught the flick of a huge ear belonging to a kudu cow. We redoubled our efforts, despite the torturous heat, and within a couple hundred yards, we saw the bull we were after.
Unfortunately, he saw us first and began that familiar kudu sprint away from danger. The sticks were hastily spread, and Nick uttered the two words I’d longed to hear for over a decade: “Shoot him!”
The Professional came to my shoulder and onto the sticks in one effortless move, and the instant I had the shot in the Bushnell’s crosshairs, the Timney trigger broke as if commanded by thought and seemingly without my hand playing any part. I don’t recall the recoil, but I do vividly remember the bull falling out of the scope. Nick’s slap on the back was the icing on the cake.
Legendary Arms Works is a collaboration between two well known industry names: It is the marriage of the Ed Brown Model 704 action and Mark Bansner’s fantastic fiberglass stocks, and simply put, they are made properly. There are three models: The Closer, The Professional and The Big Five.
When you take a rifle on safari, it needs to be utterly reliable; there is little chance that you will find someone to fix your rifle in the bush. I chose the Professional because of the design features that Legendary puts into its guns.
The Action The Model 704 action is a slim, trim, controlled round feed affair. It is a round action, which affords a comfortable grip on the rifle when carried under the floorplate.
But the 704 is not your traditional Mauser-style controlled round feed with a huge claw-style extractor; the bolt has the profile and appearance of the push-feed rifles. A slot in the bottom of the bolt face cleanly picks up the cartridge, and a full 1/3 of the remaining bolt face is a huge extractor.
Let all skepticism be put aside; even with ammunition on the hot side of the spectrum and temperatures that topped out at 112 degrees, there were no extraction problems whatsoever. The 704 uses a blade-style ejector, and the fluted bolt adds a bit of style to the deal. The magazine loads its cartridges to the left first, the opposite of most bolt-action rifles, and the hinged floorplate provides quick unloading of the firearm.
The Professional’s magazine holds three .300 Winchester cartridges, and you can chamber a fourth if you’re so inclined. A three-position wing safety, a la the Model 70 Winchester, permits safe unloading of the rifle, without putting it into battery.
To round things off, the Legendary Rifles — including the Professional — come with a hand-tuned Timney trigger that breaks at just about 3¼ pounds, perfect for a hunting rifle.
The Stock Mark Bansner has long been in the stock-making business — formerly operating High Tech Specialties — and the stock provided with the Legendary Arms Works Professional is a winner. A graceful, sloping pistol grip, which will guarantee that you don’t get that nasty knuckle-split from recoil in the hard-kicking calibers, fits nicely in your hand, and the tri-color green pebble finish is rough enough to give a good grip (even with sweaty hands in the African sun) and prevent any of that smooth surface reflection.
The comb is designed to give proper eye alignment with a riflescope, and the length of pull — 13½ inches — fits most hunters like a glove. Good stock fit and cheek weld make any rifle a pleasure to shoot, and the Professional is no exception. A pliable Pachmayr Decelerator recoil pad takes up what recoil the rifle dishes out, and I must say, even at 8.1 pounds fully dressed, the .300 Winchester was extremely manageable.
Legendary Arms Works uses aluminum bedding blocks to secure the 704 action to the fiberglass stock, which enhances accuracy. All said, I’m not particularly a fan of synthetic stocks, but the hand-laid fiberglass stocks from Legendary Arms Works are among the best I’ve ever used.
The Barrel My Professional rifle came with a 24-inch, No. 3 contour, fluted barrel with a detachable muzzle brake. A 1:10-inch twist allows the use of the heaviest .30-caliber bullets, and this rifle showed an equal liking for many different bullet weights.
Muzzle brakes and I usually don’t get along well, but the brake provided by Legendary really took the sting out of the bench work. However, for field use, where hearing protection is generally not used, the brake can be screwed off and replaced with a cap, which comes with the rifle (Author’s note: the cap fell out of my rifle bag while packing for safari, and I had to bear the torture of the muzzle brake. I already have tinnitus, and that didn’t help. Remember the cap, folks!). The machine work on the barrel/brake joint is so fine that you literally have to search to find the seam.
Legendary Arms Works uses a gray Cerakote finish on all metal parts of the Professional rifle, right down to the firing pin, so there is no worry about rust. My sweaty hands can tear a good blued finish to pieces in a short amount of time, but the Cerakote is impervious to even my hands.
The Sights The Legendary Arms Works Professional comes with a clean barrel, but it is factory equipped with Weaver-style cross-slot bases. It wasn’t difficult at all to attach a Bushnell Elite 3500 2.5-10x40mm — a perfect choice for the varying style of shots that the South African bush can present. As you’ll find out, I’m very happy I chose that magnification range.
The close work, in heavy bush, can easily be handled by a scope with a magnification range of 2.5 to 3x, yet when the ranges exceed 200 yards, I’m awfully grateful for 9 or 10x. The Bushnell 3500 Elite is a very clear riflescope, and took adjustment perfectly.
At the Bench Any good rifle will show its merits at the bench; accuracy is usually the single biggest factor in deciding the worth of a rifle headed on an important hunt. I used a couple of factory loads for initial sighting in and barrel break in: the Federal Vital Shok 180-grain Nosler Partition load and the Winchester 180-grain Power Point load.
I’ve had the best results with 180-grain bullets in the .300 Winchester, and this rifle liked them as well, with the Winchester load printing just over MOA accuracy and the Federal load just under. Either would have been an acceptable choice for a plains game safari, but I had something different in mind.
The .300 Winchester Magnum isn’t a difficult cartridge to handload for; it is one of those cartridges that falls under the loose category of “inherently accurate.” The case will perform well with powders in the medium to very slow range, say anything from IMR4064 and Varget to H4831SC and Reloder 25.
Find a charge that your barrel likes, spark it with a good magnum primer, and you should be in business. I’ve used many different bullets and many different powders over the years, and it has never been a very difficult prospect to get a good .300 to shoot well.
I’ve been experimenting with Cutting Edge Bullets, a company out of Drifting, Pennsylvania, that makes monometal copper and brass bullets that are turned on a CNC lathe. The bullets are predominately of hollowpoint design, and instead of the traditional mushroom-type expansion, the wall of the bullet along the hollowpoint breaks into several “blades” upon impact, causing nasty impact trauma, while the base of the bullet remains at caliber dimension and gives deep penetration.
They are very consistent bullet to bullet, and that simple fact enhances accuracy greatly. They had worked very well on a safari in April/May 2015 in .404 Jeffery and .416 Rigby, in both South Africa and Zimbabwe, so I was keen to use them in the Legendary Arms Works Professional for this hunt.
Based on the performance in the bigger guns — using bullets much lighter for caliber than the traditional loads — I looked at the Cutting Edge Copper Raptor 150-grain boat tail hollowpoint. I know, a 150-grain bullet shouldn’t be a smart choice for animals the size of kudu or bigger, but the performance of the Cutting Edge Raptor convinced me that albeit being lighter than normal, it would get the job done right.
Because this hunt would be conducted at the end of October and beginning of November, I knew the temperatures in the Steenbokpan area could swell the mercury very easily. I chose a new powder, one that would be insensitive to the temperature extremes: the new Enduron IMR4451, a stick powder with a burn rate slightly slower than good old IMR4350, and just perfect for the .300 Winchester Mangum.
The Enduron line of powders has been engineered to give consistent velocities across a wide range of temperatures, from sub-zero to sweltering tropical heat. My buddy Chris Hodgdon, President of the Hodgdon Powder Company that produces IMR powders, told me that this would be the first use of IMR4451 in Africa.
The second load I chose with this powder/bullet combination gave me a three-shot group measuring 0.9 inches and cruising along at 3,325 feet per second (fps), and those results were repeatable. The Norma cases I was using showed no signs of high pressure, and even though I developed the load at 55 degrees, I had faith in IMR’s claim that the temperature fluctuation would be very low.
Their claim held up. When we arrived in South Africa, we drove to the hunting concession and immediately checked the zero of the rifles.
Temps were in the 90s, yet the Professional and its Bushnell Elite scope held zero perfectly on the 9,000-mile trip, and even in the warmer climate, there were no signs of higher pressures. There was no change in the point of impact, so we were all set to go hunting.
On the Hunt During the course of a safari, your rifle can take quite a beating, and any weak spots can be brought to light quickly. On the truck, off the truck, loaded, unloaded, dragged through the brush, encrusted in dust, rinse and repeat.
The Professional took everything I could throw at it and handled it all just as its name would indicate. No matter how long the stalk was, or how many miles we put on our boots, the Professional was a pleasure to carry. Every cartridge fed perfectly, the safety stayed where I put it no matter how thick the acacia and stick-and-hook thorns got, and the rifle did everything I asked of it.
That kudu I told you about earlier was taken on the run at 70 yards, with the Bushnell set at 2.5x. The magnification was low enough for quick target acquisition, and the crosshair bold enough to get a fast shot where it needed to go; kudu bulls don’t stick around very long waiting for you to get the crosshairs where they need to be.
The Bushnell Elite 3500 also offered enough eye relief to be used with sunglasses; I have a pair of Serengeti glasses that offer good protection from the African sun, and the polarized lenses actually aid in spotting African game in the bush.
The waterbuck bull was a different story.
We were actually following the tracks of some very spooky impala on quite a long stalk. My wife wanted the impala ram in a very bad way, so while we were tracking the herd I was kind of bumbling along at the rear of the parade trying not to alert any game and watching the ground for the occasional leopard track that explained why the impala and zebra were acting so spooky.
When Nick Prinsloo told me that the impala were clearly running, and much too fast to attempt to catch them, we made our way back to the sand road to meet the truck — and the cooler full of ice water. Everybody in front of me stopped short in the middle of the road and motioned like crazy for me to come up where they stood.
Sebastian Jonker, our other PH, said in a harsh whisper “Your waterbuck is lying down across the pan; he has no idea we’re here. Take him man.” Some 217 yards away, a gorgeous waterbuck bull was indeed napping.
No pressure here — two Professional Hunters and my wife watching me, and a waterbuck with his vitals all squashed down on the ground offering a very small target.
I cranked the Bushnell up to 10x, got The Professional onto the sticks, and waited for the small circle that the crosshairs were making to become even smaller. I knew the shot felt good when the Timney trigger broke, and when the sound of the bullet hitting flesh came back on the wind, all the stress washed away.
The bull stood, stumbled on wobbly legs for 15 yards and fell down dead. “Dead, and doesn’t know it,” as the great Harry Selby once said.
So, as you can see, the Legendary Arms Works Professional turned out to be a great choice for my safari, or any other hunt on any continent, for that matter.
The controlled round feed and crisp trigger made shooting under pressure a dream; the Bushnell Elite 3500 was clear and gave plenty of contrast to get the job done. Those Cutting Edge Copper Raptor bullets worked perfectly, hitting right where they were aimed and performing as advertized: I only recovered the base of one bullet, and that was from the kudu.
And if you’re a handloader, give the Enduron line from IMR a try. You’ll be happy with it.
Keep your eyes on Legendary Arms Works; these rifles are going to be on the scene for some time to come. When you make a rifle that performs this well, it’s bound to stick around.
With the ability to easily breakdown into easily concealed components, the Ruger SR-556 Takedown might be the ultimate knapsack AR.
Compact, covert, and discreet — all words that describe the relatively new Ruger SR-556 Takedown. Takedown rifles have a cool allure with the metallic sound of multiple parts mating together to form an accurately shooting rifle.
The Ruger SR-556 Takedown has that same cool, incognito presence, and after a few pulls, twists and clicks, it’s all business. It’s a refined AR that can do a job and melt back into the scenery slung over your shoulder in a knapsack.
The DNA of the AR-15 design essentially makes it a takedown rifle. After all, the upper receiver can easily and quickly be removed from the lower receiver, breaking down the rifle into two pieces. The issue is that the upper receiver makes up the bulk of length.
By my estimation, the typical AR-15 with a 16-inch barrel has an upper receiver that is 24.5 inches long, and depending on the muzzle device, that length could be even longer. Stowing over 24 inches of forged aluminum and hammered steel is not particularly easy. Think a large duffel bag.
What the Ruger SR-556 Takedown does is allow the user to remove the barrel from the upper receiver so the respective lengths are 17.87 inches and 18.5 inches. The lower receiver is 15.75 inches with the stock collapsed. This small package fits inside its own knapsack that looks like it belongs in academia rather than in a UH-60 Black Hawk.
The beauty of the Ruger Takedown is its simplicity. It takes me about 10 seconds to assemble or disassemble the rifle. I’m not racing to complete that task, it is just that simple. And I like simple.
The Ruger breaks down into three components: lower receiver assembly, upper receiver/handguard assembly and barrel/piston system assembly. The first step to disassemble the Ruger is to pull out the pivot and takedown pins and separate the lower from the upper and remove the bolt carrier group (BCG) from the upper.
Second, move the slider bar on the underside of the handguard toward the rear of the rifle. Third, twist the barrel assembly clockwise with the muzzle facing away from you and pull the barrel free from the handguard.
Done. What is left are three manageable pieces that fit inside a small knapsack with pockets for each component.
The knapsack does have MOLLE straps, so it does look a bit tactical, and the patch with the Ruger logo is attached with hook and loops so you can replace it. From the outside, you cannot tell an AR resides inside the bag.
There are no rattles or clunking of metal to belie the contents. The case measures 22.5 inches long by 7 inches thick and 7.5 inches wide. Ruger also supplies three Magpul 30-round magazines that fit inside the knapsack with the disassembled components.
Ruger really studied the takedown concept to make the system repeatable, secure and rugged. The rear of the barrel has lugs that mate with grooves in the upper receiver. The components lock securely together even when dirtied up from extended use. Plus, there are no small parts to lose because the parts snap together. And no tools are required.
Ruger was also smart to use its piston system AR. The Ruger barrel/piston system component was sturdy.
If I accidentally dropped it, it would no doubt come out unscathed. I don’t want to worry about babying a rifle, and the Ruger design gave me that confidence.
Another check in the upside column with the Ruger SR-556 Takedown is its ability to swap calibers. Ruger sells an optional caliber conversion kit so you can shoot .300 AAC BLK, as well as 5.56mm NATO, making the Ruger compatible for most situations: hunting, plinking and home defense.
Finally, the Takedown is hands down easier to clean than the typical AR-15.
All the cool takedown characteristics aside, performance is where the bullet hits the rifling so to speak.
A concern I had was a shift in zero. How is the zero impacted when removing and replacing the barrel?
The answer is: It isn’t with the Ruger Takedown.
During range testing, I removed the barrel numerous times (if you do the same, remember to use gloves). In all cases, I found there was no significant shift in zero.
Ruger’s piston-system AR is the Cadillac of the company’s AR line, keeping the BCG cool with less felt recoil. The rifle employs a two-stage, four-position gas valve system. There are four settings marked “0,” “1,” “2,” and “3,” with “0” closing the valve so the SR-556 acts like a single-shot rifle.
The “1” setting allows the least gas to enter the system or is the lowest setting; “3” allows the most gas or is the highest setting. This system has less felt recoil and allows the user to regulate the gas to the piston to ensure proper operation especially when running subsonic ammo with a can.
The Takedown has a forged lower and upper receiver. Ruger decide to opt for premium furniture on the Takedown, with a Magpul MOE SL stock that has no rattle and gives a nice cheek weld. The Magpul MOE pistol grip feels good in hand.
The selector lever, bolt release and magazine release are all Mil-Spec. It is equipped with a forward assist and has a manganese phosphate, hardcoat anodized finish.
The Elite 452 AR Trigger is Ruger’s proprietary two-stage trigger. My sample averaged 4.5 pounds.
I liked the take up in the first stage. The second stage had a short, crisp break. It is a trigger that helps accuracy at short and long range.
The upper receiver features Ruger’s proprietary KeyMod handguard, which feels thin and is comfortable to hold. Folding sights are mounted on the top of the upper.
The front sight can be adjusted for both elevation and windage, so zero stays with the barrel. The rear sight is also adjustable.
The barrel is cold hammer-forged Mil-Spec 41V45 chrome-moly-vanadium steel, chrome-lined, and is equipped with Ruger’s flash suppressor.
At the range, the trigger helped with accuracy. Using inexpensive Aguila 62-grain FMJs and IMI 55-grain FMJs, I was able to shoot five-shot groups of 0.8 and 0.9 inch, respectively, at 100 yards using open sights.
The economy Federal American Eagle ammo was no slouch either, averaging 1-inch groups. On average, you can expect about 1- to 1.5-inch groups at 100 yards with this rifle. I liked the smooth operation of the piston system, and along with the rubber buttpad, you get less felt recoil.
The Ruger SR-556 Takedown is good to go out of the box — I mean knapsack. It is an easy rifle to dis- and re-assemble, and it shoots just as easy.
As it turns out, big surprises can come in small packages.
Upland hunters have a few more choices when it comes to how they feed their 28-gauge, with Federal Premium adding three new shells for the minimalist bore.
The 28-gauge is one of those gems of the shotgun world only a select few experience. Typically, it’s the dedicated quail hunters and serious small-bore skeet shooters that are privy to this classic, easy-shooting and flexible gauge.
It’s a shame because, given the right loads, the 28-gauge can hold its own against the 20-gauge. At the same time, it can be shot longer without a shoulder developing a touch of “smoothbore arthritis” the next day.
Most likely, one of the hobbles to wider adoption of the 28-gauge has been its relatively hard-to-find, and thus somewhat pricey, ammunition. But in recent years, the market has seemed to loosen, with some of the major ammo players upping their game on the minimalist bore.
One of the longer-running advocates of the 28-gauge has been Federal Premium Ammunition, which recently expanded it’s already respectable offerings for the bore. The Minnesota company added a trio of shotshell options from its Game-Shok line, giving upland hunters some solid new choices the next time they head to knock bobwhites out of the sky.
The heavy field loads each come with 1-ounce payloads and in three different shot sizes — 5, 6 and 7.5. According to the company’s specs, the shells push their shot hard, each with a muzzle velocity of 1,220 fps. Given all these 28-gauge shells’ 2 3/4-inch chambers, obviously the shells are sized accordingly.
The additions grows Federal’s 28-gauge offerings to 10 different loads, which also includes two specially designed for competition shooting. Currently, the company is offering the new Game-Shok loads in boxes of 25 at an MSRP of $19.95 across the board. It’s definitely more than what it costs to feed a 12-gauge, but in the scheme of the 28, it’s pretty economical.
Other than certain rounds specifically designed to work in conjunction with a suppressor, handloading for a gun outfitted with a can can be challenging… but not impossible.
“Quiet on the set!” People’s ears are tired of the loud report of rifles, and here in the States, we’re finally making a larger move toward embracing rifles equipped with a suppressor.
Unfortunately, they’re not yet legal in all states — here in New York State, for example, where fun is illegal and smiling is a misdemeanor, they’re definitely out — but it sure is nice when the fella next to you at the range has a can instead of a brake. Personally, I have ringing in my ears from too many years of exposure to gun fire (nobody wore ear pro when I was growing up) and from decades of playing in loud rock bands (louder is, in fact, better). I wear ear protection at the range — sometimes combining two types — and probably should while hunting.
The installation of a suppressor on the end of your rifle undoubtedly cuts down the decibels, but what does it do to your ammunition? What effect does it have on the pressures generated, and the trajectory curve of the bullet?
Well, I’ve done some playing around, and I believe that in the handloading world, we need to take suppressors into consideration when developing a load. Just as a longer barrel will invariably generate a higher velocity than a shorter barrel, all things being equal, the addition of a suppressor has generally shown to increase the velocity of a given load compared to a naked muzzle.
I saw this for the first time down at the FTW Ranch in Texas, shooting next to a great guy named Nate who had a sweet 6.5 Creedmoor, threaded for both a muzzle brake and a suppressor. After a full day of shooting, Nate decided to swap out the brake for the can, and immediately noticed a change in point of impact as well as the warning signs of high pressure. His bolt was sticky on the upstroke, and I could see flattened primers.
Puzzled, I asked him to switch out the can and the brake to see if something was wrong with the ammunition. Nope, ammo was good, but the problem reared its ugly head again when trying the can.
We let the barrel completely cool, and tried it again. The situation improved, but we had to let the can cool between shots. While I wish we’d had a chronograph to actually measure the velocity difference with and without the can, having seen countless numbers of cartridges running at high pressures, I can tell you there was a definite velocity/pressure increase.
This will translate directly to anyone handloading for a rifle with a suppressor. Sometimes when developing loads, you may find the point of high pressure and back your load off just enough to be safe, while maintaining accuracy. The addition of a suppressor can bring those pressure levels back up into the danger zone.
Should you run into a similar situation, my recommendation would be to re-work the load with the suppressor installed, verifying that pressures are safe, and then try it again with the can removed. I’d be willing to wager that with a bit of experimentation you’ll find a load that works well in both situations.
Bottom line is that the addition of a suppressor will, in most instances, behave like a longer barrel, and generally increase muzzle velocities.
Subsonic Loads This is the other part of the quiet equation. The .300 AAC BLK, pushing a 220-grain spitzer bullet to somewhere between 1,050 fps and 1,080 fps, showed us just how much a quiet, yet powerful, load can be. Handloading subsonic loads, in a rifle case larger than the Blackout, can be a difficult proposition.
At just about 1,080 fps — depending on the temperature of the day — the bullet leaving the muzzle will break the speed of sound and create a sonic boom, resulting in the majority of the report we hear from a firearm being discharged (the other portion being the gases slamming into the atmosphere at a supersonic rate). Reduce that bullet’s velocity to below the speed of sound, and all you’ll hear is the gas explosion, hence the immediate discernable difference between supersonic and subsonic ammunition.
For the Blackout, you can easily handload to subsonic velocities using Reloder 7, IMR4227 or H4198 and a 220- or 240-grain bullet; just be careful not to vary from the listed load in the manual, as there is no room to move.
Other cartridges will pose a challenge. I’d say your best bet would be to use a heavy-for-caliber bullet and a case with limited capacity. The .308 Win., .30-30 WCF and more than likely the .250-3000 Savage could all be loaded to subsonic velocities using IMR Trail Boss powder.
This is a funky powder, looking like miniature Cheerios, that is very light for volume. It comes in the same size can as a pound of smokeless powder but only weighs 9 ounces.
Here’s the loading process according to IMR: Pick a bullet and a seating depth, and carefully mark the outside of the case where the base of the bullet will sit. Fill the case to that point with Trail Boss, and then weigh it on your scale.
This will be your maximum (volumetric) load, though the pressures will be significantly lower than that of smokeless powder. You can reduce that maximum load by 70 percent for a safe starting load, and work up toward that maximum figure if you choose.
I’ve seen published data that indicates that a .308 Win., .30-30 WCF, .30-06 Springfield and even the .375 H&H and .416 Rem. Mag. can all be loaded with Trail Boss to obtain subsonic results, but it’s going to take a bit of experimenting to see which bullets will perform best in your gun. Perhaps this powder would serve as a good reason to cast some good, old-fashioned lead bullets, and get back to roots. I can also see where Trail Boss would serve very well in teaching a new shooter how to handle a big game rifle, without the report and recoil associated with the full house loads, especially in those big guns.
Looking to go armed, but are stuck in the weeds as to what to arm yourself with? Here are 20 of the best concealed carry gun options that will keep you on the defensive.

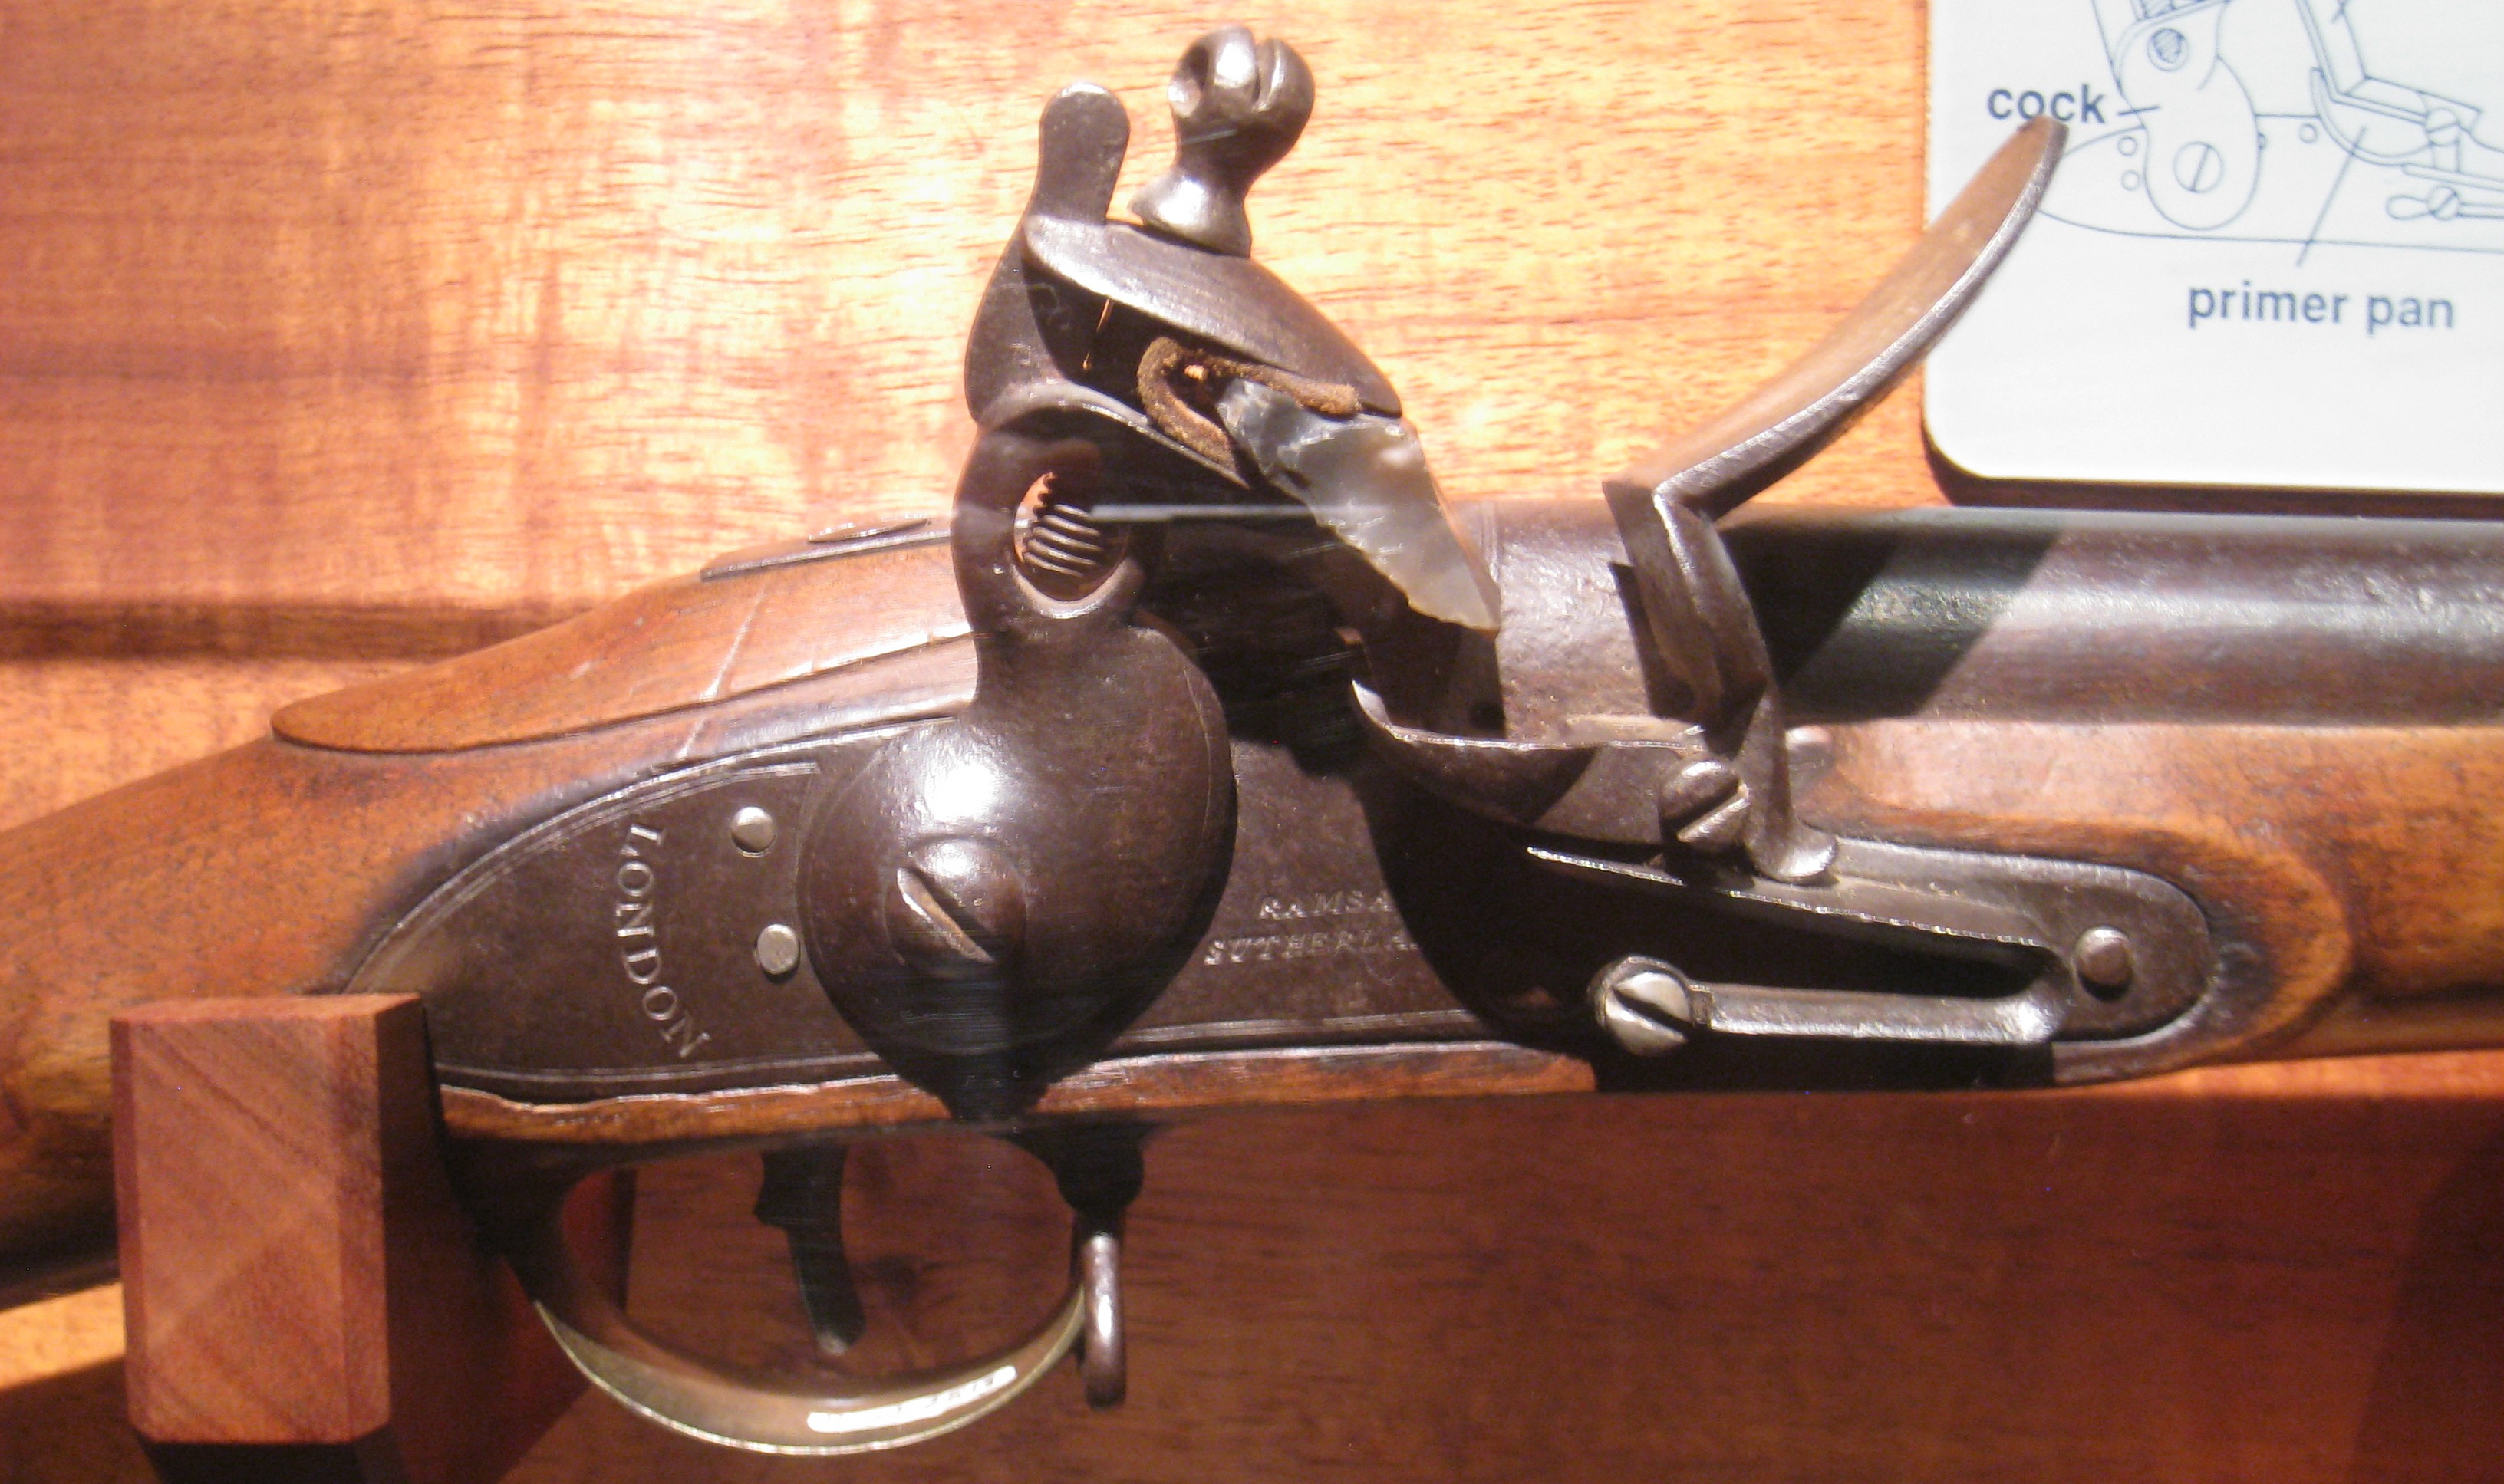
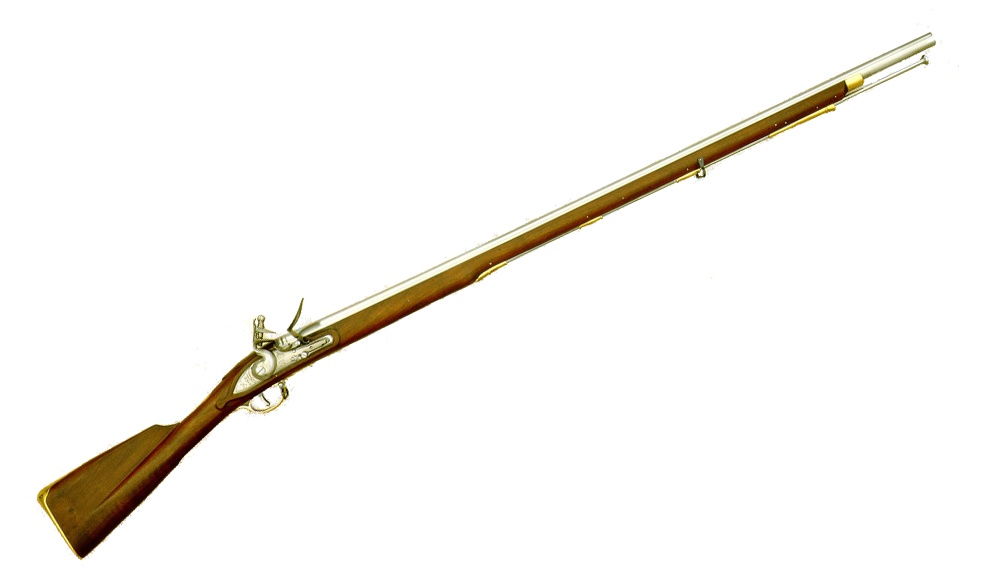 While the American Revolution had more storied firearms, this .75-caliber smoothbore was the workhorse in founding the nation and trying to prevent its foundation. Better known today as the “Brown Bess,” the muzzle-loading flintlock was the most common arm of the war, utilized heavily by both sides of the conflict.