Get the most out of your tactical shotgun with these easily installed and affordable upgrades that are certain to make your smoothbore even more effective.
What are some great tactical shotgun upgrades to increase performance in your scattergun?
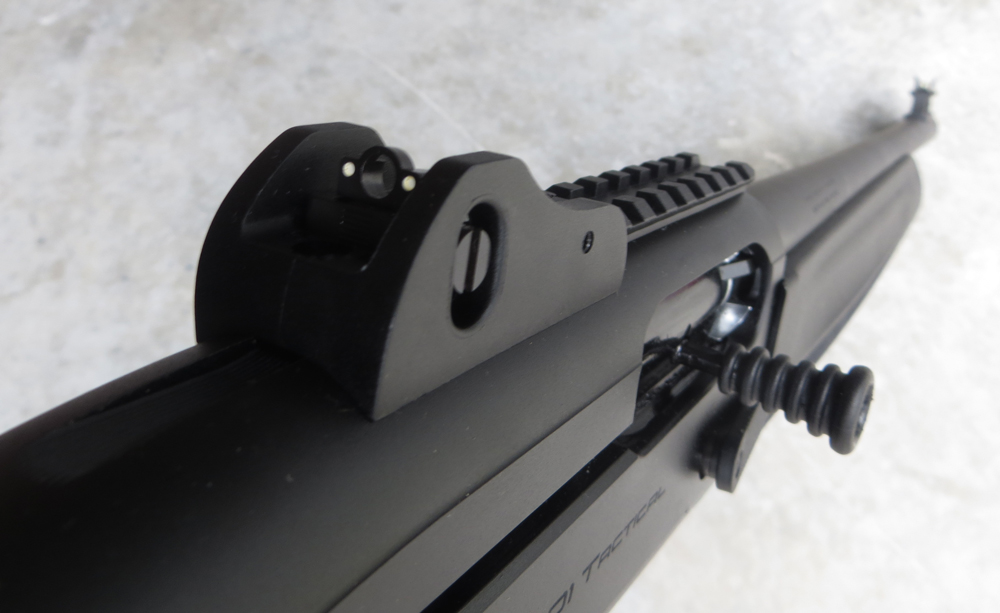
To truly harness the potential of your tactical shotgun, an improved sighting system is required.
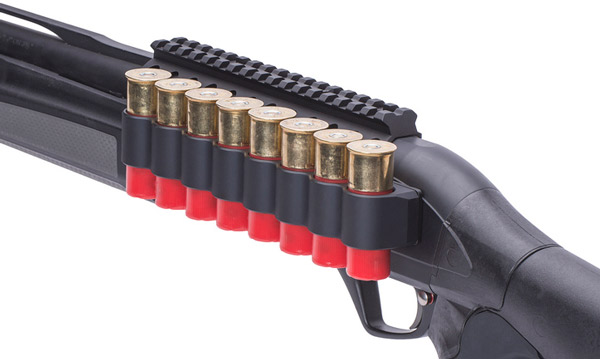
A shell carrier is a must to manage your tactical shotgun’s spare ammo and keep it at hand.
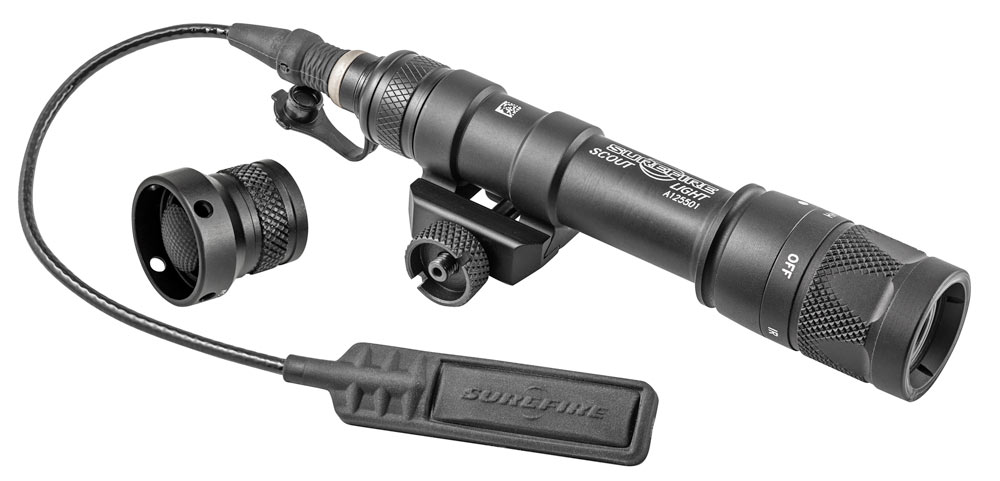
Adding a flashlight to your tactical shotgun can be tricky, but there are a slew of mounting options that make it easy.
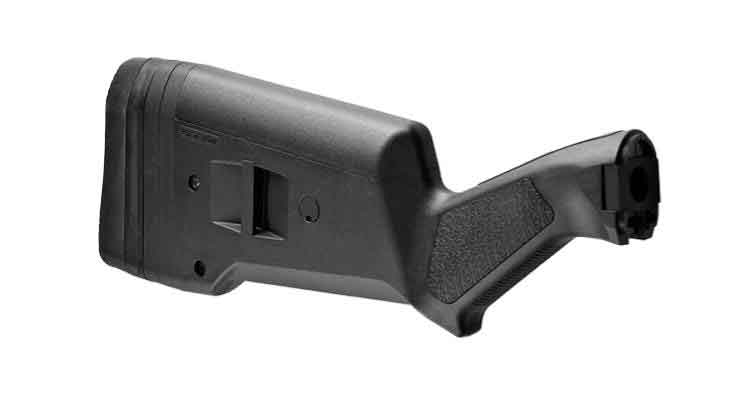
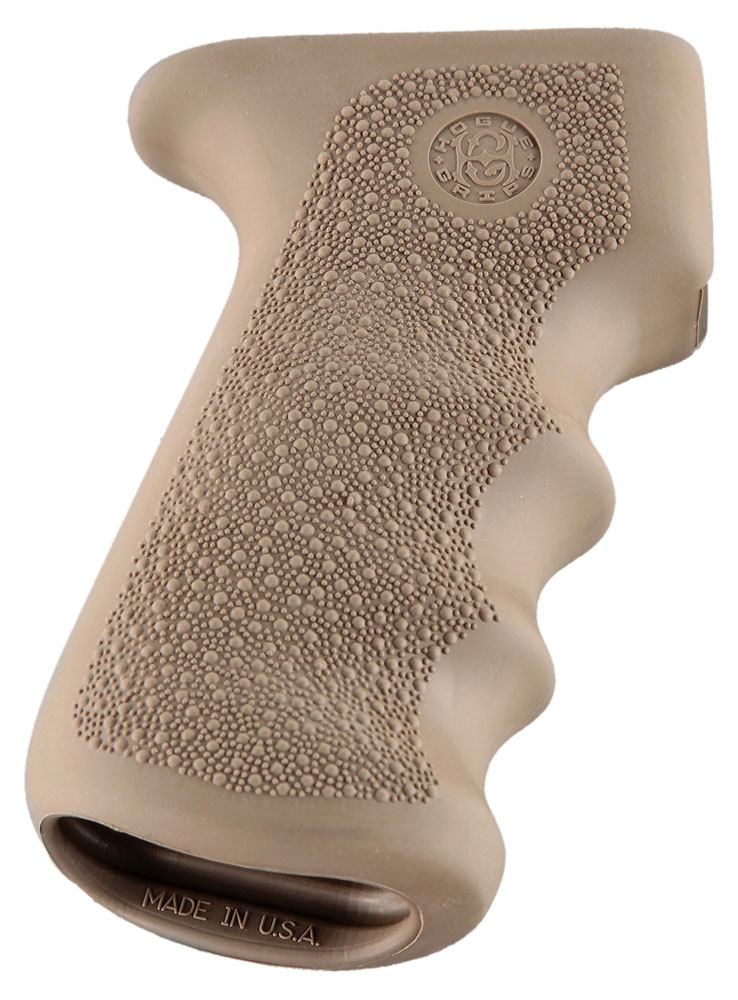
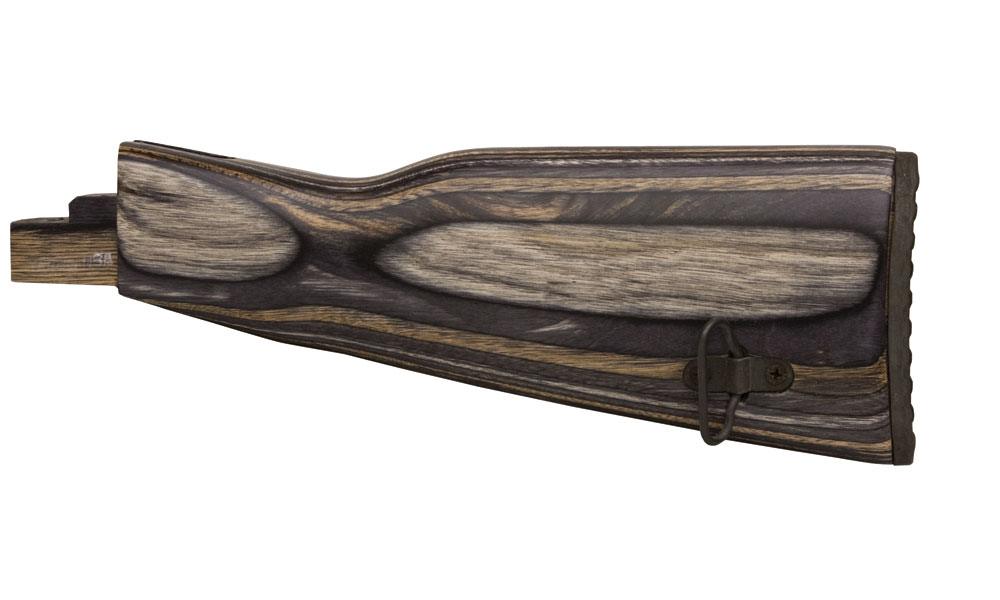
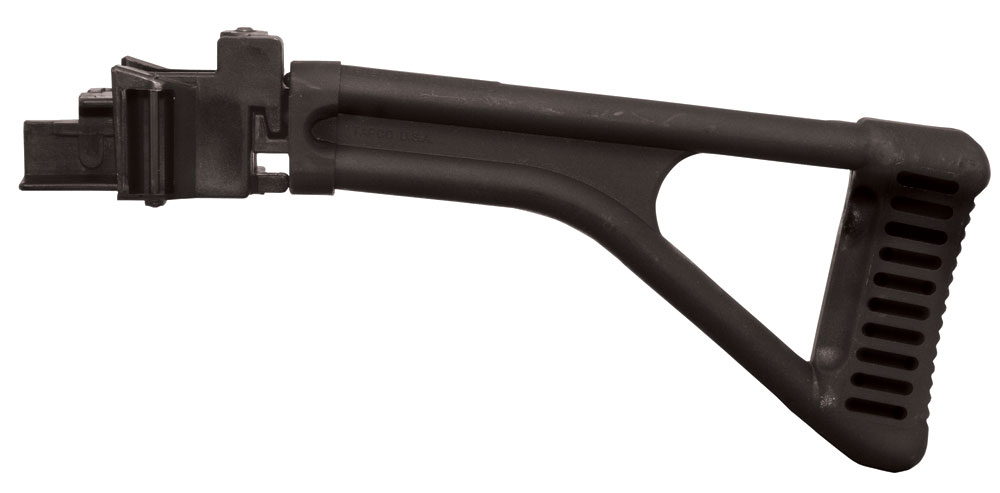
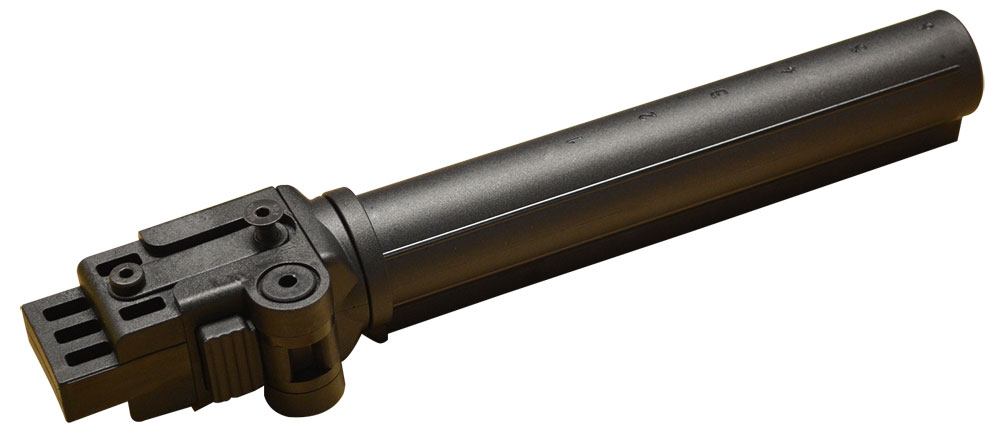
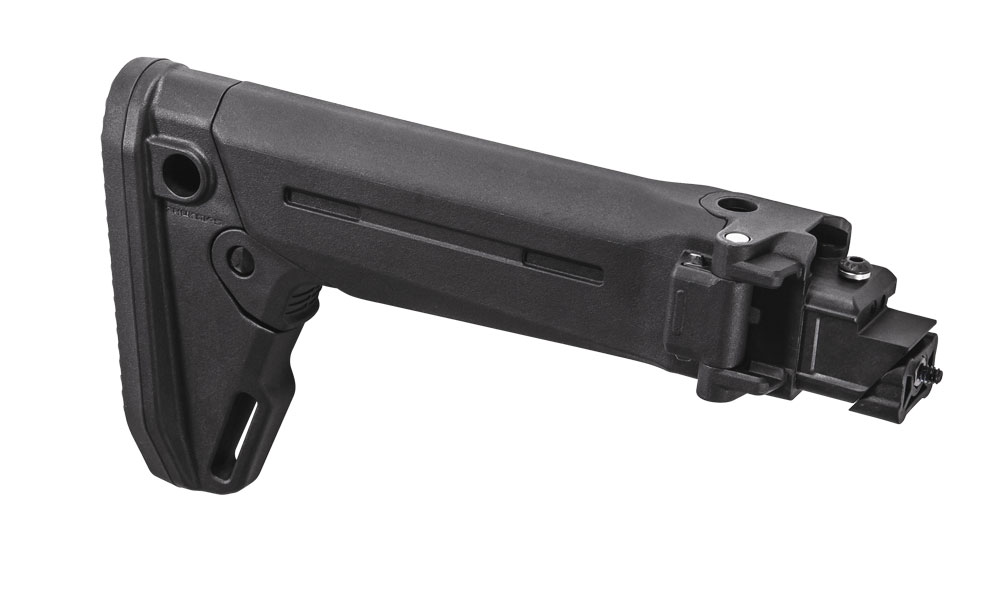
A stock buttstock just won’t cut it with a tactical shotgun; get something that will give you supreme control over your smoothbore.
When it comes to defending your hearth and home, few firearms beat the tried-and-true shotgun. The age-old weapon is as versatile as it is devastating, and in a close-quarters defensive situation, there isn’t much that can outgun it. Typically, shotguns are ready to protect you and yours right out of the box. But like all defensive arms, there are a few tweaks here and there that can make the deadly scattergun even more effective. So, without further ado, here are 4 Must-Have Tactical Shotgun Upgrades.
Sights
First and foremost, you have to get on target — accurately. And for the most part, that good old factory-installed brass bead can be used with good effect, as proven by so many police shotguns that are so equipped, but there are even better choices
Ghost ring sights are generally the preferred sighting system for shotguns, giving users extremely fast target acquisition and transition capabilities, not to mention enhanced accuracy. They also elevate a smoothbore’s medium-range effectiveness quite nicely.
Luckily, many modern tactical models already come outfitted with them. If your particular shotgun does not, or you’re looking to upgrade, there are many solid options on the market. Manufacturers such as Vang Comp Systems and XS Sight Systems, for instance, offer models with much more functionality, including fully adjustable rear aperture and tritium inserts for the front sight. On top of that, they’re winged, protecting the sights themselves and preventing them from getting snagged on gear.
Like all the shooting world, red-dot optics have infiltrated the realm of shotguns — for good reason. They plain work in ensuring payload meets target. Of course, opting for something such as an AimPoint Micro T-1 or a Meprolight Mepro-21 will run a considerable amount more than iron sights. But they can be well worth the money. Peace of mind that you’ll send a slug or buckshot exactly where the dot lands is priceless.
Shell Carrier
The typical, unaltered shotgun holds five to six rounds in its magazine, so spare shells are a must. But managing this extra ammunition can be among the greatest challenges for smoothbore operators. Shotshells, after all, might be some of the most unwieldy of all modern ammo. Side carriers are the most logical and efficient solution to this problem. Mounted directly on the receiver, the rigs can, in some cases, put as many as eight shells in sight and within reach. Mesa Tactical and TacStar provide some of the most popular models available today, at relatively affordable prices.
While practical, side carriers might not suit every shooter. For those who frown upon the ideal of toting ammo on their receiver, buttstock carriers are the way to go. The fabric sleeves are easy to install, are typically inexpensive and abound. BLACKHAWK!, Uncle Mike’s and many other manufacturers offer excellent options and can dang near be found at any gun or outdoor retailer.
Lights
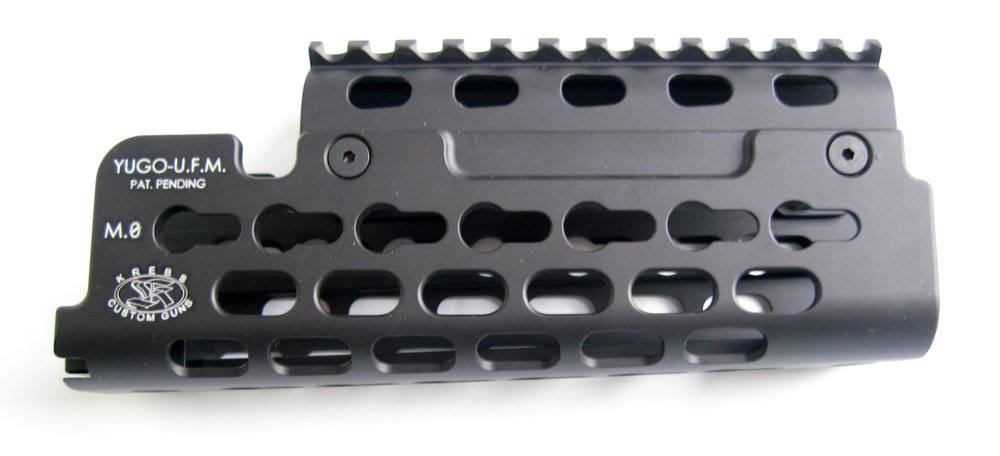
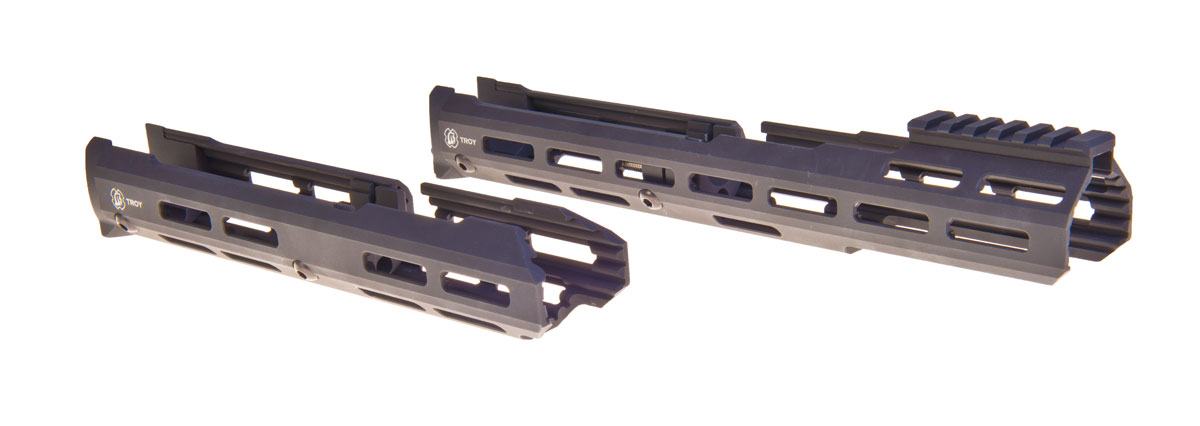
Being able to see what you’re shooting at is an obvious must for a defensive weapon. And given the likelihood of having to confront an intruder or protect your family in the dark, a light source would be a pretty dang good idea. Tactical shotguns can be a bit trickier than tactical rifles to outfit with a flashlight, given they usually don’t come with M-Lok or KeyMod real estate. But there have been a number of innovative solutions over time allowing shotgunners to light up their guns.
For those who run pump actions, SureFire has one of the most intriguing lighting upgrades — the DSF Series Forend Weaponlight. The forend replacement comes with a built in SureFire flashlight and easily accessible controls, completely integrating into the existing platform. The drawback is the DSF is a hefty investment.
Those who are a bit thriftier when it comes to upgrades might look at a plain-old flashlight mount or rail addition. GG&G offers a handy rail mount that installs directly to the forend that also includes sling mount. It is simple and nicely designed to offer plenty of functionality, especially because it allows you to run a pressure switch. CDM Gear also has a nifty system that attaches between the barrel and magazine. This allows the user to move his light much more forward on his weapon, but does somewhat limit remote-control possibilities.
Stock
Shotgun stock systems have come a long way in recent years, and upgrades are typically a vast improvement from the factory installs. They are more adjustable to the user’s frame, thus making scatterguns more intuitive to use. They offer better grip designs, in turn improving control. And they’re engineered to mitigate recoil, just plain making the smootbores more accurate on follow-up shots.
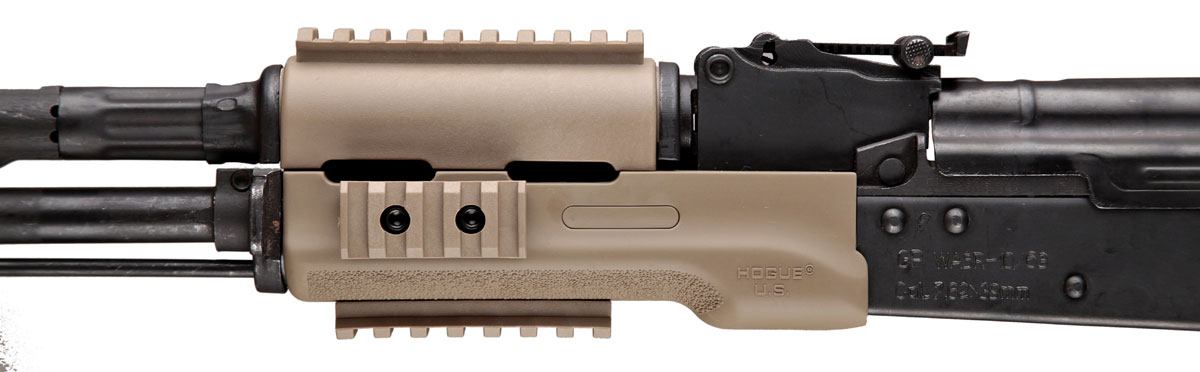
There is a whole array of options out there to fit your personal preferences. Magpul’s SGA Buttstock offers a bit of a more traditional style, but with the advantage of an enhanced grip and the option of a cheek riser. And while more set in size (there are two lengths to choose from), Hogue Overmolded Stocks are a sturdy conventional option and come with an ample buttpad to tame the thump.
For those searching for a true tactical feel to their shotgun, it’s hard to beat Fab Defense’s M4 Buttstocks. As the name suggests, they are modeled after the M4 carbine’s adjustable buttstock, and so can be tailored to any frame. On top of that, they feature a pistol-style grip that is just the ticket in gaining supreme control over a scattergun.
Want to get the most out of your .30-06 Springfield loads? Check out these tips for handloading this classic hunting cartridge.
What are some basic tips to keep in mind when reloading the .30-06 Springfield?
The .30-06 Springfield remains one of the most versatile hunting calibers, and there are loads of options when it comes to handloading.
The .30-06 will run on many powders, but the author prefers the slower-burning options, such as IMR4350 and Reloder 19 and 22
The author trims all cases, even new brass, to the .30-06’s standard case length of 2.494 inches
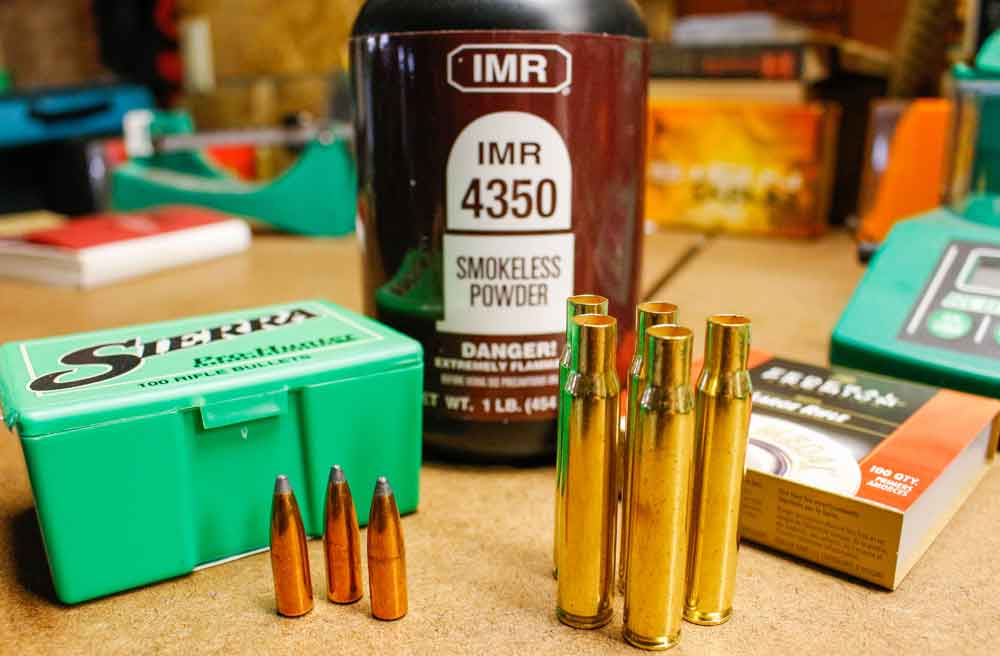
There are many pet handloads out there that will produce good results, but one of the most versatile involves 180-grain bullets (Sierra ProHunter or Swift A-Frame) atop 54.5 grains of IMR4350
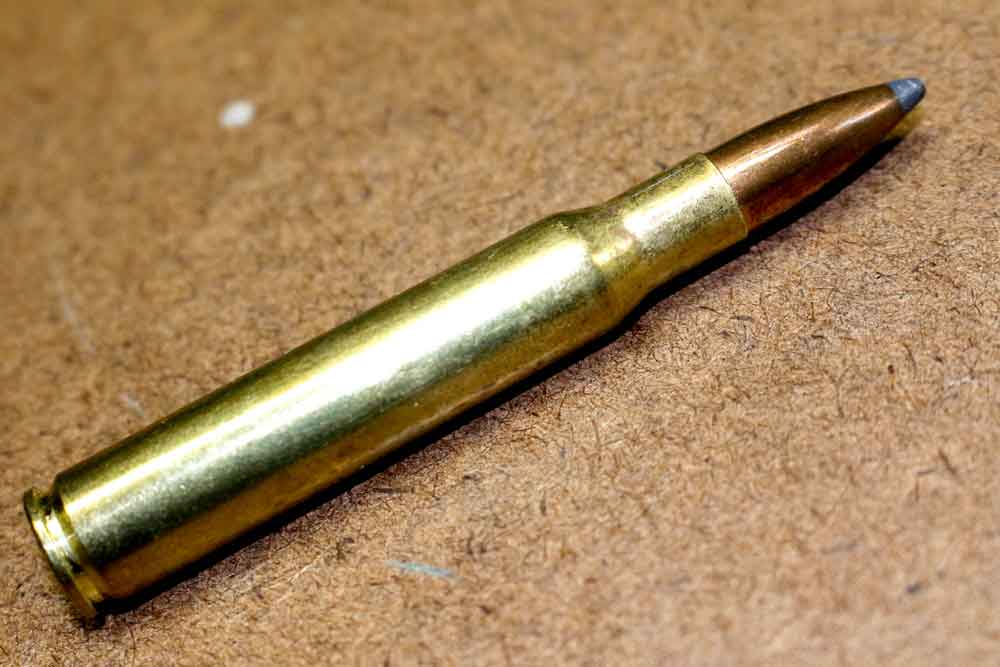
The .30-06 Springfield remains one of our most popular hunting cartridges, even 110 years after its introduction. It’s a cartridge that can effectively use the full gamut of .30-caliber bullets, and, as you’ll soon see, is rather easy to load for.
There is plenty of good .30-06 brass on the market, even when times are tough, and .30 caliber is one of our most popular. While the .30-06 has been produced in just about every action form conceivable, from single shots to autoloaders to pumps, the bolt actions are the most popular.
If you’re loading for a bolt gun or single shot, you may take full advantage of the neck sizing technique, but for the autoloaders, slides and any other action, you need to full-length resize your brass.
How To Get Started Reloading A good set of dies, such as the RCBS full-length resize and seater dies, and an RCBS No. 3 shellholder, will do almost everything you need. The .30-06 runs on a standard large rifle primer, like the CCI200 or Federal No. 210, though I actually prefer the Federal Gold Medal Match GM210 primer.
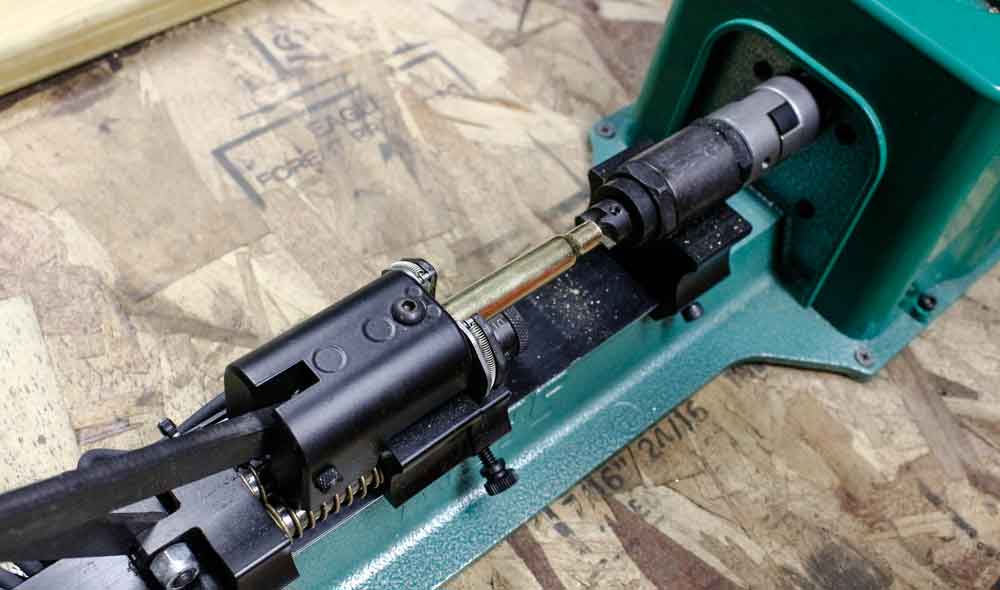
The ’06 has a case length of 2.494 inches, and I trim all my brass to that length — even the new stuff (some new brass will actually run a touch long) — and I give all the case mouths a good chamfer and deburring.
For powder choices, the Ought-Six will run on a multitude of powders, from the faster burning powders in the IMR3031 range, to the mediums like IMR4064, IMR 4451 and Reloder 15, to the slower burning IMR4350 and Reloder 19 and 22. The last group of powders is where I’ve found the best velocity and accuracy with most bullets. I like Federal and Norma cases for most of my loads.
The .30-06 Springfield is still the benchmark of the .30-caliber cartridges. It will push the 125- and 130-grain bullets over 3,200 fps without much difficulty, yet the heavy-for-caliber 220-grain slugs will still leave the muzzle at 2,500 fps.
Like I said, the ’06 isn’t a difficult prospect to reload. I’d like to share some of my favorite loads, some that have proved themselves in more than a few different rifles.
Disclaimer I’m going to put this out there now, and you’ll see it many times in my column: Regardless of the load data I share with you, you must start at the bottom of the load data in your reloading manual and work your way up slowly, looking for pressure signs. You can’t just hop in at the data listed; it may not work well in your rifle, and all barrels are different.
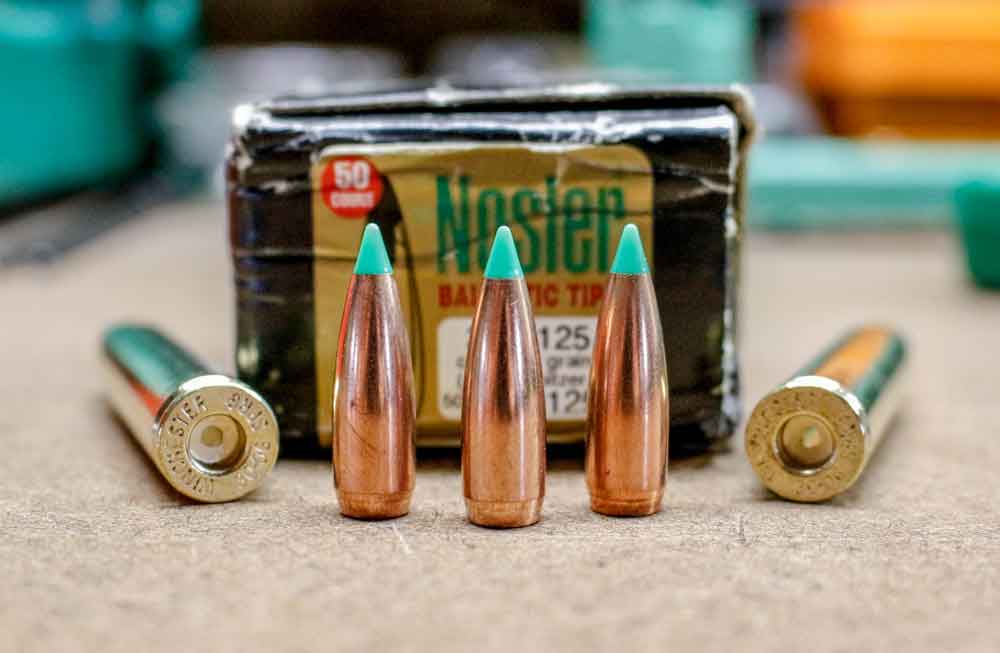
Favorite Handloads With a 125-grain Nosler Ballistic Tip, a perfect choice for coyotes and other varmints, I like to seat it over 55.0 grains of Alliant Reloder 15, for 3,275 fps. The Nosler Ballistic Tip is an accurate, if frangible, bullet, and this load has printed ¾ MOA in many rifles.
The 150-grain bullet makes a good long-range choice for the ’06, especially with a premium bonded-core bullet. The Swift Scirocco II is one of my favorites, having a good, long ogive and an effective boat tail, in addition to a nice polymer tip to enhance the BC, often having a retained weight of 85-90 percent.
Seat that Scirocco to 3.340 inches (the maximum Cartridge Overall Length for the .30-06) over top of 61.0 grains of Reloder 19 for 2,950 fps and a rather flat-shooting combination. This makes an excellent deer/sheep/antelope load.
The 165-grain bullets make a great all-around choice for most of our North American hunting, as well as a great African plains game bullet, if properly constructed. I’ve used a couple with good results.
The Sierra Game King boat tail hollowpoint is a fantastic bullet for deer, bear and elk. I know, you’re thinking hollowpoint, and therefore extremely frangible, but the Sierra bullet has a thick jacket and is capable of handling even magnum impact velocities. I’ve used it on deer for years in a number of .30-caliber cartridges with nothing but fantastic results. It has shined in the .30-06 on top of 55.0 grains of IMR-4350, with a CCI200 primer, giving an even 2,700 fps at the muzzle and sub-MOA accuracy in a number of rifles.
The 165-grain Nosler Partition is another favorite in the .30-06, and when mated with 57.0 grains of Reloder-19, sparked by a Federal GM210M primer, it makes a good choice for deer, elk and much of the African plains game. I’ve measured it at 2,725 fps to 2,750 fps, depending on the rifle, and it’s really hard to argue with the performance of the Nosler Partition.
The 180-grain bullets are the staple in the .30-06, and there are a ton to choose from. I’ve used a pair that actually worked very well with the same powder charge.
The Sierra 180-grain ProHunter, a flat-based spitzer, and the 180-grain Swift A-Frame, a flat-based semi-spitzer with a partition and a bonded core, both gave great accuracy and good velocity when sitting atop a load of 54.5 grains of IMR4350 and ignited by a Federal 210 primer. The Sierra came out at 2,650 fps, while the Swift A-Frame came into the world at 2,680 fps. This combination could easily account for 95 percent of the world’s game, and that’s one of the beautiful features of the .30-06 Springfield.
For heavier game, the 220-grain slugs make a good choice, especially at short to medium ranges. The .30-06 can push the heavy bullets up to 2,500 fps, but I found the accuracy at 2,400 fps on the button. A Hornady 220-grain round-nose InterLock over 52.0 grains of Reloder 19 gave groups of just under one-inch at 100 yards. Not too shabby for such a big slug, and good for just about anything you’d use a .30-caliber rifle for.
Final Considerations While there are those that would argue with me, I don’t crimp bullets for the .30-06 unless I’m loading for a semi-automatic; I feel there’s enough neck tension to keep things in place. If you want to crimp, you can set the RCBS seater die up to give a good roll crimp, but be sure your bullet has a cannelure, or you’ll damage the bullet and have some serious feeding issues.
I get one dummy cartridge setup to the proper seating depth, loosen the seater plug, and screw the die body lower, in small increments, until I see the crimp I want. I then use the dummy cartridge to help set the seater plug depth once again.
One last caveat: There are many good sources for military ’06 brass on the market, but be careful when using them; the military stuff has a thicker case wall, and therefore a smaller combustion chamber, and it will reach higher pressure with less powder when compared to the commercial cases.
Editor’s Note: This article is an excerpt from the May 2016 issue of Gun Digest the Magazine.
The American Civil War still remains the deadliest conflict in our nation’s history. The most widely accepted figure estimates 620,000 men lost their lives in the four years of war. However, new research pegs it higher at 750,000, even 850,000. Even on the low estimates, the number of American dead from this single conflict was massive, and was not equaled in combined death toll of all other American wars until Vietnam.
Disease in an era before antibiotics was the main culprit to these horrendous figures, more than 2 percent of the country’s population then. But weaponry advancements also played a large role. More accurate firearms, able to be fired at a higher rate, combined with outdated military tactics to pulverize vast swaths of men in the blue and the gray. To get a better handle on exactly why this seminal war was as bloody as it was, here are the 8 Long Guns You Have to Know from the American Civil War.
Springfield Model 1861
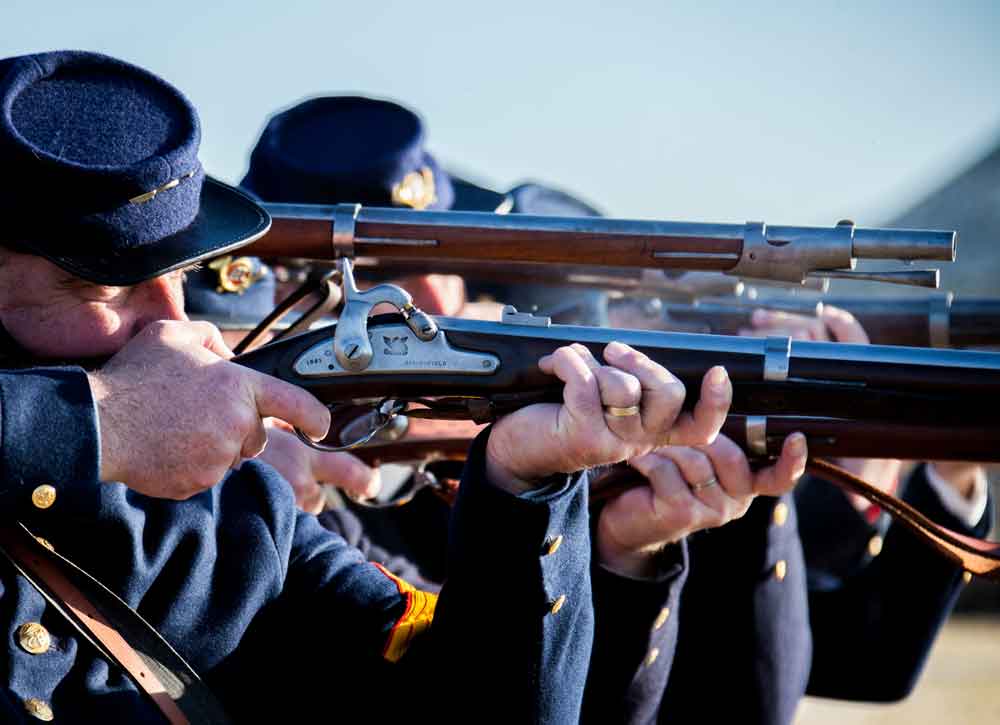
The first mass-produced American rifled musket, the 1861 was the most utilized long arm of the Civil War. The rifled musket was the dominant military long-gun design of the day and, as its name suggests, was a stepping stone between the musket and rifle. Like the musket, the projectile was smaller than the bore, allowing for fast loading, even when the arm was fouled with black-powder residue. But unlike previous iterations of the musket, the bore was rifled, which allowed the Model 1861 and its ilk to take full advantage of a deadly new technology — the Minié ball.
The conical projectile, developed by French Army officer Claude-Etienne Minié in 1849, delivered before then unheard-of accuracy to military long guns. Captain James H. Burton improved the American Minié ball fired by the Springfield by hollowing the base of the soft-lead bullet. This allowed the projectile to expand upon firing and take hold of the rifling, and in turn stabilize and be truly accurate. Both Union and Confederate armies used this accuracy to devastating effect, flinging the .58-caliber, 500-grain Minié balls at each other from up to 500 yards out. Engagements, however, generally happened at much closer range, making the 1861 all the more deadly.
The 9-pound, 40-inch-barreled Model 1861 was also a more reliable weapon than preceding military arms through the use of percussion caps. Despite these improvements, the Springfield’s rate of fire was similar to a musket’s, around three aimed shots per minute. Good thing, too, because battlefield surgeons already had their hands more than full at the pace soldiers were being wounded and killed by the Model 1861.
Pattern 1853 Enfield
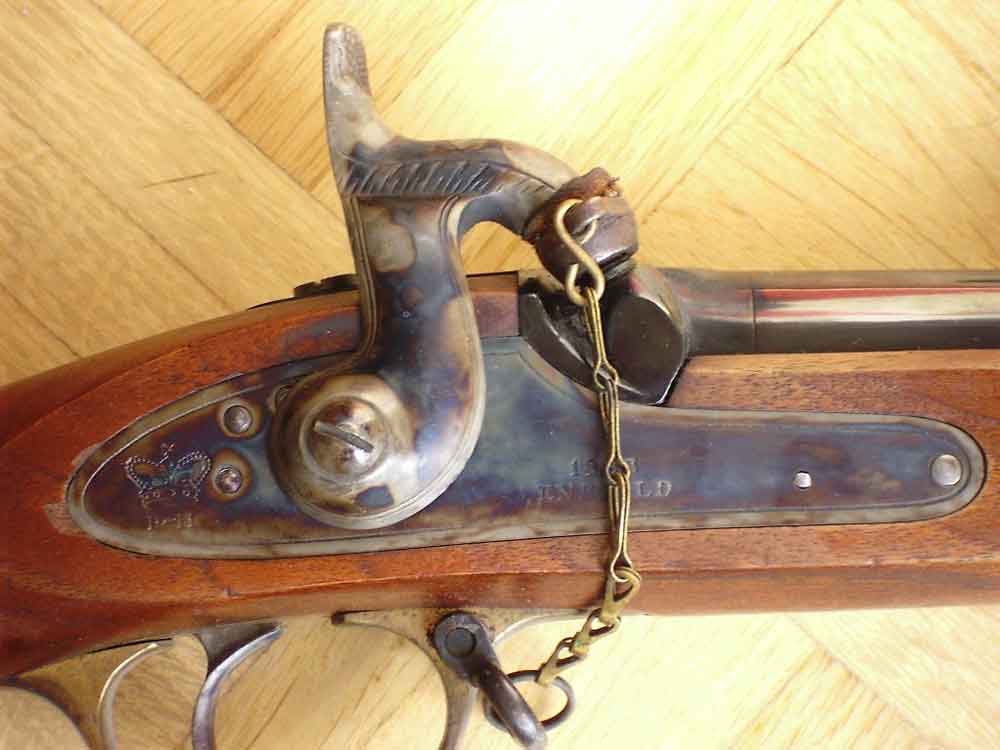
Considered by many to be the premier Minié-style rifled musket of the day, the Pattern 1853 Enfield could readily outperform its counterparts on the battlefield. The British-made arm, the primary long gun of the Empire at the time, proved effective out to 900 yards, 400 yards farther than almost any other rifled musket in the Civil War. While both sides used the 1853, it was a particularly important arm in Confederates’ hodgepodge arsenal. Given the South’s smaller manufacturing base compared to the North, it was imperative it import arms.
England became one of the Rebels’ main arms dealers, with a number of small private gunmakers from around London and Birmingham supplying up to 350,000 Pattern 1853s. This was not Britain’s first go-around with a rifle bound to shoot Minié-style projectiles. Instead, the .58-caliber rifle (it shot a .577-caliber Minié ball) was an improvement on larger-bore predecessors. The rifled musket had a 39-inch barrel attached to a walnut stock by three barrel bands, leading it to be called an “Enfield three band” by some. The rifle was used as early as the Battle of Shiloh in 1862 and was a staple long gun through to the final battles of the war.
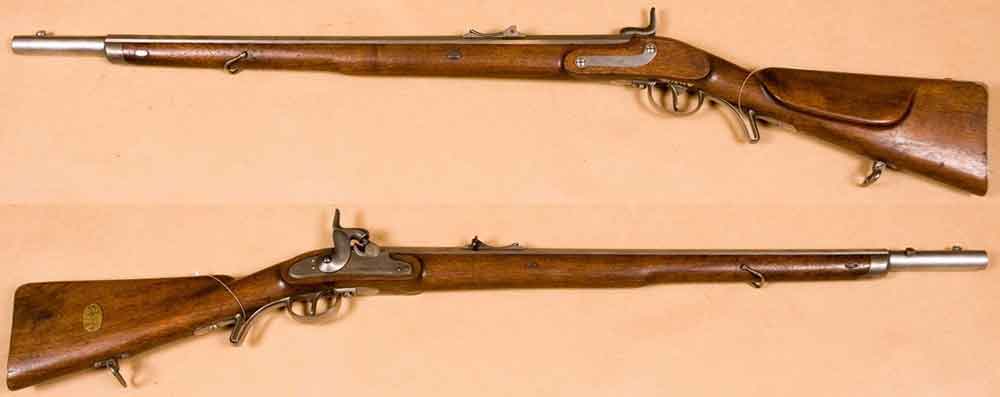
The Lorenz Rifle (again a rifled musket of the Minié variety) had highly mixed reviews in the Civil War. The Austrian-made firearm was used by both sides and was considered by some to be superior to the 1853 Enfield. To others, they were next to trash. At the root of the wide chasm in opinion on the Austrian Empire’s service arm appears to be manufacturing standards of the fairly complex weapon. If well made, it was well regarded. But there were plenty of examples of poorly crafted Lorenzs, as historian Joseph Bilby has noted:
“The 125th Illinois was issued Austrian rifle-muskets in .58 caliber of ‘which not over one-half were perfect…many will not explode a cap.’ The 125th’s regimental historian complained that some of the Austrian guns’ nipples ‘were not entirely drilled out,’ and some could not mount a bayonet without hammering it on. The 130th Illinois reported that ‘one-third or three-eights of these arms [Austrian] are defective.’”
The Lorenz was a bit like playing craps, if craps entailed being killed if the dice were faulty. Nevertheless, the rifles were heavily imported with an estimated 350,000 making their way into the hands of both Union and Confederate soldiers.
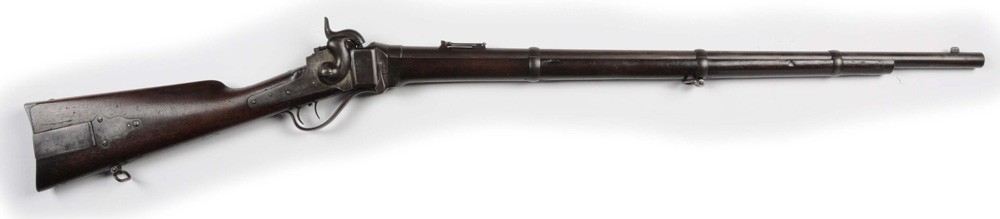
Christian Sharps’ falling-block still stirs the hearts of marksmen today. And why not? Not only is the Sharps perhaps one of the most elegant rifles to come out of the Civil War era, it also performed. There are numerous accounts of Union soldiers connecting shots from just shy of 1,000 yards with the revolutionary Sharps. But it took some doing to get the rifle variation into the hands of the 1st and 2nd Regiments of U.S. Sharpshooters. It is said Gen. Hiram Berdan had to circumvent his superiors and essentially appeal to President Lincoln himself to get the Sharps in play.
The Sharps Carbine, on the other hand, had no such problems. The firearm was the most used carbine of the war and the most commonly carried by Union cavalry, with some 90,000 produced. The .52-caliber’s self-contained cartridges could be easily loaded on horseback, giving a mounted soldier a weapon that had an effective rate of fire of 8 to 10 shots a minute. Shooting 475-grain bullets, that’s a lot of lead down range. The Sharps continued to make history after the war. Chambered in the powerful .45-70 Government, the rifle was the choice of many commercial buffalo hunters on the American frontier. And it can still be found harvesting game today.
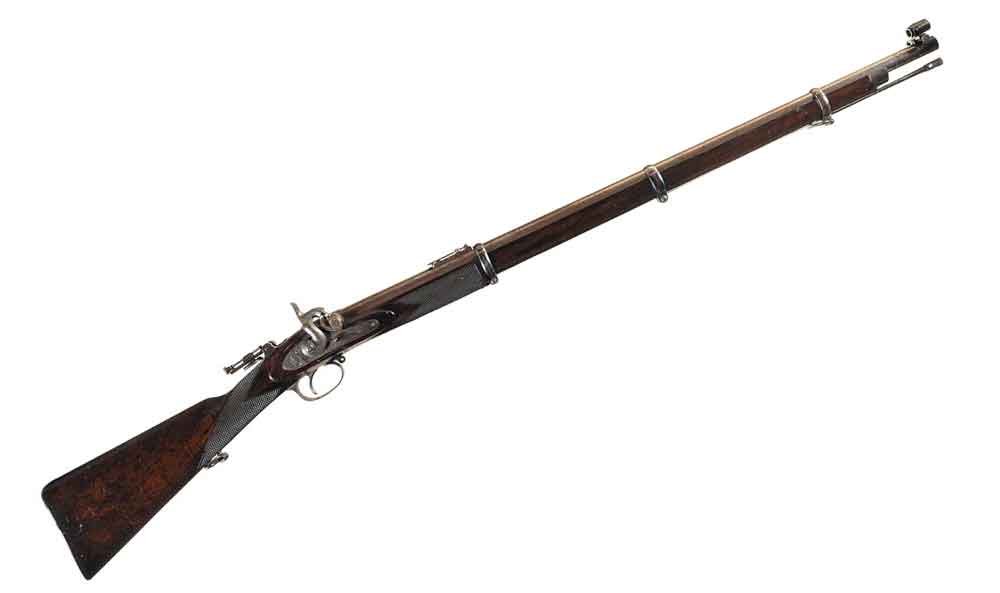
Similar to the Pattern 1853, this was another British import the Confederates relied upon, mainly their sharpshooters. And it might be one of the most unique long-gun designs of the war, and perhaps overall firearms history. That is, if you consider a gun designed to fire hexagonal bullets a bit odd. Sir Joseph Whitworth was the man behind the machine, inspired by cannon design in conceiving his polygonal rifled long gun. His goal was to build a replacement for the Pattern 1853. He certainly built a gun that outperformed it, at one trial striking targets at 2,000 yards, 600 yards better than the Enfield. Despite the rifle’s impressive capabilities the British military did not adopt the .451-caliber Whitworth.
Serendipitously, Sir Whitworth found another market for his rifle at the outset of the American Civil War — the Confederates. Despite somewhat limited use, the muzzleloader still reached mythological status with Rebel sharpshooters who achieved some truly astounding shots with the rifle, and in the process struck terror into Union troops. Prohibitive cost, however, stymied wider adoption. Where a domestically produced rifle would cost around $25, a cased Whitworth with 1,000 rounds of ammunition would cost a stunning $1,000.
Spencer Repeating Rifle/Carbine
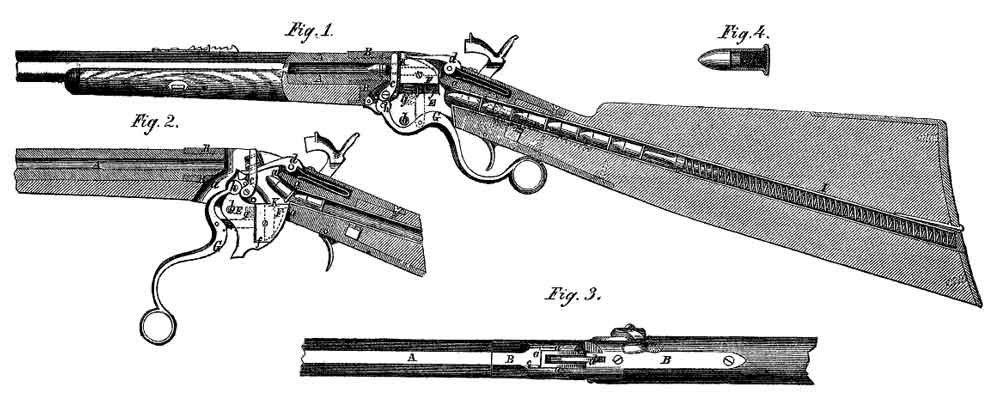
In a conflict dominated by muzzleloaders and single-shot rifles, the Spencer Repeating Rifle had to have seemed like a godsend. With seven rounds of .56-56 Spencer rimfire on tap, the rifle delivered overwhelming firepower for the time. While perhaps not as fast between shots as other repeaters that made their appearance in the Civil War — it had to be manually cocked — the Spencer was perhaps the most reliable. Christopher Spencer’s design limited the chance of dirt and other obstructions from rendering the carbine non-functional, an important feature for a rifle bound for battle. The tubular magazine in the buttstock was quick on the reload too, particularly with the aid of a Blakeslee cartridge tube, which made its appearance later in the war.
While mainly a Union firearm, a few did fall into the hands of the Confederates. And despite its overall popularity with the troops, few of the rifle variation made it into their hands. Only 13,000 Spencer rifles were purchased by the Union. The Spencer carbine, on the other hand, was widely utilized, with around 90,000 being produced for the war effort. Behind the Sharps, it was the most used cavalry carbine of the war.
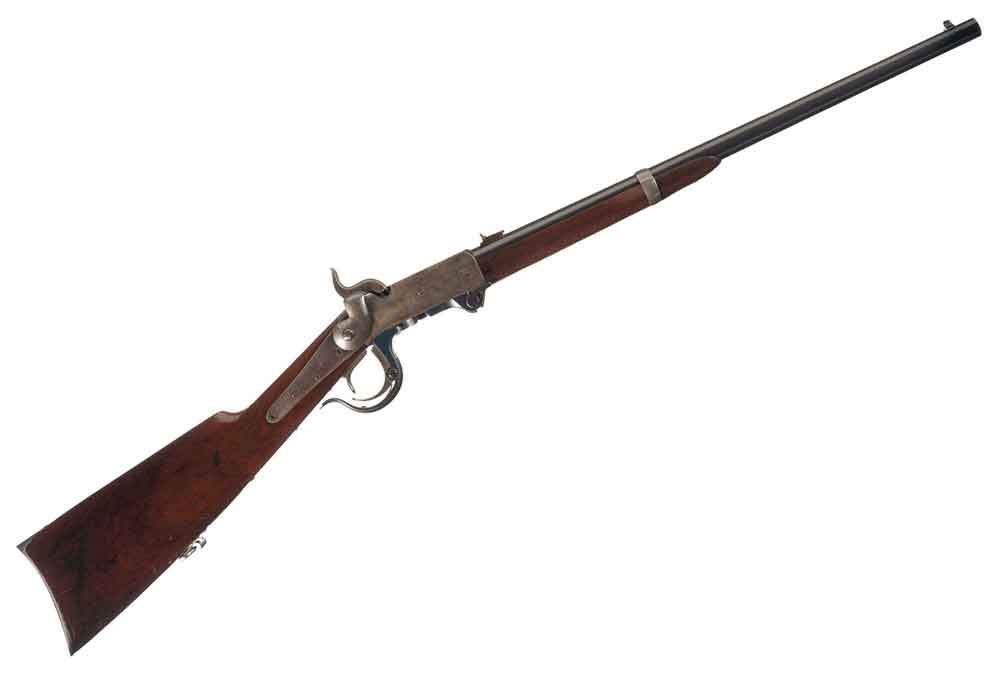
Besides being known for his poor generalship, stylish facial hair and being the first president of the NRA, Ambrose Burnside was also a firearms innovator. In the early 1850s, Burnside resigned his military commission to work exclusively on his breech-loading carbine design. The .54-caliber turned out to be a boon for the Union cavalry, giving them a quick-to-reload firearm, built to withstand the trials of battle.
The single-shot rotating-block carbine utilized one of the breakthrough firearms technologies of the time — the self-contained cartridge. Though, its strange conical-shaped cartridge could occasionally get stuck in the breech after firing. Even with this flaw, the Burnside went on to become the third most used carbine of the war, behind the Sharps and Spencer, seeing action in nearly every battle in the conflict. The rifle potentially had another downside however. It is suggested by some that the Burnside Carbine was what vaulted Burnside the man to the upper ranks of the Union Army and on to debacles in the Battle of Fredericksburg and the Battle of the Crater.
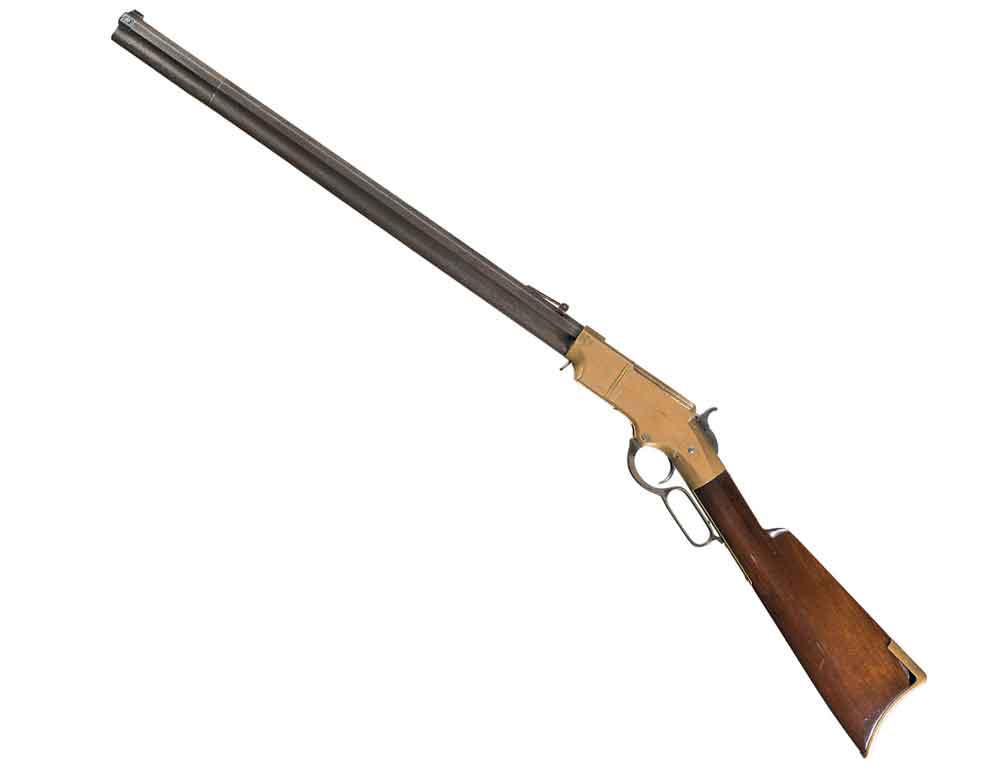
The “rifle that you could load on Sunday and shoot all week long” was a boon to the soldier who could get his hands on one. But there were relatively few that did. Officially, less than 2,000 of the revolutionary, lever-action repeating rifles were procured by the Union. But the Henry made its way into Civil War lore through soldiers spending their own hard-earned pay on the brass-receiver beasts. Some Confederates got a hold of Henry rifles too, but faced the same problem they did when they captured a Sharps or a Spencer — ammunition. Once they shot what they had on hand, there was no way to replenish their supplies, given the ammo manufacturers were based in the North.
With 16+1 rounds of .44 Henry rimfire ammunition on tap, the rifle would have been money well spent. As with the Spencer, it provided overwhelming firepower in a conflict dominated by muzzleloaders. But the 24-inch, 9-pound brainchild of Benjamin Henry did have its weak points. Its external tubular magazine could get fouled or damaged, which was trouble for a weapon that’s advantage was rate of fire. And the .44 round was relatively weaker compared to the dominant repeater of the time, the Spencer. But even with those drawbacks, it’s hard to argue that a soldier with a Henry in his hands didn’t have a great advantage over nearly any enemy he met.
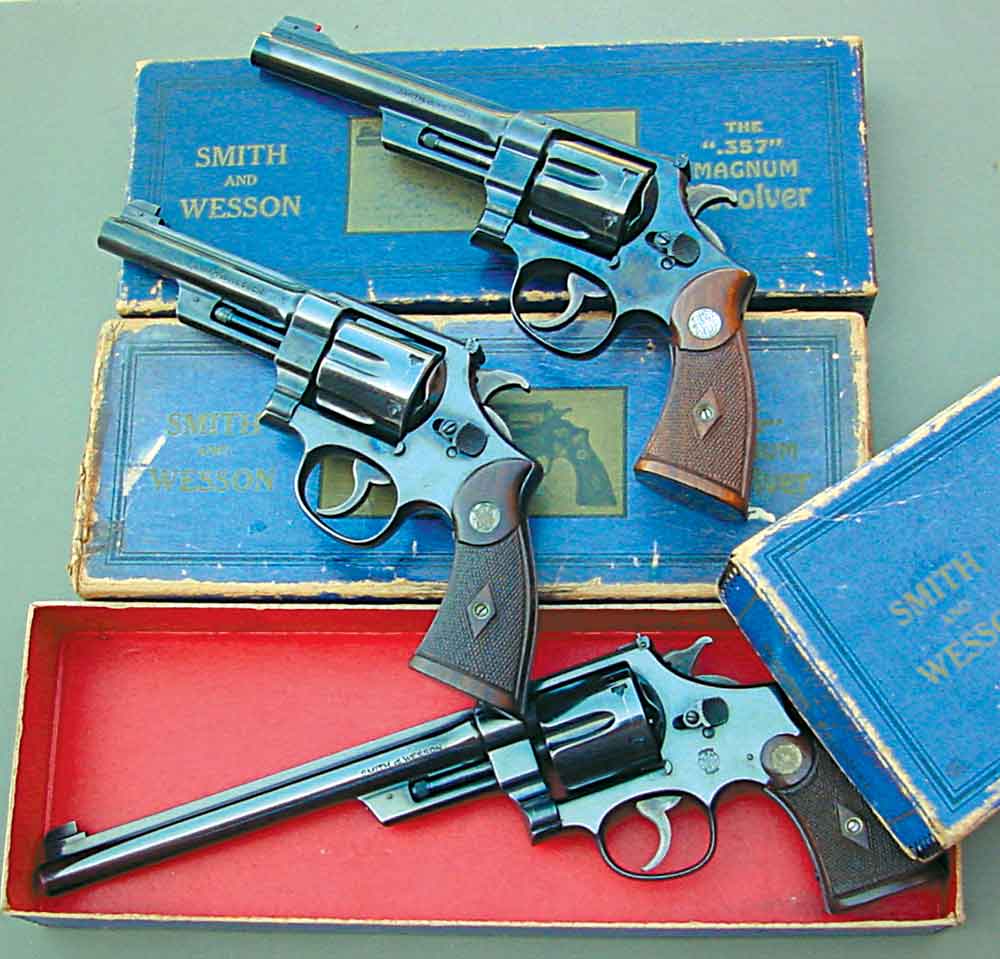
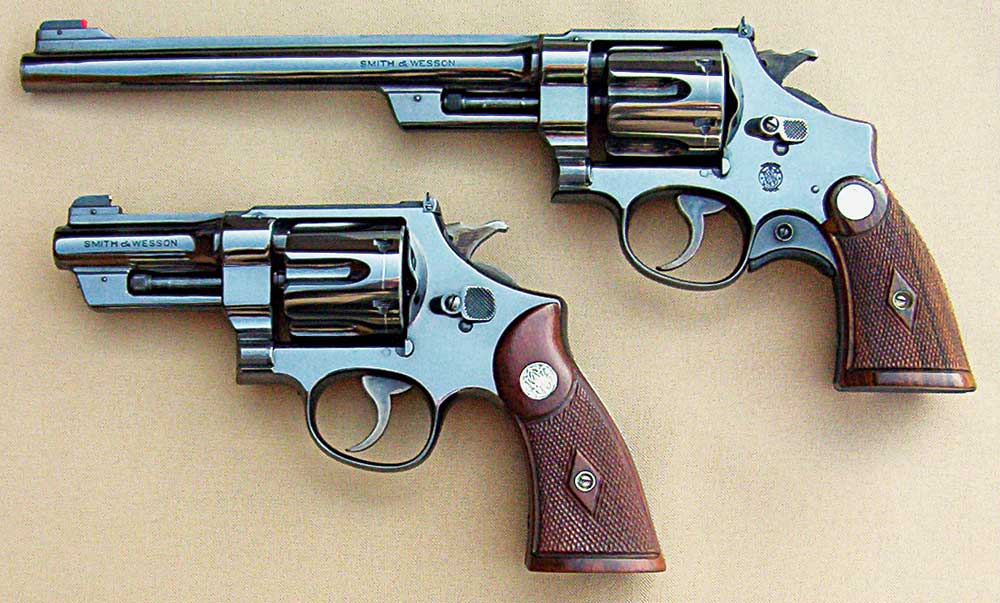
The classic Smith & Wesson .357 Magnum is a stunning piece with an intriguing history, and it’s still a very popular item with collectors.
What makes the Smith & Wesson .357 Magnum so collectable?
Introduced in 1935 and built on the large N-Frame, Smith & Wesson’s .357 Magnum was a classic revolver
Highly collectable, the .357 Magnum models are those produced before S&W introduced its numbering system in 1957
Registered .357 Magnum revolvers are the most valuable, with values ranging from $7,500 to $10,000, or more, depending on who owned them
With an intriguing history and a variety of models, the .357 Magnum will likely continue to be a desirable collector’s item
When the .38 Special cartridge was introduced in 1902 it was a considerable improvement over the earlier black-powder .38s of the 1870s — the .38 Long Colt and .38 Smith & Wesson. The .38 Special was a well-balanced, all-around cartridge and quickly became popular with law enforcement and the military, as well as with civilian shooters. Before long it became the standard to which all other revolver cartridges were compared.
For much of the 20th century, any time you saw a revolver on a policeman’s belt, it was a probably a .38 Special. But there were exceptions. By the early 1930s, the automobile began to change life in the U.S. Unfortunately, among these changes was a surge in bank robberies, with the bad guys making their getaways in fast cars. Lawmen saw a need for a more powerful cartridge than the .38 Special, something that could penetrate the steel doors and bodies of an automobile. This was not to replace the .38 Special but to give an option to lawmen in various agencies.
One option was the .38 Super in Colt’s 1911 semi-auto pistol. For several reasons, however, many in law enforcement had not yet accepted this great cartridge/gun combination. This was a time when the semi-auto was still not fully trusted, and the same could be said about expanding bullets in automatics (though the FMJ .38 Super penetrated auto bodies very well). But in the 1930s, the revolver was still king.
For several years, gun writers Elmer Keith, Philip Sharpe and others had been experimenting with powerful .38 Special handloads. Their results encouraged the engineers at Winchester’s ammunition division to take on the project, and by 1934, the .357 Magnum was born. By adding about a tenth of an inch to the case length of the .38 Special, velocity almost doubled to 1,515 feet per second for a 158-grain bullet out of an 8.375-inch barrel. The first handgun cartridge worthy of the name Magnum was a reality. It was an immediate success.
Now, for the gun to shoot it. The concept of a heavy-duty .38 Special was not new. In 1930, Smith & Wesson had introduced the .38/44 (.38 on a .44 frame) revolver, which was designed for high-pressure .38 Special loads. As the name suggests, the .38/44 was made on the large N-frame, which dated back to the .44 Hand Ejector Triple Lock of 1908. It was no surprise, then, when the .357 Magnum was built on the N-frame.
The cartridge and the Smith & Wesson revolver were both introduced in 1935, with the handgun given the same name as the cartridge. Essentially a custom-made, hand-fitted gun, it could be ordered with virtually any barrel length from 3½ to 8¾ inches. Standard features included adjustable rear and post front sights, blue or nickel finish and a checkered rib atop the barrel. Six different rear sights were available, and an interchangeable front sight blade was included for use with .38 Special ammunition.
Many of the first .357 Magnum models were registered in the name of the original owner and came with a certificate listing the serial number and any custom features. According to Standard Catalog of Smith & Wesson, 4th Edition (Gun Digest Books, 2016) by Jim Supica and Richard Nahas, it is believed that about 5,224 Registered .357 Magnums were made between 1935 and 1939, and 1,142 Non-Registered models were made between 1938 and 1941.
S&W .357 Magnum Gun Values The Registered .357 Magnum models are the most collectible of all Smith & Wesson revolvers today, and there is nothing to indicate that this is likely to change in the near future. Non-Registered .357 Magnums are also very much sought after by collectors, in part because fewer of them were made. Estimated values for Registered models in Very Good to Excellent condition with registration certificate and original box range from $7,500 to $10,000, and for Non-Registered guns from $4,500 to $7,500. New-In-Box models can demand $18,000 to $20,000. Of course, special models and celebrity-owned examples can go for much more. Elmer Keith’s personal prototype, for example, brought $28,750 at a James D. Julia Auction in 2015.
Most students of Smith & Wesson know that serial number 1 was presented to J. Edgar Hoover, the first Director of the F.B.I. This was in April of 1935. Currently, the location of this gun is a mystery, but in collector’s circles it is believed to still exist. What’s its value? One can only guess.
Among the rare features that can significantly increase the value of a .357 Magnum model is a nickel finish. It is believed that no more than 150 to 175 nickel guns were made. Some value estimates say these guns are worth double what blued models would bring. Special grips can also make a big difference. Less than 50 .357 Magnum revolvers are believed to have been shipped with factory ivory, pearl or stag grips. Factory engraved models are very rare; less than a dozen were made.
Keep in mind that before buying or selling any of the models mentioned here it is very important to obtain a letter of authentication detailing the features of the gun in question and when and to whom it was shipped. For more information, contact Smith-WessonForum.com, where you can download a form to use for the letter. Cost for this service currently is $75, which is money well spent.
The serial number range for the pre-war .357 Magnum revolvers started at 45756 and ended with 62489 in 1941 when the U.S. entered World War II. This range of numbers also includes those for other N-frame models. After the war, production resumed in 1946 with an “S” prefix added to the serial number at S71801. These early transitional post-war models of the .357 Magnum are quite collectible, especially those with longer barrel lengths.
Smith & Wesson made a few changes to the .357 Magnum in 1950, including the new short-throw hammer design. In 1957, the company went to a numbering system for each handgun, and the .357 Magnum became the Model 27. The name had changed, but it was still a beautiful example of the gunmaker’s art. When I was a young lad, I remember a photograph of a Smith & Wesson .357 Magnum with a 3½-inch barrel in my early ’50s edition of Shooter’s Bible. I would frequently pick up the book and turn to the S&W section to look at the photo again and again. That was a gun!
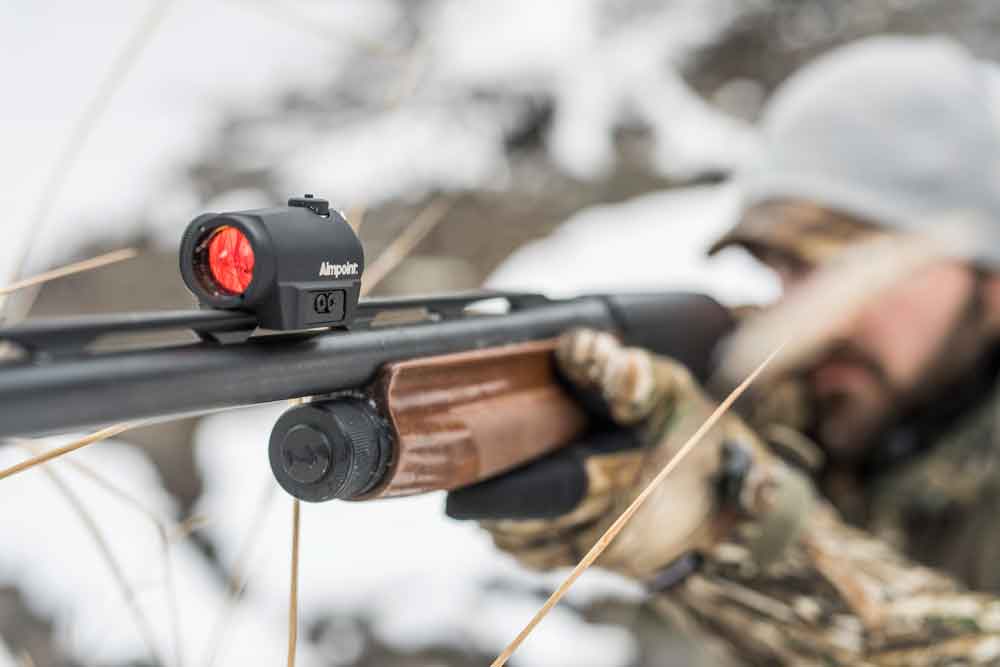
Aimpoint is shooting to be the go-to red dot for wing and clay shooters with its shotgun-specific Micro S-1 sight.
What features make the Aimpoint Micro S-1 a great sight for shotguns?
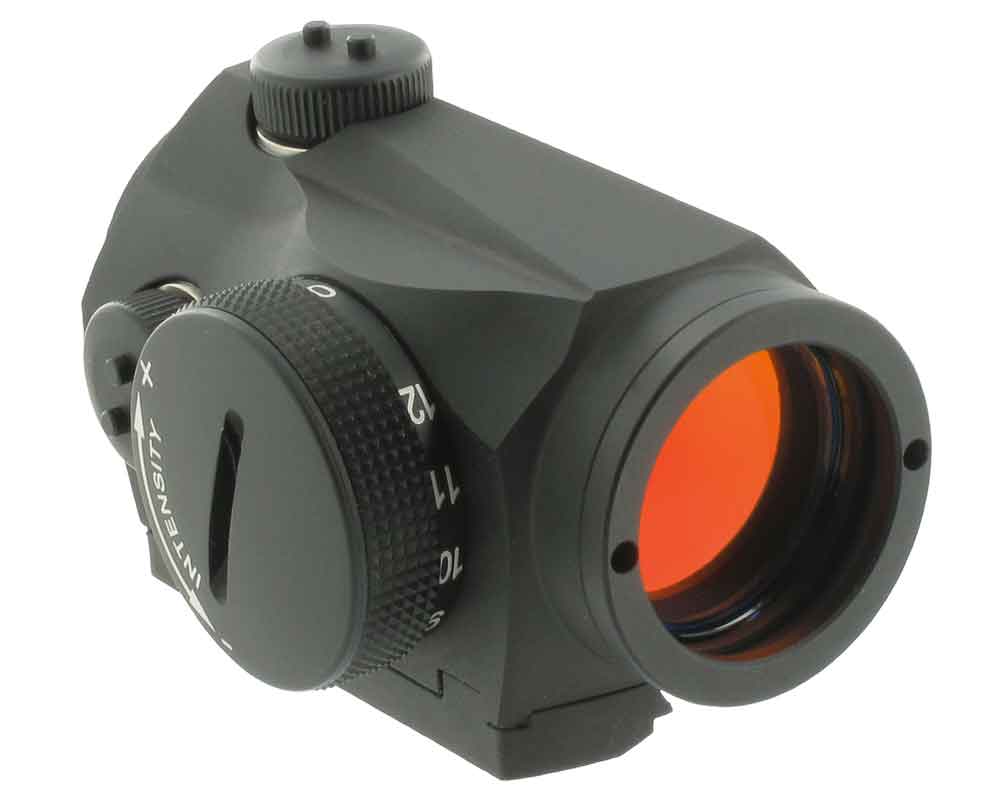
The Aimpoint Micro S-1 is a red-dot sight built specifically for shotgun use.
It features a 6 MOA dot set in the bottom third of the sight, and uses very low mounts.
With this placement, it essentially acts as an electronic bead.
It mounts in a forward position on the vent rib of a large majority of shotguns.
As with other Aimpoints, the S-1 is parallax free and has many brightness settings.
Red-dot sights have definitely carved their niche in the shooting world.
From the ideal fast-acquisition aiming solution for mean-as-hell tactical rifles to just the right way to draw a bead on deer in suffocating thick timber, the handy electronic sights are just about perfect for all close-range work, except shooting birds on the wing. And now the red dot is shooting to gun that down as well.
The Aimpoint Micro S-1 is designed for use on the ventilated rib of a shotgun, and it aims to be the cutting-edge way to draw a bead on birds and clays. The Swedish company touts it as the ideal method to deal with cross-eye dominance, poor cheek welds and other shotgunning foibles. And there is some weight to that argument.
Like all of Aimpoint’s wares, the Micro S-1 is completely parallax free; in turn, it doesn’t matter where the red dot is in the sight, the shot will follow it exactly. This means no matter how the shooter’s head is positioned, as long as he keeps the dot on the lead — and follows through — he’ll put his pattern on target.
The S-1 is designed differently than what most have become accustomed to with red dots. The 6 MOA dot sits in the bottom third of the sight, for all intents and purposes recreating an electronic version of a physical bead. And it mounts extremely low on interchangeable base plates that make it compatible with the majority of shotgun makes and models. It is also meant to mount much more forward on the gun, again somewhat mimicking a physical bead.
Like traditional red dots, its has light intensity adjustment — 12 in this case — which makes it perfect for any shooting conditions, bright or dim. And being an Aimpoint, the high-strength aluminum body is water- and shock-resistant, so it’s ready for the most rugged hunts, no matter how deep into the duck marsh a hunter might push. The Micro S-1 should also be able to serve multiple roles, being just as comfortable for use on turkey and deer as on dove and duck.
Red dots have stormed every other corner of the shooting world, so it will be interesting to see how Aimpoint does with fowling pieces. Upland hunters and waterfowlers are a traditional bunch, after all. But maybe there are a few that want to be on the cutting edge and have the $804 lying around to give the Micro S-1 a run in the field.
The Mossberg Patriot in .270 Winchester conquers mule deer country.
Mossberg Patriot Review Snapshot:
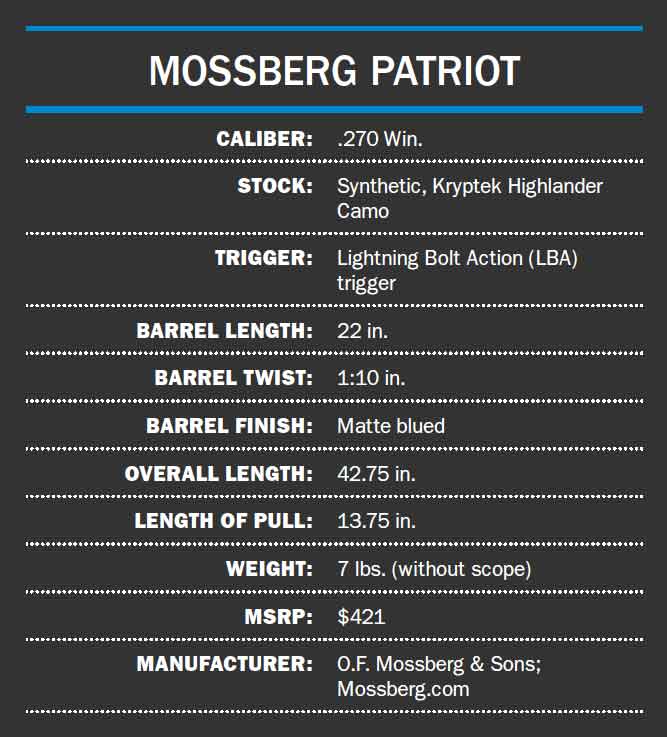
With an MSRP of $421, the Mossberg Patriot is a highly affordable, field-ready rifle.
Equipped with Mossberg’s (2- to 7-pound) Lightning Bolt-Action (LBA) Trigger, the Patriot is highly accurate.
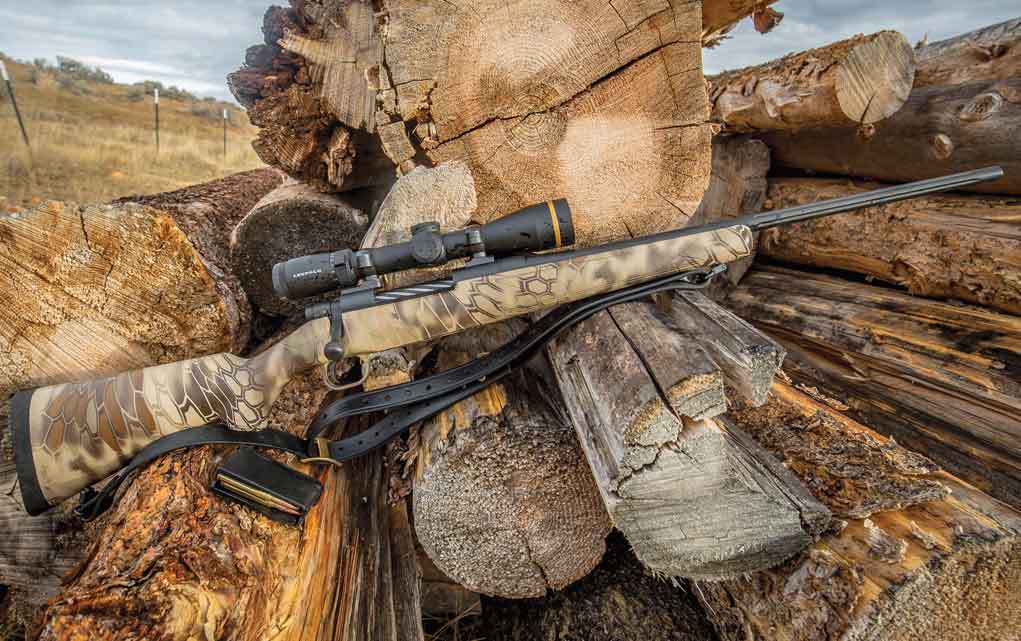
Other features include a Kryptek Highlander camo synthetic stock and 22-inch barrel.
Chambered in the classic .270 Win., this rifle proved plenty capable for mule deer.
A life of hunting is so often a war of attrition against a series of emotionally draining obstacles until, at long last, hustle and circumstance converge in distinct moments that will define not only the hunt, but also the hunter. So many times, despite our best efforts, that opportunity never arises, which only fuels the hunger that drives us in search of game. When a particular leg of our journey finally ends with meat for the table, a story has been written that will remain with us always.
I’d spent the entire month of September exhausting myself in pursuit of elk, to no avail. Then came first rifle elk season, which ended just the way it began, meatless. So crushing and consistent were the blows — like when another public land hunter walked into my set and drove off a nice 5×5 bull just before I could take the shot — that I began to question my why. Why am I out here? Why do I deprive myself of sleep, camp out in rainstorms, trek through double-black-diamond terrain, and go scouting in the truck at 4 a.m.? Driving down to the grocery store, or buying a side of beef off a local rancher, is a hell of a lot easier, and probably cheaper, too.
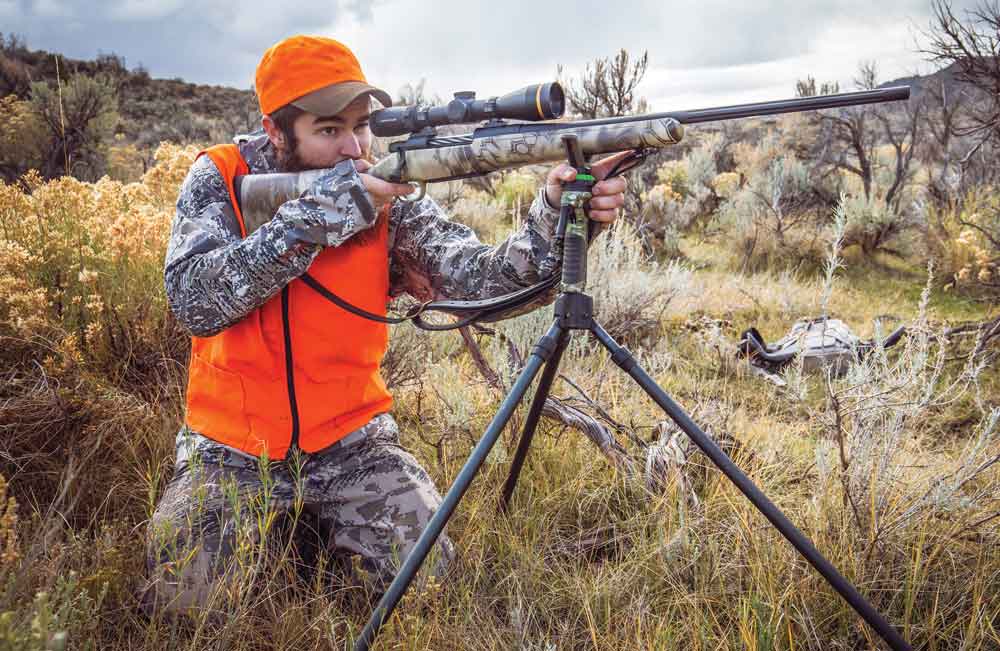
In the end, hunting is in my soul. I can’t shake it. So I did what I always do — I loaded up the truck, grabbed my rifle — a Mossberg Patriot in .270 Winchester, with Kryptek Highlander camo stock — and shooting bench, and went to get sighted in for Colorado’s mule deer season. As long as you’re fighting, there’s a chance. Focus on the process. Control what you can control. Failure isn’t going home empty handed; failure is giving up. Character is about what you do after you get knocked down.
Nothing gets me re-energized like the smell of gunpowder from a rifle that produces tight little clusters of punched paper. I call it “aromatherapy,” and it works every time. For one thing, the Patriot features Mossberg’s Lightning Bolt-Action (LBA) trigger, which is adjustable to between 2-7 pounds, breaks evenly and crisply, and is a huge part of the accuracy equation. The other major factor is the barrel, which on this rifle is 22 inches long, fluted and features a matte-blued finish. My first three rounds, which happened to come with Hornady’s 140-grain InterLock bullet in the American Whitetail lineup, produced a miniscule cluster of holes on the target, set 100 yards distant. Measuring less than .80 inch, that first group was a harbinger of great things to come for the Patriot and me.
Not only is the Patriot sleek and comfortable to shoot, it now comes in Kryptek’s Highlander camo. As much as I love a finely crafted wood stock, I’ve got to admit I’m a sucker for the pattern on this rifle. The Kryptek variant is also available in other standard calibers, including .243 Win., .30-06 Springfield, .308 Win. and .300 Win. Mag. Length of pull (13.75 inches) is a little long for my short stature (5 feet, 8 inches), but it was still manageable to shoot, and I did not experience any problem with recoil as a result. The rifle retails for an almost unbelievable $421, which is why the fine folks at Mossberg are never going to see this one again.
I topped the rifle with Leupold’s new VX-6 2-12x42mm CDS illuminated reticle scope, which retails for $1,559. I know, I know. That’s a lot of scope for a $400 rifle, but the old adage, you get what you pay for, is never more true than with premium glass. An absolute champion of low light, the VX-6 has an adjustable, push-button, red-dot illumination system that optimizes accuracy in any light. The Custom Dial System (CDS) turret allows you to send load data to the Leupold Custom Shop, which will build you a yardage-marked elevation turret for quick and easy ranging on targets. We included the scope in our annual Gear of the Year issue in 2016, because it really is that spectacular.
The Patriot comes with Weaver-style mounts, which have to be removed for use with Leupold’s Dual Dovetail bases and rings. It’s a simple swap: All you have to do is remove two Allen screws on each base, then install the new bases, which are Remington-700-style in the case of this Patriot rifle. Once the new bases are attached, Leupold rings are locked into place with a wooden dowel; you can then secure the scope with the top portion of the rings.
Loaded for Bear…and Muleys I put several other loads through the rifle, including Hornady’s 130-grain GMX and SST Superformance loads, as well as Federal’s 130-grain Fusion, 150-grain Nosler Partition, 130-grain Copper, and 140-grain Trophy Bonded Tip. The largest group came in at 1.10 inches, while the consistent average was well under the 1-inch standard. That’s pretty impressive, but highly expected from Federal and Hornady, two ammo manufacturers that never fail to impress.
While any of these loads would perform on mule deer, especially in the tried-and-true .270 Winchester, I opted for the 130-grain GMX when it came time to head afield. I’d never killed an animal with that load and I wanted to see whether it lived up to its billing. Not that it’s always necessary, but I personally feel most comfortable with a bullet that’s going to deliver premium accuracy, reliable expansion and incredible penetration, and solid copper will certainly do that. The GMX is a tipped copper-alloy bullet that leaves the barrel at 3,190 fps and in .270 Win. retains sufficient energy and manageable drop out to 450 yards.
The other load that happens to be one of my favorites is Federal’s Trophy Bonded Tip. I’ve seen it blow through shoulders, penetrate remarkably well and yet still retain a considerable portion of its mass. It’s a highly accurate round, features a bonded jacket/core, and solid rear shank for unparalleled penetration. When I work as hard as I do to find game, I don’t want to worry about the bullet coming apart or failing to penetrate through the vitals — a confidence I’ve gained in the Trophy Bonded Tip.
On to Greener Pastures I parked the truck and climbed over the first hill I came to. It was an unusually warm morning for late October, and before the sun ever crested the ridge to my back it was nearly 50 degrees in the high country. As I reached the top of the hill, my heart now beating in my chest, daylight crept across the blackened horizon. Cloud cover cast an extra layer of insulation upon the hill country and blocked out the stars. I knelt down amidst the sea of sage and watched as the world awakened.
As soon as there was enough light to make anything out, I spotted several does working the bottom of the valley below me onto the next hillside. I ranged them with my Swarovski 8×42 EL Rangefinding binos at 350 yards. Out of the corner of my eye I spotted something that gets every deer hunter’s blood moving — running does. If there’s a running doe in the rut, there’s a buck not far behind.
Sure enough, a 4×4 came darting across the scene, does scattering in every direction. As quickly as it began, the buck disappeared over the horizon. My heart sank, but I forced myself to stay focused. Control what you can control. I crept closer, shrinking the gap between me and the remaining does down to 215 yards. I sat there for 15 minutes. Nothing happened.
Finally, thank God, he reappeared, working the hillside in a hyperactive frenzy. I quickly dug my Primos Trigger-Sticks tripod into the slope, located the buck in my scope, and prayed for just one pause in his erratic stride. He cleared two oak brush and, for a split second, stood still. I squeezed the trigger, heard the impact. The blast echoed down the valley. Clean press, clean hit. He darted off, maybe 20 yards, then dropped. Blood trailing wasn’t necessary, but there were enormous chunks of lung strewn about his escape route. I later discovered that the bullet had vaporized both lungs and blown the back of the heart off—pinpoint accuracy with phenomenal bullet performance.
I could hardly control my elation. The jagged road of disappointment had led me to this fine moment. Later, when my three sons were helping me field dress and skin the deer, my 9-year-old said, “Isn’t it amazing, Dad? It just takes one moment to turn everything around. And you never know when that’s going to be.” How right he was.
Parting Shots Maybe the best thing I can say about the Patriot in .270 Win. is that I’m buying it rather than sending it back. The trigger is not just good, but outstanding. Same with the barrel, which is a tack driver. It’s an unbeatable package for a rifle with a price tag south of $500. It’s everything you’d expect — and more — from the Mossberg name.
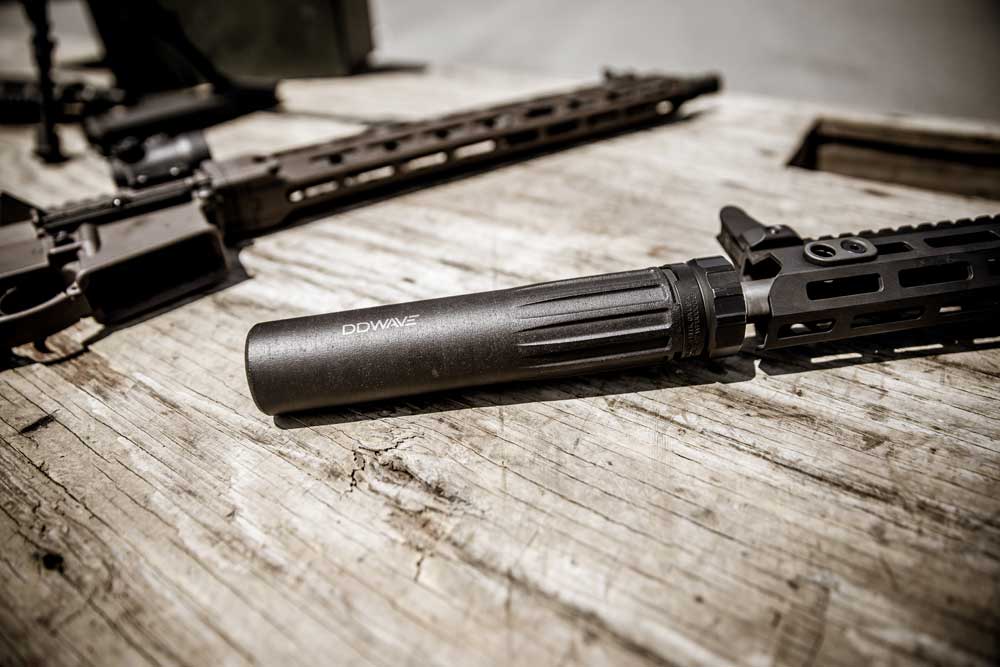
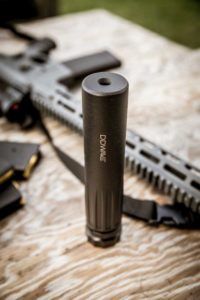
The Daniel Defense Wave 7.62 is the Georgia-based company’s first standalone suppressor, and one of the first in the industry to be entirely 3D printed.
Daniel Defense Wave 7.62 Snapshot:
Daniel Defense’s first suppressor, and one of the industry’s first major 3D-printed centerfire suppressors
Features a one-piece Inconel baffle/tube with advanced cascading baffle geometry
It utilizes no welds, which are some of the weaker points in traditional suppressors
Reduces sound by 30 dB in 5.56, 40 dB in .300 BLK
Available in quick-detach (QD) or direct-thread (DT) models
Rated for use with 5.56 NATO up to .300 Win. Mag.
It’s no secret that 3D printing technology has had an influence on the firearms industry. Whether used to rapidly produce prototypes of new products during the research and development phase or to create a finished product, 3D printing has become a key piece of technology for many in the business. This can clearly be seen with one of the newest pieces of gear to hit the market, the Daniel Defense Wave 7.62 3D printed suppressor.
Officially launched back at the 2017 NRA Annual Meetings and Exhibits, the new Daniel Defense Wave 7.62 is created using a laser sintering 3D printing approach, which essentially means it uses a laser to fuse materials together and form the desired 3D shape. According to Daniel Defense, this is the same 3D printing approach often used to create parts for space rockets.
The Wave, which is Daniel Defense’s first standalone suppressor, has to be one of the first 3D-printed cans to be produced and offered by a well-known name in the industry. Others have produced 3D-printed suppressors in the past, including rimfire versions as well as a few for centerfire cartridges, but none, it seems, with the brand recognition of Daniel Defense.
The Daniel Defense Wave 7.62 features a one-piece Inconel baffle/tube that utilizes what the company refers to as an advanced cascading baffle geometry, which is designed to effectively attenuate sound. According to the manufacturer’s website, the suppressor reduces sound by around 30 dB with 5.56 NATO and by around 40 dB with .300 BLK.
One of the more interesting aspects of the Daniel Defense Wave’s 3D-printed design is that it removes the need for welds. Welds are typically some of the weakest points in traditional suppressor designs, so removing those could certainly improve durability.
The suppressor also comes equipped with the Acme Thread Quick-Clamping System, which clamps securely to a 17-4PH stainless steel muzzle device. The heavy acme threads on the muzzle device disrupt the buildup of carbon, allowing for easy removal of the can even after it’s been used extensively.
The new Daniel Defense Wave 7.62 3D-printed suppressor is rated from 5.56 NATO up to .300 Winchester Magnum. It weighs 17.2 ounces and is 7.6 inches long.
There are two models available. The quick-detach (QD) version is available for $1,157, while the direct-thread (DT) model is listed at $986.
More than just shooting off a bench rest, these AR-15 drills are meant to help you improve the handling of your rifle, along with your marksmanship.
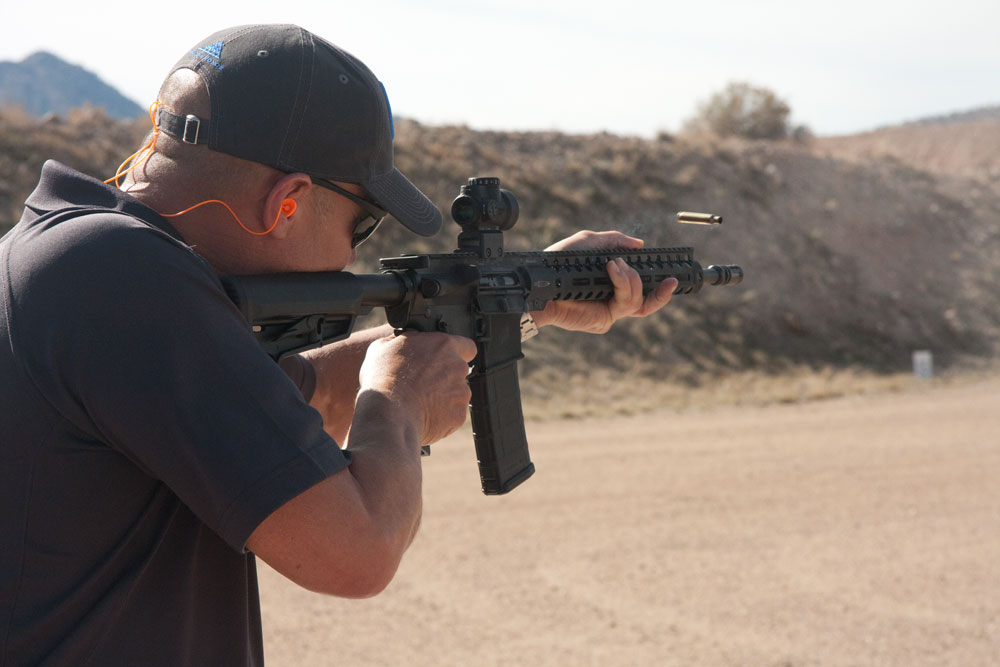
The following AR-15 drills are just a few you can use to develop your shooting skills with an AR. These are drills I have used to improve my own shooting, and I’ve also used when instructing others. A benefit of these drills is that they offer a scoring mechanism, so you can keep track of your progress and evaluate your abilities. If you can meet the standards for a particular drill, you can consider your performance better than average, if not reasonably good.
Basic Prone This is a basic sight alignment and trigger control drill, one designed to reinforce the basic principles of marksmanship. When you first conduct this drill, run it at 50 yards. When you can complete the drill miss free at that distance, increase the range to 100 yards. (If you are shooting an AR with open sights, work at 25 and 50 yards.) Concentrate on the basics of your position, breathing, sight alignment and trigger control — and, at first, go at your own pace. There’s no reason to try to complete this drill within the time limit if you cannot complete it while taking all the time you need.
Start in the prone position with the rifle loaded and the safety on. At the start signal, fire one shot each at 10 different 2-inch Birchwood Casey Shoot-N-C circles placed at 50 yards. Each hit is worth 10 points, and the goal is to get 10 hits — 100 points — within 60 seconds. Subtract 10 points for every miss and one point for every second over 60 seconds. Once you successfully complete the drill without any misses at the 50-yard range, move the targets out to 100 yards.
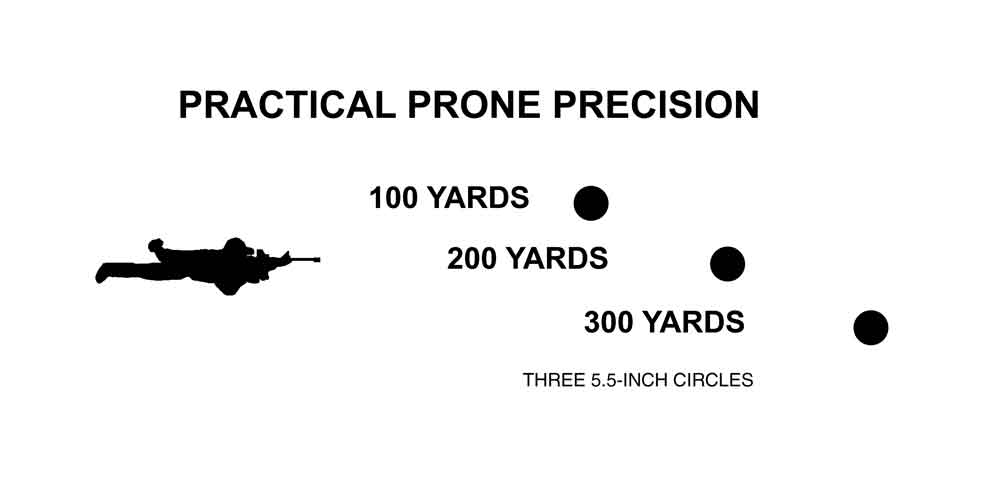
Practical Prone Drill The purpose of this drill is to establish that you can make precision shots at various ranges; you’ll have to compensate for bullet trajectory. This can be done by holding high or low, depending on how your rifle is sighted in. You can also click-in the trajectory compensation with the target turrets on your rifle scope or you might employ a ballistic reticle with additional aiming points for each distance.
You’ll need three Birchwood Casey 5½-inch Shoot-N-C circle targets, one each placed at 100, 200 and 300 yards. (If you are shooting an AR with open sights, adjust the distance to the targets to 50, 100, and 150 yards.) Start in the prone position with the rifle loaded and the safety on. You can use a bipod or sandbags as a front rest, but nothing but body parts as a rear rest.
At the start signal, fire one shot at the 100-yard target, two shots at the 200-yard target, three shots at the 300-yard target, and then four more shots at the 100-yard target. The goal is to obtain all 10 hits within 30 seconds for a total score of 100 points. Subtract 10 points for every miss and one point for every second over 60 seconds.
Regardless how your AR is sighted in, the bullet’s point of impact (POI) will be different than your point of aim (POA) at each range. The key to completing this drill within the time limit and obtaining hits at each range is to use the correct point of aim at each distance.
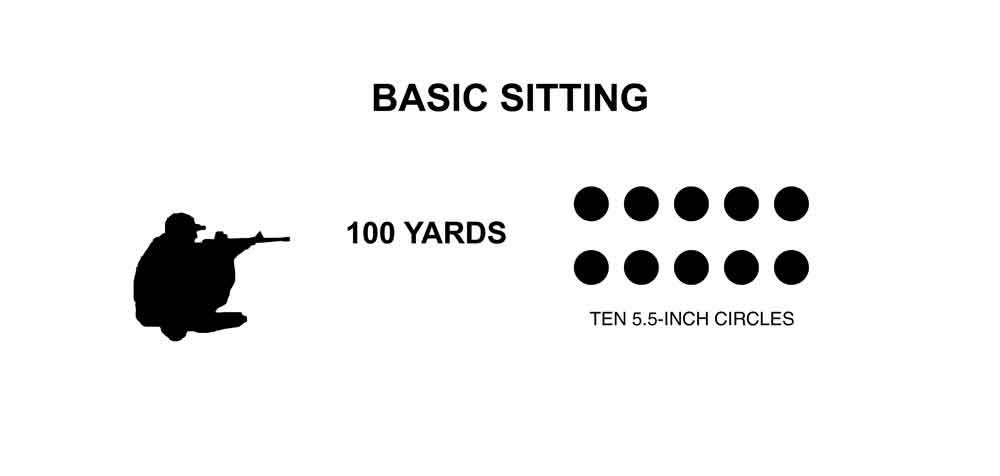
Basic Sitting Start in the seated position with the rifle loaded and the safety on. At the start signal, fire one shot each at 10 different Birchwood Casey 5½-inch Snoot-N-C circle targets placed at 100 yards. (If you are shooting an AR with open sights, restrict the maximum range to 50 yards.) Each hit is worth 10 points, and the goal is to get 10 hits within 60 seconds. Subtract 10 points for every miss and one point for every second over 60 seconds.
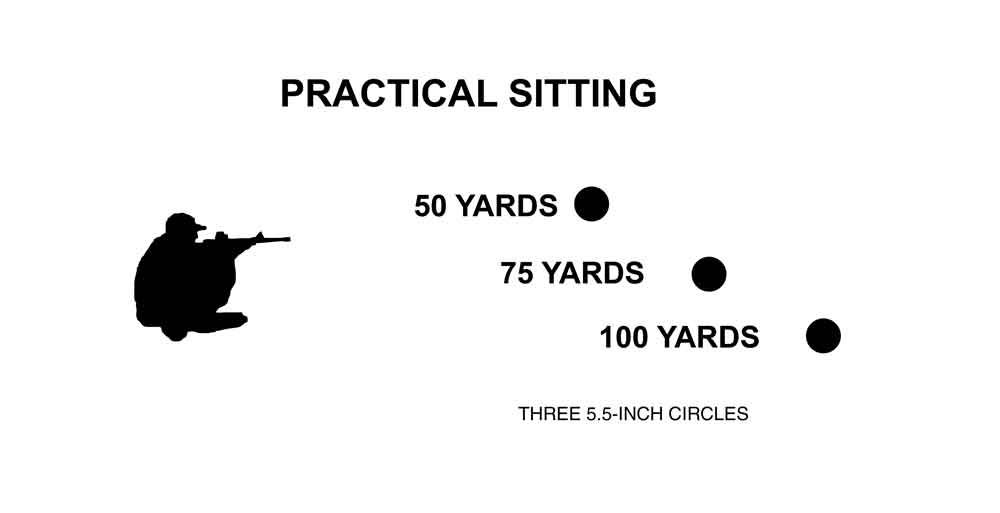
Practical Sitting Drill You’ll need 5½-inch Birchwood Casey Shoot-N-C circle targets placed at 50, 75 and 100 yards. Start in the seated position with the rifle loaded and the safety on. At the start signal, fire one shot at the 50-yard target, two shots at the 75-yard target, three shots at the 100-yard target, and then four more shots at the 50-yard target. (If you are using an AR with iron sights, adjust the distance to the targets to 25, 50 and 75 yards.) The goal is to obtain all 10 hits (each hit is worth 10 points) within 30 seconds for a total score of 100 points. Subtract one point for every miss and one point for every second over 30 seconds.
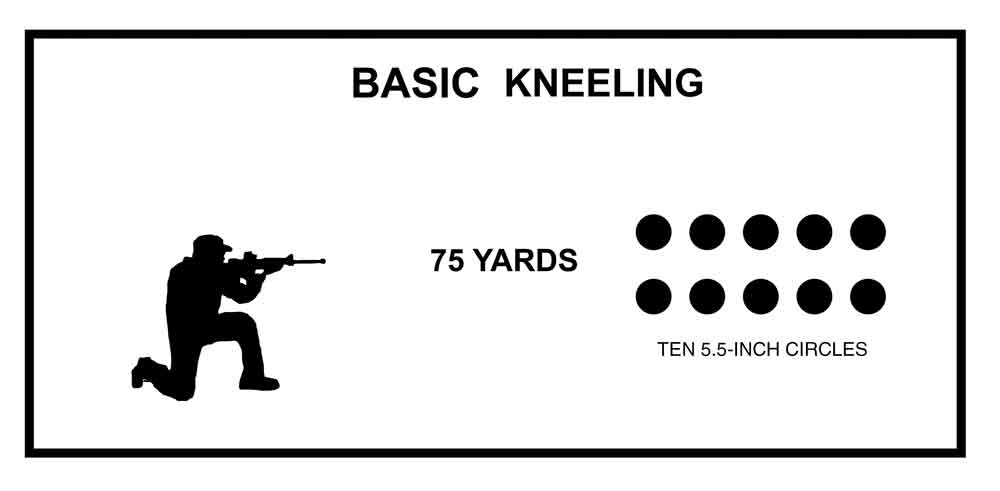
Basic Kneeling Start in the kneeling position with the rifle loaded and the safety on. At the start signal, fire one shot each at 10 different 5½-inch Birchwood Casey Snoot-N-C circle targets placed at 75 yards. Each hit is worth 10 points, and the goal is to get 10 hits within 60 seconds. Subtract 10 points for every miss and one point for every second over 60 seconds.
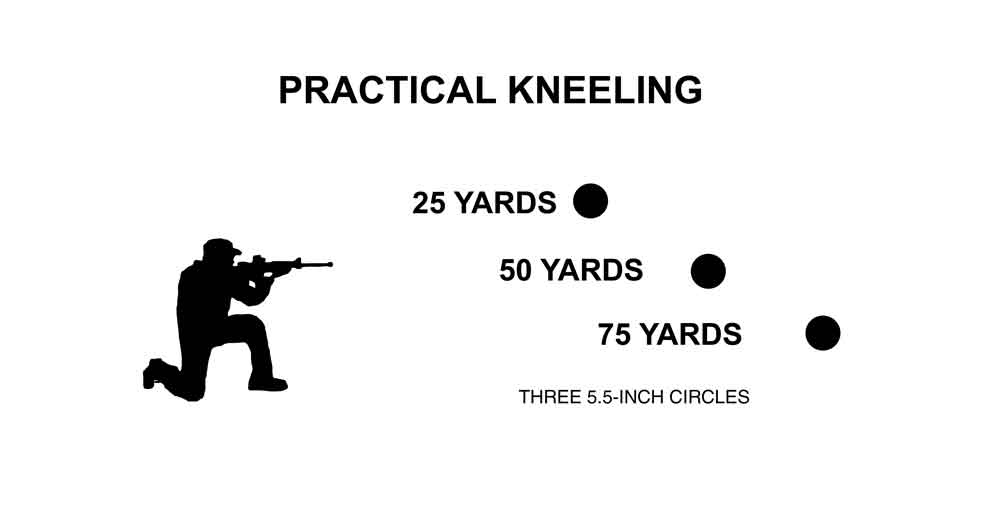
Practical Kneeling Drill You’ll need 5½-inch Birchwood Casey Shoot-N-C circle targets placed at 25, 50 and 75 yards. Start in the seated position with the rifle loaded and the safety on. At the start signal, fire one shot at the 25-yard target, two shots at the 50-yard target, three shots at the 75-yard target, and then four more shots at the 25-yard target. The goal is to obtain all 10 hits within 30 seconds for a total score of 100 points. Subtract 10 points for every miss and one point for every second over 30 seconds.
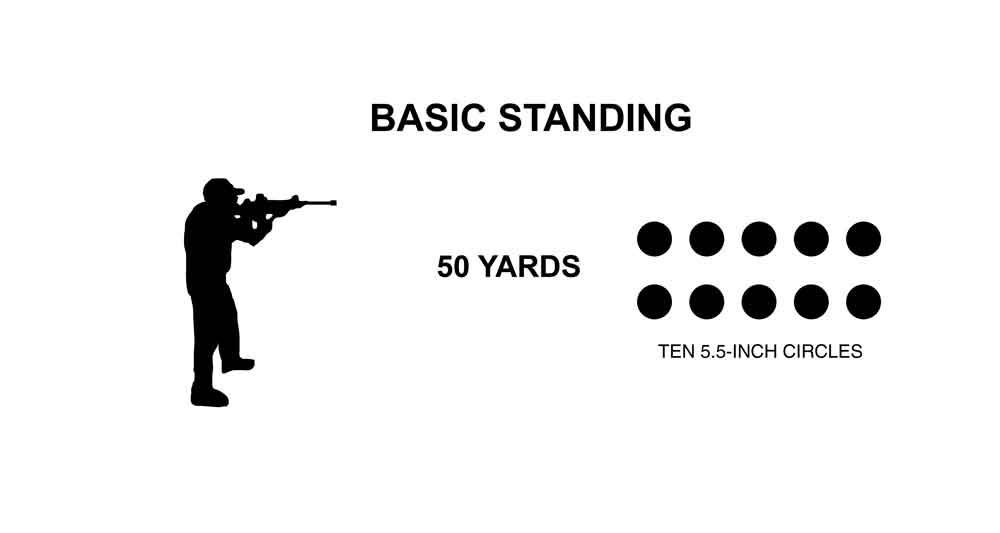
Basic Standing From the standing position, fire one shot each at 10 different 5½-inch Birchwood Casey Shoot-N-C circle targets placed at 50 yards. Each hit is worth 10 points, and the goal is to get 10 hits within 60 seconds. Subtract 10 points for every miss and one point for every second over 60 seconds.
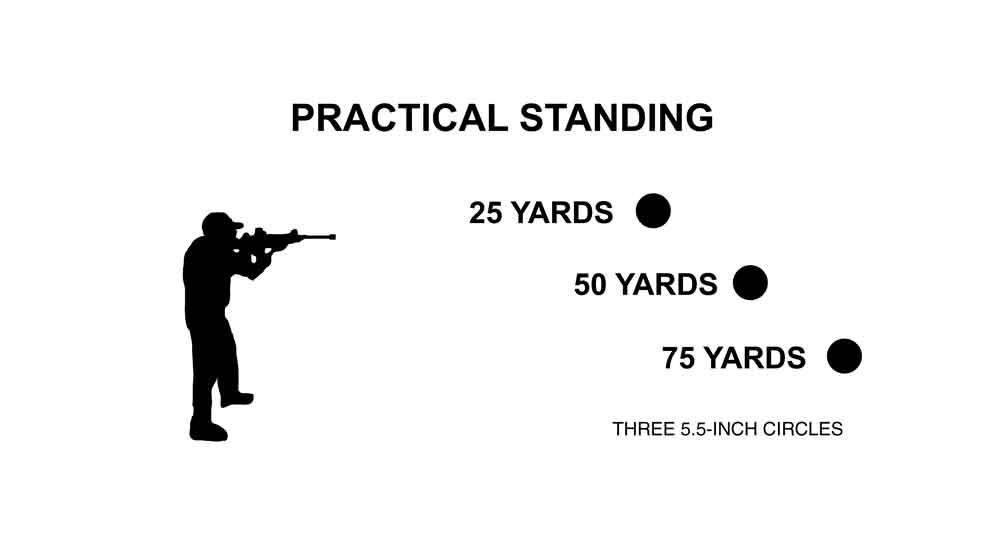
Practical Standing Drill You’ll need 5½-inch Birchwood Casey Shoot-N-C circle targets placed at 25, 50, and 75 yards. Start in the standing position, either in the indoor or outdoor ready position, with the rifle loaded and the safety on. At the start signal, fire two shots at the 25-yard target, two shots at the 50-yard target, two-shots at the 25-yard target, two shots at the 75-yard target, and two more shots at the 25-yard target. The goal is to obtain all 10 hits within 30 seconds for a total score of 100 points. Subtract 10 points for every miss and one point for every second over 30 seconds.
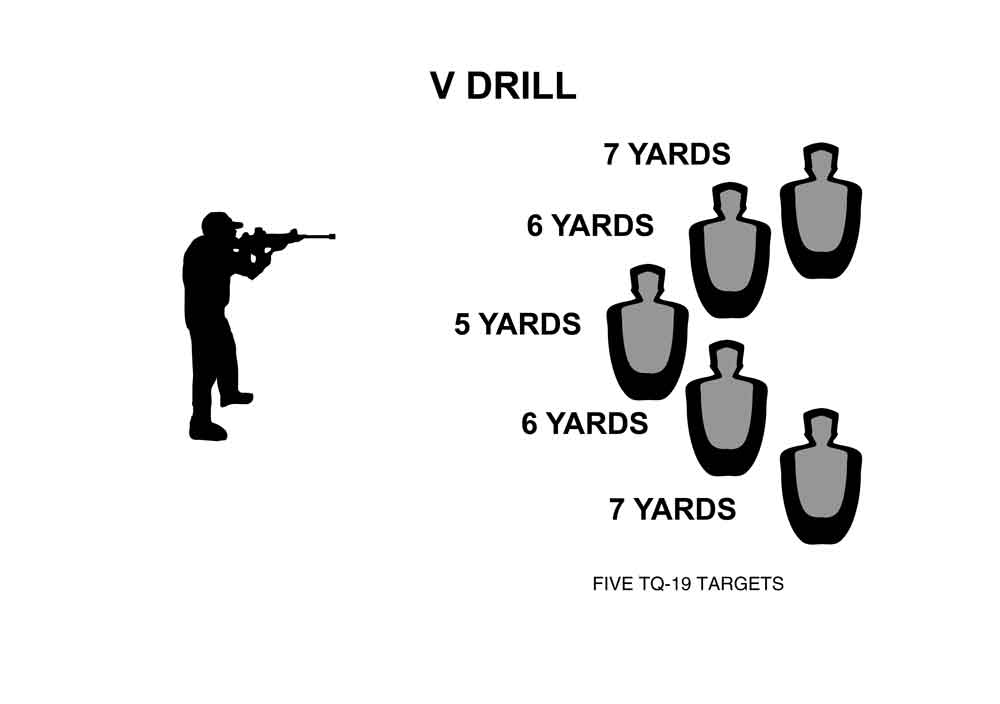
V-DRILL You will need five Birchwood Casey Eze-Scorer TQ-19 (#37001) silhouette targets. Place one target at five yards, two at six yards and two at seven yards. The target array should form a “V,” with the five-yard target in the center flanked on each side by the 6- and 7-yards targets, about a foot separating the targets laterally.
Start with the rifle in the outdoor ready position with the safety on. At the start signal, engage the targets as follows:
Center target: two shots
Left 6-yard target: two shots
Center target: two shots
Right 6-yard target: two shots
Center target: two shots
Left 7-yard target: two shots
Center target: two shots
Right 7-yard target: two shots
Center target: two shots
You will fire 18 shots total, and the goal is to obtain a hit in the light-grey zone of each silhouette target with each shot. Take your total time and add five seconds for every miss and one second for every hit in the dark-grey zone. If you get 17 light-grey zone hits in 6.28 seconds, your score would be 11.28 seconds. A great score is 5.00 or less, a good score is 10.00 or less, and average is about 15.00.
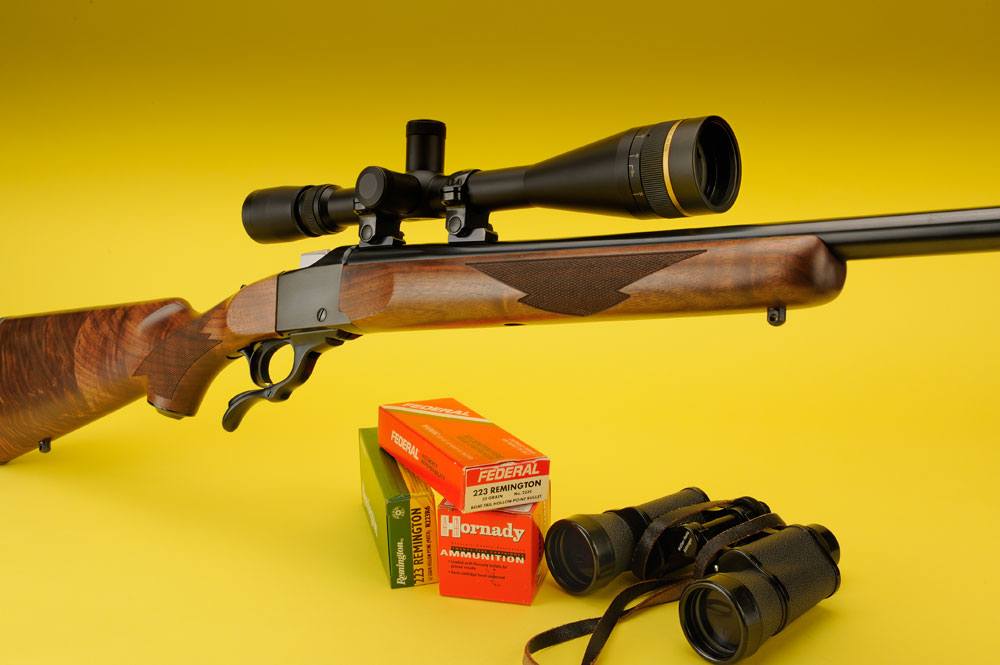
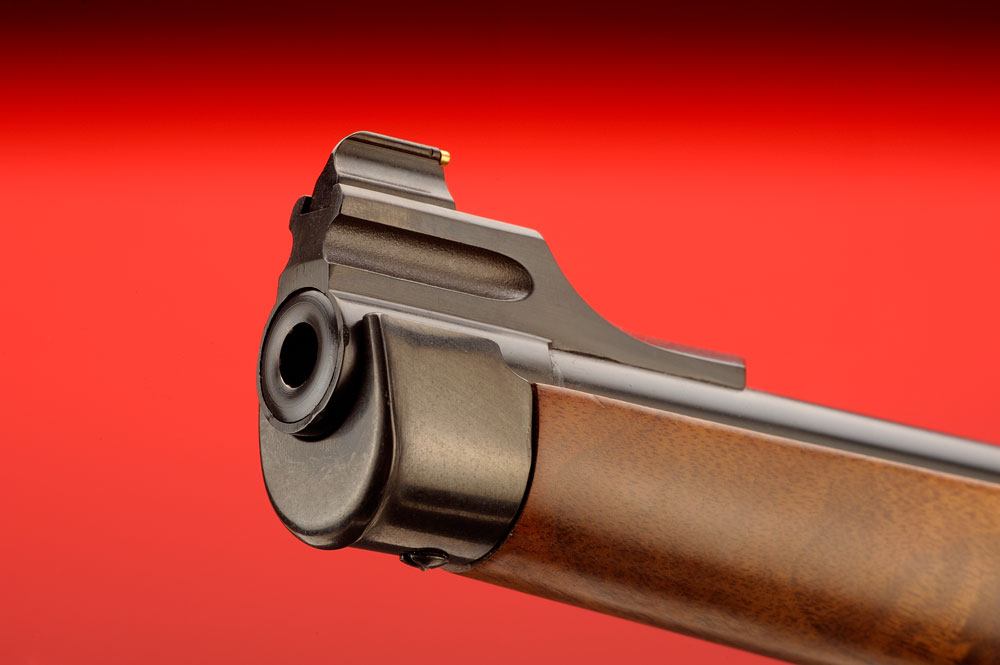
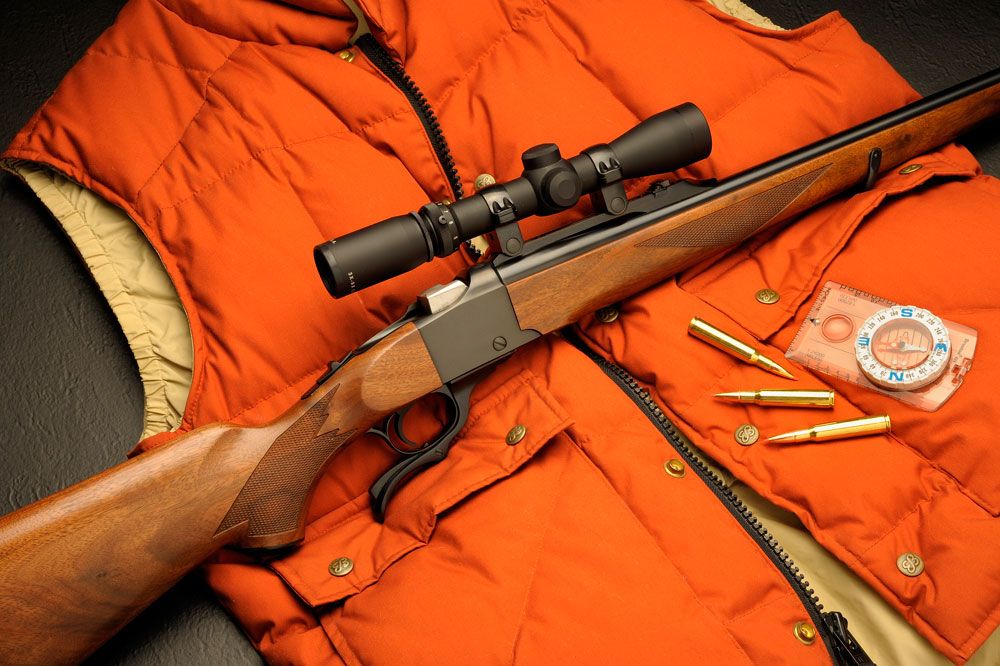
The Ruger No. 1 rifle is a classic single-shot that has stood the test of time and continues to produce respectable accuracy.
Why is the Ruger No. 1 such a classic rifle?
In production since the 1960s, the Ruger No. 1 is a timeless classic that’s still relevant
The No. 1 is a modernized Farquharson with an internal hammer falling block action
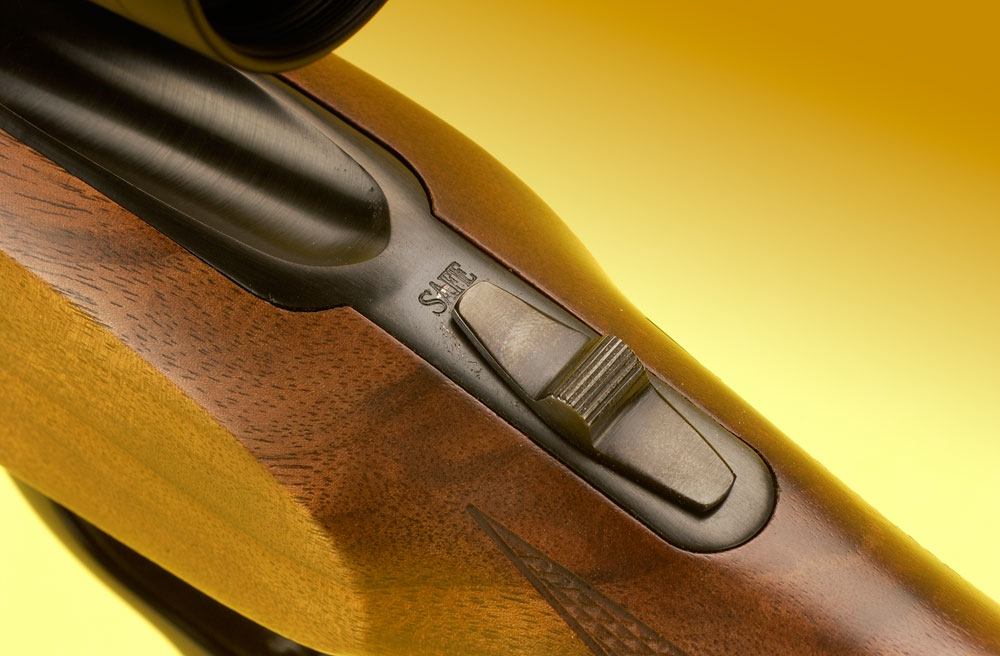
A benefit of the No. 1’s design with tang safety is that it’s truly ambidextrous
Perfectly capable of sub-MOA groups, the No. 1 can still compete with the best of them
Available in numerous calibers, there’s a No. 1 rifle for almost any hunting task
It’s hard to imagine my sporting life without the invention of the Ruger No. 1 rifle. Although I received mine about 10 years after its formal introduction, looking at my gun rack, eight of them are still there standing tall. Granted, I use them all for varmint and small game hunting, so the calibers are mostly in the .20- to .22-caliber range. Nevertheless, they have all served me well and allowed me to experiment with some vintage wildcats. And the fact that it’s a single-shot has definitely added to the challenge of any of my hunts. I believe at the time I paid around $250 for my .22-250 Remington copy.
If we want to drop accolades on one person, it just has to be Bill Ruger, and as shooters, we have been lucky to have him on our side. Starting out in a small shop in Connecticut, he built an empire — not by following others — but by going out on his own with specialized designs, cartridge availability and having a natural insight on what sportsmen like you and I like to use in the field. We’ve all seen it in the magnum handguns, the famous M77 bolt action “classic” rifles and even Bill going out on a limb by introducing a Ruger shotgun in 20 gauge as his first scattergun out of the gate.
However, I firmly believe the single-shot rifle was the dearest to his heart. In his collection, he had a nice assortment of the classics — to wit, Sharps, Gibbs Farquharson, Westley-Richards — all of which gave him the idea to come up with a modern, under-lever single-shot with a price point to match that of the average hunter, now 50 years on the market. In the end, Ruger and his design team came up with a modernized Farquharson that, through its lifetime, was chambered for almost three dozen cartridges from the .218 Bee to the .458 Winchester Magnum and available in seven distinct models, not to mention special editions and the offshoot of the No. 1, which was the No. 3.
For field hunters, it’s a natural, especially for deep woods hunters. Many of us have been raised on the Winchester Model 94, and you know how that goes. Because of the thinness of the receiver, the gun is handy to carry while climbing over old blow downs, dodging bramble bushes and small saplings. The same is in the offering of the No. 1, especially if you choose a model with open sights, as the bulk of a mounted scope is absent on this type of gun.
Using the No. 1 Light Sporter for example, the barrel is a curt 22 inches; placing it on your shoulder negates any field carry, as the tip of the barrel rarely goes over the top of your cap, making walking easy. Interesting to note is that because the No. 1 is devoid of a long, bolt-type action, my Model 1-B in .204 Ruger with its 26-inch barrel is the same length (42½ inches) as my pet Savage Model 114 in .270 Winchester, which can be an advantage to long-range shooters using modern magnum ammunition. For scabbard use, the lack of a bolt handle makes insertion or retrieval of the gun too easy to mention, and with the addition of a tang safety (forward to fire, down for safe), this gun is a natural for both right- and left-handed shooters.
While the model variations have been cut back through a change in the distributorship of the No. 1, many are still available as special runs or on the secondary market. Presently, Lipsey’s of Baton Rouge, Louisiana, has taken over the franchise of the No. 1s, and although they list six different models of the gun, be advised, they are limited on cartridge availability, with only one specific caliber per model.
I assume this will change, as waiting for the right cartridge can be painful especially at this pace. Here, a quick check at GunBroker, Classic Sporting Arms or Cabela’s will provide a long list of guns (both new and used) for sale.
For variety, the Ruger No. 1 has something for everyone. Over the ensuing years I’ve had, purchased and traded most every model they have, but the one that is my all-time favorite is the No. 1 Standard rifle.
This is the one with the extended forearm, which is perfect for my type of varmint hunting. I started out with one in 1976 in .22-250 Remington, and it’s still turning out groups around a half-inch with the Hornady 60-grain Spire Point bullet. That rifle is still in my gunroom sitting proudly on the rack.
In addition to this Standard rifle with a tapered 26-inch barrel, there are a half-dozen more to add with the barrel lengths in parenthesis. The Light Sporter (22-inch), Medium Sporter (26-inch), Special Varminter (24-inch heavy), Tropical (24-inch heavy), International (20-inch lightweight) and the Standard Light Sporter complete with a handy 22-inch barrel. All Ruger No. 1s came with a set of Ruger rings that mounted on an elegant quarter rib attached to each rifle at the factory.
For the purpose of wringing out the details, let’s stay with the Ruger No. 1 Standard rifle.
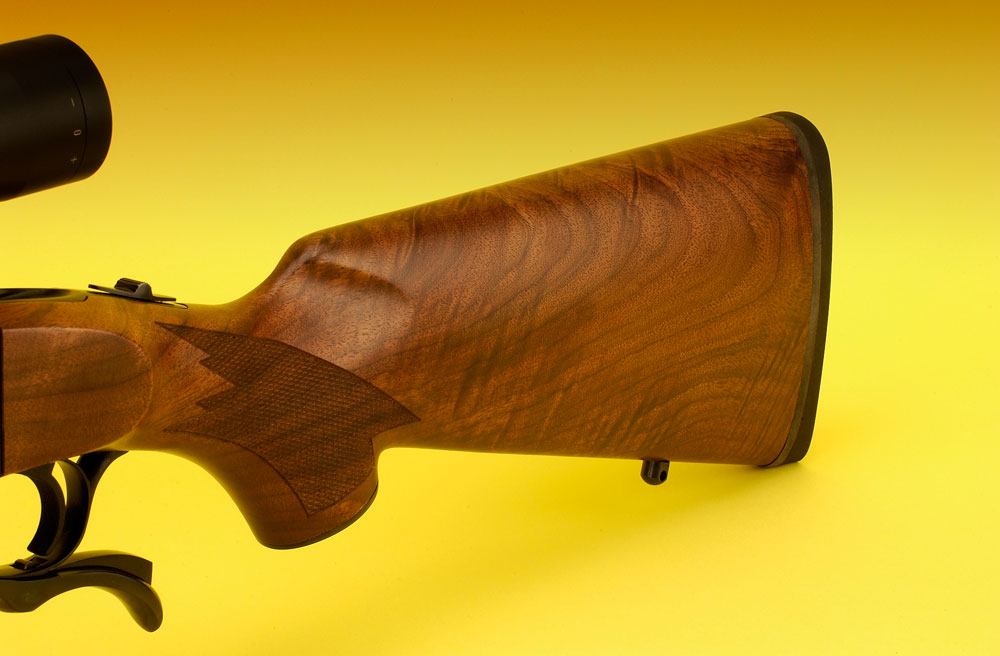
When detailing the stock, it is easy to see Bill Ruger had his two cents of involvement, as the stock is classic in every way. There is no line-disturbing comb, nor is there a cheekpiece on the left side of the buttstock.
This is what makes the No. 1 so popular with both right- and left-handed shooters. With the tang-mounted safety and no bolt to mar the operation, this is truly an ambidextrous rifle for all to enjoy.
Regardless of the model, the buttstock is finished off with a handsome and classic rubber recoil pad with a black spacer. The pistol grip has a pleasant sweep to it, and I find it comfortable whether braced on an old log or lying prone on the ground. A Ruger grip cap and a rear sling stud finishes this part of the gun off in grand style. Length of pull is 13½ inches.
With my Standard, the front part of the stock is considered to be a semi-beavertail in design and measures over a foot long from the receiver to the muzzle end of the stock. It is held to the gun via a hanger and an angled screw that, when tightened down, actually pulls the wood up and towards the front of the receiver for support and to enhance accuracy.
On my guns and samples received recently, the final finish is done in a satin patina, smooth to the touch, and covers the stock with a feeling the old masters laid down on classic guns at the turn of the century. There is more than ample checkering on the No. 1, and it covers both the pistol grip and forend of the gun.
On the former, recently, a new pattern of sorts has appeared that offers rear extension of the point pattern now standard on all No. 1s. On the latter, the point pattern continues, less subdued, nevertheless with good coverage for holding the gun.
All of the inletting is first class, with the area around the tang, trigger guard and barrel channel cut with precision. With reference to the receiver, the wood to metal fit is finished “proud,” which simply means it is not finished flush with the receiver itself. While some may object to this, this method keeps the receiver pristine, as the final finishing process will not scratch this highly polished surface, making the gun more economical to build with a lower price point.
Looking back, I can remember that the Ruger No. 1 was a premium rifle and, with this, deserved semi-fancy to fancy wood. In the beginning years, most if not all had better than select wood; in fact, I can remember wood that was outright gorgeous.
It seems over the years pricing has gone up, but the quality of the wood has gone down. Occasionally, there is a rifle with a strong grain structure, but on the whole, there is nothing of the caliber of the guns long ago. In any event, if you have the time to scout around, there are handsome stocks to be found.
The receiver, barrel and related parts are finished to a rich, blue patina in keeping with the origin of this particular gun. The investment cast action takes its look from the Farquharson rifles of the past, but it is redesigned and modified for the modern shooter.
Compared to traditional bolt-action rifles, the basic receiver is only 2½ inches long but actually measures about 5½ inches long if you include the area out to the rear of the tang housing the safety and related internal parts. As mentioned before, the width of the receiver comes to 1½ inches — perfect for those who like to hand carry their weapon into the woods.
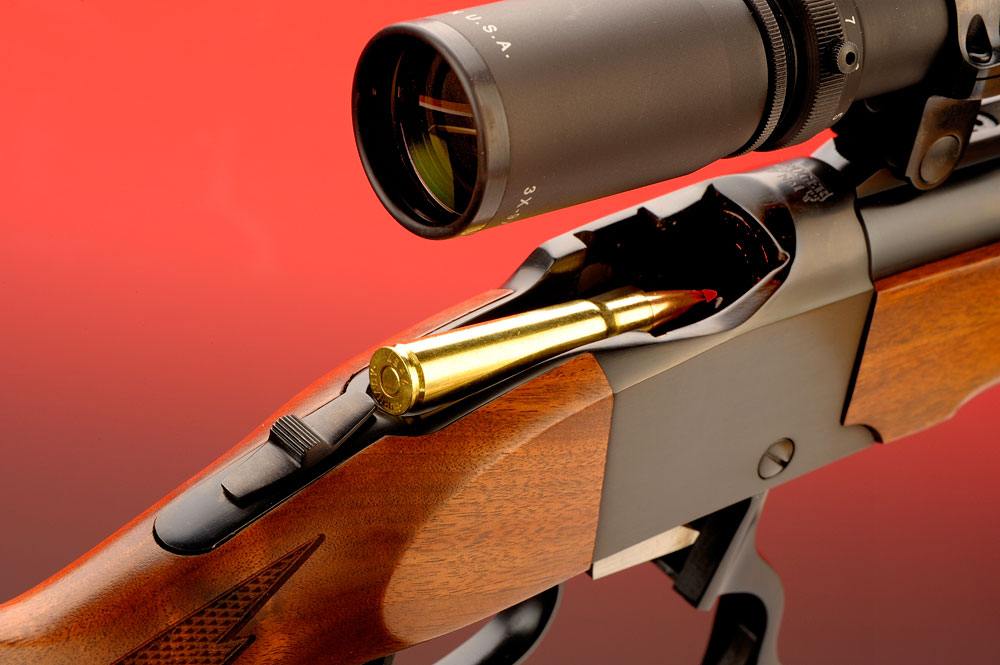
Bill Ruger and his design team had many thoughts on how to make the gun function perfectly every time while keeping it trim right down to the muzzle. They did this by moving the mainspring forward and within the protection of the forearm. From a design standpoint, the gun is considered hammerless and upon cocking the gun with the operating lever, the falling block drops down, coming to rest within the confines of the receiver. In fact, one interesting feature of this rifle is that when the gun is cocked, the very tip of the hammer shows as a cocking indicator at the forward part of the operating lever.
In keeping with the overall smoothness of operation, the breechblock moves up and down within the receiver at a preset 3 degrees to the rear as to allow it to move effortlessly over the rear of the cartridge case when installed into the chamber. When the lever is up, a lever latch locks the action in place. Pressing down on this lever unlocks this forward facing latch, dropping the block while resetting the action and ejecting the spent cartridge.
Ejection of the spent round is always reliable thanks to a massive ejector spring located within the forearm of the gun. Tied to a cam, this spring provides more than enough force to move any cartridge out of the gun.
For those of us who like to keep our brass for reloading, there is an adjustment within this assembly to keep the brass within the confines of the gun and not on the ground. In short, this allows the shooter to vary the pressure on this ejector as to limit the travel of the spent case out of the gun.
Years back, you could adjust the trigger to one’s preferences, but today that luxury is gone. While there are still the dual adjustment screws within the confines of the trigger assembly, going through the book shows that Ruger does not want you to “tinker” with the mechanism. To wit, Ruger goes on to say, “do not alter any factory setting,” which simply means it has been adjusted at the factory.
On the majority of my No. 1s in the rack, I am looking at an average of 4 pounds of pull with no take-up before the sear broke. Not ideal, but workable, and if I had just one criticism of the gun, it would be the adjustable (or the lack of) trigger.
On my Standard gun, the barrel is 26 inches — perfect for my affinity to vintage wildcat cartridges. It has a graceful taper out to the muzzle to a sporting diameter of .625 inches. Attached to the barrel is a quarter rib, perfect for mounting a scope, or factory installed iron sights.
With regards to a scope and eye relief, I offer this suggestion, especially with the higher-powered optics. If you have trouble getting a full image circle with your scope, purchase a set of Ruger dual rear offset rings. For some reason, I have trouble with all No. 1 guns, as I can’t seem to get close enough to the scope, and with these (available from the Service Department), they solve the problem with aplomb. On the other hand, some models have an adjustable folding-leaf sight mounted on the quarter rib, with a ramp front sight complete with a gold bead.
When it comes to accuracy with the No. 1, reams of paper have been written about this subject. For me, I have no problems, and since I handload, I can coax groups out of my guns that go under an inch or better. Equally impressive are modern factory loads in the .204 Ruger from Hornady or Remington that have placed three shots on paper at the century mark of .680 inches and .360 inches respectively.
The Ruger No. 1 offers a great deal of fun to any hunter, be it small game, big game or varmint. I have used these guns for my varmint hunting and cartridge experiments (my favorite is the .219 Donaldson Wasp) for the past 40 years, and they still continue to amaze me. For more information, contact www.lipseys.com or www.ruger.com.
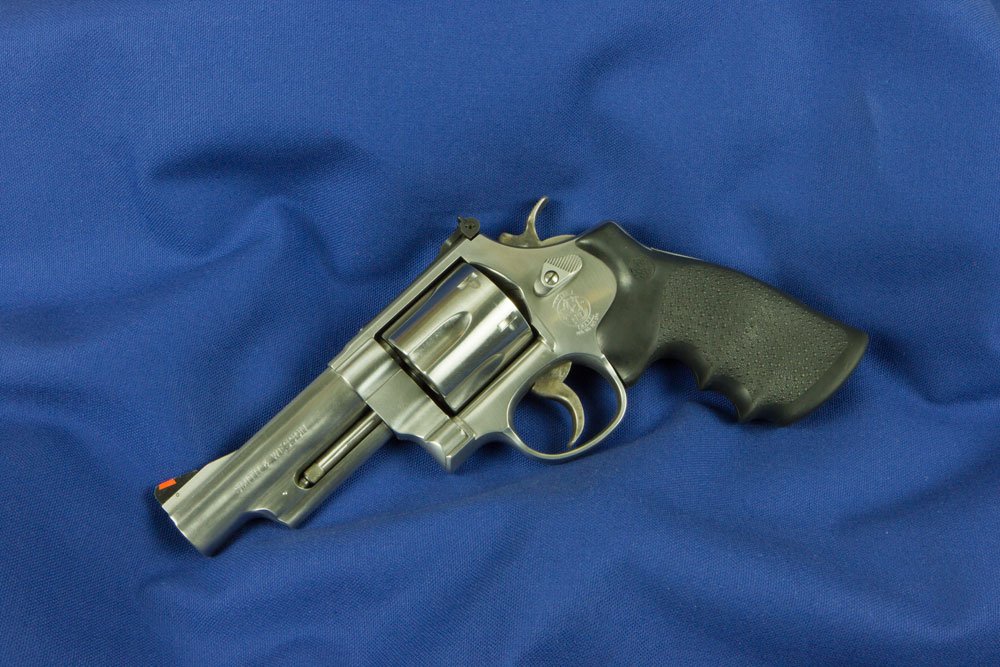
The Smith & Wesson Model 629 is a heavy duty .44 Magnum revolver that’s the perfect protection for city and country.
Smith & Wesson Model 629 Review Snapshot:
A stainless steel .44 Magnum revolver, the Model 629 is based on the earlier Model 29
The potent Model 629 offers users protection from bears and other predators
The Model 629 produced adequate accuracy, with groups around 2 inches at 25 yards
Rugged and dependable, the 629 provides what users need in a .44 Magnum revolver
For many years after its introduction in 1955, the .44 Magnum was often referred to as the most powerful handgun cartridge in the world. Several other handgun cartridges have exceeded its power since then, but it still remains a powerful round that is capable of taking most North American big game.
Smith & Wesson’s Model 29 was the first production revolver chambered for the .44 Magnum, and sales skyrocketed after Clint Eastwood’s portrayal on the big screen of Inspector Harry Callahan, aka “Dirty Harry,” who dispatched the bad guys with one. Stories still circulate about movie fans buying a Model 29 and a box of cartridges, then after shooting one cylinder full of six, selling the gun and the remaining cartridges because of the sobering recoil.
The Model 29 beget the Model 629, which is a stainless steel version of the gun. Both guns, the 29 and 629, have been in the S&W inventory for many years and continue to be excellent choices for the shooter who is seeking a recreational revolver that can also serve as protection against dangerous game, wild predators or humans intent on causing bodily harm or death. So, the Model 629 reviewed here is a versatile choice.
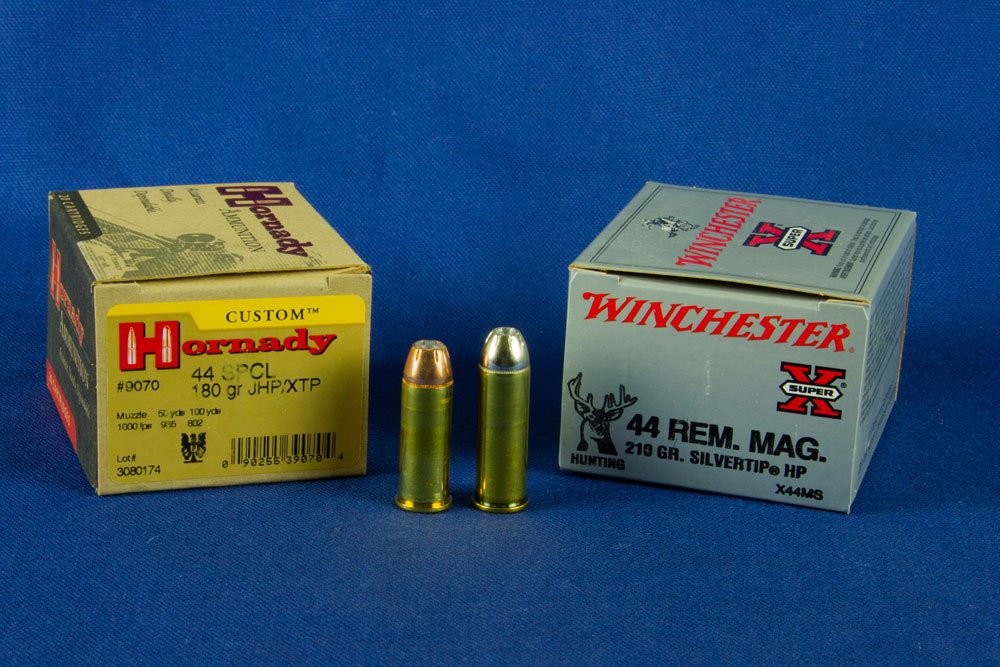
One feature that makes the Model 629 so versatile is that not only will it handle the most powerful .44 Magnum loads, it can also safely fire .44 Special cartridges because that round is less powerful, is .125 inches shorter than the Magnum and comfortably fits in the chamber. The .44 Special not only generates considerably less recoil, making it pleasant to shoot for fun or practice, it is also a popular self-defense round with ballistics about the same as those of the revered .45 ACP. And because it is less powerful than the .44 Magnum, it generates less muzzle rise, allowing the shooter to get back on target faster for follow-up shots.
Some people want that extra magnum power though for personal defense against human predators, and carry the Model 629 loaded with .44 Magnum rounds. Generally, the ammunition chosen is a hollow point design with a projectile weight of 180 to 240 grains. At the speeds generated by the magnum load, expansion and penetration both combine to deliver serious damage on the receiving end in order to stop felonious behavior.
But the 629 offers even more versatility. When loaded with heavy, hard-hitting, solid projectiles, it is an effective defense against bears and other wild predators. So why not use hollow point expanding projectiles against bears? The answer is lack of penetration.
Bears are big animals with thick hides that are much tougher than the human skin. Bears also have massive bone structures and tough muscles that work together to protect the animal and make it more difficult to reach vital organs. And doing damage to vital organs is necessary to stop a bear in the midst of a charge. A hard cast 300-grain or heavier bullet has the energy to penetrate hide, bone and muscle and do serious damage to internal organs, where a hollow point bullet is more likely to begin expanding on impact, which slows it down and reduces penetration, so it may not go deep enough to inflict charge-stopping damage.
“Penetration is key, so hard cast or solid bullets are recommended for bear defense,” says Il Ling New, professional hunting guide and Gunsite Instructor who teaches, among other classes, Predator Defense. She adds, “At Gunsite, we recommend that a charging bear be shot in the face—ideally between the eyes and nose—to stop a charge as soon as possible. Other shots may take too long to stop the bear before it can do damage.”
Many ammunition manufacturers produce .44 Magnum and .44 Special loads with a variety of bullets suitable for anything from punching paper to dropping big, tough game. So obtaining ammo is not difficult. Ammunition is supplied by major manufactures and smaller specialty manufacturers who specialize in certain loads and cater to select clientele. And the S&W Model 629 will handle them all.
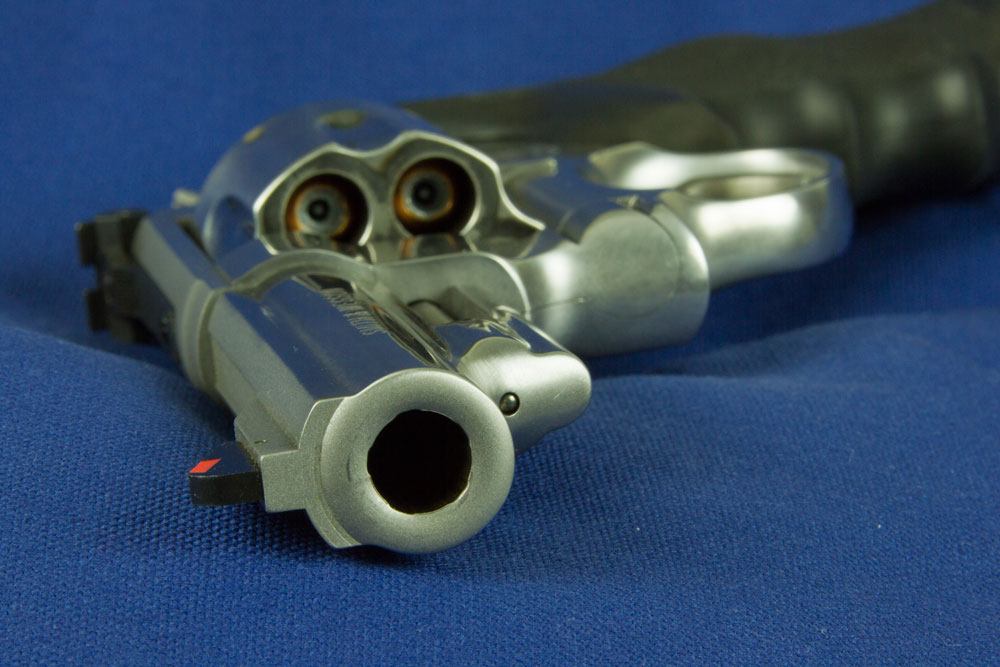
While the Model 629 is available in a variety of versions with different features, a 4-inch barreled standard version was evaluated for this article. The 629 is a large frame revolver built on S&W’s N frame, which is well suited for the recoil and pressures associated with the .44 Magnum. The gun has a bright, polished stainless steel finish with the familiar Smith & Wesson logo on the left side just below the cylinder catch.
Up front, the gun sports a blued steel ramp sight with a bright orange insert that demands attention when aiming. The rear sight is also blued steel and is adjustable for both windage and elevation by turning adjustment screws. It has a white outline to aid in acquisition when in a hurry. Since the gun can accommodate so many different .44 Special and .44 Magnum loads, an adjustable sight is an excellent feature because changing loads invariably shifts the point of impact. And an accurate zero is necessary, especially if using the gun for self defense or defense against wild predators.
The underlug beneath the barrel extends about two thirds of the distance to the muzzle. The hammer and trigger appear to be made of carbon steel, and the hammer spur is aggressively checkered for good purchase if the shooter chooses to thumb cock the revolver. The trigger has a polished, wide face that encourages a smooth, consistent trigger press when shooting the revolver double action. The double-action trigger pull on the test gun measures 13.5 pounds, whereas the single action breaks crisply at just under 4 pounds with a bit of overtravel.
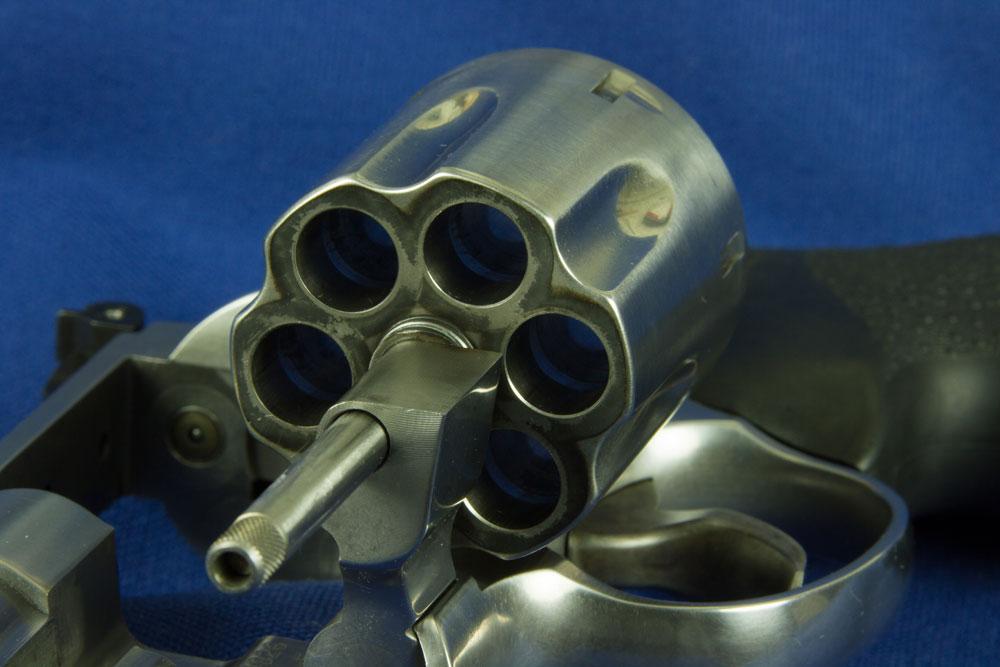
A fluted cylinder on a swing-out crane has a six-round capacity, and the cylinder catch is easily activated to release the cylinder by pushing it forward. Older versions of the Model 629 were equipped with one-piece synthetic grips featuring a stippled texture and distinct finger grooves to anchor the gun in the hand. However, the newest model has a slightly different grip with less pronounced finger grooves and a cushioned backstrap to help reduce the effects of the stout recoil that the .44 Magnum can generate with heavy loads.
Shooting the Model 629 can be a pleasant experience or, depending on the shooter’s tolerance for recoil, a bit distressing. Because the gun weighs 41.5 ounces, which is about 2.5 pounds—more for those with longer barrels—most shooters can comfortably handle shooting light .44 Special loads. The traditional 240-grain .44 Magnum loads are manageable by many shooters unless a large number are fired in a single session. The heavy loads made for hunting or predator defense, those around 300 grains or more, generate what most shooters would call punishing recoil, and firing a few rounds in a session will satisfy them. Of course, there are shooters with a higher tolerance for recoil.
The Model 629 can be a very accurate gun in the right hands and is capable of delivering tight groups. The test gun delivered groups at 25 yards averaging just over 2 inches, and shooters with very sharp vision and the proper technique can probably get better results.
The sling for your carbine is like the holster for your pistol; it’s a mandatory piece of equipment. It’s also one of the most misunderstood accessories out there.
Choosing the Right Rifle Sling Snapshot:
There are three basic types of slings: shooting slings, carry slings and tactical slings
Tactical slings, most relevant to the AR, fall into three categories: single-point, two-point and three-point
Single-point slings offer hands-free operation, quick transitions to the secondary weapon and rapid on/off attachment, but also have disadvantages
The author feels the two-point is the most versatile option, while the three-point can become cumbersome
There are a variety of slings, and while it may seem simple, choosing the right sling can get complicated. Application and personal preference determine what sling is best for you. Also, keep in mind that you can always swap this gear, changing it out to fit what you are doing.
I highly recommend starting off with a simple two-point sling. Set up correctly, a two-point sling design will do everything you need, without being too complex. After working with the AR and learning how to use it, you can start experimenting with the various types, making an educated decision on what you need or what is required for your specific application. (For details on using the sling and the different carry modes, see the section on Carry Modes.)
Shooting Slings
Shooting slings are traditionally made of leather. The support arm is looped through the sling to create a more stable firing position, but only when the support elbow is resting or braced against something. For marksmanship, this is a definite advantage. (Jeff Cooper was a major proponent of shooting slings and devoted a whole chapter to this in “The Art of the Rifle.”) The competition variety takes time to loop up, and is normally reserved for matches, such as NRA High Power competition. The exception to this is the Ching Sling, designed by Eric Ching, which is very quick to loop into; however, you rarely see them in use on ARs.
A leather shooting sling is used for slinging up around the arm for stability in positions where the support arm is resting on or braced against something.
If you are going to work with a shooting sling, looping it up for stability and accuracy, you need to remember that this puts force on the handguard, pulling it downward enough to affect shot placement. With a standard-type handguard, the front fits into a handguard “cap,” which is around the barrel just behind the front sight base. The sling is connected to the handguard. Applying downward pressure to the sling pulls the barrel down. For example, with my stock AR HBAR, looping up in the sling will lower the point of impact, where the bullet hits the target, by about 6 inches at 100 yards.
In order for this pressure not to affect your shot placement, you need a free-floating handguard. This type of handguard isn’t attached to the front of the barrel. This way any pressure on the handguard doesn’t affect the barrel or your point of impact.
Carry Slings
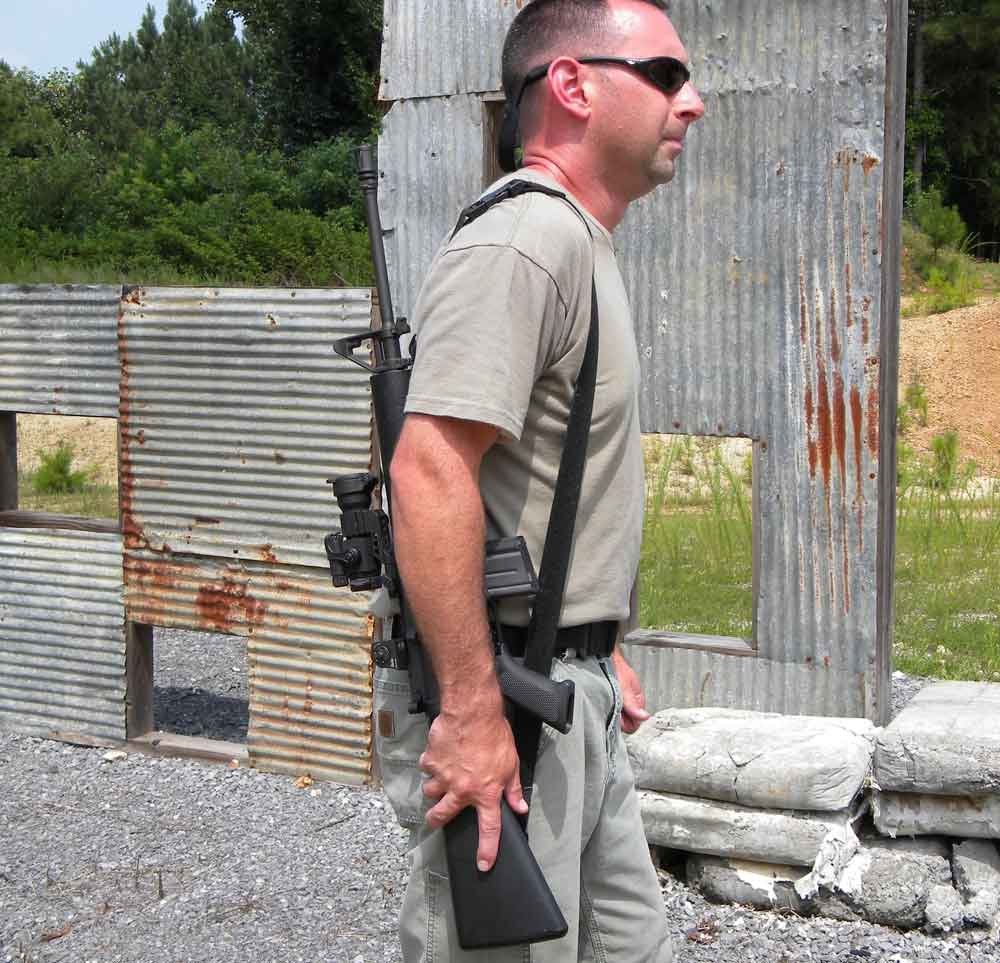
In American carry, the rifle is over the strong-side shoulder with the muzzle pointing up.
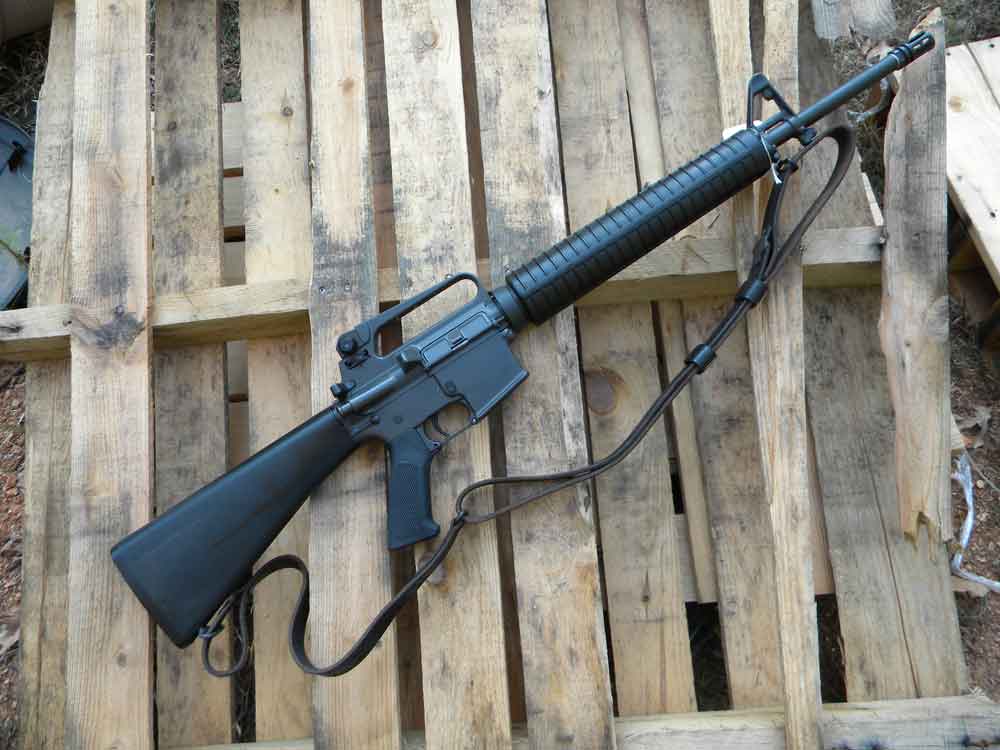
A simple carry sling, or “two-point” sling, is a great choice for general-purpose use, self-defense or patrol officers. When adjusted to the proper length, the two-point sling is extremely versatile. It can be used for “African” carry, slung on the support side of the body with muzzle down, or “American” carry, on the strong side of the body with muzzle up. It can be looped over the neck to free up both hands, “scramble” carry, or around the neck and body, in “tactical” fashion. Add a quick-release buckle so you can get free of the sling quickly if necessary and you’ve got a good thing going.
Tactical Slings
I use the term “tactical sling” for any sling that is designed to be worn around the body, looped over the neck and underneath the support arm. While most people think this is a new thing, the U.S. cavalry used something similar in the mid- to late-1800s to free up their hands for riding. Today’s versions are broken down into three types: single, two-point and three-point.
The advantage of tactical slings is that, with the rifle slung, you have both hands free and the rifle is readily accessible for immediate use. Transitions to the pistol are simplified. Lower the rifle down with your support hand while presenting the pistol, and then with the rifle hanging you have the use of both hands for operating the pistol.
Any time you need both hands free, to climb a ladder or take control of a suspect, you don’t have to worry about what to do with the rifle. Plus, I’ve found that it works really well when I’m taking the dogs for their evening walk. I can control the dogs on their leash and still have access to my rifle.
The single-point loops around the body and attaches to the AR in one location.
The single-point sling attaches both ends of the sling to one point on the carbine, usually right behind the grip, forming a loop that goes around the body. The sling should fit tight to the body, so most come with an adjustment strap.
The advantage of a single-point sling is that it is easy to attach and detach from the carbine. For example, when it’s time to gear up you loop the sling around your body, then connect it to the AR. Once you’re done, perhaps ready to set the carbine in the rack, you unsnap the sling to release the carbine, leaving the sling looped around your body.
There are a couple of issues to be aware of, however, that I consider to be disadvantages of the single-point sling.
With the sling attached to the rifle right behind the grip, sometimes the sling gets in the way of your hand acquiring a proper grip or manipulating the safety. There is only one attachment point, so when the rifle is hanging and you don’t have the strong hand gripping and controlling the carbine, it will flop around and move about freely. When the AR is hanging on your body, the weight will seek the lowest point, so the sling will rotate around the body, which causes the AR to hang too low.
The stock is lower than the shoulder, requiring more movement to get into a firing position. The muzzle is low, so if you go into a kneeling position you have to take extra care to make sure the muzzle doesn’t dig into the ground. Firing with the muzzle blocked is dangerous and will damage your AR.
As with every piece of equipment there are advantages and disadvantages. You have to train, practice and experiment under all types of conditions until you discover what works best.
The two-point, if adjusted to the correct length, can also be used as a “tactical” sling, looping it around the neck and underneath the support-side arm.
The two-point “tactical” sling is basically the same as the two-point carry type, only normally it’ll have features such as a slide buckle for quick adjustment of the length. The two-point sling is the most versatile, and will do about anything you need. It attaches at two points, normally the rear of the stock and the front of the handguard, creating a large loop.
Once the sling is looped around the body, you adjust the length so the stock is just below the pocket of the shoulder. You don’t want it too long, which will allow too much movement when the AR is hanging, and you don’t want it too tight, because that will restrict movement and the firing positions you can use. (The Carry Mode section goes into detail on the various carry or slinging techniques you can use.)
Three-point slings attach to the rifle at the front of the handguard, on the rear on the stock — similar to a two-point — and then have another section of sling that runs between these two sections that provides quick adjustment. For me, this extra section of sling gets in the way of manipulating the AR, inserting or removing the mag, and sometimes gets caught between the strong hand and grip.
The Bushmaster Minimalist returns to the origins of the AR design, offering a lightweight and nimble multipurpose rifle.
Bushmaster Minimalist Review Snapshot:
The new Bushmaster Minimalist offers everything you need and nothing you don’t
Available in 5.56 NATO or .300 BLK, the Minimalist is a capable, lightweight carbine
With its ALG Defense Advanced Combat Trigger, the Minimalist is plenty accurate
Other features include AAC SquareDrop handguard and Mission First Tactical furniture
In the past several years, there has been a noticeable shift in how some AR platform rifles are being made. The shift is, in a sense, “back,” as in, back to an original concept. The AR, after all, was designed to be a lighter rifle. That might seem like a radical idea, given that I’ve hefted AR-15s, which were all of 9 pounds, unloaded, and AR-10s that could have doubled as free weights for arm curls.
Yet, as designed over 50 years ago by Eugene Stoner, the AR platform was supposed to be a light and nimble rifle, easy to carry and quick to deploy. And those design parameters are what gun manufacturers like Bushmaster are getting back to — in Bushmaster’s case with the recent debut of its new Minimalist-SD chambered in 5.56mm and .300 AAC Blackout (BLK).
I had several range sessions with a new production model Minimalist-SD in .300 BLK, as well as a three-day predator hunt with the rifle in Eastern Nevada. The Minimalist in .300 BLK is accurate, fast handling and easy to carry, in hand and with a sling. The rifle strikes me as handy enough for home-defense duties, yet still stout enough caliber-wise (in the .300 BLK) to make a good mid-range hunter for varmints, predators and larger game up to the size of deer and hogs.
Depending on the type of event, it could well be used in various shooting competitions, too.
I also used a new riflescope for this phase of the testing, a Steiner P4Xi, and mounted it to the rifle with a rock-solid Alamo Four Star DLOC-M4-30MM mount. I shot the rifle at my local outdoor range, firing from a sandbagged rest; I first zeroed the Minimalist at 50 yards and then fine-tuned the rifle and scope rig at 100 yards. Accuracy testing was done at the 100-yard mark, and I have to admit I fired off my groups rather quickly, as befitting the functionality of an AR rifle.
My best overall five-shot group was with the Barnes VOR-TX ammunition, and it measured .958 inch. Overall, the Barnes also scored the tightest average groups, too, at just under 1.20 inches. The other two ammo brands punched in many five-shot groups at well under 2 inches, including a 1.12-inch group from the DRT and a 1.34-incher from the SIG Elite.
I didn’t get what I would call “tack-driving” accuracy and precision from the Minimalist, but I found the accuracy to be on par for what I normally experience with .300 BLK in ARs with 16-inch barrels.
Others might well have different experiences, but I’ve rarely found the .300 BLK in this platform to be a sub-MOA rifle. I think it’s the caliber more than anything, and for that same reason, I’d expect the Minimalist-SD in 5.56 NATO to produce noticeably tighter groups — I just find the 5.56 to be more accurate, from rifle to rifle, than the .300 BLK.
Also, as I noted, I was firing off my groups fairly fast. So credit my fast trigger finger for somewhat larger groups (in all probability) than what would have happened had I taken more time between shots.
My Lyman Electronic Trigger Pull Gauge measured the Minimalist trigger pull at an average of 4.51 pounds. The ALG Defense Advanced Combat Trigger snaps off cleanly, with little to no overtravel, and it also resets very quickly. With its rifle-length AAC SquareDrop handguard, the Minimalist-SD allows for fast, solid attachment of accessories at seven different angles. Of course, as you are adding accessories, you are also adding weight — but at least you start off with a light rifle.
The Mission First Tactical Minimalist Stock is light, extends out easily and is comfortable. The only problem the stock represents is that the hooked butt could very well snag if you are moving through thick vegetation with the rifle held barrel forward. I had this occur a few times on my Nevada hunt and had to make sure I was carrying the rifle at port arms or with the barrel point down to avoid catching the hooked stock on the sea of sagebrush I often waded through.
The Minimalist employs a direct-impingement gas system. And it functions just fine. I shot off well in excess of 400 rounds of ammunition through my Minimalist and didn’t have a single jam up or even one extraction problem. The empty brass kicked out nicely, ending up at a consistent 5 feet or so from my shooting position.
The Minimalist Afield Unfortunately, the hunt I did with the Minimalist didn’t go as hoped. The Nevada coyotes we were after either did not get the memo to show up — or they received the memo and figured they were better off elsewhere! What I can say about the rifle was that it was a joy to carry on the many, many sets we did, in terrain that varied from sagebrush flats to steep foothills to muddy trails. And I really appreciated the rifle’s lack of weight at the end of our hunt when a particularly bad patch of mud grabbed up our truck and held it hostage. We had to hike it four miles, at night, back to the main road to get a ride to our motel. I was very glad I was not toting a 10-pound AR.
Leaner and Meaner So, how did Bushmaster achieve this lightweight package, with the Minimalist-SD in .300 BLK coming in at 6 pounds, 3 ounces, and the 5.56 model at an even 6 pounds?
“The main weight savings are in the pencil-weight barrel on the 5.56,” said Adam Ballard, Bushmaster’s Senior Product Manager for Modern Sporting Rifles. “Obviously, the .300 BLK model needed a thicker barrel. But it also has a larger bore, so it’s only slightly heavier, adding just three ounces to the rifle.”
Another area where weight was pared off was the SquareDrop handguard. As Ballard noted, “It’s very slim in outer dimensions, and all the modular cutouts removed that much more material.”
Even with trimming out a good deal of weight, Bushmaster still managed to deliver many features that might be considered upgrades on other AR’s, including a Melonite finish, an AAC 51T Blackout fast-attach silencer mount and a lightweight Mission First Tactical Grip and 30-round magazine. The 16-inch barrel is made from chrome-moly steel and is FNC treated to stand up to hard use in most field environments.
“The Minimalist-SD runs great with a silencer, too,” Ballard said, “and the rifle’s lightweight profile makes silencer use not overly tiring.”
Bushmaster decided to produce the .300 BLK models first, so that was what I received. But in April of this year, Bushmaster also began producing the 5.56 version of the rifle and shipping it to dealers.
Both rifles have the same suggested retail prices. I’m not sure if that will hold up for prices paid in-store and across the Internet; one caliber might become more popular than the other, altering the price structure. What I am sure about is that buyers will get lightweight and very functional rifles able to handle most shooting scenarios, in most shooting environments.
How do the new Sierra V-Crown bullets stack up to the bullet maker’s traditional jacketed hollow points?
Sierra V-Crown Bullets Snapshot
Loaded into SIG Sauer factory ammo, the V-Crown is also available as a component
Sierra V-Crown bullets feature a stacked hollow point design with another hollow cavity
Available in many weights, the V-Crown proved just as accurate as other Sierra JHPs
SIG Sauer introduced its own line of premium ammunition, named Elite Performance, a little while back. The line includes FMJ and JHP bullets for most common handgun calibers, and a Match load for 300 BLK (300 AAC Blackout) rifles. (Editor’s Note: Since the time of this article’s publication, SIG Sauer has expanded its ammunition line with several other rifle calibers, and it has also added to its pistol ammo options as well.)
The hollow point handgun bullets are named V-Crown, and are offered in most common calibers: .380 Auto, .38 Special, 9mm Luger, .357 SIG, .357 Magnum, .38 Super +P, .40 S&W, 10mm Auto, .44 Special, .44 Magnum, .45 Auto and .45 Colt. Some calibers offer several bullet weights: The 9mm Luger has 115-, 124- and 147-grain bullets; the .40 S&W has 165- and 180-grain bullets; and the .45 Auto has 185-, 200- and 230-grain bullets.
V-Crown ammunition is described thus: “The ultimate defense round delivers exceptional on-target energy, maximum weight retention, and optimal expansion at all effective distances.” The bullets have a stacked hollow point design with an additional hollow cavity. A unique toothed cannelure acts to ensure weight retention and excellent expansion.
V-Crown bullets are made by Sierra for SIG’s defensive ammo, and some versions for common semi-automatic pistol cartridges have now been made available for handloaders. These include 90-, 124- and 125-grain .355-inch bullets; a 165-grain .400-inch bullet; and a 200-grain .4515-inch bullet. The 90-grain .355-inch bullet lacks the cannelure.
V-Crown bullets are a new design, and most of them have a distinctly different shape than Sierra’s traditional line of JHP bullets. Traditional Sierra JHP bullets have a truncated cone nose shape, whereas most of the V-Crown bullets have a curved nose. The exception is the 90-grain .355-inch bullet, which retains the conical nose shape.
The hollow point cavity of the Sierra V-Crown is also distinctly different than the company’s usual JHP. The traditional Sierra JHP bullets have a wide and deep hollow cavity with a flat bottom, rather like an ashtray. The V-Crown hollow cavity has sloped sides that look like they were formed with an inverted cone. The cavity leads to a small hole at the center penetrating deeper into the lead core.
The 124- and 125-grain bullets differ in an interesting way. The lighter 124-grain bullet is longer than its heavier 125-grain sibling. The nose shapes are different. The 124-grain bullet has a longer, more gradually tapered nose that would be typical of a 9mm Luger bullet. The 125-grain bullet has a shorter nose that is likely designed with the .357 SIG in mind, and it looks like the same bullet loaded in my sample of the company’s .357 SIG ammunition. SIG also loads a 125-grain bullet in its .38 Special, .38 Super and .357 Magnum ammunition.
I checked my box of SIG V-Crown .38 Super ammunition to see if it was the same 125-grain bullet as the .357 SIG. However, the .38 Super’s bullet does not look like the SIG bullet. Instead, it looked like the 9mm bullet with a longer nose. I pulled the .38 Super bullet, and it weighed 124 grains, not 125 grains like it says on the box. Oh well, close enough.
The nose of some V-Crown bullets appears to be a little longer than Sierra’s usual JHP bullet, which means the V-Crown can be seated to a slightly longer overall length. The benefit of a longer nose means more options for overall length. A short nose often means a short cartridge overall length for some calibers because the bullet will contact the rifling if loaded near the cartridge’s maximum overall length, so the bullet must be seated deeper to allow it to chamber. Some guns are finicky when feeding short-loaded bullets, so the longer nose of some V-Crown bullets means they can be loaded longer which can improve feeding reliability.
The length and weight of V-Crown bullets were compared to the lengths of other Sierra bullets. Sierra does not make a 200-grain .45-caliber JHP at the present. The company’s current 200-grain bullet is a jacketed flat point (JFP).
Sierra’s bullets have an excellent reputation for accuracy, and I wondered how this new design compared accuracy-wise with older designs. I compared them, where possible, with the same weight Sierra JHP bullets. For the 200-grain .45-caliber bullets, I used Sierra’s 200-grain JFP.
I loaded them up and fired a 10-round group at 25 yards with the pistol mounted in a Ransom Rest. Velocity was measured with a Shooting Chrony chronograph at about 10 feet from the muzzle.
The test guns were a Para Ordnance P14-45 for .45 Automatic, a Para Ordnance high-capacity frame with a Caspian slide and Ed Brown 5-inch barrel for .40 S&W, a Colt Government Model .38 Super and a Glock 19C for 9mm Luger. The V-Crown 90-grain bullets are intended for a .380-caliber pistol, but I did not have one suitable for these tests, so I tested them in the 9mm Glock.
None of these pistols would be considered fully “accurized.” The .40 S&W pistol has a custom top end, but the slide and frame fit was not tightened, and the Ed Brown barrel was a “drop-in” type. The Colt .38 Super had the bushing replaced because the factory bushing was a little loose. The Para Ordnance P14-45, and the Glock 19C are stock guns.
The group sizes with the 9mm and .40 S&W V-Crown bullets were a little smaller than their JHP counterparts. The .38 Super loads with both V-Crown bullets were slightly larger than the group with the standard JHP. The two Sierra 200-grain .45 Automatic loads produced the same group size. They were not the smallest groups, but this is about the best that this particular barrel/gun can shoot.
These new V-Crown bullets appear to have the same accuracy potential as Sierra’s standard line of bullets, which is a high bar to meet.
I asked Sierra if the company planned on making the other calibers and weights of V-Crown bullets available to reloaders in the future. They replied that they might introduce some this year. V-Crown bullets cost just a little more than Sierra’s standard JHP bullets.
It’s nice to have premium bullets available as a component. Handloaders can now duplicate SIG factory ammunition, or load the same bullet to suit their needs. V-Crown accuracy was on par with the other Sierra bullets in my pistols, so they are certainly worth trying in yours to see how they perform.
There’s little arguing that the 21st century has been the era of the semi-automatic rifle. The firearms world is awash in every conceivable style of gun designed to chew through ammunition as quick as your trigger finger can squeeze it out. But semis weren’t born yesterday.
Firearms innovators have been tinkering with the concept since the first self-contained cartridges were developed. Heck, the Danish Navy adopted the Madsen-Rasmussen all the way back in 1896, giving them the honor of being the first military force to formally adopt an auto-loading rifle.
With that sort of history, there is a slew of rare and common semi-automatic rifles that make dandy additions to any gun safe. But arguably there are some true masterworks — even in their modern iterations — that any diehard firearms enthusiast should pine after. With that in mind, here is a list of five classic semi-automatic rifles you’ve got to own.
A quick note about hunting down some of these guns: Do your research! There are many examples of some of the more vintage rifles on this list that look like the real McCoy, but don’t perform like them. Parts for many of these rifles abound and can be thrown together using less than desirable manufacturing processes. In turn, your hard-earned money can be wasted on what you thought was a functional rifle and turned out to be little more than an expensive wall hanger, if not worse.
After watching — waiting and studying — CZ-USA has become one of the latest to enter the polymer striker-fired pistol game with the CZ P-10 C, and the years spent waiting have paid off.
CZ-USA P-10 C Review Snapshot
CZ-USA has joined the list of manufacturers offering a striker-fired polymer pistol
The new P-10 C offers excellent grip ergonomics and is highly shootable
The P-10 C’s crisp, striker-fired trigger means it’s capable of respectable accuracy
CZ’s new pistol proved reliable with a host of ammunition, including steel-cased ammo
With nearly every major handgun manufacturer now offering a striker-fired polymer pistol, the wait for CZ’s offering has been excruciating. After its reveal in late 2016, fans of the famed Czech manufacturer have been standing idly by to get their hands on the newest addition to not only CZ, but to the world of polymer pistols. Having the advantage of time, CZ put a lot of thought into their design and made sure to include all of the features that have been a hit to the market — in their own style, of course.
Focused On Feel Maintaining the notorious CZ grip angle, the P-10 C is built with “feel” as its primary attribute. The angle is my personal preference, simply because it’s not too steep and it points naturally. Arguably, the aspect of grip angle is 100 percent based on shooter preference, but I certainly know more shooters who prefer sharp over obtuse.
The grip also offers a mild palm swell that dials back what Walther and Smith and Wesson started with their PPQ and M&P, respectively. I’m not saying it’s better or worse, but it’s nice to have something different in the gun case when it comes time to make a selection.
Those with “less pronounced thumb muscles” will find that the P-10 C fits very well. If you have the hands of a gorilla like me, you might find that your trigger finger falls a bit too far for automatic placement of the first pad on the face of the trigger. That said, the included three interchangeable back straps will help each shooter tailor that a bit to their needs.
Regardless of your hands’ features, the deep beavertail places your grip very far forward in comparison to other pistols, and that makes recoil recovery an easy proposition. This works in conjunction with the undercut trigger guard and makes returning to target for fast double taps effortless.
The new Czech polymer sports an aggressive studded grip both around the magwell and on the frame to act as a nice landing pad for a shooter’s thumbs. My style of teaching revolves around shooters being able to identify a proper grip by feel and committing certain textures to muscle memory. In other words, when a shooter’s grip is proper, they should feel certain parts of the gun in certain places on their hands. I found this feature to be superb for this purpose.
Anyone familiar with my work knows that I give extra kudos to any manufacturer that acknowledges the other 11 percent of the community — those often-forgotten southpaws — and puts features like this on both sides of the gun. This is not only nice for lefties, but let’s face it: USPSA, IDPA and real life aren’t always shot “strong-handed.”
Also as a nod to the southpaw, you’ll find an ambidextrous mag release and slide stop. Being fully ambidextrous out of the box just makes sense from a manufacturing standpoint, and it’s nice to see this idea catch on.
The Topnotch Trigger Although it’s taken CZ years to catch up with its competitors in the poly-striker game, the manufacturer appears to have been paying much attention to the other guys’ triggers. With a traditional “safety in trigger” setup, there’s no learning curve on the P-10 C. The new offering also utilizes a relatively straight trigger, much like those found on many of the company’s tactical pistols.
The trigger broke at an average of 4 pounds, 6 ounces as per my Lyman digital trigger pull scale. The break had just a hair of creep to it and reset at about 0.25 inch of travel. As per my testing to date, that puts it second only to the Walther PPQ.
Rounds Downrange Excited to put some rounds through it, I slapped the pistol into a Safariland Pro-Fit multi-gun holster and hit the range. I utilized five different types of ammo with projectile weights as light as 85 grains and as heavy as 147 grains.
I fired five three-shot groups with each load and allowed the gun to cool in between types of ammo. All groups were fired in a standing position without the use of a rest, simply because any handgun that needs to be shot from a bench to produce reasonable groups is useless. To some degree, comfort or “shootability” needs to be taken into account as well when critiquing a pistol’s accuracy.
The loads selected were HPR’s Black Ops 85-grain OTF, Wolf’s Polyformance 115-grain FMJ, Black Hills’ 124-grain JHP, Hornady’s Critical Duty 135-grain FlexLock, and Hornady’s Custom 147-grain XTP. Accuracy was on par with other guns of this class.
The P-10 C seemed to prefer the heavier bullets, as groups got almost increasingly smaller with increased bullet weight. The best group was fired with Hornady’s Custom 147-grain XTP round, measuring just .956 inch. We also observed very repeatable consistency with Black Hills’ 124-grain JHP.
In addition to this, I was very pleased to see flawless function and respectable accuracy with Wolf’s Polyformance steel-cased ammo. It’s no secret that I’m a steel-cased advocate, and I don’t consider a gun usable if it cannot reliably fire it.
Also, digesting mag after mag gave me plenty of practice reloading. Reloads were instinctual, which is something I attribute to the grip angle; however, the magazines did not drop free. With some lubrication and use I did see some improvement, but I would’ve liked to see them whizz out of the magwell right out of the box. Further research shows that my results weren’t typical, so I wasn’t too upset and can attribute this to being part of the break-in period.
As for sights, CZ’s new P-10 C has a standard three-dot setup with an enlarged rear notch. The oversized rear notch allows for faster sight acquisition at what many would argue comes at the cost of accuracy. With the employment of a cold hammer-forged barrel and good ergonomics, I wasn’t too deterred by this, and the resulting groups proved that they struck a good balance. Double taps were also very accurate, as the overall design reduces muzzle flip and puts you right back on target without any effort.
The Takedown Keeping it simple, the P-10 C takes down like most any other polymer striker-fired handgun. Once you’re certain that the pistol is unloaded and the magazine is removed, pull the trigger and hold it to the rear. With the trigger still depressed, pull the slide back slightly. Once it’s in the correct spot, you’ll be able to push down the disassembly buttons on each side of the frame, at which point the slide assembly will come all the way forward and slip right off of the frame.
This will now allow you to remove the guide rod/spring assembly and the barrel. Clean the fouling and lube where metal meets metal, and you are essentially finished. Reinsert your barrel and guide rod/spring, and then all that’s left is to move the slide assembly to the rear of the frame and it will lock back up.
The Breakdown I think CZ definitely put a player into the game of poly guns with the P-10 C, and one would certainly be making a mistake if he or she doesn’t put some rounds through one when selecting a pistol of this style and size. I would’ve liked to see a game-changing reset and trigger pull weight, but it’s certainly one of the better available triggers out of the box. Ergonomics were outstanding, and I feel that it was a great move to keep the palm swell modest, as it makes it stand out from its competitors who swing at the other end of the spectrum with this feature. I liked that the P-10 C fits many Glock holsters, as the introduction of new guns to the market is almost useless if a shooter cannot carry or compete with one.
Send some rounds through one yourself before deciding on what perfection means to you.
Editor’s Note: This article is an excerpt from the 2017 Concealed Carry Special issue of Gun Digest the Magazine.
Take your Kalashnikov rifle to the next level with these functional and ergonomic AK upgrades.
The AR is to many the definition of a fully customizable, modular weapon platform. Stocks, grips, triggers, safeties, charging handles, handguards or even entire uppers — pretty much any part on the rifle — can be swapped out or exchanged with relative ease, and manufacturers produce an abundance of aftermarket parts to do just that.
Customizing the AK-47 and its variants, on the other hand, can be a bit more challenging. The aftermarket for AK upgrades and parts has been more limited in the past, and the AK’s design is less conducive to customization, with the original rifle being designed in an era in which iron sights were good enough for the average soldier and a wood stock and furniture were all that were needed.
Additionally, many AK owners simply prefer the rifle with its traditional wood furniture and iron sights, with some purists going so far as to mock those choosing to modify their AK. Memes even exist that strongly dismiss the notion of upgrading or customizing the AK-47 in any way and have made the rounds online in blogs and forums.
Thankfully, not everyone feels this way, and manufacturers offer an assortment of products that help shooters take the AK to the next level. While the AK certainly doesn’t have the same degree of modularity as the AR or as large of an aftermarket parts selection, there are still plenty of accessory options and AK upgrades for owners to choose from, and the choices are only continuing to grow each year.
Take a look at this list of accessories and ways to improve performance and functionality from your AK-style rifle. It’s by no means comprehensive, but should be plenty to pique an AK owner’s interest.
Editor’s Note: This roundup does not cover optics mounts. For info on the various side rail optics mounts available for AK-pattern rifles, check out Jim Grant’s article on optics mounting options for the AK.
1. Triggers One of the best ways to upgrade any rifle and increase accuracy is to install a better trigger, and the AK is no exception. While the AK-47 and its variants have never been known for astounding accuracy, some of the factory-installed triggers that come standard don’t do them any favors. Several manufacturers offer improved trigger groups for the AK platform that will help you get more hits on target.
TAPCO INTRAFUSE AK G2 Trigger Group The G2 Trigger Groups available from TAPCO offer an improved trigger pull between 3-4 pounds and eliminate the uncomfortable trigger slap common with other designs. A “no fumble” trigger sleeve allows for assembling the group outside of the rifle and simply dropping it in as one piece. Trigger groups are available in single- or double-hook options and are manufactured using heat-treated, 4140 tool-grade carbon steel. ($32.99; TAPCO.com)
Century Arms RAK-1Enhanced Trigger Group Century Arms’ RAK-1 Enhanced Trigger Groups are available for WASR, C39, RAS47, AK63DS and many other standard AK-style rifles and pistol variants, as well as for N-PAP, O-PAP, M90 NP, M92 PV and other Yugo AK variants. The trigger is 100 percent American made and has passed a 15,000-round endurance test. Each group includes a hammer, trigger and disconnector, and, thus, constitutes three U.S. 922r compliant parts. ($39.99; CenturyArms.com)
2. Grips While less critical than a good trigger, a grip that is comfortable and conforms to your hand well is important. Some feel that the standard factory grip on many AKs just isn’t the right fit. Luckily, grips are a common upgrade for the AK platform, and plenty of manufacturers offer different grip options.
Hogue AK-47/AK-74 Rubber Grip Hogue is well known for its handgun grips, but the company also produces grips for tactical rifles like the AK. This OverMolded grip uses Hogue’s famed orthopedic handshape with compound swells and naturally proportioned finger grooves and has the manufacturer’s Cobblestone texture for a non-slip, non-irritating grip. The grip is impervious to oils and solvents and has a compartment for storage. The 922r-compliant part is available for Chinese, Russian and Yugoslavian AKs. ($26.95-$39.95; HogueInc.com)
TAPCO INTRAFUSE AK SAW Style Pistol Grip This pistol grip from TAPCO offers AK users a more ergonomic, angled grip similar to that found on the military’s M249 SAW light machine gun. The grip’s more severe angle and increased width provide the shooter with improved comfort and control when firing the rifle. It is made of a high-strength composite and houses a storage compartment for spare tools and cleaning supplies. ($19.99; TAPCO.com)
3. Stocks Replacing the stock on your AK is another easy way to improve ergonomics, and tons of manufacturers produce stocks for the rifle. Abundant stock options range from synthetic or wood fixed to metallic folding and adjustable, polymer. Add in adapters that allow your AK to accept any AR-type stock that fits a standard AR buffer tube and the options are nearly endless.
TimberSmith Premium Wooden Stocks For those who want a new stock to replace an old, possibly damaged factory one but who want to keep the AK’s classic look, TimberSmith has several wooden furniture options for Romanian AKs. The stock sets are quite stylish, offering a “like-new” appearance without moving away from the traditional look. Color options include Black Laminate, Brown Laminate, Hardwood and an elegant Red Laminate. ($145-$160; TimberSmithUSA.com)
TAPCO INTRAFUSE AK Folding Stock This stock is made from a high-strength composite and folds to the right, allowing you to reduce the overall length of the firearm when needed for storage or close quarter engagements. The AK Folding Stock incorporates a sling attachment point in the knuckle and has a 15-inch length of pull. It fits standard, single-tang, stamped receivers only. ($39.99; TAPCO.com)
Command Arms AK47SFSP Stock Tube This stock tube from Command Arms allows you to take advantage of the vast number of AR-15/M4 buffer tube type stocks on the market. Capable of attaching to most AK-style rifles with Saiga stamped receivers, the AK47SFSP (Side-Folding, Six-Position) Stock Tube allows for any standard commercial AR-style stock to be added to your AK. The stock tube is ambidextrous, easy to operate and quick to install, making it a great option for any shooter. ($124.99; CommandArms.com)
Magpul Zhukov-S Stock This innovative polymer, folding, collapsible stock comes with QD sling mounts, modular cheek risers and a shock-absorbing rubber buttpad. It has five positions for length of pull adjustment and folds to the right. Users can still charge and fire the rifle when the stock is folded, and positive detents prevent unwanted movement. The Zhukov-S fits common stamped-receiver AKs, and a Yugo variant model is also available. Magpul’s MOE is another good option, if you prefer a fixed stock. ($99.95; Magpul.com)
4. Handguards/Forends While it might not be as easy to swap out a handguard or forend on an AK as it is on an AR, and some fitting may be required, it’s certainly a worthwhile upgrade for those who do so. Most stock AK forends do not have attachment points for accessories or optics. The majority of aftermarket AK handguards and forends do, either in the form of Picatinny rail sections or KeyMod or M-Lok attachment points. This gives users tons of customization options — far more than would be possible otherwise. Additionally, some aftermarket handguards/forends just feel better than those that come standard. For either reason, an upgraded handguard is a good choice if you’re looking to trick out your rifle.
Krebs Custom UFM KeyMod System Marc Krebs has been doing some really innovative things with the AK platform for a number of years, and the company’s UFM KeyMod System represents one such product. With models available for the different AK variants, this system offers a lightweight handguard with ample mounting possibilities that is durable and maintains zero. Manufactured from 6061 T6 aluminum, it features a Picatinny rail up top and KeyMod slots on the side and bottom. ($159.99-$264.99; KrebsCustom.com)
Hogue AK-47/AK-74 Handguard This handguard features an OverMolded lower piece with metal shield for secure and comfortable grip and protection from heat during extended firing sessions. It comes with two upper handguard pieces — one with a top rail and one without. Available for Chinese, Russian and Yugoslavian AKs, the Hogue handguard also includes three Picatinny rail sections for additional options. Both this handguard and Hogue’s AK pistol grip are available in a combo kit. Color options are Black, OD Green, FDE and Ghillie Green. ($49.95 for the Handguard, $59.95 for the kit; HogueInc.com)
Troy Industries AK-47 Battlerails Troy has expanded its AK-47 Battlerails line in the last couple years to include KeyMod and M-Lok options. The new KeyMod and M-Lok Battlerails are machined from hardened aircraft aluminum with stainless steel components and finished with a Mil-Spec hardcoat anodizing for increased ruggedness. Short (10-inch) and Long (13.5-inch) versions are available, as is a 5-inch Top Rail for optics. ($124.95-$149.95; TroyInd.com)
Command Arms Picatinny Hand Guard Rails System This handguard system from CAA is designed specifically for the AK74M and AK100 series of rifles and provides four railed sections for mounting accessories, including both Picatinny and KeyMod solutions. Plus, it fits AKM and AKMS rifles. And its sturdy design maintains zero, allowing for easy field strip and maintenance. ($350; CommandArms.com)
5. Muzzle Devices One of the easiest upgrades you can make to your AK is a new muzzle device. Many manufacturers offer brakes and other devices that are compatible with AK-style rifles, so there is plenty to choose from that will enhance the capabilities of your AK.
Troy Industries Claymore AK Muzzle Brake Instead of directing muzzle blast and sound to the sides, as with most brakes, the Claymore pushes the blast and sound forward and away from the shooter, while retaining muzzle brake properties such as increased control. The brake has a very low dust signature and, with its durable, heat-treated ordnance steel construction, can be used as a breaching device if necessary. ($64; TroyInd.com)
Krebs Custom 4 Prong Flash Suppressor With a design thoroughly researched for effectively eliminating muzzle flash, the 4 Prong Flash Suppressor with 14x1mm left-hand threads is made from 4140 steel, is heat-treated and is designed for AKM/AK-74 pattern rifles and Saiga and VEPR rifles with threaded barrels. It weighs 2.3 ounces and has a black oxide finish. ($70; KrebsCustom.com)
6. Magazines Another great way to improve functionality and make your AK look good in the process is to use different magazines. There are a ton of options out there for the AK platform. Many of these AK-47/AK-74 mags are produced overseas, but for those looking to buy American, there are still ample choices.
Magpul PMAG 30 AK/AKM Gen 3 Magpul’s PMAGs have a very high reputation among those in the firearm industry, and for good reason. They are lightweight, durable and highly reliable. The new Gen 3 version of the PMAG 30 AK/AKM mag features steel-reinforced locking lugs; a removable floorplate; an anti-tilt, self-lubricating, low-friction follower; and an impact- and crush-resistant polymer body with ribbed gripping surface and aggressive front and rear texture for positive grip. ($26.95; Magpul.com)
US Palm AK 30 Magazine The AK 30 magazine from US Palm is constructed of proprietary aerospace polymers but sets itself apart from many other polymer magazines with several unique features, including the lack of a removable floor plate. It also has stainless steel reinforced weapon locking interfaces and a low-friction self-cleaning polymer follower. Cleaning is as simple as placing the mag in hot, soapy water, rinsing and inverting to drain. ($19.95; USPalm.com)
Command Arms AK MAG This lightweight polymer magazine features a no-tilt, smooth action that incorporates a fluorescent orange follower. It has clear windows on both sides that indicate remaining round count with 10-, 20- and 30-round markings. The mags are Mil-Spec heat-treated and utilize a mildly textured surface on both sides for positive grip. ($27; CommandArms.com)
Century Arms Romanian AK Drum Magazine For those range trips where 30 rounds just isn’t enough (trust me, they do exist) Century Arms has the Romanian AK Drum Magazine. Sporting a capacity of 75 rounds, this product works with all 7.62x39mm AK-style rifles and pistols that accept high-capacity mags. It weighs 2.25 pounds unloaded and 5.05 pounds loaded. ($94.99; CenturyArms.com)
7. Other Accessories There are some other less obvious parts and accessories for owners of an AK-style rifle to consider. Two of these are an enhanced safety lever and a retaining plate, or trigger pin retaining plate. Enhanced safety levers provide added functionality and ease of use over the AK’s standard safety lever, which some shooters find awkward to engage and disengage. A retaining plate, on the other hand, permits easier installation of fire control groups and better retains those pins.
TAPCO AK Retaining Plate This AK Retaining Plate installs in seconds, quickly securing pins in the correct position to keep the trigger group in place. The plate works in almost all AKs, including the Tantal version, and is finished in a phosphate coating for durability. ($5.99; TAPCO.com)
Krebs Custom Trigger Pin Retaining Plate This retaining plate is precision-manufactured from heat-treated steel alloy. It is far superior to the typical “shepherds hook” for retaining fire control parts. Krebs also has a version for Saiga-style shotguns. ($10.50; KrebsCustom.com)
Krebs Custom Mk VII Enhanced Safety Lever The Mk VII Enhanced Safety Lever allows for ambidextrous use and permits activation without removing the hand from the firing position. Lefties engage and disengage the safety using their thumb, while right-handed shooters use their index finger. The device will work on both machined- and stamped-receiver rifles and requires no modification. It will not, however, fit Yugoslavian AKs. ($65; KrebsCustom.com)
Looking to go armed, but are stuck in the weeds as to what to arm yourself with? Here are 20 of the best concealed carry gun options that will keep you on the defensive.