Home Blog Page 202

How Does Barrel Bedding Affect Accuracy?

1

Not all barrel bedding is equal. Bedding dynamics can increase or decrease a rifle’s accuracy.

What are some things to know about bedding dynamics and accuracy?

  • Today, generally the most common bedding method is to bed the receiver and free float the barrel.
  • To get the best accuracy from a rifle, you need the pressure dynamic between the barrel and stock to remain constant, or as constant as possible. This can sometimes vary quite a bit in a traditional wood-stocked rifle based on things like temperature and humidity.
  • Pillar bedding and V-Block bedding are two alternative bedding systems that are growing in popularity among manufacturers.

There are many factors that affect accuracy, but next to the barrel itself, none is more important than the bedding dynamics between the stock and the barreled action. Accuracy can be looked at from two different perspectives: 1) pure grouping ability and 2) a rifle’s ability to maintain zero.

The two are not the same. Pure grouping ability refers to how tight the average group measures, regardless of where that group is on the target, while a rifle’s ability to maintain zero refers to the point of impact (POI) relative to where we as a shooter expect it to be. In a hunting rifle, consistent POI is more important than pure accuracy.

There are a number of ways a bolt-action rifle can be bedded. Bull barrels and heavy varmint/target barrels vibrate less violently upon the fall of the firing pin, ignition and bullet movement than sporter-weight versions, and generally shoot just as well when free floated as they do when bedded.
Barrel Bedding - 2
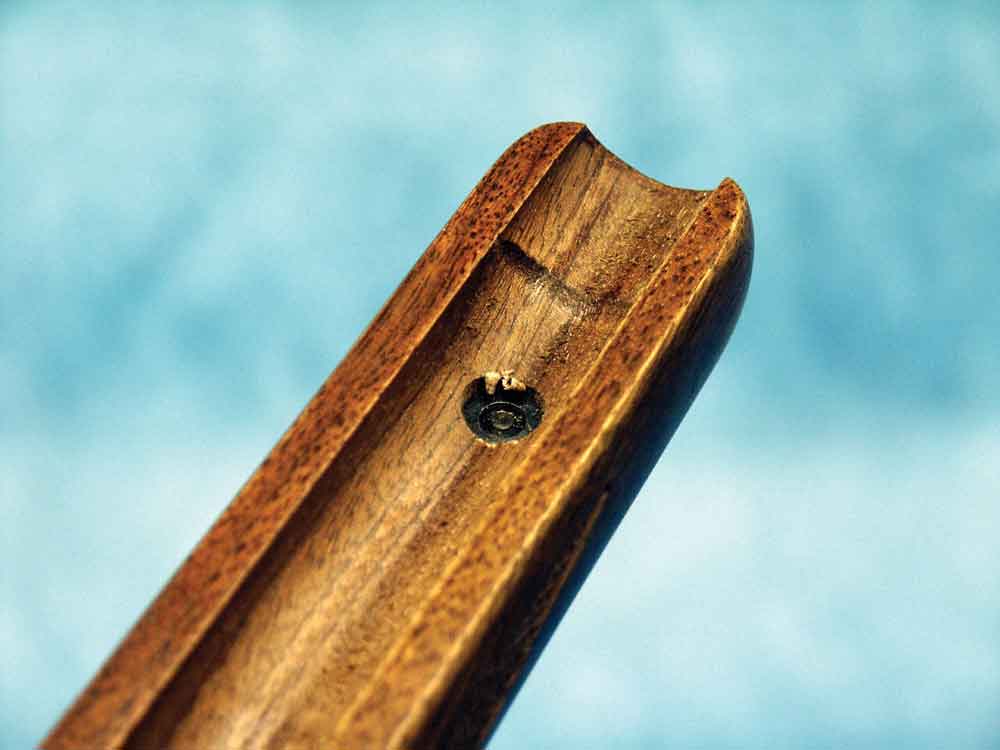
Most production rifles with one-piece wood stocks are factory bedded using a pressure band at the forend tip, which is the only contact between forearm and barrel. It can either be filed away to float the barrel or shimmed to apply more pressure.

The most common method employed today by production rifle manufacturers is to bed the receiver and free float the barrel. This practice has evolved over the past generation or so, as one-piece stocks of walnut (or other hardwoods) have been replaced by much more stable synthetics and wood laminates. This method is not used because free floating has proven superior in all cases, but rather, it’s because it’s easier from a manufacturing standpoint.

Generally speaking, slender, lightweight barrels shoot best when there’s dampening pressure being exerted by the stock either at the forend tip or by contact over the entire length of the forend. Most light carbine and sporter-weight rifles are bedded using the former approach.

By hogging out the barrel channel to where it’s 1/16-inch or more deeper and wider than it has to be, but stopping an inch or so short of the forend tip, the remaining raised band provides the dampening pressure at the tip. When the forward action screw is cinched up, the stock is actually bowed inward, and that is what produces the tension against the barrel.

Dampening barrel pressure can also be exerted the entire length of the barrel channel, but to accomplish that you must have perfect surface contact the entire length of the forearm, which is best achieved through glass bedding.

For a rifle to group its best and maintain zero, the pressure dynamic between the barrel and stock must remain constant, particularly in the case of lightweight barrels that are being dampened only at the forend tip. Traditional one-piece stocks of walnut have proven to be fairly good at keeping this pressure relationship constant, as long as the wood is thoroughly sealed not only on the outside, but on all inlet surfaces as well.

If truth be told, though, all wood stocks have at least a 5 percent moisture content, so it’s pretty rare for a one-piece stock to maintain a constant tip pressure against the barrel from season to season, or when the rifle is transported to a region where the humidity is vastly different. Then, too, the thinner the barrel, the more POI and accuracy are both affected by the forend position, whether on a sandbag or held in the hand, whether a shooting sling is being used to apply dynamic tension to steady the rifle, or if a bipod is attached to the forend.
Barrel Bedding 1
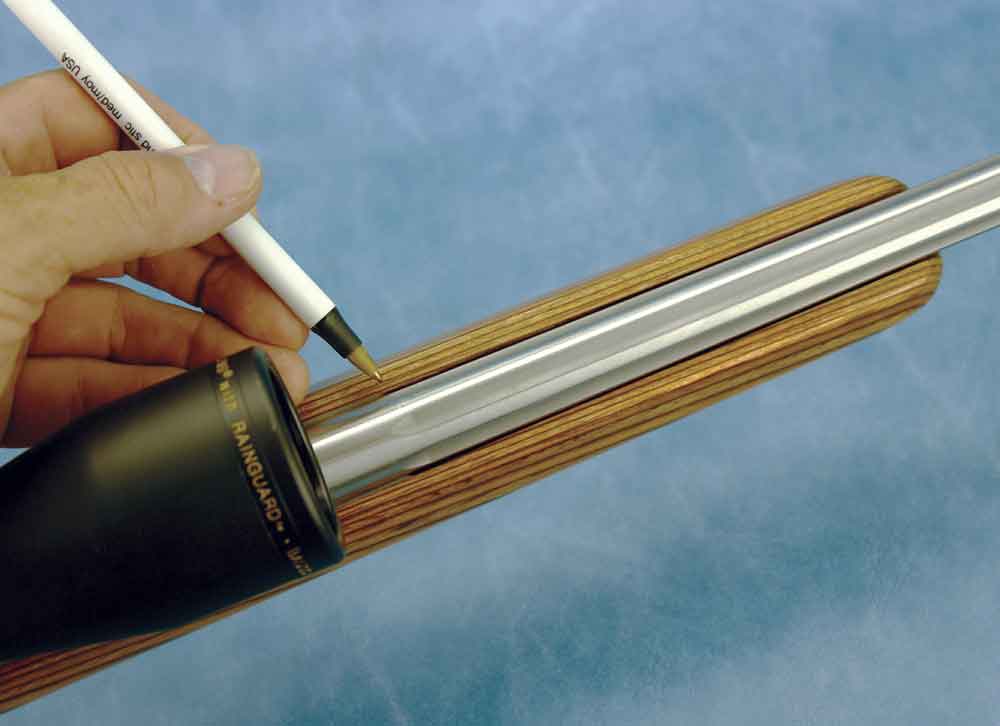
Wood laminated stocks are virtually inert if properly sealed. The consistent gap shown here on either side of the barrel channel is not likely to change regardless of environment.

Stock Swell
I know it’s difficult to believe that a chunk of wood like a rifle stock can swell, contract and warp, but they all do to some degree depending on seasonal humidity, or when subjected to drenching rain or wet snow. As to just how much a stock can warp, that can be seen only on a rifle that has a fully floated barrel, that is, with a visible space along the seam line on both sides of the barrel.

I have owned some walnut-stocked guns in which the barrel would be perfectly centered in the channel during the low humidity months of winter, and in the summer the forend tip would be touching the barrel on one side with a 1/8-inch gap on the other. Depending on the direction of the warp, imagine how much pressure such movement exerts or removes from a barrel.

Believe me when I say there can be as much as 30 to 40 pounds of pressure on the barrel at one time of year, and zero at another. That, of course, is an extreme example, but changes of just a few pounds of tip pressure against or away from the barrel can bring about significant shifts in POI.

Can accuracy and consistency of zero be achieved with a one-piece wood stock? Sure, but several conditions have to be just right, and the thinner the barrel, the more difficult it becomes.

It’s far easier to achieve with a wood laminate or a synthetic stock, with the barrel either fully or partially floated. A wood laminate that is properly sealed inside and out with a urethane-type finish is virtually immune to warping, and a laid-up stock of fiberglass or Kevlar is definitely so. If the bedding is right, it stays right.

Like I said, the most common bedding approach used today is to glass bed the receiver and float, or partially float, the barrel. I prefer the latter, in which the receiver and the chamber portion of the barrel are bedded, stopping at the point where the barrel begins its straight taper to the muzzle. Placing a small shim the thickness of a matchbook cover at the forend tip prior to the bedding procedure will ensure a fully floated barrel.

Slender barrels — say less than .575-inch at the muzzle — tend to group best when the stock is exerting dampening pressure. If after range testing you’d like to see how the rifle shoots with dampening pressure, simply place two shims at the forend tip.
Barrel Bedding - 4
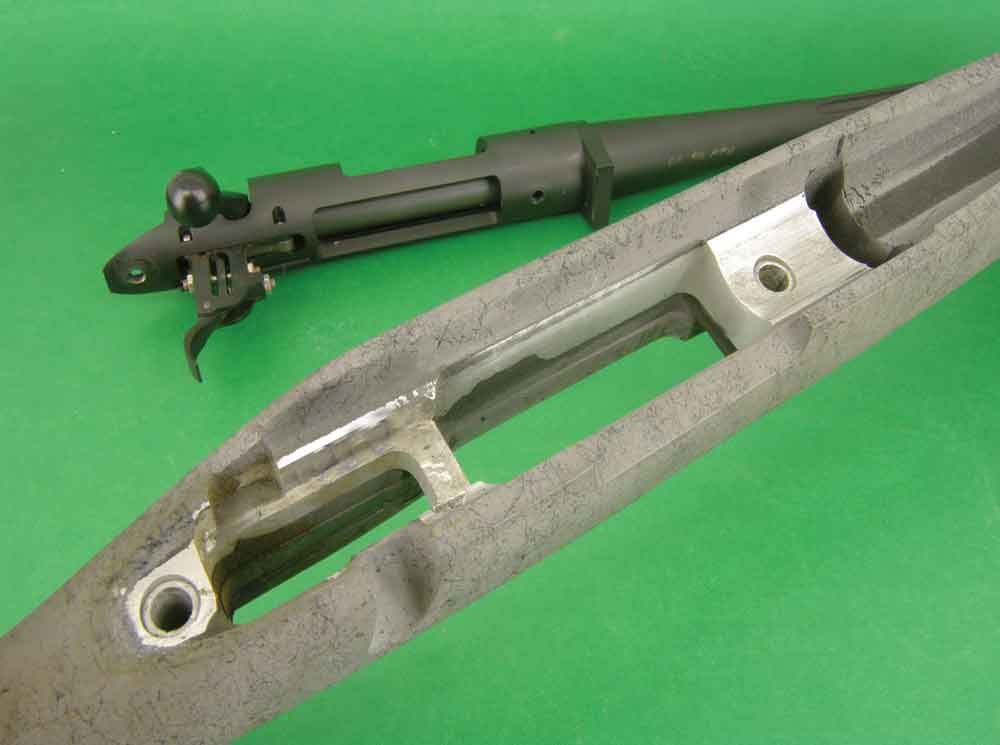
H-S Precision pioneered the aluminum bedding block chassis around which the U.S. Army’s M24 sniper rifle is designed. The concept has since been copied.

A couple of alternate bedding systems we’re starting to see more manufacturers take advantage of include pillar bedding and V-block bedding. With a true pillar-bedded rifle, the receiver actually sits on two “stilts” of aluminum or steel, and there is no actual contact between the stock and the receiver or barrel.

The pillars are nothing more than steel tubes through which the action screws pass and are just slightly longer in length than the action screw holes. The pillars are flush or slightly below the bedding surface of the receiver and serve primarily to preclude stock compression.

The V-block system, which was developed by H-S Precision for the Army’s M24 sniper rifle, consists of a hardened aluminum bedding chassis permanently molded into the company’s hand-laid Kevlar/graphite-reinforced fiberglass stocks. The latest twist to the V-block principal can be seen in Ruger’s American and Savage’s Axis rifles.

Steel blocks are embedded into the injection molded stocks and serve to support the receiver and act as recoil lugs by engaging grooves on the underside of the receiver. Either makeup is meant to provide economy of production, but more importantly, consistency to that critical relationship between a rifle’s stock and its barreled action.

Editor’s Note: This article is an excerpt from the May 2015 issue of Gun Digest the Magazine.
Classic Guns: The Ruger Blackhawk Revolver

0

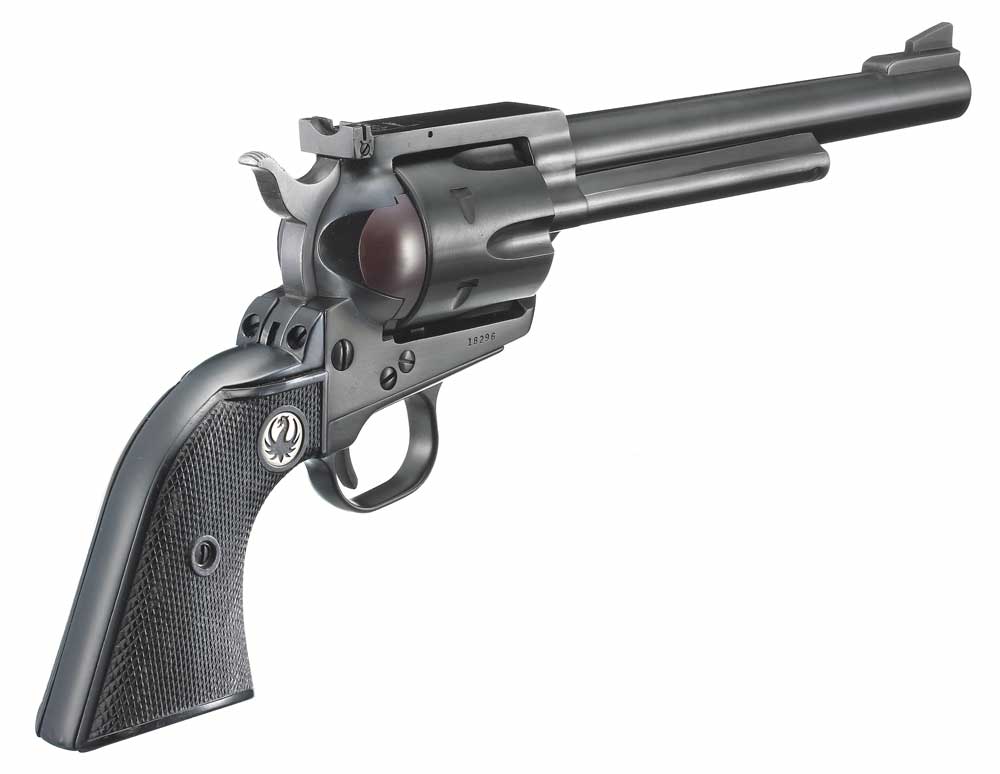
In the 1950s, Ruger introduced the venerable Blackhawk revolver, which remains both a desirable collector piece and a popular current-production gun.

What makes the Ruger Blackhawk a popular revolver, both in terms of current production and as a collector’s piece?

  • Introduced in 1955, the Blackhawk was Ruger’s first centerfire revolver, and it’s still produced more than 70 years later.
  • While development of the .44 Magnum was underway, both Ruger and S&W strove to introduce the first .44 Magnum revolvers, Ruger with an updated Blackhawk and S&W with the .44 Magnum, later known as the Model 29.
  • There were a number of Blackhawk variants developed, including the Super Blackhawk, Flattop Blackhawk and the New Model series, along with a number of different caliber options.
  • The Flattop models tend to command the highest values on the collector’s market.

In 1950 Bill Ruger’s gun company was on its way to becoming a major player in the industry, thanks to the success of his .22 Standard Pistol that had been introduced the previous year. The co-founder of Sturm, Ruger & Co. was ready to take the next step and add another product to the line. Ruger had always been a fan of single-action revolvers. He liked the simplicity and reliability of the old Colt design, along with its graceful shape and the way it felt in the hand.

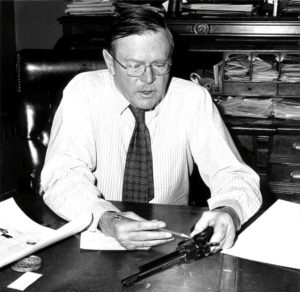
Ruger Blackhawk Revolver - Bill Ruger
Image courtesy Sturm, Ruger & Co.

Western movies were very popular in the late ’40s and early ’50s, and virtually every cast member was armed with a single-action sixgun. The Colt Single Action Army had been out of production since 1940, and the company had announced it was no longer going to be made. Timing, as they say, is everything. Bill Ruger saw that the time was right to create a new, up-to-date single-action for a waiting market. His idea was to make a rimfire six-shooter as a companion to his Standard to be known as the Single-Six.

Find Out More About Ruger Firearms

Work on the model was under way in 1951 and, by the end of 1953, Sturm, Ruger & Co. had its second handgun on the market. Like the .22 semi-auto pistol, the Single-Six was a big success and became very popular with plinkers, campers, hikers and small-game hunters.

The success of the Single-Six encouraged Bill Ruger to take the next step in the development of his line of handguns, a larger centerfire model, with the overall size about the same as the Colt. Like the Single-Six, it would be patterned after the Colt but with several changes, including an adjustable rear sight and coil springs instead of leaf springs in the action. It was decided that the new revolver would be chambered in .357 Magnum, the most versatile choice because it would also fire the .38 Special.

In 1955, Ruger’s first single-action centerfire revolver was introduced with a suggested retail price of $87.50 and was called the Blackhawk. In addition to his interest and affection for firearms, Bill Ruger was an admirer and collector of classic automobiles. One of his favorites was the Stutz Blackhawk. (Yet to come to the Ruger line was the Bearcat, named for another Stutz auto.) Barrel lengths of the Blackhawk were 4.625, 6.5 and 10 inches. Only a few hundred were made with the 10-inch barrel.

Ruger Blackhawk Old Model 1
Image courtesy Sturm, Ruger & Co.

Diversifying The Legend
The Blackhawk went on to become one of the most successful Ruger firearms. It’s still being manufactured 72 years after its introduction, and, as would be expected, there have been several changes to the original design.

One of the first was the addition of a new cartridge for the Blackhawk. It was being developed by Remington and Smith & Wesson and would be called the .44 Remington Magnum. Based on a lengthened .44 Special case, it was designed for a firearm that would also use .44 Special ammo, like the relationship between the .357 Magnum and .38 Special. In 1956, Bill Ruger learned the .44 Magnum was being developed and quickly decided to chamber it in the Blackhawk, beefing up the cylinder and frame to handle the heavier recoil. Barrel lengths of 6.5, 7.5 and 10 inches were to be offered. The latter two lengths are worth a premium on the collector’s market.

There was somewhat of a race between Ruger and S&W to get the first .44 Magnum revolver to market. Depending on who you talk to or what you read, the winner could be either one. Phrases such as “went into production” or “was introduced” are not necessarily the same in the gun business, nor is an exact date when a gun is first sold in a retail setting. But in either event, by the end of 1956, both Ruger and S&W were in the .44 Magnum business, Ruger with the Blackhawk and S&W with what was then known simply as the “.44 Magnum” revolver, later called the Model 29.

Not long after the .44 Magnum Blackhawk hit the market, Ruger began to receive complaints about the six-gun’s stout recoil. The answer was the Super Blackhawk, a larger model with a heavier frame, more substantial Dragoon-style grip, non-fluted cylinder and squared trigger guard. It was introduced in 1959, with the early models sold with a mahogany carrying case, smooth walnut grips and a 7.5-inch barrel. A few hundred were made with a 6.5-inch barrel, and about 1,600 with a brass frame.

The original cylinder top strap was flat-shaped and, in 1962, was reshaped to offer more protection to the rear sight. After this change, the earlier model became known as the Flattop Blackhawk. This was in 1962 at about serial number 42,600. That same year, several new calibers were added to the original Blackhawk including the .41 Magnum, .45 Colt, .30 Carbine and convertible models with interchangeable cylinders in .357/9mm or .45 Colt/.45 ACP. Other variations to the original Blackhawk over the years included several different grip options, reshaping of the ejector rod and a brass frame for a few rare models.

The biggest change to the Blackhawk (and all Ruger single actions, including the Super Blackhawk, Single-Six and Bearcat) was the New Model series. This major change involved a transfer bar that allowed each model to have a fully loaded cylinder.

Early classic single actions were all essentially “five shooters,” and wise shooters always carried them with the hammer resting over an empty chamber. This was a safety issue to ensure the firearm would not discharge if dropped. This change occurred in 1973, and all subsequent Ruger single actions have the transfer bar operating system. With the transfer bar lockwork, the hammer is never in contact with the firing pin. Unless the trigger is pulled, the gun cannot fire. When the trigger is pulled, the transfer bar pivots to a point between the hammer and the firing pin, and when the hammer strikes the bar the energy transfers to the firing pin.

Editor’s Note: This Collector’s Corner column is an excerpt from the Fall 2017 issue of Gun Digest the Magazine.

Get More Ruger Info:

Gun Review: Gunwerks RevX Long-Range Rifle

1

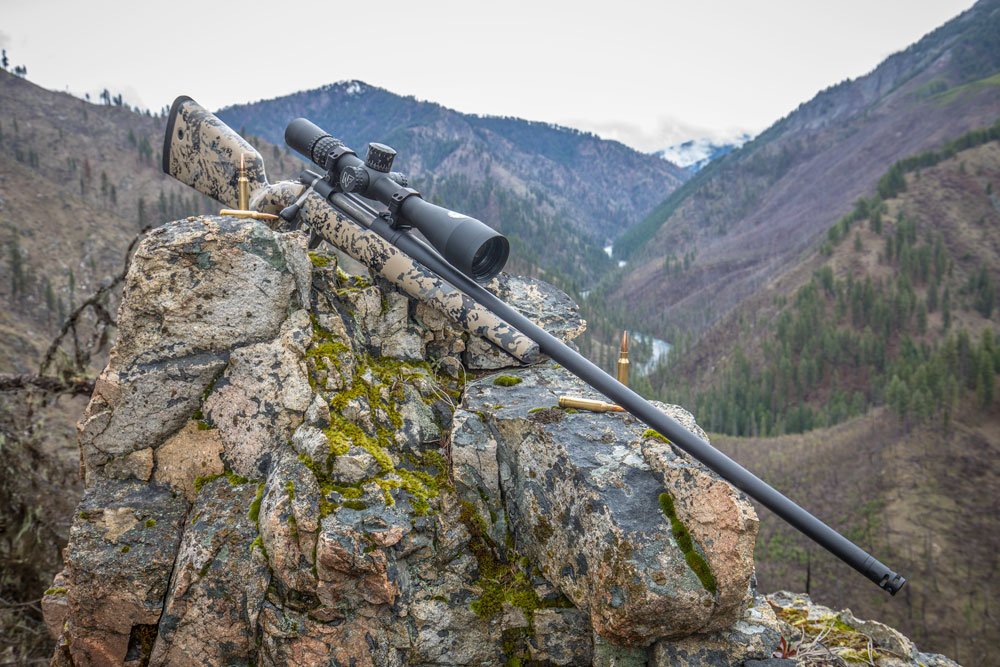
Gunwerks’ RevX in 7mm Rem. Mag. proves that it’s fully capable of delivering 1,000-yard performance out of the box.

  • The RevX is a highly capable long-range rifle that’s great for the range but also excels when taken afield.
  • Gunwerks’ RevX proved incredibly accurate, with the author achieving a remarkable .301-inch best group.
  • The RevX is loaded with features, including a 2-pound TriggerTech trigger; a Shilen hand-lapped, match-grade barrel; and an ultra-lightweight fiberglass stock.

One thousand yards out of the box. That’s the Gunwerks promise, which has intrigued me for years but has until now gone untested, at least by me. Given all the variables in bullet loads, triggers and barrel construction, to name just a few factors that greatly alter the long-range equation, I’ve always been skeptical of yardage or accuracy claims from manufacturers. Can any rifle maker honestly live up to that hype — not in a hyper-controlled range environment, but in real-world hunting scenarios?

To put the Gunwerks claim to the test, I took its newest rifle, the RevX in 7mm Rem. Mag., on a three-day backcountry excursion in the rugged wilderness of Idaho in search of spring black bear. The country is unforgivingly steep, with rock faces and slopes that replicate sheep and goat terrain. It’s in this type of country the long-range rifle becomes absolutely essential — a bear spotted across a canyon might be 700 or 800 yards and a makeable shot with the right setup, but in order to close the distance to 300 yards with a standard rifle, a hunter would have to hike down and back up the other side, which could take hours.

What makes the Gunwerks platform so extraordinary is that the company has literally built an entire package to eliminate as many variables as possible and give the shooter the best odds at conquering their go-long dreams. The RevX shipped to me with a Nightforce NXS 5.5-22x scope already installed and sighted in, paired with a custom G7 turret that matches yardage with a G7 BR-2 rangefinder, also included.

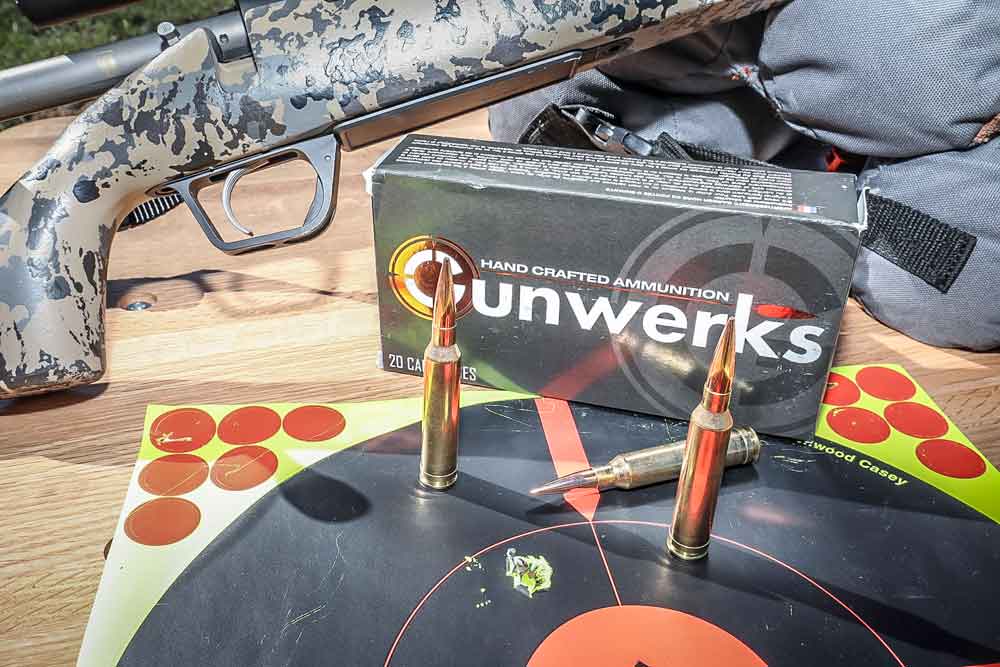
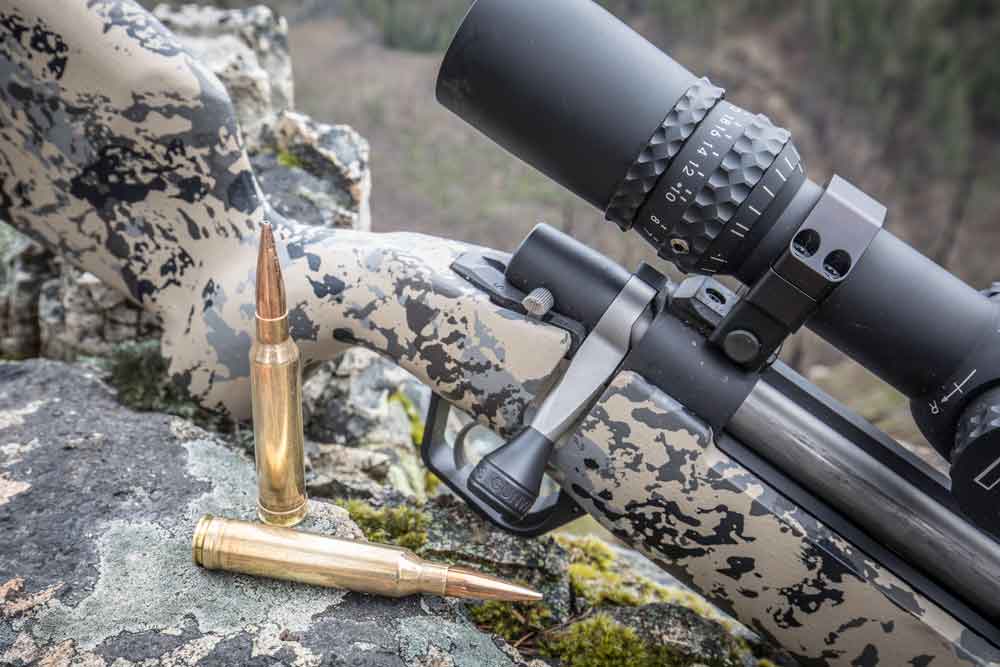
Gunwerks RevX Review - 1The folks at Gunwerks had already test fired the gun with custom loads they’d developed for the 7mm, which featured a 168-grain Berger VLD (Very Low Drag, BTHP) projectile. The VLD is an accomplished long-range bullet, with scores of fans in the long-range hunting community to testify to its greatness. As the name implies, it shoots flat and retains impressive velocities out to extended range. According to Gunwerks, the VLD they’ve loaded leaves the muzzle at 3,010 fps and has about 220 inches of drop at 1,000 yards.

After sending the rifle my way, Gunwerks’ marketing director, Landon Michaels, assured me the rifle was grouping reasonably well. Looking for hard data to verify his claim, I headed out to the range, hung targets and set up my Caldwell BR Pivot shooting bench at 100 yards for accuracy testing. I’d forgotten my Lead Sled, so I was relegated to using a pair of sandbags and a hoodie to brace the buttstock.

The TriggerTech trigger, the first thing I noticed, is an absolute dream, with an incredibly clean, crisp break that’s right around 2 pounds. The fiberglass stock, which features a flat forend for optimal setup on bags or in the prone position off a backpack, is as well weighted as any I’ve shot.

I squeezed off three rounds, rested and then repeated two more times to collect data from three different three-shot groups. As I shot, the groups just kept tightening up.

Gunwerks RevX Review - 2The first group came in at .6 inch and the second at .5 inch. As I settled into my comfort zone with the rifle, I fired the last three shots. That was the group that made me a believer — three shots in one tiny little hole, .301 inch on the digital caliper. Without question one of the best groups I’ve ever shot through any rifle.

Next, I wanted to test the range-and-shoot capabilities of the G7 BR-2 rangefinder, which Gunwerks has conveniently matched with yardage markers on the G7 custom turret out to 1,000 yards. The other great feature on the G7 is that it’ll give you MOA windage estimates at whatever distance you’re ranging, with 5 mph increments that you can select from. I set up a steel target and, with only a backpack for a rest, ranged the target at 617 yards; I then set up in the prone position from a distant hillside.

Dialing my G7 turret to 620 yards, I held just below center of target and squeezed off a round. Concussion, followed by the unmistakable wallop of bullet hitting steel. I’d be lying if I said there wasn’t an ear-to-ear grin plastered across my face, the kind you’d get that first time you mash the pedal and feel the raw horsepower of a performance engine. This long-range game is addictive to say the least.

Gunwerks RevX Review - 3Built for Distance
The anatomy of a high-performance long-range rifle is actually pretty simple to figure out, though never easy to deliver on. It starts with a quality barrel and trigger and ends with a precisely crafted and properly bedded stock, not to mention an impressive piece of glass.

At the heart of the Gunwerks RevX is a standard sporter contour Shilen barrel (with other contour options available), among the finest in the industry. The rifle features aluminum bedding blocks and a fiberglass, lightweight stock that is perfect for the all-day carry of places like Idaho’s wilderness. The hand-painted stock features a front-mounted Picatinny rail for bipods and a sling swivel point. The rifle comes with a slender yet sturdy Gunwerks sling, rubberized and textured on one side, which attaches at either side of the buttstock via push button sling swivel mounts.

As I said earlier, the rifle balances beautifully, making prone or freehand shots incredibly stable. The TriggerTech trigger is, as stated, remarkable, and the Nightforce NSX offers tremendous magnification and clarity, something that’s absolutely essential when shooting at 1,000 yards and dealing with thermals, sun glare and varying light conditions. You don’t have to go with the Nightforce scope, however, and Gunwerks will zero whichever scope you prefer, but I can’t say I’ve ever been disappointed with Nightforce’s performance and build quality.

The one-piece bolt and handle function smoothly and are aesthetically appealing, while a two-position safety rests perfectly at the rear of the action, allowing you to right thumb it without changing your grip position. Speaking of grip, the vertical contour of the stock is the equivalent of a shooter’s La-Z-Boy, helping you to keep a stable yet comfortable grip for optimal trigger press.

Gunwerks RevX Review - 6Parting Shots
Although I personally didn’t have any black bear success in Idaho — tough bears to come by in even tougher country — I came away absolutely enamored with Gunwerks and its rifle builds. Looking for some action at the end of the hunt, my friend David worked the spotter’s role for me, ranging a large white rock at 850 yards with the G7 rangefinder. A quick turn of the turret and one shot, direct hit. An absolute shooting aficionado and lifelong skeptic, even David was impressed.

“So where can I get one of these rifles?” he asked, grinning.

The RevX is a dealer exclusive rifle, offered through Cabela’s, Scheels and EuroOptic.com, and as such represents a lower price point rifle than the company has previously produced. While the rifle I shot was chambered in 7mm Rem. Mag., the RevX is also available in 6.5 Creedmoor, .300 Win. Mag. and .300 Rem. Ultra Mag. It’s not exactly cheap, starting at $4,000 (without scope), but it is much cheaper than other Gunwerks models, which start at roughly $10,000. And worth every penny, I might add.

If I was going to get into the long-range hunting world and didn’t have endless hours to tinker with loads and gear, the RevX would be my go-to option. It is quite simply one of the most impressive rifles I’ve ever shot, and that includes many custom-type builds. Phenomenal accuracy, top-of-the-line trigger and barrel, and the genius of a completely configured system — all of this forces me to give it an A+. For open country that demands long shots, there’s no other way I’d rather go. Let the revolution begin!

Specifications:

Gunwerks RevX Rifle
Type: Bolt-Action
Caliber: 7mm Rem. Mag.
Action: RevX GRB, Wyatt Length
Bolt: One-piece bolt & handle, field strippable
Stock: Natural hold, vertical grip; aluminum bedding blocks; ultra-lightweight fiberglass
Barrel: Shilen hand-lapped, match-grade
Scope: Nightforce NXS 5.5-22x, custom G7 turret
Rangefinder: G7 BR-2
Trigger: Trigger Tech
Case: Custom cut hard case
Manufacturer: Gunwerks; dealer exclusive at Cabelas, Scheels & EuroOptic.com

Editor’s Note: This article is an excerpt from the June 2017 issue of Gun Digest the Magazine.
What Are Your Options For AR Optics?

1

There are a lot of choices out there when it comes to AR optics. Make sure you choose the right one for your rifle’s intended purpose.

What are your basic choices when it comes to AR optics?

Today, it’s rare to see an AR without some type of optic on it, but it wasn’t always this way. I remember attending training classes where one guy might have some type of scope on his AR — in the “old” days there were only a couple of options for attaching optics to the AR. Now, it’s considered almost primitive — like bow-and-arrow-type technology — if you don’t have some kind of optic on your AR.

AR Optics - Options - 1History
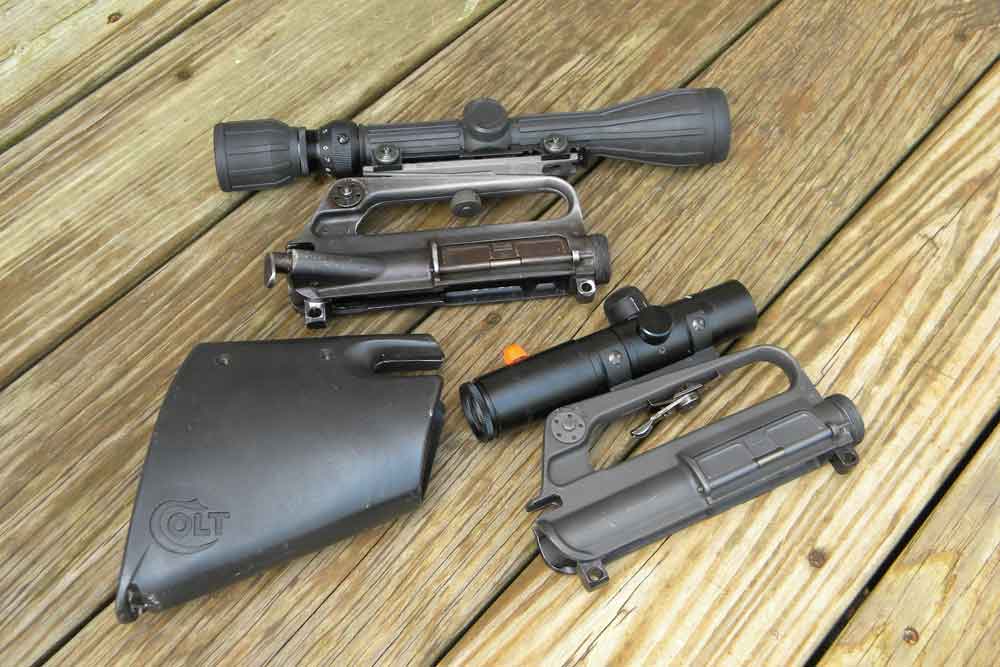
From the very beginning, in an effort to make the AR more versatile, mounting optics was a priority. Colt experimented with “flat-top” uppers in the early days, although they weren’t readily available, especially to the public. Back in the ’80s when I looked into scopes for my first AR, there was the “Delta” scope, a Tasco 3-9x variable power optic and smaller fixed-power scopes with three- or four-power magnification.

Both style scopes mounted to the carry handle of the AR, so your eye had to be about 4 inches above the stock. To create a proper cheekweld on the stock you used a clamshell that bolted around the stock that provided a higher comb (it has a cutout in it for the charging handle). Both of these scopes worked well, but neither really “fit” the AR and its applications.

The first flat-tops I ever saw were handmade. Guys cut the carry handle off the receiver, and then they bolted a section of rail onto the receiver. In 1994, the U.S. military adopted the M4 carbine with a flat-top upper. You can attach a carry handle to it, but it was built to allow you to mount almost any type of optic to the AR. In 1997, Colt introduced its first “accurized” AR with a flat-top receiver. I purchased one of these upper assemblies, stripped it down and used the flat-top receiver on my carbine. Eventually flat-tops became “standard,” and a host of AR optics designed specifically for the rifle became available.

AR Optics options - 2Red-Dot Remedies
The most popular AR optics are red-dots. These sights use a couple different methods to create a red dot or point of aim inside the optic. They’re quick to acquire, easy to use and almost parallax free. Aimpoint was the first to offer this type scope in 1975, and today there are dozens of companies offering red-dots.

Red-dots are extremely simple. Once zeroed, you focus on the target, place the dot where you want the bullet to hit — compensating for distance and windage — and press the trigger. They work great at close range and are accurate enough for mid-range work, too.

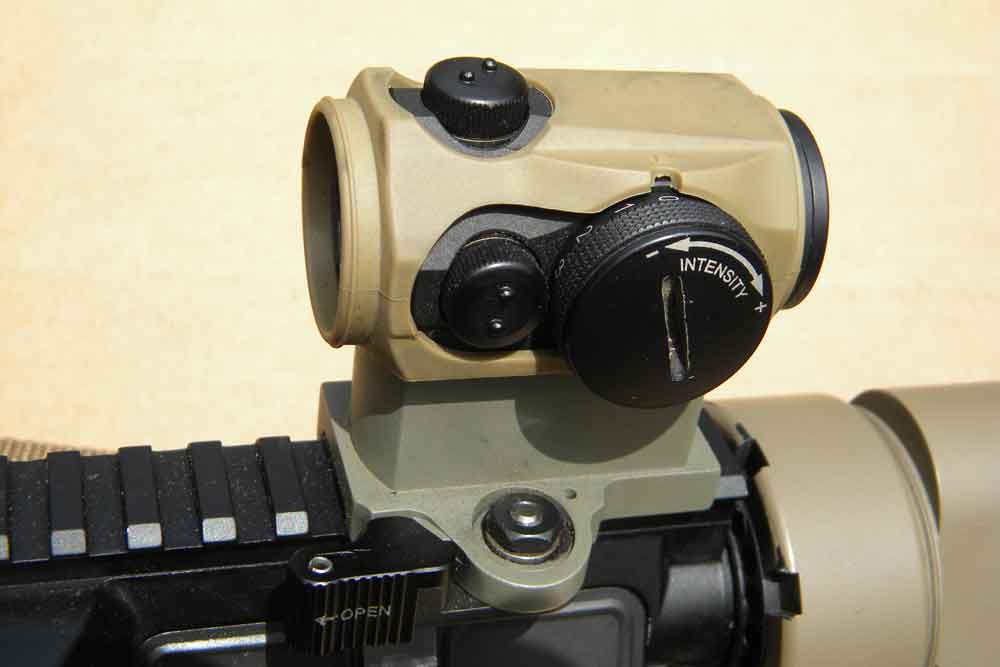
There are a variety of methods to mount the red-dot. One of the major differences is choosing between what’s called “1/3” or “½” co-witness. The 1/3 setup positions the optic a little higher above the bore. The backup sights will be in the bottom 1/3 of the red dot’s window. If the dot fails or stops working, you simply lower your cheekweld slightly to acquire the irons.

The ½ co-witness mounts the optic slightly lower, with the red-dot and iron sights lined up. With your eye centered while looking through the optic, the dot and the mechanical sights are aligned. If the dot stops working, there’s no movement required to get the iron sights lined up in front of your eye.

Even if you have an older AR with a carry handle, you can still attach a red-dot by using a “dog-leg” mount. This mount attaches at the carry handle and extends forward, dropping down over the carry handle. This mount locates the red-dot in a “scout,” or forward-mounted location. Holes in the mount allow you to still use the iron sights.

Make sure when zeroing your red-dot that the bullets are hitting in the center of the dot. The most common dot sizes are 2- and 3- or 4-MOA dots, which means at 100 yards the dot appears to be 2, 3 or 4 inches in size. A 2-minute dot covers 2 inches of target at 100 yards, 4 inches of target at 200 yards and 6 inches at 300 yards. If the bullets are actually hitting on the left side of the dot as opposed to the center, this can be the difference between a hit and a miss at extended ranges.

AR Optics Options - 4‘Traditional’ Optics
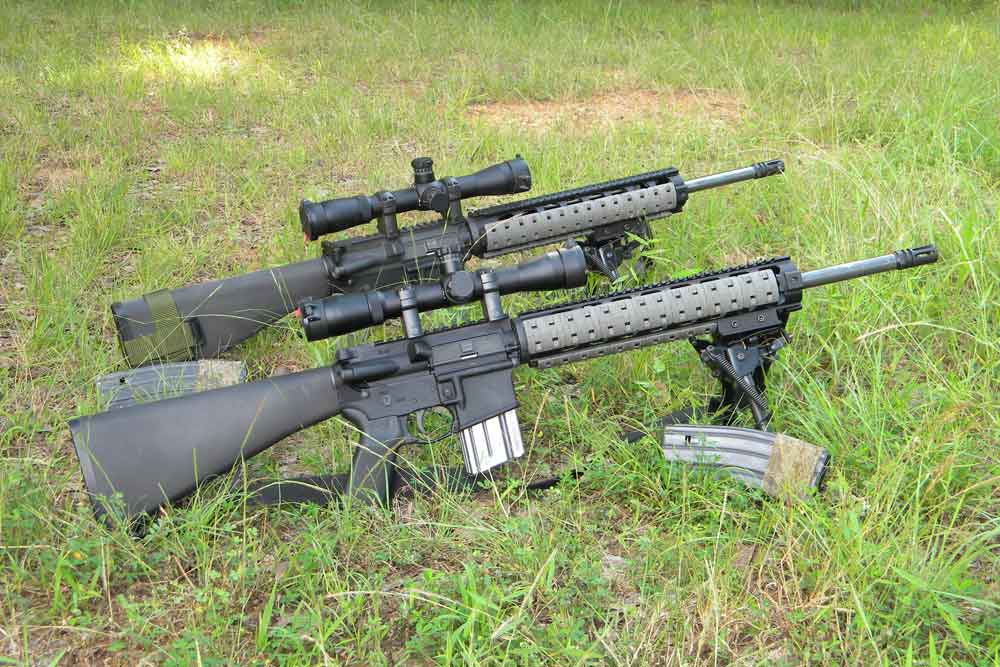
The flat-top receiver also allows you to attach a traditional magnified riflescope. Because the carry handle has been removed, the scope mounts lower and there’s normally no need to increase the comb of the stock.

A lot of the magnified optics now have pre-calculated reticles, with hash marks calculated for various bullet weights and distances. After establishing the initial zero, you simply hold on the reticle for that distance, calculate for the wind and you’re good to go.

Normally a variable-power, traditional-type optic will extend farther back on the receiver for proper eye relief. The scope is now over the charging handle, so you’ll likely need a charging handle with extended and ambidextrous latches. I highly recommend Mech Armor’s TacOps-1 charging handle. It has extended ambidextrous latches, which allow you to cycle from either side — important when working from various positions — and is almost unbreakable.

There are also scopes set up as a two-power optic, sort of a high and low — with no in between. For example, Elcan’s SpecterDR is a 1x and 4x power scope. It has a lever that you flip to switch from one setting to the other. This lets you work with one-power red-dot mode for a wide field of view and rapidly acquiring the target. And, unlike traditional adjustable scopes, the eye relief — the distance between your eye and the rear objective — is the same for both 1x and 4x power. The bad news is that these scopes start at about $1,400 and go up from there.

A good quality, affordable option is Leupold’s Mark AR MOD 1 1.5-4x scope. This is a variable-power scope with a minimum magnification of 1.5x and a green dot. On low power, you can use it with both eyes open just like a red-dot, similar to the Scout Rifle scope. Twist the adjusting ring and you work up to 4x, plenty of magnification for mid-range shooting. These scopes are great for self-defense, hunting and patrol work.

One of the cool things Leupold does now is offer “customized” factory optics. You can order your scope with it set up just for you, with custom knobs, reticles and other features.

With a traditional optic, you’ll need rings to attach it to the upper receiver. They need to be the proper height to ensure the scope and receiver clearance is correct, but not too high. Having the right mount is also important in order to get the correct eye relief.

Ultimately, what you’re wanting is to come up on target, hitting your cheekweld on the stock and have perfect sight alignment. Properly set up, you shouldn’t have to move your head and eyes for a clear sight picture.

AR Optics Options - 5Low-Light Options
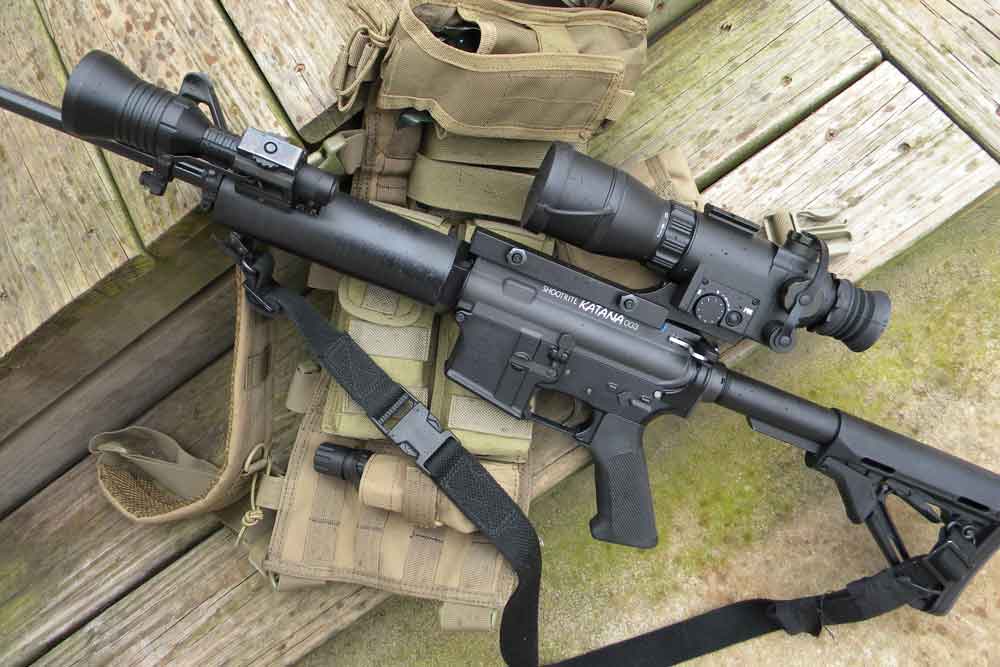
In the past, night vision optics were expensive. Today you have affordable options. Traditional night vision scopes magnify existing ambient light, allowing you to see in the dark. You can get dedicated night vision scopes or units that mount in behind your red-dot optic. Prices start around $400 and go up. The more affordable ones are larger and often use older technology. More money buys a smaller package and better technology.

Night vision scopes work well; they allow you to see what’s in the environment. But, everything appears in differing ranges or shades of the same color, making it difficult to locate or identify something not moving. The hot ticket, which costs a little more, is a thermal scope. Thermals pick up on heat, and the hotter something is, the brighter it appears. This makes it easy to pickup targets, especially if they’re hotter than the surrounding environment.

A quick search on the internet shows prices starting about $1,500 and going up from there. Once you determine what you need, it’s likely you’ll be spending a few thousand for a high-quality thermal scope. But, if you’re working in the dark, this is your best option to be able to “see.”

Just like traditional optics, night vision scopes are available with different reticles, allowing you to choose what works best for you and the application. Some allow you to flip between reticles, using a knob or button to cycle through different choices. And, just like traditional scopes, units with graduated reticles are available, which means once you’ve determined the distance, it’s easy to use that hash mark to compensate for trajectory.

A lot of the night vision and thermal riflescopes can be used for double duty. Yes, obviously you mount them on the AR, but they can also be used as a monocular or spotting scope. Most of these units come with quick-release mounts, and as long as it’s a high-quality product, you’ll be able to take it off and put it back on the AR without losing your zero.

AR Optics Options - 3Back-Up Sights
So, you’ve researched, studied and found the right AR optics for you. The scope is mounted, zeroed and ready to go. But there’s still one more thing to think about: back-up sights. If your optic stops working, regardless of why, you’ll need back-up sights to fall back on. (This might not be a requirement for target shooting. For hunting, competing or defensive/combative use, they are mandatory.)

On my AR carbines with red-dot sights, I use two types of back-up sights. The rear sight is attached to the rear receiver, behind the red-dot. I use either Daniel Defense’s A1.5 sight, which is a fixed sight, or Magpul’s MBUS sights, which can be folded down and flipped up when needed.

I prefer to keep them up all the time so they are ready for use. If you keep them down, practice flipping them up, especially from different positions such as sitting, kneeling and prone. Up front, I use a standard AR front sight base attached to the barrel or the Magpul front sight attached to a rail.

Some AR optics feature back-up sights built into the top of the scope body. They have a very short sight radius — the distance between the front and rear sight — so you won’t get surgical accuracy out of them, but they will allow you to get combat effective hits. Other optics are designed so you can attach a small red-dot on top of them. For example, there are mounts that allow you to attach sights like Trijicon’s RMR (Ruggedized Miniature Reflex) red-dot sight on top of your primary optic.

With a traditional magnified optic, you will require offset back-up sights. These sights, for example Magpul’s MBUS Pro Offset sights, come with a mount that doglegs off your rails, positioning the sights at a 45-degree angle to the primary optic. For a right-handed shooter, the back-up sights would be on the right side of the AR. If your primary sighting system stops working, you flip up the back-up sights, roll or cant the top of the AR inboard, and continue getting hits.

AR Optics Options - 6Final Thoughts
Selecting AR optics is all about application. What are you going to use it for? For target shooting at long distances, you’ll need one type of scope. For self-defense or law enforcement/patrol work, you’re looking at a different set of needs. There’s no one perfect option to do everything you want or need, but there are some excellent choices that fit the middle pretty well.

Once you’ve decided on what style “glass” you need, it’s time to research and study in order to determine exactly which specific model will suit your needs. The right AR optics will likely be a healthy investment, so take time to make sure you get things right.

Be sure to buy quality components for mounting optics. It’s a real shame to see a great rifle and good optics fail because the mounts didn’t hold up or provide the same zero after taking the scope off and installing it again.

Think real hard about what you plan to do with your AR. Research and study to determine the optics you need. Buy high-quality parts and any accessories that might be required. Get a good zero, and then shoot under all different conditions to determine what you and the scope can do. Remember: high-quality equipment is good, but it’s no substitute for the fundamentals of marksmanship. Finally, practice a lot, until you can acquire the target quickly and make good hits efficiently and with regularity.

Editor’s Note: This article is an excerpt from the August 2017 issue of Gun Digest the Magazine.
Gun Review: Springfield Armory XD-E

1

The new Springfield Armory XD-E is the manufacturer’s first hammer-fired pistol in its popular XD line and offers shooters several different carry options to suit their preferences.

  • Springfield’s new XD-E brings a hammer-fired option to its popular XD line.
  • The hammer-fired design adds an additional level of safety to the gun and offers shooters more choices when it comes to carry conditions.
  • The Springfield XD-E is quite accurate for a carry gun and comes with many of the same features that make the rest of the XD series pistols so popular.
  • At an MSRP of $519, the XD-E is plenty affordable as a carry gun.

The “Wiktionary” defines the term “belt and suspenders” as: “Redundant systems, affording mutual backup in the event of one failing. Example: He believes in a belt and suspenders, booking flights from two different airports on different airlines for important trips.”

When I first saw the Springfield Armory XD-E at the NRA Show this year, my first thought was of Pa Kettle, in one of the old Ma and Pa Kettle movies, being asked why he wore a belt and suspenders. His response was, “A man can never be too careful.”

It seems the evolution of firearms has grown faster than ever in the past few years. We now have more choices, in every description of guns, than I could ever have imagined just 20 or so years ago. This has been a wonderful thing, and that diversity is exemplified in the new Springfield Armory XD-E. While the pistols of several companies have morphed from hammer-fired to striker-fired guns, as far as I know, the XD-E is the first that’s morphed from a striker-fired pistol to a hammer-fired pistol.

Springfield Armory XD-E Review - 1What’s With The Hammer?
Some might question the logic of this decision, but I certainly can see the value. A few years ago, there was a news report about a young mother in a store whose 2-year-old child accessed her concealed carry pistol in a concealed carry purse and fatally shot her with it. I was unable to find the details on the type of pistol, but I’m almost certain it was a striker-fired gun.

Setting aside her choice of concealed carry purses and how she controlled that purse, it occurred to me that although the standard striker-fired pistol is safe and reliable to a point, it’s not the safest system. The striker-fired pistol’s simplicity can cause problems, and the system is not without shortcomings. Passive safety systems are just that and require no conscious action to disable them. Striker-fired pistols have fairly light trigger pulls, and hinges and blades won’t defeat an intentional pull or a piece of tangled fabric as the gun is holstered.

I’ve always advocated that the enclosed hammer double-action revolver is the safest possible gun to carry. The long, relatively heavy stroke of the trigger almost totally precludes the opportunity for an accidental or negligent discharge. For undertrained civilians, there’s no manual safety to find and disengage under the extreme pressure of a deadly force event. As an instructor, I can assure you the majority of concealed carry citizens are undertrained and therefore more prone to mistakes than those with more training.

With a double-action gun, the defender has only to point the gun at the threat and pull the trigger. Deactivating a manual safety adds an additional step to a person already overloaded with actions and decisions that are not part of their normal experience. Under great pressure, simple is better.

The problem with double-action guns is that most people don’t really learn how to accurately shoot a double action. Further, the downside of double-action semi-autos is that the second trigger pull is different from the first and that, after a shot, the gun must be rendered safe manually.

Springfield XD-E Review - 2Safety Through Strength
I admit I was a bit surprised when I saw an XD-E with an exposed hammer in the Springfield booth, but I instantly recognized the potential market. Other than a double-action-only revolver, this system is the safest pistol operating system available.

Like a revolver, it can be carried without worry of inadvertently activating the trigger because it can be carried with the hammer down. Further, unlike a revolver, there’s a manual safety that precludes the unlikely event of the trigger being accidentally fully stroked. The XD-E is the perfect gun for those who like options and are concerned about safety for daily carry.

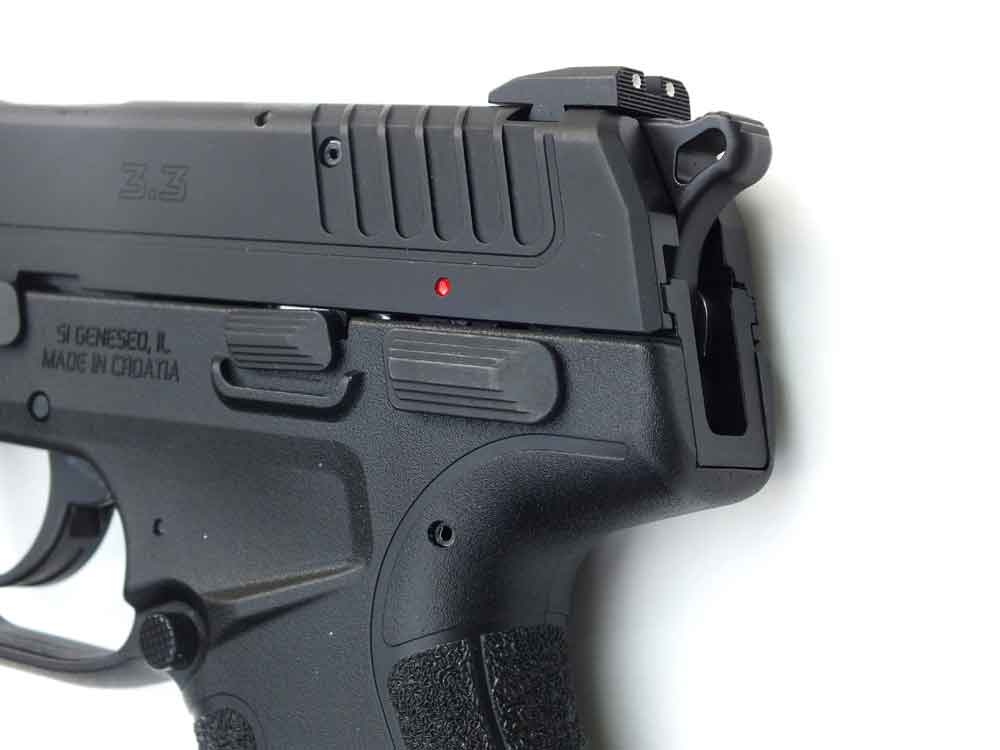
From the slide rails up, the XD-E is a standard XD-S. There’s a hammer-forged 3.3-inch barrel and a double-captured recoil spring guide rod system. The sights are the standard dovetailed two-dot rear and fiber-optic front, and there’s a tactile loaded chamber indicator on top of the slide.

Springfield XD-E Review - 3The rear of the slide has finger groves that work well in allowing slide operation without slippage, even with wet fingers. A difference I instantly noticed was the slide is considerably easier to cycle. Springfield says it’s 27 percent easier to manipulate than the standard striker-fired system.

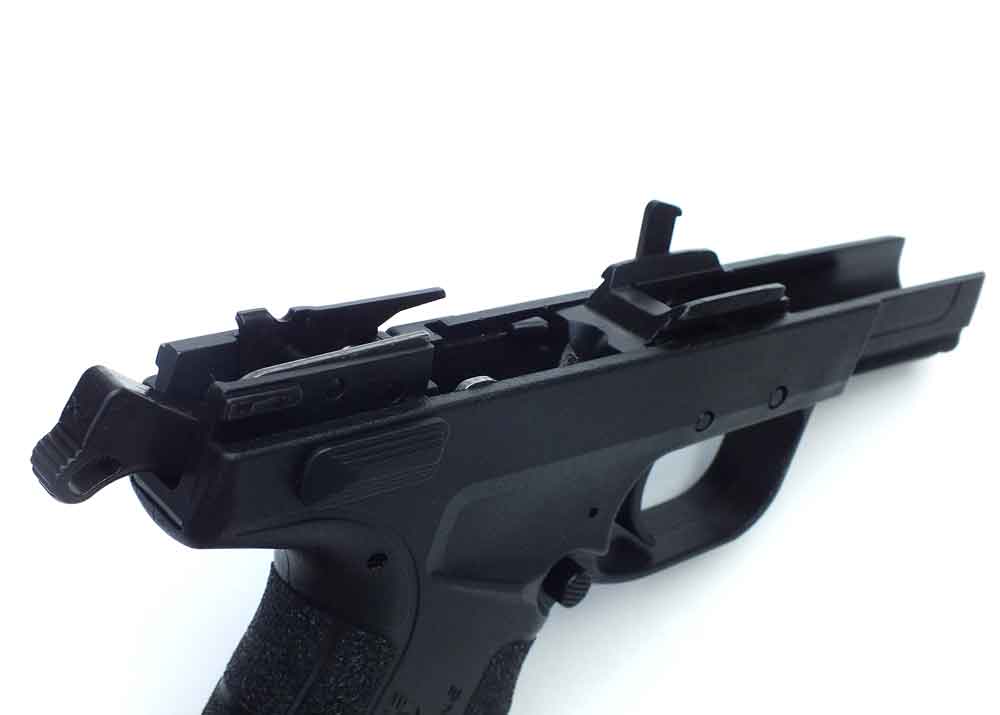
While much of what’s below the slide is different, quite a bit remains consistent. Takedown is similar, but there’s no need to pull the trigger to remove the slide. The magazine release is the same, and the now familiar Grip Zone stippling of the Mod. 2 series graces the grip area. Also, there’s still a bottom rail on the frame for lights and/or lasers, and the magazine is interchangeable with other 9mm XD-S models.

Besides the presence of a hammer, there are several other differences. The grip safety I really like on the XD series is missing. I suppose the designers thought there were so many other safety features it was superfluous.

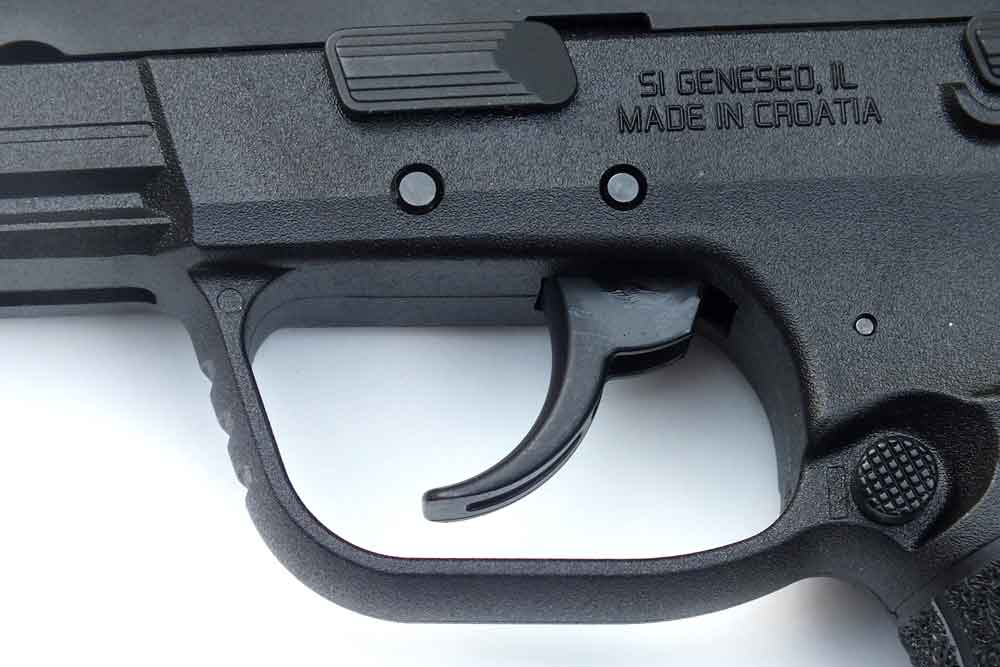
There’s no bladed trigger, but rather a smooth, stamped trigger that cocks the hammer via a steel bar that runs on the right inside the frame. Also, there’s a bi-directional lever safety on the frame that locks the trigger when pushed up and de-cocks when pushed down. As far as I know, it’s the first manual safety on the entire XD series.


Why Double Action?
The XD-E can be carried in four different modes:
1. Israeli Carry: With the chamber empty.
2. Condition one: With the hammer cocked and safety locked.
3. Double action: With the hammer down and ready for a
double-action pull and no additional action.
4. Double action, locked: With the hammer down and the manual safety activated.

As an instructor who almost exclusively trains civilians, I would not advise carry in the first two choices. While Israeli carry can work for highly trained individuals, few civilians will put in the effort to acquire enough speed for option No. 1 to be viable. Even if they did, I see it as a bad idea. Option No. 2 simply isn’t safe enough for inexperienced shooters, especially in the practice of daily concealed carry. It’s too easy to accidently de-activate a manual safety, especially an ambidextrous one.

Since we’ve already discussed the potential problems with manually operated safeties and under-trained civilians, option No. 3 is clearly the best choice, which is exactly the same as carrying a revolver with a shrouded hammer.


Springfield XD-E Review - 4Time With The Trigger
Of course, the proof is in the shooting. The double-action trigger is smooth, with pull weight similar to an average revolver and a longer-than-average stroke. The single-action trigger pull feels very much like a striker-fired gun. There’s quite a bit of the first stage, followed by a second stage that’s better than many striker-fired carry guns. There’s some creep and some backlash, but it’s a reasonable defensive carry trigger.

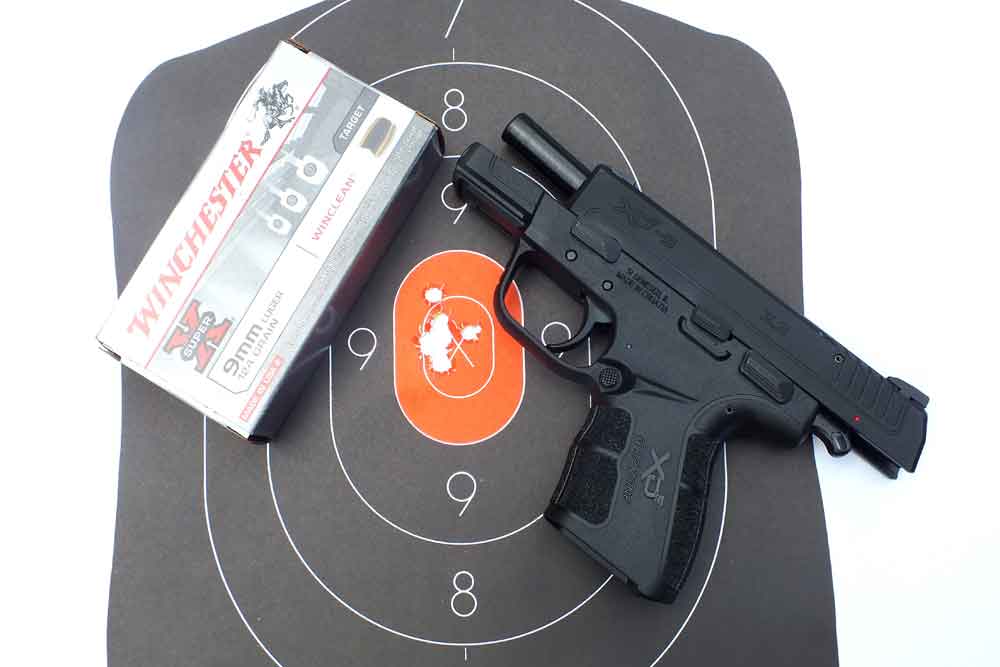
Accuracy was excellent with the WinClean 124-grain loads I used for most of the testing. At 10 yards in deliberate fire, I managed an impressive 10-shot group on a B34G qualification target that measured 1.08 inches, which is exceptional for a carry pistol. The B34G target is a half-scale target, and the score was a 100-9X. Had it been ¼ inch lower, it would have been a 10X clean.

Of course, deliberate shooting was done single action. I would recommend the XD-E be carried with a chambered round, the hammer down and the safety off (see the sidebar). In this state, the first shot would be double action with subsequent shots fired in single action.

I’ve only a little experience with double/single triggers because I’ve never carried one. I decided the best test would be to fire two fast shots from low ready to determine the difficulty of changing trigger styles while shooting fast.

Springfield XD-E Review - 5I found my first shot to be centered, with my very fast follow-up second shots slightly to the left and just outside the 10-ring. Repetition would likely result in a better transition, but both shots would have been “A” hits on a USPSA target. My judgment is that anyone who can manage a double-action trigger will have little trouble dealing with the XD-E. There’s a bit more muzzle rise with the XD-E than the standard XD-S models because the double-action system requires a higher bore axis than a striker-fired pistol.

There seems to be a lot of price competition in the concealed carry market these days, and the XD-E is competitive in price with an MSRP of $519 and a current online offer for four extra magazines, a holster and magazine pouch for free. Street price will be even better. It’s currently available in 9mm only; if the nine sells, there’ll likely be a .45 ACP to follow.

So, in summary, I think the XD-E is a viable addition to an already successful line, and I expect it to gain a following among those who just feel safer with a more secure trigger system. True, the trigger system isn’t safer than a double-action revolver, but the XD-E offers a capacity of eight plus one with the added benefit of a much faster reload than any revolver could provide.

Specifications:

Springfield Armory XD-E
Action: Short recoil operated
Trigger: Double/single action
Caliber: 9mm Luger
Capacity: 8+1 and 9+1
Magazines: Steel with round count holes
Barrel: 3.3 in., hammer-forged steel, Melonite finish, 1:10 twist
Sights: Fiber-optic front,
white dot low-profile combat rear
Frame: Black polymer
Slide: Forged steel, Melonite finish
Length: 6.75 in.
Height: 5 in.
Weight: 25 oz.
Accessories: Lockable carry case, two steel magazines, cable lock, manual and extra sight inserts.
MSRP: $519
Manufacturer: Springfield Armory

Editor’s Note: This article is an excerpt from the 2017 Concealed Carry special issue of Gun Digest the Magazine.
Gun Review: Seekins Precision SP10

1

Seekins Precision’s SP10 in 6.5 Creedmoor is a large-frame black rifle that delivers accuracy, even as distances stretch.

  • The new SP10 is available in the increasingly popular 6.5 Creedmoor, a capable long-range cartridge.
  • Seekins Precision’s SP10 is a highly accurate rifle packed with features such as Seekins’ SP3R handguard, ambidextrous controls and a crisp 3.5-pound single-stage trigger.
  • At $2,650, the SP10 is expensive, but quality costs, and it’s a price some shooters will be willing to pay for a quality precision rifle.

The 6.5 Creedmoor has taken the long-range world by storm over a relatively short period of time. Ammunition manufacturers have taken notice and are now producing high-quality factory ammunition for shooters seeking recreation as well as competition or hunting success. The flat trajectory, low recoil and high ballistic coefficients make the cartridge a natural for anyone wanting to stretch their limits.

For a long while, this was a bolt-action-only affair. Enter Seekins Precision.

Glen Seekins has been making great rifles in Lewiston, Idaho, for many years. The company’s reputation for quality and accuracy is as strong as anything in the industry.

Its SP10 was introduced a few years ago as a large-frame black rifle in .308. When Seekins started producing the SP10 in 6.5 Creedmoor, this writer had to take the plunge. This article profiles this superb rifle.

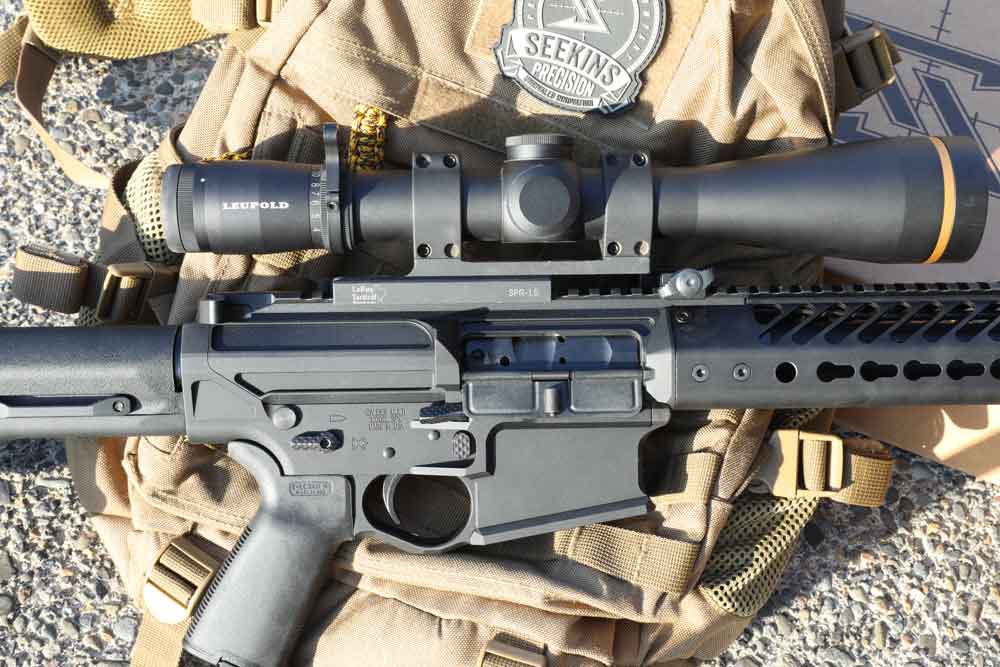
Seekins Precision SP10 - 1Feature-Packed Rifle
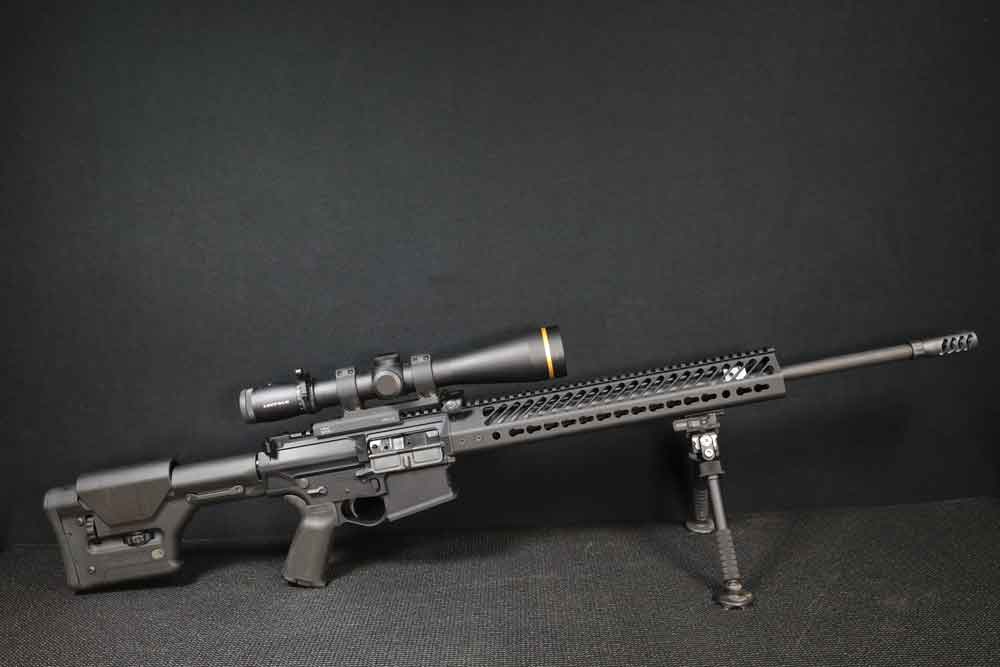
With many black rifles, modifications must be made to stock components in order to increase accuracy. This rifle is a semi-automatic tack driver right out of the box, with virtually nothing left for improvement by the end user. Just add a scope mount and quality optic and go shoot out to 500 yards with little effort whatsoever — and 1,000 yards with a ballistic app and some practice.

The SP10 upper and lower are CNC machined from 7075-T6 billet aluminum, and just like all Seekins Precision actions, they are perfectly mated. The fit between the upper and the handguard is tight enough to appear monolithic at first glance, but upon close inspection, they can be seen as two separate pieces. However, the top rail extends beyond the action and over the barrel mount.

At first, this seems trivial, but this extra space comes in handy for mounting a rifle level (see below). This extra rail real estate on the upper would also be useful for other optic setups, such as a clip-on thermal scope.

The controls on the lower receiver are truly ambidextrous, including the safety, magazine release and bolt release. A very nice feature is the ambidextrous bolt catch, which may be used to lock the bolt back from either side. The single-stage trigger is tuned from the factory at 3.5 pounds and is very crisp. A Strike Industries charging handle and Melonite-coated bolt carrier group round out the action.

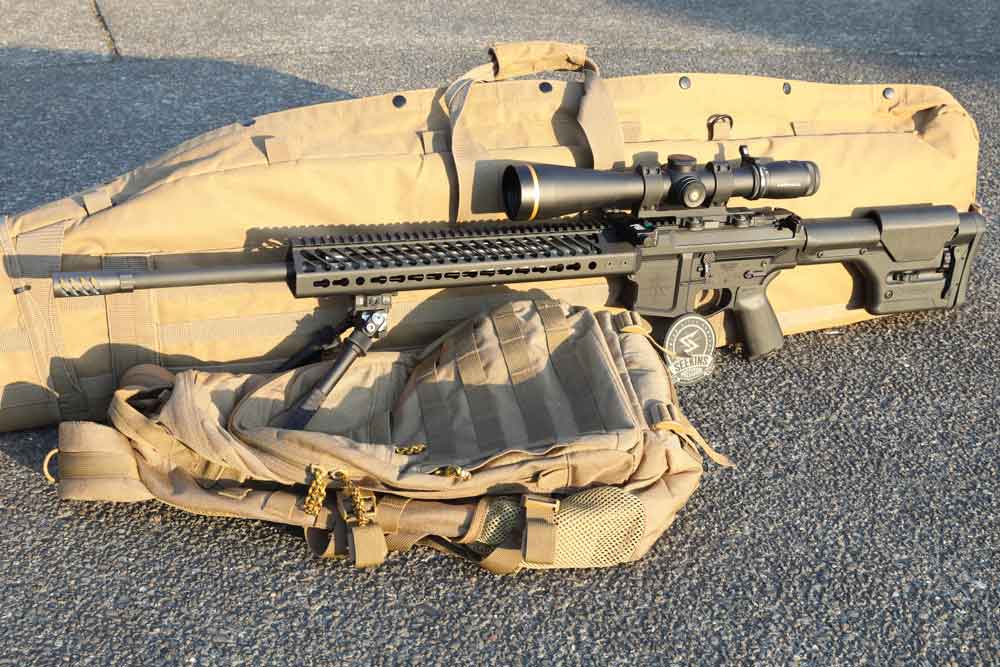
The handguard is the 15-inch Seekins Precision SP3R, a free-float design, which is flat on the bottom for stable shooting off of bags or barriers. The version tested had KeyMod slots, although M-LOK is another option. The hardcoat anodized finish on the SP3R perfectly matches that of the action. The barrel is a 22-inch match-grade stainless barrel with a 1:8 twist.

The gas system is rifle length and uses a Melonite-coated gas tube. The Seekins Precision adjustable gas block is a set screw and adjustment screw design. The muzzle brake is the Seekins Advanced Tactical Compensator, which minimizes the already light recoil of the 6.5 Creedmoor.

The stock and grip are from Magpul, the latter being an MOE+ with a storage compartment. The Magpul PRS stock is a proven design, with tool-free adjustments for cheek height and length of pull. One 20-round Magpul magazine is included with the rifle.


Seekins Precision Send iT sidebarSend iT Electronic Rifle Level
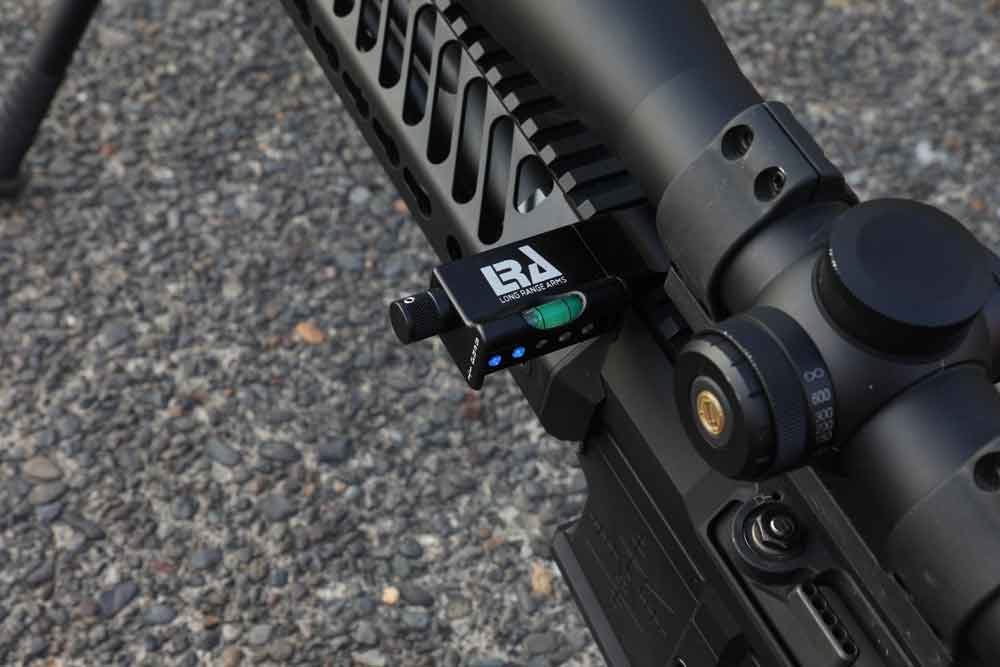
The Send iT electronic rifle level manufactured by Long Range Arms is the invention of longtime precision shooter Bennie Cooley. It is an extremely well-thought-out product for long-range shooters. The cant of a riflescope — how much the vertical reticle varies from being truly vertical due to tilt introduced during scope installation or by the shooter while shooting — has very little effect at short ranges. However, at 1,000 yards or more, this becomes a material issue.

To combat this, shooters commonly use bubble levels to install scopes and rifle-mounted bubble levels during shooting. “The accuracy of spirit levels is limited by the manufacturing process to 15-20 degrees max,” said Cooley in a recent interview. The Send iT electronic level is designed to detect and display deviations from vertical within 2/10ths of 1 degree.

Seekins Precision SP10 -sidebar 2The accuracy advantage of the Send iT is only its first attraction. The sensitivity may be modified by the user anywhere from 2/10ths of a degree to 1 degree. Five LED lights indicate whether the rifle is canted — two blue lights, two red lights and one green light in the center.

A green light indicates the rifle is level to within 2/10ths of a degree if the sensitivity is on that setting. One blue light indicates 2/10ths cant, and two blue lights mean 4/20ths off of level. The red lights mean the same thing going the other way.

Beyond increased accuracy, the LED indicators on the Send iT level are very easy to see — especially for older eyes. “We average 4-6 seconds faster shots,” said Cooley. In a precision rifle match, that amount of time per shot is an eternity. This writer can no longer see a crisp clear bubble level while behind a riflescope, but the Send iT level lights are obvious and easy to read even using peripheral vision.

The third advantage is the unit may be mounted to a rail at 12 o’clock, 3 o’clock, 6 o’clock, or 9 o’clock. Finally, the Send iT electronic rifle level can be used to ensure that scopes are installed perfectly vertically every time. ($225; LongRangeArms.com)


Seekins Precision SP10 - 3Testing And Reflections
Unboxing the rifle was a bit like Christmas morning the year I was 12 and my dad presented me with my first gun. The Seekins Precision SP10 had this writer grinning like a little kid.

The SP10 is gorgeous. All controls have a precision feel, and the hard coat anodized finish on the action and handguard is pure black satin goodness. This rifle is dead sexy. A trip to the range couldn’t happen fast enough.

At 10.5 pounds unscoped, one would think it handles like a beast, but that is not the case. While not a lightweight rifle, the SP10 is well balanced and easy to use.

A side focus Leupold VX6 4-24×52 was selected as an optic, and for the first run to the range, a Larue 34mm QD one-piece scope mount was used. The latter will be swapped out for Seekins Precision rings in the near future.

Seekins Precision SP10 - 4Hornady 140-gr ELD Match ammunition was used to sight in the rifle and to shoot a few groups. A KeyMod rail section was attached to the bottom of the SP3R rail system, allowing an Atlas bipod from Accu-Shot to be used during testing.

Sub-MOA groups from day one were produced with Hornady’s factory ammunition. The rifle performed as perfectly as it looked.

All of this beauty, precision and accuracy comes at a price: $2,650. But quality costs money, and for those who adhere to the “buy once, cry once” school of purchasing, the SP10 is absolutely worth considering. The fact that the SP10 6.5 Creedmoor is currently back-ordered on the Seekins website should tell readers one thing: This rifle is a shooter, as many people are finding out.

Editor’s Note: This article is an excerpt from the July 2017 issue of Gun Digest the Magazine.
New Rifle: M&P15T With Crimson Trace LiNQ System

0

M&P15T with M-LOK and Crimson Trace LiNQ System

The M&P15T is optimized for low-light situations with the Crimson Trace LiNQ system and eminently configurable with an M-LOK handguard.

  • The M&P15T offers low-light performance out of the box with Crimson Trace’s multi-functional LiNQ system, which boasts both green laser sight and 300-lumen light.
  • The LiNQ system is ideal for tactical rifles, remotely operated with grip controls for intuitive operation.
  • The Magpul M&P15T’s handguard offers plenty of real estate to configure the carbine to a shooter’s tastes, with M-LOK ports running the entirety of the circumference.
  • The carbine itself boasts 5R rifling, an optimized lands design and configuration meant to cause less bullet deformity and promote accuracy.

Getting left in the dark is always a concern with defensive firearms. In turn, the accessories market abounds with every conceivable method of keeping guns on target when light is scarce.

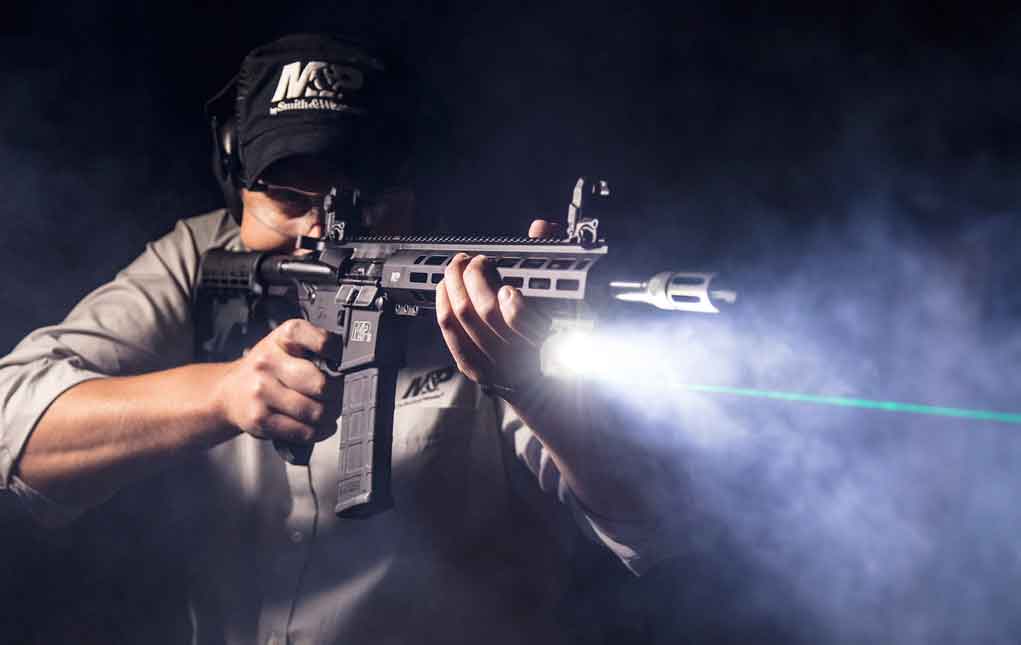
Recently, Smith & Wesson teamed up with Crimson Trace to tackle this issue right out of the box, mating a couple of the companies’ most popular products in a shot to own the night. The M&P15T outfits the gunmaker’s highly affordable AR with the laser-sight specialist’s multi-function LiNQ system for a package well adapted to send rounds where they need to go, no matter how dim the situation.

“The M&P15T rifle was the perfect platform to showcase the award-winning LiNQ, wireless operated system,” said Lane Tobiassen, President of Crimson Trace. “Together with Jan Mladek, General Manager for the M&P Brand, we were able to collaborate and develop a firearm package that showcases the versatility of the LiNQ as well as the ability of the M&P15T rifle to adapt to accessories.”

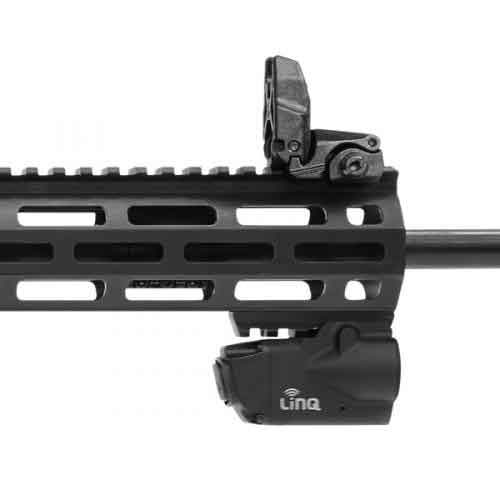
Crimson Trace LiNQ System mounted on the Smith & Wesson M&P15T

The LiNQ is a multi-function unit that offers the M&P15T more than an aiming solution. In addition to its green laser sight, the system also has a 300-lumen LED light capable of illuminating a target in most close- to medium-range situations. To top it all off, the entire LiNQ unit (mounted at the extreme forward of the handguard) is remotely operated. The controls are conveniently situated on the carbine’s grip, making the actuation of the laser sight and light intuitive.

The 16-inch-barreled carbine itself comes outfitted with a 13-inch handguard, slimmed for ease of handling, and compatible with Magpul’s M-LOK system. Furthermore, the M&P15T has a modular free-floating rail system and comes standard with Magpul MBUS popup front and rear sights. And finally, it boasts 5R rifling, an improved lands design and configuration meant to reduce bullet deformity, thus sending a much more uniform and stable projectile downrange accurately.

The extras on the M&P15T do bump up its price compared to the rest of the typically economical line, with an MSRP of $1,449. But for shooters looking for low-light performance in a tactical rifle straight from the box, the package deal might be a small price to pay.

New Precision Rifle: Savage Model 10 GRS

0

Savage is again taking aim at precision shooters with the Model 10 GRS, a moderately priced rifle long on features.

  • The Savage Model 10 GRS is available in three calibers that are favorites of long-range shooters — .308 Win., 6.5 Creedmoor and 6mm Creedmoor.
  • The Savage Model 10 GRS features a fully adjustable stock from the Norwegian stock maker GRS.
  • The rifle boasts a heavy barrel, fluted to make it more nimble when taken afield, and is also outfitted with Savage’s proprietary AccuTrigger, allowing shooters to adjust the pull weight.
  • The rifle is modestly priced when compared to other firearms in its class at $1,449.

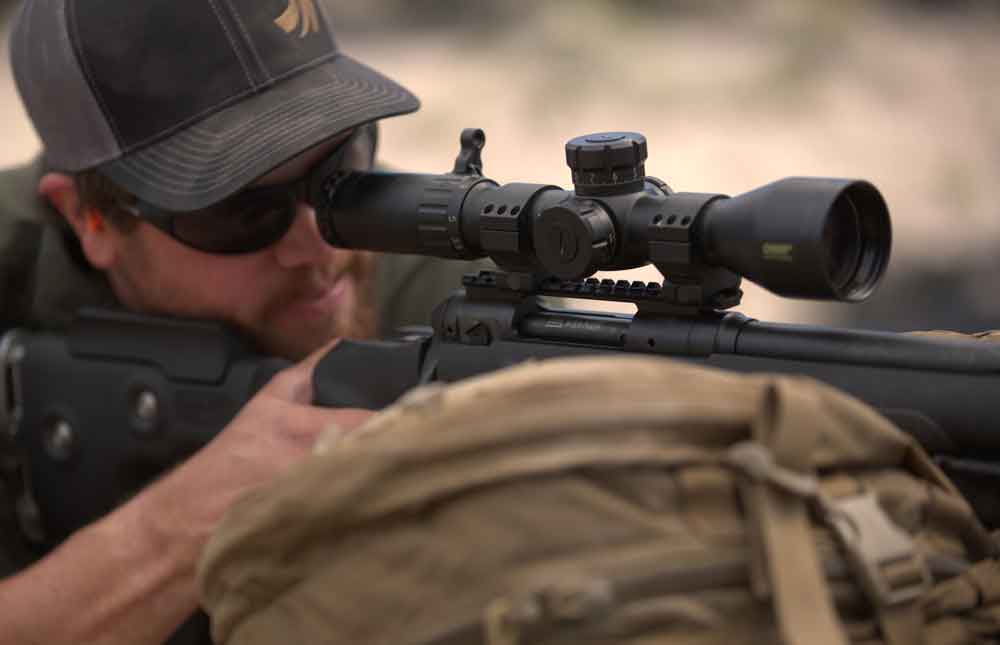
It could be argued, with ample supporting evidence, we are living in the golden age of bolt-action rifles. Steady as the march of time, gun companies have ticked out new and impressive precision models in recent years, each aimed at pitching jacketed lead a country mile and right on target. At this point in the game, the weakest link in making a long shot come in is the shooter himself — as it should be.

Savage has continued its march into the ultra-precise shooting world with a dressed up variation of one of its most popular models. And given the advanced system the gunmaker is offering, the Model 10 GRS appears more than capable of going the distance and perhaps farther.

Model 10 GRS

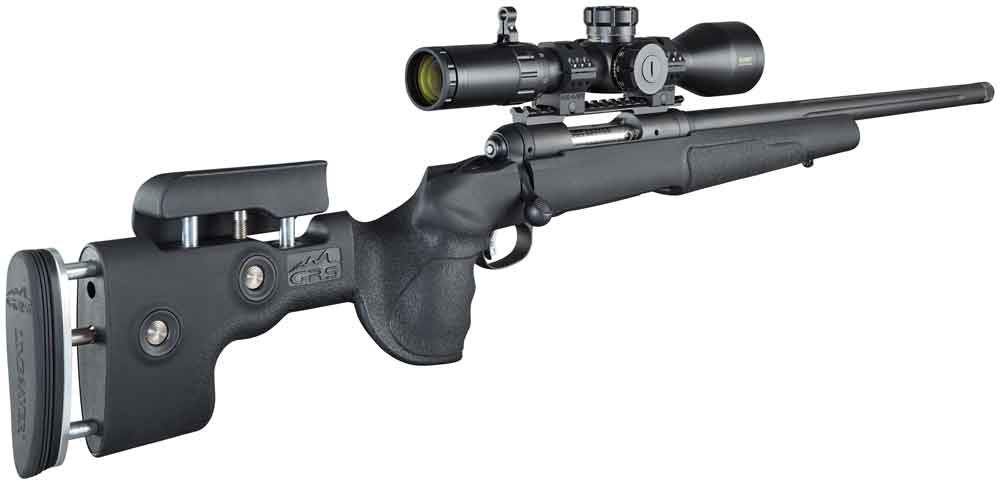
The obvious keystone of Savage’s new shooting system — available in .308 Win., 6.5 Creedmoor and 6mm Creedmoor — is its fully adjustable stock, adaptable to any person behind the trigger with literally a push of a button. The ingenious split-nut system is courtesy of Norwegian stock specialists GRS and appears to be its Berserk model.

In addition to boasting the ever-necessary cheek riser, it also comes with a full 3 inches of play in the length of pull. These features, when adjusted properly, go a long way in facilitating consistent shouldering of the rifle and intuitively puts the shooter’s eye straight down his scope and on target.

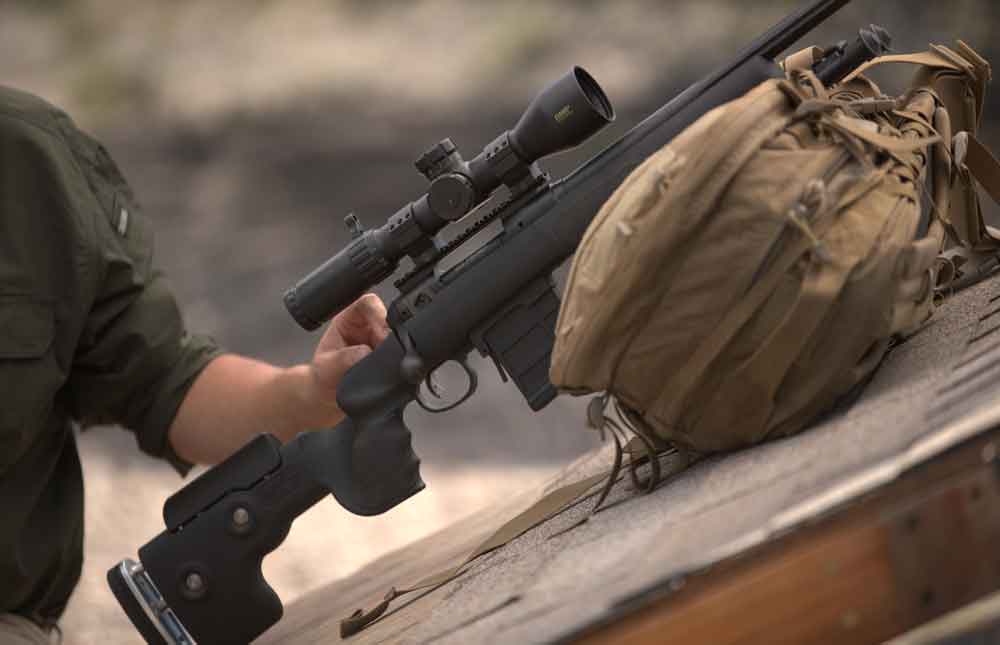
GRS has also paid attention to the little touches that should do their part in milking the most stability, control and potential accuracy out of the Model 10. The stock features a rubberized full grip and forend, giving shooters maximum command of the rifle, even when sweat or precipitation work their way into the equation. And the elongated buttstock is formed to function seamlessly with a rear bag when shooting prone.

Model 10 GRS

Beyond the ergonomics, the GRS also brings a load of rigidity to the rifle, with the use of Durethan. The fiberglass-reinforced nylon is just the ticket for injecting the stiffness required for precision work. And it also boasts pillar-bedding blocks made of 65-percent fiberglass, ensuring there is no play in the Model 10’s free-floated barrel.

Savage has also played its part in making certain the Model 10 GRS shoots straight, particularly when it comes to the barrel. The button-rifled heavy barrel should endow the rifle with excellent harmonics, even when it’s heated up from long shot strings. But the company hasn’t made the new Model 10 purely a bench rifle, fluting the barrel to keep it nimble if taken into the field; each of the three caliber choices weighs in at 9.5 pounds or less.

And those looking to slap on a muzzle brake or a suppressor need not fret; the muzzle is threaded — 5/8-24 pattern.

Model 10 GRS

Like all Savage rifles, the Model 10 GRS comes with the company’s proprietary user-adjustable AccuTrigger (1.5 to 6 pounds). It utilizes a four-round, flush-fit magazine, but is compatible with larger-capacity options. And it has flush cup sling loops and sling mount for bipod.

The question, as it is with anything long-range shooting oriented, is how many pay periods will it take to get one in a gun safe. Fewer than most would figure. At $1,449 for all three calibers, the Savage Model 10 GRS is most definitely at the lower end of the precision rifle price range. And if it owns the X-ring like the company promises, the new Model 10 GRS could be money well spent.

Specifications:

Savage Model 10 GRS
Caliber: .308 Win., 6.5 Creedmoor, 6mm Creedmoor
Barrel Length: .308 Win. 20 in., 6.5 Creedmoor 24 in., 6mm Creedmoor 26 in.
Stock: GRS, Durethan
Twist Rate: .308 Win. 1:10, 6.5 Creedmoor 1:8, 6mm Creedmoor 1:7.5
Weight: .308 Win. 8.9 lbs., 6.5 Creedmoor 9.2 lbs., 6mm Creedmoor 9.5 lbs.
Overall Length: .308 Win. 40 in., 6.5 Creedmoor 44 in., 6mm Creedmoor 46 in.
MSRP: $1,449


Hunting: The Hard-Hitting .45-Caliber Revolver Cartridges

1

The .45s are a very versatile group of cartridges, ranging from the .45 Colt on the bottom end up to the high-velocity champ, the .460 S&W Magnum, at the top end. My personal favorite is the smallest and lowest pressure producer, the .45 Colt. Lower pressure leads to lower recoil and lower noise levels. I don’t place a premium on velocity potential, but there is no denying that increasing velocity increases the range of effectiveness, if you want to reach out a bit farther than typical handgun hunting distances.

What are the hard-hitting .45s?

Kim Ralston took this Maine black bear at 45 yards using Freedom Arms Model 97 .45 colt with 5.5-inch barrel. It’s topped with a 4 MOA JPoint sight and shoots a Hornady 250 XTP over 20.5 grains of 2400. Photo by K. Ralston
Kim Ralston took this Maine black bear at 45 yards using a Freedom Arms Model 97 .45 Colt with 5.5-inch barrel. It’s topped with a 4 MOA JPoint sight and shoots a Hornady 250 XTP over 20.5 grains of 2400. Photo by K. Ralston

.45 Colt

This segment really is the story of two cartridges. Born in 1873, this old black-powder cartridge never seems to get its just due. Think of the .45 Colt as the Rodney Dangerfield of big-bore handgun rounds (a reference older readers will get!). Rarely is it loaded to potential from the factory because of the vast number of older revolvers in circulation that are incapable of handling the higher pressure, modern smokeless loads that would most likely reduce them to shrapnel. Basically, full-power loads in those old guns are lawsuits waiting to happen. So, due to liability issues, the .45 Colt is rarely ever viewed in the same vein as the .44 Magnum.

No slouch even in black-powder form, the .45 Colt in modern times really takes on a different persona. Load it to its full potential, and it will give the much-vaunted .454 Casull a run for its money and leave the .44 Magnum sucking wind in its rear-view mirror. But before you roll out the hate mail, keep in mind that I own at least a half-dozen .44 Mags of all shapes and sizes. It’s just that I am a bigger fan of the modern .45 Colt. If there ever was a do-it-all cartridge, the .45 Colt would be at the top of the heap.

Gun scribe Ross Seyfried is also a big fan of the .45 Colt and chose one to use against Cape buffalo in the mid-1980s. Seyfried evidently had a great deal of confidence in the capabilities of the round — when loaded to potential — and his own ability on the trigger. In an article in Handloader magazine, while discussing the merits of the .44 Magnum, Seyfried said, “In the midst of this I began working in Africa. It was a handgunner’s paradise. Plenty of deer- and elk-like critters could be stalked within honest handgun range. Many could be taken with the .44 Magnum, but I always felt like I was asking a boy to do a man’s job.” Almost losing a trophy kudu shot with his trusty .44 Magnum further exposed that round as an underachiever of sorts on really huge game, and Seyfried’s confidence in the .44 Magnum fell.

.45 Colt Cartridge

About this time, a gentleman by the name of John Linebaugh began pestering Seyfried with letters and phone calls touting the .45 Colt as a significant step up and over the legendary .44. The two finally met, and Linebaugh offered Seyfried the chance to shoot his .45 Colt over the chronograph. Ross declined, stepping back an adequete distance and taking cover, as he truly expected the revolver to come apart like a grenade in Linebaugh’s hands. But, the chrono’ told the true story — six times in a row, the 310-grain bullets traveling at 1,500 fps. Remarkable!

The biggest shock came when Seyfried, expecting to pound the surely mangled cartridge cases out of their chambers, was able to lift them out with minimal effort. Linebaugh was definitely on to something, and Seyfried immediately commissioned him to build one of these super .45 Colts. As for my love affair with the cartridge, what’s good enough for Ross Seyfried is certainly good enough for me.

One need not load the .45 Colt to Casull levels to enjoy a leg up in effectiveness. Loaded to much lower pressure levels, the .45 Colt will not leave you needing more.

.454 Casull

Lynn Thompson, a masterful handgun hunter, killed this Cape buffalo with his Freedom Arms Model 83 in .454 Casull. Photo by L. Thompson

In the early 1950s, while Elmer Keith was hot-rodding the .44 Special, Dick Casull turned his attention to the .45 Colt and building special five-shot cylinders on Colt Single Action Army revolvers. In those days, with limited gunpowder options, one had to get creative in order to achieve high velocities. Casull was able to get a full 2,000 fps out of a 230-grain (one designed for use in the .45 ACP round) bullet by loading two grains of Unique, 25 grains of H2400 and three grains of Bullseye. At the time, highly compacted triplex loads were the only path to achieving the pressures necessary to reach the velocities he sought.

Manufacturers of .454 Casull ammunition have remained true to the original design parameters, offering some very high-velocity loads. However, with modern powders, the .454 is loaded to lower levels than the SAAMI maximum spec, as they are able to achieve the desired velocities without touching the maximum pressure ceiling. The pressures are still high, relatively speaking, but lower than the max allotted levels. The Casull also shines with heavy-for-caliber bullets, though care must be taken when loading them at high velocities, for such recipes have a propensity for testing the integrity of the crimp.

In 1983, the Freedom Arms Model 83 was introduced in Dick Casull’s souped-up .45-caliber cartridge. Never before had such a high-pressure revolver round been produced nor a gun that could live under the abuse generated by it. Other manufacturers, such as Ruger and Taurus, followed suit years later with their own super-strong revolvers chambered in .454 Casull, as this round required a revolver of much stronger construction than any made for the .44 Magnum.

This was not only because of the higher pressures, but also because Dick Casull specified a longer case to prevent the accidental use of .454 Casull ammunition in .45 Colt revolvers of inadequate strength. Additionally, Casull specified a small rifle primer pocket to strengthen the head of the case by virtue of leaving more material in this area.

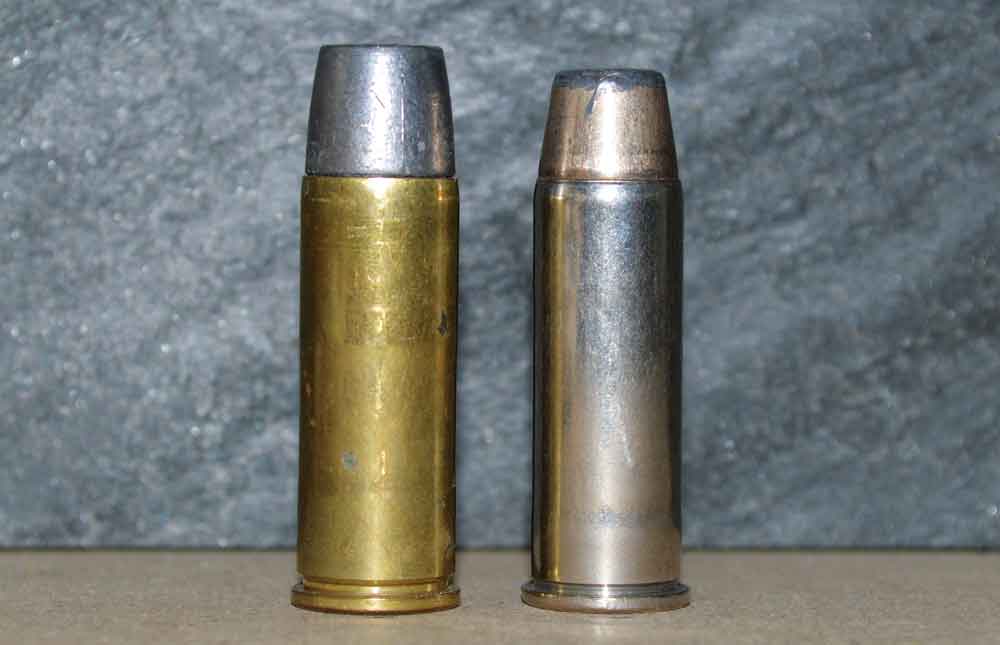
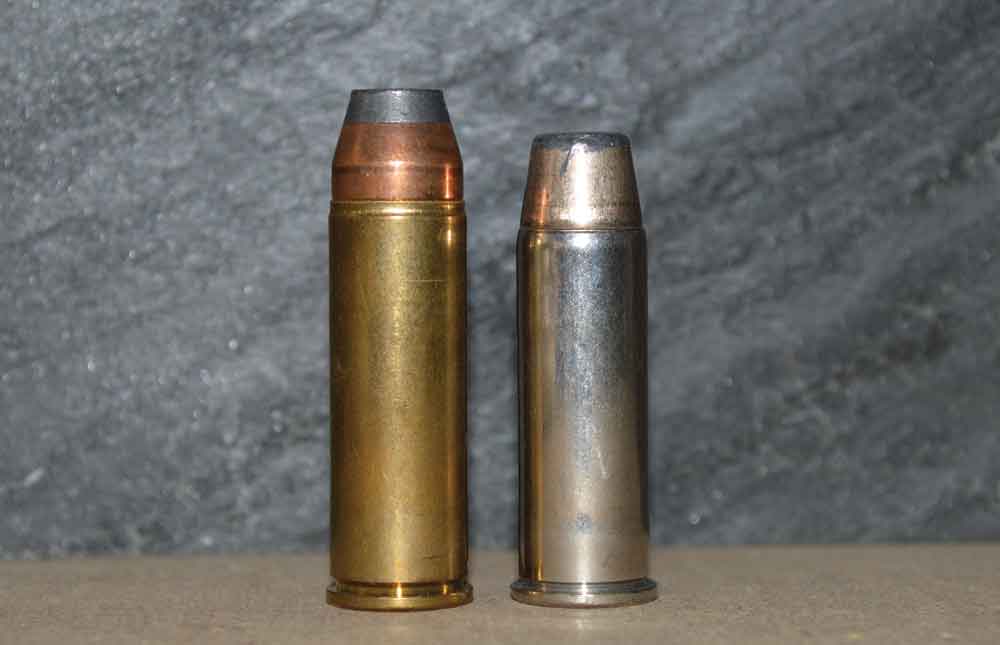
.454 Casull Cartridge next to a .45 Colt

I think of the .454 Casull as the .378 Weatherby of the revolver world, as neither is really pleasant to shoot when loaded to spec. The .454 Casull generates horrendous recoil and has caused its fair share of injuries. Most .454 Casull ammunition manufacturers load the cartridge short of its full velocity and pressure (SAAMI specification) potential. However, paper ballistics sell, and even loaded down a bit, the .454 can still boast potent numbers. There is no other commercially available handgun cartridge that has a maximum SAAMI pressure specification as high as the .454 Casull, though the .460 and .500 S&W Magnums come close.

At the end of the day, the .454 Casull is a very flexible cartridge, which was Dick Casull’s vision from inception. What he wanted and what was ultimately delivered was a cartridge and revolver combination that can be loaded from mild to extremely wild, as the shooter’s desires and needs dictate. I think Dick Casull succeeded impressively.

.460 Smith & Wesson Magnum

Guide Don Martin with Ernest Holloway and the grizzly bear that charged them.

Smith & Wesson’s long-range wonder cartridge was introduced in 2005, housed in the company’s X-frame platform. Boasting a case length of a full 1.8 inches, the .460 is basically a stretched .454 Casull. This new cartridge was designed in the same vein as the .454 — high pressure, high velocity, long range. The .460 S&W Magnum has the distinction of being the highest-velocity production revolver cartridge in existence, with some factory loads able to exceed 2,300 fps.

With an overall cartridge length of 2.30 inches, the .460 XVR will also safely chamber and fire .454 Casull and .45 Colt ammo. However, I have not been able to extract acceptable accuracy shooting various loads of .45 Colt or .454 Casull through my test XVR.

.460 S&W Mag. cartridge next to .45 Colt

Not a terribly efficient round, the .460 excels with both light and heavy bullets, but it will not outshine the .454 Casull by much when mid-weight bullets are loaded. Similar pressures can be achieved, and, by increasing the payload, the results aren’t dramatic. That said, in most factory loads, the .460 pushes a lightweight bullet at high speeds, just as intended. In this iteration, it does well on thin-skinned game, but light, frangible bullets at high velocity are a recipe for disaster on truly large animals. Fortunately, the .460 is very effective loaded with heavy bullets as well.

The price you pay for choosing the .460 S&W Magnum is the size of the revolver necessary to hold the oversized cartridge. Then again, every decision you make comes with a price.

.45-70 Government
I know I’m going against the fabric of this by including a rifle round in the lineup. Having said that, this is another cartridge worth mentioning, as it is popular in the one production revolver produced in this old workhorse of a caliber. That revolver is Magnum Research’s BFR — Big Frame Revolver. This super-sized offering is big on size and power with surprisingly moderate recoil.

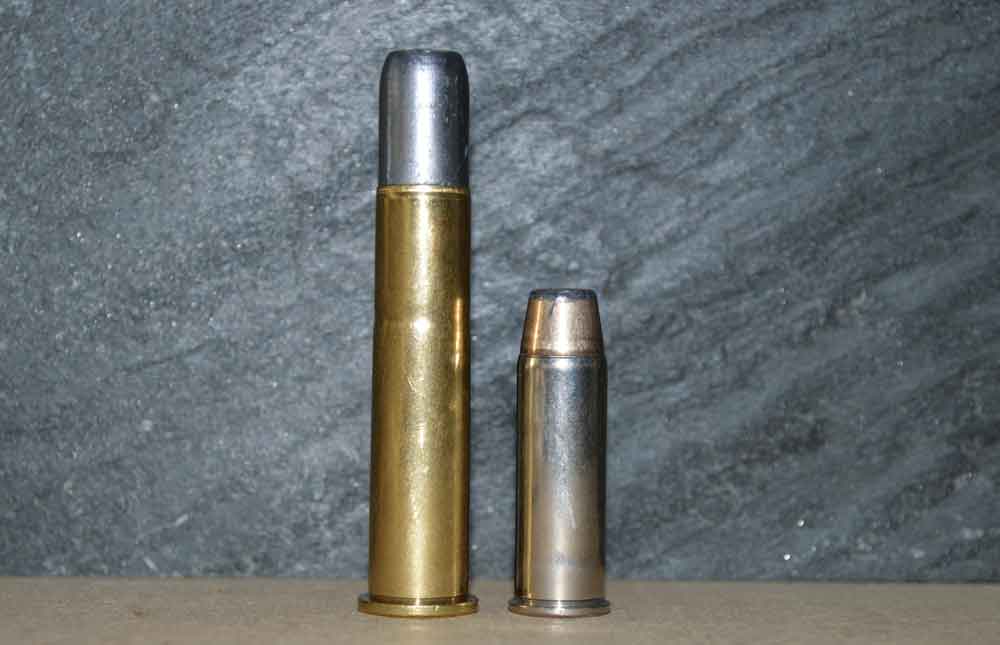
.45-70 Govt. cartridge next to .45 Colt

In its nomenclature, “.45” denoted the caliber and “70” the number of grains of black powder. This old warrior is still hanging around, more viable and youthful than ever. Introduced in 1873 at the U.S. Army’s Springfield Armory, the .45-70 in modern form is quite the performer, one able to mimic the .454 Casull in a handgun, but at much lower chamber pressures. We are talking about modern smokeless powder loads here, not the .45-70 in black-powder form. Granted, it takes a lot of revolver to house the big .45-70 round, but the bulk of the BFR serves to tame the cartridge quite a bit over a lighter revolver loaded to similar levels as the .454 Casull. The nominal bullet diameter is .458 inches, and the case length 2.10 inches.

I took delivery of a BFR in .45-70 with a 7.5-inch barrel. The long-framed revolver has surprisingly good balance, despite its exaggerated proportions. The trigger was good and broke cleanly at about 3.5 pounds. All BFRs have a free-wheeling pawl, and the fit and finish is very good.

This article is an excerpt from Gun Digest Book of Hunting Revolvers.

Six Classic Must-Have Centerfire Semi-Auto Pistol Designs

0

In the modern era of firearms, one type of gun seems to dominate all others — the semi-automatic pistol.

The fast-shooting handguns allot superior firepower, fast reload times and dead-on accuracy. And nowadays, they’re everywhere — from concealed carry holsters to the deer woods. The development of the semi-auto pistol has been marked with some icons that stir the imagination of any true firearms nut. With that in mind, we’re going to look at Six Must-Have Classic Centerfire Semi-Auto Pistol that are solid additions to any holster or gun safe.

What are some of the true classic semi-auto pistol designs?

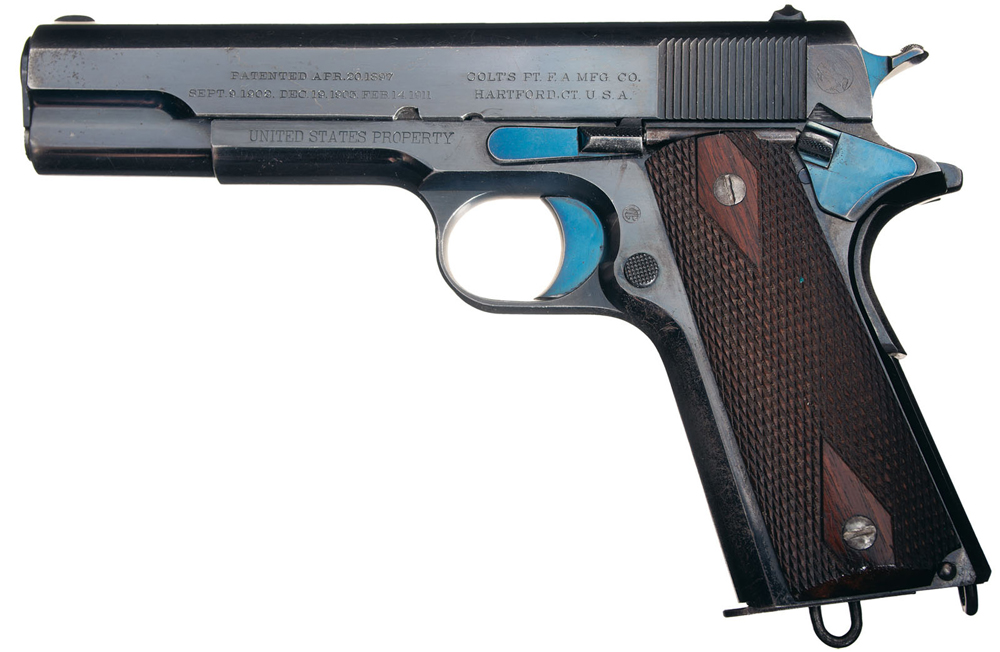
M1911

M1911A1 semi-auto pistol
Photo: Rock Island Auction Company

Aside from the Colt Single Action Army, no other pistol stirs more emotions than the M1911. Then again, few firearms have seen the action and performed as valiantly as John M. Browning’s short-recoil miracle.

The dominant sidearm for the U.S. military for the majority of the 20th century, the M1911A1 stormed the beaches of Normandy and patrolled Vietnam’s Mekong Delta. Even after its retirement as the military’s official service pistol in 1986, an act of sacrilege to some members of the armed services, the .45 ACP has remained a staple on the modern battlefield.

Adopted in 1911, the original M1911 was a response to the poor showing by the Colt M1892 revolver against the Moro guerrillas in the Philippine-American War. The .38 Colt just couldn’t put down these determined adversaries, so the military called for a new service pistol, one that would be at least a .45 caliber. Browning’s pistol performed nearly flawlessly in the ensuing military trials, not failing once in the torturous last leg. Despite its already strong design, the M1911 was tweaked in the inter war years with the relatively minor modifications, and then designated the M1911A1.

The iconic single-action semi-automatic lives on today in nearly perfect renditions of the original models and tricked-out versions purpose built for everything from concealed carry to competition. Heck, even if you demand the real McCoy, there are plenty of the original military models floating around. But any way you go, no gun safe is complete without this true American classic.


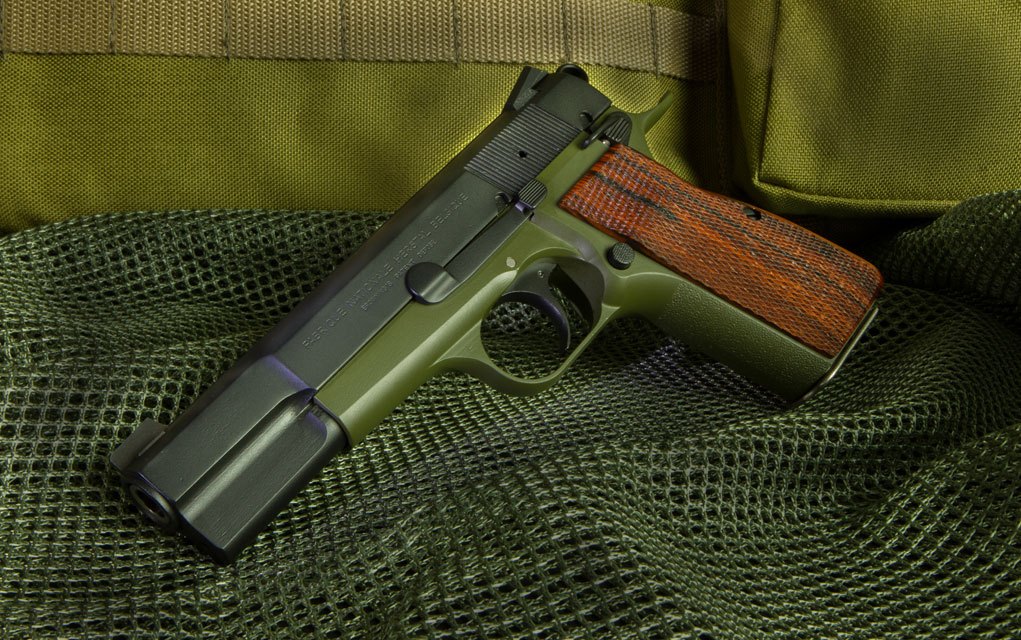
Browning Hi-Power

Browning Hi-Power semi-automatic pistol
This is yet another pistol with John Browning’s fingerprints all over it. But the gun genius doesn’t get to take sole credit for one of the most prolific military sidearms of all time. Browning died well before the Hi-Power was finished, leaving his protégé at FN, Dieudonné Saive, to put the final touches on the pistol and see it through to production in 1935.

The 9mm had a rocky road from drawing board to cold, hard steel. Much of this was due to the French Military dragging its feet on adopting the pistol, which turned out to be a blessing in disguise. This indecision allowed time for patents to run out on another Browning classic — the M1911 — that Saive borrowed heavily from to come up with the Hi-Power we know today.

Like the 1911, the Hi-Power is a short-recoil, single-action semi-automatic, in principle operating identically to the American icon. But there is a notable difference between the pistols, in particular how their barrels unlock. The Hi-Power uses a cam arrangement actuated by a hardened bar in the frame, opposed to the 1911’s toggle link. As minor as it might seem, this point would have a major ripple effect on the gun world, dominating semi-auto pistol design up to present date.

Arguably the major factor for the Hi-Power’s profusion, adopted by more than 50 militaries across the world, is capacity. With 13 rounds of peppy Parabellum — nearly twice that of other semis of the day — the pistol gave operators a decisive advantage.

In America it might not hold the same prestige as Browning’s 1911, but everywhere else the Hi-Power is king of the world.


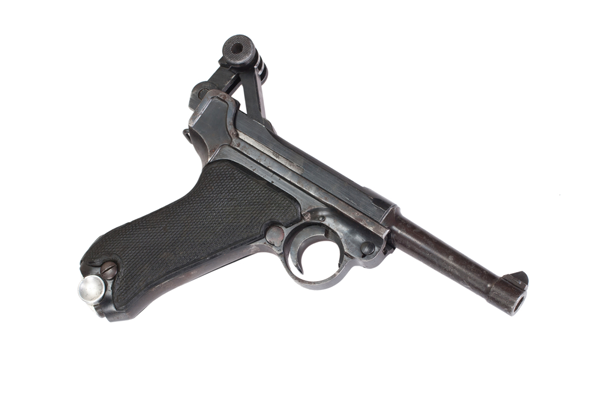
Luger P08

Luger P08 semi-auto pistol
Photo: Rock Island Auction Company

With its connections to the Third Reich, this semi-automatic has more sinister overtones than perhaps any other pistol created. But purely from a firearms enthusiast’s standpoint, the P08 is a near work of art. The Luger, as it’s better known, saw extensive combat in both World Wars, was a major factor in popularizing the 9mm, and might be the coolest pistol to come down the pike.

What makes it so dang appealing to gun cranks is its toggle-lock action. The Luger was perhaps the best-known example of this form of short-recoil operation, but it is not the sole one to utilize the design. Georg Luger’s close friend Hugo Borchardt developed his C-93 pistol around the toggle lock, inspired by the Maxim machine gun’s use of it. As an aside, the toggle-lock mechanism is found in much earlier firearms designs, such as the Volcanic rifle.

The system made the Luger deadly accurate, since there was very little barrel movement in the course of firing. And it allowed for a certain amount of resiliency in the system. The Luger could still operate even with a budged barrel, since it wasn’t shrouded by a slide.

But as is always the case in any engineering endeavor, there were tradeoffs with the Luger. In this case it was complexity and cost — one led to the other. The slick little 9mm cost as much as three Mauser rifles out of the box, with perhaps half or a quarter of the battlefield utility of the bolt action.

Still, the German soldiers couldn’t get enough Lugers, with millions produced up to it being replaced by the Walther P-38 in 1938. And today, collector and shooters with a yen for true classics still flock to this wicked little pistol.


Walther P38

Walther P-38 semi-automatic pistol
Photo: Askild Antonsen

Carl Walther had a tall task ahead of him in 1930s Germany — build an economical military pistol that would outperform the beloved Luger. He went one better and changed the combat pistol world.

The P38, adopted by the German military in 1938, was the first service pistol outfitted with a double-action/single-action trigger. And by all accounts, it was the first pistol to combine this fire control with a locked breech. The configuration has since swept militaries and police forces around the world, even going so far as replacing the U.S. Army’s beloved 1911 in the form of the Beretta M9.

The P38’s DA/SA trigger gave it a leg up on many of its contemporaries. Generally, pistols such as the M1911 were supposed to be carried in condition 3 (hammer down, chamber empty), meaning the slide must be racked to get it into action. On the other hand, the P38 only took a squeeze of the trigger to send a round down range.

The P38 configuration was groundbreaking for its time. Before, DA/SA was strictly a blowback operation affair, found in near equal Walther classics, the PP and PPK. Carl Walther actually made a run at the military contract with a scaled-up version of the PP — Model MP — also chambered in 9mm. But the round proved too powerful for the design.

The eight-round 9mm was well-regarded by the troops as a reliable and accurate pistol that delivered when called upon. And unlike its predecessor — the Luger — it was painfully simple to troubleshoot in the field.

The P38 definitely stole some aesthetic points from the Luger. But there is no arguing Walther’s service pistol stands in a class of its own.


CZ 75

CZ 75 Semi-auto pistol

If imitation is truly the highest form of flattery, then there are plenty of gunmakers fawning over what this pistol brings to the table. Few other handguns in the modern era have spawned more clones and outright copies than this Eastern European masterwork.

Sure, much of copycatting is do to the CZ 75’s designer, František Koucký, hamstrung when it came to international patent protections. But it also had a great deal to do with his 9mm being one heck of a pistol in and of itself. It wasn’t called a “Wonder-Nine” for nothing.

What the CZ 75 brought to the table was large capacity mated with a well-designed double-action/single-action trigger. The Czech masterpiece could rattle off 15 rounds like it was telling bad jokes, which, especially in competitive circles, turned heads immediately. And, overall, its trigger got high marks — smooth in double action and snappy in single.

On top of that, it had a unique aspect when it came to DA/SA pistols — it could be carried in condition 1. Going “cocked and locked” appealed to many (once again, think competitors) and is a rare feature on this style of pistol.

While the CZ 75 clones are innumerable, it is easy to see the pistol’s roots are sunk deep in another classic design — the Browning Hi-Power. This includes the Czech gun’s lines and cam system to unlock the barrel. But Koucký put his own twist on the pistol, such as the slide riding inside the frame rails, counter to most semi-automatics.

While there is ample opportunity to get a hold of a CZ 75 in function only, it’s worth holding out for the actual number. After all, there’s a reason why everyone wanted to copy the original.


Glock 17

The Gen 4 Glock 17 semi-automatic pistol
The Gen 4 Glock 17

What can an engineer with no background in firearms and a familiarity with cutting-edge materials do to the gun world? How about turn it on its ear.

Gaston Glock’s Glock 17 wasn’t the first polymer-framed pistol to hit the market, but it certainly was the first successful one. Though, in all truth, the word success misses the mark, because the little 9mm, initially designed as an Austrian service pistol, did a whole bunch more. It essentially redefined the market from 1982 on.

The Glock 17’s reduced weight, simple design and natural shootability made it a worldwide sensation and an instant classic. And it took a blink of an eye to achieve. After assembling a team of European shooting and firearms experts to offer design points, it was only months before Glock came up with the prototype he’d submit to the military trials.

Aside from materials, the other revolutionary design point is the Glock 17’s trigger. The double-action-only trigger (called ‘Safe-Action’ by Glock) offered one of the most consistent pulls to that date. Squeeze after squeeze, the striker-fired trigger breaks at a predictable 5.5 pounds — a big boost to any shooter’s accuracy potential.

Of course, shooting a Glock comes at a cost — the 17 and its blocky black cohorts have all the charm of a sod house. But when your life is in the balance, Glock’s ugly is plum beautiful.

How-To: Dry-Run Drills to Master the AR

0

AR dry fire practice

Whether you’re new to the AR or are getting acclimated to a brand new rifle, deliberate and mindful dry runs will jump start mastery of the firearm.

  • The author recommends dry practice with the AR to fully understand the rifle’s controls and how they operate.
  • Proof the AR by shooting it at close range, looking for tight groups; the zero is of secondary concern at this point.
  • At the start of dry practice, ensure you are in your proper stance, running a mental checklist from the feet up.
  • Shoulder your AR and make certain you’re on target and are establishing a natural point of aim.
  • Once you move on to live fire, every step, from shouldering the AR to breaking the shot, should be deliberate and thoughtful.

If you are new to the AR, I highly recommend plenty of dry practice before ever firing a shot. It’s important to get a good idea of how the AR works before going to the range.

In the beginning, don’t worry about zeroing the AR or adjusting the sights for a precise alignment for you and the carbine. Start with a close, large target, such as 25 yards or even closer. Your shots might not go into the center of the target until it’s zeroed. What you’re looking for is a tight group size, all the shots in the same area. Then, later, you can adjust the sights to move that group so the bullets are impacting on the center of the target.

Dry Practice And Establishing Your Natural Point of Aim

Start by confirming the AR is empty and clear. Make sure you’re in the proper stance, and run a mental checklist from the feet up through the body and out the muzzle to confirm that everything is correct.

Once you have everything squared away, come up from the low ready and on target. As you come on target, the safety is disengaged, and once you’re on target, your finger goes to the trigger. At this point, if you have a good base or platform you should have a sight picture, the alignment of the sights between your eyes and the target.

Hold this position, close your eyes, and inhale/exhale about three times. Open your eyes, and see where the sights are aiming. If the sight picture has drifted left or right, then you need to adjust your stance by re-positioning the feet so the sights are back on target. Everything from the feet up should remain the same. (Don’t worry about the elevation, or up and down. The focus here is on the lateral positioning, left and right.) Repeat the process.

Once you have a good stance, the sights should be on target when you open your eyes. You are establishing your natural point of aim, which means your body is in a relaxed, consistent position, relying on bone support as much as possible as opposed to muscle tension. (The same technique applies to all other firing positions.) Eventually, you’ll be able to acquire a good point of aim without having to go through this process, but in the beginning it’s important to take your time and get a good position before ever firing a shot.

Live Fire

For your first shots, start at a close distance of about 15 yards or so. After establishing your stance, keep everything in the same position, and from the low ready, load the AR. Remember to use the proper technique, and focus on loading, as opposed to thinking about shooting while you’re trying to load. Think about one thing at a time.

Moving on to AR live fire

From the low ready, come up, disengaging the safety as the muzzle rises. Once you’re on target place your finger on the trigger. Perform any adjustments that may be necessary to fine-tune your sight picture. Focus on the front sight, or with a red-dot your focus is on the target, and smoothly start applying pressure to the trigger. Eventually, the AR decides it’s time to fire.

Follow through, which means recover from the recoil, reacquiring a sight picture and resetting the trigger. “Do I need to shoot again,” you ask yourself. The answer is no; you’re only firing one round. Come off the trigger, off the target, into the low ready position, and engage the safety. Now, finally, you can look to see where the round hit. But, don’t worry about where the hit is. I know this sounds confusing. The purpose of shooting is to hit the target, right? Actually, right now the main point is to focus on the fundamentals and make sure to follow through completely, as opposed to immediately coming off the trigger and target to locate where the shot went. You’ve got to establish good habits from the beginning. Plus, remember, you haven’t zeroed the AR yet, so the hit might not be exactly where you’re aiming on the target.

Repeat the process, performing the same sequence and firing another shot. Do it again, consciously thinking about each step, one step at a time. Eventually you start to see a group forming. All the shots are clustering in one location on the target.

Deliberate AR practice

When you’re working on these fundamentals you might have a round or two that isn’t grouped with the others. For right now, ignore these. I know, they stick out and cry out for attention. If you start thinking about what went wrong, you’re not thinking about what to do right. As long as you’re shooting, you’re always going to have a “flyer” here and there. Ignore the fliers, focus on the group you’ve shot, and think about what you did right for all of those instead of thinking about the anomalies. It’s all about reinforcing the positives and creating confidence in your abilities.

Once you’ve got the hang of firing one shot at a time, start working on firing two-shot groups. After that’s looking good, work on shooting three-round groups. Although you’re firing multiple-round groups, think about each shot as a separate entity all its own. Slow down, make one good shot, and then repeat as needed. Regardless of how many rounds you fire, after the last one, always follow through, preparing to fire another shot. Ask yourself if you need to shoot again, and then you’re off the trigger, off the target and safety on.

Once you’re getting good groups, then you can start adjusting the sights to zero the AR, and working from extended distances and/or with smaller targets. Don’t worry about shooting or firing fast, especially in the beginning. Concentrate on applying the fundamentals and making good hits.

Video: World’s Smallest Rifle — SIG Sauer’s MCX Rattler

1

SIG Sauer’s new MCX Rattler is being described as the world’s smallest rifle, and it packs a lot of firepower into an incredibly small package.

SIG Sauer has been doing a lot of innovative things with its already-innovative MCX platform recently. Earlier this summer, the manufacturer debuted its MCX Virtus, an upgraded version of its standard MCX, modified based on input from various special operations soldiers and built to achieve a service life beyond 20,000 rounds without replacement parts. Now, SIG has officially unveiled another impressive adaptation of the platform: the new MCX Rattler.

Designed, again, based on requests from Tier 1 operators, the MCX Rattler is billed as the world’s smallest rifle. With its stock folded, the entire package is smaller than just the MCX Virtus’ standard 16-inch barrel alone.

SIG Sauer MCX Rattler - 1And folding the stock does nothing to hinder the functionality of the rifle. All controls remain accessible, and the gun can still be fired with ease. Plus, the stock can quickly and simply be switched back and forth between the extended and folded positions, meaning it can be stored discreetly and rapidly brought into the fight.

Externally, the rifle appears to share quite a few characteristics with the previous MCX Virtus. However, the differences are also pretty obvious as well. The MCX Rattler features a much shorter barrel and a correspondingly shorter handguard.

Given its very short barrel, the standard MCX Rattler is an NFA affair. Some will be just fine with that. Others might not be.

Luckily for those individuals, it looks like SIG might also be offering an MCX Rattler pistol variant, which will feature an SB brace. This is sure to be a popular item and big seller, given the lack of NFA hassles.

Check out the video above to learn more about the groundbreaking new MCX Rattler and to see the rifle in action.


Raise Your Sig Sauer IQ:

New Rifle: Christensen Arms Mesa Long Range

0

Christensen Arms has expanded its bolt-action rifle collection to include the Mesa Long Range, a little number tailored for precision work both at the range and in the field.

  • The Mesa Long Range rifle is configured for precision long-distance work, whether it’s long-range target shooting or hunting.
  • The carbon fiber composite stock is the bedrock of the rifle, providing convenient user adjustments and a rigid shooting platform.
  • The Mesa Long Range has a removable side-baffle muzzle break, taming the rifle’s recoil.
  • The precision rifle utilizes Christensen Arms’ Invar pillar bedding system, to reduce accuracy fluctuations caused by temperature change.

Christensen Arms has had a busy year, adding some notable new pistols and AR-style rifles to its catalog. But the Utah-based company hasn’t turned a blind eye to its high-performance bolt-action rifle lineup, with a recent and intriguing new addition: the Mesa Long Range.

The new Mesa Long Range rifle puts the company’s materials know how to work to produce what looks to be a true tack-driver. And it comes at a relatively reasonable price for a Christensen rifle. While the bolt action should be a hit with long-range shooters of every stripe, its late-summer release definitely shows the company has its sights set for those aiming to take distant cracks at elk, deer and other critters.

Mesa Long Range Rifle - 1

The heart of the Mesa system is an attractive carbon fiber composite stock — black with a gray webbing pattern — that offers shooters a rigid base for precision work, and a key adjustment to ensure a proper fit to their frame. In particular, the adjustable cheek riser facilities a solid weld to the stock and proper eye alignment with the optic. Interestingly, the system operates with spacers, which, while perhaps not as easy to tune on the fly, should add an element of ruggedness to the rifle, maintaining fit even on the longest of hunts.

Christensen Arms has opted for a stainless-steel barrel on the Mesa, button rifled. It adds weight to the rifle, which isn’t a bad thing when it comes to precision work. The barrel is a medium Palma contour, so it should be a bit more manageable in the field, yet rigid enough to maintain accuracy. And it comes topped off with a slick-looking side-baffle muzzle brake, aimed at cutting down on felt recoil.

Like all of Christensen Arms’ bolt-action rifles, the barrel is free floated, utilizing a unique pillar bedding system. The company uses Invar — a nickel-iron alloy — for its pillars because it does not expand or contract with temperature change, thus minimizing accuracy fluctuations that are commonly found in more sensitive materials. Furthermore, Christensen spot beds the area around the recoil lug to ensure the stability and rigidity of the system even further.

Mesa Long Range Rifle - 2

Presently, Christensen Arms is offering the Mesa Long Range in five caliber choices (6.5 Creedmoor, .308 Win., 28 Nosler, 7mm Rem. Mag., .300 Win. Mag.), each with an optimized barrel length and twist rate for long-distance work. It also gives the shooter everything he needs to squeeze off the most accurate shot possible with its match-grade trigger, preset at the factory at 2.5 to 3.5 pounds.

The Mesa Long Range, relative to the rest of Christensen’s catalog, is affordable with a MSRP of $1,595. For some shooters, that price still might be pretty steep. But, as always, precision comes at a price.

Specifications:

Mesa Long Range Rifle:
Calibers: 6.5 Creedmoor, .308 Win., 28 Nosler, 7mm Rem. Mag., .300 Win. Mag.
Barrel Length: 6.5 Creedmoor 26 in., .308 Win. 24 in., 28 Nosler 26 in., 7mm Rem. Mag. 26 in., .300 Win. Mag. 26 in.
Twist Rate: 6.5 Creedmoor 1:8, .308 Win. 1:10, 28 Nosler 1:9, 7mm Rem. Mag. 1:9, .300 Win. Mag. 1:10
Weight: 8.9 lbs. short action, 9.9 lbs. long action
Capacity: 6.5 Creedmoor 4+1, .308 Win. 4+1, 28 Nosler 4+1, 7mm Rem. Mag. 3+1, .300 Win. Mag. 3+1
Barrel Material: Stainless Steel
Stock: Carbon Fiber Composite
Thread Pattern: 5/8×24
Finish: Tungsten Cerakote
MSRP: $1,595

5 Dangerous Game Bullets To Bet Your Life On

0

When facing the most dangerous game animals on the face of the Earth, you don’t want a bullet that goes to pieces when it matters most.

The Dangerous Game Bullets to Bet Your Life On:

Those of us who enjoy the pursuit of dangerous game spend an extraordinary amount of time focusing on the gear we use; it has to perform flawlessly, as our very lives depend upon it. I’m not the kind of hunter who holds one form of hunting above another, as though dangerous game is somehow superior to other game animals, but I do know if my deer rifle malfunctions, odds are my life won’t be in danger. The same cannot be said for the truly dangerous game animals.

One malfunction — whether from an errant shot, a misfire or a bullet that simply doesn’t reach the vitals — and things can turn nasty in the blink of an eye. Rogue elephants, mauling leopards, grizzlies that just won’t die, or the charge of the Cape buffalo — ”Black Death” as he is affectionately known — all can very easily turn the tide with tusk, tooth, horn and claw.

While there are volumes written about appropriate cartridges and rifles for dangerous game, we must agree that in the end it is the bullet, and only the bullet, that does the job. Let’s look at what makes a good dangerous game bullet tick.

First, you’ll want a bullet heavy enough to penetrate sufficiently to reach and destroy the vitals from any angle. Second, you’ll want a bullet tough enough to resist premature expansion, which prevents sufficient penetration. Different animals require different levels of performance, but here are my choices for good dangerous game bullets, based upon my own experiences.

The Nosler Partition

Dangerous Game Bullets Nosler Partition

The Godfather of Premium Bullets still makes a fine choice for dangerous game, for anything smaller than elephant. Having been developed for penetration, John Nosler ensured his bullet would hold together by leaving a horizontal partition of thick copper between two lead cores; this way the front core expands upon impact, while the rear core stays intact to ensure deep penetration. This design has been with us since 1948, and, in any suitable dangerous game caliber at sane impact velocities, you’ll end the argument. Choose the heaviest weight for your given caliber for the best results.

The Swift A-Frame

Dangerous Game Bullets Swift A-Frame

This is my particular favorite soft-point for everything south of elephant. It is a design similar to the Nosler Partition in that there is two lead cores separated by a thick wall of copper, but in the Swift A-Frame’s case, the jacket is thicker, and the front core is chemically bonded to the core, slowing the expansion and increasing penetration. The A-Frame simply works. It is an accurate bullet that will retain 90 percent of its weight when recovered, and I’ve trusted it to perform all over the world, from North America to Africa, on game as gnarly as Cape buffalo. The classic recovered A-Frame has a slight rivet shape just behind the partition and expands well enough to wreck the vitals of the largest buffalo or grizzly bear, while often penetrating the entire animal. For dangerous game like buffalo, grizzly, lion and hippo, you really can’t go wrong with an A-Frame.

The Hornady InterLock

Dangerous Game Bullets Hornady InterLock

For a cup-and-core bullet to be used on dangerous game, I like the Hornady InterLock, preferably when in the round-nose configuration and with a high sectional density. Hornady makes some great models within this line, like the 300-grain .375-inch and 400-grain .416-inch. Both will cleanly take bear and buffalo and are just about perfect for lion. There is enough exposed lead at the nose to provide good, but not radical, expansion, and at the aforementioned weights the sectional density figure will be well over 0.300, the accepted minimum for good performance on dangerous game. The bullet’s cannelure locks the jacket to the lead core (hence the name), and among the other qualities, I’ve found these bullets to be very accurate. I also like the fact that Hornady makes them in lighter calibers like a 160-grain 6.5mm, or a 220-grain .308-inch, which would be perfect for the African leopard.

The North Fork Semi-Spitzer

Dangerous Game Bullets North Fork Semi-Spitzer

The Oregon firm of North Fork bullets makes a fine bullet for dangerous game. Its semi-spitzer bullets are a chemically bonded marriage of pure copper and pure lead, with the lead core taking up the front half of the bullet. The rear section of the bullet is a pure copper shank and the bearing surface is comprised of small grooves to keep pressures down. This design keeps the weight forward and it gives straight-line penetration, often exiting the offside of even the largest animals. North Fork also offers these bullets in heavier than normal weights, such as 350-grain .375s, 430-grain .416s, and 550-grain .458s. I firmly believe that the heavier bullets are a fine choice for settling an argument when things get up close and personal. The semi-spitzer meplat transfers energy quickly, and those few North Forks that have been recovered from game animals have shown good expansion. North Fork has a winner with this bullet.

The Woodleigh Hydrostatically Stabilized Solid

Dangerous Game Bullets Woodleigh Hydrostatically Stabilized Solid

The solid bullet, which has no exposed lead or is designed not to expand at all, is usually reserved for the toughest jobs like penetrating the skull of an elephant or for back-up shots on Cape buffalo or hippo. They are called upon when penetration is a must and the vitals must be reached from any angle. For decades, these bullets were comprised of a lead core, a thick steel jacket and a thin covering of gilding metal. That has changed with the Woodleigh Hydro solid. It is a monometal bullet with driving bands on the shank to reduce pressure and fouling, but the neat feature of this bullet is the small cup at the meplat. This tiny addition creates a hydrostatic shockwave, destroying tissue in an 8- to 12-inch radius around the entire path of the bullet, while the bullet exits at caliber dimension. This gives us a bullet that can be used on smaller game without the huge exit wounds, yet works perfectly for dangerous game. I used this bullet in Africa in my Heym .404 Jeffery, at 400 grains, and took impala and blue wildebeest very cleanly. I also put the penetrative qualities of this bullet to the test with two body shots on a huge-bodied Zimbabwean bull elephant. The Woodleigh Hydro passed through the entire body with two quartering-toward shots and put the bull down quickly and effectively. I think this design represents the future of dangerous game bullet technology. I know I’ll be using them again.

Editor’s Note: This article originally appeared in the April 2016 issue of Gun Digest the Magazine.
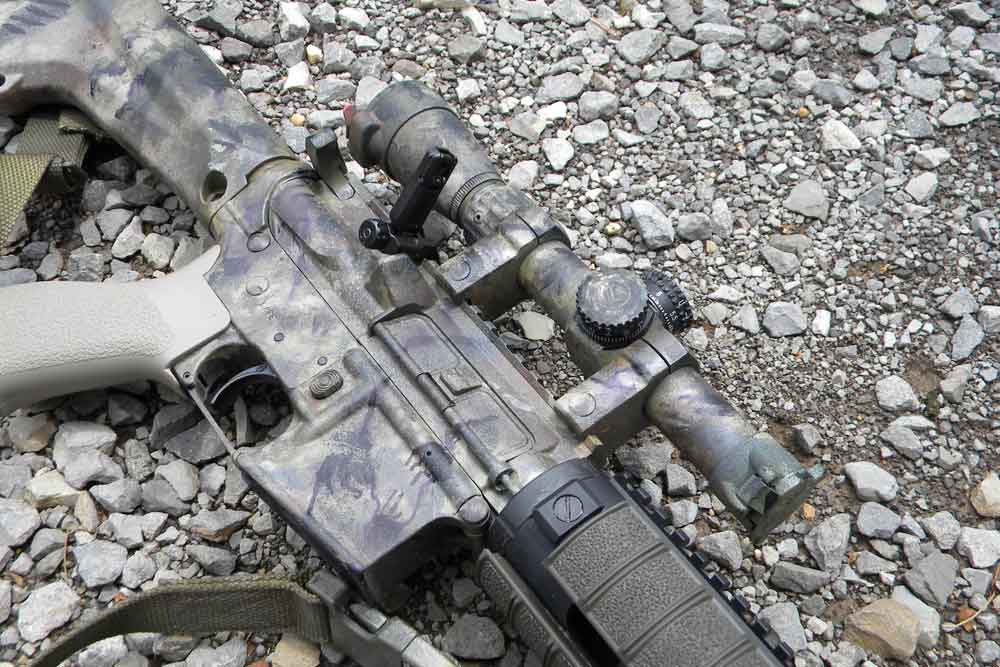
Concealed Carry: Is The .380 ACP Enough For Self-Defense?

11

Pistols chambered for .380 ACP have grown in popularity due to their compact size and concealability. But does the round bring enough to the table to be viable for self-defense?

Should you trust your life to the .380 ACP?

  • When John Moses Browning designed the .380 ACP in the early 1900s, he built it for the era’s blowback pistols.
  • The different .380 ACP rounds tested had vastly different penetration capabilities, and a number of them were unable to defeat various barriers, let alone reach FBI penetration minimums.
  • Wound-cavity analysis tells a similar story concerning the .380 ACP, with individuals shot by the round able to function seconds to minutes after being shot.
  • As might be expected, larger-diameter bullets produce more devastating wound cavities and have a greater likelihood of striking vital organs.
  • While any gun is better than no gun at all, it is the author’s contention pistols chambered in .380 ACP are best served as backup guns and not primary self-defense handguns.

Nearly three-quarters of a century ago, on January 30, 1948, Hindu nationalism advocate Nathuram Godse carried out an assassination. At 5:17 p.m., he used a possibly stolen Beretta M1934 to shoot Indian independence leader Mahatma Gandhi three times in the chest, point-blank. In doing so, Godse sealed his own fate — he would be hanged in 1949 — and made Gandhi a martyr to his cause. The Beretta used was chambered in 9x17mm Corto, another designation for the cartridge more commonly known stateside as the .380 ACP.

Gandhi’s assassination is just one of many instances — famous and otherwise — where the cartridge has been utilized with deadly results. Does this mean the .380 ACP is a powerful round, or is it only fatal in rare instances?

Three pistols chambered for .380 ACP
When John Moses Browning designed the .380 ACP in the early 1900s, he built it for the era’s blowback pistols, specifically the Colt Model 1908 Pocket Hammerless. Blowback-operated pistols lack a barrel-locking mechanism; the combination of the slide’s mass and the recoil spring’s strength bear the brunt of recoil.

Arm Yourself With More Concealed Carry Knowledge

Today, many pistols chambered in the cartridge follow the original blowback design, but others use a locked-breech action in which the slide and barrel initially recoil in tandem, but then the barrel stops moving while the slide continues rearward (of course, variations abound). Browning’s design might be more than one century old, but it continues to influence the firearms world to this day.

When it comes to the .380 ACP, gun owners tend to love it or hate it — middle ground is uncommon in the “great caliber debate.” Many claim it’s too small, and it is, indeed, a diminutive cartridge. It has an overall length of .984 inch, a bullet diameter of .355 inch and a maximum pressure of 21,500 psi.

When compared to a cartridge such as the 10mm with its SAAMI overall length of 1.250 inches, bullet diameter of .400 inch and maximum pressure of 33,000 psi, it appears even smaller. However, the .380 vs 9mm, with its matching bullet diameter of .355 inch, the issue becomes more complex.

So, what it comes down to is real-life performance. In the gun world, ballistic knowledge is power, so let’s take a look at how the .380 ACP performs in gel tests and wound studies.

Ballistic Gel Testing

.380 ACP round penetrating 10 inches into ballistics gel.

Ballistic gel is the medium used by manufacturers and writers to test the terminal ballistics of various bullets. Protocols for its use are typically based on the FBI’s ammunition test, which the agency undertook almost 30 years ago following the Pyrrhic victory of the 1986 FBI Miami Shootout, during which two agents were killed and five were wounded in a firefight against a pair of serial bank robbers. The shootout brought up questions regarding caliber capabilities, and the ammunition testing protocols the FBI created a few years later remain the guidelines to this day.

According to the protocol, bare gel or gel covered by heavy clothing, automotive sheet metal, wallboard, plywood or automotive glass is shot from a distance of 10 feet. Bullets must then penetrate to a minimum depth of 12 inches to be considered effective, a number based on anatomical averages and the belief that erring on the side of too much is better than too little. When the FBI performed their tests in 1989, they used 24 tons of gel, and measurements were made blind — agents didn’t know what caliber they were measuring — for statistical accuracy.

As for ammunition, there are untold numbers of manufacturers in the United States, thanks to startups and relatively unknown or new companies, but there are only a few dozen that are well established and even fewer well-known manufacturers. For the purposes of this test I used defensive .380 ACP loads from Federal Premium Ammunition, Hornady, Barnes Bullets, Dynamic Research Technologies (DRT) and Snake River Shooting Products (SRSP) Team Never Quit. The variation of loads among these established brands made them ideal for comparison. Handguns used included the Ruger LCP II, Kimber Micro Advocate, Remington RM380, Glock 42 and Browning Black Label. Some data was supplied by manufacturers.

.380 ACP penetration table.

In bare gelatin, the most impressive performance came from DRT’s 85-grain Terminal Shock JHP with an average penetration depth of 11.40 inches, although the SRSP Team Never Quit 75-grain Frangible HP was right behind it at 10.90 inches. Conversely, the Barnes 80-grain TAC-XPD penetrated the shallowest, with an average penetration depth of 7.75 inches.

Of course, the average assailant will be clothed, meaning further testing was required. With heavy clothing over the gel block, Hornady’s Critical Defense 90-grain FTX reported the greatest average penetration of 10.25 inches; Federal Premium’s Personal Defense 99-grain HST was fairly close at 9.325 inches.

So, what do all these numbers mean? Going by the FBI’s protocol requiring a minimum penetration depth of 12 inches, frangible HPs such as DRT and SRSP Team Never Quit come close — but not quite — while rounds such as Barnes’ TAC-XPD fall noticeably short.

Analyzing Wound Cavities
Although ballistic gel is designed to simulate the density of human tissue and potential resulting wound cavities, nothing beats going to the source. Numerous gunshot wound studies have been done by surgeons, coroners and, of course, the FBI. This means there’s a decent amount of data readily available.

As reported by Dr. Andreas Grabinsky, the program director for emergency and trauma anesthesia at Harborview Medical Center, which is the only Level I trauma center in Washington State, approximately 76 percent of gunshot wounds are from handguns. Dr. Grabinsky also states relevant wounding factors include bullet diameter and penetration depth, both of which correlate to tissue damage. Tissue damage refers to the temporary and permanent wound cavities a bullet creates; the immediate, temporary cavity occurs when the bullet enters, but it quickly collapses, resulting in the permanent cavity.

Ruger LCP II in .380 ACP

Dr. Grabinksy repeatedly states the significance of penetration, saying even millimeters matter when it comes to damaging vital organs, blood vessels or arteries. He references experiences of gunshot wound victims shot by calibers 9mm and smaller — which includes the .380 ACP — having had no problem walking around and functioning anywhere from seconds to minutes after being shot.

In 2006, a coroner wrote a report titled, “Terminal Ballistics as Viewed in a Morgue.” He stated he performed an average of 8.2 autopsies a day and chose to be blunt in his findings. “I absolutely despise a 9mm for defensive situations … and a .380 ACP as well,” he wrote, adding he will “take a slow-moving .45 ACP to a gunfight any day.” In addition, he stated that when a gunshot wound victim crossed his autopsy table with multiple rounds in their bodies, those bullets were typically .380 ACP or 9mm, while single-shot gunshot wound victims were usually shot by .40 S&W or .45 ACP.

Finally, there’s the real-life experience of now-retired police Sergeant and US Army veteran Tim Crawford. Sergeant Crawford made his feelings immediately clear: “Never .380 ACP as a defensive round. I made a run one night on a guy who had been shot 7 times with a .380 ACP. It was a drug deal gone bad. [After being shot] the guy whooped the shooter’s ass and took his gun away from him. Made my mind up on it. And the guy lived.”

.380 Handguns In Stock:

Expand Your Knowledge on .380 ACP Firearms and Ammo

The Bottom Line

Remington RM380 in .380 ACP

So, is the .380 ACP a viable self-defense choice?

From a medical perspective — and here I delve into my own relevant experiences in my past life in emergency veterinary medicine — there’s no denying that a bigger hole drops an assailant faster, as they lose vital fluids. Hydrostatic shock is an oft-argued reality influenced by factors such as velocity, proximity, placement and bullet diameter. Larger diameter bullets also mean a better likelihood of striking vital organs and breaking through bone, rather than potentially ricocheting harmlessly away. Other factors also come into play, such as psychological state and the ingestion of drugs capable of spiking adrenaline and strength.

Ballistics has come a long way in recent years, with vast improvements in propellants and bullet designs. But even with those improvements, some things haven’t changed. For example, bullet diameter for a given round hasn’t suddenly increased. From a self-defense perspective, the .380 ACP performs to its greatest ability at close ranges, and by close I mean less than 3 yards — closer is even better.

And, as always, shot placement is king.

.380 ACP Ammo In Stock:

Trauma center studies report cranial shots to be the deadliest, with multiple close-range center mass shots —those striking vital organs or arteries — being second deadliest. In short, a .380 ACP is best served as your BUG (backup gun), the pistol you pocket or ankle carry as insurance.

Pistol in .380 ACP ready for ballistics testing.

This is not to disparage the .380 ACP, but it’s simply to state the facts medically, in terms of ballistics and based on the personal experiences of law enforcement officers and doctors. It’s enjoyed popularity for some time now based largely on affordability and concealability — which are undeniably fantastic — but where gun owners tend to go wrong is in utilizing it as their EDC (every day carry). There are situations where a pocket pistol is the only option due to legalities or other matters, but throughout our 50 states, those scenarios are the exception to the rule.

The late Col. Jeff Cooper once said, “The first rule of gunfighting is to have a gun.” It’s a good rule to follow, meaning any gun — even one of a smaller caliber — is better than no gun at all. A gun collecting dust in your safe does you no good, so get the gun you’ll actually train with and carry. Of course, Cooper also said, “Perhaps the first thing you should demand of your gun is that it be unfair.” Do you think a .380 ACP gives you an “unfair” (read: good) advantage over an attacker? Based on the aforementioned facts, I don’t think it does. Not at all.

And I, for one, want that unfair advantage.

Table of .380 ACP ballistic data.

Editor’s Note: This article originally appeared in the Concealed Carry 2017 issue of Gun Digest the Magazine.
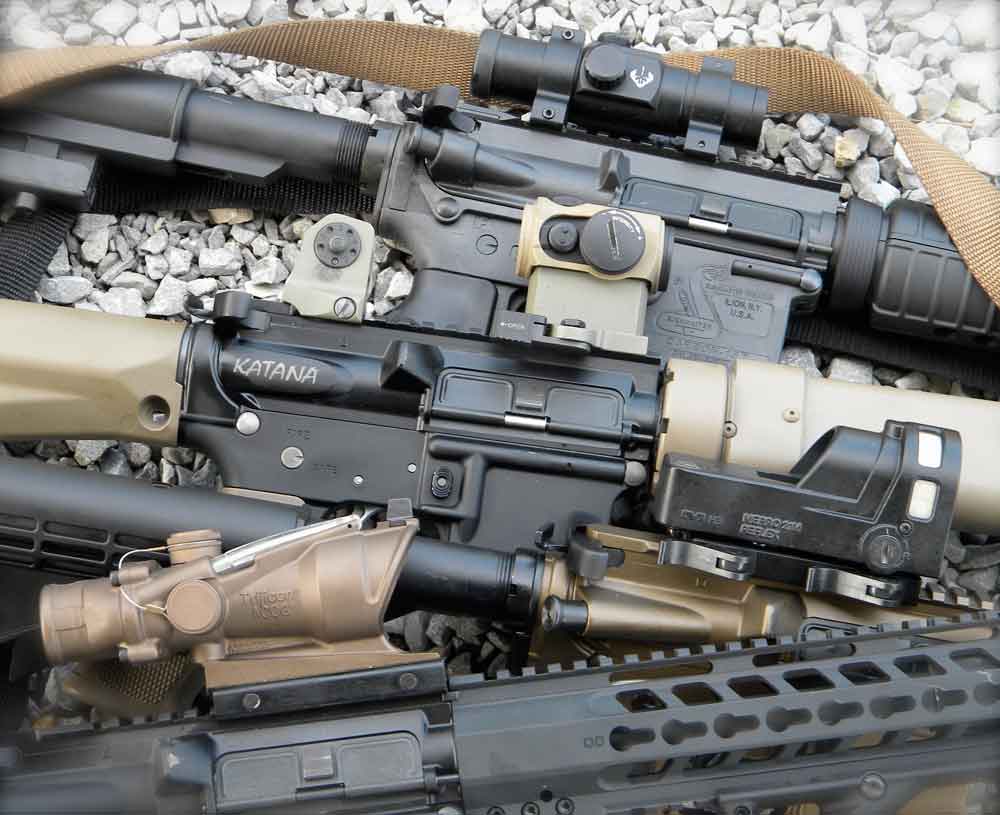
Expand Your Knowledge on Concealed Carry

Ammo: Does Case Shape Really Matter?

1

There have been a number of factory and wildcat cartridges that have played with case design. But has it had any real effect on ballistics?

Hot shots about a case design’s effects on ballistics:

  • As far back as 1946, gun writers and experts already concluded case shape had no effect on velocity or pressure.
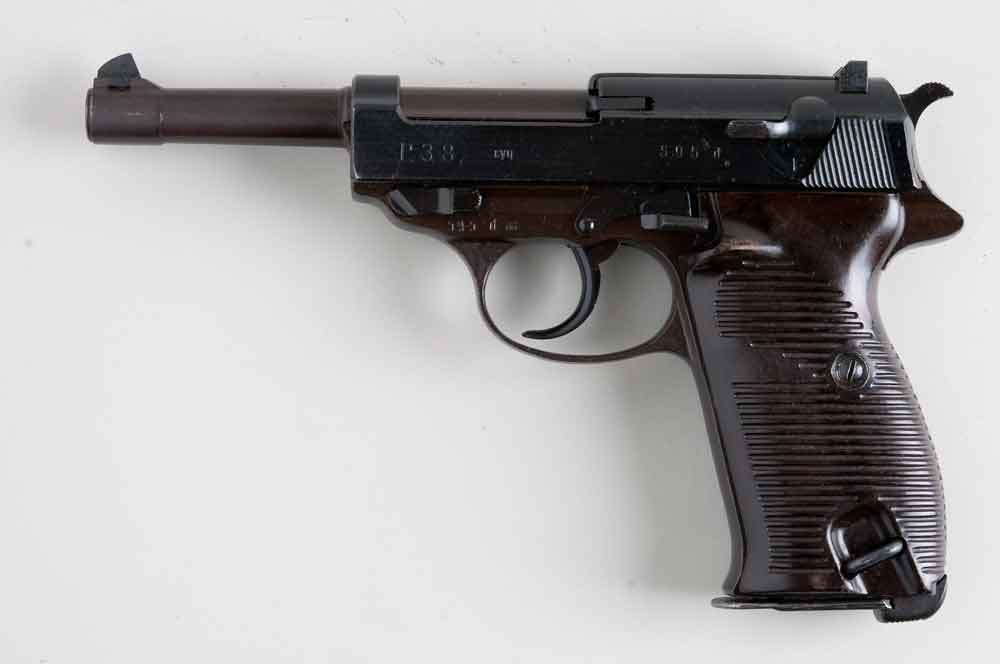
  • No matter how a case is shaped, if it is measured against one of the same caliber and capacity, it will have near identical internal ballistics.
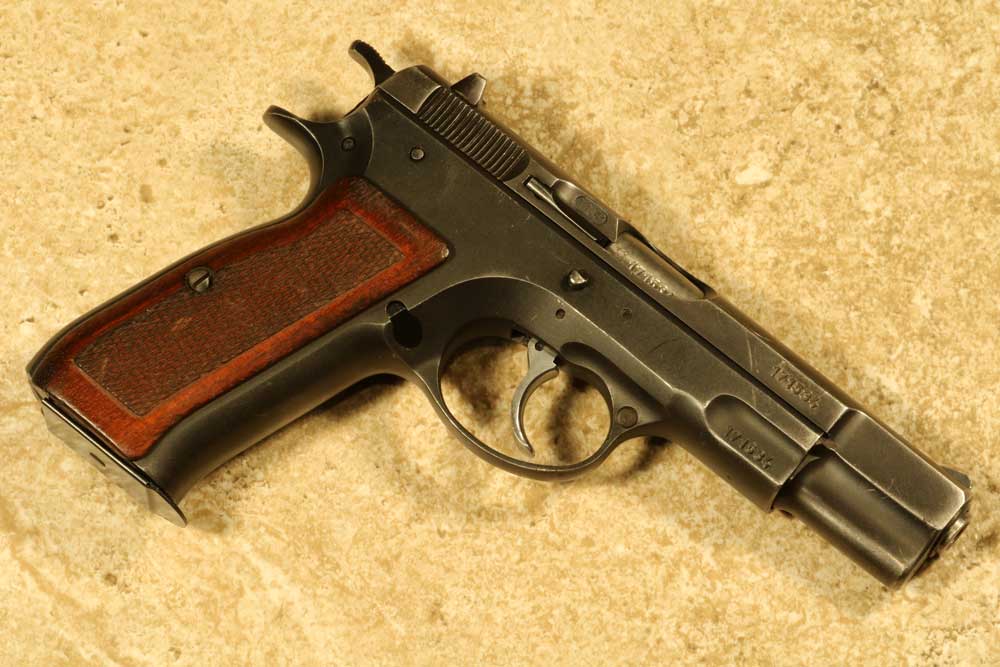
  • Col. G.O. Ashley did a load of range work comparing the .257 Ackley and a wildcat of the same caliber called the .25x60mm C.A. to support the conclusion case shape has little to no effect on ballistic performance.
  • Despite this evidence, there are still wildcatters and manufacturers who claim to have innovative case designs and promise the moon when it comes to performance.
  • Ackley himself acknowledged the limitations of cartridge design, saying: “There is no evidence which substantiates the claim that one cartridge design is more accurate than another.”

As far back as July, 1946, American Rifleman ran an article by C.C. Merideth discussing this very question of case design. His conclusion, “… we must arrive at the conviction that any variation in pressure to velocity ratio ensuing from any alteration in chamber shape is negligible as compared to other purely mechanical changes, such as altering bullet diameter, wear in the throat and many other possible differences between any two apparently identical rifles.”

Bob Hutton knew of the Merideth article mentioned above; he was sure he could disprove the conclusions drawn there almost 20 years earlier. He created a wildcat with the same case capacity as the .219 Donaldson Wasp in a short, fat configuration. Prior to testing, he expected that the design would allow the use of slower burning powders for better overall results. In testing, he found that it required the exact same powder and charge and delivered identical results.

case - A cartridge’s energy is often touted as the measure of its knockdown power when, in fact, it is more indicative of the round’s killing power.

Hutton, while discussing the concept of modern cartridge design (including improved cases), wrote, “Shape, in the mathematics of interior ballistics, makes no difference.” It’s important to understand that we are talking about internal ballistics not how the case functions in a given chamber design. The idea is simple and easily demonstrated. If a cartridge holds 40 grains of powder and if all other variables are equal it will produce statistically identical results along with any other design of the same caliber with any shape chamber you can imagine so long as it also holds 40 grains of powder.

Col. G.O. Ashley did an article that required a fair amount of actual range work. He and a couple of gunsmiths used a .257 Ackley Improved and a wildcat called the “.25x60mm C.A.” The idea was to have cartridges of the same caliber and capacity with totally different shapes (the exact discussion we are interested in here). The two cartridges ended up within 1.1 grains water weight capacity, about as close as you could get. These tests showed that the Ackley case delivered between 3 and 12 fps more velocity than the .25x60mm C.A., statistically that is a zero, especially since the 1.1-grain edge in capacity belonged to the Ackley Improved. All this is in support of Hutton’s statement that case shape has no effect on internal ballistics or how the powder is consumed in the process of driving a projectile down the bore.

Most recently, the SMc line of cartridges came to the market. Mic McPherson and By Smalley partnered to create www.superiorballistics.com (a now defunct web site) to promote their ideas. “SMc naming designation accounts for caliber and usable case capacity. For example, our 5/35 SMc is a 20-caliber (5mm) cartridge holding about 35 grains of water (to base of neck). One important patented design characteristic of all SMc cartridges is a powder column that is between about 2 times and about 2.1 times bullet diameter.”

case - Figuring out the greatest cartridges of all time has the benefit of having to test a ton of ammo.

This is the newest design to claim improvements in ballistics via case design. In reading over the data provided on their site no pressure data was provided. Knowing that pressure and velocity are directly correlated you have to assume from the velocities reported for the 5/35 SMc that they are not afraid to load hot. Now to be fair, they are using high quality brass and this probably helps with handling pressure as the cases are relatively thick in the wall and designed for top pressures.

The only new information that this line of cartridges brings to the table is a fairly extensive test of barrel heating. The conclusion of McPherson in a nutshell is that the SMc design produces less barrel heating and possibly less throat damage than other cases tested.

It appears from the data reported that contentions about barrel heating were proved out in McPherson’s tests. He went on to say that the test should be repeated to insure the results were accurate. So, how does this relate to our axiom that case design has no effect on internal ballistics and velocity? I would say that only further testing could determine if the ideas of the SMc really have merit. Nearly thirty years of experience in gunsmithing, reloading, and barrel making tell me that it’s not likely that any increase in velocity is a result of the design in question, but rather a result of hot loads.

So where does the increased velocity come from in an Ackley Improved case design? It’s very simple — more case capacity. Ackley did not merely change the shape of the case. He added, in most cases, a fair amount of case capacity, which allows for more powder while holding the overall pressure to the same limits. This added capacity is only available for increased loading after the cases are fireformed to the chamber.

Customers often ask, “What pressure does that wildcat operate at?” The answer is, exactly the same pressure as the factory counterpart, or parent case.

Ackley thought he could exceed the pressures of the factory cases … that might be true with antiquated designs like the .30-30 WCF or the .25-35. Cases with a lot of taper were often originally held to lower chamber pressures. It is not true of more modern designs that already have relatively straight walled cases and sharp shoulders, also modern cases normally are designed for higher pressures. A good example of a high pressure design is the .270 Winchester, it was one of the first cases to be loaded to full potential by the factory, modern SAAMI specifications show the .270 at 65,000 psi.

Case - One of the better groups shot from the author’s custom .280 AI. The Nosler Custom 140 gr. AccuBond outshot reloads in the accuracy department.

The .30-06, which many consider to be modern in design, is limited to 60,000 psi by SAAMI. The factories tend to load .30-06 ammo below that pressure level. Why? Because there are large numbers of older and often weaker rifles in general use, so it is wise of the factories to hold those pressures down.

In the case of the .270 Winchester, it was never available in these weaker actions from the factories, and they do not have to take responsibility for custom guns on old actions, so they load it to full potential. This gives us an insight into the reason that Ackley perceived his .270 AI to be no real improvement over the .270 Winchester.

Once fireformed, a .30-06 AI can be loaded to the full potential of the brass. In a modern high quality action that is at least 60,000 psi, and most wildcatters will go straight for the 65,000 psi as SAAMI uses with the .270 and many other modern cartridges.

If you check the pressure on the average handload in any caliber you will find that it is well above the pressures of factory ammunition. So it’s easy to see why folks think that case shape increases velocity. In reality it is simply more powder and the fact that you are probably loading hotter than the factory.

Ackley should have the final word here. “There are no Wildcat cartridges which are actually revolutionary. There are a few which fill gaps between existing commercial cartridges. There are many more which are no better and perhaps not as good as their commercial counterparts.

“There is no evidence which substantiates the claim that one cartridge design is more accurate than another. It certainly cannot be demonstrated that inaccurate barrels can be made more accurate by simply rechambering them to some so-called ‘improved’ cartridge or Wildcat caliber.”

Editor’s Note: This excerpt is from P.O. Ackley: America’s Gunsmith available exclusively at GunDigestStore.com.

MUST READ ARTICLES