Home Blog Page 186

Reloading Dangerous Game Cartridges: Life in the .40s

0
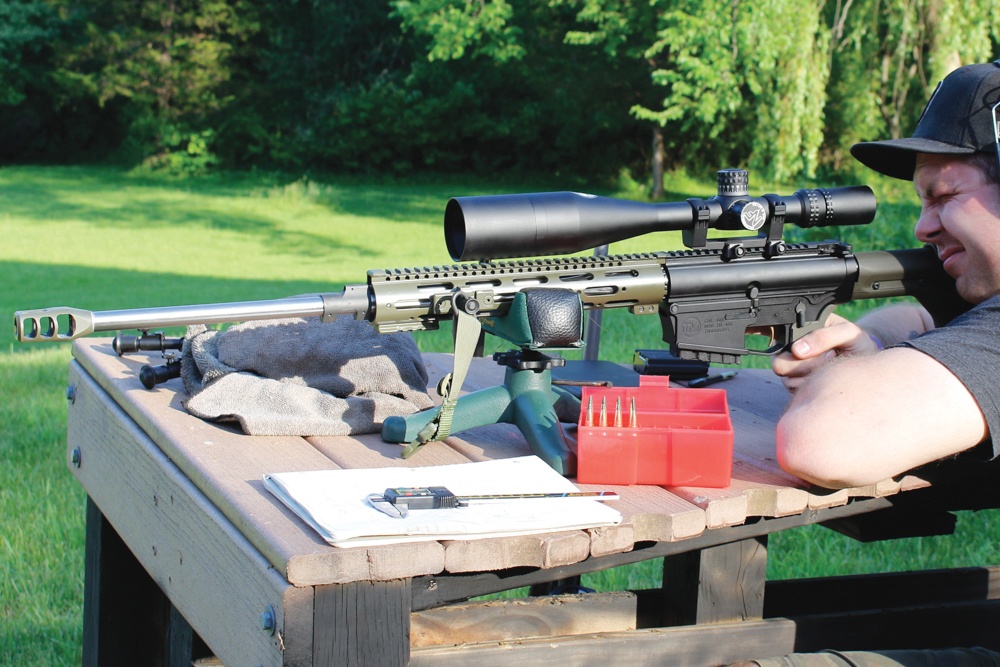
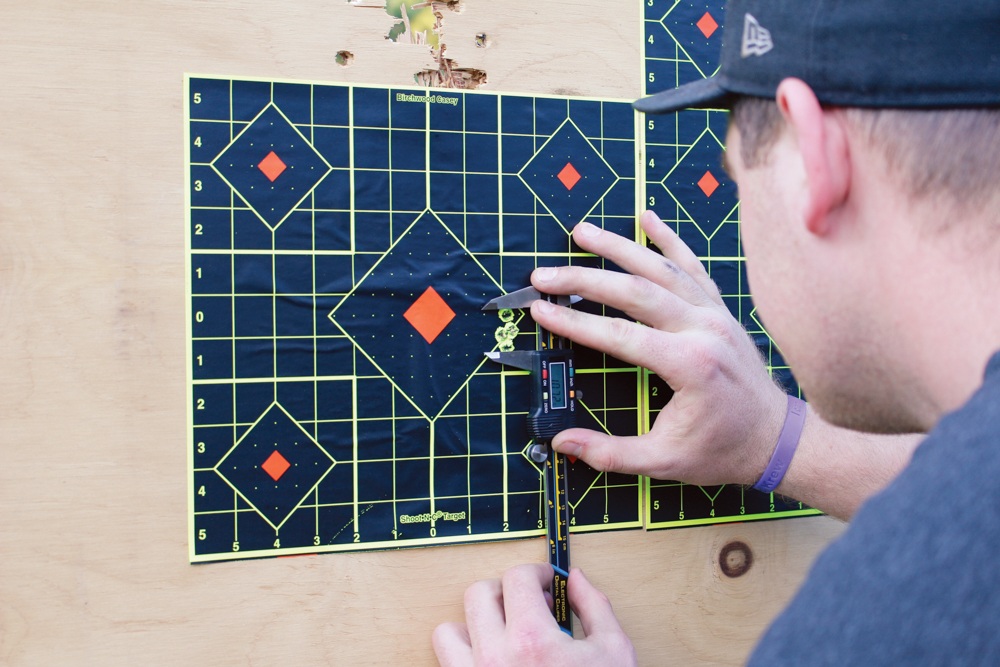
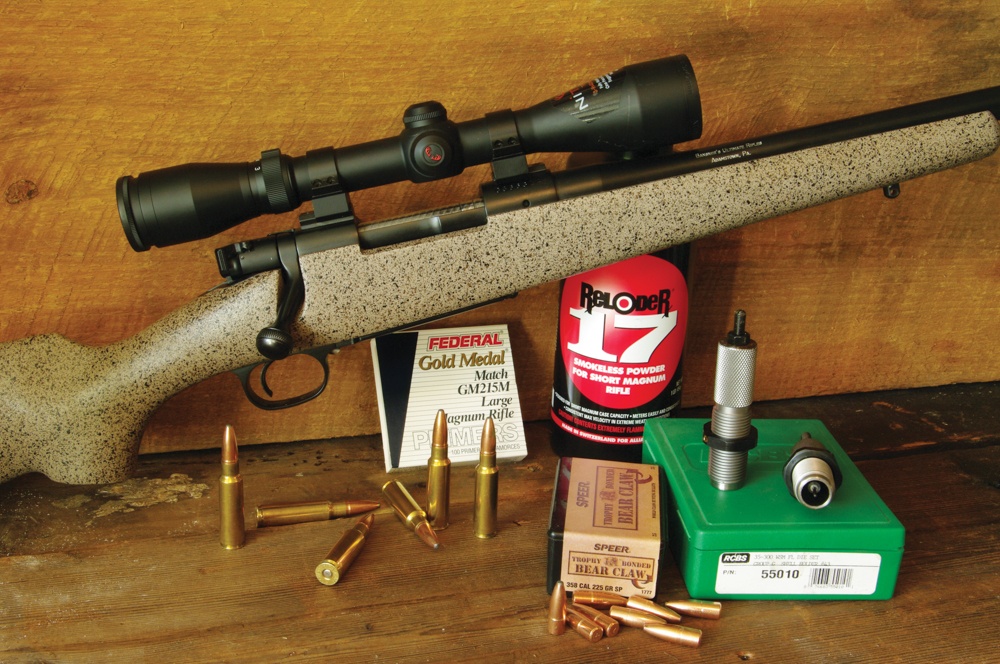
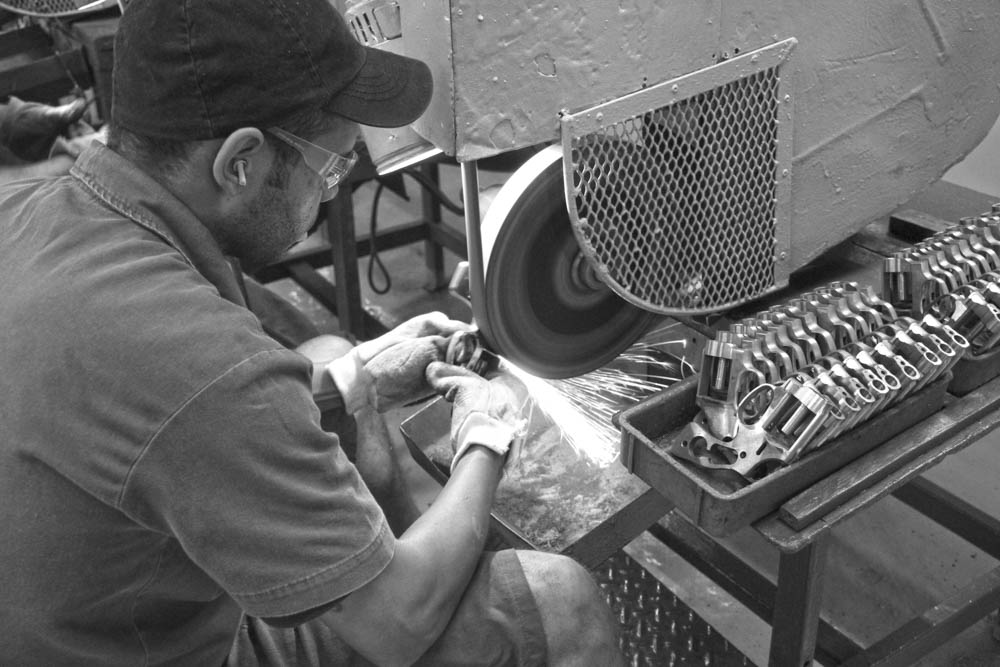
  • Reloaded ammunition is just as reliable as factory ammo when facing dangerous game, assuming you have put in your time at the bench and shooting range to verify.
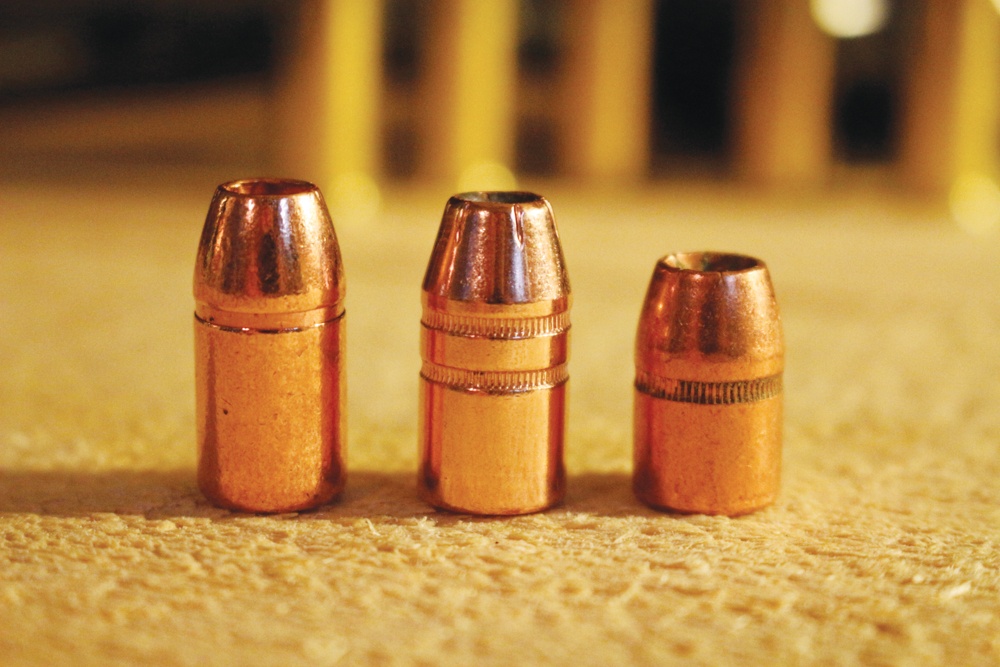
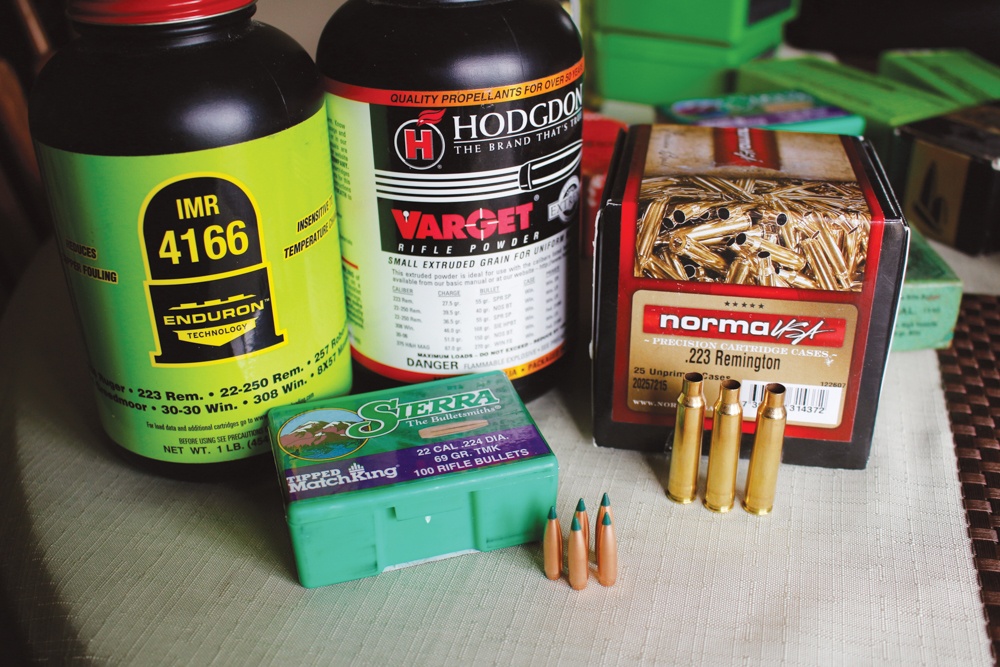
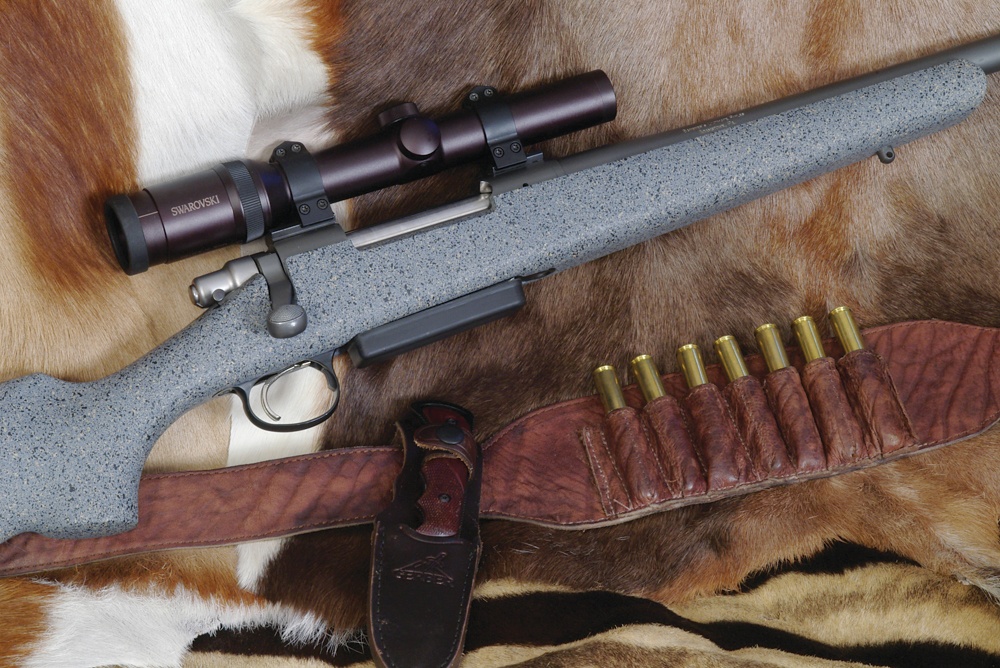
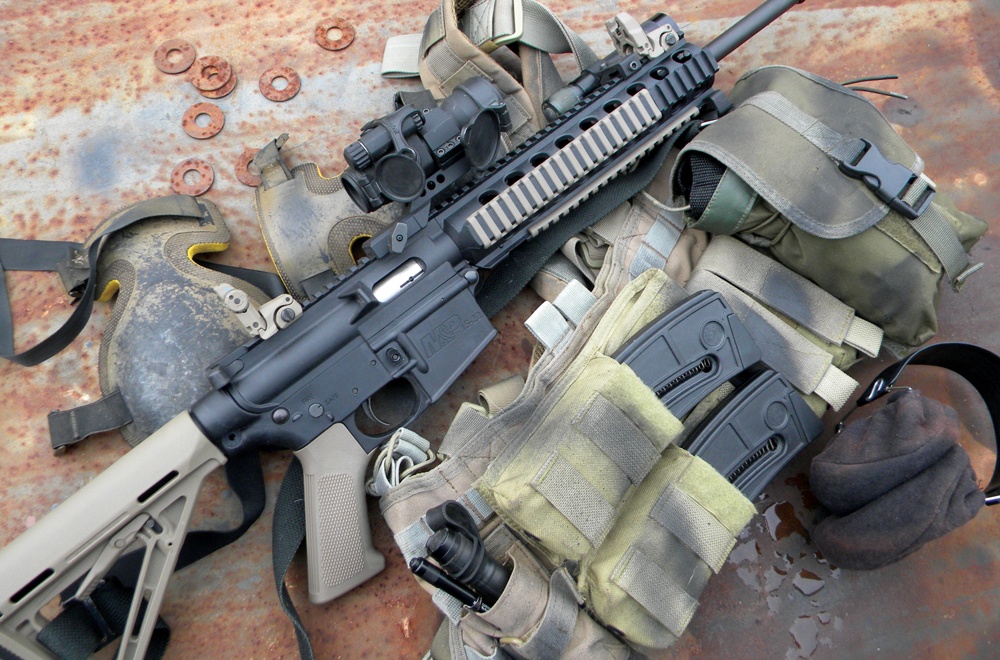
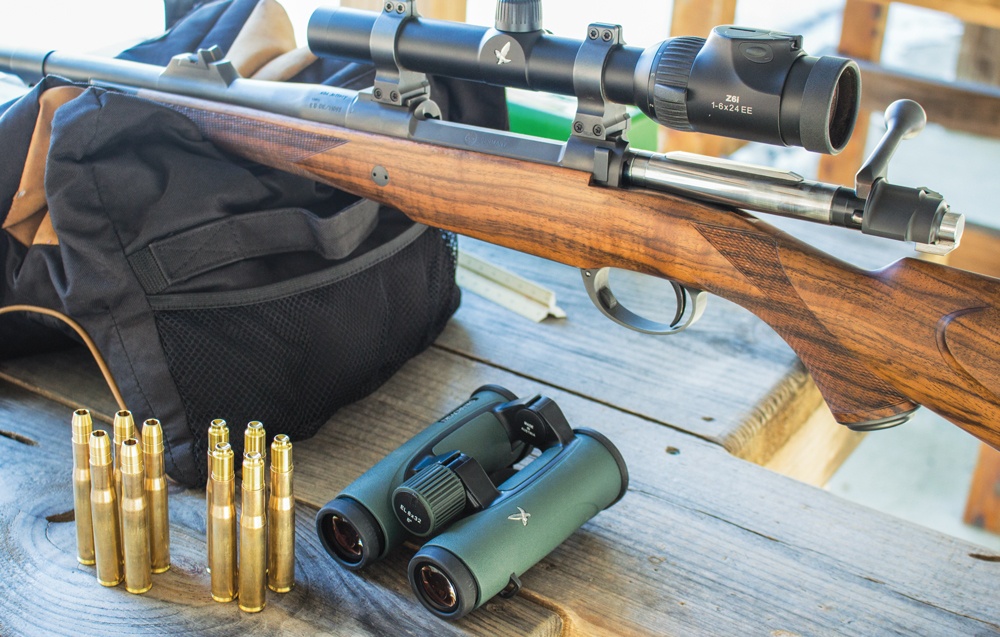
  • Handloading dangerous game cartridges allows you to select high-performance bullets for the toughest critters.
  • Many classic safari cartridges are inherently versatile, a trait handloaders can take full advantage of.

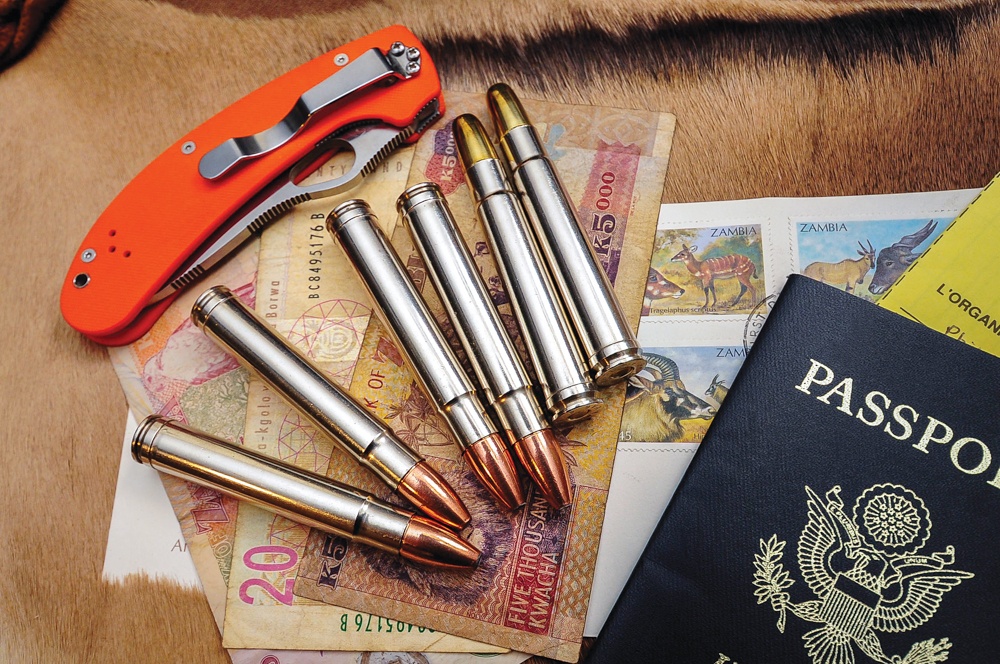
Is reloading your own dangerous game cartridges a good idea? Phil Massaro takes several .40-caliber rifle cartridges to the Dark Continent to find out.

The .416 Remington Magnum and 400-grain Swift A-Frames and Hornady Solids. Photo: J.D. Fielding

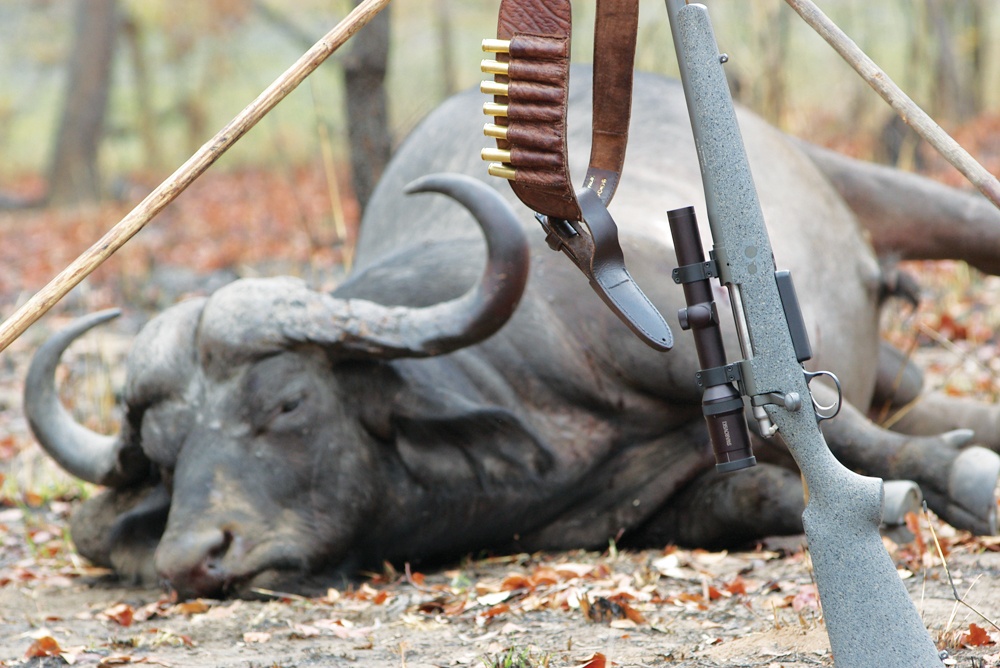
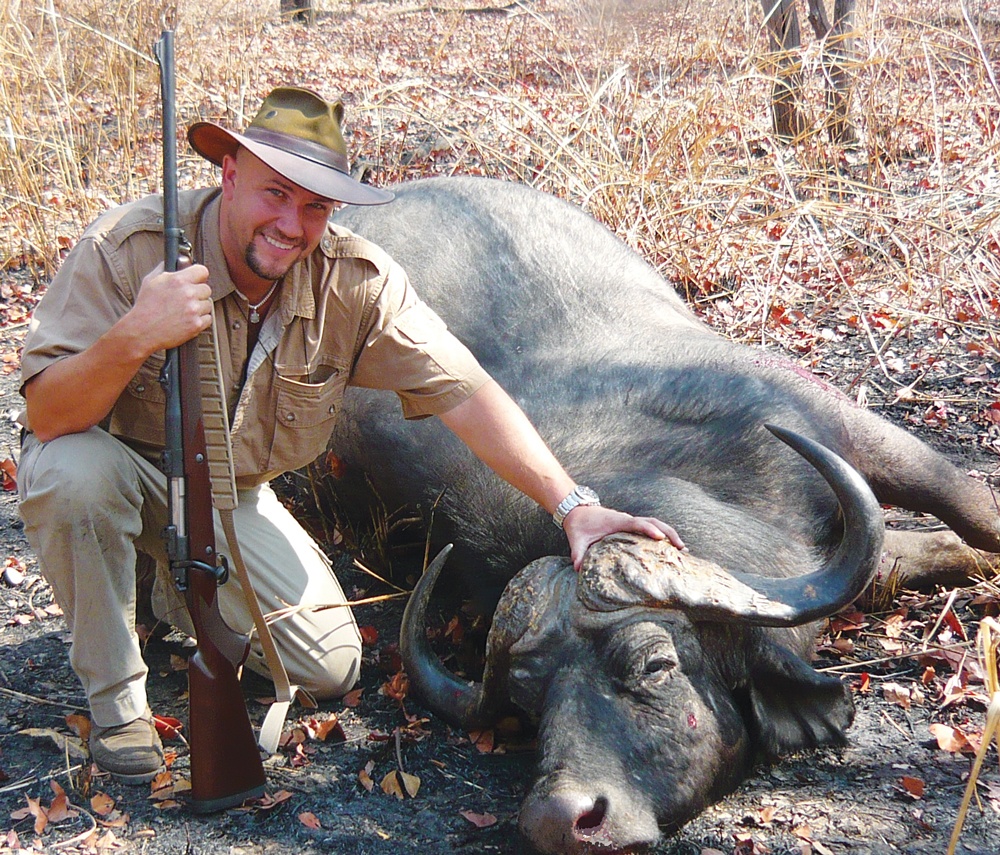
Deep into the Nyaminga block of Zambia’s Luangwa Valley, Professional Hunter Nicky Wightman gingerly spread the shooting sticks, eyeballing the Cape buffalo bull that was lying down 40 yards away. He and Lamec, his tracker and right-hand man, were silently communicating about the bull and whether or not he was old enough to take, while I stood by, with my Model 70 in .416 Remington, handloaded with 400-grain Swift A-Frames.

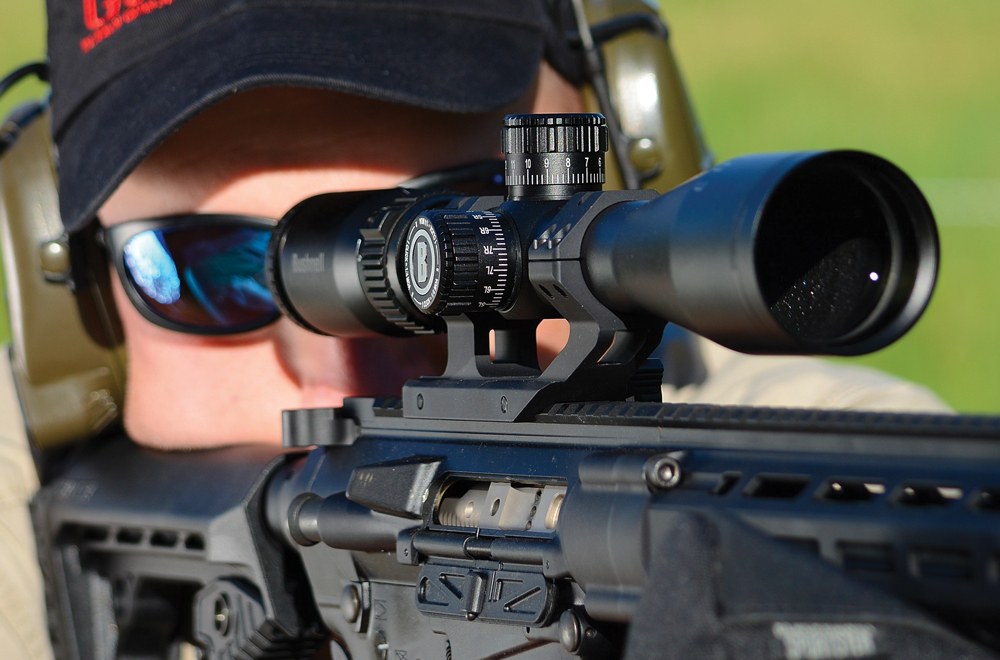
Although every nerve stood on edge, I knew exactly what the rifle would do, as I had spent countless hours at the bench, and in practice from field positions. While the gun gave acceptable accuracy with factory ammunition, it shot sub-MOA with my handloads, and I knew that was the proper ammunition to use.

We sorted that bull out with a well-placed first shot, and a second A-Frame to ‘pay the insurance,’ as the saying goes, and both bullets rested against the offside shoulder skin. They gave perfect performance, imparting all 5,000 ft.-lbs. within the bull, and killed quickly and humanely.

Buffalo bull taken with .416 Rem handloads.

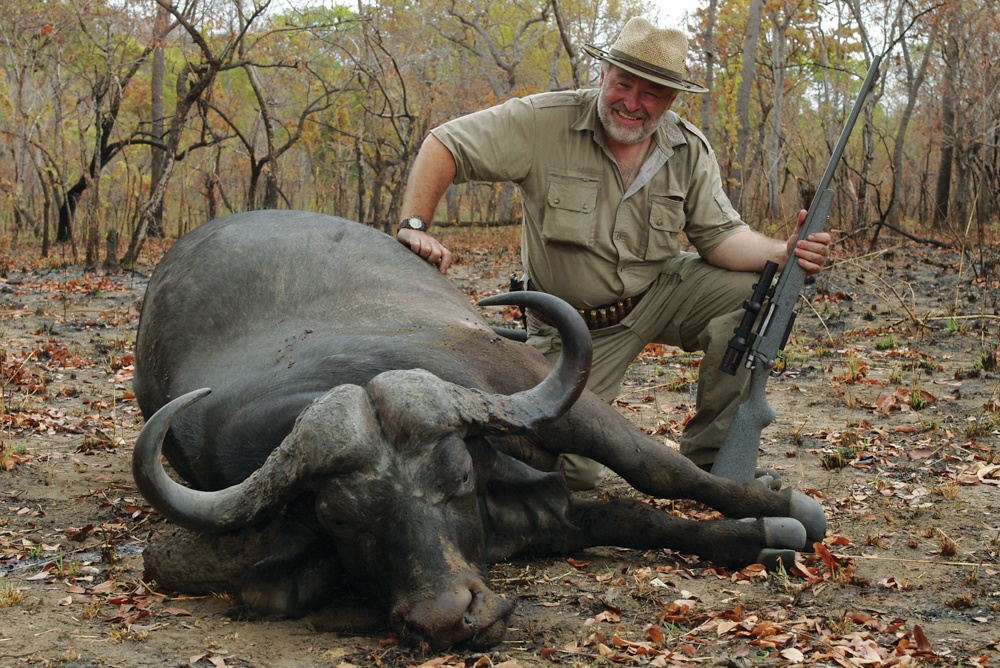
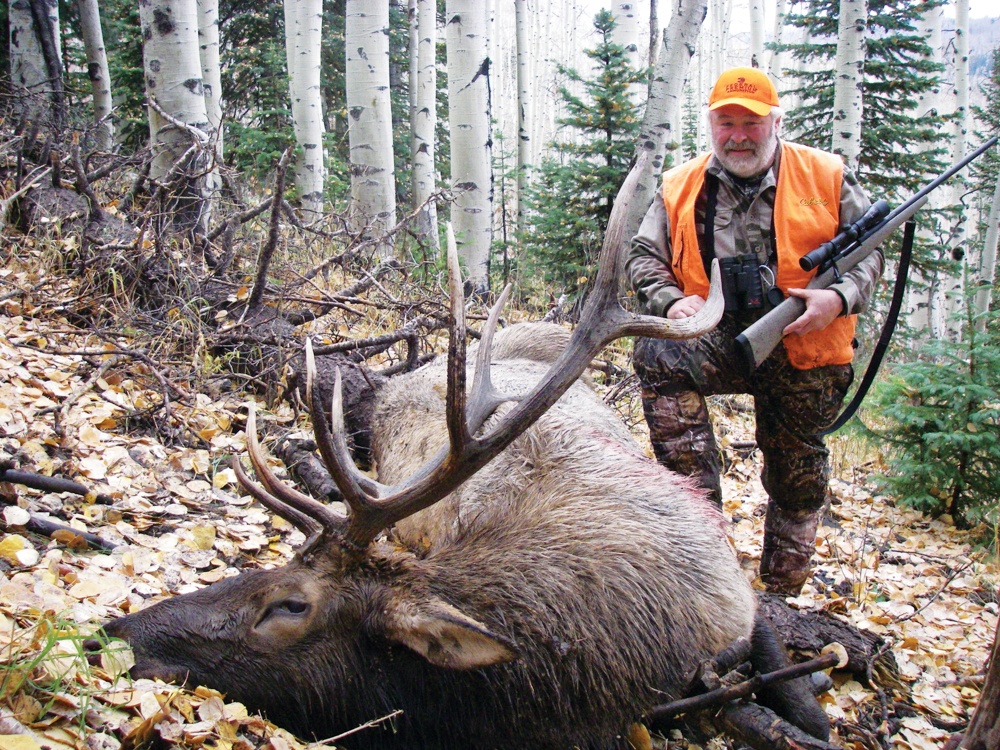
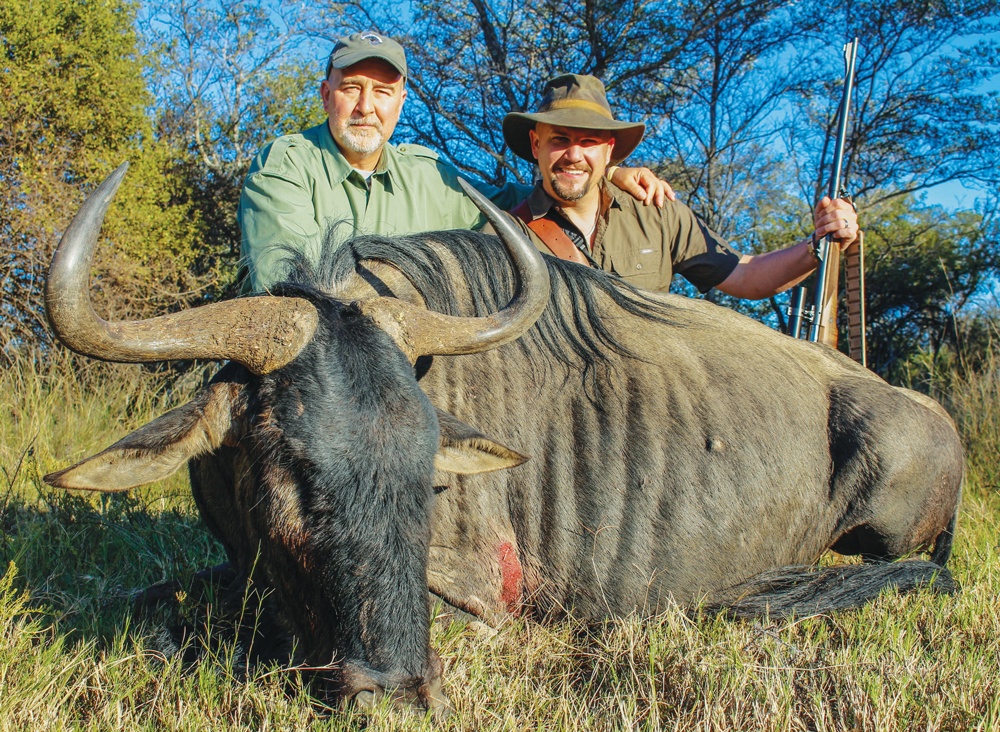
Fast forward almost four years and I stood with PHs Tim Schultz and Danie Wingard in Matabeleland North in Zimbabwe, with a huge-bodied bull elephant on the other end of the line. This time I carried a Heym Express in .404 Jeffery, handloaded with 400-grain Woodleigh Hydrostatically Stabilized Solids, at a muzzle velocity of 2,280 fps. It was a short hunt, and the bull was essentially gift-wrapped, feeding at 16 yards.

The first shot nearly put the bull down on his haunches, and the second sealed the deal. My hunting buddy Dave deMoulpied had booked this hunt for me, and had come along as a camera man. After the bull was down, and the respects were paid, Dave showed me the footage. The Woodleigh solid had hit exactly where aimed, and the video showed the effect of that well-designed bullet, a heart/lung shot which penetrated the entire elephant.

“Buddy, I’m glad you went with the Woodleigh,” said Dave. “That hit was as impressive as the shots I’ve seen from .470s.” Now, I know for certain that the .404 Jeff is not the equal of the mighty .470 Nitro Express, but it is a perfectly viable big game cartridge, suitable for absolutely anything on earth. That’s what I want to discuss: the benefits of handloading rifles in the .410-.423 calibers, and why they make so much sense for the traveling hunter.

Everybody who has hunted Africa is aware of the versatility of the famous .375 H&H Belted Rimless Magnum; there’s simply no denying the fact that a good .375 H&H will get the job done, regardless of species. I’ve heard from more than one PH, “When in doubt, bring a .375 H&H.”

That said, when it comes to the heavyweights like buffalo and elephant, there’s no denying that the .40s hit harder, and the visible effect of the shot is plainly evident. However, the beauty of the .375 is its versatility; it can take the biggest elephant bull, but is also suitable for oribi, duiker and steenbok.

I own a .375, I shoot it and I love it, but I’m also a huge fan of the .40s for reasons we’ll outline shortly. What I like to do as a handloader, is to do my best to approximate the versatility of the .375s in the .40 calibers.

Accuracy of .404 Jeffery Heym rifle with Woodleigh Hydro solids.

In this class of rifles, I like the following cartridges (in order of caliber) for a versatile hunting rifle: the .450/400 3” Nitro Express, the .416 Rigby, the .416 Remington, the .416 Ruger, the wildcat .416 Taylor, and the venerable .404 Jeffery. All of them have made their reputations shooting a 400-grain bullet of good sectional density, at muzzle velocities of 2,050 fps (for the .450/400), up to 2,400 fps for the .416s, with the .404 coming in somewhere in the middle, depending on how you load it.

The classic recipe of the 400-grain bullets at 2,400 fps from the .416s will yield just about 5,000 ft.-lbs. of kinetic energy at the muzzle, yet is surprisingly easy on the shoulder, especially in comparison to the .458s pushing a 500-grain slug at 2,150 fps or so.

The .450/400 3-Inch Nitro Express

The .450/400 NE works well at the much lower velocity, being a perfect choice for the recoil-sensitive shooter to use against the heavyweights. The penetrative qualities of the .410-inch diameter bullet are legendary; flipping through John ‘Pondoro’ Taylor’s classic African Rifles and Cartridges will yield the following comments:

“It’s one of the grandest weapons imaginable for all big game hunting…  …I have used it extensively on all kinds of African game from elephant down with the greatest possible satisfaction.”

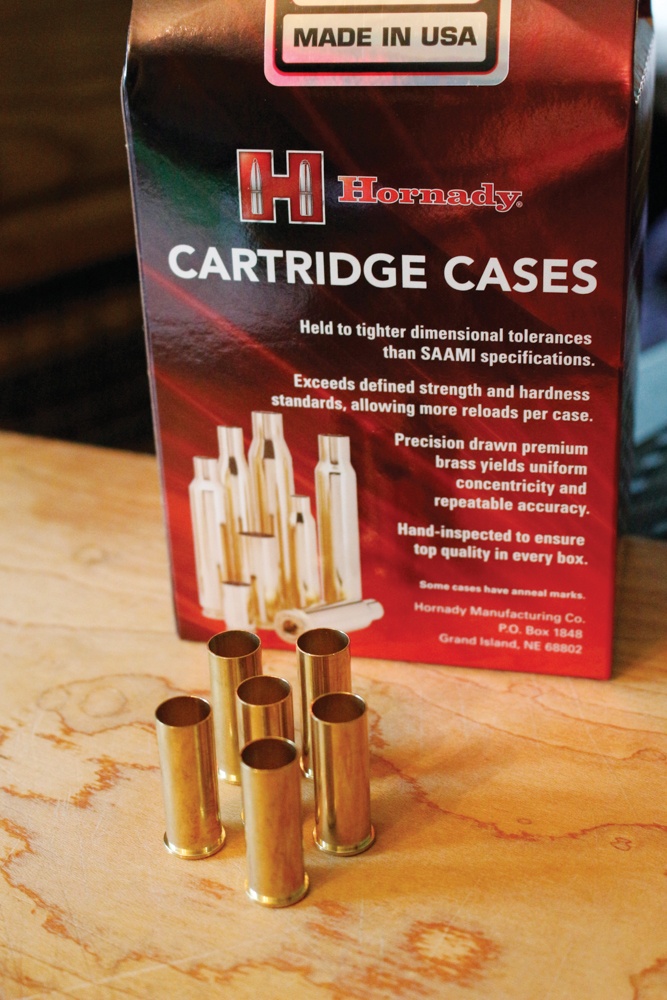
That is what I would call a ringing endorsement from a man with decades of field experience. The bullets of today are much better than those of Pondoro’s era, and the recent revival of this case is due to Ruger chambering their No. 1 single-shot rifle in this cartridge, and Hornady’s factory ammo available with the potent combination of DGX and DGS bullets.

Dave deMoulpied’s .416 Rigby with 325-grain Cutting Edge Safari Raptors.

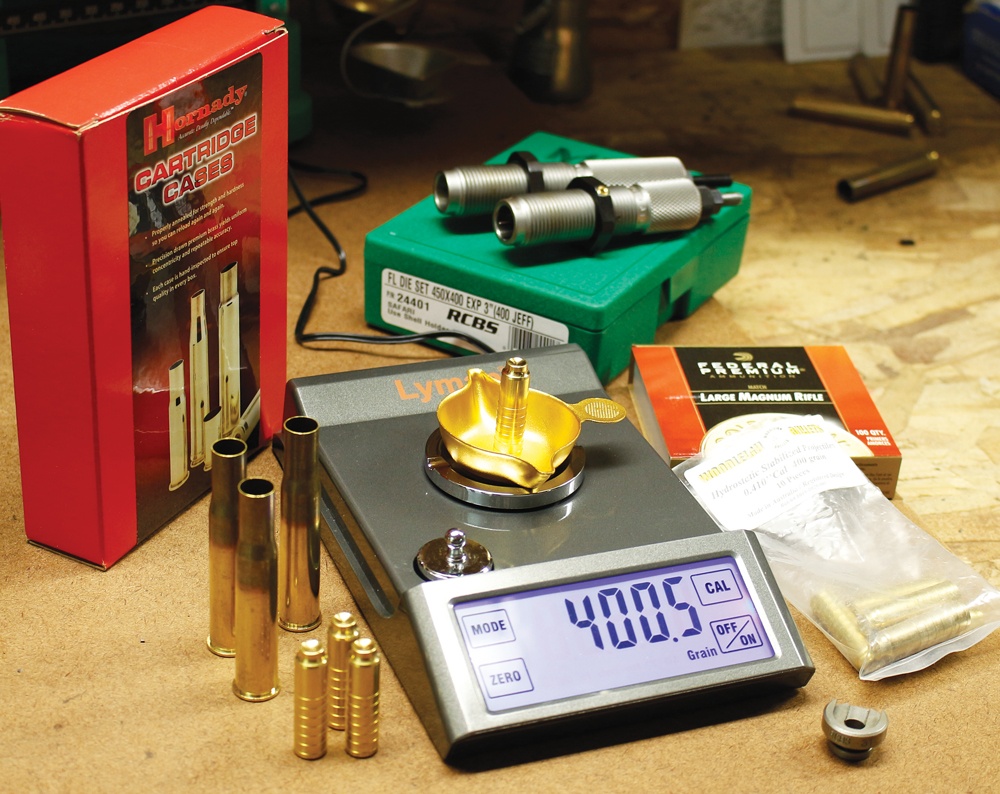
My buddy Doug Giles, international hunter and author of Rise, Kill and Eat, is a huge proponent of the .450/400, and has both the No.1 and a sweet double in this cartridge. He asked me to handload some ammo for his upcoming safaris, which will include buffalo and big cats. I immediately recommended the North Fork trio of bullets: the semi-spitzer bonded core, the Percussion Point (similar to the semi-spitzer, but skived at the nose for greater expansion on cats), and the fantastic monometal Flat Point solid, all in 400-grain configuration. His double regulates well with the existing Hornady ammo, but Doug was after a custom ammunition experience.

I got my hands on some Hornady cases and a set of RCBS dies, and taking a long look at several reloading manuals, I settled on a load of 83.0 grains of Alliant’s Reloder-19 and a Federal GM215M primer, which gave a muzzle velocity of 2,075 fps, in close proximity to the Hornady load, and (thankfully!) it shot just perfectly from Doug’s rifles. He is now well equipped for any game animal on earth, including the dangerous stuff of Africa and North America.

Author with Blue Wildebeest.

The .416s

Undoubtedly, we owe the popularity of the .416-inch diameter cartridges to the writings of Robert Ruark, as he made both PH Harry Selby and the .416 Rigby famous in his classic safari book Horn of the Hunter. I, for one, am very happy he did that, because prior to that 1950s literary gem, the .416 was a proprietary cartridge that was little used.

During the 1960s and 70s, as Kynoch faded away as an ammunition producer and supplies dwindled for the classic British rifles, an American PH named George Hoffman necked the .375 H&H case up to hold .416-inch bullets, resulting in the .416 Hoffman.

Bob Chatfield-Taylor did a similar thing, but based his case on the shorter (2.500-inch) .458 Winchester Magnum case, giving birth to the .416 Taylor. Remington saw the value of the Hoffman design, and modified their 8mm Remington Magnum case to create the .416 Remington Magnum, released in the year I graduated high school, 1988. The Hornady/Ruger team had great success with the .375 Ruger cartridge, and modified the beltless design to yield the .416 Ruger, fitting in a standard-length rifle action.

All these cartridges, generally speaking, deliver the wonderful 400-grain .416-caliber bullet at or near 2,400 fps, and this is a magic combination. For the handloader, there are many premium 400-grain bullets available that aren’t commercially loaded.

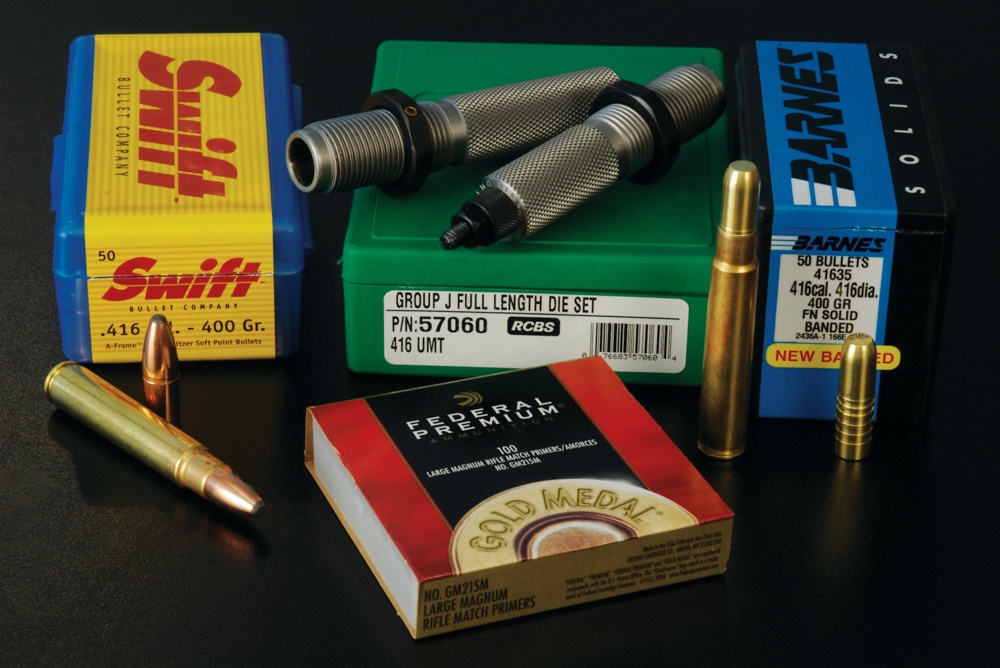
Remington did, at one time, load the 400-grain Swift A-Frame for the .416 Rem, but I don’t find that in their catalogs any longer. I’ve said this before, but it warrants repeating: I feel that the Swift A-Frame, in a heavy-for-caliber weight, is the best Cape buffalo bullet on the market. It gives good expansion at a wide range of velocities, fantastic (90%+) weight retention, but most importantly it is strong enough to penetrate the biggest buffalo at any angle. I’ve used it extensively in my .416 Remington, not just on buffalo, but on a wide variety of plains game, from bushbuck and puku, to warthog and hartebeest, all with good results.

Author’s .404 Jeffery ammo.

Dave deMoulpied’s AHR in .416 Rigby loves the 400-grain A-Frame, but at a reduced velocity of 2,250 fps, because that’s where we found the accuracy. Ninety grains of Reloder-19 prints three of them into sub-MOA groups at 100 yards.

Pair these A-Frames with a good solid and you’ve got the quintessential buffalo battery. While the Barnes Banded Solids, Trophy Bonded Sledgehammers and Hornady DGS are fantastic choices, for buffalo especially, I like a pair of ‘new-wave’ designs that have come along.

The idea is this (although it is changing quickly): The first shot on buffalo should most definitely be a premium soft point, many of the older Professional Hunters demand a solid (read non-expanding) bullet for the follow up shots, to ensure penetration from any angle. The solids give exactly that; but offer no expansion at all to destroy vital tissue. Here’s where the new-wave designs enter the mix.

The Woodleigh Hydrostatically Stabilized Solid, and the North Fork Cup solid, both have a small “dish” shaped meplat, enough to either create a shockwave of damage, or to give the slightest bit of expansion at the meplat for more tissue damage than traditional solids give. For buffalo, I like them both very much. Both shoot very accurately, and most importantly, to the same point of impact as most of the premium softpoints.

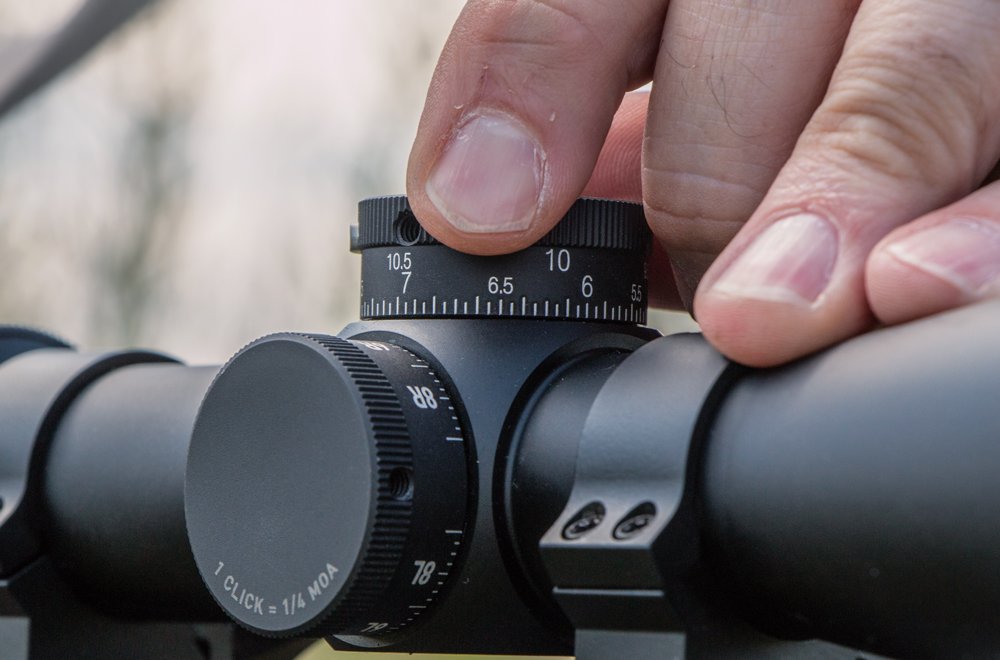
That idea of getting your solids to hit the same place as your softpoints, can be a bit of work for the handloader. The .375 is one of the most forgiving calibers in that respect, and I can say that my .416 Remington is as well.

The .450/400 makes a great low-recoil choice for Africa.

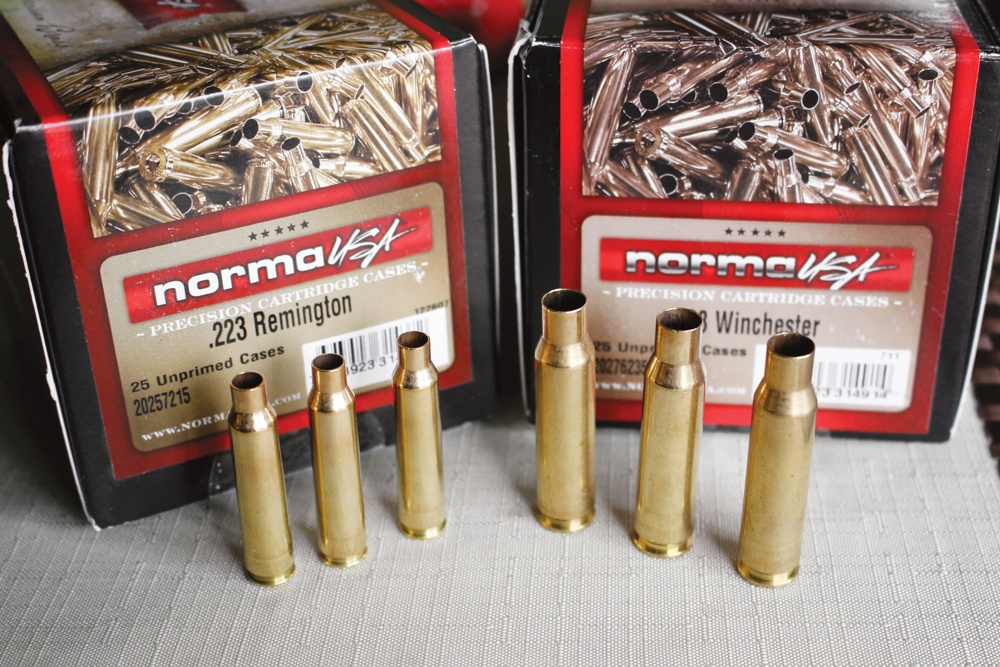
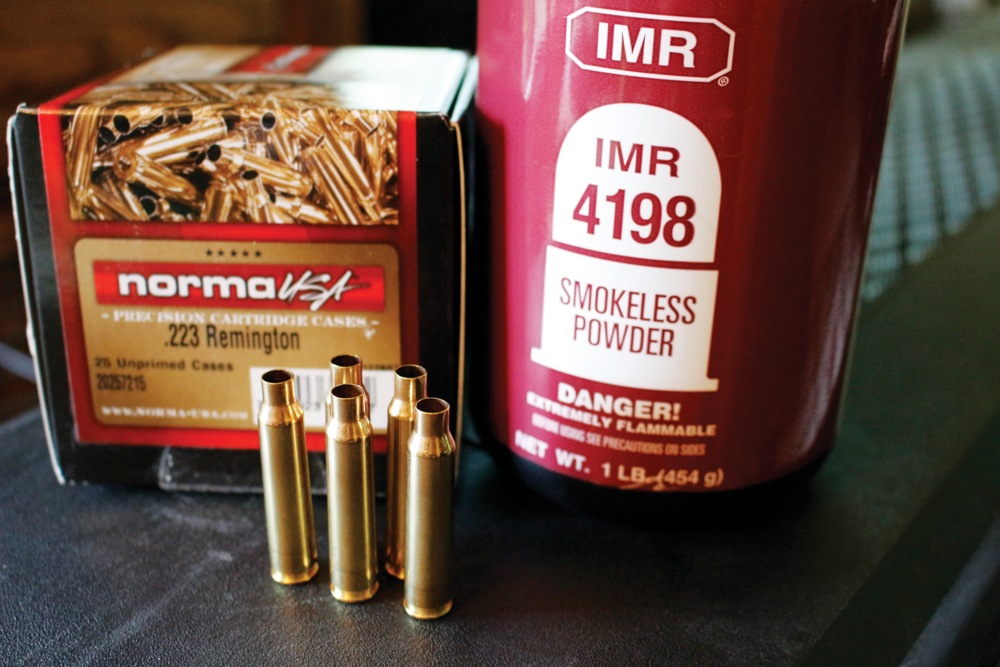
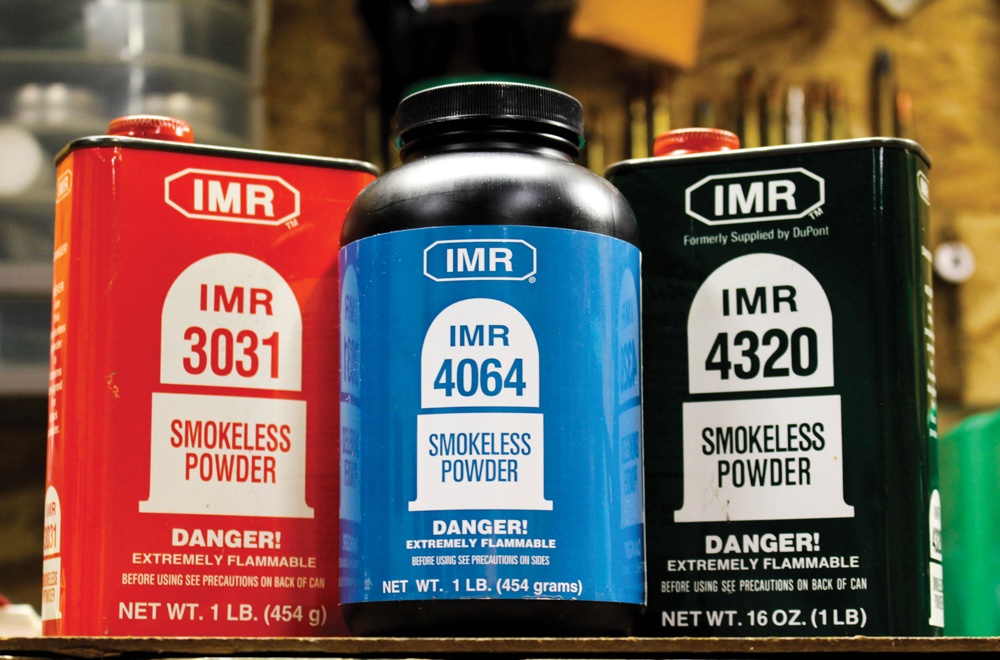
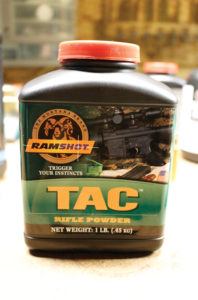
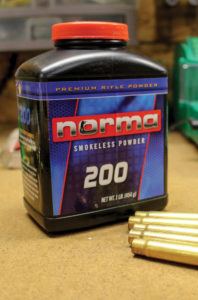
My Model 70 .416 Remington likes just about any 400-grain bullet over a charge of 78.0 grains of IMR-4064 with the Federal GM215M primer. I use Remington nickel cases for the solids, and Norma brass cases for the softpoints, so I can easily distinguish one load from the other. If your rifle won’t regulate softs and solids to the same point of impact, you’ll have to tinker with the loads until you can find the best combination of individual accuracy for each load, and a common point of impact.

Generally speaking, I’ve found that backing off the load  a grain or two for the solids can help bring them into line; in my experiences they tend to hit high.

Now, more about that versatility thing I mentioned early on. The .416s certainly shine when using the 400-grain slugs, and that weight makes a great all-around load. It’s been my go-to choice for my .416 Rem. on two safaris, and it works well.

But maybe there are situations where you’d like to use a .416 with a lighter load, for a flatter trajectory. That very thing happened to me on my last safari. It was actually two safaris in one, as Dave deMoulpied and I were hunting for three days in the Waterberg District of South Africa for plains game, and then heading up to Zimbabwe for elephant near the Hwange National Park. I had the aforementioned Heym in .404 Jeffery, but I asked Dave to bring his .416 Rigby, in case some misfortune should befall the Heym.

For plains game, we discussed some lighter bullets that would give suitable performance and a flatter trajectory, should a longer shot present itself.

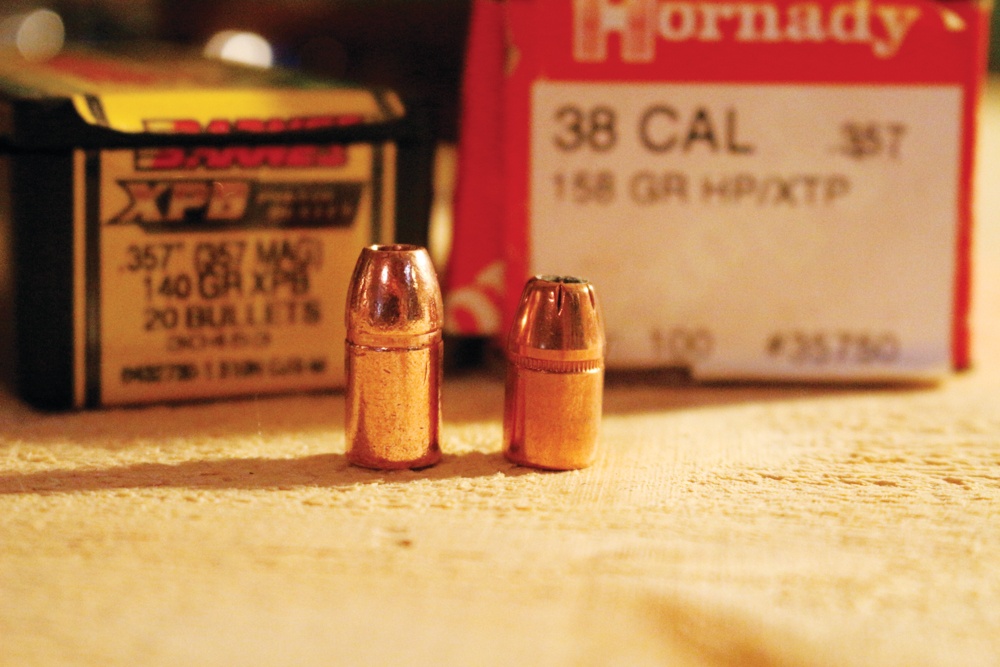
Enter Cutting Edge Bullets, with their 325-grain Safari Raptor. These bullets are constructed of brass, with a deep hollowpoint. The walls of the hollowpoint are skived, so that when the bullet strikes flesh, the walls of the hollowpoint break into small blades, creating all sorts of impact trauma. The rest of the bullet remains at caliber dimension, to penetrate very deep into the vital organs, often penetrating the entire animal. Really cool concept, and I was eager to put them through field tests.

.416 Ruger Hornady cases, Barnes TSX 400-grain bullets and Hodgdon’s VARGET powder.

We pretty much nailed it on the first try. A mix of Hornady .416 Rigby cases, an even 100.0 grains of Reloder-22, Federal 215 primer and the CEB 325-grain Raptor printed groups of just under an inch at 100 yards. Dave made a few clicks of adjustment on his scope, and he was set. The Oehler chrony showed 2,550 fps, so longer shots wouldn’t pose a problem.

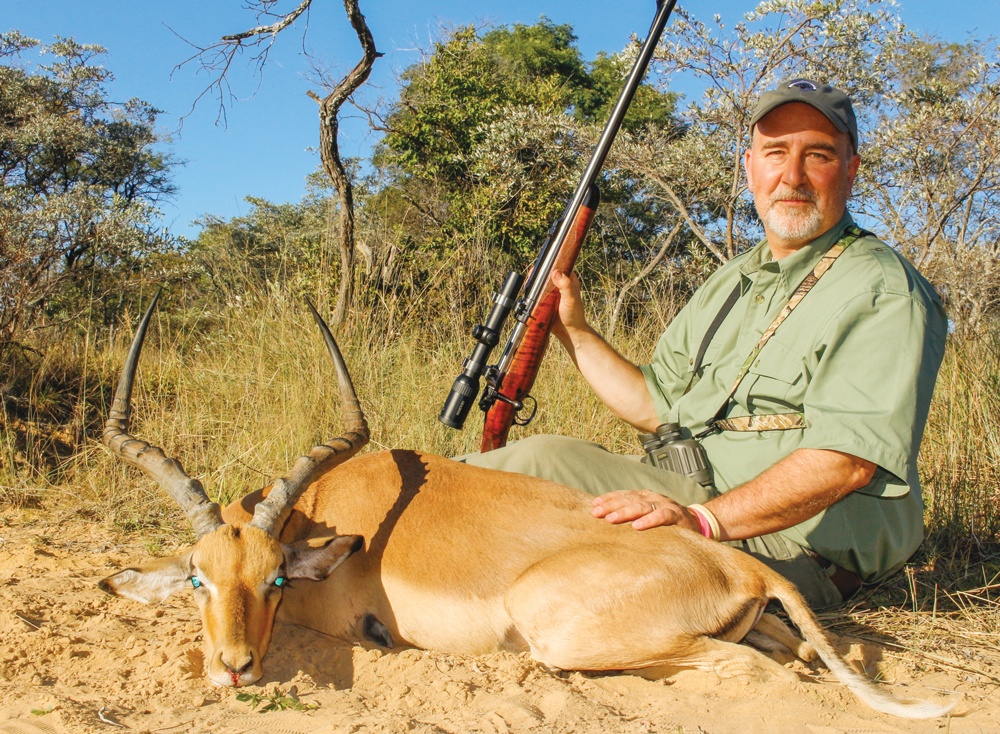
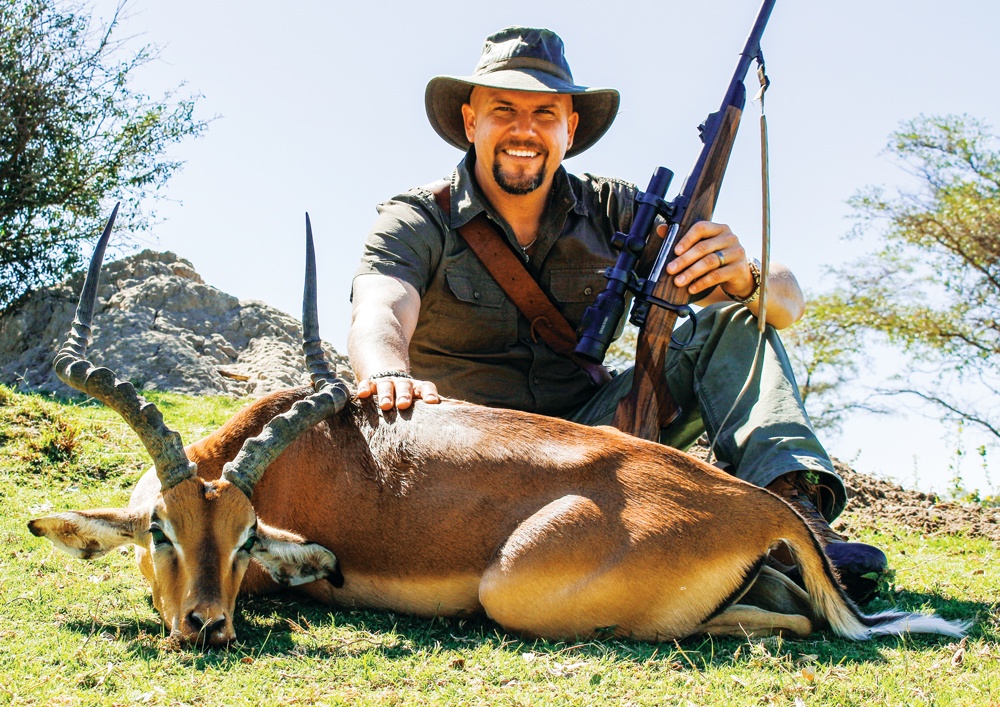
The big cow wildebeest dropped to a frontal shot from 80 yards as if she were pole-axed; and Dave’s impala didn’t even have time to react. Both were one-shot kills, and while there may have been a bit of bloodshot meat, these bullets certainly did their job. It was Dave’s zebra that impressed me most.

The striped horses of Africa have a reputation for being very tough, especially if hit improperly. Dave put that 325-grain Raptor right in the boiler room, a perfectly placed shot, from just under 200 yards away. The beautiful mare simply fell out of the scope. These lighter bullets do quite a bit for the versatility of the .416s, especially when hunting plains game. Other that the blades, there was nothing for the skinners to recover.

On the other end of the spectrum, there are some heavyweights available for the .416 rifles as well. Woodleigh’s Weldcore and Solid bullets both come in 450 grains, and we can drive them to 2,150 fps. Those heavy 450s have a sectional density of 0.371, and should be fantastic for buffalo, elephant, hippo and other plus-size game animals. Another way to look at it is that you’re only 50 grains lighter than the .458s, and while you’ll be giving up a bit in frontal diameter, you gain in the SD figures.

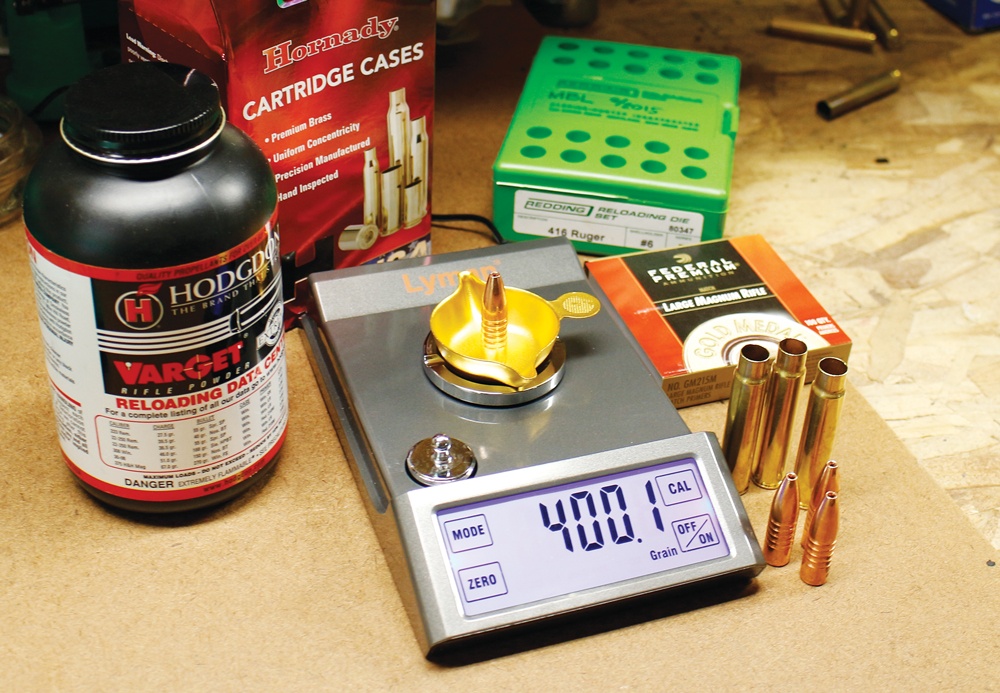
The .416 Ruger case is, like the Rigby, a beltless case, but shortened to fit in a standard .30-’06 length action. My good buddy Tim Wegner absolutely loves this cartridge, and asked me to handload him some of the fantastic 400-grain Barnes TSX bullets.

Dave deMoulpied with an impala.

While the factory stuff claims to reach the mystical 2,400 fps, even in the shorter Ruger African barrels (I haven’t had an opportunity to test the factory stuff), according to the manuals the handloads should run somewhere between 2,250 and 2,300 fps.

I had the best blend of velocity and accuracy using 75.5 grains of Hodgdon’s VARGET, in Hornady cases, fueled by a Federal GM215M primer. This gave 2,270 fps at the muzzle, and just over MOA accuracy – plenty enough for big bears, buffalo, or any other nasty worthy of a premium softpoint.

Among the .416s, I’ve found that the Rigby case gives the most severe recoil, due to the fact that the voluminous case (designed around the temperature sensitive Cordite) requires 90-100 grains of powder, depending on burn rate, while the Remington and Ruger cases run at 75-80 grains for most loads, albeit at a higher pressure.

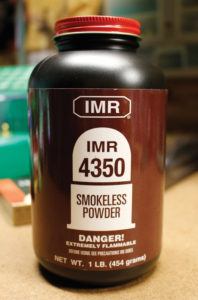
While I like the Rigby, and appreciate its place is African cartridge history, I feel that the Remington case especially has been one of the most useful modern updates of a proven classic, offering all the same ballistics in a cartridge case and rifle that is smaller and handier in the field. The Rigby case will work best with powders on the slower end of the spectrum, like IMR4350, Reloder-19 and 22 and H4831, while the Remington and Ruger cases like a medium burning powder, like Reloder-15, IMR4064 and Hodgdon’s VARGET.

The .404 Jeffery

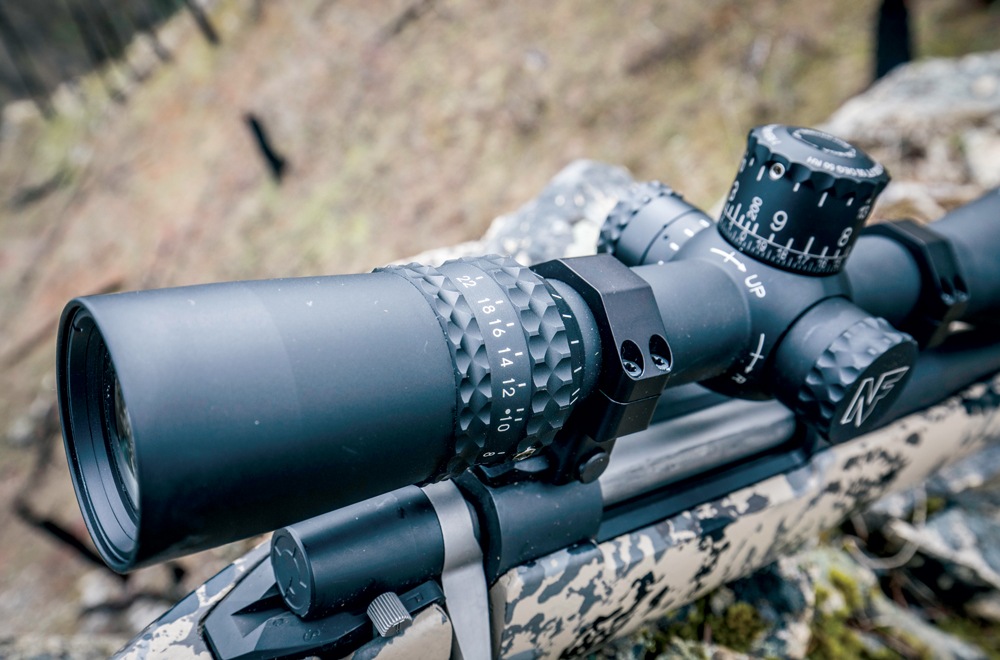
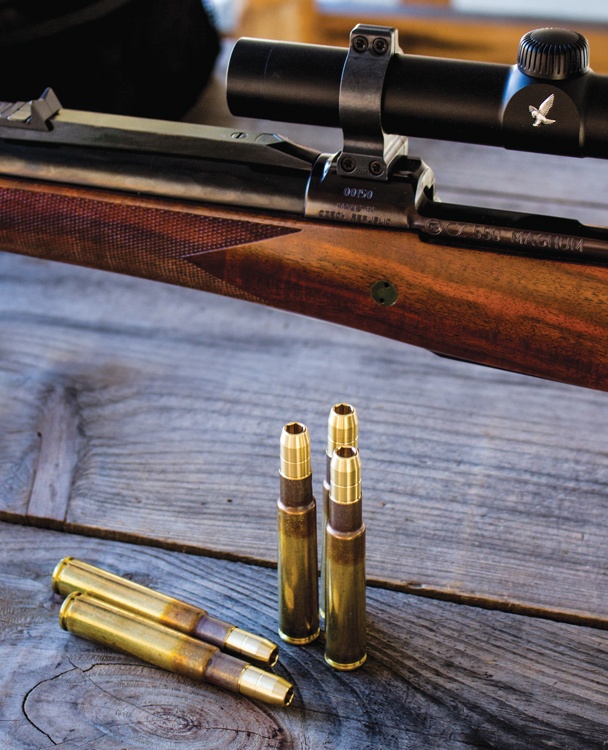
I feel like I’ve found a new old toy in the attic; the .404 Jeffery was always a cartridge that interested me, but until recently I didn’t have an opportunity to experiment with it. My buddy Chris Sells, of Double Gun Imports, acts as the importer for Heym rifles of Germany. While Heym has a fantastic reputation in the double rifle community, their Express bolt-action rifle is a little-known gem.

Stocked to feel like a fine British rifle of classic vintage, and using Heym’s proprietary action, which they make differently for each individual caliber, this rifle is poetry in steel and walnut, balancing like a fine shotgun. When Chris offered the use of a .404 Jeffery for my plains game/elephant safari, I jumped at the opportunity.

The .404 Jeff has long been an African classic, being chosen as the standard issue rifle cartridge for most of Eastern and Southern Africa’s game rangers, and its moderate recoil and striking power offer a fantastic balance of shootability and performance.

Ruark’s writing propelled the .416s to the forefront, but the .404 was truly the workhorse of Africa. Designed in 1909, the Jeffery case was intended to be the rimless equivalent of the .450/400; however the bullet diameter changed from .410 to .423, for reasons I can’t explain.

40s-13c
Author with Impala ram.

At any rate, the muzzle velocity of 2,150 fps with a 400-grain bullet generated just over 4,000 ft.-lbs. of energy, more than enough for the largest game, but the sedate muzzle velocity is directly proportional to the moderate recoil. I will say that the felt recoil of a .404, with the classic loading, is less than that of the .375 H&H, especially in recoil speed. The older load’s velocity is easy to attain as a handloader, and still works as well as it did in 1909.

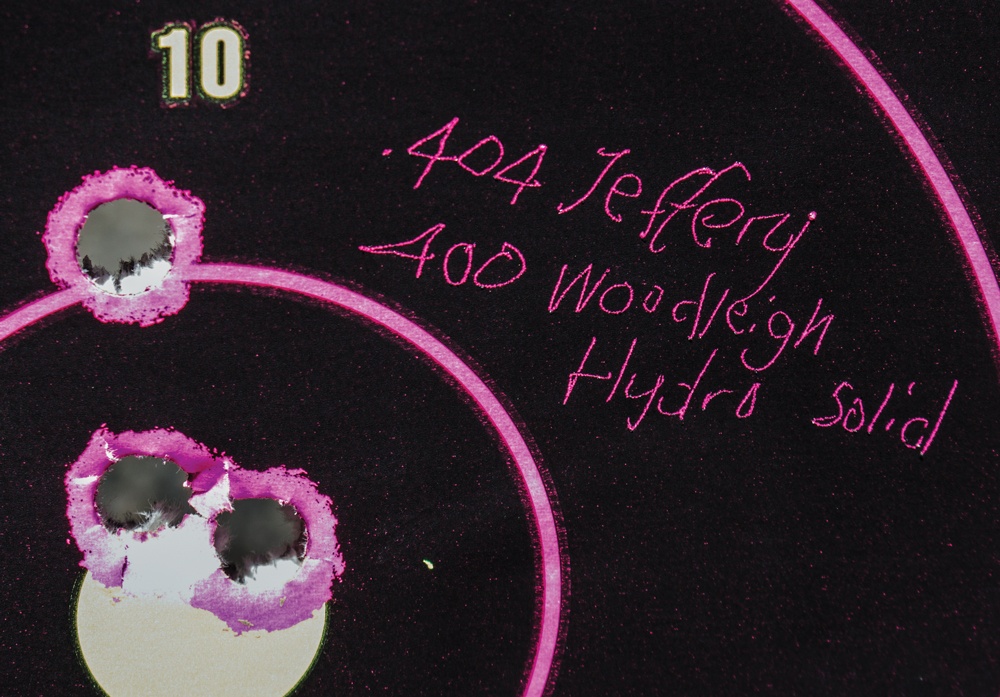
The modern load is the 400-grain bullet, driven to 2,350 fps, putting it in the same league as the .416s. My own load for my safari was somewhere in the middle, and it worked out just perfect. I was using the 400-grain Woodleigh Hydrostatically Stabilized solids, over 80.0 grains of Reloder 15, sparked by the Federal GM215M primer, in Norma cases.

This combination yields 2,280 fps at the muzzle, for around 4,650 ft.-lbs. of energy, and will print MOA three-shot groups if I do my part. As I told you early on, this Woodleigh bullet gives fantastic penetration, and they worked well on both wildebeest and impala in addition to the huge-bodied bull elephant.

For a good all-around load, the Woodleigh Hydro solid is a fine choice. The other bullets I tried, like the 400-grain Hornady DGS and the North Fork semi-spitzer, liked the same load. While other powders will certainly work, I like Reloder 15 as a good medium burn rate choice.

Being a curious creature, I wanted to see if that Cutting Edge Safari Raptor that worked so well in Dave’s .416 Rigby would perform in the Jeffery. At 325 grains, it gave up a bit of the sectional density that the 400 grainers will give, but can be loaded to a higher velocity. The Heym liked them very much, putting them into MOA accuracy, and actually printing them to the same point of impact as the 400-grain Woodleighs. 85.0 grains of Reloder 15 gave a velocity of 2,560 fps, bringing the .404 into the realm of the .375 H&H, as far as decent trajectory goes.

I brought that load over with me, with the intention of taking a bush pig with it.  My PH, Cornus du Plooy made a great blind and set up, and while we put our time in, the bush pigs decided not to take part in our particular hunting adventure.

Norma has introduced a new load for the .404 Jeff, in their African PH line of ammunition. PH Kevin ‘Doctari’ Robertson has helped to shape the ballistics, and it is well thought out in addition to being very useful. Their factory ammo pushes a heavy-for-caliber 450-grain Woodleigh softpoint and solid at 2,150 fps, for 2,650 ft.-lbs.

This makes good sense, especially for buffalo and elephant. The lower muzzle velocity has worked with the 400-grain bullets for over a century, but with an additional 50 grains of bullet, the sectional density figures increase considerably, which will make a cartridge that has a reputation for incredible penetration even better.

Author’s combination of 325-grain Cutting Edge Bullets and 400-grain Woodleigh Hydro Solids.

We can reproduce this formula at the bench. These Woodleigh bullets are available in component form for us handloaders, and if the heavyweights are on your list, there is no reason not to take advantage of them.

I think that the 450-grain Woodleigh Weldcore would make a terrific bullet for big grizzly bears, interior or coastal. You’ll definitely want a large rifle magnum primer, and I’d stick to powders on the faster end of the spectrum, as the longer bullets will start to eat up some of your case capacity.

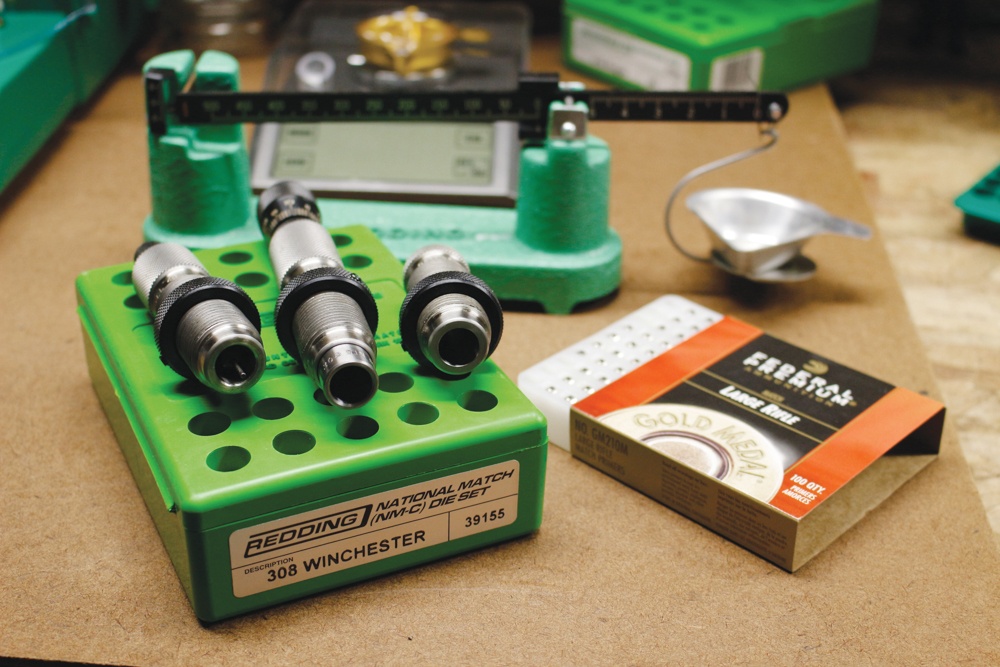
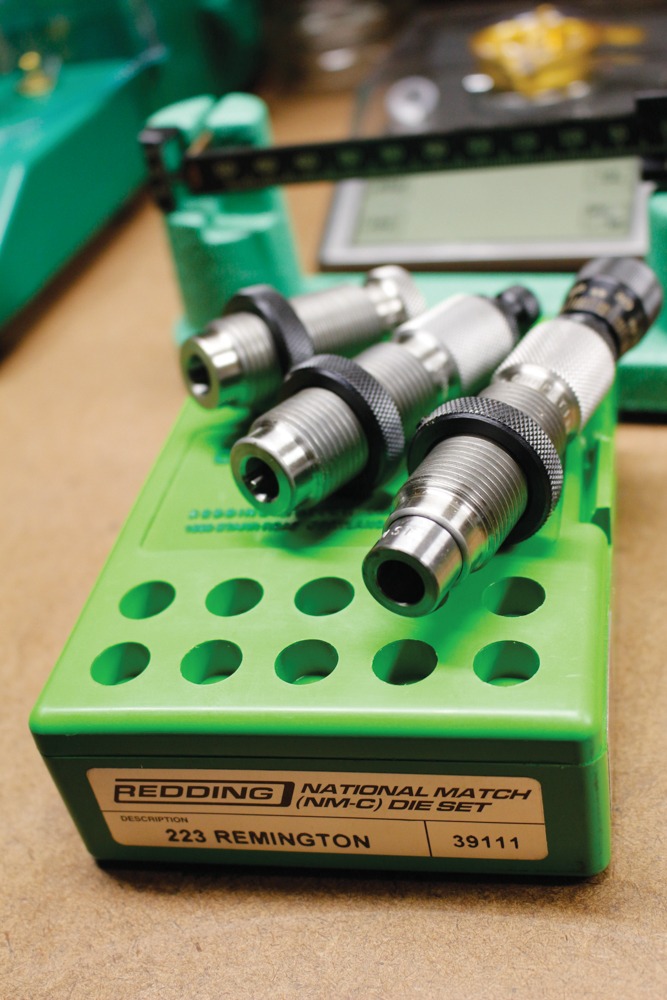
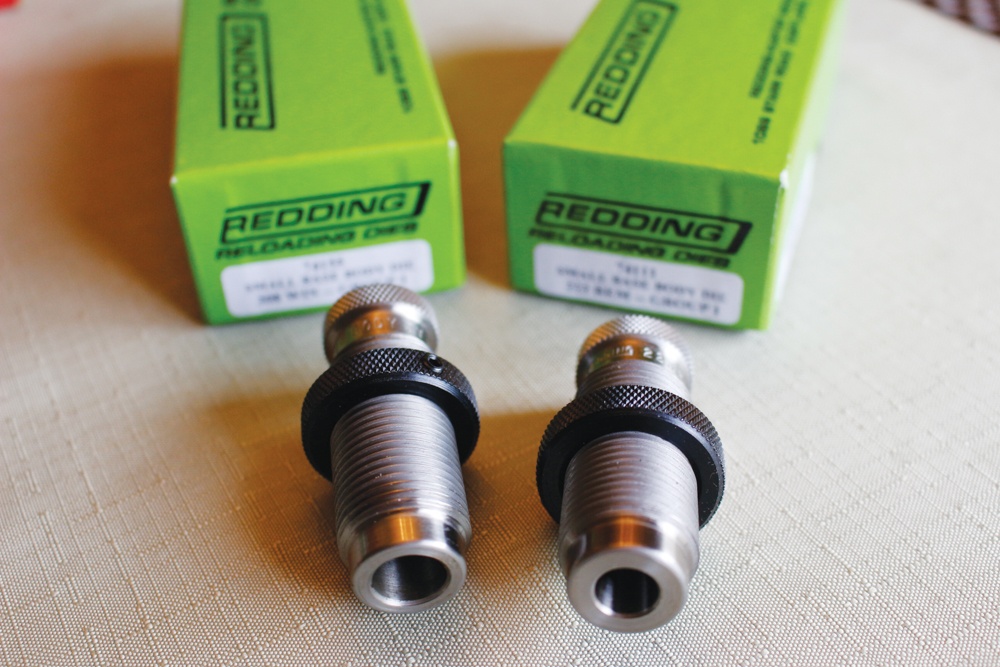
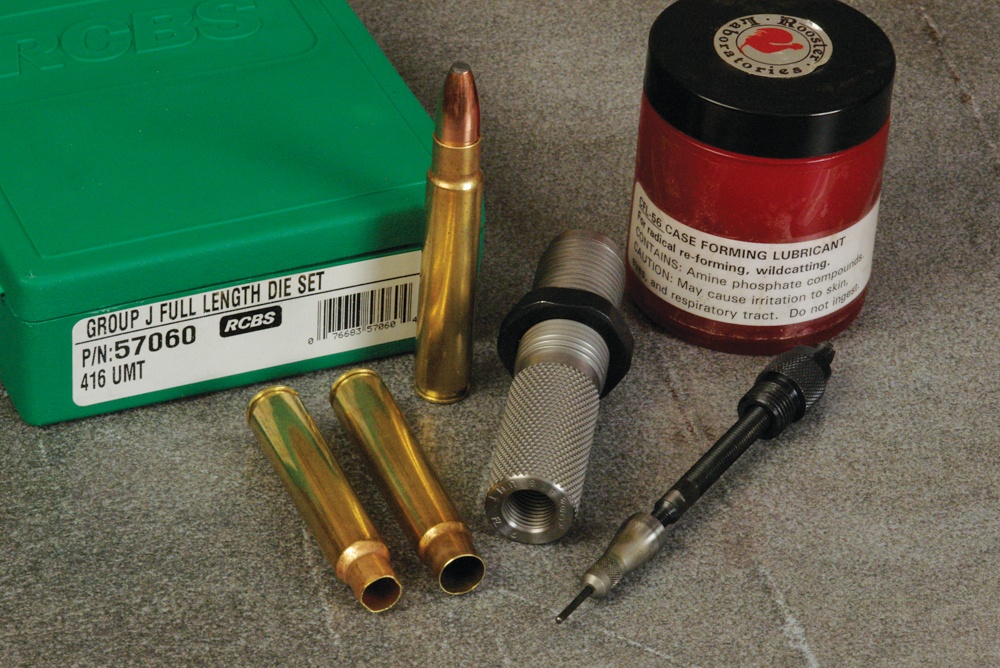
With an effective bullet range of 325 grain up to 450 grains, and good cases produced by Norma and Hornady, the old Jeffery case should be seeing a revival in the next decade. Get a good set of dies from RCBS or Redding, and find a rifle that fits you well. After my safari, I called Chris Sells of Heym and asked him to hold on to the return shipping label for that Heym Express, and send an invoice in its place. I’ll be hunting with this rifle for years to come.

Conclusion

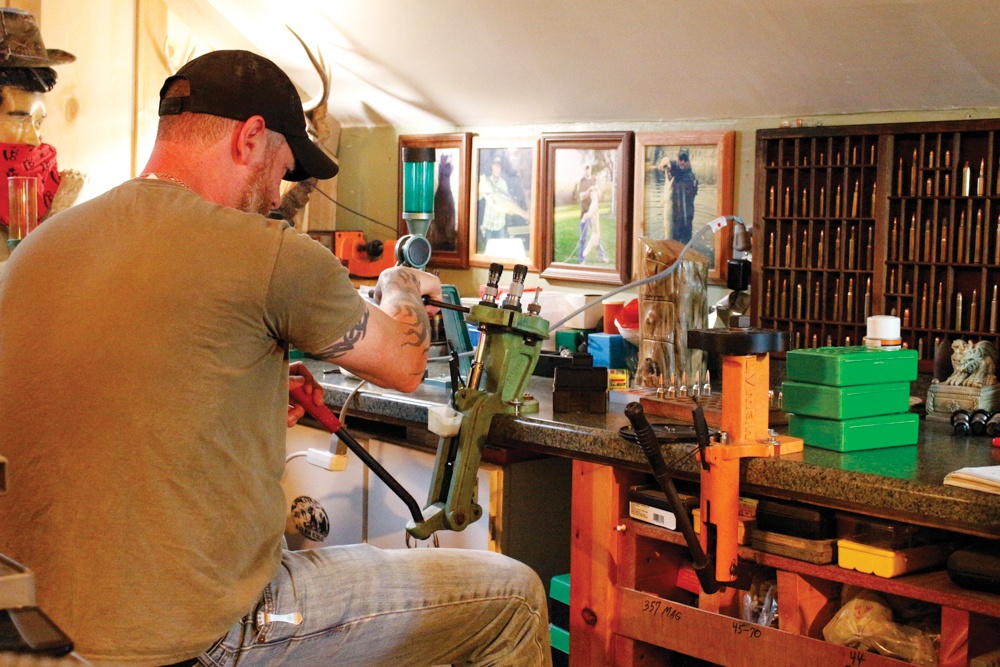
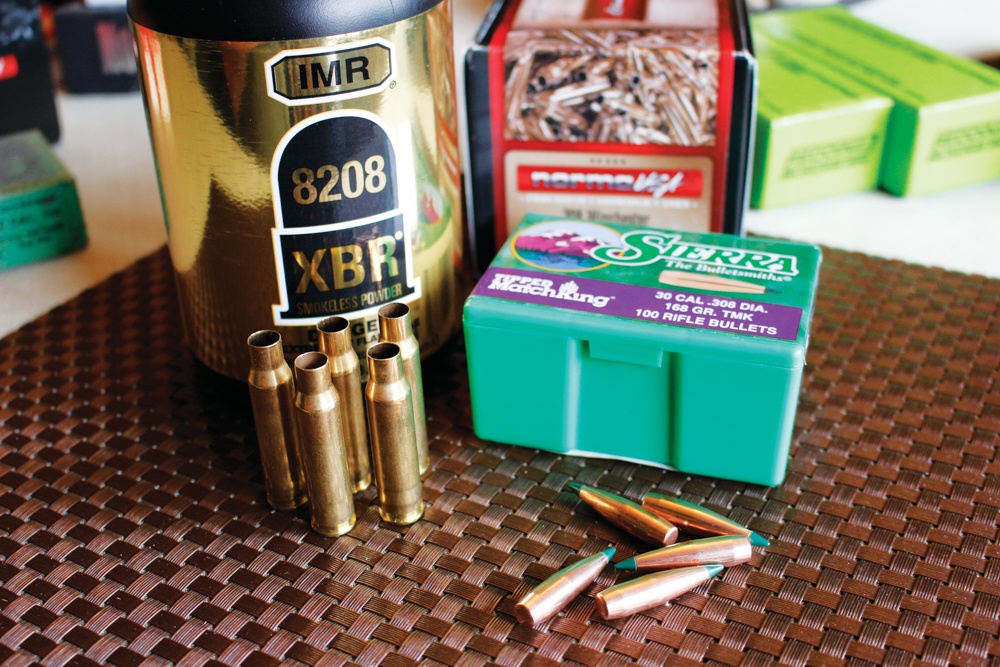
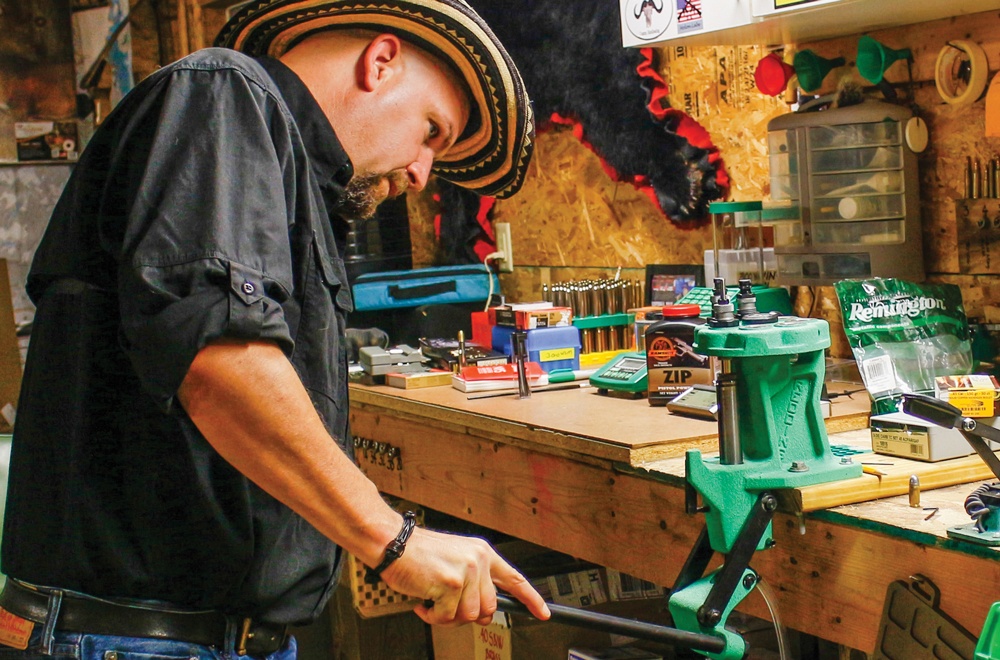
I’ve had people tell me that my sanity is questionable because I hunt dangerous game with handloaded ammunition. While I totally agree with the fact that factory ammunition is better than it’s ever been, I feel that the diligence that I put into assembling the ammunition cannot be matched by the machines.

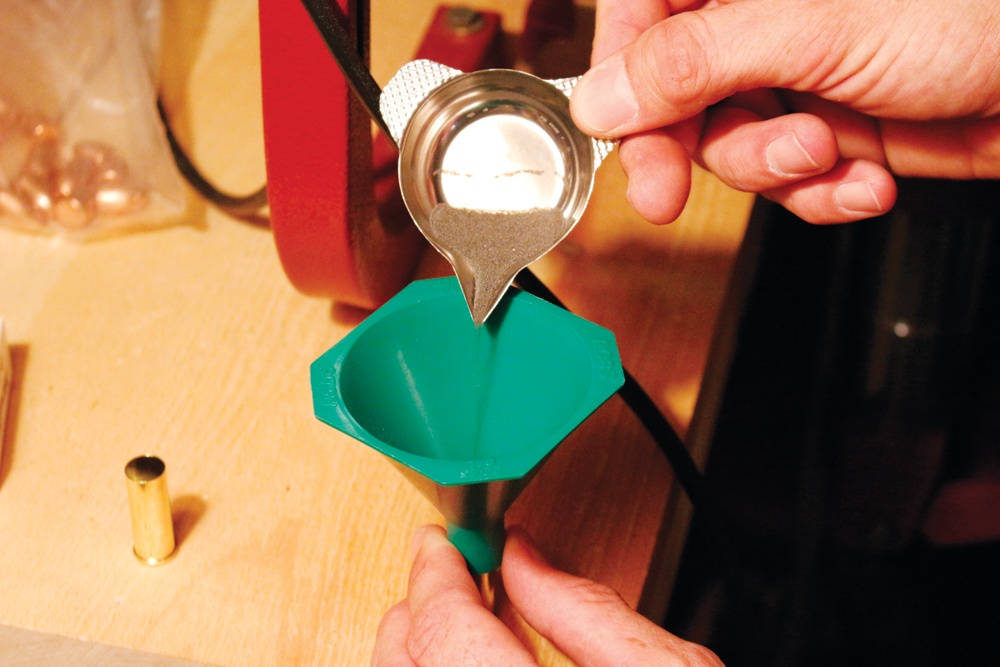
I weigh the bullets, resize all the brand new cases, weigh every powder charge, and make sure that each and every round I intend to hunt with has been run through the rifle’s chamber, to ensure that there will be no feeding issues. After five safaris, I can honestly say that with the exception of .22 LR ammunition, I’ve never pulled the trigger on factory ammunition in the game fields, and I’m totally OK with that!

Editor’s Note: This excerpt is from Handloader’s Digest, 19th Edition available now at GunDigestStore.com

DISCLAIMER: Any and all loading data found in this article or book, including past or future editions, is to be taken as reference material only. The publishers, editors, authors, contributors, and their entities bear no responsibility for the use by others of the data included herein. 

Reloading Classic Hunting Revolver Ammo

0
  • The .357 Mag. and .44 Mag are considered classic hunting revolver cartridges the author has used effectively on all manner of game and predator.
  • Both cartridges are a dream come true for the handloader given the abundance of components in today’s reloading market.
  • Handloading for classic revolvers can not only rejuvenate your interest in them,  but breathe new life and accuracy with modern bullets and powders.

Modern reloading of hunting revolver ammo can bring newfound interest to old iron.

.357 Magnum with Nosler bullets. All Photos: J.D. Fielding Photography

Modern reloading of hunting revolver ammo can bring newfound interest to old iron.

I own a pair of classic revolvers. One is a 1979 Model 13 K-frame with a 4-inch heavy barrel, chambered in .357 Magnum with Pachmayr grips. I inherited this gun, which was once my father’s favorite handgun, and is now very dear to me.

My other favorite is a 1957 pre-model 29 N-frame with a 6 ½-inch barrel chambered in — of course — the classic .44 Remington Magnum. In preparation for writing this article, I had the pleasant opportunity to breathe some new life into these old guns by using some new bullet and powder combinations.

.357 Magnum Reloads

Though not looked upon by many as a hunting pistol, my old standby sidearm is the Smith & Wesson Model 13 chambered in .357 Magnum, with a 4-inch barrel.

Considered by many to be underpowered — and some have even called it “wimpy” — I have used this gun enough to know differently. Throughout my life I have tried to redefine the basic laws of physics, but have always failed miserably, usually resulting in broken bones, stitches, or some type of hard-learned lesson. I quickly learned that I cannot change these laws and that basic physics will always win.

Applying these pesky laws, I have found a 158-grain Hornady XTP with a muzzle velocity of 1,170 fps, when put in the right place, deals with all the critters I generally contend with here in Upstate New York.

Most of my data for the .357 may not be impressive in comparison to many reloading manuals or most of the Internet experts, but these loads were all derived from field testing in my 4-inch-barreled Model 13, as opposed to being tested in a Universal Receiver with a 10-inch barrel, which will generate higher velocities and pressures that are not realistic from my handguns.

Reloading revolver ammo.Here are the strengths and weaknesses of this revolver: First off, it’s a pleasure to carry. It fits right on your belt and is easily concealed so you’re not taking your gun off every time you go out. Here in Upstate New York our laws prohibit open carry; it’s concealed carry only.

One of my favorite things about this handgun is the fact that I can feed it .38 Special ammunition all day long and have a very accurate plinking gun. This is the gun’s usual diet; unless, of course, it’s deer season. Its recoil is very manageable even with full-house loads, especially when compared to other hunting calibers.

My wife shoots it regularly, and very accurately at that. When going out to do chores, this is the gun to wear. It doesn’t get in your way on your belt and doesn’t slow you down while working. That’s not something that can be said of carrying an X-frame revolver.

Secondly, when this little gun is off its diet of .38 Specials, it’s fed with premium bullets, usually Barnes XPBs or Hornady’s XTPs, and it’s never had a problem putting venison in the freezer or exterminating any of the predators that always seem to be in my chicken coop.

Smith & Wesson Model 13 in .357 Mag. with Barnes XPB bullets.

One of its downfalls is its effective range, as it is limited by its 4-inch barrel. It’s a tradeoff that is offset by the handiness of the gun. I limit myself to a 50-yard shot at deer, and only if I have a clear shot at its vitals.

At 50 yards I know I can shoot it accurately enough to make a solid hit and the bullet will still retain enough energy to get the job done cleanly. I don’t consider myself to be a good enough shot to shoot any farther than this at any animal, as both accuracy and energies diminish to the point that I am not comfortable.

The limited sight radius on this short-barreled gun not only makes it less accurate than, for example, an 8-inch barreled sixgun, but once again those damned laws of physics rear their ugly heads; you don’t have the velocity or energy generated by a longer barrel.

.44 Magnum Handloading

My other favorite hunting revolvers is my 1957 Smith & Wesson pre-29 .44 Remington Magnum with a 6 ½-inch barrel. I got lucky and found this gun at a local shop for a great price.

This gun can shoot better than I can, with just about any load. It has a great trigger and balances perfect for me. It does not fit on the hip as well as my .357, but it is still much easier to carry than a rifle. With its 6 ½-inch barrel, the sight radius is much longer than the .357’s 4-inch tube, thus making it much more accurate to shoot.

T9918-Handloading-Revolver-Ammo-3
The author’s favorite .44 Magnum — a 1957 Smith & Wesson Pre-Model 29 with a 6 ½-inch barrel.

I find this to be the optimal length for me when hunting with iron sights, but I still limit myself to 100-yard shots with it. I know there are plenty of people who can shoot an identical gun a lot farther, but this is my limit for iron sights.

In my neck of the woods, most deer hunting is done within 100 yards or less. I find target acquisition to be very fast with this gun, when compared to a scoped pistol. Now, I am not going to lie; usually a scoped single-shot or a big X-frame in .460 or .500 will shoot a hell of a lot more accurately than my old .44, but this .44 Magnum is about as big a handgun as I can shoot accurately offhand. I stress “offhand” and mean shooting it without a rest or fence post or anything to support the weight of the gun.

I can shoot my .460 Smith & Wesson at twice the distance and with twice the accuracy. But here’s the kicker: I can’t shoot it offhand, I can only shoot it well from a rest or supported position. It weighs too much for me to group accurately offhand. It also wears a 2.5×8 scope and has 12 inches of barrel. Is it still a handgun if you can’t shoot it like a handgun? I will let you decide.

I will also include data for a couple of .44 Special loads because this is what I normally practice with. They are much easier on the gun and my wrist, not to mention cheaper to shoot.

Hornady brass proved to be very consistent.

Reloading Revolver Ammo

My reloading methods are by no means considered the latest and greatest, or even advanced. Most anyone can replicate my loads with similar results. In fact, some are considered outdated by most of the people in the reloading crowd. I was even called a dinosaur this week because of some of the Winchester powder I was using.

My gun/reloading room is a hodgepodge of reloading equipment, some of which are antiques, and some of my preferred powders have been around for over 50 years. I am generally of the mindset of, “If it ain’t broke, don’t fix it,” but I have started to use some of the modern products recently. Trying some of the new bullets and powders has given me very impressive results that I did not think possible.

For this article I used all new dies, brass, primers, and bullets to take out some of the variables.

Don’t get me wrong; I will always be the guy that saves all brass until it splits or the primers won’t stay seated. But using some of today’s new products has shown me that there are more efficient ways to handload.

We will start off with the die sets. Most of my dies are yard sale specials, hand-me-downs, or bought off the clearance rack. I acquired new dies from Redding, to ensure there was no wear and tear. While using these new dies, in comparison to my old ones, all I can say is “Wow, these things are amazing!”

The Redding sets feature micrometer-adjustable seating and crimping dies. The dies are fast and easy to get set up and have given the best crimp I have ever achieved. Their ease of adjustment saves a lot of time when you’re changing between different bullets. To be honest, I don’t know how I am going to go back to using my old ones.

T9918-Handloading-Revolver-Ammo-6
Suitable powders for classic revolvers include IMR4227, Alliant 2400, Accurate No. 7 and No. 9, H110, and Ramshot Enforcer.

For this experiment, I used brand-new Hornady brass cases. I spent the better half of a day measuring and weighing this brass, and did not find a single problem. I am a real stickler for trimming all pistol brass to get the perfect pistol crimp, but this brass is of such quality that trimming was not required. When the brass is of a uniform length, the crimping die will give an equally uniform crimp on the bullet’s cannelure.

If your brass isn’t trimmed to a uniform length, the resulting crimp will be all over the map, and can drastically affect the function of the revolver, as well as velocity and accuracy. All the cases weighed and measured were well within my strict standards. All were of uniform weight and length. Hornady really impressed me with their product. If you have never used new brass before, you should try it. You will be amazed.

For the primers, I used all Federal Gold Medal Match primers, small pistol primers for the .357, and large magnum pistol for the .44 Magnum. I have used them for years and found them to give the most consistent ignition, and I always keep a large supply on hand.

Now, on to the powders.

T9918-Handloading-Revolver-Ammo-8
Ramshot Enforcer is a very fine ball powder that meters wonderfully.

I wanted to use some old standby powders to compare with some of the new propellants on the market. I started off with Hodgdon H110. I have used this stuff often in the past, so I know how predictable the results are. I have also been happy with the accuracy of this powder, often giving me fantastic accuracy and consistent velocities. It meters very smoothly and consistently.

I also used some Alliant 2400, a top performer that I have been using for years. I wanted to try some new powders with this batch of premium bullets, so I grabbed Accurate #9, and Ramshot Enforcer, as these both work very well with the all-copper bullets I used for testing.

Despite my old-school mentality and utter reliance on my old standby loads, both gave top velocities and fantastic accuracy. I think the Enforcer might end up my new pet load for the .44 Mag., replacing my old loads of Alliant 2400 in the old wheelgun.

Ramshot’s Enforcer not only proved most accurate, but also gave among the highest velocities, something that rarely happens.

This powder, made in Belgium, meters perfect and burns surprisingly clean. Enforcer seems to be made for the .44 Magnum. I like it so much that I will be stocking up on more of this powder. Enforcer worked great in the .357 Magnum, too, being tied with the Accurate #9 for top accuracy.

The bullets I chose were all premium hunting bullets, as developing hunting loads was my goal, starting with the Hornady XTP.

Barnes 140-grain XPB (left) and Hornady 158-grain XTB.

The XTPs have always performed well for me; I have never had one fail. They open up to at least 1 ½ times their original diameter for immediate energy transfer, but also penetrate very deeply.

Any broadside shot I have ever taken with my .44 Magnum has resulted in a complete pass through; I have never recovered any .44 bullet. Deer I have hit with the XTP’s have taken not more than a few steps before expiring. I prefer to use the heavier 300-grain bullets at a slower speed and I am amazed at their performance, whether the distance is 10 yards or 100.

The Nosler jacketed handgun bullet has long been a favorite in my .357, and the 158-grain slugs over a charge of Hodgdon’s H110 has been a magic recipe for years. This has, and will continue to be, a go-to bullet for me.

Another of the premium bullets chosen was the Speer Gold Dot in .44 caliber, weighting 240 grains. These things are accurate and open up a huge hole. Although I have never hit a deer with one, I am sure they would be very effective. Penetration tests suggest they would have no problem passing entirely through a deer.

Two coyotes were taken with these bullets and that’s how I know they open up so fast. They leave a Buick-sized exit wound — most impressive! As far as a defensive bullet, they might be overkill but I would not hesitate to use them.

The Barnes 225-grain bullet (left) has more bearing surface than the 300-grain Hornady XTP (middle) or the 240-grain Speer Gold Dot (right).

Whether you love them or hate them, the Barnes XPBs are the hot rods of handgun bullets. What I like about Barnes is that bullets are all that they make — just bullets. And they have been doing this for over 80 years. They seem to do a lot more research in the ballistic department than all the other companies.

These bullets are an all-copper design with a massive hollowpoint cavity, which upon impact forms the shape of a mushroom with razor-like pedals. These controlled expansion-type bullets give devastating amounts of terminal damage when they hit flesh and bone. This is why deer never seem to take another step when hit correctly with one.

Barnes bullets deliver more energy within the game animal than any other bullets, in my opinion. I have heard people voice concerns about the large hollowpoint cavities potentially becoming obstructed and not expanding. However, I have never had this problem. Now for the downside: they cost more than most other brands, but you get what you pay for with Barnes.

Loading data is drastically different for these bullets than a leadcore-type bullet, due to the all-copper construction. For example, a .44-caliber 225-grain Barnes is a lot longer than a bullet of the same weight that is jacketed lead. Therefore, they will leave less case capacity than lead bullets because they must be seated deeper into the case to maintain the same Cartridge Overall Length, or COL.

I ended up using some compressed loads with these, something I rarely do, but is common when using monometal bullets. I was only able to find a limited amount of load data for Barnes, so, on a whim I just called them up.

The people at this company were very helpful, and more than willing to spend time with me discussing this project. I told them what powders I had and they gave me all the load data I needed, right over the phone.  It was a pleasant surprise to have customer service that knowledgeable and friendly.

Author at the reloading bench churning out some handloaded revolver ammo.

Barnes highly recommended using Ramshot’s Enforcer as well as Accurate No. 9, as their laboratory testing found these powders to give the best results with their bullets.

This company has come a long way since 1932 when Fred Barnes started making bullets. They are something all handloaders need to try.

I’m loading those Hornady XTPs for our local deer and bear seasons. The Gold Dot bullet will remain my favorite for the liberal coyote season we have here in New York, and the Barnes 225-grain XPB is getting the nod for an upcoming feral hog hunt.

With this trio of bullets, I’m very well covered for anything smaller than coastal brown bears! I have really enjoyed the testing of these new powders and bullets, and it has truly brought newfound interest to my pair of classic revolvers.

I am glad I knocked the dust off these two classics and tried modern loads through them. It has shown me how far reloading products have progressed and has given me new respect for my old iron.

Editor’s Note: This excerpt is from Handloader’s Digest, 19th Edition available now at GunDigestStore.com

DISCLAIMER: Any and all loading data found in this article or book, including past or future editions, is to be taken as reference material only. The publishers, editors, authors, contributors, and their entities bear no responsibility for the use by others of the data included herein. 

Handloading for AR-15 Rifles

0
  • You can get tack-driving accuracy from match-grade AR rifles, but attention to detail in reloading is still necessary.
  • Some bullet crimp may be necessary; test your first rounds by hand-cycling a few rounds through the action to see if bullets are getting pushed in.
  • With careful reloading, one-hole sub-MOA accuracy is achievable in the AR-15 and AR-10 platforms.

Can handloading for AR-15 — and AR-10 — rifles achieve accuracy that matches modern bolt-actions?

Author Mark Nazi at the bench testing .308 loads. All photos: J.D. Fielding Photography

The AR is a platform that I have had a love/hate relationship with ever since I picked up my first one, many moons ago. Most of my reloading experience with the AR platform has been trying to find a load that’s accurate, uses components that are generally easy to obtain, cycles without fail, and uses bullets that I can seat deep enough so there is no fighting between the tip of the round and the wall of the magazine.

So, when Phil Massaro tasked me with the project of using .308 and .223-powered ARs to disprove the popular notion that AR-platform rifles aren’t as accurate as conventional rifles, I was extremely excited for the chance to develop a new load beyond my normal 3-Gun/plinking load that I’ve used for many years.

When it came time to pick my hardware for this project I knew I had the .223 end covered. With one phone call and a three-minute drive, I had my hands on a beautiful Rock River Arms rifle that had been outfitted with a full Krieger match-grade pipe, countless hours of stone work, and a trigger that breaks like an icicle.

The author shooting the Rock River Arms EOP in .223.

Now all I needed was a .308. A quick call to a friend over at June Bug Customs and I had everything needed for the .308, including a beautiful, semi-heavy, 1:10 twist, 24-inch stainless steel barrel.

I decided to top these beautiful rifles with what I personally consider to be the top-of-the-line in rifle optics — Nightforce. The company provided a jaw-dropping NXS 5.5-22 X 50 for the .223 and a monstrous NXS 8-32 X 56 for the .308, both equipped with the MOART reticles.

When these scopes arrived, I bolted them up using the Nightforce 20 MOA one-piece ring and base. Having mounted countless scopes from every manufacture known to man, I must say that the Nightforce rings and bases are of the most unbelievable quality. Normally I acquire my scope and mounting solution and then the lapping begins, but with these Nightforce products lapping the rings would be an insult.

After getting the scopes mounted and adjusted to my eye it was time to take them outside and get a look at the MOART reticle. The clarity of this glass is not something I can describe accurately in words. It is stunning.

When I gathered my components, I kept reminding myself that I was going for accuracy while being able to retain reliability. In terms of the handloading process, I knew this was going to be a single-stage operation; that is, using a single-stage reloading press. When going for accuracy I personally prefer the single-stage method, as it allows me to walk my brass through each stage, keep a close eye on every process, and hand-check every step.

I chose a Forsters Co-Ax B3 single-stage press. After the press had been decided, it was time to choose my options for everything else. First off, was brass. I wanted something to hold everything together in a nice package, so I went with brand-new Norma .308 Winchester and .223 Winchester brass.

I figured that for what I was doing, 100 pieces of each would suffice. Next, I needed an ignition source. I’ve been a long-time fan of the Federal Gold Medal Match primers. Over the many years I’ve been using them, they have never given me anything but perfect performance.

Premium Nightforce optics ensured the author was able to obtain true accuracy measurements.

After that it was time to pick some powder. For the .308 I picked Accurate Arms LT-30, IMR XBR 8208, Hodgdon Varget, and the classic IMR 4064. For the .223 I grabbed cans of Reloder #7, Varget, IMR 4198, and X-terminator by RamShot. After settling on my choice of brass, powders, and primers it was time to pick the projectiles.

Since I had been tasked with delivering accuracy, I decided to grab a few boxes of my favorite target bullets, the Sierra MatchKing hollowpoint boat-tail. This has long been one of my favorites. I was also able to acquire a few boxes of the brand new Tipped Match Kings, as well as a box of Nosler Ballistic Tips that I have found to be flawless in performance.

Finally, it was time to choose my dies. I tossed around a few ideas before deciding on Redding National Match dies in .223 and .308, with the added small-base sizing die included separately. Now that I had everything in front of me it was time to get to it.

T9918-Handloading-AR15-3Reloading AR Cartridges for Accuracy

I decided to start with the .308. After referencing a number of different reloading manuals as well as measuring the length of the magazines I had on hand, I knew that my Cartridge Overall Length (C.O.L.) was going to be 2.800 across the board.

When I reload for accuracy I like to take all my components and lay them out, starting with the brass. I take my brass, and, one piece at a time, give it a good visual inspection before placing it into the loading block.

Once I’ve got my loading block filled up I begin my sizing process. First, I’ll take my tub of case wax and apply a little on my fingers. Next, as I grab each case to be sized, I rub the wax all over the case to ensure that it will enter and exit the die smoothly.

With the semi-automatic AR-style rifles I always use a small base sizing die as the first step. My reasoning for this is the rifles I am using — like most AR-style rifles — are a direct impingement system.

That means that as a round is fired gases from the explosion are recycled through the gas system to cycle the action, eject a spent casing, pick up a live round from the magazine, and chamber it.

After all my brass got the small base resizing it was time to run them through the full-length resizing die.

Redding National Match dies in .308.

Finally, I had a full loading block of sized brass. Normally I would say this is where I trim all my brass, but as I looked in my reloading manual to acquire the trim-to length, I grabbed my digital calipers and started measuring. My trim-to length was 2.005. What I like to do is find a case in my lot that measures exactly 2.005 and set it aside. I refer to this casing as my “god case.” I’ll use it to set my case trimmer, set my die depth and height, and many other tasks.

What I found truly surprising when I started measuring was that every single case I measured was exactly 2.005 exactly.

At first, I was in disbelief. I asked my loading buddy to find me brass in this lot that did not measure 2.005. He was only able to find perhaps two pieces that measured either 2.006 or 2.004. I must tip my hat to Norma; well done, boys.

I then fired up my Lyman case prep station and began looking and feeling for burrs left from the manufacturing process. Again, and to my delight, the Norma brass came out of the box ready to deliver.

With minimal chamfering and de-burring and now with all my brass to the proper size, length, and dimensions it was time to prime. I grabbed a fresh box of Federal GM 210 M large rifle primers, which is Federal’s match-grade large rifle primer, tossed them into my Lee Auto Prime XR, and began priming my cases.

I was blown away how consistent the primer pockets of this brass were; they were tight but not too tight, and the pocket depth paired with the GM 210M primers was right on the money.

T9918-Handloading-AR15-12
National Match dies in .223 Rem. — also from Redding.

I like to seat my primers a few hairs under flush with the bottom of the case. After I had my cases fully prepped it was time to start charging them, so I grabbed a one-pound can of XBR and a load data sheet.

For load development I went with the simplest form of ladder testing. A number of published loads for XBR paired with a 168-grain MatchKing bullet showed a starting load of 33.2 grains and a max load of 43.2 grains. With this data in hand I fired up my RCBS Chargemaster 1500.

With my process of ladder testing what I do is draw a diagram in my bench notebook and start with the lowest charge weight. I’ll load five rounds at the start weight. In this case I started with 33.5 grains of XBR 8208. All five of these rounds will sit in row 1 of my ammo box.

From here I’ll step up my charge weights in .5-grain increments. In other words, row two consists of five rounds with a charge weight of 34.0 grains, and so on until I reach the maximum recommended weight.

If you do not use a reloading bench notebook I strongly recommend it. I refuse to reload without my notebooks. If asked any questions regarding my load data for any particular rifle or cartridge, I will not attempt to remember off the top of my head; only after referring to my notebook will I give such data.

With the single-stage nature of loading for these rifles, my RCBS Chargemaster 1500 was the obvious choice for me. For those who are not familiar with this extremely accurate, time-saving device, I highly recommend it. RCBS has taken a digital powder-dispensing system and paired it with a Chargemaster digital scale. You simply level the machine on a sturdy surface (I use a block of marble), calibrate it with the included weights, punch in your desired charge weight, press dispense, and away you go.

Redding small base dies.

The scale and dispenser unit talk to each other until your desired weight has been reached, then the machine beeps and displays the actual charge weight as another check to insure you’ve reached your desired weight. It is a must-have for any single stage loader.

After getting all my cases charged it was finally time to break out the one die I had been drooling over since the beginning of this project, the Redding National Match Competition seating die. The micrometer adjustments were flawless, smooth and precise. The die uses a bushing system to seat the bullets, causing no deformity in the copper jackets.

I grabbed a box of .30-caliber 168-grain Tipped MatchKings, referenced as much published data as I could, and came up with a C.O.L. of 2.800. Setting my C.O.L. at 2.800 gave me enough room to be able to load in magazines and have them function properly. But what did worry me was not having much room to play with in the way of how far off the lands and grooves I was able to seat the bullet. Only time would tell if that adjustment was one that needed tinkering.

Seating the tipped 168-grain Sierra MatchKings was a dream, given the extremely high quality of the Redding dies coupled with the free-floating base plate of the Forster Co-Ax B3 press.

To Bullet Crimp Or Not To Bullet Crimp?

After getting all my bullets seated it was now time to consider bullet crimp. I’ve heard many schools of thought regarding crimping AR-style rifles, or even any semi-automatic rifle. What I do is make up a few extra rounds with no powder or primer in them, jot down my C.O.L., place two or three rounds into the magazine, then cycle the action as roughly as I can. I’ll then take those rounds and take measurements again to see if the violence of the action is pushing my bullets deeper into the case.

Components for the .308 buildup.

If I do notice my C.O.L. getting shorter I know there is not enough neck tension holding the projectile to keep it in place. If a crimp is needed, I’ll reset the test and apply the slightest crimp I possibly can, then re-test the rounds until my C.O.L. is the same going in as it is coming out.

Each rifle is different; some have military feed ramps and some do not. Some chambers are tighter than others. Always take some extra time to determine if a crimp is needed in your case.

One thing to keep in mind is how the feeding system in AR-style rifles works: the bolt pushes a round from the magazine into the feed ramps, the feed ramps then guide the round into the chamber. This is a very violent action and could potentially push your bullet too deep into the case, causing a catastrophic failure resulting in possible serious injury, death, and destruction of a very expensive set-up. After applying a wee bit of crimp to my rounds it was finally time to get behind this beautiful system.

Sierra 168-grain MatchKing.

Testing the Ammo

I first loaded a few mags of factory-loaded ammo to get the rifle on paper. Again, the Nightforce scope was an absolute dream to work with. All the adjustments on the turrets were flawless and of the utmost precision. If you dialed up an inch adjustment at 100 yards, an inch is exactly what you ended up with. When you take the .308 out past 100 yards and really let it stretch its legs the zero stop feature of the Nightforce allows you to transition between what you are zeroed at and whatever distance you care to dope to quickly, efficiently, and with precision.

The way I run my ladder test is, I will shoot from a bench with a rest on the front and rear of the rifle to take as much human error out of the equation as possible. I fire one round, then lock the bolt open to let it cool back down to ambient temperature. I find the ejected brass and inspect it for any signs of high pressure; then I take the round that the rifle chambered and measure it to ensure that my crimp and neck tension is holding the projectile in place properly.

Once the chamber and barrel have reached ambient temperature I’ll fire my second round, repeating the process until my string of five rounds has been fired. After that I’ll take a walk down to the target with calipers for my group measurements. After all my rounds have been fired I’ll sit and compile my data.

Using the same chart for my ladder test, I’ll write the group size in the corresponding row that already has the charge weight in it.

I was easily able to get five-shot groups under an inch at 100 yards at right around the 43.0-grain mark with the XBR powder.

T9918-Handloading-AR15-2
Measuring group size at the target. Indeed, ARs are capable of fine accuracy if you spend some time finding the right combination.

Throughout my XBR testing I found the closer I got to the max load, the tighter my groups were getting. I finally settled on using 43.0 grains of XBR. This load was consistently between .5 and 1.00 inch, cycled perfectly, and generally performed flawlessly. I also was able to find great accuracy with the other powders I tested but stuck with the XBR because I was happy with the results and it metered like a dream.

Now it was time to grab the .223 and basically duplicate the testing. For powder I grabbed cans of X-terminator, IMR 4198, and Reloder #7. After looking at bullets for a while and keeping in mind that I had to keep the C.O.L. less than the size of my magazine, and the fact that I was dealing with a tight Kreiger match chamber, I ended up grabbing a box of 40-grain Nosler Ballistic Tips and a box of 40-grain Sierra BlitzKings.

I found that both bullets delivered five-shot, one-hole groups at 100 yards.

At the end of my load development 23.5 grains of Reloder #7 was the magic number when it came to the Nosler Ballistic Tips, delivering group sizes of under a half-inch at 100 yards. When I switched to the 40-grain BlitzKings it was 22.5 grains of IMR 4198 that delivered very similar results.

What I recommend, if tighter grouping is what you’re after, is a second round of ladder testing. Let’s take our .308 load of 43.0 grains of XBR and go back to the loading bench. Using the same diagram as we did before, let’s load row 1 with 43.0 grains of XBR, row 2 with 43.1 grains, and row 3 at our max recommended charge of 43.2 grains.

What I also like to do in the second installment of ladder testing is go on both sides of the accuracy, so my 4th row will be 42.9 grains and 5th row of 42.8 grains. After that it’s back to the shooting bench and let the fun data collection process begin. This second round of ladder testing will help you fine tune your load to the rifle and conditions you shoot in.

IMR 8208 XBR and 168-grain Sierra MatchKings were a very good match.

Tips For Accurizing Military Brass For Reloading

One last thing I’d like to touch on when it comes to reloading for AR-style rifles is the endless ways to make cheap, accurate ammo for them. Military brass is some of the most available brass out there but does require a little extra attention to bring it up to spec.

Military brass comes with a crimp applied to the primer pocket, as well as primer glue applied; this is to ensure that water cannot enter the cartridge and that primers do not back out under fully automatic fire.

I’ve found that my loading buddies will normally just give away the brass they have acquired with the military crimp simply because they don’t know how to — or don’t want to — deal with it.

You can either cut the crimp from the primer pocket or you can swage the entire pocket back into spec. I’ve heard good and bad results about cutting the pocket, but after reviewing the data I decided to go with the swaging option. I called up Dillon and had them send me a primer pocket Super Swage 600. Let me tell you: this little device is a must have if you deal with large quantities of military-primed brass. It chews through casing after casing without so much as a flinch, and with a little extra work you now have reloadable brass.

One other thing to keep in mind with military brass is that case capacity is slightly different from that of non-military brass. Keep this in mind if you’ve got a load worked up for your rifle using store-purchased brass, but discover a nice cheap lot of military stuff.

IMR4198 and Norma brass proved a winning combination.

Let’s use our load from the .223 testing of 23.5 grains of Reloder #7 as an example.  Say we want to transfer that load to the pile of military brass we have. Keep in mind your max load, then load a string of five rounds at 23.5 grains, then in the following rows back your charge off .1 grains until you achieve the original accuracy.

As always practice safety with every step of reloading and never go above your skill level.

Editor’s Note: This excerpt is from Handloader’s Digest, 19th Edition available now at GunDigestStore.com

DISCLAIMER: Any and all loading data found in this article or book, including past or future editions, is to be taken as reference material only. The publishers, editors, authors, contributors, and their entities bear no responsibility for the use by others of the data included herein.

Reloading: The Way of Wildcat Cartridges

0
  • Many common factory ammo offerings began as wildcat cartridges.
  • Reloading wildcat cartridges allows you to learn more about ballistics and load development.
  • There is a satisfaction that wildcatters get from taking game with their own cartridge designs.

The word “wildcat” denotes something untamed, rebellious and maybe just a little bit dangerous. But that shouldn’t stop you from considering wildcat cartridges for hunting and shooting.

The 416 UMT rifle on shooting sticks, cape buffalo in background. Selous Reserve in Tanzania. Scope is a Swarovski a 1.25-4X24 Habicht model in Warne mounts. A dangerous game rifle will be used at close range and a low power, wide field of view scope is the best choice.
The 416 UMT rifle on shooting sticks, cape buffalo in background. Selous Reserve in Tanzania. Scope is a Swarovski 1.25-4X24 Habicht model in Warne mounts. A dangerous game rifle will be used at close range and a low-power, wide field of view scope is the best choice.

Just like the wildcat oil drillers who became legends, those gun guys who pioneered the wildcat cartridges were never afraid to ignore the naysayers. Wildcatters are the rebels, the guys who refuse to accept the status quo. They are the pioneers who stretch the boundaries to prove that there can be something more, something better.

Like most pioneers they rarely get the credit. Take for example the .22-250 Remington. Popular cartridge, right? But have you ever heard of Harvey Donaldson, Grosvenor Wotkyns, J.E. Gebby, John Sweany, or J.B. Smith?

Remington didn’t develop the .22-250; those guys did. They pioneered the early high speed .22 cartridges.

The Wotkyns version was called the .220 Wotkyns Original Swift (WOS) and was the forerunner to the .220 Swift, later introduced by Winchester. Gebby and Smith are most often credited with the version we call the .22-250 Remington today. They named it the .22 Varminter. Gebby even obtained a copyright on that name, but Remington took the design, added their name and got all the glory.

It’s the same with the .204 Ruger, 7mm Remington Magnum, .257 Roberts, .35 Whelen, the Winchester Short Magnums and a very long list of other popular cartridges. They were all developed by independent wildcatters and then “claimed” by a gun company as its own, often with the blessing of the wildcatter, but sometimes not. For the most part, the guys who developed the cartridges expected — and got —  nothing. The exception might be the WSM cartridges, which are historical as the wildcats that ended up in court. It’s also what is slowly killing these cartridges.

The .416 UMT is a wildcat made from .375 RUM cases. It demands the hottest primers and the best bullets.

But that’s OK. Wildcat cartridge designers are not in it for the glory or to get rich. They do it for a love of guns and cartridges and for the challenge of doing something that’s never been done. Just like mountain climbers, they do it because “it’s there.”

For as long as I can remember I have been handloading and shooting many popular wildcats, like the .357 Herrett, 7mm TCU, .243 AI, .280 AI, .300 Whisper, .375 JDJ, and several others. I learned about case forming and load development by working with these cartridges, often in the very early years when there was little available data.

But like a lot of hard-core gun guys with a technical mind and a love of pushing the edges, I felt the need to create wildcat catridges of my own.

Nobody ever called me a conformist in anything I do, and I found the inspiration for my wildcats hiding that part of my rebel brain. I love .35-caliber rifle cartridges, even while the public does not. There has never been a hugely successful .35-caliber cartridge. The .35 Remington probably comes the closest, but it’s been dying a slow death for decades. So of course, that’s where I went for my first wildcat cartridge.


The author with a cape buffalo taken in the Selous Reserve in Tanzania. The beast was taken with the .416 UMT, which threw a 400-grain Swift A-Frame. Dangerous game is hunted close and bullet placement must be precise. A 100-yard zero works well.

.358 UMT

Remington showed a select group of gun writers their new .300 Remington Ultra Mag in the fall of 1998, and the first thing I thought was that that big case would be awesome with a .358 bullet.

After considering a lot of case design possibilities I decided to keep it simple and necked the .300 Remington Ultra Mag case up to .358 with no other changes. It maintains the same body taper, the same 30-degree shoulder and the same datum line for headspacing. The only difference is a larger neck and the resulting shorter shoulder. I called the new cartridge the .358 Ultra Mag Towsley (UMT).

One pass of a well-lubed Remington case through the RCBS sizing die’s tapered expander button takes the neck from .30 to .35. Case loss during forming is all but non-existent. The expanding process shortens the case by about .018-inch, so I square the new case mouths and trim to 2.820-inch.

The rifle started as a stainless-steel Remington Model 700 chambered for .300 RUM, but only the action remains. I ordered a Krieger barrel with a 1:14 twist rate to stabilize 250-grain bullets. The barrel proved accurate and the bore is remarkably smooth and is easy to clean.

Gunsmith Mark Bansner turned the 24-inch barrel to a taper that measures .675˝ at the muzzle and then added six longitudinal flutes.

RCBS .416 UMT dies with cases and lube. One pass over the tapered expander in the RCBS resizing die will neck the .375 RUM up to .416. To increase neck tension, polish a small amount of material off the neck sizing button. Lubrication is important for sizing cartridge cases. But, it requires just the right amount.

The limiting factor in overall cartridge length with any of the Ultra Mag cartridges is the rifle’s magazine. I knew the maximum workable cartridge length in this gun would be 3.675 inches. I made up some dummy cartridges with Nosler 250-grain Partition bullets and shipped them to Dave Manson Precision Reamers.

I asked Manson to configure the chamber reamer so it would provide a .010-inch jump to the rifling with the Nosler bullet seated to 3.675 inches. My other bullet choice at the time was a Barnes 225-grain X-bullet and, because of the difference in bullet profile, it would have a jump of about .030-inch when seated to the same overall length. This is fine because the Barnes X-Bullet requires a larger gap for peak performance.

Bansner chambered the barrel and installed it on the action, which had been polished and tuned. The entire barreled action was then bead-blasted for a matte finish.

I had him install a trigger from Timney Manufacturing Inc. and adjust it for a crisp 3-pound pull. I also asked him to change the safety so it would lock the bolt down when it is on (eliminating my pet peeve with current Model 700 rifles.)

.358 UMT (.300 Rem. Ultra Mag) 225-grain Barnes Triple Shock.

Bansner then added one of his High Tech synthetic stocks, which proved to be one of the keys to making this rifle so user-friendly. The stock is designed so the butt is 90 degrees to the bore, which directs recoil straight back and helps to eliminate muzzle rise. As a result, your face is not beaten up by the rifle’s comb, as often happens with hard-recoiling rifles. The stock has a wide butt and a Pachmayr Decelerator recoil pad to further reduce felt recoil.

I conceived this to be a gun that would be lugged for miles up steep elk mountains or through the muskeg of Alaska. The weight needed to be balanced between heavy enough to shoot well under field conditions and light enough to not be hateful at the end of a long day.

When fitted with a Leupold Vari-X III 3.5-10 scope in Leupold two-piece mounts, the rifle weighs 8 pounds. This is on the light side for a rifle chambered in so powerful a cartridge, but the recoil is very manageable for an experienced shooter. Most people who shoot the rifle for the first time remark that the kick was a lot less than they anticipated.

I wanted a rifle suitable for hunting elk, big bears, moose and the larger African plains game in all the differing terrain in which they live. I wanted it to shoot flat so it could handle long shots, but also to hit hard and penetrate deep for big, tough game. This calls for heavy bullets with high sectional density and ballistic coefficient numbers. Bullets weighing 225 to 250 grains were the obvious choice.

The author’s .358 UMT, or Ultra Mag Towsley.

With a large case capacity, heavy bullets usually call for slow-burning powder to push them and that proved true with the .358 UMT. It is not a particularly fussy cartridge to load, except that it does favor specific powders.

I initially thought it would work best with powders like IMR 4350 or IMR 4831, but they proved to be a bit too fast. IMR 7828 was by far the best powder tested, but H-1000 also works very well in some loads. With big charges of any powder, a hot primer is important. I used only Federal 215 primers.

The SAAMI spec for the .300 Ultra Mag cartridge is a mean average pressure of 65,000 psi, which I used as a guideline.

Some interesting things happened when I started shooting this cartridge. Most .358 bullets are designed for a much lower velocity and some of the best big game bullets that work so well in my .350 Rem. Mag. and .35 Whelen turned into varmint bullets with this cartridge, often fragmenting on impact.

The Barnes bullets were the exception. I started with a 225-grain XLC Coated X-bullet. Barnes didn’t make that one but coated some for me as a favor. After I wrote about it they got so many requests that they added it to their line. The XLC bullets are gone now, replaced by the Triple Shock. Today, my preferred bullet in this cartridge is the Barnes TSX 225-grain loaded with IMR 7828. This produces 3,165 fps and sub-inch groups.

RCBS dies, cases and Swift bullets for the .416 UMT.

Another bullet that proved to work well is the Swift 250-grain A-Frame. When teamed with IMR 7828 it spits out the muzzle at 3,114 fps. Accuracy is nearly one hole for the best three-shot groups and always averages under minute-of-angle.

The steep o-give profile of this bullet allows it to be seated out close to the rifling lands, while the cartridge length remains short enough to fit into the magazine. The bullet expands rapidly and very big, so penetration is not as good as expected. But for elk-sized or smaller game this bullet does a great job.

I have used the .358 UMT while hunting a diversity of big game from springbuck to brown bears. It’s been to Africa with me twice and has accounted for a lot of African game, including a waterbuck and a diminutive red duiker that both made the record book.

I have used it a lot in North America as well while hunting game as diverse as mule deer to brown bears. The odd thing is that while I developed the gun for elk, I have not shot an elk with it! It’s been elk hunting, but never when the elk got the memo and remembered to show up.

The .358 UMT shoots flatter than a .300 Winchester with a 180-grain bullet and has more energy than a .416 Remington at any range.

L to R: .416 Remington, .416 UMT and .416 Rigby.

With a 250-yard zero the 225-grain Barnes TSX is 2.24 inches high at 100 yards and 3.26 inches low at 300 yards.

With the 250-grain bullet the .358 UMT produces 5,384 ft.-lbs. of muzzle energy. At 100 yards it still has more energy than the .375 H&H has at the muzzle and at 200 yards it retains 3,676 ft.-lbs., almost as much as the .338 Win. Mag. has at the muzzle.

.416 UMT

A few years later, I decided that if big is good, bigger is even better and I designed another cartridge in the UMT family — the .416.

The .416 UMT is not a complicated wildcat. It is simply a .375 Remington Ultra Mag necked up to take a .416 bullet. The shoulder angle, base to shoulder length, and datum line are all maintained the same as the .375 RUM. One pass of a well-lubricated .375 RUM case over a RCBS resizing die equipped with a tapered neck expander forms the case.

The only other thing I do is square up the case mouth with a case trimmer. This results in a case that is 2.825 inches, or about .025-inch shorter than the .375 RUM.

.416 UMT rifle built on a Remington Model 700 by Mark Bansner.

The case holds 120.2 grains of water to the top of the neck. The most popular .416 cartridges and the closest competitors are the .416 Remington, which holds 103.4 grains of water, and the .416 Rigby, which holds 129.6 grains.

The Ultra Mag class of cartridges were all designed to operate at a maximum average pressure of 65,000 psi, which is the same as the .416 Remington. The larger case capacity with equal pressure results in higher velocity with a given bullet weight. The .416 Rigby runs at about 52,000 psi, which keeps the performance lower when compared to case capacity.

Alliant RL 15 and Hodgdon H4350 were two of the best powders tested, and accuracy was excellent with groups averaging just over one inch with the best loads. With 400-grain bullets and RL15, velocity ran a bit over 2,500 fps.

Ingredients for the .358 WSM wildcat include 225-grain Trophy Bonded bullet, 75 grains of RL17, and a Federal 215M primer.

There are a couple of boxes of this unique ammo someplace in the Dar es Salaam airport, as I was greeted on my way home by a Nazi masquerading as a KLM airline ticket agent. She would not let my bags on the plane because they were a few pounds overweight, even if I paid. I was headed home, the ammo was disposable, and the last time I saw it some guy was carrying it at arm’s length like it was a nuclear bomb.

A muzzle velocity of 2,500 fps is a considerable increase over the .416 Remington and .416 Rigby, which are cataloged at 2,400 fps but rarely have shown it on my chronograph. The realistic “real world” gain in velocity for the .416 UMT is about 150-200 fps over those two rivals when compared with guns of equal barrel length.

The performance on game is outstanding. The first shot of the safari dropped a warthog like he was hit with Thor’s hammer. My buffalo was hit with three Swift A-Frames and two Barnes Banded Solid bullets. All but the first shot exited and they all went through the vitals, including the first shot, which traveled end for end. It hit him in the ass and stopped under the skin on his neck. (Yes, I was aiming there. Don’t ask, it’s a long story.)

The author shot this Colorado elk at 248 yards with a .358 WSM wildcat, which was comprised of a 225-grain Trophy Bonded bullet and 75 grains of RL17. It was stoked with a Federal 215M primer.

Mark Bansner built the gun on a Remington Model 700 action and fitted it with a 24-inch Lilja barrel. The extractor was changed to a larger design for a more positive grip on the case during extraction. I had Mark replace the safety with one that would lock the bolt shut. Mark coated the metal with his proprietary Ti-K-Cote polymer-based finish and fitted the barreled action to one of his High Tech Specialties Stocks. We added a staggered-feed magazine with a single-stack, center feed system from H. S. Precision so the gun would feed Barnes Solids reliably.

When I received the rifle from Mark it only weighed 8-1/2 pounds with a scope. With a brake it was a beast, but it was manageable. I took the brake off and this gun became a detached retina in waiting. I could shoot it, but it wasn’t fun.

It also ate high-quality scopes like they were snacks. So, I had Mark install three mercury recoil suppressors, two for the butt and one in the forend. The result was a gun that came in at a comfortable 10-1/4 pounds when equipped with a Swarovski 1.25-4X24 Habicht scope in Warne detachable mounts. Unlike some others, this scope has stayed together through several hundred shots.

The rifle weight is just about right for this type of gun. It’s still light enough to carry well on those long tracking jobs but is heavy enough to keep the recoil manageable. The biggest advantage of that in a dangerous game rifle is to be able to control the rifle for fast follow-up shots. With this gun I was now able to fire repeated shots very quickly.

A Bansner-built rifle on an M70 action and topped with a Nitrix scope. It’s chambered in .358 WSM wildcat, which shoots a 225-grain Trophy Bonded bullet. The propellant: 75 grains of RL17 and a Federal 215M primer.

.358 WSM

I was there when Winchester launched the .300 WSM and my first thought was to neck it to 35-caliber. In fact, I ordered a “donor” rifle that day. But due to some uncontrollable issues the project stalled for a couple of years and by the time I got my rifle somebody else had already done the cartridge and called it the .358 Sambar.

My rifle is based on a Winchester Model 70 short action rifle. Mark Bansner built the gun as he has several other custom rifles in the past, including both of my UMT wildcats.

The brass is easy to make by simply running .300 Winchester Short Magnum cases into a RCBS die with a tapered expander. I have tested several powders, but of those I tried, Aliant RL 17 is by far the best. It was developed for the short magnums and has certainly lived up to that in this cartridge. It gives me over 100 fps more velocity with a 225-grain bullet than any of the other powders I have tried to date.

The .358 WSM.
The .358 WSM.

With a 225-grain bullet this cartridge easily produces 2,950 fps on my chronograph. That’s the same “advertised” velocity of a 180-grain bullet from a .300 Winchester Magnum. The 225-grain loads produce 4,400 ft.-lbs. of muzzle energy, which is almost 1,000 more than the .300 Winchester.

I have used Trophy Bonded 225-grain bullets to shoot elk, whitetail, and even antelope. The first was a bull elk at 250 yards. The bullet broke both shoulders and exited. You can’t ask for more than that.

The Barnes 225 TSX shoots close to one-half MOA in my gun and is deadly on any game I have shot. The last one was a big whitetail buck that was facing away from me at 15 yards. I caught the last rib and the bullet exited out his neck. To say the results were spectacular would be an understatement.

The 200-grain Barnes Tipped Triple Shock X bullets have a muzzle velocity of 3,100 fps and average .73-inch groups from my rifle at 100 yards. With a 250-yard zero this load is 2.55 inches high at 100 yards and 3.67 inches low at 300 yards.

The author took this whitetail with a Bansner Custom Model 70 in .358 WSM.

This cartridge is not fussy and is very easy to handload. Recoil is very manageable. It’s an extremely versatile cartridge that is good for hunting any big game in North America. It’s not out of place for deer, and I would not hesitate to use it to hunt brown bear. It’s also a good choice for African plains game, including the huge, tough-to-kill eland.

I don’t kid myself that my wildcats will ever achieve commercial success like the .22-250 or 7mm Remington Mangum and that’s OK. I like that they are a bit oddball. While their level of performance is outstanding, the huddled masses will never recognize that. But a gun guy will see the truth and that’s what matters most to a wildcatter.

Editor’s Note: This excerpt is from Handloader’s Digest, 19th Edition available now at GunDigestStore.com

DISCLAIMER: Any and all loading data found in this article or book, including past or future editions, is to be taken as reference material only. The publishers, editors, authors, contributors, and their entities bear no responsibility for the use by others of the data included herein. 

Modern Shooter: The Proper Defensive Handgun Grip

0

From pistols to rifles, it’s all about positioning and working to get a grip on this week’s episode of Modern Shooter.

Get a grip! It’s not just good advice for those who have a tendency to lose their cool, but it also provides the perfect foundation of effective defensive pistol craft. When the chips are down, a solid and proper grip initiates an entire sequence of movements that, in the end, can ultimately wind up saving your life or those of your loved ones.

Phil Massaro delves into the minutia of grip, presentation, efficient kinetics, body position and much more on a recent trip to Double Eagle Tactical Training in this week’s Modern Shooter. The defensive shooting school, located in New York’s Catskill Mountains, specializes in rigorous, true-to-life situational training. Essentially, the concern hones armed citizens’ decision-making skills to a razor’s edge. But as the above clip shows, they also ground students in the fundamentals of combat handgunnery, ensuring that when the decision to use righteous deadly force is made, it is fully executed without flaw.

Gear Review: The Blowback Laser Trainer

0

Finding time to maintain shooting fundamentals can be a challenge, but the Blowback Laser Trainer provides a realistic solution.

Basics about the Blowback Laser Trainer:

  • Laser trainers have evolved a lot recently and can help with basic marksmanship.
  • The Blowback Trainer has a similar weight and feel to a Glock 19.
  • The trigger functions much like a two-stage trigger, with a long take up and clean break.
  • The mag drops out and houses a CO2 cartridge, which is used to simulate recoil.
  • The Blowback Trainer comes with a laser-sensitive target.
  • While no replacement for range time, it serves as a good way to fill training gaps.

I was at my desk on a random Tuesday afternoon in mid-January when it hit me: I hadn’t been to the range for nearly 3 weeks. Granted, that’s not long for some and a very long time for others — and I’ve certainly had longer stints between pulling some triggers at the range — but it bothered me more than usual this time.

blowback-trainer-first - blowback laser trainer

I was in the middle of editing an article about being fully prepared (it’s actually printed in this issue beginning on page 36) as a gun enthusiast who carries concealed. Although it’s near impossible to discuss the concept of “being prepared” or having a defensive strategy without talking about trigger time, the article focuses just as heavily on the other equally important facets of preparation — physical, mental and legal.

On that particular afternoon, that article got me thinking just how difficult it can be to train properly. Really think about that for a moment. If you’re training for a marathon (not that I’d ever recommend that), putting a treadmill in the basement or simply lacing up and hitting the road out front of the house is easily attained. Getting into woodworking? Put a lathe and a table saw in the garage and you can make dust to your heart’s content.

See where I’m going with this? Having chosen a lifestyle dedicated to firearms proficiency, it’s not always easy to practice — in any facet. Unless your backyard is measured in acres instead of feet, the neighbors can get a little jumpy at the sound of gunfire. And for most of us, the ol’ ball and chain would frown at the installation of an indoor range in the basement where the treadmill used to be.

Another editor on the Gun Digest staff and I were participating in some water-cooler-style whining about these and other range withdrawals, and he asked me if I’d spent any time with the Blowback Laser Trainer.

Negative.

The Blowback Solution

Laser-training pistols have evolved dramatically as of recent, and although every product in that category is far from the real thing, you can train and maintain your basic marksmanship principles such as sight alignment and trigger pull quite effectively. And because there’s minimal (if any) muzzle report and no projectiles being launched down range, no down range is needed.

blowback-third - blowback laser trainer

Here’s the problem: You don’t need to be the head cashier at Bass Pro Shops to know that recoil plays a dramatic effect on, well … everything we train around. Yes, you can argue that lack of recoil is exactly why many train with a .22 LR, but that doesn’t solve the range problem. And most laser trainers have no recoil. That’s right — most.

To aid in alleviating range withdrawals, I got my hands on the Blowback Laser Trainer system as recommended. I figured it couldn’t hurt, and it surely had to be less than trying to convince the Mrs. that a basement range was mandatory.

Here’s the skinny:

The Blowback pistol (known formally as the Blowback Laser Trainer) has a similar weight and overall feel to that of a Glock 19, though it’s pretty non-denominational with a metal actuating slide and polymer grip. The muzzle brandishes the bright orange designation of a training gun. The trigger is interesting, in that it functions much like a two-stage trigger with a very long-take-up and then a clean break. It pulls a bit hard, but it is one of the better trigger’s I’ve tickled on a training pistol.

Here’s where things get interesting: The mag drops out and is actually the housing unit for a standard, tubular CO2 cartridge. It’s also home to the battery that powers the laser — but I’ll get to that in a minute.

Upon firing, the Blowback Laser Trainer pistol releases a CO2-powered blowback, cycling the slide like any live-fire semi-auto pistol and simulating felt recoil. Simultaneously, a laser mounted just under the bore is activated, to visually indicate the hit location. It’s pretty damn cool.

The Doorknob Test

For the next few weeks, I snuck around the house (having a home office does have its benefits), assaulting every doorknob and receptacle plate from the basement mechanical room to the upper-level master bedroom closet. I even had time to work in a Labrador hunt or two, though he no-doubt thought I had lost my mind. And, an early delivery by the mailman one morning led to a very random conversation that culminated with me learning that he’s a Sig connoisseur. Who knew?

Confession: I was quite skeptical about the Blowback Laser Trainer system, but then again, I’m skeptical about absolutely everything. But the Blowback surprised me.

Although the recoil isn’t overly significant — I’d put it on parallel with a light 9mm target round — it makes a marked difference in how I trained with that laser pistol versus other stagnant laser pistols without any sort of recoil or report. Upon firing, you receive the audible burst of the CO2 dispersion in addition to the metal racking of the slide functioning during blowback, which brings the entire system that much closer to realism.

The sights are wide and prominent for quick target acquisition, though a little nail polish — my wife’s nail polish; I don’t own any — would go a long way on both the front post and the rear U-notch. It’s a simple home fix, but I would like to see that from the manufacturer.

On average, I was getting 47 trigger pulls from a single CO2 cartridge, which is very reasonable given the amount of inertia it takes to drive the slide. Remember: It’s for the weight and feel of a “real” gun overall, including the slide. CO2 canisters are not hard to come by, and Blowback sells a 20-count box of them on their website for $20.

blowback-trainer-second - blowback laser trainer

The CO2 canisters seat easily into the magazine through the bottom, and they’re installed/removed via a large Allen bolt. The process is a bit slow and I would love to see a Gen2 with a “fast change” option for swapping the CO2 canisters, but this certainly doesn’t detract a bit from the overall effectiveness of the Blowback Laser Trainer system.

Blowback also makes a Laser Trainer Target, which features two target faces that light up and report a “ping” sound when hit, and it features a timed and a standard score mode. It’s a great addition to the Blowback pistol, and it sees daily action on the shelf across the room from my desk … namely whenever I have writer’s block. Still, I prefer slinking around the house and preying on unsuspecting inanimate objects, but that’s just the hunter in me.

Can the Blowback Laser Trainer replace range or simulation time with live ammo? Hell no. And it’s not designed for that. However, it does fill in the gaps between trips to the range rather nicely.

Blowback Laser Trainer Pistol Specs
Height: 5.5 inches
Width: 1.18 inches
Length: 8 inches
Weight: 28.5 ounces
Cost: $450 Laser Trainer / $665 Laser Training System with Target

Editor’s Note: This article originally appeared in the 2018 Concealed Carry issue of Gun Digest the Magazine.

Gear: Buying A Better EDC Knife

2

Understanding the difference between a $25 and a $300 EDC knife.

Top 10 things to consider when buying an EDC knife:

  1. Overall material quality
  2. Top-quality blade steel
  3. Maker/manufacturer and customer service
  4. Application
  5. Price point
  6. Type of lock mechanism
  7. Design for use
  8. Ergonomics
  9. Size and weight
  10. Ease of carry

Gun and knife enthusiasts know it to be true: A person can have a personal connection to an inanimate object, one that cuts or shoots, and particularly if it’s carried every day.

The Brad Southard “Downing” LinerLock folder, showcases marbled carbon fiber handle scales, titanium liners, a 2.125-inch blade and a pocket clip.

Getting ready for work in the morning, you grab your wallet, keys, phone and everyday carry (EDC) piece. Gun guys can tell a high-quality carry piece from trash and what works best for them, what they feel comfortable shooting, how it feels in their hands, which model, caliber and configuration suits their purposes, as well as what they’re most comfortable carrying.

Maybe that’s the key — what is comfortable, what feels right, like a good pair of jeans, a favorite T-shirt or a jacket that hangs just right. And all those things are personal items, familiar and comfortable. They are worn because they fit.

It might not always seem so obvious with knives, and price ranges for knives vary considerably. So how do you get the best everyday carry knife for your money? Will a $25 knife from a big box store suffice? Is there such a thing as a high-quality $25 knife, or does it become necessary to spend $100, $500 or $1,000 for a blade?

I guess you’d have to ask a knife guy — and you’re in luck. There happens to be as many knife enthusiasts as there are tactical knives, fixed-blade hunters and assisted opening folders with thumb studs, pocket clips and locking liners. There are also experts in the field, those willing to assist with choosing the right everyday carry folder or fixed blade for you.

Choosing The Blade For You

“Directing a customer to an EDC knife is somewhat like pointing them toward an everyday car,” says Mike Dye of New Graham Knives in Bluefield, Virginia. “Some think a base economy model suits them well, whereas others want a high-end luxury model. “Obviously, a good mid- or high-end blade steel is paramount,” Dye continued. “And the feel of the knife in the hand — it must fit the user. Different handle materials can make a world of difference in the feel of the knife. Micarta, G-10, smooth or worked titanium, stainless-steel, bone and stag — these choices are of a personal nature.”

Though Dye says everyone likes something different, there are keys to finding the right everyday carry knife. One tip, he notes, is to choose a knife that’s neither too small for the tasks it might encounter on an average day, nor one that’s too large to carry daily.

Matt Salazar, store manager for House of Blades, agrees, and he even has a suggestion as to blade length, saying a 3- to 3.75-inch blade is ideal for an EDC knife. He mentions modern blade steels, such as CPM S35VN or M390, as those that are more than adequate for everyday cutting tasks.

Kershaw makes great knives in every price point. The entire lengths of the flipper folders are ergonomic and flowing, including the blue-anodized handles.

“Stick with a good, high-quality brand that has a track record of great customer service,” Salazar recommends. “G-10 and aluminum are great options as far as handle material goes, although titanium and carbon fiber are widely available if you want something a little more high-end.”

High End Or Affordable?

Dye says a $25 knife might be the perfect choice for a farmer, miner or auto mechanic who uses the knife for any task that comes up. “If broken or lost,” he states, “it’s easier to repurchase a $25 knife than it is a more expensive piece. For others who are less likely to overwork or ask a knife to do chores it’s not designed to do, a higher-end model with ‘prestige’ might be in order.”

“As for a high-quality $25 knife … ,” Dye continued, “yeah, they’re out there. Over 40 years ago, when I started selling pocket knives, the China-Made knives were a joke. That’s not the case today. Some factories in China are producing amazingly high-quality knives at popular prices.”

Dye says such companies as Kershaw and Spyderco (specifically in its Byrd line) market knives manufactured in China with great success. “Ontario and ESEE have great EDCs at a reasonable price,” he notes, “and they offer support for warranty issues.” When tasked with helping someone find the right EDC knife, Salazar always poses the question, “How long do you want the knife to last?”

“In my opinion,” Salazar said, “you’re going to be really hard-pressed to find a high-quality knife for $25. I will say that Kershaw makes great knives in every price point, but I’d also say that $75-$100 would get you an excellent EDC knife that should last you many years with proper use. You can certainly spend more if your budget will allow.”

Many steels in lower-end knives will not retain a sharpened edge for as long as high-quality blade steels, which means more frequent sharpening and a shorter life expectancy for a knife.

“Steel quality, in general, would be the biggest drop-off in opting for a lower-end knife,” Salazar explained. “Inferior edge retention is likely the most significant downfall when purchasing a budget knife. After all, it’s a cutting tool.”

The Zero Tolerance Sinkevich Frame Lock Flipper boasts a carbon fiber front handle scale with a titanium rear scale and a 3.25-inch CPM S35-VN blade that opens smoothly on a KVT ball-bearing system. The knife weighs 2.7 ounces.

High-dollar production knives, such as those available from Chris Reeve Knives, Hinderer Knives and Zero Tolerance, exhibit high-quality craftsmanship, better steel options and stricter quality control. “Look for solid lockup if it’s a locking folder, smooth action and overall quality construction,” Salazar recommended.

“Generally, when the customer has tired of the off-brands and low-end offerings at the big box stores, they come to me asking for a high-quality knife,” Dye added. “That said, most of our walk-in folks have a ceiling of around $50-$100, and there are dozens of excellent choices in that range.”

Tangible advantages to higher-end knives include titanium versus pot-metal knife frames, and handle materials such as Micarta, carbon fiber and natural bone versus molded and crude plastic grips.

“Fit and finish on higher-end knives are rightly expected to be superior,” Dye stated. “A customer will have a good experience with a knife that sharpens easily, cuts well and retains an edge. With high-end EDCs, you start to get into higher-quality frame materials, better steels with superior heat treating, and locking mechanisms that hold greater tolerances.”

“If possible, handle the knife before purchasing it,” he suggested. “Look for lack of blade play on folders, both horizontally and vertically, and examine lockup. Look at fit and finish. Well-made knives at any price will show well in those areas.”

This Enrique Pena handmade “Zulu” frame-lock folder sports a 3-inch blade (an ideal size for an EDC knife) and jigged titanium handle scales.

In conclusion, Dye said, “I tend to steer customers away from fancy opening mechanisms, unorthodox locking mechanisms and knives that have obvious marketing gimmicks associated with them.”

Evaluating Knife Properties

Stainless-steel, as opposed to high-carbon blade steel, is a consideration for Julie Maguire and Ryan Thompson of Arizona Custom Knives.

“In order to be an EDC candidate, a knife should have a high-quality stainless blade,” Maguire said. There are more stainless-steels to choose from today than ever before. Do your research and choose the one that fits your cutting needs,” “Finding a knife with durable handle materials is also important,” Thompson added. “Titanium, G-10, Micarta and carbon fiber are all great options that hold up well in various conditions.”

Weight of the knife should also be a consideration in an EDC knife, according to Thompson and Maguire. “If a piece is too heavy, you will be constantly reminded of it as you go through your daily activities,” Thompson said. “A great EDC knife is one you forget about until you need it!”

“And the same applies for size,” he adds. “Try to choose a knife that’s just large enough to handle the cutting needs you’ll encounter in a normal day. Carrying a knife that’s larger than needed can become cumbersome and frustrating.”

When asked for the No. 1 thing to consider when deciding between a $25 and $300 knife, Thompson answered, “Quality, plain and simple — if you’re choosing to spend $300 on an EDC knife, you should expect superior handle materials, blade steel and craftsmanship.”

“A customer would be unrealistic to expect the same level of quality in a $25 knife that one should get in a high-end production or custom knife,” Thompson says. “As an example, certain handle material can cost more than $25 in and of itself.”

The Spyderco Para Military 2 folder has G-10 handle scales and a 3.43-inch CPM S30V blade. It weighs 3.9 ounces and is available from NewGraham.com for $136.47.

Other signs of high-quality knives include excellent workmanship throughout and added features such as an IKBS (Ikoma-Korth Bearing System) on folding knives or custom-made sheaths to accompany high-quality EDC fixed blades, Maguire says.

Some qualities to look for, she adds, are blade centering between handle halves on folders, overall fit and finish, secure lockup on folders, smooth opening/closing action and comfortable overall knife ergonomics. Gimmicks to avoid on an EDC knife include less-practical opening mechanisms and locking devices.

“There are incredibly creative opening, closing and locking mechanisms that unfortunately don’t translate well to an EDC cutting tool,” Maguire explains. “In general, if a knife can’t be opened, closed or drawn from its sheath with one hand, it probably isn’t a great fit for an EDC.”

“Consider how often you hold an item in your hand and realize you need your knife to cut, peel, open or trim that same object,” she proposes.

Buy From A Reliable Source

Where a customer buys an EDC can be just as important as what they buy, Thompson said. He suggests researching a manufacturer’s track record when buying a production knife, or to educate yourself about a maker’s reputation when considering a custom knife.

Jordan Saldana, general manager of American Edge Corp., suggests customers receive a more personal experience when they “shop small.” “At American Edge, we always try to find the best knife for the customer based on what they will be using the knife for, as well as the price range that he or she falls under,” he explains.

Chris Reeve folders are consider quality knives with ergonomic designs, thick frames, solid locks and easy-opening, high-end steel.

“It’s hard to go to Walmart and receive the custom experience of going to a small business that specializes in knives,” Saldana added. “We take the stress of guesswork off customers by customizing the right choice of knife.” Saldana’s ideal EDC knife is lightweight, slim and compact, with a blade length between 2.5 and 3 inches. “You want something that’s capable of handling any task that you would find during your normal daily routine, but it also must be light and small enough where it isn’t burdensome in your pocket all day,” he said.

“You can get a decent knife at $25, but it will probably not last nearly as long as one that is more expensive,” Saldana continued. “I suggest purchasing an EDC knife for between $100 and $300. The quality at that price range should be great, and it will hold up. You’ll see more ultra-premium blade steels and handle materials, tight machining tolerances, and mechanisms and locks will be smoother to operate and solid.”A company with a good reputation stands behind its products and offers hand-fit and hand-assembled knives, Saldana explained.

As far as gimmicks on knives, he said, “A good rule of thumb is that if you can’t look at the knife and figure out how it operates, the mechanism is probably not user friendly.”

One thing is for certain: As knife designs, blade steels, materials and mechanisms improve, the perfect EDC will always be a moving target.

Editor’s Note: This article originally appeared in the 2018 Concealed Carry issue of Gun Digest the Magazine.

Video: The PepperBall Non-Lethal Weapon System

0

The PepperBall is a non-lethal weapon system designed to incapacitate would-be attackers with a stinging projectile filled with a concentrated powder irritant.

Many of those who take their safety within the home seriously might have a handgun in a nightstand or a shotgun propped nearby for addressing threats. However, for those unfamiliar with or untrained with firearms, or for those not prepared to or unwilling to defend themselves with lethal force, a non-lethal response tool might be the ticket. And a great option that’s currently available is the PepperBall non-lethal weapon system. 

At the crux of this system are a spherical projectile (typically filled with a concentrated powder irritant designed to incapacitate threats) and a launcher designed to propel it. One of the nice things about this, of course, as opposed to simple pepper spray, is that the risk of accidentally spraying yourself is dramatically reduced, as the ball is launched at decent speed to the target.

During the recent 2018 SHOT Show, Gun Digest Editor Luke Hartle was able to get a hands-on look at the PepperBall system. More specifically, he examines and tries out the “Life Light,” or Flashlauncher, which sends the projectiles downrange at around 300 feet per second — plenty fast to bust the PepperBall open and unleash its payload. 

As an added bonus, the launcher, as its name suggests, comes equipped with a 180-lumen flashlight. A light is critical in any home defense scenario, and with this PepperBall launcher, it’s built right into the design.

It also incorporates a laser sight to assist the user with aiming. Just as a laser makes sense on a home defense firearm or carry gun, so too does it here.

Although it’s the powder irritant that most will be looking at with the PepperBall system, the manufacturer’s website also lists a host of other projectile options. These include various types of visible and non-visible marking rounds, a water-filled training round and a glass breaking projectile, among others.

For more information on this innovative non-lethal weapon system, check out the video above or visit the PepperBall website.

New Holsters: DeSantis Introduces The Osprey And Infiltrator

0

Designed with comfort and flexibility in mind, DeSantis’ new holsters should facilitate comfortable concealed carry.

The two new DeSantis carry holsters:

Next to your delicates, there’s nothing more personal than a holster. And like underwear, you pick the wrong one and it’s a real pain in the rear.

That’s the short and long of why there are so many dang makes, models, styles, designs and systems to secure your handgun to your person. Not every holster was meant to or will function optimally for every person. It’s a somewhat uncomfortable lesson armed citizens quickly learn; and in the process, it earns them a small legion of just-off Kydex and gunleather that junks up the back of a closet or utility drawer.

DeSantis Gunhide has either simplified this process or complicated it, depending on where you stand, with the introduction of two new holsters. Executed with the company’s eye to detail, the two rigs cover nearly every carry style short of pocket and ankle.

Osprey
DeSantis-Osprey-Holster

Constructed from premium tan saddle leather, the Osprey has a classic holster look, configured for convenience and versatility. With slots that accommodate belts up to 1 ½ inches wide, the holster is designed for both inside- and outside-the-waistband carry. Additionally, when utilized IWB, the Osprey can cant to user preferences and is adjustable without tools. And a single screw gives a user complete control of the holster’s tension. The Osprey has a fairly affordable price tag, $69.99, and is compatible with medium and large autoloaders and is available for a number of popular makes and models, including:

  • Glock 19, 19 GEN 5, 23, 32, 43
  • SIG P250C, P320C, P938
  • Ruger LC9
  • S&W M&P Shield 9/40, M&P Shield M2.0 9/40
  • Springfield XDS 3.3″
  • Standard 1911 models 5″ FROM Colt, S&W, SIG Sauer, Ruger, Kimber, Springfield, and others
  • Kimber Micro 9mm

Infiltrator Air
DeSantis-Infiltrator-Holster

Strictly an IWB holster, the Infiltrator Air is designed for the utmost comfort when it’s up close and personal. A backboard constructed of breathable synthetic material accomplishes this, molding to the body, while allowing airflow. Additionally, the material has wicking properties, pulling perspiration away from the skin, so the holster doesn’t create a personal swamp even on hot days. DeSantis’ hybrid holster features a precision-molded Kydex retention system, custom fit to specific makes and models. Retention is adjustable by tightening or loosening six screws that marry front to back. The holster attaches to a belt with adjustable C clips; however, J clips are available for the rig. Compared to many hybrids on the market today, the Infiltrator Air is competitively priced at $89.99 and is compatible with a wide spectrum of semi-automatic pistols and revolvers, including:

  • Glock 17, 17 GEN 5, 19, 19 GEN 5, 22, 23, 26, 27, 36, 42, 43
  • SIG P229, P229R, P229DAK, P220, P220R, P226, P226R, P225,P225-A1, P228, P228R
  • S&W M&P 9/40, M&P CPT 9/40, SD9, SD40 4″, M&P M2.0 COMPACT 4″, M&P M2.0 4 1/4″, M&P. Bodyguard 380CAL & M&P Bodyguard w/ integrated CTC laser Shield 9/40, M&P SHIELD M2.0 9/40, J FRAME 2 ¼” – 2 ½”, M&P Shield .45
  • Ruger LCR, LCRX, LCP 380CAL, LCP CUSTOM, LC9, LC9S
  • Kimber Solo 9mm
  • Springfield XDS 3.3″ & 4″, XD9, XD40, XDM 3.8″, XDM 4″, XD 9/40 MOD 2 4”
  • Standard 1911 Models 3-3.5″ and 4-5″ from Colt, S&W, SIG Sauer, Ruger, Kimber, Springfield, and others
  • H&K VP9/40

Reloading: Accuracy’s Unsung Hero — Powder

1

There are a ton of great powders out there for reloaders — and not all of them are new.

Getting the most out of your powder:

The means of propelling a projectile is an often-overlooked link in the ballistic chain. Whether you credit the Chinese — who had developed the substance earliest — or the works of Friar Roger Bacon, the use of gunpowder to launch a bullet changed the world forever. Black powder, that mixture of sulfur, saltpeter and charcoal, remained relatively unchanged until the mid-19th century, when nitric acid was put upon cellulose to produce nitrocellulose.

Three of the original IMR powders, released in the 1930s. They gave good accuracy then, as they do now, but the modern developments offer some advantages.

This substance was known as guncotton, and it was capable of producing pressures and velocities much greater than its black powder counterpart, and it took a bit to develop metallurgy that could withstand the pressures generated. Later, in 1887, Mr. Alfred Nobel invented Ballistite, which consisted of a mixture of nitroglycerine and nitrocellulose and created a plasticized substance that was a stabile compound. This substance was something of a precursor to cordite, a British version introduced two years later.

Cordite was the chosen propellant for many of our classic cartridges. One of cordite’s little peculiarities was the fact that it was extremely sensitive to temperature fluctuation, and those cartridges that were developed in England and Continental Europe often saw dramatic pressure increases when brought to Africa and India. The heat of the tropics quickly brought out the flaws of cordite, from extraction troubles to cracked receivers, and this is why some of the huge cases like the .416 Rigby and the .470 Nitro Express came about. They simply needed that case volume to keep the pressures at an acceptable level.

Our modern era of smokeless powders has seen incredible advances in the science of propellants; these new developments have made the older cartridge designs even more effective, and they’re an important part of the excellent accuracy we are all enjoying today. It’s relatively simple: Accuracy is — taking the shooter’s effects out of the equation — a product of consistency, in cartridge, projectile and barrel.

The Silent Partner

We’re all pretty familiar with the quality of modern barrels, and most definitely with the fantastic bullets of the 21st century, but the powders have an equally important role. If you’re not a handloader, you might not have an opportunity to examine or experiment with the variations in powder performance, at least not in a method that is controllable.

IMR4350 has been faulted for its velocity variations as temperatures change, but it sure has served the author well in many different climates, in many different cartridges. Old is not dead, and IMR4350 will remain a staple.

If you handload your ammunition, you’ve more than likely seen how big a part that powder choice plays in the results of your handloaded ammunition. In either case, a deeper investigation is warranted in order to best understand how our ammunition works and how to arrive at the best results for your particular shooting situation.

There are three types of grain structure we need to be concerned with: flake, ball and stick. Flake powders are usually employed in handgun cartridges and shotshells, as they tend to have a fast burn rate that is optimal for both of those applications. Ball powders are good choices for rifle cartridges with a lesser case capacity, especially when using the longer-for-caliber bullets. Stick powder is extruded into thin, spaghetti-like sticks and then cut to a specific length. It’s stick powder that dominates the rifle cartridge market.

We owe much to the DuPont company, founded in America just after the turn of the 19th century, for the development of powders we’ve relied on for the past 80 years. Under the IMR, or Improved Military Rifle, brand, DuPont gave us the classic IMR 3031, IMR 4064 and IMR 4350 — all during the 1930s. These powders gave handloaders and wildcatters a means of expounding on the magnum cartridge idea, developing higher pressures and correlative velocities.

Alliant Reloder 16 gave great results in the author’s .318 Westley Richards, keeping the Standard Deviation on Velocity to single digits.

After the Second World War, Bruce Hodgdon — who learned that the U.S. government had burned huge amounts of surplus powder at the end of WWI — decided that he’d market surplus powder. The Hodgdon Powder Company sold kegs of 4895 — designed for the .30-06 but useful in many cartridges — and began a journey that continues to this day. While those early powder developments are still used by many today, there are many new offerings that have changed the game.

As a handloader, I use many different brands of powder, including Hodgdon, IMR, Winchester, Alliant, Norma and Vihtavuori. Some of the first accurate loads I ever developed are still in use and will more than likely remain so, based on the “if-it-ain’t-broke-don’t-fix-it” theory, but I also enjoy experimenting with new powders in a constant effort to improve performance.

In the effort to enhance accuracy — something every shooter chases — powder engineers have made every effort to reduce the velocity variations produced by temperature fluctuation. It has been an accepted premise that ammunition would lose 1-2 fps for every Fahrenheit degree of change from the mean temperature of 68 degrees, which might not seem like much, but it’s a definite factor when hunting in extreme temperatures. It also might not dramatically affect trajectory at sane hunting ranges, but it can be a nagging problem for the long-range target shooters.

New-But-Proven Champions

Three of the four IMR Enduron powders, engineered for temperature insensitivity, as well as reducing copper fouling.
Three of the four IMR Enduron powders, engineered for
temperature insensitivity, as well as reducing copper fouling.

Hodgdon has been at the forefront of powder development, in both their Extreme line — which includes VARGET, H4831SC, and H322 — and in the IMR Enduron line (IMR is currently owned by Hodgdon), and both series of powders are designed to virtually negate the effects of temperature fluctuation. I’ve done a bit of work over the years with both of these lines of powders, and they’ve been true to the advertised claims.

When I handload my ammunition for African hunting, I do my best to test the ammo in the hottest conditions I can muster. I leave the cartridges and rifle in the summer sun to get them as warm as possible, and then test for pressure signs. If the area of Africa I’m hunting is cooler, then there are no pressure concerns, perhaps at worst a change of point of impact.

When I was heading to South Africa to hunt the first week of November, I knew things would be warm, but not as warm as I found out it would be. I had loaded a bunch of .300 Winchester Magnum with IMR 4451 — one of the quartet of Enduron powders — and found the accuracy pretty close to maximum. Temperatures during load development peaked at about 80 degrees, but our first full hunting day in South Africa rose to 112 degrees, and that’s hot enough to test the mettle of any powder. I’m happy to report that the Enduron powder functioned perfectly, giggling at the effects of the African blast furnace.

H335, one of Hodgdon’s spherical powders designed to run perfectly in the .223 Remington, saved the day for me when my Dad and I headed to Tanzania. Ol’ Grumpy Pants was bringing a Winchester Model 70 in .458 Winchester Magnum for Cape buffalo and wanted 500-grain bullets at 2,150 fps. I had some of the old A-Square Dead Tough softpoints and Monolithic Solids and went nuts trying to find a powder that would give me velocities anything close to what I wanted. Enter H335, a powder that took up the least amount of room yet delivered the goods in both the accuracy and velocity department. Three-shot groups measured an average of 1.5 MOA, and muzzle velocities ran at 2,120 fps. Mission accomplished.

Ramshot’s TAC saved the day with an older, finicky .300 Savage, bringing it quickly out of retirement.

A key part of accurate ammunition is a consistent muzzle velocity. The serious long-range shooters strive for a standard deviation on velocity in the single digits to ensure the most consistent performance. Hunting ammunition doesn’t necessarily need that same level of consistency, but it sure doesn’t hurt.

Sometimes, experimenting with new or different powders will yield some unexpected results in a rifle that will appear unsatisfactory. My buddy has a family heirloom: a Savage Model 99 in .300 Savage. That rifle, while equally handsome and sentimentally valuable, didn’t like any factory offerings; some groups were as large as 4 inches. Mike had given up on the rifle until I suggested we handload for it. The first attempts were fruitless. I grabbed a canister of Ramshot TAC powder, which has a burn rate perfect for the .300 Savage cartridge, and set to work. The first set of loads gave us 1.5-MOA groups, and after some tweaking, we got that rifle to print sub-MOA.

When my wife was preparing for her first safari, she knew she wanted to use her Legendary Arms Works Big Five rifle in .375 H&H Magnum. She trained with all sorts of ammunition, but we settled on a 235-grain Cutting Edge Raptor for the plains game species she was after. Experimenting with a few powders that I’d used in the three-seven-five before, I wasn’t getting what I wanted for Mama.

Once again, I tried some Norma 200 powder on a whim and was more than pleased with the results. Group size was 0.8 inch at 100 yards, and muzzle velocity was just shy of 2,800 fps. Had I stayed with the powders that work so well with the 300-grain bullets, I might have given up on the bullet and missed out on a great combination.

Pistol cartridges are equally benefitting from powder advancements. The Barnes XPB bullet is a good choice for those who hunt with a handgun, but it will definitely pose some different reloading challenges. They are long for caliber and take up a good amount of room in the case. Classic powders like Unique and Bullseye are still valid, but other choices such as AA No. 9 from Accurate Arms can make a huge difference in performance, especially with the monometals. Likewise, powders like Titegroup, CFE Pistol, IMR Unequal and Alliant’s Sport Pistol all deserve a worthy audition in your favorite handgun cartridges, where applicable.

Time-Proven Propellants

Now, with all these new developments, does that mean the old standbys are sent into obscurity? I don’t believe that’s the case at all.

Norma’s 200 powder gave some unlooked-for accuracy in the .375 H&H Magnum, using lighter bullets.

Good old Reloder 19 — a powder oft cursed for its mood swings correlative to the thermometer — has given me some very accurate results. The same can be said for IMR 4350. Alliant’s Reloder 15 is a neat little secret for so many of the big-bore cartridges I love, giving good velocities with what feels like an appreciable reduction in recoil. IMR 4064 has been with us for over 80 years, yet it still fuels a .308 Winchester, .22-250 Remington and .375 H&H perfectly. That said, if I know for certain that I’m headed into an extreme environment, be it hot or cold, I might take full advantage of one of the less volatile powders and develop an entirely new load.

Battling Variances

What about the variances in powder, from one lot to the next? Does it play a part in the accuracy equation?
Absolutely.

I was invited to tour the Norma Precision ammunition plant in Sweden and got to see how the manufacturer’s African PH line of ammunition is put together. This ammunition line has a great reputation — my own Heym .404 will put three 450-grain Woodleigh softpoints from the Norma stuff into ¾-MOA — and I wanted to see what made it tick.

It turns out that the Norma African PH line is handloaded by a very talented man named Victor, and it’s part of that process to check the lot-to-lot variation in powder pressures and velocities. For example, the .470 Nitro Express ammunition needs to be at an even 2,150 fps in order to regulate properly in a double rifle. Each lot of powder is tested in a machine to verify that the tolerances are acceptable, and if not, an adjustment is made to rectify the variance.

Trust But Verify

I know — first hand — that all of the powder companies take every possible step to ensure that their products are the most consistent and repeatable that they produce, yet we handloaders need to be aware of the possible pitfalls, and the same theories explain why some factory ammunition will show variances from case to case. It’s better than it ever was, but still part of the bigger picture.

Powders-fourth

Should you change your favorite powder/bullet/cartridge combination? Well, that’s a personal decision, but I’m the type of hunter and handloader who likes to hedge his bets, always having a backup plan should we face the drought of 2013-2014. At the very least, you’ll enjoy the time spent with your handgun, shotgun or rifle while experimenting for a minimal investment.

Having good loads already developed for most of my rifles and handguns, I enjoy the sheer experimentation involved with new powders, adding to my library of loads. Either way, I feel that modern powder developments are as important as modern bullets or modern optics — they’ve made our lives as hunters and shooters much easier.

Editor’s Note: This article originally appeared in the December 2017 issue of Gun Digest the Magazine.

How-To: Improve Accuracy With Minor Scope Adjustments

1

drift-first

Improved accuracy can be as simple as a few scope adjustments to sharpen your view and relieve eye strain.

Some things to know about focus and your rifle’s scope:

  • Many riflescopes are improperly fitted to the shooter.
  • A simple adjustment almost always results in improved accuracy.
  • Ocular focus ensures the reticle is properly focused for your eye.
  • Properly adjusted, your eye won’t strain trying to focus on the reticle.
  • Parallax is where objects at different distances appear to change position when your head moves.
  • Many scopes have parallax adjustment knobs to place reticle and target on the same focal plane.

Most of my students have had one thing wrong with the setup of their rifles when they start a course (this includes military and police snipers, as well as recreational shooters). The improper setup has a direct impact on their ability to shoot as good as they should and, once we change it, there’s almost always an instant improvement.

This means that there’s a good chance you have this problem, too — and it just might be holding you back.

The common issue is not having the riflescope adjusted for the particular shooter. This doesn’t just apply to having the scope mounted in the correct position or the stock’s cheek piece (comb) adjusted to the proper height. The most common error I see is not properly adjusting the scope’s ocular focus to the shooter’s eye.

What Is Ocular Focus?

The ocular focus ensures that the reticle in the scope is properly focused for your eye. It’s typically adjusted by turning the adjustment ring closest to your eye; however, sometimes the entire ocular housing must be turned.

If your eye becomes fatigued, or if you have trouble keeping the reticle in focus while you’re shooting, this is likely a problem on your riflescope.

The best way to adjust the ocular focus is to have a friend help, but it can be accomplished on your own.

1. First, have your friend place a white sheet of paper halfway down the barrel (or, if you don’t have any friends, position your rifle near a light-colored wall a few feet in front of the muzzle).

2. Next, get on the rifle with your eyes closed and only open your shooting eye once you’re in a comfortable position. If you need to adjust your head’s position in order to see clearly through the scope, that’s a good clue that you need to adjust your scope’s mounting position or adjust your cheek rest.

3. Once you can see clearly through the scope, quickly glance (one or two seconds) at the reticle and then close your eye. Then, make a bold adjustment to your ocular focus and re-open your eye for another quick glance. Make a determination on whether the reticle’s image/focus is better or worse than last time. There’s no need to over-think this process or make an overall determination immediately. Better or worse is all we care about right now.

A quick glance is important — if you stare too long, then your eye will play a trick on you and work to focus the reticle’s image.

Keep making bold adjustments to your ocular focus in each direction until you have figured out where the best/crisp image of the reticle is.

4. Now that it’s adjusted properly, you’ll be able to shoot better because you’ll be able to clearly focus on the reticle and not strain. However, the ocular focus is only half of the “focus” battle.

Parallax/Target Focus

Your scope is now focused to your eye, but it’s not focused on the target. There is no perfect focus for the target because it changes with different target distances.

Many (most) hunting scopes don’t have an adjustment for target focus — you’ll still be better off for having adjusted your ocular focus properly. However, most higher-end hunting scopes and tactical-style scopes have a parallax/target focus knob that you should use whenever you shoot at a new distance.

What Is Parallax?

Parallax is the name of the phenomenon that makes objects at different distances appear to change position when you move your head. For an example, place a finger from each hand in front of your face at different distances and line them up with your eye. Now, move your head from side to side and notice how your fingers are no longer lined up. That is the effect of parallax.

In your scope, the target’s image is focused at one location within your scope. If that location is different than where your reticle is located, then you’ll notice parallax when you move your eye side-to-side. The goal is to get the target’s image and the reticle on the same focal plane so that they move together (as if one finger was directly behind the other).

The parallax knob (or target focus knob depending on what your scope’s manufacturer calls it) moves the location of the target’s image in your scope. You can use the distance markings on the parallax knob to get close, but the only way to check it for sure is to adjust the knob until the target’s image is clear.

scope-first

Some scopes have an adjustable objective. This is not the same as adjustable parallax or target focus. Instead, it means that the objective housing (the lens facing the target) turns to adjust for target focus. It does the same thing as a side-focus knob, but I much prefer the knob on the side because it’s easier to adjust. Don’t specifically hunt for an adjustable objective scope — instead, look for one with an adjustable parallax or target focus (regardless of how that particular scope adjusts for it).

Once you’ve done this, you’ll have no parallax issues (which can make you miss with imperfect head position) and your reticle and target will be clear (without that sensation of having to focus on one or the other).

I’m going to make a bold claim: Properly adjusting these focus settings for your eye and the particular target you’re shooting will make you a better shooter.

This article originally appeared in the Winter 2017 issue of Gun Digest the Magazine.

How-To: Adjust Iron Sights On Fixed-Sight Pistols And Revolvers

0
iron sights-1
This is an old-style front sight, properly staked onto a 1911 slide. Done right, this won’t come off short of a hammer.

Iron sights on handguns remain a durable and cost-effective option. Check out these tips to adjust the iron sights on your fixed-sight pistol or revolver.

Sights come in three types; fixed, adjustable and optical. Fixed and adjustable sights are referred to generically as “iron” sights. Despite their name, fixed sights can still be adjusted, though they require filing or welding, and drifting with a hammer and copper punch, to adjust. Adjustable sights can be moved with just a small screwdriver, and you can easily make incremental changes. A lot of shooters wonder why, if the fixed sights are so hard to adjust, they should use them. The answer is this: Fixed sights are cheaper and more durable.

Adjust Iron Sights On A Fixed-Sight Revolver

There are two directions to adjust on a sight: Vertical and horizontal. Do not make vertical (up-down) adjustments until you have the revolver hitting on the centerline horizontally (left-right adjustments).

Adjusting the horizontal is done by turning the barrel fractionally in or out of the frame. When you turn the barrel slightly tighter into the frame, you will move the bullet strike to the right. When you slightly unscrew the barrel, you will be moving the bullet strike to the left.

Before you start, examine the top of the barrel where it joins the frame. You need to record exactly how the two fit together before you make any adjustment. If the barrel is a smooth round cylinder, take a permanent marking pen and draw a straight line from the barrel to frame. With a barrel that has a rib or grooves on the top, make a drawing of just where the rib or lines match up with the frame.

Take the cylinder out of the frame. Clamp the barrel vertically in a padded vise, or in barrel blocks in the vise. Secure a frame wrench firmly around the frame. Depending on which adjustment you need, right or left, use a wrench to tighten or loosen the barrel slightly.

The amount you will adjust the barrel is extremely small. Make your first adjustment so the mark you are using as an index on the barrel/frame alignment is moved no more than .010 inch. Take the revolver to the range and test fire it. Your group will be moved by the adjustment you have made. Use the difference between the unadjusted and adjusted groups to determine how much additional adjustment may be needed, or what fraction of the correction you need to undo.

For example, your bullets had been striking 6 inches to the right, and you loosened the barrel .010 inch. Now the bullets are only 2 inches to the right. A .010-inch adjustment corrected 2/3 of the error (4 of the 6 total inches). To correct the remaining 1/3, or 2 inches, you need to make another adjustment of .005 inch, or half the adjustment you already made. Setting up a simple proportion will help you calculate the adjustment with any set of numbers.

Vertical adjustment can be made only by filing the front sight to raise the bullets’ impact, or welding more steel to the sight to lower the impact.

Except when you change barrels, you will rarely have to adjust the horizontal impact. You may have to “tweak” the new barrel back and forth a couple of times until the sights are dead-on. Filing the front sight for vertical adjustment is common only on single-action Colt or Colt clone revolvers. On these, the barrel is often made with the front sight too tall. You file it to the correct height after adjusting horizontal impact. I have never had to adjust a Smith & Wesson barrel for vertical impact.

Adjust Iron Sights On A Fixed-Sight Semi-Auto Pistol

To make horizontal adjustments on most pistols, you move the rear sight. Use a brass or copper punch and a hammer, or an adjustment fixture. To move the bullet impact to the right, move the rear sight to the right. Move the sight to the left to move the bullet to the left. Many modern pistols will have a front sight that is installed in the slide by means of a dovetail. Just like the rear, the front sight is pressed into the dovetail and left centered on the slide.

If you have a pistol that strikes right or left of your aiming point, look first at the front sight as a check. Measure it. Is it centered? If it is, then you can proceed to make your corrections on the rear. If it is not, plot the front sight offset, and how it affects your problem. If you find that you have a pistol that hits to the right, and curiously enough your front sight is left of center, perhaps the front is more of your problem than the rear? Center the front sight, test-shoot again, and see what happens.

Unlike barrel turning, you can calculate the exact amount you have to move your pistol sight without trekking back and forth to the range. The ratio of the sight radius to the correction needed is the same as the ratio of the distance to the target and correction on the target. This is the same formula in Chapter 3, using a mill to adjust your sights. The sight correction divided by the sight radius equals the target error divided by the target distance.

For vertical adjustment, file the front sight to move the bullet impact up. Install a taller front sight to move the bullet impact down.

Glock makes vertical adjustment very easy by offering their rear sights in a range of heights. If you find that your Glock is off vertically, check the side of your rear sight and find the line or lines cast into the plastic. The lines indicate the height of the sight. When you write to Glock for a replacement, state which model Glock you have, how far off your pistol is at what distance, and what your current sight says on the side. If you plan to own several Glocks, you can order one sight of each height, and then swap them around as needed.

This article is an excerpt from Gunsmithing Pistols & Revolvers 4th Edition.

Buying A Used Pistol: What To Look For In The Glock, 1911 And Beretta 9MM

0

There is nothing wrong with buying a used pistol. Assuming, of course there is nothing wrong with the used gun you are buying. But how to tell?

Check out these gun-specific tips for:

The first thing to do is buy from a reputable shop, one with a clear return policy. The best chance of buying a good used gun is from a shop with a gunsmith in residence. With a ‘smith on premises, you can be pretty sure every used gun in inventory went through his hands. And any you buy can be returned for an inspection to see if the problem you are encountering is real or caused by an outside force.

The process is simple: look, feel and listen. Look for things out of place; wear that is odd, or signs of abuse. Feel for the way it functions compared to a new model or a known-good used one. Listen to the noise of the springs, the clicks, the slide cycling. They’ll all tell you something.

And ask what the owner/merchant knows about its history, previous owners, performance, or reputation? Buying a competition gun can be good, and it can be bad. Was it the backup gun of a Grand Master that spent most of its time lounging in his range bag waiting its turn? Or was it the experimental subject of an aspiring gunsmith or competitive shooter? Be careful, ask, listen, and get the return policy in writing.

Etiquette Of Buying Used

There are a few things you have to know about buying a used firearm. First of all, remember that until you hand over the money, it is someone else’s firearm you’re handling. It is entirely within the performance parameters of many handguns to be dry-fired from now until the end of time and suffer no damage. However, some people don’t believe it, and will be very grumpy if you dry-fire their handgun. Ask before you dry-fire. If they refuse, then you have to either move on or do your pre-purchase due diligence without dry-firing.

Ask before you disassemble, as again, some people just don’t like having their handgun yanked apart. They may be cranky, and they may simply have had too many bad experiences with people who didn’t know what they were doing.

Properly done, negotiation and a resulting purchase is a mutually pleasurable social event, not a dental visit.

used gun-2
When buying a used firearm, look for signs of dropping. This dented barrel may not have harmed the crown, but it might have lead to the barrel being bent or the frame twisted. Look, check, and get a return guarantee if you can.

Buying A Used 1911

When you’re considering a used 1911, start with a good visual inspection. Has the exterior been abused? Hammer marks or rough file marks on the outside should make you wonder how careful the previous owner was with the inside. If the original blued surface is now gray from years of use and carry, but the owner never dropped it and fired it seldom, you have a great opportunity. The looks are likely to bring the price down, but mechanically it can be just fine. If it is a pistol used in competition, you might be able to find some answers by asking about its history with other competitors. Did the previous owner have a reputation of always shooting unreliable guns? Or were his pistols always reliable, just ugly?

But also be aware history, or rarity, might overwhelm the other factors. I was just looking at a nice 1911. It had most of its bluing. It had dents and dings and a mildly stained fingerprint on the slide. The wood grips were worn down past the checkering, where it had been exposed outside of the holster. Actually, it is worth the price of a small used car because it was made in 1912 and remains unmolested though honestly worn, and it came in a USGI holster issued with it in WWII. Age and rarity elevated the price far beyond the price-lowering variables of its condition.

After visual inspection, check operation. If you haven’t already done so, make sure the pistol is unloaded, and tell the clerk at the store you want to perform some safety checks. Cock the pistol and dry fire it. Was the trigger pull very light? A very light trigger pull will have to be made heavier to be safe and durable. Or was it very heavy? Did it feel as if it was crunching through several steps before it finished its job? A very heavy or gritty trigger pull will have to be made smoother and lighter.

Execute a “pencil test.” Cock the pistol and drop a pencil down the bore, eraser end first. Point the pistol straight up, and dry fire it. The pencil should be launched completely out of the pistol. If it isn’t, something is keeping the firing pin from its assigned duties.

You must perform a mechanical safety test. Cock the hammer again and push the thumb safety on. Holding the pistol in a firing grip, press the trigger a bit harder than you would to fire it. Seven or eight pounds of pressure is sufficient. Let go of the trigger, and push the thumb safety off. Now hold the pistol next to your ear and slowly draw the hammer back. You should not hear anything. If you hear a little “tink” when you draw back the hammer, the thumb safety is not engaging fully.

If you heard the “tink,” here’s what happened. When you pulled the trigger with the safety on, the sear moved a tiny amount until it came to a stop, bearing against the safety lug. It shouldn’t have moved at all. The hammer tension kept the sear from moving back into its start position when you pushed the safety off, leaving the sear partially bearing on the hammer hooks. When you held the pistol close to your ear and drew back the hammer, the tension on the sear was removed. The sear spring pushed the sear back in place, causing the “tink” you heard. If the hammer stayed cocked, the sear only moved a tiny amount. The fix is easy. What if you never got to the “tink?” If the hammer fell when the safety was pushed off, before you even tried to listen, the thumb safety fit is very bad and you will have to buy and fit a new safety. In the worst case, the hammer falls even when the safety is on. These also need a need thumb safety, and perhaps some other new parts inside as well. Considering the amount of work needed, and the possibility of other things being badly fit, you might just want to pass on this particular 1911.

Next test the grip safety. Cock the hammer and leave the thumb safety in the down position. Now, holding the frame so you do not depress the grip safety, pull the trigger. Release the trigger, and, now grasping the pistol so you do depress the grip safety, hold the pistol up to your ear again and draw the hammer slowly back. If you hear that “tink” again, the grip safety is barely engaging. Look at the grip safety. Because some competitive shooters don’t feel the need for one, they grind the tip of the grip safety off where it blocks the trigger. If this has been done to the 1911 you’re thinking of buying, you will need to have the tip welded back up, and fit it to the trigger. If the tip hasn’t already been ground off, or otherwise altered, you’re looking at an easy fix. It is probably just a simple misfit, which you can correct with careful peening.

used gun-3
Some “problems” are cosmetic. This crack in a 1911 has been the same size for over 10 years and 5,000 rounds. There isn’t any real need to weld it up and re-finish the frame.

The last test you need to perform is a hammer/sear engagement or hammer flick test. There’s a good way and a bad way to perform this test. In the caveman days, we would lock the slide open empty. Then we would release the hold-open lever and let the slide crash home on an empty chamber. This is more abuse than test, especially since it doesn’t fairly test the hammer sear engagement. Continued “testing” this way can actually do harm to your hammer and sear and abuses the barrel, link, and slide.

In the modern, improved “flick” test, you cock the hammer, grip the pistol so the grip safety is depressed, and hold down the thumb safety. With your other hand, flick the hammer back against the grip safety, and let the hammer go forward to sear engagement. This non-destructive test can be performed until your fingers bleed, and will not harm the sear and hammer hooks. If, however, during this test the hammer falls — even once — the hammer/sear engagement will require work. You cannot depend on this pistol to stay cocked when firing. The pistol may simply require re-stoning the engagement surfaces, or it may require a new sear, or both new sear and hammer. Until you look at the engagement through a magnifier, there is no way to tell.

Buying A Used Glock

What with every police department on the planet going to the Glock (or so it seems) there are large numbers of used Glocks for sale everywhere. Every wholesaler flyer I get has used Glocks listed, sometimes pages of them. So, you’re peering through the glass at your local gun shop or cruising a gun show, and you see a used Glock offered at a good price. What to look for?

First, give it a good visual external inspection. Look to see if there are any signs of abuse, neglect and/or experimentation. External abuse would be things like the corners of the slide being chewed up and or dented from being dropped. Dropping the slide when it is off the frame can bend the recoil spring retaining tab. Neglect would be rust (rare) or a cracked slide from too many hot reloads (even rarer). Experimentation would be something like the slide being machined to take some other sight system than factory, or milled for ports other than factory. The good news is that the cracked slide might be replaced by the factory for free or at little cost. The other cosmetic problems or experimentation done by previous owners are items that Glock will likely leave you on your own to cover. Don’t worry about what sights might be on it; sights are cheap and easily replaced. At the current pricing, an armorer’s cost for a new set of sights is only $5! You can get good replacements other than Glock polymer for around $20 to $30.

A scarred and chewed-up frame can be cleaned up, but Glock won’t be replacing it just because it got scraped along a curb during a fight. Glock will replace it, regardless of condition, if it is one of the E-series Glocks that were made from September 2001 through May 2002 that they deem needs replacing. If you aren’t sure, give Glock a call. One way to tell is the serial number of the frame. The E series will be marked (as an example) EAA123US. If the frame has been recalled and replaced, the slide and barrel will still have the original serial number while the frame will be marked “1EAA123US.” The “1” indicates replacement.

With the permission of the owner, cycle the slide and dry fire it. Try firing it without depressing the trigger safety. It should not fire. Try pulling the trigger normally and then hold it back and cycle the slide. Does the trigger return? If not, it may be due to a broken/bent trigger spring or a “trigger job” gone awry. The parts don’t cost much, so bargain the price down as much as you can but don’t expect the owner to budge much.

Disassemble and inspect the slide and barrel. Is the barrel clean? Un-marred? Look down the bore. Do you see dark rings? “Smoke rings” are bulges in the barrel from lodged bullets being shot free. A new barrel costs money. At the armorers cost, a Glock barrel runs $95 to $125, with compensated barrels running up to $140. Aftermarket match barrels can run up to $200. If the barrel is bulged, bargain hard; a replacement won’t be cheap.

Look at the slide, in the breech face area. Inspect the area around the firing pin slot. In a very high-mileage 9mm, fed many rounds of +P or +P+ ammo you may find the area around the firing pin slot eroded or even peened back. The erosion comes from blown primers jetting hot gasses back at and through the firing pin slot. In those, you should check the firing pin to make sure it is in good shape. The peening comes from the high-pressure setback of the primer. The wall between the breechface and the firing pin tunnel isn’t thick (it can’t be) and the repeated hammering from a steady diet of hot loads can peen it back. The Tenifer makes the slide hard, but the substrate isn’t hard. If the area is too hard, it may break. If it is too soft, it may peen.

If a Glock with a peened or eroded breechface still works fine (you won’t know until you test-fire it) then you can use it. But the drag on an empty case from the primer expanding into the bulge or erosion can create malfunctions. Glock may or may not replace the slide. If they do, and they charge you, it can get expensive. The old armorer’s manual listed slides and frames as parts that could be ordered. The new manual does not, so I cannot look up the expected price. You will know only after you ask Glock. Aftermarket slides can cost up to $200. Check the underside of the slide for peening from impacts with the locking block. A small amount is OK, but very heavy peening indicates something is wrong. Peening happens mostly with the .40 Glocks, as they have a relatively high bullet mass/velocity ratio. 9mms rarely have it, and the 10m/.45s do not show it much at all.

Other parts of the Glock may have been stressed. Look at the front of the slide. Excessive recoil from hot loads may have stressed the front of the slide where the recoil spring assembly bears on it. A crack there is very bad and cannot be repaired. The slide must be replaced. Bargain the price down. Also, the slide is thin on the ejection port side, and a steady diet of +P or +P+ loads may have cracked it there. (If you’re lucky, a peened breechface also has a cracked slide, and Glock will likely replace it at low or no cost.)

We also face a new wrinkle these days – lead-free ammunition – but the bullets aren’t the problem; it’s the priming compound. Traditional non-corrosive primers use a compound called lead styphnate. There is also a pinch of other heavy metals in there, too. Lead is bad for you, there’s no doubt about that, but the exposure can be controlled. The problem is with the new compounds. They have a higher brisance or shattering power, so the primer gets hammered by a sharper, higher-pressure combustion. This is directed at the breechface, which is not the strongest point of Glock’s design.

Glock now tells everyday shooters not so use lead-free ammunition, but what about law enforcement shooting Glocks who are required to train with lead-free ammo?

If you have a Glock with a cracked slide, I suggest a letter and some photos first. If Glock is willing to replace the slide for free, ship it. If they want to charge you for it, find out how much. A replacement Caspian slide can be had for $140 for a G-17, and you may want to go that route if Glock will charge you more. But if they already have your pistol, and won’t ship it back without repairing it, you won’t be able to exercise the Caspian option.

Check the firing pin safety for function. Press the striker back, then try to push it forward. If it goes forward past the firing pin safety, the firing pin and its safety need inspection and replacement.

The extractor needs a look. A chipped extractor may not function 100 percent, but a replacement isn’t very much. What you may need is the armorer to replace it, as Glock needs to know the serial number and caliber to use the correct one.

used gun-1
Don’t worry about what sights might be on it; sights are cheap and easily replaced.

Look at the trigger parts. Black? Silver? Black is really old, and must be replaced, but Glock will do it for free. Check the trigger safety engagement. With the slide off, press the trigger bar forward and listen for the safety clicking in place. While still pressing forward, pull the trigger and ease the bar back. If there is a problem, it may be very dirty. Then again, it may have been polished, ground, filed or otherwise experimented on. Internal parts for Glocks are inexpensive, easy to replace, and common. At a good enough bargain price, you can replace all the guts and still be in for not much money.

Inspect the frame forward of the locking block. Gently flex the recoil spring housing right and left, up and down. Some guns, especially the major-caliber compacts and subcompacts, have been known to crack near where the serial number plate is inserted. A cracked frame will be replaced by Glock but gives you an opportunity to bargain the price down. It also gives you an opportunity to create a collector’s piece. If Glock returns the gun with a new serial number, keep the paperwork. You have a factory mis-match, and it may bring a bit of a premium at some future time.

Recoil springs on Glocks don’t give up the ghost very easily, so looking at the spring won’t tell you much. Unless you have a Glock so old that it pre-dates the switch to the captured recoil spring assembly. (It probably has the old trigger parts, too.) A new recoil spring assembly is inexpensive, so don’t worry about it, but keep bargaining.

Magazines are almost always part of a handgun purchase. Pistols don’t work very well without magazines. Inspect the magazines to make sure they are as stated. Old-style or drop-free? If they are drop-free, do they? Insert them in the Glock in question and see. Make sure they are Glock, especially if you are paying a premium for honest to goodness Glock mags. Check the feed lips to see if the polymer is still attached. We’ve been seeing more Glock magazines delaminating, that is, having the polymer separate from the steel feeds lips. Glock won’t replace magazines that have delaminated, but are still functional. The internals and base plates can easily be replaced, so your main concern is the tube itself. If it is in good shape and correct for the pistol you’re buying, then shake over a price and have fun with your new toy.

The inspection and test process is the same for all striker-fired pistols.

Buying A Used Beretta 9mm

The first thing you must be careful of are military “surplus” parts. As a relatively controlled item, there are no surplus items released from government stores. Second, it is current government policy that no useable parts are allowed out for civilian sale. Yes, that’s right, they torch everything.

Buy government-marked items with caution or not at all. A manufacturer may well have deliberately made a production over-run, to have “surplus” items for sale. Then again, they might be parts that were spirited out of government ownership.

Check a used Beretta to make sure the safety operates properly. Make sure it is unloaded. Cock the hammer. Drop a pencil (eraser first) down the bore and use the safety to drop the hammer. If the pencil does more than bounce, the safety is not blocking the firing pin. Check that the trigger returns smoothly when released after dry-firing. Check that the magazines drop free. Look down the bore for bulges. You could easily drop another $150 on a replacement barrel, so if you see a bulge, bargain the price down accordingly.

Remove the top end and look at the locking block seat. That is where the locking block cams down and ramps to a stop in the frame. The block, barrel and slide are steel. The frame is aluminum. It is not unheard-of for high-mileage frames to crack at the locking block seat.

A heavily used Beretta should have all the small springs and some parts replaced. A high-mileage Beretta may need a new locking block. If the block shows as much wear as the barrel does, and the finish on both is heavily worn, get a new block. You could even use the need for a new block as a bargaining lever. However, if you’ve already bargained down from everything else, you may find the seller is at his or her price limit.

The above process works for any other traditional DA pistol, be it Sig, S&W, Taurus, etc.

Editor’s Note: This article is an excerpt from Gunsmithing Pistols & Revolvers 4th Edition, available now at GunDigestStore.com.

Modern Shooter: Behind The Scenes At Turnbull Restoration

0

If you’re a gun guy, you know the name Doug Turnbull. Turning out some of the most marvelous and unique creations in the firearms world today, he’s pretty much the Willy Wonka of classic firearms restoration, inimitable metal finishes and custom manufacturing.

This week, Modern Shooter goes behind the scenes where the magic happens with a visit to Turnbull Restoration and Manufacturing in upstate New York. There, Turnbull’s master craftsmen tirelessly ply their art — not to mention a dab of blood and sweat — to make peerless one-of-a-kind guns and the old new again. And boy howdy, do they pull off some miracles.

Sam Chappell gives a solid example of one such feat in the above video. The Turnbull restoration specialist goes step by step through what it takes to breathe new life into an old gun — in this case an early 1911. Stripping the pistol to its bones, smoothing every well-earned dent and pit, and applying a rock-solid new finish, the true classic is born again hard. In all honesty, it would be difficult to tell Turnbull’s project from an original that rolled off the assembly line more than a century ago. And that’s Turnbull’s aim with every timeless pistol, rifle and shotgun that passes across the workbenches.

Catch the rest of Turnbull’s incredible creations in this episode of Modern Shooter 10:00 p.m. EST Friday on the Pursuit Channel. The episode rebroadcasts Monday at 12 p.m. EST and Tuesday at 11:30 a.m. EST.

How To: Mastering Carbine Basics With A .22 LR AR

0

Scale down to a .22 LR AR for mastery of the basics and cost-effective training.

How the .22 LR AR will help you master your carbine:

  • With similar ergonomics and controls, the .22 LR ARs is an ideal training tool.
  • Also, they are light on the pocketbook, as ammunition is affordable.
  • Learning requires repetition, and cheap, .22 ammo offers more trigger pulls for training.
  • Ideally, try to match a .22 version closely to your standard AR for better training.

One of the best calibers ever created is the .22 LR rimfire. It’s fun to shoot, affordable — and you can have almost any style firearm you want in .22. Every gun owner needs a good .22 LR, and the AR is one of the great firearms of all time, so pair the two with a .22 LR AR and you’ve got shooting bliss.

The .22 LR is available in a variety of types. You buy bulk ammo for plinking, and match ammo if you’re working on marksmanship. With a .22, you’ll need to experiment until finding the right ammo for your gun. 22 LR AR
The .22 LR is available in a variety of types. You buy bulk ammo for plinking, and match ammo if you’re working on marksmanship. With a .22, you’ll need to experiment until finding the right ammo for your gun.

In addition, the AR’s ergonomics are perfect, with all the controls exactly where they should be. With the variety of accessories available, the AR can be set up to fit anyone, and almost any application. Combining the .22 rimfire and the AR gives you the best of all worlds: The .22 LR AR is fun, easy to shoot and a perfect firearm for every gun owner.

Most of us learned to shoot with a .22, so we all know how it works. Walk into any store that sells ammo and you’ll be able to buy a variety of .22 ammo. (There’s only been one time in my life when .22 wasn’t readily available, and that seems to have been a fluke.)

The .22 LR is also cheap to shoot. You can buy plinking ammo by the box, brick or bucket for about eight cents a round. Match-grade ammo — for added accuracy — will cost around 45 cents a round. Regardless of the application, the cost is going to be significantly less than any other caliber. For example, 5.56 in 55-grain ball ammo is running 30 cents a round in this part of the country. This makes the .22 LR an excellent round for fun, training and practice.

Eugene Stoner was a genius. One of his greatest works is the AR-15. He made the AR easy to use for both right- and left-handed shooters. It’s lightweight, which is always a plus, and the recoil from the .223/5.56 is easily managed — another advantage of Stoner’s influence. The AR quickly rose in popularity, which created a huge surge in design and production of aftermarket accessories.

 S&W’s 15-22 can be modified to suit your needs or tastes. The stock and grip are easy to swap out, and with Tacticool22’s handguard kit, you can change handguards — mounting any type of handguard you get, from factory to aftermarket. 22 LR AR

S&W’s 15-22 can be modified to suit your needs or tastes. The stock and grip are easy to swap out, and with Tacticool22’s handguard kit, you can change handguards — mounting any type of handguard you get, from factory to aftermarket.

It doesn’t matter whether you’re a left- or right-handed shooter; it’s an intuitive, easy to use rifle. You can configure an AR for any application. Manufacturers took notice of the AR market and began producing models in a variety of calibers. One of the best is the .22 LR version.

A Classic Combo

The .22 LR AR versions vary according to how closely they resemble the real thing. My favorite is the S&W 15-22. Shooting and manipulating the 15-22 is very close to the full-caliber AR. The 15-22 weighs about 4½ pounds — vs. 6 pounds for my defensive carbine — the charging handle doesn’t come back as far as a “real” carbine, and the mag is shaped a little different, which isn’t a concern. Other than that, all the controls are exactly the same. This makes it a great platform for introducing new shooters to the fundamentals of safety, marksmanship and manipulations. Then it’s an easy transition from .22 to a full-size AR — which comes in an extensive variety of calibers.

The .22 LR AR is also a good idea for experienced shooters and provides an affordable option for training and practice. I’m a big believer in consistency, so I wanted a .22 AR that matched my defensive carbine, which is a Shootrite Katana, built by MHT Defense.

This meant modifying my 15-22. As .22 ARs became popular, aftermarket companies stepped up to provide accessories for them. I used a Handguard Conversion Kit from Tacticool22 to mount a PRI handguard to the 15-22, and attached a Magpul MOE adjustable stock. The front sight is a steel A2 tower — modified to fit the S&W 15-22 barrel — and the rear is a Daniel Defense A1.5 rear sight. The 15-22 has the same grip — a DuckBill Tactical Grip — same red-dot sight and the same sling as my Katana. The S&W 15-22 is almost a perfect match to my regular work carbine, except it weighs less and it’s much cheaper to shoot.

Train To Perform

Learning requires repetition, and the brain — where all the learning takes place — doesn’t know whether you’re shooting a .22 or a full-size caliber. The fundamentals are all the same. To shoot accurately, you aim, hold, press and follow through — recovering from the recoil, reacquiring the sight picture and resetting the trigger.

A .22 AR set up like your defensive carbine allows you to practice skills and tactics at a reduced cost. There are small differences — the mags are a little longer, and the gun’s charging handle doesn’t cycle back as far as a real AR — but these are minor. Remember, it takes repetition to learn, and the .22 is an affordable way to get those reps. 22 LR AR
A .22 AR set up like your defensive carbine allows you to practice skills and tactics at a reduced cost. There are small differences — the mags are a little longer, and the gun’s charging handle doesn’t cycle back as far as a real AR — but these are minor. Remember, it takes repetition to learn, and the .22 is an affordable way to get those reps.

With a .22 LR, you can get in more repetitions cheaper. The same applies to skills like moving and shooting, using cover and manipulations like reloading. “But,” you ask, “what about recoil?” Use your normal stance and mount, shoot, and then, like any other firearm, concentrate on recovering from the recoil as opposed to trying to control it. If you try to tense up in anticipation of trying to control the recoil, it’s going to affect your accuracy regardless of caliber. The .22 LR is more than ideal for new and experienced shooters.

At one time, practicing with a .22 LR meant using a weapon that was radically different from what you might normally carry or shoot. Today, you can practice with a .22 AR — which is going to be very close to what you normally use. You’re learning just as much, maybe even more, and it’s not costing you nearly as much as shooting larger calibers all day long.

The .22 LR is ideal for introducing new shooters to the AR platform. Plus, for me at least, there’s a nostalgic connection to the .22. I, like a lot of you, learned how to shoot using the .22. Today, when shooting the .22, it always takes me back to great days on the range with my dad.

The .22 is hard to beat. The AR is my favorite rifle. A .22 AR is the best of both worlds.

Editor’s Note: This article originally appeared in the February 2018 issue of Gun Digest the Magazine.

Tales Of Woe: Are You Making These Gunsmithing Mistakes?

0
1942 Singer Gunsmithing-0014
This pistol, an original and unmolested Singer from 1942, is far too valuable to change anything. Leave it alone and find something else to practice on.

Learn from the misfortunes of others to avoid making these gunsmithing mistakes when repairing or maintaining your own firearms.

Mistakes in gunsmithing fall into two categories. There are those you can fix with money or effort, and those that require paperwork. Both happen because you didn’t apply patience. Before you tighten the vise and begin cutting, drilling and filing, or fire up the torch, think through what you’re going to do. A moment spent visualizing can save you a lot of hassle and hours, days or even weeks of work.

Don’t Work On Irreplaceable Firearms

Do not work on irreplaceable guns unless you are a pro and you’re willing and able to replace them if you screw up. If someone comes to you with a Jim Hoag or a Swensen–built 1911 and wants you to replace knarfed grip screws, go for it. Find some as close to original as possible and replace them. If they want you to refinish it, replace the barrel or checker the frame, counsel them that they are trying to irrevocably alter a historical, valuable collectible, and they shouldn’t do it … and you won’t!

Something like a pristine WWII bring-back should be cleaned, carefully, and left as-is. Some things should be left alone.

Don’t go increasing power on something. If someone approaches you at the gun club, knowing you do pistolsmithing, and wants you to take their old S&W M-28 and re-build it to a .44 magnum, turn them down. First of all, S&W won’t sell you the magnum parts. Second, there’s a reason they make new .44s, and don’t re-build old guns to new, bigger calibers.

A Union Switch & Signal 1911A1 is much more valuable as a collectible than anything you can do to make it a world-beating competition gun. In fact, the owner could sell it for enough to buy a matched pair of custom-built 1911s, and have two more-durable guns to boot.

General Considerations

Don’t make a change that can’t be reversed for a competition gun unless you’re sure it’s an allowed modification for the discipline in which you plan to shoot.

Hunting regulations matter. My .40 Super is a very good selection for deer hunting, except for a pesky part of the Michigan regulations: The handgun-allowed areas specifically disallow bottlenecked cartridges.

You may also have to take into consideration bizarre state or national laws. You may live in a state that insists on sample bullets as a requirement of sale. Changing barrels might also require a sample bullet. It may require a sample bullet from a “certified testing laboratory” or someone certified, bonded, inspected or approved. Make sure you know what is allowed.

The Loctite Episodes

Some thread-locking compounds fix quickly. One of the fastest setting is my favorite, 680 Shaft and Bearing, the dark green stuff. It fixes in the absence of oxygen and when friction stops. You can keep turning the part while 680 is on the threads and it won’t set up, but don’t stop.

Loctite wicks. Every gunsmith in the country has bonded a trigger assembly together at least once. Once it starts wicking you cannot control where it goes. Use it sparingly, and use gravity to control it. Then check everything again after the Loctite has set. I once had to chip the Loctite off a rifle trigger mechanism (and detail strip it to do so) from an errant few drops of Loctite that were meant to keep scope mounts in place.

Loctite does not work through oil. My first few scope mounting jobs came loose because I did not sufficiently degrease the threads. I thought I had, but what seemed good was not what the real world said was good. If you plan to use Loctite, degrease the threads.

Parts Is Not Parts

Keep track of what you’re doing. Work on one firearm at a time. I once had a customer come in with his fully tricked out, super-custom competition 1911 that had suddenly “lost its accuracy.” I was puzzled at first, but upon inspecting it discovered that the barrel was a loose fit. I stripped it and looked underneath, and sure enough the barrel was marked with a different serial number than the frame and slide. (Many custom gunsmiths number-match major and minor parts to each gun to make sure they don’t get misplaced.) The barrel in his custom gun was the barrel from his carry gun. The match barrel was such a tight fit in his carry gun (which he had on at the time) that it would short-stroke if fired. He had decided to clean them both the weekend before – at the same time – and mixed up the barrels upon reassembling them. Luckily, he’d gone for practice with the competition gun before he needed the carry gun at work.

If you own identical firearms and are in the habit of working on them at the same time, it might not be a bad idea to get an electric marking pencil and mark the last two, three or four digits of each of their serial numbers in unobtrusive places.

We all know about poor-quality magazines, but there are other parts that can be poor quality too. Like the fellow who invested in a cheap replacement barrel at a gun show for his 1911. Too bad the barrel was made of soft steel and the locking lugs on the barrel peened. Once they’d peened enough, they started chipping the locking lugs on the slide. The end result of “saving” $50 at the gun show was a new slide and barrel, and the labor to fit them – about six times the price.

Rare Nambu Gunsmithng-0152
This is a baby Nambu. Rare hardly begins to describe it, and it is off limits as far as gunsmithing modifications are concerned.

Milling And Drilling

Is the location you’re about to drill the real, actual, place you want that hole to be? Once drilled it is difficult to re-drill. Yes, you can tap the hole, secure a threaded plug in place and re-drill, but even then there can be problems. What if the new plug you just laboriously installed is a different hardness than the surrounding metal? The correct, offset hole may wander when drilled. The plugged hole may show after you’ve installed whatever the part is.

A gunsmith of my acquaintance once did not secure the dovetail cutter tightly enough in the chuck before proceeding to mill the dovetail slot in a slide. The force of cutting pulled the cutter down out of the collet and into the slide as it fed across. He was halfway across the slide before he noticed. Luckily the customer wanted the slide hard-chromed after all the work was to be done on his expensive and super-custom 1911. The solution was to file a piece of steel to fit in the mutant sight dovetail. Then solder it in place, machine the slide correctly, finish filing the edges of the plug to match the slide, then machining French borders to hide the plug, polish, bead-blast and plate. The customer loved it and showed all his friends the extra work he’d gotten as a make-up for the delay in delivery. The gunsmith ended up spending an extra five hours of time on the job because he failed to spend 30 seconds making sure everything was tight and correctly positioned.

Then there was my “oops.” I drilled a scope mount on a rifle and “kissed” the barrel threads. (I mis-measured the stop gauge on the drill press by .010 inch.) No problem, as the customer never intended to change the barrel. Well, you guessed it. That hunting season was a very snowy one. His muzzle ended up in the snow, he split the muzzle on firing it, and he wanted a new barrel. I had a heck of a time getting the old barrel off, what with the drilling burrs I had created. It turned out all right, but I spent an extra week soaking the threads in Kroil, and took a lot longer to clean the receiver, rosin the surface and clamp it as tight as I could make it. I crossed my fingers before going to unscrew the barrel.

Parts Is Parts

If at all possible, do your filing, stoning, fitting and other work on a cheaper or more easily replaced part. Sometimes you can’t avoid it. You must cut the frame to fit a beavertail grip safety. But if you need to fit a bushing on a 1911, fit the bushing and don’t go cutting on the barrel or slide if you can avoid it. If your trigger is too large to fit the 1911 frame, file the trigger and not the frame.

Practice fitting on old parts bought for the purpose. Improving your trigger by stoning the sear that came with it goes much easier if you practice beforehand on one bought at a gun show for a dollar. Buy a rusted or busted barrel and have it welded up to learn how to fit barrels. That’s also the way to let your welder get some practice, although don’t be surprised if he charges you for it. Unless you’re a working gunsmith you won’t have the luxury of practice guns to work on, but old parts are cheap, and bar and round steel is cheaper still. Practice takes time, and if you are working for yourself, time doesn’t matter. A pro has to bill his time, and practice is time he can’t bill (but a necessity regardless of cost). You aren’t billing your time and are working on your own handguns. Get it done right by working your mistakes out and building your skills on practice parts.

And if you do make a mistake on a “good” part, don’t be cheap. So you stoned a Chip McCormick sear to death? Or a Wilson? Spend the less-than-twenty bucks and buy a new one and learn from your mistake.

The Early Plate Job

Hold off getting your gun finished, especially if you are a competition shooter. You may find that there is a sharp edge or corner you hadn’t noticed at first. Or the safety chafes once you’ve practiced with it. Or the sights just aren’t all you’d hoped they’d be. But now the plating you so eagerly had applied has to come off before you can get the extra work done.

Most plating cannot be treated like paint, that is, “spot-sanded” and retouched. It all must come off. The plater will charge you to remove all of the old and charge you again to plate anew. If you want to shoot your new custom gun for a while before getting it plated, you can have it blued. Or you can treat it to a bake-on finish from Brownells. The finish will last long enough to let you determine that you are ready for plating. The temporary finish will also protect the surface until you can have it finish-polished and plated.

One aspect of plating you need not worry about: porting. Chrome, nickel and other metal platings are all electrically conductive. Mag-na-port will not have any problem porting your barrel (or slide) through the exterior plating. If you have a non-conducting finish like a bake-on epoxy, they can scrape enough of the finish off for the electrodes to find a conducting surface to work with, and then port through your finish. But the final finish will be better served if you port first, then finish.

Gunsmithing Mistakes-0772
This gentleman knows exactly what he’s doing, so the stream of sparks is not cause for alarm. If you are getting ready to grind, cut, file or machine, remember: measure twice, cut once.

Paperwork Errors

There was a fellow who was so taken with the idea of turning his old surplus M-1917 S&W .45 ACP revolver into a snubbie that he didn’t measure the location of the serial number. Taking square-butt revolvers and turning them into round-butt revolvers was something that used to be done a lot more often. The factories had made a bazillion square-butt wheelguns, and buying a new, round-butt revo could be expensive.

He used a pair of round-butt wooden grips as his grinding template and ground the backstrap and butt to match the grips. Only when he went to have it polished for bluing did he discover he was missing a digit and a half from the serial number. Luckily for him, the serial number was also stamped on the frame in the crane cutout. However, even with a pre-existing, valid serial number in place on the gun in a different location, it is a technical violation of Federal law to alter or obscure a serial number. Learn from his lesson.

One prospective paperwork error is the crushed frame. If you attempt to clamp your pistol frame in the vise without a clamping block in place, you may crush the frame. It is very difficult to restore the interior to a size that will accept a magazine. If you are lucky, the factory will replace the frame with a new one bearing the same serial number (and destroy the old one). They will charge you dearly for it. If they cannot or will not send it back bearing the same serial number, you must then go through the paperwork process of proving the old one scrapped and then registering your “new” firearm. The simplest way to do so is to turn it over to a professional gunsmith and his Federal Firearm License. He can enter the old one on his books, then show it sent to the factory and retained by them. You then keep the work order showing the disposition of your “old” firearm. You “purchase” your “new” firearm from him, conforming to all the state requirements. All in all an expensive lesson.

The prospect of replacing a busted frame with one of the same serial number is now not as easy as it used to be. I was discussing the subject with a big manufacturer, and had the following story related to me: apparently manufactures get regular government inspections. On one of these, the ATFE agent being escorted around passed a door and asked “What’s in there?” Answer: “Oh, that’s where we keep the un-numbered frames for repairs.”

Not anymore, they don’t. Now, if that company wants to replace your frame with one of the same serial number, they have to have an employee intercept a correct frame at the serial-numbering station, pluck it out of the production stream, then walk it to the custom shop, where it is stamped with your gun’s number right after the frame of your gun is destroyed. That’s a lot more cost, and may mean the end of the courtesy of same-numbered replacements. And when it happened, it was just that, a courtesy.

Getting Hurt

Back in junior high school shop class my teacher was Mr. Braisted. One of the items on his desk was a looseleaf folder full of photographs. Some in color, most in black and white. They showed the injuries suffered by people who didn’t pay attention to safety. The one that sticks in my mind was the guy who was using a file on a lathe-turned part to polish it. He neglected to put a handle on the file and, when the file got snagged by a jaw of the chuck, it impaled his hand with the file tang.

In our own class, someone failed to take the drill press key out of the chuck, and when they turned it on the key was hurled off the chuck. It broke the chain and hurled the key across the room, narrowly missing Mr. Braisted.

Those aside, how else can you hurt yourself while pistolsmithing? One way is to forget things are hot. So, you’re soldering a pair of parts, and it slips and you go to catch it. That you’ll only do once. Ditto sharp objects. Wear sturdy shoes, and if something falls, intercept its path with the top of your shoe, to buffer its impact on the concrete.

Never forget the reason firearms exist is to hurl bullets. I was once testing a Browning A5 shotgun in 16 gauge. I chambered a round and pulled the trigger, and it failed to fire. Okay, so I went to pull the charging handle back to unload it and boom!!, off it goes.

The A5 has a safety alignment built into it that if the bolt isn’t fully closed, it won’t fire. Well, the hammer won’t go fully forward. This 16 gauge had been rebuilt from its original 2-9/16” chambering to 2-3/4” and the smith who had done the work hadn’t fully checked his work in also adjusting the hammer clearance. So, chamber a round, pull the trigger and the hammer catches on the action bar. Pull the bolt back slightly, and the hammer clears, goes forward and fires the gun. Because I was careful, the damage was limited to the heavy-duty electrical junction box where the muzzle had been pointed at that moment, and my pride.

Caustic chemicals, flammable solvents, sharp edges, these are all reasons to get in and stay in the habit of dressing for success. That means safety glasses all the time. When the time comes in our law enforcement patrol rifle classes, we tell the officers “wear the safety glasses we told you to bring.” It is amazing how many don’t have such glasses. And even those that do will not always wear them while guns and parts are in play. If you use power tools, earplugs or muffs. A work apron, to keep your clothes clean. Sturdy shoes or boots. And if you are grinding, then a face mask – paper, cloth, respirator, whatever.

Dress properly, and you’ll have a long future of happily working on guns. Fail to dress properly, and things might not be so happy.

Editor’s Note: This article is an excerpt from Gunsmithing Pistols & Revolvers 4th Edition, available now at GunDigestStore.com.

MUST READ ARTICLES