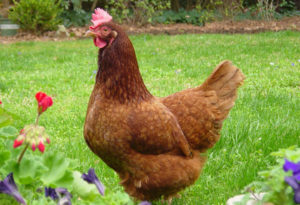
It’s not zombies and supermoons you have to worry about when getting started in self-sufficient homesteading (not yet anyway). It’s building codes and zoning ordinances. Time and time again, those who live against-the-grain or off-the-grid get pinched by well-meaning local officials. The backyard chicken group I met this weekend was a perfect example of how to correct those misguided ordinances.
After finishing a charity 5k of all things, I jogged (OK…walked) over to check out the sponsor booths. One of them was an organization called Andover Backyard Chickens. You can probably guess what its cause was about.
In an eggshell, Andover Backyard Chickens is trying to relax local zoning restrictions to allow homesteaders to keep birds inside Andover. This mostly suburban city is located a few cities out from Minneapolis. While urban homesteading is popular, Andover sits at the intersection of big city, suburban and rural lifestyles.
The situation was similar to many others across North America. But there was one important difference:
ORGANIZATION
Andover Backyard Chickens not only sponsored a 5k full of locals who could put pressure on the city, it put together a comprehensive proposal for city officials to consider. This included specific zoning suggestions, licensing suggestions (such as taking a class before getting a permit for chickens), breed information and more. It was all put neatly together in a 3-ring binder.
Additionally, Andover Backyard Chickens sported matching “Got Chickens?” T-shirts, passed out homemade brochures with backyard chicken FAQs, got a petition together, started a Facebook page and generally stuck to a few key talking points.
All this added up to an organized effort that has a great chance at beating city hall on this issue.
I mention this because, unfortunately, some self-sufficiency/preparedness groups don’t display this level of organization. They’re forgetting that successfully communicating a message requires two parts: the message itself and an effective way to get the point across. Neither is more important than the other. This matters quite a bit when it comes time to talk with media or offer testimony.
It’s no guarantee, but the kind of organization that Andover Backyard Chickens displayed is the best shot at changing things for the better.
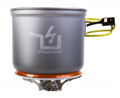
There is a lot of so-so survival gear out there. It’s hard not to become just a little cynical here at Living Ready. So when staff first heard of a portable generator called the PowerPot that converted heat from hot water into electricity, the first reaction was, “Prove it, wise guy.”
But after a test run, there’s no doubt about it: The PowerPot is the real deal. Read the full review below or get started right away by ordering the PowerPot from the Living Ready Store (hey, you even get a free rechargeable battery on the house). Yep, staff liked it so much that the PowerPot is in the official Living Ready store.
PowerPot Review: An Innovative Portable Generator
The PowerPot works like this. First, fill the 46-ounce pot up 2/3 of the way with water. Attach a USB 2.0 plug into the side of the pot. Connect your cell phone or other gadget to the USB 2.0 plug. It cranks out electricity as soon as the water warms up.
That’s it. No moving parts. No degree in thermodynamics required. Phones will charge in 1-2 hours.
PowerPot Review: More than Just a Portable Generator
Specs – Voltage: 5 volts; Regulator Current: 1 amp max; Power: 5 watts max; Weight: 18.2 ounces; Dimensions: 4.5″ x 5.5″ without bowl/lid or 4.5″ x 8″ with bowl/lid; Volume: 46 ounces (1.4 liters)
In addition to being able to charge gadgets, the PowerPot does a lot more.
For starters, it’s a pot that can boil water inside. I don’t have enough space in this article to list why that’s so important in a survival situation, but Living Ready readers know the significance of that trait.
On that note, there’s nothing special about the way it needs to be used. Heat water with it just like you would any other pot. The only exception is that the water doesn’t need to be boiling for it to work.
That means you can use it on or near a fire, on a portable stove, inside a solar oven, on the hood of a hot car or any other method that heats water. The stove in the Living Ready kitchen was used for this review out of convenience, but field tests have shown how responsive this device is to any heat source. Charging times may vary depending on heat intensity, but who cares? It works. That’s what matters.
Second, the PowerPot comes with an LED attachment that’s painfully bright. It could easily light up a room in the dark or a camp. This might seem redundant considering a heat source may also be producing light (fires, for example), but remember that illumination at night can equal safety. And it’s just not possible to be too safe.
Third, the PowerPot comes with a small bowl for cooking. The bowl sits on top of the larger pot, creating a double-boiler for food. It can’t heat a lot of food, but this added functionality really adds to the versatility of the overall product.
However, PowerPot stresses that the pot with the water should not be used to also cook food. Only water should be used. Food goes in the separate bowl.
On Next Page: The Final Verdict & How to Get a Free PowerPot Battery
Editor’s note: Watch for a Living Ready University Online Course on food preservation and year-round garden planning from Tracy Schmidt coming later this month.
Here is a list of items I would be at a loss without in my modern homesteading kitchen.
There are many fancy gadgets available, but having these core modern homesteading items will put well on your way to a year-round stock of preserved foods.
Modern Homesteading: Canning Tools
I have a couple of water bath canners in different sizes. Remember, the bigger they are the longer it takes to boil the water.
I also have a pressure canner to safely process low-acid foods, such as green beans and meat. With pressure canning, you can ensure even heat throughout the cooking process.
Modern Homesteading Items: Dehydrator
I prefer the cube dehydrators with the multi-trays but the circular-style ones are also good. I actually use both on a regular basis for my food dehydrator recipes. I use the mesh sheets for herbs and liner trays for leathers.
Modern Homesteading Items: freezer containers for food
I keep a list of what is in my freezer, and I also keep bags in larger bags to help with organization. I use the large zippered treat bags from Halloween. You can get great deals on them after the holiday is over so keep an eye out!
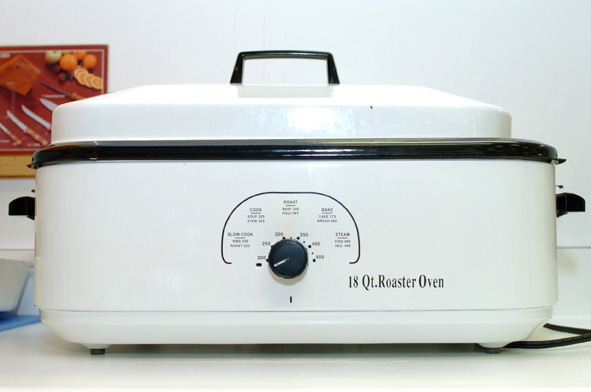
Modern Homesteading Items: 18-qt Electric Roaster Oven
It might sound surprising, but my electric roaster oven is actually a great canning tool. It keeps my canning jars warm during canning. It gives me an additional source for hot water if my canner runs low. It also helps me cool down my produce after blanching when I put ice water in the insert.
The empty insert also holds large amounts of produce, such as corn and beans, when I am prepping for freezing food.
Modern Homesteading Items: Cutting Board
It is important to have a good cutting board that will not slide off of your counter. Try to buy one that has a ridge around the edge to catch juice from items being chopped. It is also important to purchase a cutting board that will come clean.
It used to be thought that wooden cutting boards were better than plastic, but that is no longer the case. Get a cutting board that you can wash thoroughly and sanitize in your dishwasher or diluted bleach water. Food particles can hid in the scratches on a wood cutting board and make you sick.
Modern Homesteading Items: Sharp Knife Set
Having a sharp knife set will keep you safer. A quality knife will have a full tang that goes up into the handle which is then riveted together several times.
Do not put your good serrated knives through the dishwasher. Taking the time to hand wash will help preserve the sharp edge. Always cut away from your body, and keep your fingertips curled under so any misses will glance off your knuckle and not result in separating your finger.
You will be doing a ton of chopping, slicing and dicing during food preservation preparation so spend money to get a good set of knives.
Modern Homesteading Items: Vacuum Sealer/Vacuum Food Storage Containers
The vacuum sealer is a great thing. It helps your preserved food retain a higher quality by keeping out the air and moisture that advance spoilage.
It also allows you to preserve food in appropriate portions. For example, you can make several dried herb pouches in a strip you can then cut apart as you go.
Be sure to stock up on plenty of vacuum food storage containers in a variety of sizes.
Modern Homesteading Items: Stockpots
I have several large stockpots and seem to use them all. My favorite pot is a 7-qt, old enameled stockpot with a glass lid I picked up at a thrift store for a couple dollars. Nothing seems to sticks to this pot, which provides a great cooking experience and an easy cleanup making it a must-have kitchen tool.
Modern Homesteading Items: Large Cookie Sheets
I buy the largest cookie sheets that will fit in both my freezer and oven. I like to freeze foods such as meatballs, hamburger patties, blueberries, strawberries and onion rings individually before I bag them.
Modern Homesteading Items: Flexible Silicone Mats
I find these mats to be invaluable for freezing berries and other foods on the cookie sheets. They can be lifted and the berries can be funneled right into freezer bags or vacuum food storage containers.
This is an easy-cleanup winner in my book as things don’t stick, they can be washed easily and the cookie sheets stay clean.
Remember that using recycled products is a great way to live a subsistence lifestyle in the modern homesteading kitchen. Again, there is some foraging required, but it will save you some money and help the environment. Go picking at thrift stores, flea markets and country auctions to find pots, glass jars, and utensils such as large ladles and spoons.
Editor’s note: Tracy Schmidt’s Living Ready Online Course on food preservation and garden planning will hit the Living Ready Store later this month. Be on the watch for it, it’s full of great information.
Food Safety Tips During Blackouts
The lights go out. The refrigerator and freezer stop humming. You think of the critical survival food storage items in the freezer that you spent a year preserving.
How long can the power be out before your food becomes bad? How do you know how to tell food that has spoiled from food that is okay? Is there anything you can do to help save those perishables stocked in emergency food storage? Will it be safe to cook food that has been thawed?
Food Safety Tips: Get Prepared Right Now
Don’t wait until a blackout to think about these things. Being prepared doesn’t cost much. You’ll need…
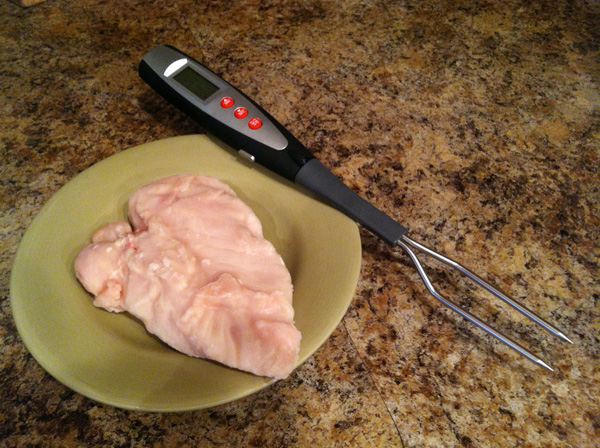
A meat thermometer (best if it doesn’t need batteries to work)
An appliance thermometer
If you want to take things to the next level, invest in a high quality cooler, such as a nearly indestructible, super-insulated Icey-Tek cooler. It’s not cheap, but it can go a long way with emergency food storage, as well as keeping cold medicines cool.
Food Safety Tips: Trust Your Senses, but Listen to the Experts
I personally follow the food safety tips provided by the USDA and the USFDA. Here are several food safety considerations that should be followed when evaluating food.
Never taste any food you have any doubt about. It is not worth the risk…throw it out.
Do notopen any canning jars or other sealed packages from your emergency food storage plan that show signs of spoilage. They also must be thrown out.
Use a food thermometer and/or appliance thermometer to evaluate whether your food is at a safe temperature: zero degrees Fahrenheit for the freezer and 40 degrees Fahrenheit for the refrigerator.
Remember that how a food looks, smells or tastes may not indicate if it is safe or not to consume. It’s good to trust your senses, but don’t follow them outside recommended guidelines.
Add block ice to your freezer if needed to help keep the temperature down. This is a good idea for survival food storage anyway. It cuts down on energy costs.
According to www.FoodSafety.gov, “food such as meat, poultry, seafood, milk, and eggs that are not kept adequately refrigerated or frozen may cause illness if consumed, even when they are thoroughly cooked.”
Food Safety Tips: Refreezing Food
The first steps to take in evaluating food for refreezing is to wait until the power comes on, then check the temperature using an appliance thermometer. If it is 40 degrees or colder, then you can then refreeze it.
It is important to remember when refreezing any food that it may be safe to eat, but the quality of the food will likely be impacted by any degree of thawing. You spent a lot of time building a survival food storage plan, and the temptation is to keep what you can, but remember that your health must always come first.
On the Next Page: Resetting Your Survival Food Storage Plan
Food Safety Tips: Resetting Your Survival Food Storage Plan
The following food safety guidelines apply to food that comes from the freezer and refrigerator. Keep in mind that if it has been over 40 degrees for two hours or more, it must be discarded if it is meat, poultry, seafood, dairy (except hard cheese), casserole, frozen convenience food, cakes and pies.
Foods that can be refrozen if left out for longer are: flour, fruits that do show signs of spoilage, pie crusts, bread dough and hard cheeses. Vegetables can be refrozen if thawed and left out for up to six hours at above 40 degrees. Be sure to carefully check over any refrozen food for signs of slime, yeast or mold.
Now go back to just the freezer side of the guidelines. If your food still has ice crystals in it and has stayed at a temperature 40 degrees or less it can be refrozen. Here are some good foods to refreeze keeping the former in mind: meat, poultry, seafood, casseroles, shredded cheese, fruit juices, vegetables, cakes, pies and frozen convenience foods. Keep those in mind while designing your emergency food storage plan in the first place.
According to the USDA, an unopened refrigerator will keep food cold for about 4 hours and a full freezer for about 48 hours. If you need to cook food that is still at a safe temperature make sure you cook it fully to the following recommended minimum internal temperature:
Beef, pork, veal and lamb muscle cuts: Cook to at least 145 degrees Fahrenheit and allowed to rest for at least 3 minutes so the temperature becomes even. Ground meats should be at least 160 degrees Fahrenheit or higher internally.
Poultry, leftovers and casseroles need to be cooked to a minimum of 165 degrees Fahrenheit.
Fish needs to be cooked to 145 degrees Fahrenheit to be safe.
If you made it to the end of this article, you’re already better prepared to eat food safer during and after a blackout. To recap, have a meat thermometer, an appliance thermometer and these food safety tip sheets printed out ahead of time. It’s also a good idea to have an understanding of this information before making an emergency food storage plan.
Have you ever had to sort through food after a blackout? Have any food safety tips to share of your own? Leave a comment below.
Editor’s Note: Whether you call them healthy living networks, prepper groups, farmers markets or community co-ops, all organizations that coordinate resources to be better prepared and self-sufficient share the same goals. Think outside your comfort zone and take Tracy Schmidt’s advice to heart. Even working with one or two neighbors can make a big difference. You might even have fun in the process.
Why Start a Healthy Living Network?
“Many hands make light work” is a quote that truly applies to food preservation. In the not too distant past, it was common for multi-generation families to work together to put up food. They would share the divide the spoils at the end of the day.
Today, many families are smaller and are often more spread out, making this kind of collaboration with family harder to accomplish.
The World War II feeling of community responsibility through maintaining a Victory Garden and preserving food has waned. However, there is a branching movement today that stems from some of the same circumstances: healthy living networks.
Healthy Living Networks Growing in Popularity
The economic decline of the past several years has caused more of the middle class to critically examine food budgets. Gardening and food preservation are cost-effective solutions for people facing the ever-tightening apron strings of today’s economy.
Some people are more health conscious today and are looking to be better able to control what they ingest to fuel their bodies.
Still others don’t want to be so far removed from the natural world they become dependent on grocery stores to get food. They want to preserve the skills that kept our ancestors alive. The skills that are not borne from computers and electricity, but rather understanding the natural world around us.
Knowing why you want to preserve food will help you find other folks who share your interest. Coordinating with them is called a healthy living network, sometimes also known as prepper groups or community co-ops.
Be a Good Member of a Healthy Living Network
However, in order to be a good member of any group you have to be well educated so you don’t get yourself in trouble. Find someone who cans, freezes and dries food. Ask if you can watch them in the kitchen. There are many tasks you could help them out with, from washing and chopping food to making sure jars are clean and kept hot. The lessons learned from these simple things can be priceless.
Good Places to Find People to Start a Healthy Living Network
There are other people like you out in the world. If you want to start a group look for other members at local churches, libraries and fitness centers who might share your interest and be willing to work along beside you.
Look for gardening groups, as many people who preserve food also like grow it. Find them, inspire them, help educate them and you will be able to reap the benefits of starting a great group with a strong foundation.
The benefits of self-sufficient living and growing your own food
There are so many benefits of healthy living in this way, where does one begin? Here are several areas that I feel must be discussed when I try to explain self-sufficient homesteading to others: the body, the mind and the spirit.
Benefits of Growing Your Own Food: Body
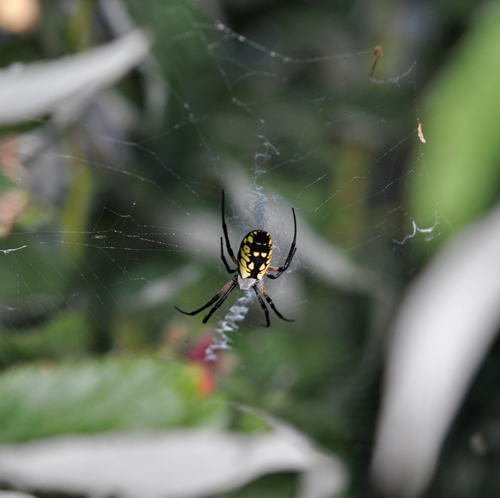
Taking time to appreciate a spider in its web while doing garden work is one of the many benefits of growing your own food. (Tracy Schmidt photo)
The body physically benefits from eating food grown at home in several ways.
The variety of foods eaten tend to be leaner, healthier foods such as berries, nuts, mushrooms, fish and venison. People practicing self-sufficient living tend to grow organic produce and limit their exposure to processed food.
Many individuals living self-sufficient embrace food preservation: freezing, canning and drying so they can enjoy their locally grown/gathered foods and home grown foods all year long.
Gardeners may choose to garden without pesticides like we do. I use minimally intrusive methods for weeding, like a scuttle hoe (a.k.a. stirrup hoe and shuffle hoe) and my hands.
Another of the body benefits of growing your own food is the exercise that comes naturally. Whether you are weeding your garden, hauling water to your livestock or dragging a deer, a self-sufficient life is very physical in nature.
Benefits of Growing Your Own Food: Mind
The self-sufficient lifestyle requires planning, strategy and research.
You have to understand what resources are available through the seasons. You have to understand how to harvest and gather and preserve those natural materials. You have to understand how to use those resources to your benefit and then understand how to give them back. Composting is a good example.
Learning to hunt and fish successfully takes a lot of strategic thinking, as does planning a garden that will provide enough quantity of food and varieties of food to last throughout the year.
Knowing what types of wood to harvest and burn and how to best dry it is important. Knowing where to store your wood and how long it will take to dry takes thought.
Benefits of Growing Your Own Food: Spirit
The third area effected by self-sufficient homesteading is the spirit. For me, the benefits of living a healthy lifestyle and the peace that comes from knowing your place in the natural world are of primary importance.
When I work all day in my garden and see what is happening around me and how everything in the world somehow magically works I am stunned into silence. I marvel at how the large garden spider has spun a large web in my raspberry patch. It creeps out onto its web as night falls to catch insects. I leave it alone and pick my berries around it and actually look forward to seeing it each twilight. The birds singing in the trees wait for me to finish hoeing so they can look for worms in the freshly worked soil.
When I hunt, I get up early and watch the world come alive at dawn. The birds land on my hat and the squirrels run through the leaves. At dusk I watch dragonflies eating mosquitoes in the field like swarms of helicopters. These things lift my spirit.
What also lifts my spirit is being able to teach my kids how to survive in the real world. The world beyond the TV screen. The world where they know if something happens and the power goes out we have lots of jars of healthy food that they helped grow waiting to be opened. No food fairy from the grocery store required.
For me, self-sufficient living is an amazing life journey. It is about hard work, but its benefits reach far beyond monetary frugality. In short, it is all about quality.
Get great stories like this one sent right to your inbox every week by signing up for the free Living Ready e-newsletter. You’ll receive a free download on troubleshooting common composting problems when you enter your e-mail below.
Okay, you have worked really hard to preserve food, forage food and stretch your food dollar. You made sure to have plenty of room to store your jars and frozen goods. The next question is how long does everything keep before food spoilage happens?
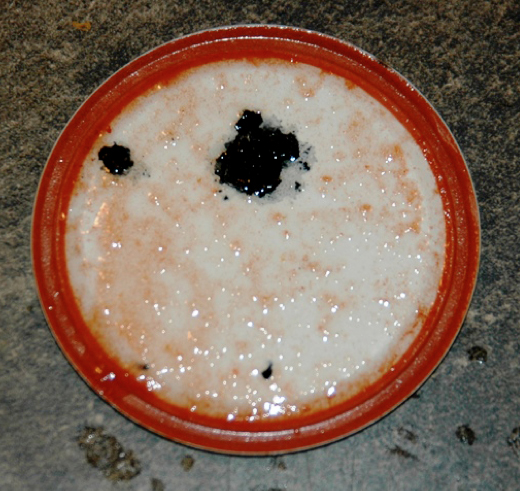
Food Spoilage in Cans
The underside of this canning lid shows signs of food spoilage.
Food that is home canned stored in a dark, dry environment with temperatures between 50 and 70 degrees Fahrenheit should be used within a year. They should be stored with the bands off so you know that they are properly sealed. The jars should be wiped clean so there is no food residue.
I like to write the date with permanent marker on the lid. If lids are tightly vacuum sealed on cooled jars, remove screw bands, wash the lid and jar to remove food residue; then rinse and dry jars. Label and date the jars and store them in a clean, cool, dark, dry place. For best quality, store between 50 and 70 °F.
Can no more food than you will use within a year. This sometimes surprises people because the canned food they purchase from the store is usually dated further out than a year.
One major difference between home canning and commercial canning is that the temperatures commercial processors use are much higher than can be achieved in a home kitchen. That is why pumpkin can be canned commercially as puree but only in cut up cubes by the home canner. It is safe to use cubes because the heat can circulate through the liquid around the cubes but cannot get hot enough to consistently and evenly penetrate something as thick as pumpkin puree. The same preservation issues involved with pumpkins are true for winter squash.
I always halve my winter squash, cook them cut side down in the oven on a silicone-lined four-sided cookie sheet.* I add water at a depth of half the side height and bake at 425 degrees Fahrenheit for 40-60 minutes. I then let the squash cool, scoop it out into a large mixing bowl and then whip it with my hand mixer. I package it in serving size freezer bags and freeze them flat after they have been labeled with the type of squash and the date.
Food Spoilage in the Freezer
According to the USDA (United States Department of Agriculture), food kept in a freezer will not spoil but the quality of the food in terms of taste and texture will diminish over time. In other words, it likely will not kill you two years from now, but you may not want to eat it either. The following are the USDA quality for use recommendations:
Bacon and Sausage 1-2 months
Casseroles 2-3 months
Frozen Dinners and Entrees 3-4 months
Gravy, meat or poultry 2-3 months
Ham, Hotdogs and Lunchmeats 1-2 months
Meat, uncooked roasts 4-12 months
Meat, uncooked steaks or chops 4-12 months
Meat, uncooked ground 3-4 months
Poultry, uncooked whole 12 months
Poultry, uncooked parts 9 months
Poultry, cooked 4 months
Soups and Stews 2-3 months
Wild game, uncooked 8-12 months
Learn More About Food Spoilage & Food Preservation
Learn the proper preservation techniques that avoid food spoilage in Tracy Schmidt’s excellent Living Ready University Online Course, Food Preservation & Garden Planning. Schmidt offers a bird’s eye view of staying self-sufficient throughout the year.
Click here to download this essential food preservation course from Living Ready University.
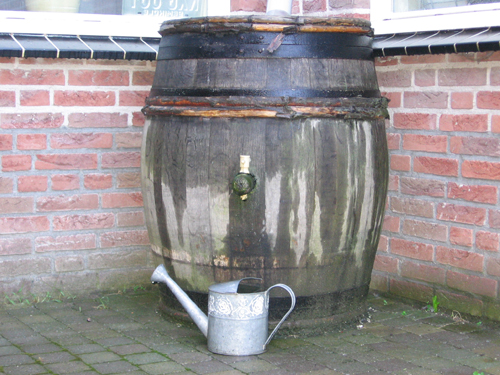
Collecting rainwater, or rain harvesting, to use on your plants is a great idea, so long as it’s legal in your area.
Basically, with a few modifications any heavy barrel container, also called a rain barrel, that won’t let in light can be used to collect roof runoff from a downspout.
If you don’t want to make your own, there are many rain barrels available commercially.
Rain Harvesting: How Much to Collect
Whether you buy or build a barrel for rain harvesting, you will not want to collect more water than you will use in a week to water your ornamental plants and/or lawn.
You can also use the harvested water to wash your shovels and other garden tools.
Rain Harvesting: Safety Concerns
There are a few safety concerns to keep in mind, because of bacteria and chemicals water collected from roof downspouts should not be used on vegetables or as drinking water for humans.
Be careful about the type of roofing materials that are on your house. Runoff water from roofs having tar and gravel including asphalt shingles, made of asbestos or treated cedar shingles should not retained in a rain barrel to be used on vegetables intended for human consumption.
You will want to make sure your rain barrel empties out once a week so you do not have issues with mosquitoes and algae.
If you live where it freezes during the winter months, it will also be necessary to disconnect and clean your barrel for winter storage. Make sure your barrel has an overflow spigot with a hose attached to keep water away from your foundation. If you are being chemical conscious, remember that many hoses may contain lead so make sure you use one that is lead free if that is a concern.
Make Your Own Rain Barrel for Rain Harvesting
To make your own rain barrel, you will need a barrel with a hole in the top to catch water. You will want to have the hole covered with a mesh screen to keep debris such as leaves and insects that would decompose out of your water.
Decomposing organic materials could also clog your spigots and hoses so make sure to keep your screens clean of debris buildup. There will need to be a hole toward the bottom with a spigot so you can get out water and the above mentioned overflow drainage facing away from your house.
Give Rain Harvesting a Try
Using a rain barrel will reduce runoff contamination from pesticides and fertilizers. It will also keep water away from your foundation. If you have to pay for water where you live it will also save you money.
With so many benefits for such a small amount of trouble why not give it a try?
Learn more from the author about self-sufficient homesteads in her Living Ready University Online Course, Food Preservation & Garden Planning.
Are you ready for the great refrigerator food safety quiz? People always seem to ask me questions about refrigerator storage of their food.
Here are some of the questions that seem to come up in conversation on a more regular basis and more importantly, the answers.
The answers to the food safety quiz are at the bottom. Quiz your family and friends, too.
Food Safety Quiz Questions
Q1: If I opened a package of beef bologna a week ago Monday and the date on the package is two months away so how long is it good for?
Q2: What types of food should I store in the door?
Q3: What is the safe temperature range for a refrigerator?
Q4: What is an effective, economical way to cut down on refrigerator odors?
Q5: Is it okay to thaw meat in the meat drawer next to deli meats?
Q6: What are the differences between a “best buy” date, a “use by” date and an expiration date?
Food Safety Quiz Answers
A1: According to USDA guidelines the lunchmeat is safe for 3-5 days.
A2: The temperatures in the door area are not as consistent as the main cavity of the refrigerator so it is best not to store foods that are perishable there. Use it for condiments, butter, hard cheeses, and soda not for eggs and milk.
A3: The safe temperature range for a refrigerator is somewhere between 32 degrees Fahrenheit and 40 degrees Fahrenheit.
A4: You can use an open box of baking soda in your refrigerator. Don’t forget you can easily use a cheap generic version of this product.
A5: No. You must make sure to keep all foods away from any chance contact with raw meats juices. I thaw out my sealed meat in a pie plate in the meat tray or in a deep bowl so it does not have any chance to leak.
A6: According to the USDA terms are defined as follows:
“Sell-By” tells a store how long to display the product for sale. It should be purchased before that date expires.
“Best if Used By” or “Best if Used Before” date is recommended for quality and is not a purchase or safety date.
“Use-By” date is the last date recommended for the use of the product while at peak quality. The date has been determined by the manufacturer of the product.
Organize your homestead’s preserved foods with a little planning ahead.
Since I can, dry and freeze my own food, and have for years, I have lots of home organization tips.
Because I do so much food preservation, I have had help from my father-in-law and gone to country auctions to get shelving and cupboards for storing my preserved foods. We have three chest freezers in our basement that are full by December every year, so I have a lot experience in freezer organization as well as dried food storage and canning jars.
Home Organization Tips: Dried Foods
I will start with what for me is the most straight forward: organizing dried foods. I freeze dried pizza sauce leathers and jerky in zippered freezer bags.
I divide up my dried foods into either vacuum sealed bags or vacuum sealed packets left on long strips for things I will be storing for a longer time.
I also put dried food into zippered storage bags based upon whether they are fruits, vegetables or herbs for shorter-term use.
I label everything with what it is and its born on date. I then put the little storage bags in larger clear zippered storage bags and put them in a dark place. I actually buy the ones that are available around Halloween for trick or treating after the holiday for not a lot of money. I store all of my dried foods in a cupboard.
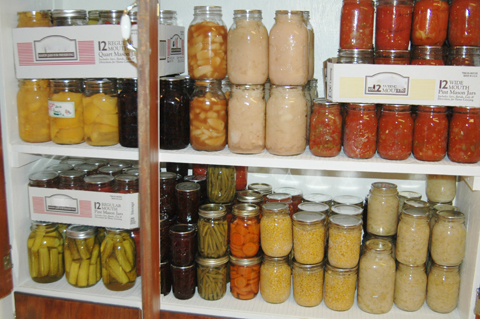
Home Organization Tips: Canned Foods
Organizing my canned goods is easy. I purchased someone’s vintage bright yellow painted canning cupboard at a country auction. We brought it home in the truck and I painted it white and refinished the doors.
The cabinet has six doors and thick shelves to support the weight of the canned goods. I also have a wooden shelf my wonderful father-in-law built for my basement to hold the weight of my canned goods.
The main point being that canned jars of food are very heavy when grouped together. You have to make sure to have strong shelving to stack them. I organize them by their contents with the foods I will use most frequently located upstairs and the foods I use less often downstairs. Canned food must be stored in a cool, dark environment. Make sure to label all foods with the year and its content.
Home Organization Tips: Frozen Foods
We have three chest freezers and designate each one for a specific kind of frozen food.
One is for meat, one is for veggies and fruits and one is for everything else. I use the huge zippered clear trick or treat bags to group the smaller serving-sized bags by fruits and veggies. This gives them an extra layer of protection in the freezer and it makes things easy to find.
General Home Organization Tips
Some overall home organization advice is to label everything with the date and content, keep the things you use most closest at hand and keep things in serving-sized portions.
If you make a chart when you preserve your food of how much of each type of food you need to preserve you can use that chart to keep an active inventory of what you have altogether.
I have dried food, canned food and frozen food and I intermingle them in my recipes and meal plans. I may open a quart of canned venison and put it in a large sauté pan, add some herbs, a jar of canned carrots, some frozen peas and 1/4-cup flour blended with some water to thicken it and serve it over egg noodles.
How easy is that? A hot meal made in 15-20 minutes during a work week makes my night better. With a little home organization and planning you can enjoy the same healthy convenience.
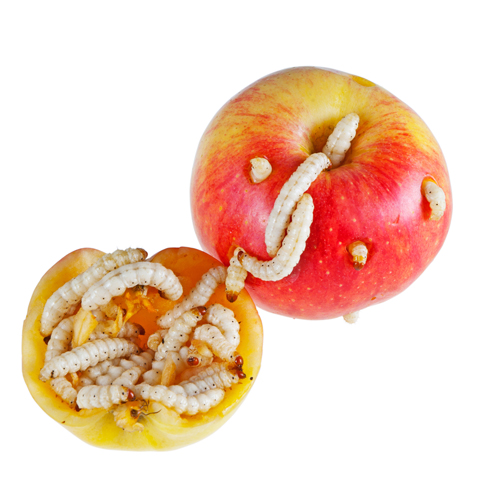
Insects are just one of the seven causes of food spoilage.
Here are the seven causes of food spoilage — from insects to mold and oh so much more — and how they could ruin your food preservation efforts.
To begin to understand the six food preservation options (refrigeration, canning, pickling and fermenting, salting, drying and freezing) it is helpful to have a basic understanding of what causes food spoilage.
The primary contributors to food spoilage are:
Insects
Oxygen
Bacteria
Yeasts
Molds
Moisture Loss
Enzymes
Let’s take a look at each one at a time.
Food Spoilage: Insects
Let’s start our discussion with insects. To store preserved food it is best to use metal, glass, and plastic food containers. Plastic bags or cardboard boxes can be more easily penetrated and infested.
Food Spoilage: Oxygen
Next, oxygen causes discoloration and can impact bacterial growth. Use airtight containers and wrap food tightly or vacuum seal to keep oxygen out of your food. Try to save things in qualities you will use so you do not keep exposing contents to oxygen.
Food Spoilage: Bacteria
Bacteria is also a cause of food spoilage. There are good bacteria that aid in fermentation but there are many bacteria that will make you sick. Keeping food preserved at the proper temperature in your refrigerator and freezer will help your food remain safe. Many bacteria need oxygen, so using vacuum sealing and canning to create a vacuum seal on your jar will keep oxygen out. Bacteria cannot grow in high acid foods but some can survive if they exist in the environment.
Food Spoilage: Yeasts
Yeasts can grow without air or with it. Food with yeast problems appear slimy, murky and can have scum. For some things like beer yeast can be beneficial but it can result in spoiled food. Yeasts like to grow in acid foods.
Food Spoilage: Enzymes
Enzymes are naturally in food. When we freeze or dry vegetables we blanch them to stop the enzymes from causing color changes, vitamin loss and loss of sugar content to mention just few things. Refrigeration does not kill enzymes but it does slow them down.
Food Spoilage: Moisture Loss
Foods lose moisture at higher temperatures so refrigeration is also a benefit for this source of spoilage. Drying your foods of their moisture purposely with a dehydrator or oven will slow the growth of bacteria who grow rapidly in moist conditions.
Food Spoilage: Molds
Molds need oxygen to grow so removing air from preserved foods will reduce mold growth. Molds can be destroyed by heating food to 190 degrees Fahrenheit. Mold will spread its toxin if present at all through all of a food except hard cheese.
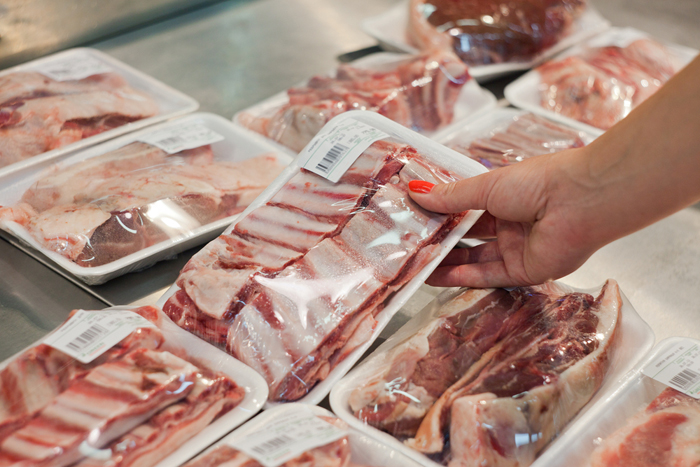
It seems to me like the tooth fairy has a second cousin, and it’s getting in the way of healthy living for kids. I like to call her the “food fairy” because she, like many other fairies, is a myth.
The food fairy waves her magic wand and meat magically appears on a hermetically sealed, foam tray. These trays come in many fancy colors: blue, pink, red, white just to add a little excitement. The packages are lined up in festive refrigerated cases with flashy advertising around them in displays about as far removed from the product’s origin as possible.
Healthy Living for Kids: The Truth About Food
This work of fiction is what most children see as the origin of their food. I prefer my children to understand the reality of where their meat comes from so they can truly appreciate the sacrifice of the animal they are eating. It is a wisdom that impacts them every day of their life, and contributes to informed and healthy living for kids of all ages.
Healthy Living for Kids: Lead by Example
We eat chickens butchered at home. We eat venison that we pull from the woods, field dress, and hang up on a pulley system in our garage.
My kids see the animals that become their meal and they are better for it because they understand how hard their mom and dad have to work for it.
There is a sense of responsibility and value that just grabbing a package of chicken at the store the way one grabs a quart of ice cream can never bring.
They understand that it is what helps sustain them over the cold winter and are thankful.
We also have a huge garden. My kids know that their food gets wet from rain, gets nutrients from the soil, and is weeded everyday by the whole family.
When it gets on their plate, in their eyes it represents both nature and nurture in memory form.
Food is not a source for a little sticker from Mexico or farther away to add to their collection.
Healthy Living for Kids: Start Early
My husband, Dan, and I have tried to instill our food value feelings in our children since they were born. They have seen both mom and dad go hunting. They have seen both mom and dad in the garden. We make sure they are not only exposed to the reality of where food comes from, but are active participants in what ends up in their stomach.
It is nice to know that if the food fairy can’t come to the grocery store there is a freezer full of food in our house and a pantry full of jars and dried foods to go with it. That’s true healthy living. For kids. For families. For everyone.
Use these self-sufficiency and homesteading tips to save money on food.
I am a woman who prefers to cook from scratch. I have loved cooking since I was a kid and hope my children follow the same path.
To me, knowing how to do things from scratch is a primary way to save money on food. You pay for convenience.
Conversely, you save money on food by spending your time doing things for yourself.
How to Save Money on Food at Home
Determine which foods you use are the most expensive to buy. Purchase them when they are in season or grow them yourself and preserve them. Start with things you need in bulk, for example, tomato sauces.
I raise about 30 tomato plants a year. To save money I start them from seed myself. I actually start almost everything in my garden myself from seed because while it is cheaper to buy plants than buy produce, it is cheaper yet to start the whole cycle from seed to table yourself.
Starting things from seed enables you to pick high-yield varieties with shorter growing times. If you have a small greenhouse like I do, you prolong your harvest season by starting to grow things from seed like cucumbers, melons, peppers, summer squash, tomatoes, etc.
How to Save Money on Food at the Grocery Store
When you buy items at the store stock up on things that will store for longer periods of time when they are on sale like pasta. Stock up on basic canned produce like diced tomatoes you can use for many purposes.
I dry lots of vegetable and use them to make cream soups, in stews, chili, dips, salad dressings and casseroles like scalloped potatoes. I grow herbs myself and dry and freeze them to use throughout the year. They tend to be expensive at the store.
When I can get bulk blueberries and peaches I can them for pie filling and make my crust from scratch. You can make-ahead dry ingredient bags for pancakes, waffles, breads, cakes, pizza crust and cookies. I make spaghetti sauce, dehydrate it on fruit roll trays, freeze the dry product to put on pizza and use in lasagna. I make pizza and freeze it to cook later. I make large batches of cookies and freeze part of the batch to have at a later time.
Once you know how much you need to have on hand in preserved food, you can supplement that with smart store buying and really come out ahead. If you have a busy lifestyle and quick-fix meals you can get there with preserved foods.
One of my favorite meals is canned venison over extra-wide egg noodles. I crack open a can of meat and throw in some canned beans and carrots. I boil it for 10 minutes because of the canned beans, check the seasoning, thicken with 1/4 cup flour and pour it over a bed of egg noodles. It doesn’t get much easier than that to put a meal on the table. All the cutting, peeling and chopping has already occurred and it is like I am eating at a great restaurant.
We grow our own onions which we turn into onion rings. We then freeze any leftover onions chopped before they can get rotten and I use them all winter for cooking in soups and casseroles. The key to saving money on food is good planning so you know how much you need to have on hand of meats, fruits and veggies to feed your family. Then you should look at achieving that goal from the cost and storage stand point.
If you do the planning you will be able to save money on food to its maximum potential.
From rolling blackouts to hurricanes, floods to tornadoes, power can go out at a moment’s notice. If the grid fails, the PowerPot will keep you charging! The PowerPot thermoelectric generator converts any heat source directly into power that charges your USB handheld devices. Get Yours Now
If you know how to hunt deer, you’re well on your way to providing a self-sufficient source of animal protein.
Weights and Measures
It takes 200 pounds of meat to feed a family of four for a year. If you can kill deer, you can easily account for 150 pounds of that total with venison. You can then supplement the other 50 pounds with small game.
How to Hunt Deer: Location
You will need to find a place to hunt, either public or private. If you plan on butchering yourself, you need to make sure you have the proper equipment and adequate space. You must keep your game under 40-degrees Fahrenheit and out of the rain and other moisture to avoid meat spoilage.
Learn How to Hunt Deer
Like most types of subsistence food acquisition, research and scouting will help you achieve your goal. There are many great books on hunting public land, but one of my favorites is, of course, my husband’s Whitetail Wisdom book.
Published 10 years ago and still on Amazon’s best-seller list, the book crams Dan’s decades of deer hunting experience and insights from his time as editor of Deer & Deer Hunting into a very useful handbook for learning how to hunt deer. If you’re not a hunter, it will teach you the ropes of how to hunt deer. And if you’re a season veteran, it will dispel many of the longtime hunting myths that cause many of the struggles hunters face when pursuing pressured animals.
How to Cook Venison
There are many great ways to cook deer meat. My book, Venison Wisdom Cookbook, is full of down-to-earth, family friendly recipes. Some people think that having to plan their meals with frozen or canned meat is difficult.
It really is just a matter of knowing what you have to use in your freezer. I indexed the venison cookbook based on cut of meat so if you have hamburger to use then you can just turn to the hamburger section and there will be a list of great recipes to try.
Anyone can cook game meat. Don’t let the fact that you have hunted it in the woods instead of bringing it home on a Styrofoam tray make you feel intimidated. Instead, let it make you feel invigorated for the great gift you have provided to your family.
Those Altoid tin survival kits can be handy, but space restrictions mean carrying a more functional knife is out of the question. Is there a way to combine the best of the mini survival kits with the workhorse of a fixed blade knife?
Yes, as survival authority Jim Cobb shows in the video above. His knife sheath DIY survival kit strategy combines the portability of small kits with the utility of a knife.
This technique would work perfectly as an outdoor survival kit, a travel survival kit, emergency kits for cars, camping survival kits or even a fun project as survival kits for kids (with proper adult supervision, of course).
Putting Together a Knife Sheath DIY Survival Kit
Cobb first made a couple Altoid mini survival kits before attaching a camera pouch to a large knife sheath. The tins slip nicely inside the camera pouch. Additional compartments in the pouch can hold a number of other helpful items.
Cobb points out these items in his knife sheath DIY survival kit:
Tinder tabs LED light x2 Snare wire Over-the-counter pain relief and caffeine tablets Butane lighter Signal whistle Small folding knife x2 Button compass Can opener Magnesium fire striker Water purification tablets Bandages Signal mirror Paracord (18 feet)
Knife Sheath DIY Survival Kit: Considerations
As Cobb mentions in the video, adding the DIY survival kit makes the sheath heavier to carry. It might be better to wear the sheath on a shoulder instead of on a belt.
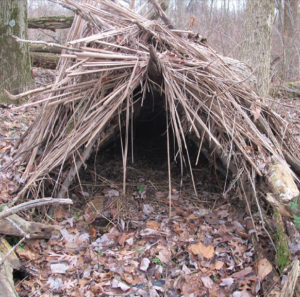
There are lots of survival shelter designs out there, but ideally they should all be located according to these five tips.
Editor’s note: The first step in knowing how to build a survival shelter is to choose a location. These tips from Creek Stewart in his new book, The Unofficial Hunger Games Wilderness Survival Guide, might seem obvious at first, but don’t blow them off. In a survival situation, your mind might be racing and not thinking clearly. Fall back on what you’ve learned to save time and energy.
There are many survival shelter designs, but ideally they should be situated according to the following criteria. Then a fire can be built, water can be boiled and the odds of survival go way up. ~Ben
Survival Shelter Location Consideration #1: Dry
No matter what kind of weather, region, or environment you find yourself in, you must choose the driest possible shelter site. Wet and/or moist shelters kill people. If you are wet, you can develop hypothermia.
Remember, water travels downhill so, typically, elevated areas are drier. Southward-facing site locations are also drier because they receive sunlight as the sun travels east to west.
Survival Shelter Location Consideration #2: Away from Hazards
Flash flood areas mentioned above are prime examples of naturally hazardous areas. Other well-known hazards include:
Poisonous plants
Stinging or biting insects
Rock cliffs
Large, dead tree limbs overhead
Survival Shelter Location Consideration #3: Close to Resources
You need some resources to meet your basic survival needs. Make sure you have access to:
Water
Building materials
Fuel for fire
Survival Shelter Location Consideration #4: Meets Purpose of Shelter
The survival shelter designs you choose should be heavily influenced by why you need a shelter. What is the purpose of your shelter?
There are no black-and-white rules to shelter configurations. Every scenario is different, which is why it’s absolutely critical that you be able to improvise.
However, learning some basic shelter configurations for a variety of scenarios will give you a knowledge base to work from. Your creativity and on-hand resources will fill in the blanks.
Survival Shelter Location Consideration #5: Energy Conservation
Energy conservation should be at the forefront of every survival decision you make—especially shelter. Building even a simple survival shelter can be a very labor-intensive task.
I’ve worked eight hours of back-breaking labor building cold-weather debris huts that, in the end, gave me only the bare minimum shelter I needed. Working like this spends thousands of calories, and that will eventually catch up with you.
I’m not suggesting that you be lazy, but rather make intelligent decisions that help you save time and energy. Try to develop a partnership with Mother Nature instead of working against her. Let her do some work for you if you can.
Looking to go armed, but are stuck in the weeds as to what to arm yourself with? Here are 20 of the best concealed carry gun options that will keep you on the defensive.