An ode to the Ruger single action revolver, designed with classic western lines and modern innovations and materials.
[slideshow_deploy id=’217617′]
[slideshow_deploy id=’217617′]

Semi-automatic handguns are typically the better choice for suburban and in-home use and, when cared for and kept clean, are the flavor of the day in what I’ll term combat zones—whether an Afghanistan outpost, a disaster area overrun by consequence-free crime, or an apocalyptic end-of-days scenario.
Revolvers, on the other hand, are the better option when sand, dust, and involuntary neglect add up to an environment that may challenge a semi-auto’s reliability. They are just more reliable in very dirty conditions. Also, revolvers tend to be chambered for more powerful cartridges—sometimes much more powerful—than semi-autos. While this is an advantage in the backcountry or around livestock and heavy predators, it’s a disadvantage in an urban neighborhood composed of thin walls and sleeping children.
Can the two vastly different handgun types cross over in usefulness? Absolutely. However, each has its strengths and weaknesses.
Since revolvers don’t depend on harnessing the energy of a cartridge to function, like semi-autos do, there’s just one less thing to go wrong. Squib loads, dud primers, a tight cartridge too stubborn to chamber easily—none of these affect revolvers. Additionally, since human muscle works a revolver’s action, bits of sand, lint, dust, or fouling that would choke a semi-auto can be overcome by, well, a little more muscle. Just ear that hammer back and let fly.
As mentioned earlier, the magnum cartridges frequently chambered in revolvers can offer quite an advantage for rural use, too. They provide more downrange reach, more downrange energy, and typically a great deal more penetration—important when scraping an enterprising black bear out of the bacon griddle next to your tent, or trying to kill a wigged-out saddle horse that’s running like a banshee while you bounce along the cactus-covered ground with your boot stuck in the stirrup.
Revolvers are slower to reload. With practice and a good speedloader (a device that holds the bases of a cylinder-worth of cartridges, and drops them into the open cylinder of a double-action revolver at the twist of a knob) or moon clip (a spring steel device that holds a cylinder-full of cartridges, and goes into and out of the gun with them), a good revolver man can get back into action pretty quickly. But, speedloaders and moon clips are awkward to carry, and it takes good training to achieve speed and surety. Single-action revolvers are even slower. Much slower.
On the plus side, your revolver will never turn into a one-shooter because you misplace your magazines. And if you’ve got a little survivalist in your nature, you’ll appreciate the fact that empty cartridge brass is easy to collect—just dump it into your pocket after ejecting it. With care, you’ll never loose a piece, and you never have to hunt for little sparkly brass bits flung indiscriminately away by your greedy semi-auto.

Revolvers have the appealing virtue of simplicity. Neophyte shooters intuitively grasp how they function, and the lack of slides, slide stops, magazine releases, decockers, and safeties of various flavors is attractive. Many women opt to carry a compact revolver for that winsome simplicity, frequently compounded by the fact that petite women sometimes struggle to pull back a semi-auto pistol’s slide in order to chamber a cartridge.
As I see it, the revolver has only a few drawbacks as a prime personal protection sidearm. They have limited capacity, they are slow to reload, and the cartridges for which they are chambered are often overpowered for city and in-home use.
The first two drawbacks are what they are, and shooters opting for a revolver should plan on spending time practicing reloading in order to even the odds a bit. The over-power issue, on the other hand, can be turned to the owner’s benefit by choosing ammunition with hollow-point projectiles designed for dramatic expansion, in a light-for-caliber weight. The effect is two-fold: With less mass, projectiles will penetrate less, and the large, on-impact expansion will slow bullets down, dumping more energy into the bad guy and reducing the chance of a pass-through that could potentially endanger family members or neighbors.
It boils down to this: With the correct ammunition and some quality practice-time manipulating the gun, a revolver will do anything you’ll ever need it to.

As far and away the most popular type of sidearm for personal protection, the semi-auto’s primary attractions are high capacity and excellent rapid-fire capability. With correct maintenance and quality ammunition, good semi-autos are very reliable, too.
I grew up carrying a revolver while working cattle in Southwestern desert country. None of the guys I knew owned a semi-auto because prevailing opinion was that they couldn’t cut the mustard in the country and conditions in which we worked. I’ve since learned differently—a good semi-auto can take an awful lot of abuse and still function reliably.
When I first started carrying a semi-auto (a Colt Gold Cup 1911 in .45 ACP) it wasn’t for high capacity, it was for the rapid-fire characteristic. The Colt didn’t really offer much in the way of additional round count—my surplus G.I. magazines were seven-rounders. Heck, my single-action .44-40s held six. But I couldn’t shoot a single-action as quickly as a semi-auto, and though I could hose rounds downrange pretty quickly out of a double-action, I couldn’t shoot it fast nearly as accurately as my 1911.
Speed is one of the most important advantages that a semi-auto offers the average person. Sure, there are revolver shooters who can shoot faster and more accurately than 99 percent of the semi-auto shooters out there, but the reality is that, for most folks, semi-autos are a little easier to shoot fast than revolvers.
Throw in high capacity, and you’ve got a very supportable argument that the semi-auto makes a better personal protection gun than does a revolver. Truth is, most of today’s popular designs hold more cartridges than a wheelgun—usually a lot more. Even a modern magazine in a .45-caliber 1911 holds eight rounds, plus one in the chamber. That’s a total of nine, for a 50-percent increase on the capacity of most revolvers. Throw in high-capacity guns, such as Glock’s G17, Smith & Wesson’s M&P9, and Springfield’s XD(m), all of which contain 17+1 to 19+1 rounds in the magazine, and you’ve got three times the capacity of a revolver. Three times! Add a couple of easy-to-carry magazines in innocent-looking belt sheaths, and you can comfortably carry over 50 rounds on your person.
You can argue that, in most of today’s typical defensive encounters, you shouldn’t need even a tenth that number. You’d be right. However, what about that non-typical encounter? Or—admit it, we all think about it—an end-of-days scenario? There are a lot of situations in which it would be mighty comforting to have 50-plus rounds available.
Semi-autos do have some drawbacks. They are clean freaks. They are also picky about subpar ammo. Whereas a revolver will accept anything that fits properly into a cylinder chamber and will dutifully fire it downrange, a semi-auto must have cartridges with the correct bullet nose geometry for reliable feeding, enough propellant to fully function the slide but not so much that it batters the internal mechanics, correct case length for proper headspacing… all this within spec so that it flows into the chamber and out again without hanging up in a gun powered purely by energy harnessed from the explosion of the cartridge itself. Looked at from an informed, objective position, that’s a lot to ask. It’s a marvel than so many semi-autos are the reliability champs that they are.
The very magazines that provide high-capacity firepower can—if lost or damaged—cripple a semi-auto and, in essence, turn it into a single-shot. Or worse, incapacitate it completely if it’s one of the models with a magazine disconnect safety that prevents it from firing unless a magazine is inserted. These days, we take magazines pretty lightly, as most of us have a spare or several. But in the early days of semi-autos, folks considered the potential more gravely. Many early models—especially those of European design—didn’t allow magazines to fall freely when released; this influence extended up through the first-generation Glocks.
Limited energy and penetration are another characteristic of shots fired from most semi-auto handguns. In many scenarios, limited penetration is an advantage. A 9mm hollow-point projectile is much less likely to penetrate through walls than a classic soft-point .357 Magnum projectile. But it does limit a semi-auto’s suitability for certain tasks. I know of two Alaskan bear guides who carry semi-auto .45 ACP pistols for backup. What tomfoolery. Even the more powerful revolver calibers (until you get to the obscenely powerful .500 S&W Magnum) are unsuitable for stopping a bear with uncivilized intentions, let alone a semi-auto with very limited penetration and (in bear terms) not nearly enough energy on impact.
However, we’re discussing personal protection firearms here, and none of the above semi-auto drawbacks really apply. Shoot quality ammunition, and purchase plenty of magazines and keep track of them diligently. As long as you attend to those two details, a good semi-auto makes more sense than a revolver most of the time.
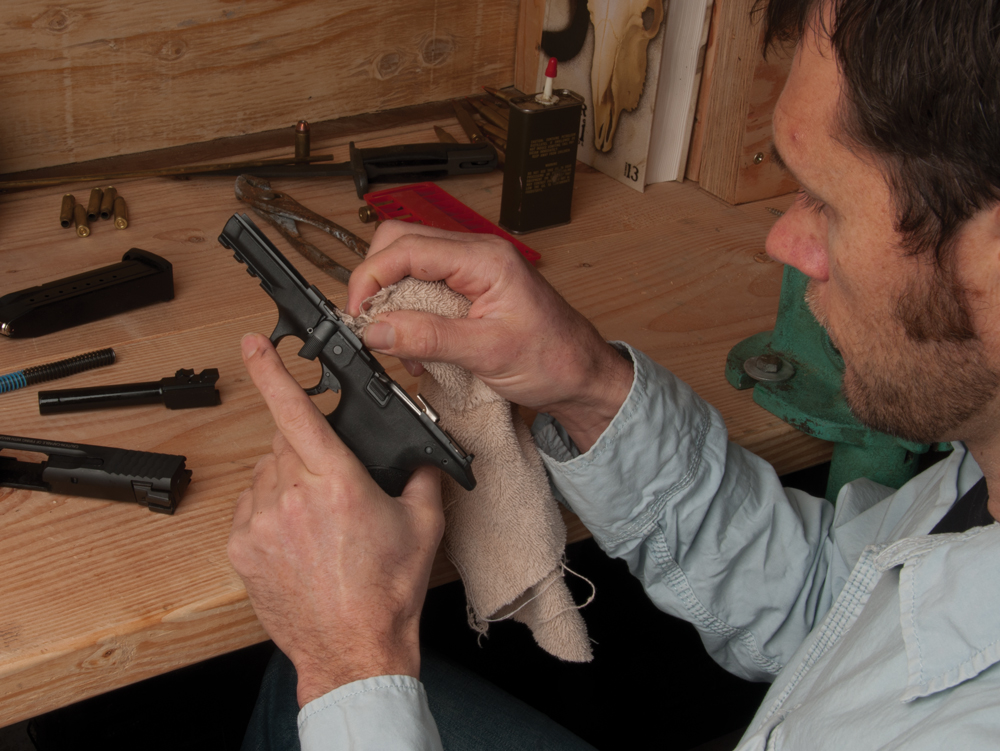
The handgun covered in this report is arguably among the finest finished and fitted handguns in the world. It is manufactured by Sphinx Systems Ltd. of Switzerland, a firm that is enjoying more than 140 years as a tool and precision manufacturing company.
The present pistol is the result of long experience in producing quality handguns, including the original Sphinx and a number of CZ 75-inspired clone guns. These handguns have proven accurate and reliable. However, for many reasons, including currency trades, the pistols are often very expensive. Quality handguns are not inexpensive, but as the price reaches $2,000 or more, buyers are few. Sphinx set out to develop a handgun with excellent performance but which might be sold for a price in the middle range—in this case about $1,350. Sphinx developed the SDP series to fill this role.
The handguns are well-finished by any standard and offer excellent performance. They are not inexpensive, but they are affordable.
There is much that is familiar with the Sphinx pistol. It uses the proven short recoil system and a locked breech design that began with the Browning patents. The pistol’s construction is interesting. While the slide, barrel and critical parts are of steel, the upper portion of the frame is aluminum. The lower receiver is of a modern polymer. This is an unusual construction. While polymer is lighter than steel and less expensive, this mix of materials isn’t easily mastered.
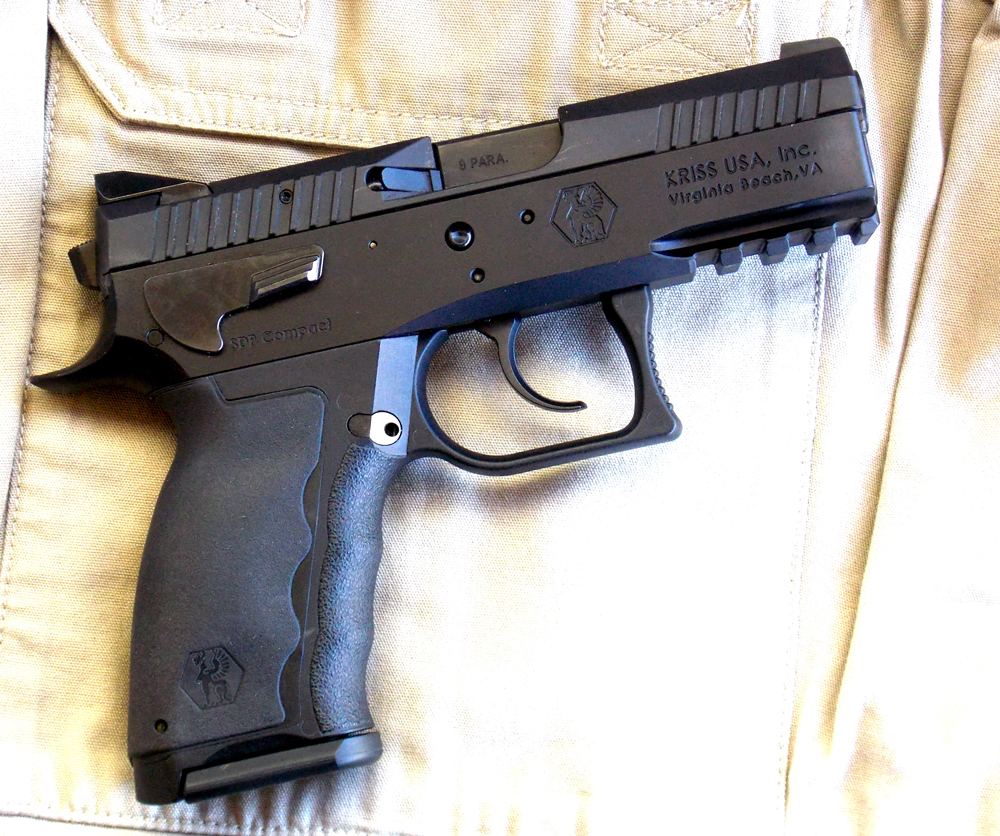
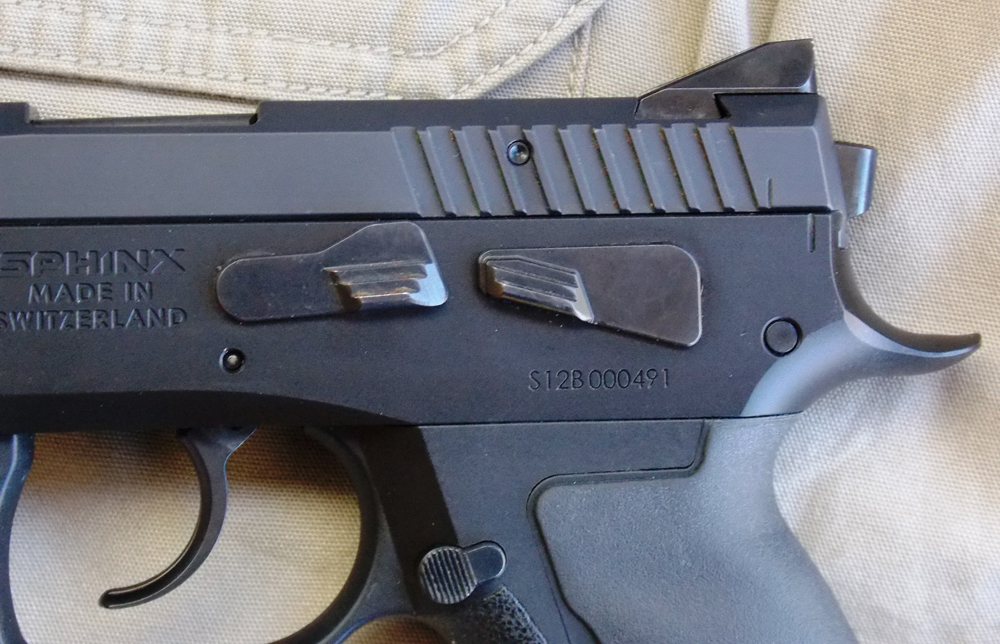
The appearance of the slide is a clue to the pride with which this handgun was produced. In a day when many gunmakers are attempting to cut corners and limit machine work, the Sphinx slide requires extensive machine work. The bevels are very well done. The slide features forward cocking serrations, and the ejection port machine work is artfully accomplished.
Another feature is that the slide rides inside of the frame. This gives the practiced eye a clue to the lineage of the Sphinx handgun. It is based upon the durable and well-respected CZ 75 handgun. The slide’s position inside of the frame limits muzzle flip, as the bore axis remains low. This is a difficult feat to achieve with a double-action handgun. The contact between the slide and frame is tight, resulting in high accuracy potential.
As for the sights, the rear sight is dovetailed in place. The front sight is not a common dovetail but is firmly attached in a trough that runs from the forward section of the slide to the rear of the front sight. This is an excellent setup that anchors the sights well. The rear sight may be drifted to adjust the point of impact for windage. The sights provide a good sight picture.
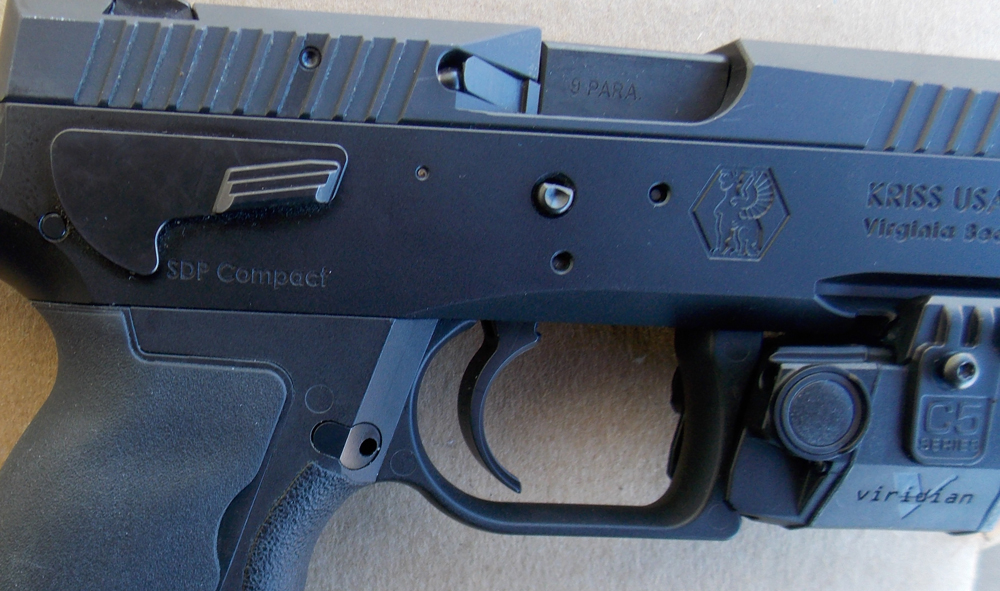
The action is contained in the aluminum section of the receiver. The double-action first-shot trigger is similar to that of the CZ 75, with a recurved trigger offering good leverage. The double-action trigger pull is tight, long and heavy, as these often are, breaking the sear at about 14 pounds. The single-action trigger is clean at 5.5 pounds with the modest backlash common to the CZ 75 and its variants.
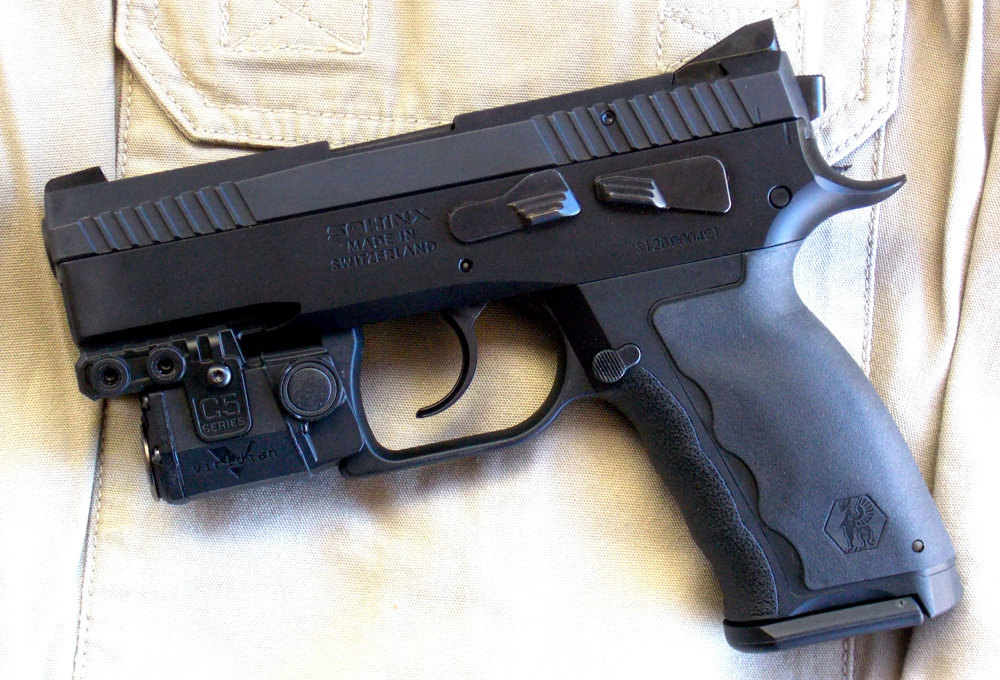
Controls include a slide lock, a frame-mounted de-cocker and a magazine release. The hammer is bobbed with no hammer spur. The de-cocker is ambidextrous. There is no manual safety and no provision for carrying the pistol cocked and locked. The frame is bobbed to prevent snagging on covering garments. The frame features a light rail for mounting laser aiming devices or a combat light.
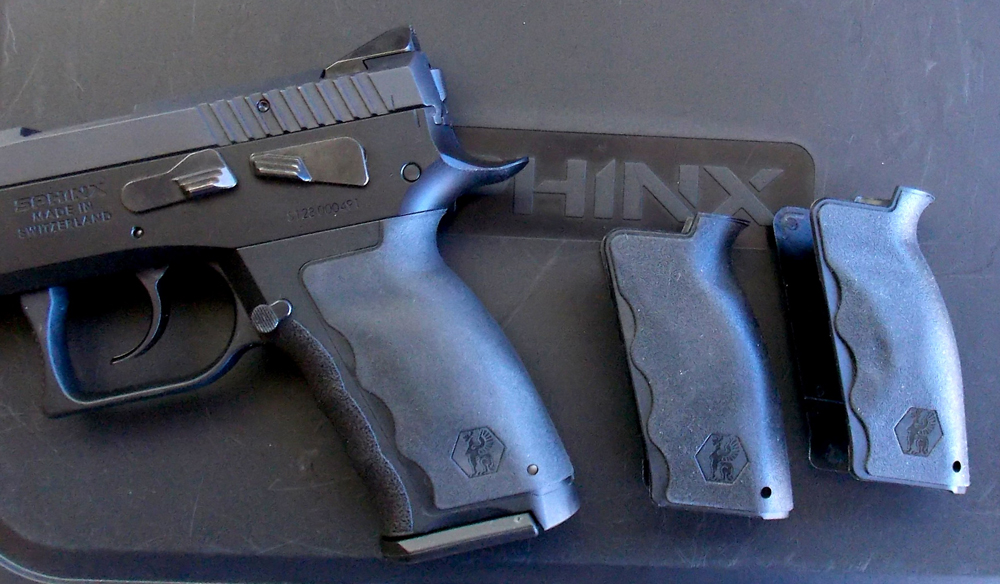
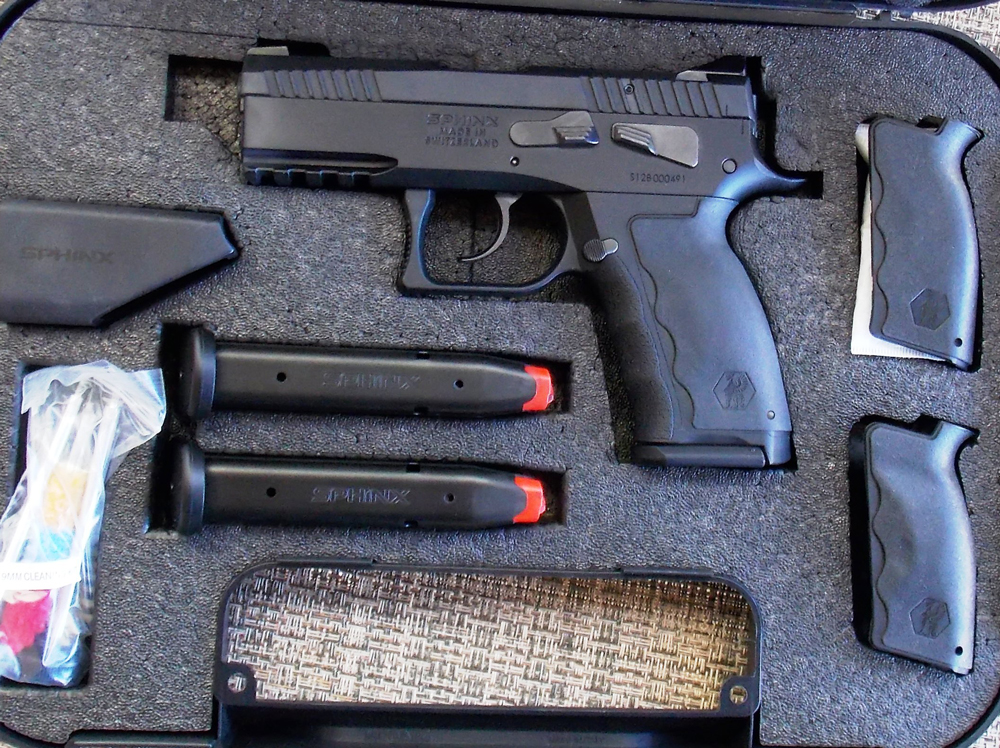
Unlike most CZ 75-based handguns, the Sphinx can be adjusted for hand fit. This is due to the inclusion of the polymer grip frame component. Additional grip inserts are included in the hard plastic box supplied with the Sphinx.
The polymer grip frame feels good in the hand, with the heft consistent with a quality CZ 75 handgun. When you look at the de-cocker and the magazine release, it is obvious that a lot of care goes into producing high-grade checkering on each of these parts. The grip frame offers plenty of abrasion as the result of a serrated finish. There is a removable backstrap that allows for good hand-to-gun fit. There is a total of three straps. The front strap features slight finger grooves.
Three steel magazines that hold 15 rounds of 9mm Luger ammunition are provided.
The Sphinx in every detail is an impressive piece of Swiss workmanship. No corners have been cut. It exhibits high precision in the detail work and excellent slide-to-frame fit. This is a tight handgun. The slide rides in the frame with excellent lockup. Lateral play is practically non-existent. The frame feels good, and the pistol is well balanced. The slide is short, giving the pistol a squat appearance. The 3.7-inch barrel is well fitted into the slide and locks up by butting the barrel hood into the slide.
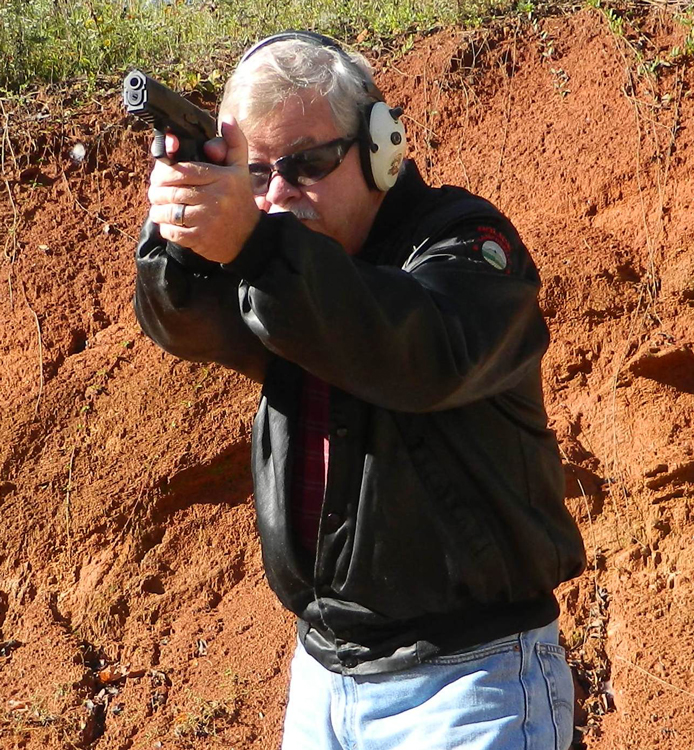
The heft and balance of the handgun is good, coming in at 28 ounces unloaded. When beginning the firing sessions, I loaded the magazines with Black Hills 115-grain Blue Box re-manufactured loads. These loads are an excellent resource for training and practice. I fired at man-size targets at five, seven and 10 yards. I started the drills in the double-action mode. After the first shot, I fired the subsequent single-action shots as quickly as I could reacquire the sight picture, and the Sphinx gave excellent results. The sights are good combat sights that are quickly picked up by the eye.
The grip frame is comfortable while firing. I am not a fan of finger grooves in the front strap, but I have to admit, in this case, the modest grooves seem to be an aid in control. The pistol proved to be more than combat accurate.
During one session, firing at seven yards, I put a magazine of 15 rounds into the same ragged hole. Double taps were easily delivered and the pistol is easily the most capable double-action/first-shot handgun I have fired in some time. During the initial firing tests there were no failures to feed, chamber, fire or eject. Felt recoil was light.
Moving to personal defense loads, a number of popular JHP loads were fired in the Sphinx with good function. Among these was the Black Hills Ammunition 115-grain EXP. This load isn’t loaded to +P pressure but instead for the greatest velocity possible, hence the term, Extra Power.
At well over 1,200 fps this load gave good function and control, virtually the same as the 115-grain practice load. I also fired a quantity of the Black Hills Ammunition 124-grain +P service load. If I were back in uniform, this would be my favored 9mm service load. The slight difference in recoil was noticeable, but the Sphinx remained controllable.
A good test for any handgun and shooter is firing at small targets at known and unknown ranges. The Sphinx proved accurate at long range, connecting on the Innovative Targets steel gong at a long 50 yards. This target is an excellent training resource that I use often. (InnovativeTargets.net)
Moving to bench rest firing, I collected a number of loads that have proven accurate in the past.
Taking a careful rest, with attention to every detail, I fired two 5-shot groups with four different loads. These loads were from four manufacturers and in four different bullet weights, so the results were excellent by any standard. The single most accurate load, the Fiocchi 124-grain Extrema, produced a 5-shot group of 1.9 inches. That is target-grade accuracy. The Black Hills 124-grain +P is about 100 fps faster and posted a group of 2.25 inches.
The Sphinx is indeed an accurate handgun. Remember, this is a compact handgun designed for concealed carry or all-day uniformed carry. The Sphinx isn’t inexpensive, but it is clearly worth its price.
SPHINX SDP SPECIFICATIONS
Manufacturer: Sphinx Arms
Distributor: Kriss USA
Model: SDP Compact Alpha
Action: Double-Action/Single-Action
Caliber: 9mm
Slide: Steel, Matte Black
Upper Frame: Anodized Aluminum
Grip Frame: Black Polymer
Grips: Polymer/Synthetic Inserts
Sights: White Dot Front, Drift Adjustable Rear
External Safety: None, De-cocking Lever
Barrel Length: 3.7 inches
Overall Length: 7.4 inches
Height: 5.35 inches
Width: 1.06 inches
Weight: 28 ounces
Capacity: 15 rounds
Accessories: Pistol is provided with three magazines, magazine loader, cleaning kit, hard case, lock, owner’s manual and grip inserts.
This condition is primarily present if downward pressure is applied to the bolt too early while pushing it forward. While Savage has received no reports of accidents due to this condition, we have decided to offer free retrofits of all B.MAG rifle bolts out of an abundance of caution and in our ongoing commitment to quality and safety.
To avoid possible unintentional discharge or injury, do not use your B.MAG rifle until your bolt has been retrofitted with a new bolt handle and cap. For instructions on receiving your free bolt retrofit, visit www.savagearms.com/recall/bmagbolt/. For other questions related to this bolt recall, call us at 844-784-3301 Monday through Friday 8am to 10pm EST. This retrofit only applies to Savage B.MAG rifle bolts.
The bolt retrofit includes the replacement of the existing bolt handle and bolt cap with a revised bolt handle and bolt cap.
The correct, revised parts are easily identified:
To avoid serious injury or death with any rifle, observe these precautions:
Savage Arms is the leader in accuracy, quality and value, and we stand behind our products. We sincerely apologize for any inconvenience this may cause you.
Source: Savage Arms
If you ever wind up in front of a judge or jury in the unenviable position of having to justify an act of self-defense, you will need to prove that your actions were reasonable under the circumstances. Informing the triers of fact about the training you’ve had is the key.
Under the rules of evidence, you have the right to introduce evidence that will help court officials understand your mindset leading to your decision to shoot in self-defense. This evidence may include an instructor explaining what he or she trained you to do under those circumstances.
You can explain the nature and extent of your training and knowledge to the judge or jury, but only if you can document that you possessed that knowledge before the self-defense incident occurred.
For example, let’s say that you shot an individual who was threatening to cut your throat while that person was five steps away from you. If you’d had the right training, you knew before this ever happened that a person five steps away possesses both the ability and the opportunity to use that knife against you. The jury should understand your prior knowledge, so they can decide if a reasonable person would have pulled the trigger when you did, knowing that someone threatening with a knife is a deadly danger to you, even five steps away.
Your ability to introduce properly documented training will greatly aid the court in understanding that your actions were indeed reasonable—and hence justifiable.

You need to document classes you’ve attended, books you’ve read and DVD lectures you’ve viewed so there is no question of what you knew ahead of time. This documentation can be done in several ways. At the Armed Citizens’ Legal Defense Network, Inc. we provide members with eight lectures on DVD. On the DVD labels, we print lines for members to initial and date each time they view one of the lectures. You can and should do the same with educational and training DVDs.
Each time you watch an educational DVD, document the viewing with an indelible marker on the disk label and take notes on the material taught. Once you’ve developed a good set of notes, mail the notes to yourself by U.S. Mail, return receipt requested. When the notes come back to you, file the unopened, postmarked envelope in a safe deposit box.
If you ever get a judge who doesn’t believe you knew what the lectures taught, introducing a signed, sealed and delivered copy of notes made while watching the lectures on DVD should do the trick. The same strategy will work for professionally taught classes and books.
Another tactic is to give your notes to an attorney other than your defense attorney and have them filed with your records at the law firm’s office. There may be a small fee for this, but it is worth it. Again, do not secure the notes with your defense attorney, but with someone else so the lawyer holding your notes can testify as an officer of the court that you gave them the documents, something the attorney defending you cannot do. Next, you testify about how you took these notes. Let’s say that perhaps you watched the video three times as your notes would show.
Another way to document material learned by lectures on DVD would be to view training DVDs in a group setting, for example at your gun club. Make a list of all who were present and also saw the video, and then you could call one or more of these people as eye witnesses to having viewed the video.
Get good training, read books by knowledgeable authors and use DVD lectures to increase your understanding of self-defense issues, but do not fool yourself into thinking that is enough. Take good notes and preserve the integrity of those notes with the understanding that they may be the factor that ultimately proves the reasonableness of your self-defense actions.
 Join Armed Citizens Legal Defense Network, Get a Free Download
Get help following a self-defense incident when it’s needed most. Unlike insurance, the Armed Citizens’ Legal Defense Network, Inc. pays the legal expenses as they emerge, rather than requiring the need to raise the money to get to “Not Guilty,” then apply for reimbursement. Join here and get a FREE download


The unthinkable has happened, you’ve had to draw your handgun and use it in self-defense.
Everything was justified — the assailant was armed, your life was threatened, the situation demanded lethal force. It was a traumatic few moments that will live with you forever. Unfortunately, those handful of seconds potentially only marked the beginning of your tribulations.
There is a chance you’ll be whisked away to your local police station, perhaps in handcuffs, for questioning and possibly more. One imprecise answer, one sloppy turn of phrase and you could be in a world of trouble.
The likelihood is also there for the local media to pick up on the story, splashing your face and name across every one of your neighbors’ T.V. screens. And there could be further ramifications, perhaps with your job, leaving you in financial dire straits.
You may have saved your life with the use of deadly force, but for all intents and purposes it could be over. A criminal conviction, financially crippling civil lawsuit, community ostracization, employment trouble all could be in your future.
Knowing all of this you’re rattled, but not panicked. You have the peace of mind that you’ll get the support you need through this trying time. It’s precisely why you planned wisely when you took on the responsibility of your own self defense by joining the Armed Citizens’ Legal Defense Network.
Even if the worst happens — the district attorney executes a full-court-press and you don’t have one thin dime in your bank account — you have the comfort of knowing you’ll get the legal and expert support you’ll need when you’re dropped in this crucible.
These extraordinary circumstance are exactly what Marty Hayes designed the ACLDN to handle. And his revolutionary concept of how legal support should work after a self-defense incident goes above and beyond anything currently on the market.
The organization not only allows its members to choose their own attorney, it gives guaranteed financial support for legal fees and other professional services they may need for their defense. There are few — if any — other organizations or companies that offer this depth and breadth of post-incident support.
Perhaps one of the most comforting aspects to the ACLDN is its action plan for a self-defense incident. This is the most grueling time, but also the most important, and the organization has it covered.
The group will forward up to $10,000 to hire the attorney of your choice immediately. This is crucial, given it is inadvisable — no matter how clear-cut an incident — to go into a police interrogation without legal representation. If you do not happen to have a lawyer, the ACLDN will dispatch a representative to your location to help you find one suited to your needs.
If your incident of lawful self-defense is prosecuted, the ACLDN will, upon request, tap into its’ legal defense fund of over a half of a million dollars, to provide for your legal defense. This includes paying up front for attorneys, investigators and experts, if necessary, to provide the member with a complete legal defense.
While comforting, the legal support is only one dimension of what ACLDN offers its members. The organization also has some of the most recognized and respected self-defense experts at their beckon call.
In addition to renowned firearms instructor and expert witness Massad Ayoob, ACLDN’s advisory board is made up a roster of well respected firearms instructors and professionals from around the nation. These include John Farnam, Jim Fleming, Tom Givens, Emanuel Kapelsohn and Dennis Tueller.
These authorities are not only there to advise during a worst-case scenario, but also to help in providing educational support to the organization’s members. This aspect of the Armed Citizens’ Legal Defense Network is perhaps one of its most marked breaks from other legal support entities.
The organization takes the time to tutor its members in the legal aspects of being armed in today’s society. In addition to eight educational DVDs and a 235-page book, the members also receive a monthly journal that explores every angle of self-defense and the laws that surround the responsibility.
Maybe the best part is the affordability of the Armed Citizens’ Legal Defense Network. It is basically equivalent to a couple trips to the burger joint each month. However, those couple of bucks could be the difference between saving the life you know and watching it circle the drain.
You taken the time to become a responsibly armed citizen, now take the time to defend your right to self-defense.
After more than half a century of duty, Kalashnikov has become Russian for resilience. Mud, neglect, un-mechanized peasants—there is little that slows down the iconic battle rifles and even less that stops them.
There is no free lunch, however. And the rock-solid reliability of this family of rifles comes at a cost. In the Kalashnikov’s case, it’s the firearm’s tolerances. To put it mildly, they’re loose.
This is more than notable in this beautifully shot video by Vickers Tactical. It’s hard not to notice the flex in the Arsenal AK-74 after each round Larry Vickers throws down range. It almost seems like each time the rifle is fired it is ready to vibrate into a pile of stamped metal and wood.
Of course, it never does. The long-stroke piston system just keeps chewing through the ammo and asking for more.
Another interesting point brought out through the slow-motion footage at the :25 and 1:06 marks is the 5.45x39mm round’s ballistics. If you happen to be a precision shooter, the yaw and tumble is enough to give you a case of the vapors. This is especially true of the first instance in which the bullet can be seen tumbling less than a foot away from the muzzle.
This is a trait that was intentionally engineered into the round with the expectation of greater tissue damage. And it is the main reason why the 5.45x39mm became known as the “Poison Bullet” during the Soviet’s Afghan War.
Rock Island Auction Company is gearing up for its Sept. 11-13 Regional Firearms Auction. And for collectors, the event should provide an incredible opportunity to bid on some truly historic firearms. In addition to having firearm designs spanning the past five centuries, the sale will also include a number of guns from notable collections and owners. Here is a brief look at some of the more impressive items of the 3,000 or so that will be crossing the block.
[slideshow_deploy id=’217488′]
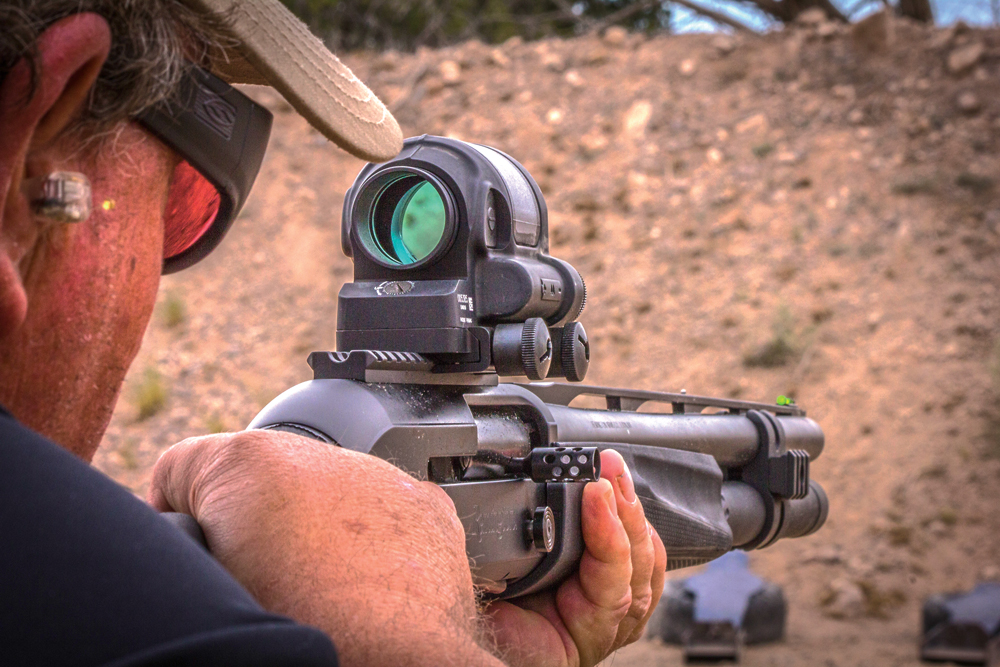
Choosing a weapon for home defense is a serious matter, and as far as I’m concerned, a handgun should be an integral part of any home defense plan. Why? Unlike a shotgun or an AR, handguns are easy to keep with you at all times. With a long gun, you’ll have to go fetch it when the balloon goes up. A handgun, however, does not constitute a comprehensive home defense plan. Handguns are personal defense weapons, and while one might very well be needed during a home protection scenario, if a long gun is wielded with authority and precision, the handgun will remain in its holster.
Both the AR and the shotgun have more reach than a handgun. Both deliver a lot more power, and both are easier to shoot with precision. I’m not a shotgun kind of guy. This is not in any way a reflection on the usefulness of the weapon system—it’s just representative of my taste in firearms. As biased as I might be, I appreciate and understand that in some cases the shotgun might be the best answer.
The shotgun has long been a popular weapon for home defense. Some would argue this is due to its suitability to the role, but I believe it’s more likely due to the shotgun’s prevalence in society. Uncle Bob likely kept a shotgun behind the kitchen door because a shotgun was the only gun Uncle Bob had. Carbines—short rifles—have always cost more than shotguns and require more training for most folks to shoot them accurately. For the one-gun homestead, a high-power rifle was not the best tool for small game or flying foul.
Just because old wives tell us the shotgun is the best home defense gun does not make it so. Many of those old wives were probably married to Uncle Bob. At the basic level, the shotgun allows for a slight bit of point of aim/point of impact variance. This is because it disperses shot into a pattern that increases in size with range. The farther the target is away from the shotgun, the easier it is to hit. But everything has its limits, and the shotgun’s limits are not that far away.
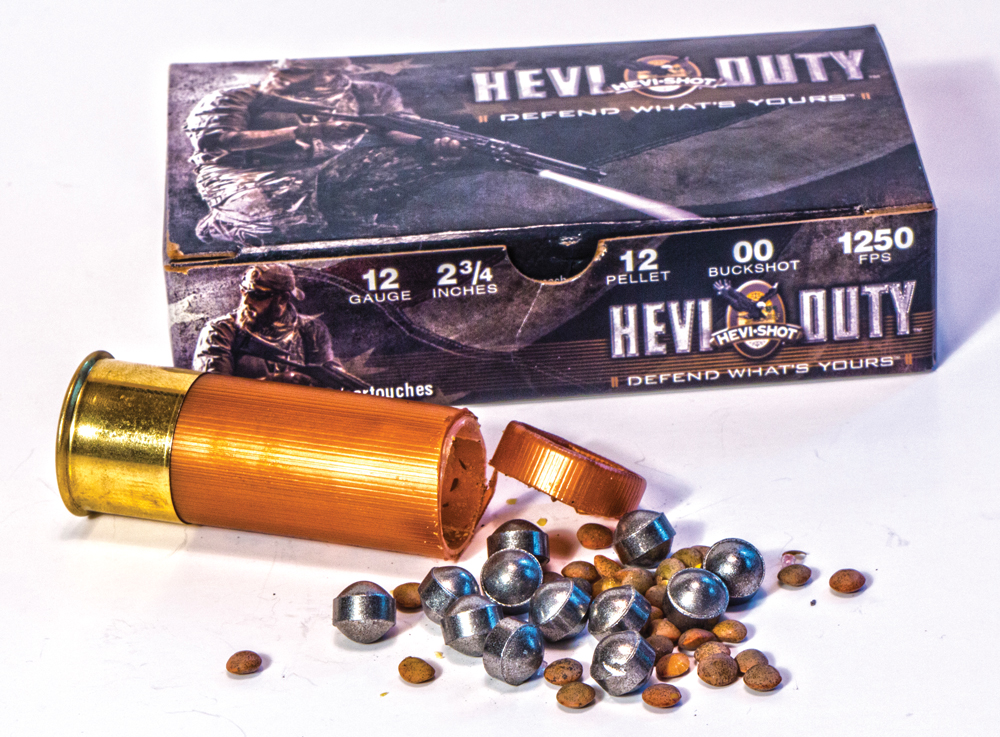
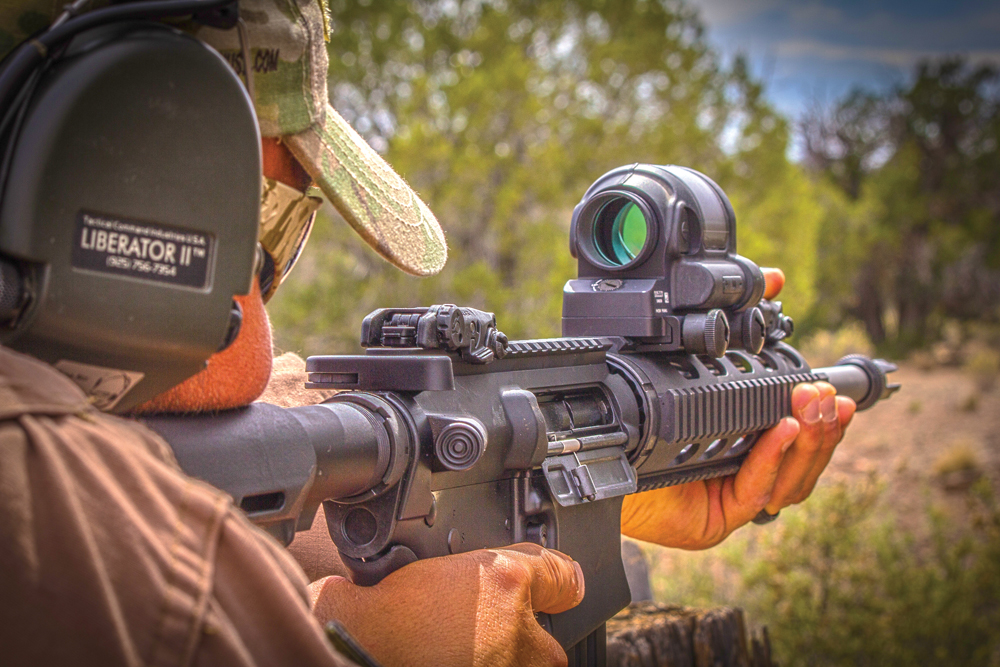
Ballistically speaking, the AR-15 carbine chambered for the .223 Rem. is more powerful than the shotgun. With a nominal impact velocity of 1,250 feet per second (fps), a single 54-grain 00 buck pellet will have 187 ft.-lbs. of kinetic energy. This is very similar to a single bullet fired from a high velocity .22 LR. If you can hit your attacker with every pellet in a 00 buckshot blast, it would be like shooting the bad guy a bunch of times, all at the same time, with a .22.
On the other hand, a 55-grain bullet fired from a .223 AR-15 carbine will strike with about 1,000 ft.-lbs. of energy. But all that energy will be directed at a single spot. To further exaggerate the difference in terminal performance, shot pellets are non-expanding; they will only punch a caliber-size hole through the bad guy. A centerfire rifle bullet will expand and sometimes violently fragment, creating a much more ferocious and painful wound. Of course shotguns can also fire slugs, and slugs are wickedly powerful projectiles that make big holes and are hard to stop. A ¾-ounce slug from a 12 gauge will deliver about twice the energy of any .223 Rem. load and will make a very, very big hole going in and coming out. Hit your target with a slug and it will suffer. And as Sir Isaac Newton so aptly explained, so will your shoulder.
 Whether it’s shot or slug, shotguns throw a large payload. Nine 00 buck pellets will weigh about 480 grains, which is about nine times heavier than a .223 bullet. To push this cargo out the barrel it takes lots of energy, and that push goes both ways. In short, shotguns kick hard—about eight to 10 times harder than an AR-15. Recoil is the prime detractor to the shotgun; it’s the reason many cannot shoot it well and the reason many do not want to shoot it at all.
Aside from recoil, there are other considerations. The most popular defensive load for the shotgun is 00 buck. These 00 buck pellets will penetrate very deep—about 20 inches in 10-percent ordnance gelatin. These pellets are also capable of passing through most interior walls and easily through any, if not every, wall in a mobile home. If you’re worried about hitting a family member in an adjoining room or if you live in a trailer park, double-ought buckshot is probably not the way to go. The solution can be smaller shot; at conversational distances, #6, #7 and even #8 shot is unimaginably destructive to the human body.
The downside to all shot shells is range. Much past 25 yards, shot becomes terminally ineffective for two reasons. First, the pattern size expands to the point that a large portion of your shot will miss the target, and the resulting wound is less concentrated. Secondly, round shot is not very ballistically efficient and loses energy fast. If the engagement distance extends past 30 yards, it would be advisable to switch to a slug.
Finally, it only makes good sense to choose the ammo for your AR with the same care and concern. To eliminate penetration through interior and exterior walls, look to fragilely constructed varmint bullets or specialty loads like those in the Hornady TAP line. If, however, you are a hopeless bachelor living alone out past the landfill, you can opt for any shotgun or AR load you like. In fact, in the most rural settings, deep-penetrating loads might be a good idea; sometimes four-legged predators must be dealt with, too.

Practically speaking, there’s not a great deal of difference between an AR and a shotgun for home defense. It is unlikely you will need the capacity or extended reach of the AR. Of course as soon as that’s said, you’ll be accosted by a horde of zombies charging across the back pasture. Shotguns are not known as precision weapons, but if equipped with good combat sights and loaded with quality slugs, they can easily keep three shots inside a 3-inch circle at 50 yards. If you choose your ammunition wisely, from a pure ballistic standpoint, it’s a toss up. The simple answer is to choose the one you can shoot the best. If you find the shotgun intimidating, it will never be a good choice. All the same, you might not be the person who has to wield it. The need to deploy the long gun in a defensive situation could fall on another member of the household.
ARs are generally more compact, often lighter and much easier for most to shoot with precision. If recoil is a big deal to you and your family but you prefer the shotgun, don’t overlook the 20-gauge. It has less recoil but is still very effective.
It might surprise you to learn my primary home defense long gun is a Smith & Wesson M&P15-22 loaded with a magazine full of CCI Stingers. No, a .22 is not the most lethal long arm, but everyone who lives in my home can operate it with enough precision and speed to deal with anything from a bad guy to a rabid fox. The key is not to rely on a home defense plan built around one gun. That’s why I also have a Mossberg 590A1 12-gauge in the den and a handgun basically on me at all times.
This article appeared in the August 2015 issue of Gun Digest the Magazine. Click here to download the full issue.
 Gun Digest Shooter’s Guide to the AR-15
The Gun Digest Shooter’s Guide to the AR-15 by Richard A. Mann presents a comprehensive and user-friendly look at today’s most popular modern sporting rifle. Among a wide variety of topics, the firearms expert and noted author provides helpful ammunition and accuracy tips, an explanation of the AR platform, a wide range of AR-15 applications, and much more, enhanced by 250 black and white photos. Keep up with the increasing popularity of the versatile AR-15 with this indispensable shooter’s guide. Get your copy
I don’t know who it was or when some advertising guru came up with the euphemism “value priced,” but you gotta admit, it’s a kind way of delineating products designed for those to whom price is of paramount consideration. I mean, it does sound better than cheap, inexpensive, budget or entry level, doesn’t it?
We’ve now got a gaggle of bolt-action centerfire rifles to which the term “value priced” can be applied, and for this piece we’ve set the limit to rifles with an MSRP under $450. Granted, it’s an arbitrary figure, but it’s also a realistic one. As such, we’re talking the Mossberg Patriot, Remington 783, Ruger American and Savage Axis.
Interestingly enough, late last year, two rifles that would have been included here were discontinued—Marlin’s X7 and Remington’s 770. I can see Remington not wanting to have two budget-class rifles competing with one another in the same market niche, but Marlin’s dropping of the X7 is a bit more baffling because it was as solid a rifle as any of the others. I’m just spit-balling now, but I suspect the reason the X7 didn’t gain traction in the marketplace was a matter of the public’s perception tying Marlin so closely to the traditional lever-action rifle. The X7 represented Marlin’s second unsuccessful attempt in the last 20 years to break out of that mold.

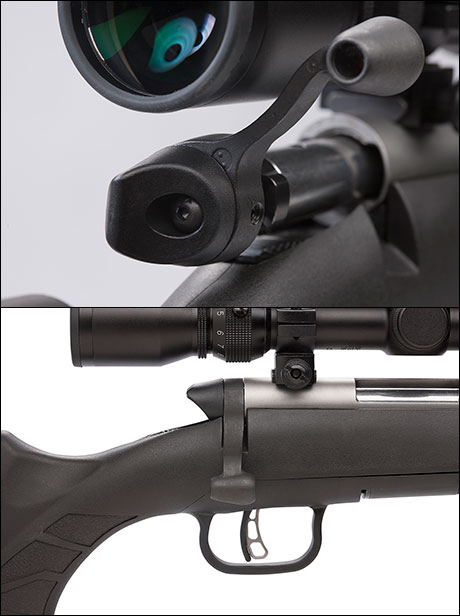
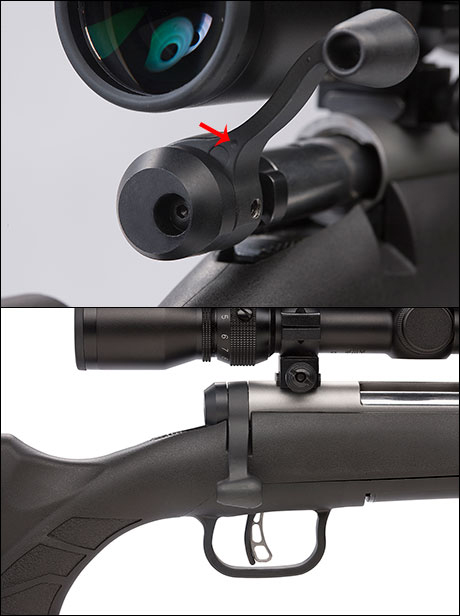
New for 2015, the Patriot is simply the existing Model 4×4 with a new and much improved stock and a new bolt handle. Also new is that the .375 Ruger chambering has been added to the caliber lineup, a first for Mossberg and a step that bestows true big-game credibility to the line.
Like the other rifles we’re reviewing here, the Patriot is designed for ease and economy of production. As such, it employs a tubular receiver, a barrel lock nut and a separate, washer-type recoil lug sandwiched between the receiver and the barrel lock nut. This same arrangement is also seen on Remington’s 783. While all four rifles under discussion here employ a barrel lock nut, as we shall see, the Ruger American and the Savage Axis do not use the washer-type recoil lug.

There are no flats or facets milled into the receiver, as seen on so many other tubular-receiver rifles, to disguise the fact that it is essentially nothing more than a straight tube with an ejection port and a cut-out in the floor for the magazine. The bolt is comprised of three components: the spiral fluted body to which a separate, floating bolt head is crosspinned at the front end, and a handle collared onto it at the rear. The crosspin that holds the bolt head to the body has a hole in its center to allow passage of the firing pin. This crosspin arrangement allows a few thousandths of an inch of lateral play in the locking lugs so that they self seat, as it were, against their abutment surfaces. It accomplishes the same thing as hand lapping the lugs and a lot less expensively.
The recessed bolt face hosts the familiar plunger-type ejector, while the extractor slides radially within a T-slot at the front of the right-side locking lug. An anti-bind groove in that same right-side locking lug contributes to smooth, wobble-free bolt travel. Mossberg’s LBA trigger is user-adjustable from 2-7 pounds, though I can’t imagine anyone wanting a trigger even close to 7 pounds.
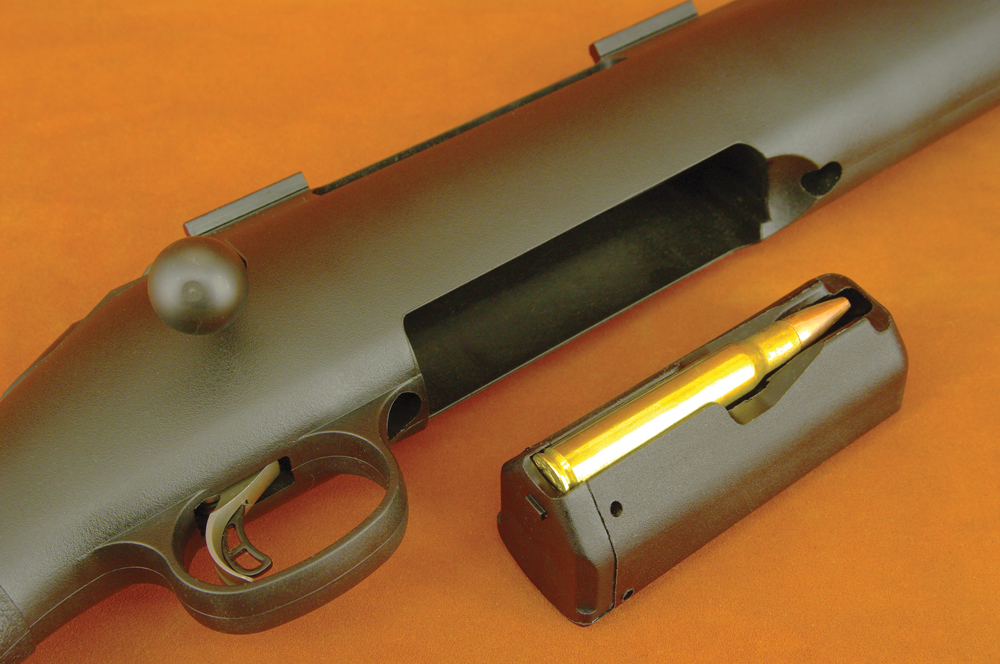
The stock is the biggest change and what really separates the Patriot from the previous 4×4 models; let’s face it, they were downright ugly! The unique bedding system of the 4×4 however, remains unchanged, in that there is a one-piece polymer bedding platform for the receiver that also serves as the well for the detachable magazine. This bedding chassis, if you will, simply drops down into the stock and is not permanently mated to it. This same assembly is found in all three stock types offered for the Patriot—an injection molded synthetic, a traditional walnut stock and a wood laminate.
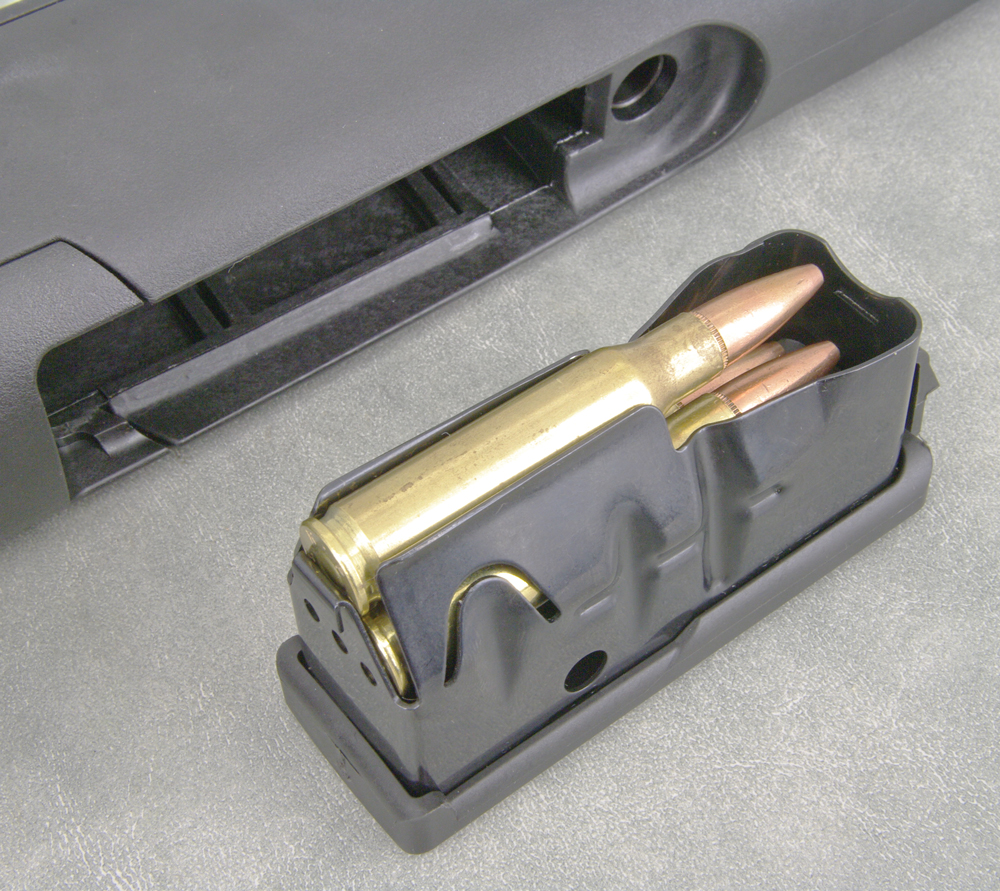
One of the real strong points of the Patriot is its excellent detachable magazine; it’s one piece of molded polymer with integral feed lips. It’s feather light, virtually indestructible and one of the easiest loading we’ve ever encountered. The one thing about this gun we don’t like is the unsightly protuberance sticking out on the left side of the bolt shroud. It’s a safety thing meant to preclude replacing a decocked bolt back into the receiver, in which case the firing pin would be protruding. In the event a live round was chambered, a forceful push on the bolt could cause ignition with an unlocked bolt. There are other ways to preclude such an event that are far more acceptable both mechanically and cosmetically.
The Patriot is offered in 11 calibers ranging from .22-250 to .375 Ruger. Prices range from $386 for the synthetic stocked version, to $584 for the black/gray wood laminate model with Marinecote metal finish. Pre-mounted Weaver-type scope mount bases are included. www.mossberg.com
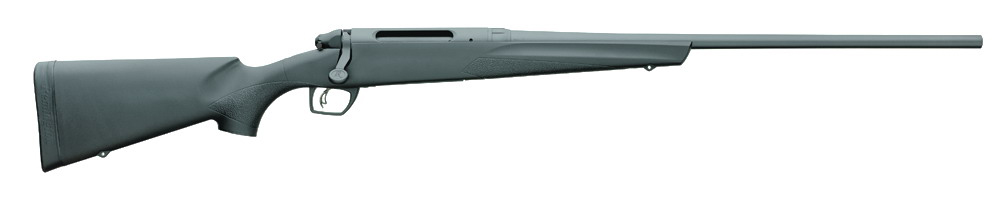
What’s already been said about the Mossberg Patriot’s bolt design and fabrication, barrel fitment and receiver can also be said of this rifle, right down to the same extraction, ejection and anti-bind slot at the lower edge of the right locking lug. The bolt shroud, however, is much more attractive on this rifle. Even the bolt stop/release is exactly the same—a pivoting, one-piece blade of sheet steel with an upward extension that juts up just behind the left side of the receiver bridge. A forward push pivots the front end downward out of the left lug raceway allowing bolt removal. It doesn’t get any simpler… or more efficient.

The ejection port is of minimal dimensions, which makes this receiver substantially more rigid than most bolt actions that have far more material removed from the top half than necessary. Such wide ports were needed on military guns to accept charger clips and for loading fixed magazines from above, but most of the newer bolt actions have detachable boxes, so those are no longer needed.
The trigger is Remington’s user-adjustable CrossFire, which is housed in a robust nonferrous casting that’s bolted to the receiver. It has a range of 2.5-5 lbs. and is conceptually similar to Savage’s Accutrigger, Ruger’s Marksman and Mossberg’s LBA. A two-position side safety blocks trigger movement but does not lock the bolt. The bolt stop/release is virtually identical to that described for the Mossberg Patriot, i.e., a one-piece pivoting blade.
The detachable magazine, which sits absolutely flush with the belly of the stock, is a sheet metal box with a polymer boot. The release lever is part of the magazine, not the stock, which we prefer. The stock itself is quite handsome despite the fact that the shape of the fore-end tip and triggerguard bow are not mainstream. The swivel attachments are molded into the stock, but the triggerguard bow is a separate component. On most other budget rifles with molded stocks, the guard bow is integral.
While several rifles on the market claim to be pillar bedded, the 783 truly is. The only contact points for the entire barreled action are the two aluminum pillars through which the action screws pass; their top surface is about .025 inches higher than the area surrounding them. At the butt end is Remington’s SuperCell recoil pad that does a good job of attenuating felt recoil. All in all, the 783 is a sound, good-looking rifle at a rather astounding price. Consider that in 2015 it will be sold only as a package rifle with a pre-mounted and bore-sighted 3-9×40 scope at the almost unbelievable MSRP of $399 in all calibers. That means that realistic street price will be somewhere around $340! Chamberings offered are .223, .22-250, .243 and .308 in the short action and .270, .30-06, 7mm Rem. and .300 Win. Magnums in long. www.remington.com
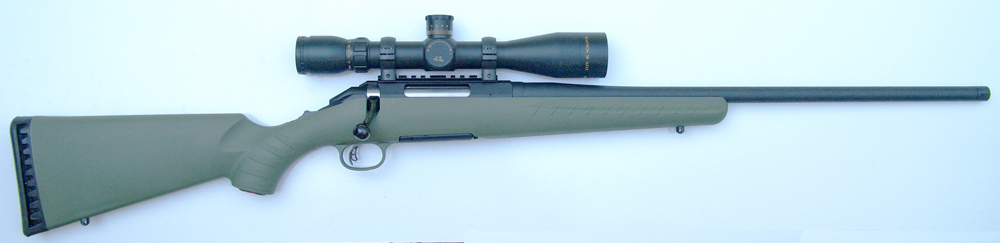
Unlike the other three guns under review here, this is not a Mauser-type twin-lug action requiring a 90-degree bolt rotation. Rather, it’s of the “fat bolt” school that employs a larger than normal bolt with forward locking lugs that are formed by machining away material at the head. In other words, measured across the locking lugs, the diameter is the same as that of the bolt body behind.
So, instead of two opposed locking lugs, the one-piece American bolt has three, oriented on 120-degree centers, and, as such, require only a 70-degree handle lift. Dual cocking cams reduce the effort required to cycle the action, which with a shouldered gun makes reloading easier. The recessed bolt face houses the ubiquitous plunger ejector and an extractor very similar to the others in that it slides radially within a T-slot housed in the face of the right side locking lug. The bolt stop/release serves a third function in that it rides a lengthwise groove in the bolt body to prevent free rotation of the bolt when out of battery. Such an arrangement is necessary on fat-bolt actions because there are no protruding locking lugs riding raceways within the receiver.
Instead of employing a washer-type recoil lug, two steel V-blocks embedded into the stock fore and aft of the magazine well engage matching grooves in the underside of the receiver. It’s a clever and very efficient way to transmit recoil to the stock, as well as providing a bedding surface for the receiver. The barrel is, of course, free floating. The receiver is tubular, but two lengthwise facets milled at the 2 and 10 o’clock positions dispel that impression. Like the 783, the ejection port is just large enough to fulfill its function.
The one-piece polycarbonate magazine is among the very best we’ve seen on any rifle, domestic or foreign, regardless of price. It’s a rotary type whereby the spring-loaded follower rotates around a shaft on the left side of the box. As cartridges are loaded, the follower backs up, storing them in a “C” orientation. The bottom of the magazine fits absolutely flush with the belly of the stock and is of matching contour. The trigger is Ruger’s Marksman, which is user-adjustable from 3-5 pounds. The two-position top tang safety is as ergonomic as it gets; when engaged, it blocks trigger movement.
The American is offered in seven standard calibers ranging from the .223 Rem. to .30-06. If in the future it were to be chambered for magnum calibers, some major changes would have to be made to the bolt because the rim of the recessed face is too thin for the enlargement necessary to accommodate a .532-inch rim diameter. The American carries an MSRP of $449, which includes pre-mounted Weaver-type scope bases. www.ruger.com

It is somewhat ironic that the Axis series, which is Savage’s least expensive centerfire rifle, shares a feature found only on the company’s most expensive target/varmint and competition rifles: a minimal-size ejection port. Another unique feature on the Axis is a large scallop machined into the left side of the receiver, which reduces weight and lends some visual interest to what otherwise would be a straight tube.
Yet another difference between this gun and Savage’s flagship Model 100-series (as well as all other domestic bolt-action rifles), is that there is no integral rear tang on the receiver. Normally, the rear tang anchors the trigger assembly and has a deep notch machined into its right side into which the root of the bolt handle lowers, thus acting as a non-bearing auxiliary safety lug in case of a catastrophic failure. On this rifle, the receiver bridge ends abruptly, and what looks like a rear tang is actually an extension of the trigger housing. Though a different arrangement, the end result is the same tang-mounted safety as found on all Savage 100-series rifles, except that the Axis has a two-position rather than a three-position safety.
With the barreled action removed from the stock, other differences between the 100-series rifles can be seen, differences that cut production costs without materially affecting mechanics or performance. The bolt cap and handle are different, as is the magazine geometry, and the triggerguard is a separate sub-assembly of the injection-molded polymer stock. Instead of the washer-type recoil lug sandwiched between the barrel and receiver, a steel plate is embedded in the stock that engages a slot on the underside of the receiver. Both methods are equally effective.
We don’t like everything about this rifle, particularly the stock—it’s way too thin in the wrist even for our small hands, and the fore-end is too slender as well. The magazine works well enough and fits perfectly flush with the belly of the stock, but it’s stamped from sheet stock that’s not much thicker than a soup can. But again, none of these affect the rifle’s accuracy or function.
The Axis is available in standard calibers ranging from the .204 Ruger to .30-06 at an MSRP of $362.
www.savagearms.com
All four of the rifles reviewed here have more in common than just being value priced—all are embarrassingly accurate! I say that because you can spend double or more for each company’s flagship rifle and have them not shoot any better. Granted, you give up some degree of refinement like fit, finish, materials and caliber choice, but if you’re interested in performance as well as price, you can’t go wrong choosing any one of them.
 The world has you convinced that venison jerky needs to be a gristly jawbreaker of edible cardboard. That the best venison jerky recipes must involve a smoker you’ll use once a year, a dehydrator in pieces somewhere in the basement or an impossible-to-clean oven rack. That unless you nick your thumb with a knife while filleting venison down to the width of a toothpick, you’re doing it wrong.
No, friends, the world is wrong.
The following is what I believe to be the absolute best venison jerky recipe. You might call it “nugget-style venison jerky” or “steak-style venison jerky.” I’m calling it “Living Ready style venison jerky.”
Use a sharp knife to cut chunks of venison about the size of your index finger. There isn’t an exact science, but do keep the cuts under a half-inch thick. The cuts don’t need to be uniform, but it helps.
Place the venison cuts in salted water for 24 hours to draw out the blood. This step is easy to overlook, but it keeps the jerky tender.
Buy a bag of commercial curing mix, available at sporting goods stores (it looks like regular salt). It’s important the mix contains either sodium nitrite or sodium nitrate. It can be pre-seasoned or unseasoned. If it’s unseasoned, buy a dry rub to combine with the cure.
Don’t like sodium nitrite/nitrate? You’re not going to have much luck with this venison jerky recipe. These agents of preservation mean the difference between tender, flavorful jerky and dry steak chunks as appetizing as poker chips.
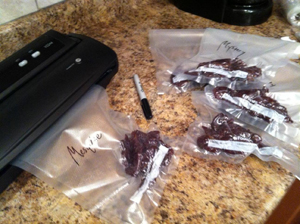
Remove the venison cuts from the salt soak. Place them in a sealable, plastic freezer bag and mix in the cure (including dry seasonings). Coat the cuts, seal the bags and let it all sit in the fridge for 24 hours. Behold the power of chemistry in action as the venison transforms from mere meat to pre-dried jerky.
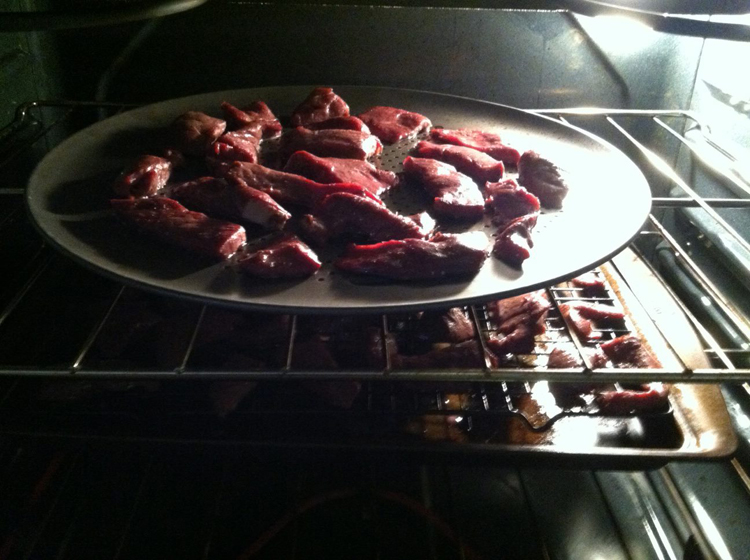 Step 5: Head to the Oven
Preheat the oven to 200 degrees. Place the venison cuts on a pizza pan with holes in the bottom or on a wire rack over a cookie sheet. The idea is to allow airflow underneath the pieces.
Cook the venison cuts in the oven at 200 for five hours. Flip each piece at the 2.5-hour mark.
Have a bite after the jerky completely cools. You’ll understand why this is the best venison jerky recipe of all time.
 Because this jerky is larger and softer, it’s much more versatile than the standard strips. Here are some possible uses:
 The best laid SHTF plans don’t start and end with survival shelters and gear. They’re often grounded in a particular moral or philosophical worldview.
There’s plenty of evidence for this in Living Ready‘s poll about the role of faith in preparedness. Readers told Living Ready that regardless of their faith or lack thereof, some sort of worldview informs each decision they make.
When it comes to actually applying those views in a survival situation, the waters get a little murky. Living Ready asked readers on its Facebook page what they would do in this scenario:
The SHTF a month ago, but you’re plenty prepared to ride things out for a long time. You look out the window of your fortified shelter and see a toddler clearly starving to death. There are no other people around except the toddler. What do you do?
Here are the most interesting responses from the Facebook page:
“I will let God guide me. Until we know exactly what we are up against there is no way to figure out in advance how I will react to anything. But……I may find myself with a whole bunch of new grandkids.” – Laurie Blanchette
“I wouldn’t trust that there would be no other people around. We’d have people out watching and doing a check of the close and far perimeter (maybe someone has sent him in and they’re half a mile away with a scope, watching) before we engage the child and bring him/her in.” – Carrie Bartkowiak
“By that time many that weren’t prepared will be extremely desperate and they will try to take advantage of our emotions. Luckily my group has good situational awareness and contingencies for said event. That kid would be coming inside with us regardless if it were a trap or not.” – Justin King
“Living through a SHTF knowing you made the decision to allow that child to die would not be a world worth living in. We follow what Jesus would do.” – Susan Anderson
“Discreetly secure a perimeter and use counter surveillance/counter sniper techniques while observing and assessing the toddler. Ultimately we would ensure the child’s safety, but only after very careful consideration. There are a number of ways that this could play out.” – Jeff Tremblay
“I would think it was a trap. Toddlers don’t just appear out of nowhere. Desperate people would use anything to lure you out of your safety zone. However, since I have plenty of back-up, I would probably take the kid in after a waiting period and a perimeter search. I guess you don’t know for sure until it actually happens.” – Julie Campbell
“I would care for and feed a child in a heartbeat. HOWEVER, that toddler didn’t get to our place on its own. It wouldn’t have survived. So there would have to be some checking done of just who and where those adults were.” – Kathi McBride Martin
“One: Stop looking out the window! Two: How fortified is your shelter if it has a window you can look out!?” – Michael Tardie
“I would save the child, even if it is a biological outbreak. I would not rush out right away, though. I would circle around the perimeter, then wait, depending on what I feel at the moment, either circle back to the entrance I came out of, or do a wider perimeter search with a vantage point towards my shelter and the child.” – Jazer Andrew Sotomayor
If your SHTF plan depends on riding things out in a survival shelter, what would you do in this scenario?

Here’s my recipe for venison stuffed cabbage rolls. There are many venison recipes out there, but this one stands out. Be sure to check out my tips for preparing venison the right way before giving this recipe a try. And if you have a lot of venison to spare, don’t miss the secret to the best venison jerky period.
Michilli cabbage (or any type of cabbage on hand, but use two)
Few cloves of crushed garlic
Olive oil
1.5 quarts of homemade, canned whole tomatoes (or a 14.5-ounce can of crushed tomatoes from the store)
Lemon juice
Water
Spoonful of flour
Chopped onions
Tomato paste
Ground venison
Milk
Salt
Pepper
Two eggs
Cooked rice

Less than 100 years ago, 50 million people died from an influenza pandemic. Since then, the planet has become only more crowded as some areas of medicine run out of treatment options, creating conditions suitable for another global outbreak.
Here are five pandemics that could wipe out humanity in the near future, along with my own unscientific odds of it actually happening and a prep tip to keep you grounded.

Although the trendy term for a TEOTWAWKI health event today is “pandemic,” the worst and most recent such outbreak in modern history was labeled under the deceivingly mundane “flu” name: The Spanish Flu. It was so devastating it practically ended World War I in 1918 all by itself.
Although the Spanish Flu actually originated somewhere else in World War I Europe, neutral Spain got stuck with the name likely because of the Allies’ and Central Powers’ propaganda machines containing information along the Western front.
Regardless of where it started, around 50 million people worldwide would later die from the Spanish Flu. Many of them had only hours to live after first noticing the symptoms. Thankfully, it burned itself out by the end of 1919, exiting the stage just in time for the 20th Century “good ol’ days” of the Great Depression, another world war and the start of a decades-long Cold War. Yep, the Spanish Flu is a thing of the past.
Or is it?
Diseases adapt to their environments. The fast-killing strains had to go away because they ran out of hosts. The slower moving ones mutated into what became today’s worst flu strains. (P.S. Go read Guns, Germs and Steel by Jared Diamond for a fascinating history lesson on how diseases shaped humanity.)
Remember swine flu from a few years back? And bird flu in the mid-2000s? Those were all distant relatives of the Spanish Flu. From ABC News comes this Spanish Flu news:
Health experts are concerned that the Spanish flu that ravaged the world has many similarities to the avian flu now found throughout Southeast Asia.
The 1918 flu strain itself originated as an avian flu that mutated into a form that could jump between humans. And the 1918 strain, according to research published this week in the scientific journals Nature and Science, has several of the same genetic mutations as the current avian flu strain.
Could a deadly pandemic happen again? Some doctors say yes.
On the plus side, maybe the Spanish won’t get the shaft on naming rights this time around.

Viruses like the Spanish Flu don’t get to have all the fun. Bacteria want a piece of the action, too. In an ironic twist, the harder humanity tries to get rid of them, the stronger bacteria become.
Here’s how that happens. A dose of antibiotics in sick humans, livestock or other animals wipes out harmful bacteria causing the illness. But a small number of bacteria survive because of some quirk in their genetics. Those bacteria reproduce and can spread to other hosts, living as long as a stronger antibiotic doesn’t kill them.
When antibiotics are overused, you wind up with stronger bacteria. Some may even become resistant to any antibiotics. It’s important to find a balance to prevent so-called “superbugs” from developing.
Not to worry, Dr. Uncle Sam is on the case. As this PBS article on drug-resistant bacteria highlights, Congress started the Interagency Task Force on Antimicrobial Resistance in 1999 to address the problem, with predictable results:
Part of the problem is that there’s been very little attention at the highest levels of government to antibiotic resistance. Although Congress created an Interagency Task Force on Antimicrobial Resistance in 1999, the committee hasn’t put together the “coordinated, national surveillance plan” its own action plan recommended in 2001. The task force has no dedicated staff and when we asked the CDC to tell us about it, we learned that the body has only met in person 11 times.
I guess that’s where the phrase “death by committee” originated.
And that’s not an article posted years ago. PBS ran that this week. There’s not enough space here to get into why antibiotics are overused, but it’s certainly a concern.

It’s already been 10 years this month since the SARS (severe acute respiratory syndrome) outbreak infamously hit Toronto, Canada, after making its way from Asia. The outbreak ended in 2004 after claiming less than 1,000 lives worldwide, as the CDC (Centers for Disease Control and Prevention) reports on its SARS website.
So there’s nothing to worry about right?
Not quite. Check out this disturbing bit from the CDC’s SARS information page:
On October 5, 2012, the National Select Agent Registry Program published a final rule declaring SARS coronavirus a select agent.A select agent is a bacterium, virus or toxin that has the potential to pose a severe threat to public health and safety.
Well, anything could be a potential. I could potentially be hit by an elephant dropping out of the sky. That doesn’t mean it’s going to happen, right?
Actually, SARS is slowly crawling its way back into the spotlight. Reports out of Mecca in Saudi Arabia indicate a new type of SARS, called MERS (Middle East Respiratory Syndrome Coronavirus), is infecting religious pilgrims. A SARS report from The National in September lays it out:
Countries sending pilgrims to the Haj in Saudi Arabia should increase surveillance for a deadly virus that has killed more than 50 people in the kingdom, the World Health Organisation’s emergency committee has said.
While the committee said the Mers coronavirus outbreak is not yet a public health emergency, the Haj pilgrimage, which begins next month [October] and last year attracted 3 million pilgrims, has raised concerns that the virus could spread globally.
The concern here is having that many people in one spot with a relatively unknown virus on the loose. Cramped quarters in World War I led to the Spanish Flu. Could the Haj be ground zero for the same kind of outbreak?

Sensing a pattern yet? Diseases don’t go away. They just change shape and lurk until the right moment.
The Bubonic Plague (aka, “The Black Death,” “The Plague” or – as I like to call it – “The Reason I Don’t Feel Bad About Mouse Traps Disease”) is still around. Last year, 256 people in Madagascar died from the Plague. Rats are to blame, as they were in the 14th Century, for the outbreak. Or more specifically, the fleas that transmit the disease from rats to humans.
Not surprisingly, overcrowding is the spark for the latest Plague outbreak, this time in rat-infested prisons. Here’s the latest on the Madagascar prison Plague from The Guardian:
Christoph Vogt, head of the ICRC delegation in Madagascar, said: “The chronic overcrowding and the unhygienic conditions in prisons can bring on new cases of the disease. That’s dangerous not only for the inmates but also for the population in general.”
An average of 500 cases have been recorded on the island every year since 2009. October is the peak month as hot humid weather attracts fleas, which transmit the disease from rats and other animals to humans.
Containing the rats is critical. Because if the disease ever jumped the prison wall…
Christophe Rogier of the Pasteur Institute of Madagascar told the BBC: “If the plague gets into prisons there could be a sort of atomic explosion of plague within the town. The prison walls will never prevent the plague from getting out and invading the rest of the town.”
But Madagascar is an island. It’s not like there are rodents running around the western United States carrying the Plague, and it’s entirely possible that the disease could find a way to leap humans, right?
From NPR:
AUDIE CORNISH: For most of us, plague is something that maybe we read about in history books. In the 14th Century, it wiped out half of Europe’s population. But the bacteria is busy killing wildlife now in the American West. By studying small mammals scientists have learned that plague is far more pervasive a killer than anyone thought.
BIGGINS: Plague would come from this unknown source and invade quickly into a prairie dog town, explode and kill almost all the prairie dogs, and then disappear back into its reservoir form where it existed without damaging anything too much.
And from the same article:
Plague is killing various kinds of mice and ground squirrels in New Mexico and Mexican wood rats in Colorado.
All it would take is a way for the Plague to get from these U.S. rodents to humans, and you’d have yourself a pandemic straight out of the 14th Century. It may already be happening. Last month, The New York Times reported that the U.S. is near the top of Plague countries:
The United States now ranks 11th in the world in cases of plague, according to a new survey of the disease.
With 57 cases in a decade, it is far below the hardest-hit countries, Congo with 10,581 and Madagascar with 7,182. Still, it is the only wealthy country on the list; 97 percent of cases are in Africa.
Feel free to set a mouse trap tonight.

Pandemics don’t check in with the CDC before unleashing hell on humanity. There are “known unknowns” out there that could pop up without any warning. Still, science can make educated guesses. This article on the next big pandemic in the New York Times outlines the traits to watch for:
Prediction is difficult. But we can be reasonably confident on a few points. The worst new diseases of the future, like those of the recent past, will be zoonotic [This means they came from nonhuman animals and made the leap to humans]. Unfamiliar pathogens come to people from wildlife or livestock. The scariest of the new bugs will probably be viruses. Formidable, hardy, opportunistic and impervious to antibiotics, viruses replicate and evolve quickly. They exist in extraordinary diversity and seem ever ready to colonize new hosts.
Experts believe that the next global pandemic is likely to be caused by a virus with high “intrinsic evolvability,” meaning that it mutates especially quickly or recombines elements of its genetic material during the process of replication. It crackles and snaps with accidental variation. Darwin told us that variation is the raw material of adaptive change; and adaptive change is what enables an organism to thrive in unfamiliar conditions — including human hosts.
In other words, it’s like trying to predict where a home run ball is going to hit the outfield bleachers. You know the ball will be somewhere in that area, but all you can do is bring a glove in hopes of catching it before it knocks someone else in the melon. It boils down to good timing, educated guessing and just plain luck.
Live ready, friends.
It’s a bit of an oxymoron to use the words “quick slow-cooker” in the name of this survival bread recipe. But that’s exactly what this is: a quick way to make survival bread in a slow cooker (aka “crock pot”). The baking time may be long, but the prep time is lightning fast.
As explained in a previous post about survival bread recipes, there are two criteria that must be met for this type of preparedness food:
As it often does, simplicity equals versatility when it comes to survival bread. This allows for endless experiments in the kitchen – indoors and out. The following is one of my favorite off-the-beaten path recipes.
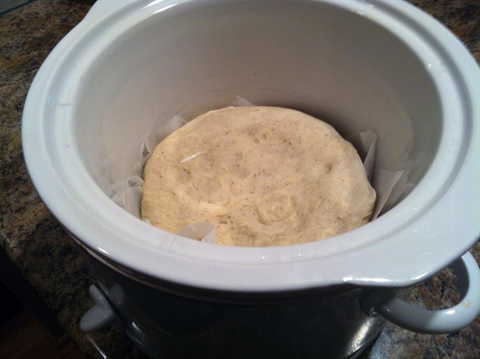
Proof the yeast in the water for a few minutes. Add the flour, the salt and the sugar. Make a dough ball and set it on a greased piece of parchment paper that’s a couple inches larger than the dough.
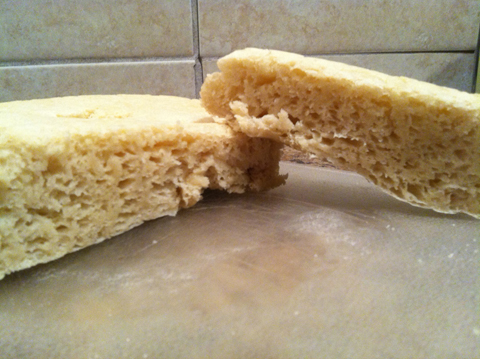
Turn the slow cooker on high and set the paper inside so it separates the pot from the dough. There’s no need to let the dough rise before putting it in the slow cooker. Let the bread bake for 1.5 hours, or until a toothpick comes out of the middle clean. Make sure it’s cooked completely or it’ll turn out gummy.
This recipe turned out better than expected. The loaf was dense and moist, perfect for homemade jam. Don’t expect the bread to brown up, though. It’ll likely be pale from top to bottom.
If you prefer a boost of flavor, add some dried spices. It’d be easy enough to whip up a sweet or herbed version.
Experiment with baking in your slow cooker. Unlike an oven, these handy gadgets don’t suck a ton of power. Should you be running electricity through a generator, a slow cooker might become your oven for every meal.
Here’s the last Deer Jerky Recipe you’ll ever need.
[slideshow_deploy id=’216920′]
Davey Tree submitted these tips for flood preparedness and tree management. The two might seem unrelated, but they actually have quite a bit in common. Sick trees are more likely to become dislodged during a flood. They can cause damage to your property or to a neighboring area.
Even healthy trees can be a concern in flood-prone areas. This is especially true after a flood. From Davey Tree:
The best way to address these issues is to either remove the tree yourself or get in touch with an arborist. In either case, the decision should be a thoughtful one. Trees take too long to grow and add too much value to property to jump into a decision.
Davey Tree suggested watching for these five factors when it comes to trees:
Total removal of a tree isn’t always necessary. Here are some other options to consider, as offered by Davey Tree.
In any case, the goal is always to have trees that can stay strong before and after a flood. Don’t skip this straightforward and important bit of flood preparedness.


