E85 is usually less expensive than regular gasoline, but is doing a conversion worth it? [Photo credit Carolina K. Smith MD / Shutterstock.com]From solar and wind to portable generators and PowerPots, prepared folks are always curious about alternative energy sources. They can provide energy security when mainstream sources fail, and even cost savings in the long run.
One question that pops up quite a bit is that of E85 fuel for vehicles. This blend of 85% ethanol and 15% traditional gasoline offers an alternative when prices at the pump skyrocket. Ethanol is made from corn grown in the United States, insulating the commodity against foreign events, such as war or political unrest. Claims have also been made about E85’s fuel efficiency.
That said, is it worth it to convert a vehicle from traditional gasoline to E85? One Living Ready reader, Clay Atnip, crunched the numbers for his conversion, then sent in the results. Here’s what he determined.
Researching the E85 Conversion
From Atnip:
“I was researching switching my 2002 Ford Taurus SE Station Wagon E85. There are only a few differences between the regular and E85 version of my car: PCM, fuel injectors, ECU and different plugs. The gas lines, fuel pump, seals, rings and etcetera all have the same parts numbers from unleaded to E85. The myth that E85 will melt the fuel system of a non-E85 vehicle is a myth.
“The cost of putting E85 parts on my car was high, too high to consider.
“I researched E85 converters that plug into your injectors. They ran about $400 for kits that are completely automatic and sense the octane and alcohol level, to $200 for kits that have a sliding switch on the side to manually adjust the setting ‘by ear.'”
The Verdict: E85 Conversion Not Worth It
“I then researched the ‘savings’ I would get from E85 and how long it would take me to pay off the conversion kit from the ‘savings.’
“There aren’t any. You don’t save money by switching to E85. My Taurus gets an average of 19 mpg on unleaded and 14 mpg on E85. That’s a loss of about 30%.
“Currently E85 prices versus unleaded prices locally are a difference of 3%. Do the math, there are no savings there.
“I had read that you can produce your own ethanol for $0.75 per gallon. However, building an ethanol still is even more expensive. Buying a pre-built one can cost $10,000 to $19,000. Even if you have the plans and build it yourself the cost can be high.”
An Alternative to the E85 Conversion
Atnip then looked at ways to increase fuel efficiency without a lot of work. Here are his tips:
Make sure tires are at the correct pressure
Get rid of excess weight, such as heavy tools stored in the vehicle
Change the oil, spark plugs and air filters on a regular basis
Don’t idle for long periods of time (that goes for winter warm-ups, too)
Use air conditioning sparingly
Try adding 100% acetone to the gas tank, about 2 ounces per 10 gallons, and track the mileage difference
Reduce drag on the vehicle by keeping it clean
Ever Attempted an E85 Conversion?
What do you think of this experiment? Ever attempted an E85 conversion for yourself? Leave a comment below.
From rolling blackouts to hurricanes, floods to tornadoes, power can go out at a moment’s notice. If the grid fails, the PowerPot will keep you charging! The PowerPot thermoelectric generator converts any heat source directly into power that charges your USB handheld devices. Get Yours Now
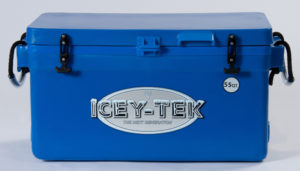
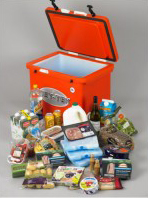
When the folks at our sister brand, Deer & Deer Hunting, first brought over this Icey-Tek 55-quart cooler for the Living Ready staff to check out, I couldn’t believe it. Not the cooler. The price tag.
“You paid $295 for a cooler?” I said. “In that case, I’d like to tell you about the ocean front property I’m looking to sell cheap.”
But it soon became clear why the Deer & Deer Hunting crew had the cooler. It’s not just a cooler. It’s a time machine.
Which is to say, time ceases to exist inside it. That makes it the ultimate emergency food storage container.
The ultimate emergency food storage container
Here’s what I mean. An average $50 or so cooler off the shelf at the local superstore will keep things cold for about 12 hours. After that, the ice melts and you’re left with cooler soup.
The Deer & Deer Hunting crew had no use for cooler soup. What they needed something like a portable, non-electric refrigerator for keeping game fresh for long periods of time.
They got it with the Icey-Tek coolers. It’s almost magical how ice doesn’t melt inside the cooler. The super-insulated cooler will keep ice solid for days, not hours. Adding wild game and other food doesn’t change that performance.
Stack that against the typical survival food buckets and survival food storage containers out there, and suddenly $50 doesn’t look like such a great deal.
Not just for emergency food storage
While it’s clear how the Icey-Tek coolers could help hunters, campers and others in the outdoors, the preparedness community might still need help seeing the benefits. After all, $295 is just one of the price points. They go up from there, too. That’s money that could be spent on other preps.
Look at it this way. Icey-Tek coolers aren’t just for survival food storage. They could be used for…
Keeping medicine, such as insulin, cold during extended blackouts
Storing food from the fridge and freezer when the power is out
Bugging out
Bugging in
Keeping heirloom seeds fresh at a stable temperature (remember that coolers don’t make things hot or cold, they just retain the temperature inside)
Storing ammunition in a cool, dark, dry place
Coolers can seem like an afterthought. But a cooler isn’t a cooler. There are good ones and bad ones. Your preparedness is only as good as its weakest link.
I recently took on a special assignment from Living Ready to find the best survival knives of 2013 so far. I dug through fixed blade survival knives, cheap survival knives, so-called Rambo survival knives and more at the 2013 Blade Show to bring you a few models running for the title of the ultimate survival knife of 2013.
The above represents my nine survival knife choices, as seen in the Fall 2013 issue ofLiving Ready (on print and digital stands around Aug 10). This issue also features survival razors, something readers may not have heard of before.
My Top 9 Survival Knives
Southern Grind Bad Monkey Folding Modified Tanto
Hallmark Cutlery BB0114 Jungle Commander
Bear & Son Cutlery Bear Ops CC-600-B4-B Constant II
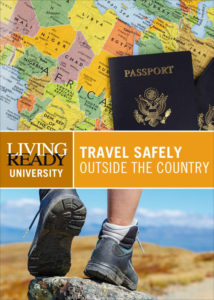
This Online Course from Living Ready University provides secrets from globe-trotting journalist Vincent Zandri on how to travel safely far from home.
Being prepared doesn’t end at the driveway – and neither do disasters. Living Ready University tapped globe-trotting journalist Vincent Zandri to guide an Online Course all about how to travel safely when far from home.
The Travel Safely Outside the Country Online Course is more than just a pile of safe travel tips. It’s a detailed analysis of the little-known secrets of staying safe when you’re at your most vulnerable. Zandri shares some of his incredible experiences to show you how to travel safely no matter where you are – in the U.S., Canada, Mexico or anywhere else.
Here are the resources in this Online Course to help you travel safely:
ThePreparedness, Precautions and Passportspresentation from Vincent Zandri plays on your computer or mobile device. Zandri reviews how to travel safely in any locale. (PC, Mac and mp3 versions included)
The Summer 2013 issue of Living Ready magazine features Zandri’s incredible survival story in the African bush, where a stranded vehicle had him taking his own advice. (PDF)
More than 1,100 pages of safe travel tips expertly curated by Living Ready staff are offered in a single PDF. This exhaustive reference covers a range of information to travel safely. Travel tips include what to do if a disaster strikes, how to spot common illnesses, steps to take if a passport becomes lost, crime, food safety, births or deaths overseas, parasites, water quality and even forced marriages. (PDF)
Podcasts from the Centers for Disease Control and Prevention focus on malaria travel tips, rabies and more. (mp3)
If you’re going to leave your home turf, you owe it to yourself to know how to travel safely. Download the Travel Safely Outside the Country Online Course for $19.99 from Living Ready University.
Learn more about hurricane preparedness with the 2.5-hour video presentation in this Online Course from Living Ready University.
This infographic on how to hurricane-proof your home comes courtesy of US Door & More Inc.
For a more in-depth look at hurricane preparedness, be sure to check out the 2.5-hour Living Ready University Online Course presented by Charley Hogwood of P.R.E.P. included in this Online Course from Living Ready University.
If you’re having trouble seeing the infographic, do a right-click and View Image. Then zoom in.
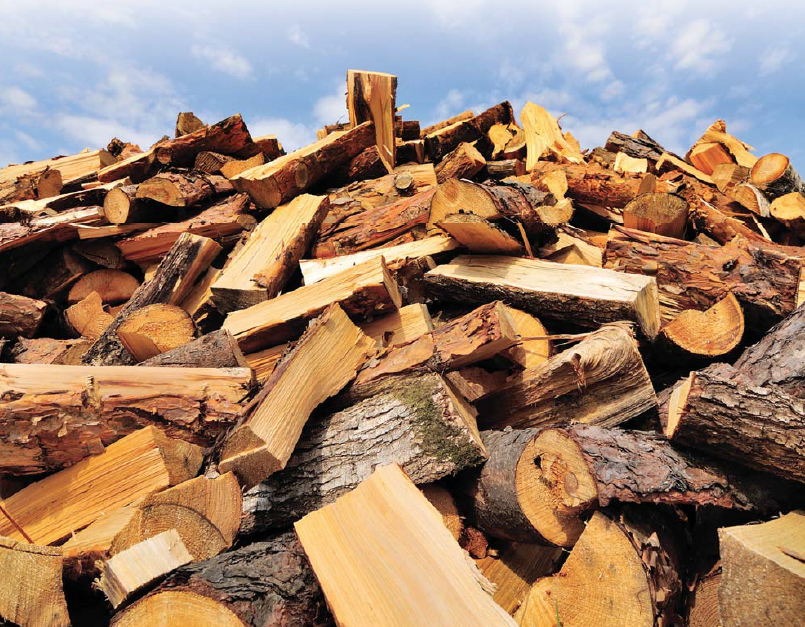
One of my friends once said as he looked over his personal library, “When I have a lot of good books I feel wealthy.” I feel the same way about firewood, but different types of firewood have different characteristics. Some burn fast with intense heat and some burn slow and ooze heat throughout the night. Others kick off too many sparks or smoke. Some wood, such as hickory or maple, are great for smoking meats, while evergreens, like pine or spruce, will leave your pork chop with a Pine-Sol flavor.
To help narrow things down, Living Ready put together this guide to the best firewood. Look for the embed code below to paste it onto your own website or blog.
No one looks forward to a gunfight. The great paradox of avoiding one is that the better your firearms and self-defense training, the less likely you are to engage in a violent altercation. That’s due to command presence.
What is Command Presence?
“Command presence” is the dynamic projection of the skill and will sufficient to persuade someone to comply with your verbal orders. In other words, if you tell someone to do something (such as “back off”), and you look capable of effectively using a firearm while you say it, you’re more likely to achieve compliance to your verbal commands.
Command presence is key to avoiding violent altercations, and it’s explained in great detail in my How to Avoid Gunfights Online Course at Living Ready University. Command presence is something that everybody can learn, but you’re not born with it. You learn to do it.
Good Reasons to Understand Command Presence
In the case of a prolonged social disruption, 911 dispatch will only function as long as the diesel in their emergency generators will allow them to function.
If the grid goes down, the average police department has a tank in the back with about two days’ worth of diesel in it.
If the trucks can’t refill the tank, dispatch goes down. And if dispatch goes down, law enforcement stops.
You’re on your own for as long as the disruption exists. And under those circumstances, your ability to demonstrate command presence could be the only thing that keeps your supplies yours.
Learn More About Command Presence
The techniques for establishing command presence require practice. Lots and lots of practice. Start with the How to Avoid Gunfights Online Course from Living Ready University. It explains the must-know information for achieving compliance to your verbal commands in crisis situations. This is critical instruction, don’t skip it.
Big-Bore Revolvers offers a one-stop resource for the large-caliber revolver novice to the hardened veteran and everyone in between. With in-depth coverage of commercial and wildcat calibers and their effectiveness, theoretical and actual application of terminal ballistics and a detailed look at today’s large revolvers, this is the most comprehensive book ever published on the big-bore revolvers. Get Your Copy
Here are five good reasons to butcher deer yourself.
In the absence of experience or a willing instructor, most hunters take their deer to a local processor to have it butchered for a fee. In most cases, however, even the novice ends up with better quality venison when he butchers his deer himself.
Several reasons apply. They could apply to venison or any wild game processing.
Butcher Deer Yourself: You’re Actually Getting YOUR Deer
For one thing, when you butcher deer that you harvested, you know the venison comes from your animal. There’s an unspoken rule about using professional processors. Although you may get your money’s worth in venison, you may wind up with venison from a number of animals you didn’t kill. There may be safety concerns about this, but for purity’s sake, it’s most satisfying to know what you’re eating is the deer you killed.
Butcher Deer Yourself: Take Your Time
Also, you can take as much time as you like to remove hair, blood, gristle and fat to make the finished product more enjoyable.
Further, you can debone the deer as much as you wish, saving valuable freezer space. Completely removing all bones represents the easiest way to butcher deer.
Butcher Deer Yourself: It Doesn’t Take Much
Surprisingly, it takes very little practice to become proficient at butchering deer, and you don’t need any special tools other than a sharp, stiff knife and a steel to keep it sharp. With the deer hung, remove the front legs and shoulders first. Then remove the loin, or backstrap. Next, cut off rib meat for grinding. Finally, remove the hind quarters, and cut them into round steaks and rump roasts.
Butcher Deer Yourself: Feed Your Ego
When you butcher deer you harvest, it provides personal satisfaction. As the completion of an age-old ritual, when the venison steaks are sizzling or the stew is bubbling, you will know exactly where that meat came from. That’s a feeling you can’t buy.
Butcher Deer Yourself: It’s a Learning Opportunity
As a side benefit, the butchering process also offers an opportunity for you to become familiar with deer physiology. This knowledge naturally translates into better understanding of shot placement – thus ensuring future clean kills.
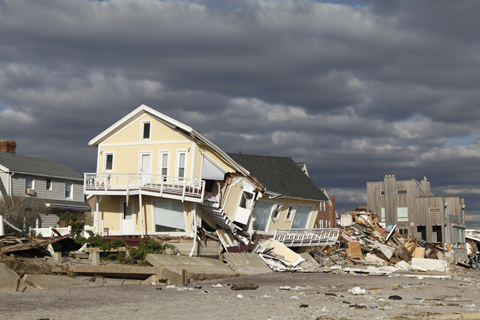
How to Survive a Hurricane: Evaluate Your Location
When it comes to hurricane preparedness as a storm approaches, you need to think about your location critically. Whether you’re at home or on vacation, and you find yourself in an emergency situation, perform a “hasty hazard analysis.”
Ask yourself these questions.
Will Your Home Survive a Hurricane? The House Itself
How old is your home? Was it built before 2002? After 2002, hurricane codes were improved tremendously.
Will Your Home Survive a Hurricane? The Roof Design
What type of roof do you have? Is it a hip roof or a gable roof? A hip roof is one that comes down on all corners. A gable roof is the one that has a triangle at one end or the other. If you have a hip roof, you’re probably a little better off than if you had a gable roof.
Will Your Home Survive a Hurricane? The Roof Materials
Is the roof made with shingles or tiles? Old shingles have a tendency to blow off in storms. Cracked tiles, even one or two, can cause damage to the entire roof if the wind gets underneath them.
Will Your Home Survive a Hurricane? Counting the Stories
For every 33 feet you increase in elevation (about every three stories up you are from the ground) you can actually add one category of storm intensity.
Will Your Home Survive a Hurricane? Debris
Watch for materials or structures that can blow into your home. Clear them prior to the hurricane if possible.
When we talk about prepping and survival, we often turn our attention to potential risks to our safety and well being, such as economic collapse, major severe weather events, or even pandemics.
Unfortunately, we have a tendency to overlook the more, shall we say, routine hazards that can crop up.
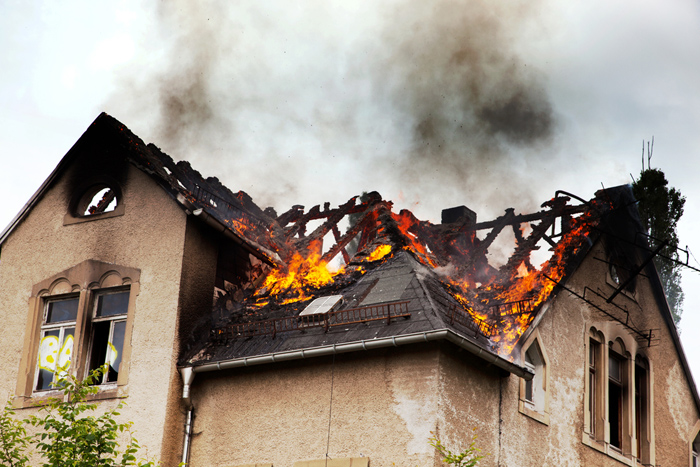
Fire prevention and related safety measures are important no matter what the economic climate is or whether martial law is on the horizon.
October is Fire Prevention Month, and this is as great a time as any to go through your home and ensure everything is up to snuff.
Fire Prevention Month Tip: Check Smoke Detectors
Start with your smoke detectors. You should have at least one on every level of your home. Personally, I like to have one in or very near the kitchen, another near the furnace area, and one near the bedrooms. Test each one to make sure the batteries are working. If you find one that isn’t operating correctly, replace the batteries or the unit as soon as possible.
Fire Prevention Month Tip: Don’t Forget Fire Extinguishers
Every kitchen should have a fire extinguisher as well as baking soda in easily accessed locations. The baking soda is for tossing on small grease fires. Never use water to try and douse a grease fire as it will just cause the grease to splatter and spread the fire. Check the expiration date on the extinguisher and replace it if the date has passed.
Fire Prevention Month Tip: Replace Furnace Filters
Furnace filters should be replaced with clean ones every one to three months. Most filters are incredibly cheap and ridiculously easy to change out.
Fire Prevention Month Tip: Clean the Chimney
If you have a fireplace, the chimney should be swept and inspected every fall. If you’re not sure how to do it properly, spend the money on a professional. Chimney fires are not something you want to risk.
Fire Prevention Month Tip: Make an Evacuation Plan
Finally, this is a great time to review and practice your fire evacuation plan.
Everyone in the family should know how to get out of the house and where to go once outside.
Be sure to teach each family member to feel the inside of their door before exiting the room. If the door is hot to the touch, do not open it. Put a blanket or towel along the bottom to help keep out smoke and then exit through the window, if possible.
Pick a specific location outside where everyone is to meet, such as a certain tree in the neighbor’s yard.
Fire Prevention Month Tip: Take It Seriously
Proper fire prevention measures are also critical in the event of a major grid-down event. It’s bad enough to have a fire during relatively normal times. But, if 911 isn’t an option, things could end up being far, far worse.
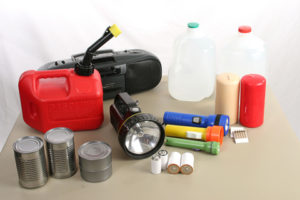
A collection of items necessary to survive in the aftermath of a hurricane
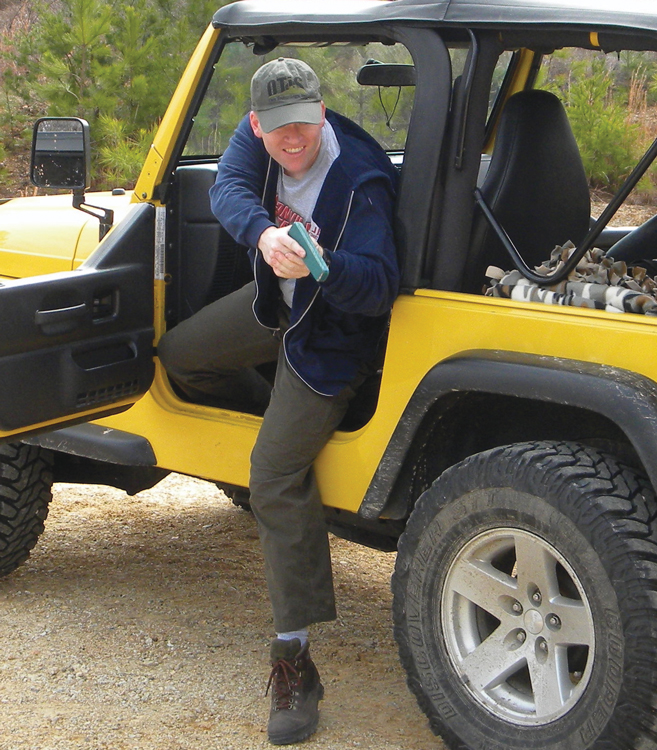
It’s always great when readers of Living Ready‘s magazine and newsletter write in with questions. If the staff can’t answer them, we usually know someone else with the right know-how. But this one has us stumped. Can you solve this riddle of cold weather car survival kits?
Jeff W. lives near Chicago, where the winters can get brutally cold. The summers can get just as hot. This makes it tough to balance the items in his car survival kit, or “go bag” as he calls it.
With the winter approaching, he wrote in with this question. It’s a really good one.
When talking about go bags, most people think of being fully prepared for 72 hours or more. Up here north of Chicago, if I leave my bags in the car for a long shopping stop everything will freeze solid in the winter, and the inside of the vehicle will get north of 140 degrees in the summer.
Anything in a pressurized can, such as Fix-a-Flat, would not only freeze, but you run a real risk of it exploding along with your other supplies. Any cans of food, even solids like candles, can break to pieces at the slightest good bump.
In the summer, you have chances of your food spoiling or melting, fire starters possibility causing a fire, not to mention ammo and other flammables causing a fire.
Plus, all these huge swings in temperatures have to even affect items like tents, freeze-dried food, and other equipment shortening their life span also.
I have several go bags, but I really can’t see a safe way to carry them on a regular basis in the above conditions in my vehicles. I guess you could always only carry the items that travel safely under the above conditions but that could leave you very short on supplies when you really need them.
I’m sorry but I can’t figure an easy way around this issue.
Here was my suggestion:
You need two bags. One goes in the cab with you. The other one goes in the trunk.
The items that need to stay warm in the winter or cool in the summer (like a can of Fix-a-Flat) go in the bag in the front. That air will be conditioned to be cooler or warmer depending on the season. Even if you don’t have AC, body heat or rolled down windows can help a lot.
The bag in the trunk is for things that need to stay out of the sun during the summer, aren’t as sensitive to temperatures in the winter or just should stay in the trunk.
What about you? Have any suggestions? This riddle is the challenging reality everyone with car survival kits in a cold state (and warm states sometimes) faces with each extreme temperature swing.
From rolling blackouts to hurricanes, floods to tornadoes, power can go out at a moment’s notice. If the grid fails, the PowerPot will keep you charging! The PowerPot thermoelectric generator converts any heat source directly into power that charges your USB handheld devices. Get Yours Now
Despite my initials, I have no intention of leading you into pastures of bovine manure when it comes to survival gear, friends. Neither does the rest of the Living Ready staff. Case in point: the Living Ready Store.
On a daily basis, we receive solicitations from survival gear companies to place products in our store. While this is certainly flattering, our response is always the same: Send a sample for us to test, and we’ll add it if we like it. That leaves some products out in the cold and others straight to the highlight reel.
So when it seems like I and the Living Ready team are trying to sell you something, it’s because that’s exactly what we’re doing. We’re trying to put the best survival gear we could find into your hands. We don’t want you to get lost on Amazon or Biff’s Survival Website for Chumps and wind up with junk.
That said, it’s about time for a rundown of the best survival gear in the Living Ready Store. The categories are:
Best Portable Generator (small)
Best Portable Generator (large)
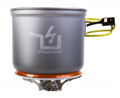
Best Rocket Stove
Best Portable Water Filter Bottle
Best Insulated Cooler
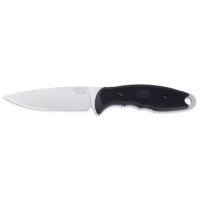
Best Survival Knife for the Money
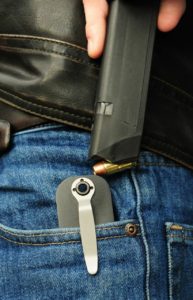
Best Gun Accessory
Best Survival Kit Item
1. Best Portable Generator (small): The PowerPot
The PowerPot is the reigning champ of innovative survival gear products. It converts hot water into electricity for charging batteries and gadgets. It’s simple, easy-to-use and packs a massive “cool” factor.
Not that there’s anything cooler than having electricity during an emergency in the first place. But when you think of the best survival gear innovations of the 21st Century, this is on top. You can read my full review here or order the PowerPot for $149 from LivingReadyStore.com right now.
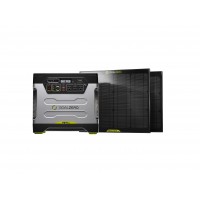
2. Best Portable Generator (large): Goal Zero Yeti 1250 Solar Generator Kit
The great advantage of the Goal Zero Yeti 1250 Solar Generator Kit is what it doesn’t do. Unlike gasoline- and diesel-powered portable generators, this one doesn’t make noise or require it be used outdoors.
This is a bigger deal than some might think. Gas generators have a tendency to walk away, especially during a crisis where people are desperate.
The Goal Zero Yeti 1250 can be brought indoors where it’s safe. It packs enough juice to run an entire house for a day or two. It can then be recharged with the included solar panels or a wall outlet prior to a disaster. That means no worrying about gas stations running dry.
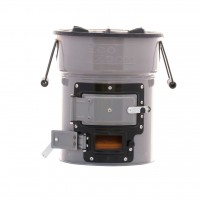
Any rocket stove worth its weight must use scrap fuel (think twigs and branches) in the most efficient way possible. The EcoZoom Versa gets things hot in a hurry using minimal fuel sources and a smart design that actually doesn’t try to kill the person using it (imagine that!). Living Ready contributor Charley Hogwood of P.R.E.P. reviewed the EcoZoom Versa with flying colors, and he has the bacon to prove it.
Even better, for each Versa sold, EcoZoom will donate a rocket stove to a needy family. Now that’s a true commitment to preparedness.
4. Best Portable Water Filter Bottle: Aqua Vessel Insulated Filtration Bottle
While dedicated water filters like the LifeStraw are indeed phenomenal products, they don’t often leave survival kits. The modern prepared person needs something that works well for survival, but doesn’t scream “look at the weirdo” when you bring it everywhere you go.
The Aqua Vessel Insulated Filtration Bottle is the solution. It marries form and function into a stylish, insulated bottle. Inside is a filter that removes 99% of nasties. It’ll fit in at the office, the gym, hunting camp or when the SHTF.
Boy oh boy, did I catch flak from readers the first time the premium Icey-Tek ice chests were featured in the Living Ready newsletter. “You want $325 for a cooler? A cooler!?” was about the gist of it. But sure enough, the Icey-Tek line of insulated ice chests proved to be the best-selling items at Living Ready Store for several months.
Here’s the deal. Icey-Tek ice chests aren’t like the coolers you find at the gas station. These are more like electricity-free refrigerators that keep contents cold for days and days – not just an afternoon of fishing. The passage of time means nothing inside an Icey-Tek cooler. I wouldn’t be surprised if Keith Richards from the Rolling Stones slept inside one of these things.
6. Best Survival Knife for the Money: SOG Team Leader
I’m a knife nut. I originally started at F&W Media (parent company of Living Ready) as a print editor for BLADE magazine a few presidential elections ago. As such, I look at knives like I look at steak: If you have to melt a bunch of cheese on top to sell it, there must be something wrong with what’s underneath.
Simplicity is deceiving. That’s why the best knifemakers in the world are constantly churning out “oh, I could do that”-looking knives and selling them for thousands of dollars. It’s harder than it looks.
The Living Ready team sorted through a ton of stellar survival knives to find the best. Then we crunched the numbers to see how we could get one of those to you for under $100.
We did even better than that and wound up with the SOG Team Leader for under $50. It’s a full tang, fixed blade knife ready and willing to be beaten and pounded on like the Vikings defense (sorry, but I’m a Packers fan). But in this case, there’s no cheese necessary. The SOG Team Leader is without a doubt the best survival knife for the money.
The SnagMag found its way to Living Ready from sister pub Gun Digest. Stock quickly fell to zero, and Living Ready Store immediately ordered extra.
The SnagMag‘s popularity comes from its “wish I’d thought of that” design. It makes carrying a spare pistol magazine in your pocket a breeze. Handgunners and concealed carry permit holders, this is one for you.
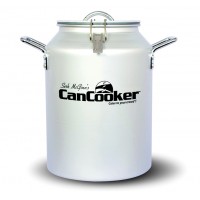
The four-gallon CanCooker came to the Living Ready Store from the folks at Deer & Deer Hunting. They had hunting camp meals in mind, but I found its true calling is as a survival kit canister.
Fill up all four gallons of the CanCooker with your survival kit essentials and a desiccant pack, then snap the lid shut for an airtight seal. This will keep gear dry and secure.
You could get the same functionality out of an ammo box, but you’d be missing what the CanCooker was designed to do all along: cook things. In an emergency, unpack your survival gear, then use the CanCooker to boil water and cook food. It doesn’t get better than that.
Editor’s Note: Living Ready has posted reviews of the EcoZoom Versa before, most notably with this omnibus of the best survival gear and this rocket stove review. But because this is such a great product with legions of fans, it’s worth another review, this time from Jim Cobb. Convinced yet? Get one from the Living Ready Store here.
EcoZoom Versa: A Rocket Stove for the Rest of Us
If you have nothing more than a postage stamp for a yard, if any yard at all, building a nice campfire or firing up a grill might not be feasible or practical. Enter the EcoZoom Versa Rocket Stove.
EcoZoom Versa: Easy to Use
In the box, you receive the stove, a windscreen, and a metal support for fuel. The instructions are pretty bare bones, because really, this couldn’t be simpler. There are two doors on the front of the stove. The top one is where the fuel goes in, the bottom is the damper.
I started the stove using a piece of crumpled newspaper, some dryer lint, and a few small twigs. It took me less than four minutes to go from there to a roaring fire in the stove.
As it burns, you slowly feed larger sticks into the stove through the top door. This is where having that fuel stand is awesome. No need to prop anything up or monkey-rig anything.
Check out the video and photos above to see the the EcoZoom Versa in action.
EcoZoom Versa: Cons
Click here to get an EcoZoom Versa rocket stove from the Living Ready Store.
My list of cons for this product is very short. First, it is heavy. One person can easily pick it up by the attached handles and move it around, of course. But, at about 25 lbs., it isn’t something you’d want to strap to your back and go on a 10-mile hike.
The other thing isn’t really due to the stove, but if you are making stew or something, I’d suggest putting a lid on your cook pot. Ashes from the fire do tend to drift up as you add fuel to the fire. When I boiled the pot of water, I noticed a few ashes had settled into the pot.
EcoZoom Versa Final Thoughts & Where to Get It
All in all, this is a wonderful tool for any preppers out there concerned about preparing food off-grid.
The EcoZoom Versa Rocket Stove is available in the Living Ready Store. Click here to order one of the best rocket stoves on the market.
From rolling blackouts to hurricanes, floods to tornadoes, power can go out at a moment’s notice. If the grid fails, the PowerPot will keep you charging! The PowerPot thermoelectric generator converts any heat source directly into power that charges your USB handheld devices. Get Yours Now
If living healthy means taking care of yourself as well as your family and friends, are you obligated to let them know about life-changing warnings? Let’s say, the end of the world as we know it (TEOTWAWKI)?
It’s not as irrelevant a question as it seems. Last week, Ukrainian astronomers predicted that a large asteroid may collide with Earth in 2032. The chances of this happening are slim, but they’re still higher than the typical flyby (and there are a lot of them, check out this asteroid flyby chart and try to sleep tight tonight). Even more alarming, this 2032 asteroid is so large it’s designated as a “minor planet.”
Did those scientists have a duty to report that dire warning to the world? With odds so low, it’s easy to say yes. But what if the odds were 100 percent? Would it be responsible to tell others?
That’s what Living Ready asked readers on its Facebook page. The most interesting answers are below.
Here’s one last disturbing thought. Many people said they wouldn’t tell a soul if they knew TEOTWAWKI was coming. By that reasoning, there could be someone – a scientist, politician, religious leader or just an average Joe – out there right now with that kind of knowledge and you’d never know it. If TEOTWAWKI was coming tomorrow, you wouldn’t receive a heads up.
What Would You Do If You Knew TEOTWAWKI Was Coming?
“I’d tell everyone that I knew.” – Cheryl Lien
“If I was the only one who knew, I wouldn’t tell a another soul.” – Jonathan Cooper
“Morally obligated to tell someone…problem is, as a known ‘paranoid’ (someone who does a little prepping) no one would listen to me, any more than they give any regard to my suggestions to put some gear and food aside for simple prudence.” – Jcharles Tower
“I think the real question is, if all the world governments knew, would they tell us?” – Joyce L. Suich
“Odd question. How any ONE person could know this without anyone else knowing is impossible to imagine. On the other hand, I watch the weather where I have family living and don’t hesitate to call if something bad is heading their way.” – Mike Phillips
“I’d tell everyone and have one hell of a week long party!” – Paul Kendall
“I’d tell my family members and announce it on my Facebook page. Probably my immediate neighbors, too. They’re nice folks.” – Carrie Bartkowiak
“Well, if I was going to tell someone, it would only be people who could keep it a secret. And it would not be people in a city or in high population areas.” – James Thomas Hyde, Jr.
Which is more important to preparedness: hunting guns or survival food? Find out why a bullet might be better than a breadstick in this interesting feature.
All components of SHTF plans are important: survival communication, food, shelter, survival or hunting guns, medicine and gear are just a few. In a perfect world, a household would have enough money to purchase everything needed or all the skills to fill in the gaps. But that’s just not the case.
With mortgages, insurance, day-to-day expenses and other financial burdens, prepared people have to make quick decisions about the preps they purchase. To put this into context, we asked readers to choose between survival guns and preserved food. The question was:
For long-term survival, would you rather have all the hunting guns, ammo and gear you could ever need and have to hunt for every meal you ate OR would you rather have all the food you could ever eat but never be able to use firearms, bows or other hunting gear?
Survival Guns or Food?
Many readers chimed in with their views. Just about everyone agreed that in the scenario above, hunting guns trump food.
“Firearms serve a dual purpose for both hunting and protection. So, truthfully, as tempting as an infinite food cache sounds, I’d stick with the firearms for the above reason.” – Steve Chapel
“I’ve never hunted a day in my life, but I would learn in a hurry.” – Ian Graham
“Either way you choose there is a good possibility that you will in the long run end up hungry and or dying. The food without any means of protecting it can easily be taken from you. Then you will have nothing. Having all the guns is no guarantee that you will be able to bring down game enough every single day or month. Balance is the key to life.” – Echo Moon
“Guns and gear. It’s more work to hunt for your food, but you need protection.” – Julie Campbell
“You could trade gear for food VERY easy, not so much food for guns!” – Damon Stelly
“Hunting gear. It could serve dual purpose, like protection.” – Dale Durgin
“I’m going with the gear. Just have to get my wife to adjust her tastes a bit.” – Kyle Balek
Pictured: What you’ll be doing after the outbreak. (artist’s rendition) An outbreak of the zombie virus spread across the globe overnight. Some say it’s man-made. Others claim it’s from outer space. Either way, TEOTWAWKI is here.
If you’re reading this, you’re one of the few survivors still with Internet. The following is the best zombie gear for the apocalypse from the Living Ready Store. Good luck.
1) Best Zombie Machete: Woodman’s Pal Military
Everyone knows that the only way to kill a zombie is through decapitation. And if you don’t, you will soon. Zombies are squirrely sunuvaguns, so you’ll need gear that can really pack a bite on contact.
Outfit yourself with the Woodman’s Pal Military Premium with Canvas Sheath & Stone. The beefy blade was originally designed to clear brush, chop firewood, make kindling and a ton more. You’ll need it close by for switching between camp work and old-fashioned zombie throat-bustin’.
Specs
16.5” overall length
5” Military style soft leather grip with steel knuckle guard
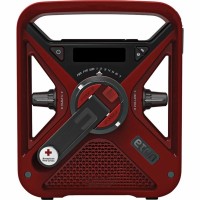
2) Best Zombie Emergency Radio: Eton American Red Cross FRX 3
For the latest news on the zombie outbreak, you’ll need a radio that doesn’t run out of batteries. So long as you can turn a hand crank 360 degrees, you’ll always be in touch with the Eton American Red Cross FRX 3.
Here’s what Living Ready‘s Corey Graff had to say in his Eton FRX 3 review shortly before joining the legions on the undead:
The FRX3 is small, just 7.875″ high x 7″ wide x 3.5″ deep, but it’s packed with useful features, including a built in solar panel and rechargeable Ni-MH battery (3.6V/600mAh) for extended use when grocery stores aren’t stocking batteries. It also plays on 3 AAA batteries, for times when the sun isn’t out.
Warning: Despite the world ending, this radio may still pick up Top 40 stations. Use with extreme caution.
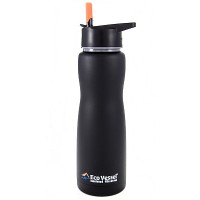
3) Best Zombie Water Filter Bottle
With the zombie virus contaminating local water sources, having a portable filtration option is critical. The Aqua Vessel Insulated Filtration Bottle is your answer.
It eliminates 99 percent of zombie viruses, plus giardia, cryptosporidium and many more nasties, all on its own. Just fill the bottle with water, then drink. It’s that easy. When paired with a purifying chemical or disinfected water, it’s even more effective.
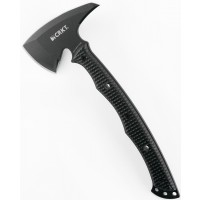
After a long day, sometimes you just don’t feel like getting off the couch to hack up that grotesque walker lumbering through your front door. If you have the CRKT Kangee T-Hawk, there’s no need to worry. Just give this tactical tomahawk a forehead-splitting toss and you’re done.
Of course, there are many practical uses for the CRKT Kangee T-Hawk, too. It’s perfect for quick chopping tasks outside – or in. The smart design keeps this tool firmly in your hand during smooth operation.
Specs
Overall Length: 13.75 inches
Weight: 1 lb. 8.4 ounces
Blade Length: 2.93 inches
Thickness: 0.23 inches
Material: SK5 Carbon Steel
Blade-HRC: 54-55
Finish: Black Powder Coat
Grind: Flat
Style: Axe Edge Front with Spike
Edge: Plain
Click here to get this best zombie ax from the Living Ready Store signed by its designer, Ryan Johnson.
5) Best Zombie First Aid Instruction
A zombie bite, just like any wound far from help, is serious business. The best thing to do is to quickly clean and close the wound, then see a doctor. But what if one isn’t around and all you have are a few basic First Aid items?
If you’ve taken the How to Treat Wounds & Burns Online Course from Living Ready University, you’ll know exactly what to do. Dr. James Hubbard, MD (aka The Survival Doctor) explains the must-know steps to take for treating wounds on the fly.
Click here to download the best zombie First Aid instruction, How to Treat Wounds & Burns, from Living Ready University.
Bonus: The Cure for the Zombie Virus
Experts are still working on a cure for the zombie virus, but that doesn’t mean you can’t up your immune system in the meantime. A healthy diet and exercise are keys to living well.
You’ll get both with Recipes and Tips for Sustainable Living by Stacy Harris. This book explains how to live and eat with self-sufficiency in mind. It’s as good a cure as you’ll find.
Looking to go armed, but are stuck in the weeds as to what to arm yourself with? Here are 20 of the best concealed carry gun options that will keep you on the defensive.
![E85 is usually less expensive than regular gasoline, but is doing a conversion worth it? [Photo credit Carolina K. Smith MD / Shutterstock.com]](https://gundigest.com/wp-content/uploads/E85-Conversion.jpg)