If you’re planning a trip and want to carry a gun, here’s what you need to know about packing state to state.
Planning a trip? Taking a gun? Before you head off down the road, make sure your itinerary doesn’t include a trip to jail. Your license to carry may be good in a lot of places, while in other places it doesn’t mean diddly. So make sure you learn as much as you can before traveling with firearms.
The past few years have seen an expansion of what is commonly known as state reciprocity for concealed pistol licenses or carry permits. But that doesn’t mean this is a universal phenomenon, and keep in mind that if you are planning to carry in another state, you will be carrying under that state’s laws. What may be legal in your home state might not be legal where you visit.
Before heading down the road, brush up on the laws in the state where you are heading and any states in between through which you may be traveling.
Places to Avoid
Let’s get this out of the way up front: There are some places travelers may wish to avoid. According to the popular Handgunlaw.us website, states that do not honor anyone’s carry license or permit include California, Connecticut, the District of Columbia, Hawaii, Illinois, Maryland, Massachusetts, New Jersey, New York, Oregon, Rhode Island, plus the territories of American Samoa, Guam, Puerto Rico, Northern Marianas Islands, and the U.S. Virgin Islands. Many activists who focus on “universal recognition/reciprocity” figure it this way: If these states or territories don’t recognize your right to self-defense within their borders, they don’t deserve a penny of your money.
As of this writing, there had been a reciprocity/recognition bill passed in Oregon, but the governor had not yet signed the measure. Things may change in the Beaver State, so keep an eye on that one.
There are several other states that honor out-of-state licenses and permits, provided they are held by residents of those states. That is, people who have obtained the widely touted Utah or Florida permits get no recognition if they are not residents of either Florida or Utah.
A growing number of states—Alabama, Alaska, Arizona, Arkansas, Idaho, Indiana, Iowa, Kansas, Kentucky, Michigan, Mississippi, Missouri, North Carolina, Oklahoma, South Dakota, Tennessee, Utah, Vermont—honor all licenses, but again, the non-resident carries in those states under the laws of those states.
And then there is Vermont, where there has never been a license to carry other than your driver’s license. The downside to being from Vermont is that your state driver’s license will allow you to carry in only three other states: Alaska, Arizona, and Oklahoma. Since the state does not issue licenses or permits, there’s no Vermont document any other state can really honor.
Thirty states have non-resident permits or licenses; that is, a non-resident of a state may obtain a carry license for that state—this is what has made the Utah and Florida licenses so popular—that they are recognized by other states. For example, non-Washington residents can get an Evergreen State concealed pistol license that is valid in 25 states at this writing. A Virginia non-resident license is valid in 28 states, while the Utah permit is recognized in 31 states. Oregon only issues non-resident permits to residents of states that border Oregon: Washington, Idaho, California, and Nevada, but the permit is valid in 20 states.
Requirements for obtaining a non-resident permit vary depending upon the state to which one applies. Florida, for example, will issue permits by mail to people who meet the requirements. On the other hand, one must apply in person in Pennsylvania. Other states require applicants to either be employed in the state or own property.
There are two resources the frequent traveler should consult. One is a little booklet called the “Traveler’s Guide to the Firearms Laws of the Fifty States,” which is updated annually, and the other is the aforementioned Handgunlaw.us. The latter is updated frequently as things may change, sometimes at a moment’s notice—and they do that occasionally—and it is important that the armed vacationer/traveler brush up before heading down the highway or out to the airport. The “Traveler’s Guide” features one-page summaries of the laws and is a popular publication among people who may summer in one state and winter in another.
Frankly, the Handgunlaw.us website is quite possibly the best resource there is for the armed traveler. Books can only be updated every so often, while an online site is far more up to date. There is one page on this site that has a concealed carry reciprocity guide, which is also available from the Second Amendment Foundation (Saf.org).
A less reliable resource is an Internet gun forum, and there are scores of these on which people can uncover all levels of knowledge, from accurate to pure supposition. Don’t risk a vacation or business trip by relying on advice from somebody who might call himself the “gun dude” on a chat forum.
There is something else I discovered when researching this article. Handgunlaw.us isn’t afraid of ruffling feathers. Each state has it’s own page on the website, and the one for Delaware had a notation that was rather blunt: “Over the years the Delaware Attorney General has listed states on their website that they actually didn’t honor or stating there was a reciprocity agreement when one didn’t exist. Use caution when reading anything on the DE Attorney General’s website as it has listed inaccurate information over the years when it comes to who they honor and who honors them.” Take that critique to heart and be forewarned.
Common Sense when Traveling with Firearms

Common sense should always prevail, but it is amazing—if not embarrassing—that some people just don’t get it. Sometimes I wonder if they’re willfully ignorant. With somewhere in the neighborhood of 11-12 million legally licensed citizens across the U.S., it is incumbent upon these people to know the laws about concealed carry where they are going to be spending time. Ignorance is no excuse, and there have been cases—most notoriously in New York and New Jersey—in which law-abiding citizens who didn’t pay attention wound up in serious legal trouble.
How many times a year do we read about somebody who gets stopped at the security checkpoint at an airport with a gun in their carry-on luggage? This is unforgivably stupid because there has been so much publicity about it over the years. Nobody can claim ignorance of this prohibition, and even if someone is not criminally charged, chances are good they’re never going to see their firearm again. Before you head to the airport, check the contents of your carry-on bag. No knives, no guns, no ammunition, no problems.
If you do travel by air with firearms, as I have done many times, follow the rules: Guns must be unloaded and locked in hard-sided cases. Handgun cases will be inside of your luggage, and your suitcase should also be locked. Notify the ticket agent when you check in at the airport, get your luggage checked through by a TSA agent, and go about your business. Not so difficult.
Years ago, I bought a handy little Doskocil lockable handgun case that has traveled thousands of miles with me all over the place. It takes two small padlocks and easily fits inside my checked luggage.
If you drive and your route takes you through some states where your license or permit isn’t welcome, before crossing that state line make sure your handgun is unloaded and locked away. That’s another place where the locked gun case comes in handy.
A few years ago, I installed a locking safe in the console of my truck. I have the combination and don’t share it. When the pistol is inside, it’s not immediately available to anybody. These things are handy and can prevent theft when you might have to leave a pistol in your rig. Never lock up a loaded gun. While traveling, make sure the ammunition is separated from the firearm.
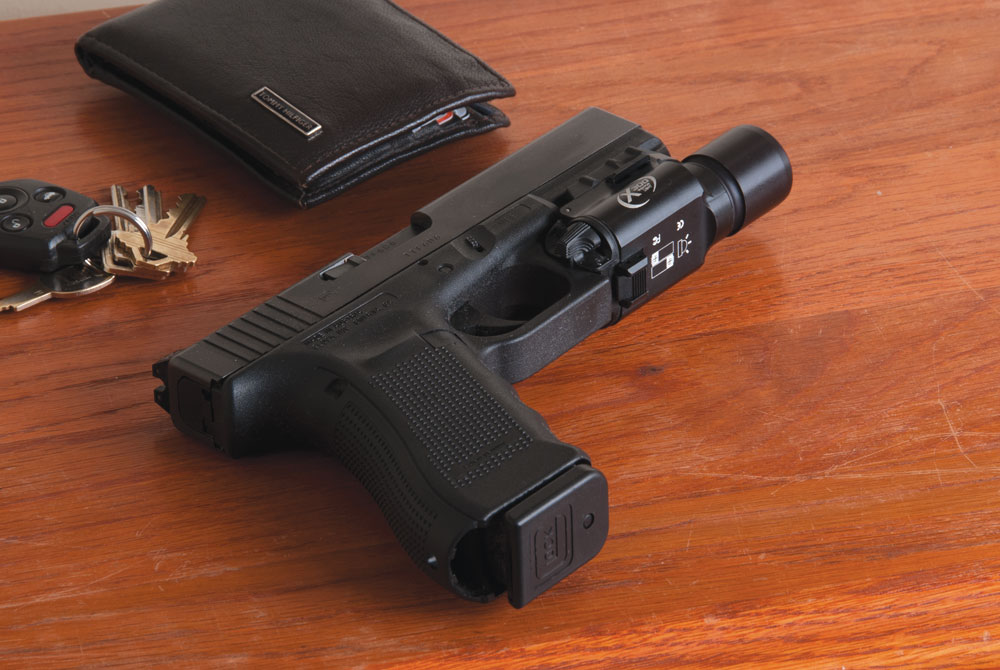
I have carried concealed in several states, including Michigan, Florida, Montana, Idaho, Virginia, Arizona, and Alaska. Those experiences taught me one thing over all others: Carry discreetly. That is, concealed means concealed. Nobody in your presence should know you are armed. Translate that to mean your out-of-state carry piece should be a handgun that will not be noticeable under a cover garment. People who are compelled to carry their hardware in such a manner that they let everybody within eyesight know they are packing just might have a maturity or ego problem. The last thing an armed citizen should want is to be the center of attention. You’re carrying for personal protection, not an ego stroke. This is particularly true if you are in a different state.
Interacting with Police
There are a handful of states in which the attitude of some armed citizens can land them in very hot water. This has to do with a legal requirement that you immediately notify a law enforcement officer if you are armed.

I did a quick perusal of the states at Handgunlaw.us and found at least six with this provision: Louisiana, North Carolina, Ohio, Oklahoma, South Carolina and Texas. If you are carrying in any of these states and have any interaction with police or sheriff’s deputies, such as a traffic stop, you need to tell them right up front you’re licensed to carry and are armed. Now, if you drive within the speed limit, don’t engage in any really foolish highway maneuvers and behave yourself in public, you’ll lower the odds of having that kind of interaction. Stay off your cell phone and don’t text while driving down the road, and don’t litter.
If you do interact with police, don’t become the jerk in the latest YouTube video telling an officer about your constitutional rights. The odds of having a rotten experience in a different state increase exponentially with every rise in the decibel level.
Another thing to watch for in a state you may be visiting are signs telling you that no firearms are allowed on the premises. In most states, this is a given in such places as federal government buildings, including ranger stations and visitor centers, any courthouse or school building, police stations, jails, hospitals, mental institutions, sports stadiums and private business establishments that are well-posted, including hotels. In some states, such signs have the force of law, while in others they do not.
When traveling with firearms it is also incumbent to check out state laws about carrying in certain establishments, especially restaurants where alcohol is served. Each state’s laws about this are slightly different, and you definitely need to be on top of this one because road trips almost always involve at least one or two stops to eat. One rule to always follow: Don’t drink alcohol if you are armed. This is not debatable, especially if you are in another state where the law just might be different than back home.
This article is adapted from the July 31, 2015 Concealed Carry issue of Gun Digest the Magazine. Click here to download the full issue.