Ringing steel is great, but the humble paper target still has a lot to offer when it comes to improving your shooting skills.
How do you practice shooting targets at long range? Common sense would say, by shooting targets at long range. But not everyone has access to long-distance ranges. So, how can we train ourselves to succeed when the range is less than 200 yards?
![]()
Maximize Paper
I love to shoot on paper. Paper targets don't lie to you—there’s no place to hide with it. However, we’re seeing increased pushback toward shooting paper. For many long-range shooters, steel is a much easier target to manage. But paper tells a story, and it’s one worth listening to.
Putting up a paper target at 100 yards is very easy. The average range in the United States is 200 yards. There’s a lot of very productive work you can accomplish inside these distances. I’d highly recommend you stop shooting prone or bench-style groups at 100 yards unless you zero the scope.
You may be surprised by a new shooter’s difference in group size when comparing 100-yard versus 200-yard results. While the mindset everyone uses is 1 inch at 100 becomes 2 inches at 200, this rarely plays out in real life when it relates to group size. Instead, we see a student with a .65-inch group at 100 shoots 2 inches at 200 yards. Two hundred is a much more difficult distance for groups. This very reason is why we recommend groups at 200 instead of 100.
What we see in terms of practice success at 100 yards is positional shooting.
Build and Break Drills
Building and breaking drills means you step back from your position and rebuild that position for every new shot or series. It’s creating positive repetitions, so you’ll revert to muscle memory when faced with a similar scenario under less-than-ideal conditions.
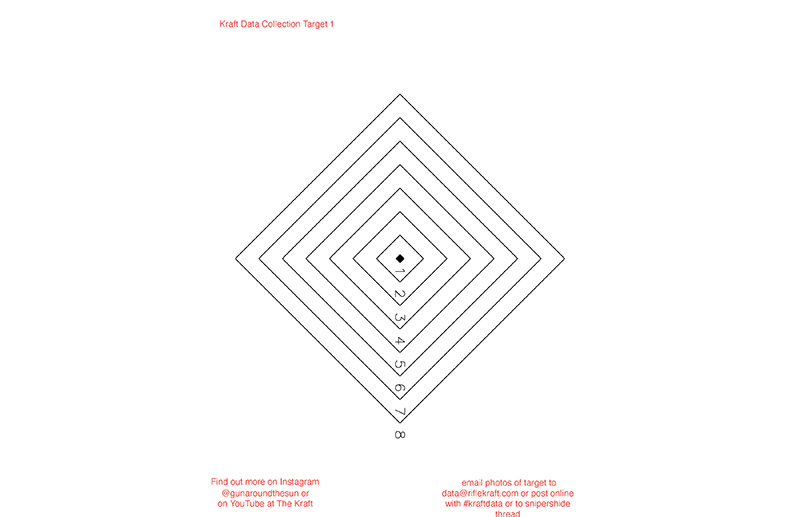
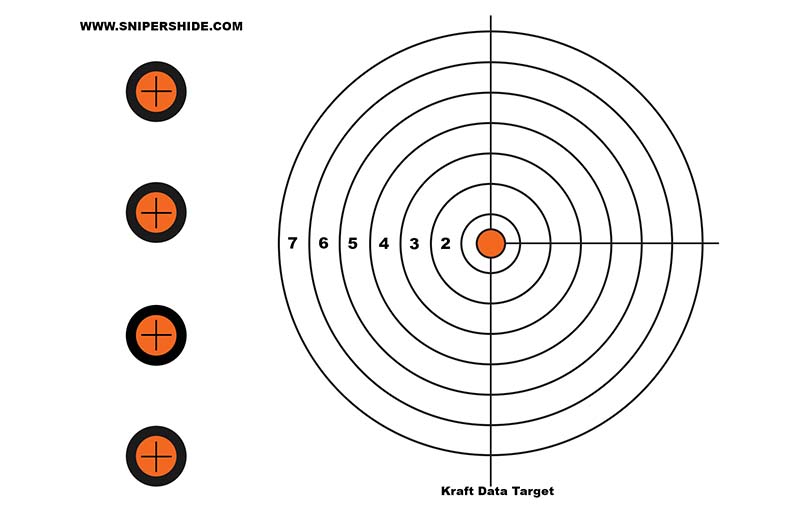
Local competitor Chris Way has introduced the Kraft Data Challenge that many of us are using today. This target gives the shooter an instant visual to diagnose shooting problems. Using his uniquely styled target, the shooter takes three shots from sitting, kneeling, standing and prone to identify accuracy and precision. Accuracy tells us how close to the center of our aiming point we’re impacting, while precision identifies the group size.
Dot Drills
For some of us, shooting groups is a lesson in frustration. Not every shooting discipline uses groups as a metric for success. The tactical shooter and hunter are “one hit, one kill” types. Hunting rifles aren’t designed to shoot groups; the barrels are too thin, heat too fast and can walk. That brings us to the Sniper’s Hide Dot Drill.
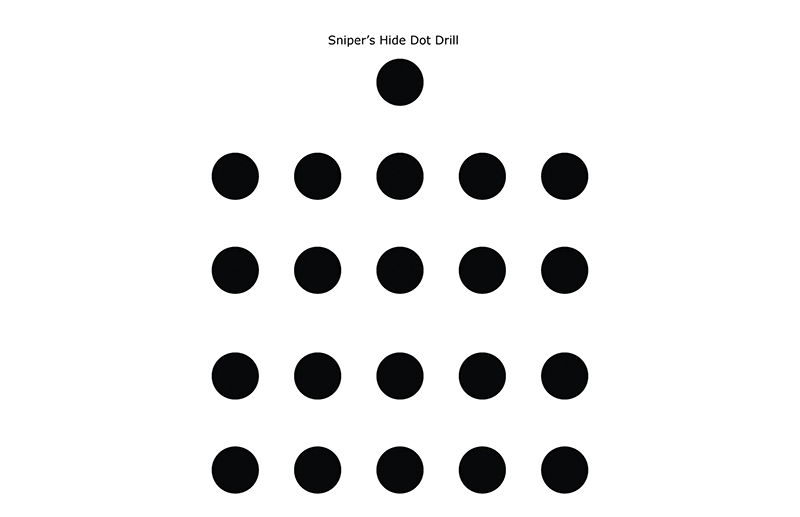
When I worked in Texas at Rifles Only, I designed the Dot Drill. The majority of our classes were military and law enforcement—the single-shot crowd. On top of that, these shooters are dynamic; their training requires them to get on target as quickly as possible. Speed wins in this case.
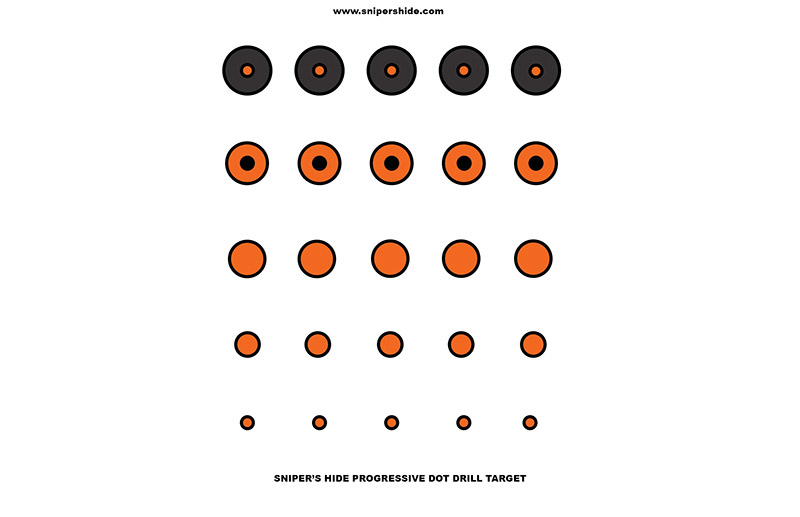
The Dot Drill was designed to put one round on each target. The original sheet was all 1-inch dots. It has since been modified and adapted by numerous groups of shooters. Each row of five targets was designed as a single drill. The first row would slow fire, giving 1 minute. The second row might be the support side—right-handed shooters use their left. The next row was the up-and-down drill.
The up-and-down drill starts with the shooter standing behind the rifle, magazine in and bolt back. On the Gun Command, the shooter drops down and fires one round in 15 seconds. The drill is then reset, and the next gun command gives 12 seconds for the next target. After each reset, you reduce the time: 10 seconds, 8 seconds … and finally, 6 seconds. Try it—it’s a great drill for working at 100 yards and will make you much faster on the rifle.
Mix And Match
Mix up your training; a combination of both steel and paper targets is a great way to improve. Paper is cinematic storytelling, while steel is the equivalent of a wolf whistle. The report back of an impact can be satisfying, but all you know about the shot is that it worked.
Paper explains the process. Are you strung vertically or more so horizontally? Do you have multiple groups, two touching here with the other three scattered? Each pattern is an explanation of what the shooter is doing behind the rifle. Please don’t ignore this valuable information when it’s available.
Training is essential—the best way to improve is through practice. How you practice has a bearing on the results and your long-term success.
Editor's Note: This article originally appeared in the April 2021 issue of Gun Digest the Magazine.
More Firearms Training And Drills:
- Competition Shooting Vs Defensive Training
- Gun Digest’s 10 Best Shooting Drills And Firearms Training Posts
- 6 Defensive Handgun Drills to Master
- 5 AR-15 Drills That Will Help You Master Your Rifle
- How-To: AR-15 Dry Fire Drills
- Handgun Drills: The Things To Practice

Next Step: Get your FREE Printable Target Pack
Enhance your shooting precision with our 62 MOA Targets, perfect for rifles and handguns. Crafted in collaboration with Storm Tactical for accuracy and versatility.
Subscribe to the Gun Digest email newsletter and get your downloadable target pack sent straight to your inbox. Stay updated with the latest firearms info in the industry.

![Best Concealed Carry Guns In 2025 [Field Tested] Wilson Combat EDC X9S 1](https://gundigest.com/wp-content/uploads/Wilson-Combat-EDC-X9S-1-324x160.jpg)


![Best 9mm Carbine: Affordable PCCs [Tested] Ruger Carbine Shooting](https://gundigest.com/wp-content/uploads/Ruger-Carbine-Shooting-100x70.jpg)
![Best AR-15: Top Options Available Today [Field Tested] Harrington and Richardson PSA XM177E2 feature](https://gundigest.com/wp-content/uploads/Harrington-and-Richardson-PSA-XM177E2-feature-100x70.jpg)
