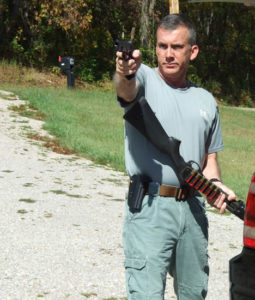
Last September, the Springfield Police Division (SPD), Springfield, Ohio, acquired 17 new M-4 carbines with a value of just over $14,229.
Now, the Division is looking to upgrade its shotguns to the tune of some $15,000.
Photo from Springfield News Sun
“The division, however, isn't using taxpayer money to acquire the firearms,” the Springfield News-Sun reported. “It's acquiring all that new equipment by trading other people's guns, each confiscated during a crime.”
Confiscated firearms used to take up space in the SPD property room.
“Now they're being swapped with federal firearms dealers to keep the division's firepower up to par in lean economic times. For Springfield's police division, it's a new way of dealing with the hundreds of seized firearms in its possession.”
“It's turning a negative into a positive,” said Lt. Brad Moos, who organizes trades for the division. SPD created very specific guidelines for potential trades. “Only sporting firearms-shotguns, rifles and handguns-used in misdemeanors or found by strangers and turned in are being traded.Guns also must have a visible serial number.”
“Something that's used to hurt someone, chances are, 98 percent of the time, that gun is going to the furnace,” said Police Chief Stephen Moody. “As a law enforcement officer, I don't want that gun back on the street. That's an affront to the victim.”
The firearm trades not only help SPD in these tough budget times. The trades have also freed up a good deal of space.
Last year's deal for the M-4's, for example, moved out 160 firearms.
“When I came down here,” said Sgt. Barry Eggers, who manages the property room, “we had 2,000 guns that go back decades. We had shotguns just lying all over the place.”
Before this Ohio police department buys new firearms, it'd be wise to do some research in The Official Gun Digest Book of Guns & Prices 2012. It contains gun prices for modern and vintage firearms.
Click to get this essential gun price guide for $16.15 (35% off retail).
Last time around we talked about eye dominance and the importance it place on accurate shooting. Now we are getting into the building blocks of putting your rounds on target. If you need to draw your concealed carry pistol that means the fight is on. This is not target shooting. When the weapon comes out of the holster you need to be ready to fight, which means you need good balance and the ability to move. A fight is a dynamic thing, if you stand still, you will get killed. So let’s take a look at the proper shooting stance as outlined in the book Tactical Pistol Shooting by Erik Lawrence.
Stance
This fundamental of shooting is always important; it is the foundation for your shooting platform. For combat-type shooting, the stance should be solid, yet potently ready for movement. This stance looks like a fist-fighter’s stance. This stance should be very similar to your shooting stance for tactical carbines and shotguns and with the empty-hand martial arts. The less you have to change for different weapon systems, the more natural it will be. Make this stance a habit.
Feet
Fig. 5-2a The proper stance as seen from the side.
The feet should be shoulder-width apart. The non-firing foot is slightly forward of the firing foot (usually 3 to 6 inches) and is pointed to the target to be engaged. Your firing foot should be firmly planted and at up to a 45-degree angle outboard to provide you with balance.
Weight distribution between the non-firing foot and firing foot should be 60/40 and focused on your toes (essential in recoil management). Refer to Figures 5-2a and 5-2b. Your weight should be centered over the balls of your feet. This position also allows for quick lateral or forward movement.
Natural point of aim is very important for beginning shooters, as it is where the body naturally points and is a good starting place so you are not correcting for other mistakes. You can find your natural point of aim by acquiring your stance oriented at the desired target, closing your eyes, presenting your hands toward the target as if holding a pistol, and then opening your eyes. At what are you oriented? If it is not the center of the desired target, move your firing-side foot slightly forward or backward to bring your natural aim point to the desired area. Repeat until your hands are oriented to the center of the desired target.
Knees
Your knees should be slightly bent and your upper torso leaning forward. When you assume this position, you absorb the recoil through your body, which will allow you to speed up engagements.
Elbows
Your elbows should touch the side of your body. Stand with your head and shoulders square to the target and your head erect.
Your stance must be comfortable, so make sure you attain it every time you start your practice. It is quick to move from, you present the strongest part of your body armor, if used, and you are facing the known threat so you can analyze your courses of actions with the most amount of information available.
Fig. 5-2b. As seen from the front, you are ready to fight.
Grip
This section will teach a right-handed shooter who is right-eye dominant. You left-handers know the drill. If you are cross-eyed dominant you will still be using the same grip, just raising the pistol in front of your dominant eye.
With your unloaded weapon pointed in a safe direction and the index finger off the trigger and outside the trigger guard, use the non-firing hand to place the pistol in the web of the shooting hand. Make a fist around the handle of the pistol. Your grip should allow you to place your trigger finger so that you have maximum control. Your trigger finger should be straight and lie along the side of the frame or the outside of the trigger guard. Refer to Figure 5-4.
Be sure to fit the “V” of your hand, formed by the thumb and the index finger of the shooting hand, as high as possible on the backstrap of the frame. This placement is to help manage recoil more efficiently. Your grip holding the pistol should align the backstrap of the pistol with the wrist and forearm.
Your non-firing hand should now fill in the exposed grip panel from the back to the front to make a fist over your firing hand fingers. The thumb of your non-firing hand should be under the thumb of the firing hand, which is pushing down. The index finger of the non-firing hand should be indexed under the trigger guard, pushing up. Refer to Figure 5-5.
Fig. 5-4 This is the basis of the strong-hand grip.
Try to apply most of the tension to hold the pistol with your non-firing hand, which allows you to relax your firing hand and obtain greater control with your trigger finger. My rule is a 70/30 ratio of non-firing hand to firing hand tension. Others think that equal pressure (50/50) is more easily learned and works well for some.
Use 100 percent of the grip panels; you can use skateboard tape to maximize friction. Pinch the heels of your hands together to get a complete grip. If you have extremely white knuckles or start trembling immediately, you are gripping too hard. You must find your happy medium, for this balance allows for sustained shooting if the need arises. You will find the more you lock your wrists using the top tendon, the more control you have with recoil management.
The arms form two sides of a triangle, your back the third, with your arms taking equal pressure in your position. The elbows are just under a full lock (keep it comfortable) to assist in allowing the recoil to go through the arms into your chest to help manage recoil. You may have to modify this grip and your elbows slightly as everyone has different hands, physical dimensions, and different pistols have various grips. Your grip must be consistent and comfortable. This isosceles of the arms is more natural to maintain under extremes than some forms of the Weaver technique. Train to use your natural instincts, not to counter them.
Fig. 5-5. A good grip gives you control of your pistol.
NOTE: Your grip will change as you become more proficient, and you should always check your grip before drifting any sights. Pistols come from the factory bench sighted in, and you should make your hand fit your pistol, not your pistol fit your hand. If you do this step correctly, you will be able to shoot quite well with any factory, out-of-the-box pistol. Try different pistols to learn which one fits you the best; there are many different grip angles out there, so check them out first.
These tips come directly from Tactical Pistol Shooting, the excellent book by Erik Lawrence available online at the Gun Digest Store. On Friday will talk about sight picture for the pistol shooter. Tactical pistol Shooting offers everything from shooting fundamentals like those shown here to dealing with extreme situations like shooting while wounded and speed reloading behind cover. This is a must-read for anyone with a CCW permit or who carries a pistol for work or self-defense.
If you were to try to determine which guns truly influenced the history of the world, you could draw a few conclusions.
Paging through The Greatest Guns of Gun Digest edited by Dan Shideler, you see the Colt Single Action and the Winchester 94, both guns that won the West and aided exploration into the last frontier. The Luger is included and that pistol played a role in WWII. The 1903 Springfield has a chapter dedicated to it and deservedly so as it was probably the greatest rifle in U.S military history. Many other guns are included in the book, and they are certainly great but how much did they influence the course of history?
What was one gun that was pivotal is changing the history of a society?
An obscure air rifle can be credited to have an enormous influence on how the young country of the United States of America developed.
It was a Girandoni, an Italian-made .46 caliber repeating rifle. How it arrived in America in 1803 is unknown but it became the essential weapon of Lewis and Clark on their westward explorations. Without the firepower of the Girandoni, Lewis and Clark may have never survived their journey.
Watch this brilliant video produced by the NRA's National Firearms Museum. It's the about history of the gun and how Lewis and Clark capitalized on its features which in turn, made their journey a success.
It is the most fascinating vintage air rifle you will ever come across.
"Build the Perfect Bug-Out Bag" offers tips for home disaster survival kits.
In this video, author and survival expert Creek Stewart discusses survival kit tips from his book, Build the Perfect Bug-Out Bag.
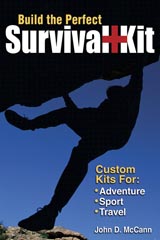
Build the Perfect Bug-Out Bag shows you how to create a self-contained disaster preparedness kit to help you survive your journey from ground zero to a safer location. Survival expert Creek Stewart details from start to finish everything you need to gather for 72 hours of independent survival—water, food, protection, shelter, survival tools, and so much more.
Gun Digest is the source for firearms news, pricing and guns for sale. With a subscription to Gun Digest, readers benefit from in-depth editorial expert advice, show reviews, how-to instructions and Second Amendment issues.
Inside this Issue
Click the cover to subscribe to Gun Digest the Magazine.
* Going Solo: Kimber's little 9mm is a classic
* SIG's 229: More than a sawed-off SIG
* Crossbreed Holsters: Old school and the space age
* The USP 45: A class act from H&K
* Michalowski: CCW is still a hot topic
* Shooting Fundamentals: Build a Foundation for Accuracy
Establishing Dominance: Figuring out which is your dominant eye
Learn the skills you need to shoot effectively under the toughest situations.
You are carrying your concealed pistol with the knowledge that one day, under extreme stress, you may be forced to use it. These are perishable skills, reviewing them from time to time will keep you sharp. When the day comes that you must remove that pistol from its holster, your goal is to put rounds accurately on target. Doing so starts with a sound basis in shooting fundamentals and the first step is understanding how your body works so you can aim properly. You need to know which eye will effectively control your pistol. This tip and the next few that will appear in this space are brought to you directly from Tactical Pistol Shooting, 2nd Edition, by Erik Lawrence. The first tip is simple, but it is the foundation for accurate shooting. Understanding your dominant eye makes accurate shooting possible.
Fig. 5.1A Extend your arms with palms away from you and cross your hands to make a hole.
Your dominant eye is the eye you use primarily to see details with the assistance of the less-dominant eye. The shooter should always aim with his or her dominant eye yet keep the non-dominant eye open to improve peripheral vision and maintain depth perception. In normal binocular vision there is an effect of parallax, and therefore the dominant eye is the one that is primarily relied on for precise positional information. If the shooter is right-handed and cross-eye dominant, the shooter simply orients the pistol under the left (dominant) during the draw.
To find out which eye is dominant, take this simple foolproof test. Extend both arms in front of your body. Refer to Figure 5.1A.
Place the hands together, forming a small opening between them. Refer to Figure 5.1B. With both eyes open, look at a distant object through the opening that was formed. Keeping focused on the distant object, bring your hands back to your face. Bring them back until they touch your face. Refer to Figure 5.1C. The eye that the opening is over is your dominant eye. If you have doubt, repeat the steps to be sure of your dominant eye.
Next up, we’ll talk about stance. Remember this is a gunfight, so you need to standing like a fighter. Come back herein a couple days to learn more about tactical pistol shooting. Until then, you can get a copy Erik Lawrence's great book delivered right to your door.
Fig. 5.1B Look through the hole with both eyes open and slowly move your hands back toward your face.Fig 5.1C Your hands will automatically come back to your dominant eye.
Other great books for those who carry concealed handguns:
The time it took to read that sentence is how long you'll have to think when disaster hits. If you have a survival kit already prepared, you're doing better than most people.
However, there are five essential items that won't be in that home survival kit because you use them every day. Don't forget them.
From Gun Digest Editors: Make sure your prescriptions are always attached to your medicine. That way you won't need to look for them in case of evacuation.
Personal Documents
Since you live in a disaster prone area, get all personal papers such as personal identification items, deeds, bank books, check books, insurance papers, agents' phone numbers, car titles in one place so you can take them if you have to evacuate. Have them stored in a plastic folder so it’s a grab and go.
Personal Medication
Keep an empty zip-lock poly bag stored inside your medicine cabinet. Place all your personal medications in it and take with you when it is time to evacuate. For help in times of panic, write beforehand on the bag with a marker or make a list of the items you really need to put in this bag when the time comes.
Glasses/Contacts
Don’t forget your extra set of glasses or contacts.
Cell Phone Charger
Most of us have cell phones today, make sure you have a car recharging unit to take with you so you will be able to recharge the phone battery from any car lighter or 12V socket. Electricity outlets may not be readily available for your home plug in recharger.
Extra Set of Clothes
If you have the room in your vehicle's trunk, put in an extra set of work type clothes like jeans and t-shirts and clean socks.
Number 6: A Knife
Unless you carry one every day, the Gun Digest editors recommend keeping a knife set aside just for emergencies. Don't forget it. As they say, “your knife is your life.”
Select a knife that is durable, portable, reliable and affordable. Something like this CRKT M-16 is perfect.
Click to order a CRKT M-16 knife for just $47.99 (20% off retail).
Before you gather items for your home survival kit, buy one of those 5-gallon buckets with a lid from Home Depot or Lowe’s. A small plastic trash can with a good lid and handles also works. Mark on the bucket when you last filled it with the items below. They will need to be replaced every three to six months.
Contents for Home Survival Kit:
From Gun Digest Editors: Remember that LED flashlights offer more lifespan per battery.
Flashlights – At least two of them without batteries inserted. Batteries for flashlights – At least 3 sets for each light (watch dates on package) Small roll of duct tape Pair of work gloves Basic tools At least four chemical light sticks (8-12 hour variety) Portable radio (batteries out) Two sets of radio batteries (again, watch the dates) Small, basic First Aid kit Roll of toilet paper Toothbrushes Toothpaste Small bar of soap Washcloths Wet Wipes (moist towelette)
Bottled water (rotate every six months). Stack bottles around perimeter of bucket. Water is heavy, but necessary and could be a scarce commodity in a shelter.
A 32 oz. wide mouth polycarbonate water bottle (available at hiking shops) in case you have to secure water in a shelter. Put as many personal toiletries inside the bottle as you can.
Save a small eyedropper type bottle and fill it with household bleach (replace every six months). You can use the bleach to disinfect your drinking water. 1 quart water = 2 bleach drops if water is clear, 4 drops if water is cloudy.
A few high-energy food bars/candy/mints (watch expiration dates)
Pre-sweetened iced tea packets or drink mix, maybe even some dry soup mix.
Consider including a small pocket stove and solid fuel tablets, to heat water for a cup of tea or soup mix, a little comfort item. Put in a metal campers cup to use over the flame.
Small hard plastic cups, in case they are dispensing water.
Next time you are in a fast food place, take a few sugar and salt/pepper packages to spice up shelter food service.
Your out of state family-friends phone contact numbers taped inside the bucket lid, including your home/car insurance policy# and agent contact #…
SPACE® Brand ALL WEATHER BLANKETS for warmth and protection, they will not get damp or mildew laden. A few SPACE® Brand EMERGENCY BLANKETS for on-the-go use protection or signaling or to help out a neighbor who is wet and cold. They help deter the effects of post trauma shock by maintaining a person's body heat so they do not easily go into shock. Being wrapped up and protected is a great psychological advantage in all the panic.
Draw top kitchen trash bags – use bucket as emergency toilet, bags as disposable liners.
Smokers; put in a pack of cigarettes and lighter, you don’t need stress in a time like this.
Pen and a notebook, you will need it.
If you have children, small puzzle books, deck of playing cards, reading material, a ball and small game items to occupy their time if you are stuck in a shelter.
Some cash as credit cards and your ATM will be useless.
Developing a disaster plan for your home requires a lot of thought, but it's simple to get started. Here are 10 considerations you can plan for right now.
1. Research
Natural catastrophes are one reason it's good to have a disaster plan.
Learn about the natural disasters that could occur in your community from your local emergency management office or American Red Cross chapter. Earthquakes, tornados, floods, hurricanes or severe winter storms all pose a potential personal survival situation.
2. Discuss
Discuss openly and honestly with your family members about the potential emergencies and how you as a group are going to respond to each. Talk about what you would need to do in an evacuation.
3. Communicate
Plan how members of your immediate family will stay in contact if you are separated. Identify two meeting places: the first should be near your home if realistic, and the second place be away from your neighborhood in case you cannot return home.
4. Meet
Pick a friend or relative who lives out of the area for household members to call to say they are okay. Pick a safe place to meet if you are separated.
5. Utilities
Make sure everyone in your household knows how and when to shut off water, gas, and electricity at the main switches. Consult with your local utilities if you have questions.
One part of a disaster plan is having cash - not credit cards - set aside for emergencies.
6. Finances
Reduce the economic impact that could be caused by any natural disaster on your property and your household's health and financial well-being. Review property insurance policies before disaster strikes-make sure policies are current and be certain they meet your needs (type of coverage, amount of coverage, and hazard covered-flood, earthquake).
7. Save
It is advisable to keep a small amount of cash or traveler's checks at home in a safe place where you can quickly gain access to it in case.
8. Neighbors
Consider ways to help neighbors who may need special assistance, such as the elderly or the disabled.
9. Pets
Make arrangements for pets. Pets are not allowed in public shelters. Service animals for those who depend on them are allowed.
10. Special Needs
Do emergency planning for people with special needs. If you, or a member of your family have a disability or special need, you may have to take additional steps to protect yourself and your household in an emergency. If you know of friends or neighbors with special needs, help them with these extra precautions.
From military to police, to competition and survival uses, there's an optics solution ideal for your AR-15. Patrick Sweeney takes a look at some of the newest and very best scopes and red dots for the AR-15 platform.
[imagebrowser id=221]
This photo gallery is an excerpt from the new Gun Digest Book of the AR-15, Vol. 4.
24 bold images of home defense tactical shotguns. Including pump shotguns and semi-autos for home defense, from the simple bone-stock scattergun to heavily accessorized bad guy stoppers.
[imagebrowser id=191]
This photo gallery is an excerpt from the The Gun Digest Book of the Tactical Shotgun.
All your pistol needs in one discreet package. The MTM Handgun Concealed Carry Case is perfect for keeping your gear organized.
I try to pretend I'm organized, but sometimes things get away from me. Still, the important things, like my range bag are always as they should be. That's why I was really impressed with the new MTM Handgun Concealed-Carry Case. It is one of those products that makes you say, “Why didn't I think of that?” The Handgun Concealed-Carry Case is an excellent inconspicuous case that makes transferring a concealed-carry handgun and related supplies to and from the range safe, simple and very discreet. The gun itself is stored in the top of the case and is sandwiched by foam padding to protect and prevent shifting during transport.
The large, deep bucket bottom below the gun storage holds all other supplies such as ammo, cleaning supplies and gun tools. The Handgun Concealed-Carry Case is double padlock tabbed allowing for complete security. The case has a tongue-and-groove O-Ring seal system for a superior water-resistance seal. The Handgun Concealed-Carry Case is molded out of rugged polypropylene plastic, has a heavy-duty latching system and contains molded-in stacking ridges for added versatility.
Drop a Bore-Snake, some cleaning solvent, a few boxes of ammo and even some small targets into the bottom portion and you are ready for a training session at the range. There is also room for a small tool kit, shooting glasses and ear protection. In short, all of your training gear is in one discreet package and ready for you to stop at the range, even on short notice. The Item Number is HCC-30 and the MSRP is just $21.95. You can't ask for a better deal.
Recommended gun books for those who carry concealed handguns:
Looking to go armed, but are stuck in the weeds as to what to arm yourself with? Here are 20 excellent concealed carry gun options that will keep you on the defensive.