I would like to attempt to clarify the confusion often surrounding the terms “ferrocerium” and “mischmetal” when it comes to various fire starters.
My wife, who speaks fluent German, voiced confusion to the term mischmetal as it relates to ferrocerium. She explained that the term mischmetal is from the German word Mishmetall, meaning mixed metal, and that since a ferrocerium rod is made of a mixture of metal, by definition it is a mischmetal rod.
So I did a little digging and she is right. But the terms have taken on their own vernacular by the survival/fire-starting community. The terms are used to distinguish the difference between two types of fire-starting rods or tools.
What are Mischmetal and Ferrocerium?
A mischmetal, also known as cerium mischmetal, is an alloy of rare earth elements, namely those from the lanthanum series. The resultant mischmetal by itself is too soft to use as a flint, such as used in a lighter.
Therefore, it is blended with iron oxide and magnesium oxide. The resulting man-made material is called ferrocerium — probably because of the addition of the iron (ferro) and the mischmetal (cerium), hence ferrocerium—and will produce sparks to ignite tinder when scraped by a sharp edge, usually a piece of steel.
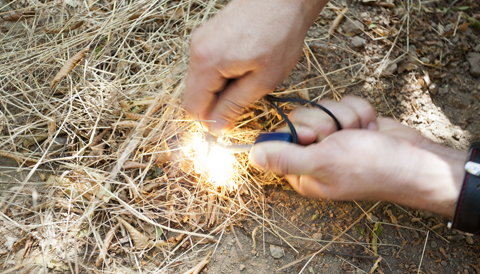
The scraper is called a striker. For years, this was the only type of spark-producing fire-starting device that came in a rod form, and was termed a ferrocerium rod or a mischmetal fire starter.
The New Mischmetal Rod
Enter the twenty-first century and a desire for a hotter fire starter rod. A new fire starter rod is introduced and it is called a mischmetal rod. I know, I know, but what can I say.
This rod allows the user to obtain both a sufficient ignition spark and an ample shower of hot burning flakes of magnesium used to ignite tinder.
Without getting too technical, this is done by lowering the iron content and increasing the magnesium content. The increased amount of magnesium, relative to the decreased iron content, results in a softer rod.
The pieces that are scraped off are larger and, after being ignited by the sparks, continue to burn after leaving the rod.
Which One is Right for You?
There you have it. For the purpose of this book, a ferrocerium rod (also known as a ferro rod) is harder and gives lots of sparks, but the sparks don’t continue to burn.
A mischmetal rod gives large burning chunks of magnesium that continue to burn after leaving the rod.
I, being old school, still prefer the ferrocerium rod. It is hard and, in my opinion, lasts much longer than a mischmetal rod. A ferro rod only gives you sparks, but hot sparks, and they have always been adequate for me to ignite tinder. The sparks are fairly easy to aim into a tinder pile.
I have found that the large burning pieces of magnesium scraped off the mischmetal rod are more difficult to aim and the rods wear down in a much shorter time than a ferro rod.
However, when the hot burning pieces of magnesium do find their way into the tinder, they burn longer, and will even ignite a piece of paper (a ferro rod won’t do that).
To make an intelligent decision, experiment with both and determine which is best for you.
Disaster Survival: Pitting Reality Against Morality
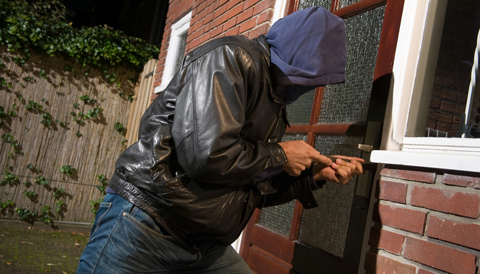
It’s easy to sit on a moral high horse while times are good. But when disasters strike, there’s a guarantee that theft will follow.
It’s not always career criminals smashing and grabbing. Sometimes it’s people in tough situations getting critical supplies using the only option available. There’s a fine line between “looting” and “scavenging for necessities.” Where you fall on it will depend on how you answer this question: When is it OK to steal?
To put this into context, Living Ready asked readers on its Facebook page to think about the following scenario:
It’s been three weeks since your utilities went out following a major disaster. Your water supplies are almost gone, and your family is literally dying of thirst. You know your neighbor has more than enough water stockpiled in a nearby garage. You know you could sneak in and take some with anyone noticing. Would you steal water for your family?
Disaster Survival: Is It Ever OK to Steal?
The responses went in a surprising direction. The consensus was that bartering should be the first course of action. Using skills learned ahead of time to purify water was also referenced. It goes to show how important it is to be educated about survival situations before they happen.
“No, I would not steal my neighbor’s water. I have many skills. I have plenty of other stockpiled goods. And if my neighbor was attempting to cut me off from water on purpose and flat out refused to share or trade, I’M STILL NOT STEALING OR TAKING HIS WATER. If there’s no local water and I cannot drill into the aquifer, then it is time to migrate. But I will tell every thirsty migrant I pass along the way about my ex-neighbor’s easily accessible stockpile of water…and the newly empty home next to him.” – William Major
“Steal, no. I would, however, offer to trade him something, whether it be useful items, labor to turn his yard into a garden, or taking a few security watch shifts at his house so he can get some things done or get some sleep. And if he refused any of those things, I’d be heading out to the nearest water source – no matter how far or difficult it was.” – Carrie Bartkowiak
“No. Stealing is not the way to gain an ally, but to ensure they are an enemy. Ask, trade, beg or find some way to work together.” – Jeff Tremblay
“Get some sillcock wrenches for your urban bug out bag, you can tap exterior water outlets on commercial buildings. Also learn how to collect and purify water using charcoal and sand filters. Better then stealing!” – Regis Johnson
“If it was a matter of life or death – yes! Then I would have enough to live on for a few days while I search out for water for my family.” – Deborah L. Earl
“If it’s okay to steal water from him, then it is OK to steal everything else he has. May as well just kill him, too. If it’s for my family, that makes it OK, doesn’t it? And people wonder whats wrong with our society. Sheesh.” – Darrel Gill
“Until it happens, people can say ‘I wouldn’t,’ ‘I can’t’ or ‘that’s wrong.’ But look at how emotional parents gets over something stupid. Now add in stress, fatigue, anger, frustration and hunger. Then watch the morals and society fade away.” – Rusty Mallett
What would you do in that situation? Leave a comment below.
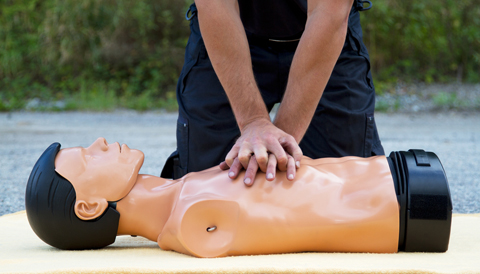
1. Kneel beside the person with both of your knees close to the person’s chest. Lean over the chest.
2. Place your hands on top of each other and position the base of your bottom hand over the middle part of the breastbone. Position your elbows and shoulders directly over your hands.
3. Use your weight to compress the chest, leaning your entire body weight down on your arms to apply pressure. Do not bend your elbows (like they do on TV). Compress the chest down at least 2 inches (5cm; yes, that’s also a lot more than they do on TV).
4. Compress at a minimum rate of 100 times per minute. The rate is the same as the beat of the Bee Gees’ tune, Stayin’ Alive.
5. Compress until help arrives. If you’re using an AED, it will direct you when to compress and when to stop.
6. If you don’t have an AED, stop and quickly recheck for a pulse or other signs of life such as breathing or responsiveness every two minutes. If someone is with you, take turns performing compressions.
7. If no help comes and you don’t get a pulse or other sign of life, there will come a time when continuing is fruitless. Stop if you become exhausted. It’s extremely rare to revive a person unless you have an AED or can transfer her to a medical facility. Even then, it’s pretty uncommon, so don’t be too hard on yourself if you’ve done your best.
Why Chest Compressions? Why Not CPR?
Current thinking is that artificial respirations, such as those used in CPR (cardiopulmonary resuscitation), aren’t effective when performed by non-medical personnel.
The treatment does little to improve the overall recovery of someone whose heart has stopped beating.
It’s more useful and efficient for a nonmedical person to spend her time on proper chest compressions.
Recommendations do change from time to time depending on new data. The best way to keep up with the latest recommendations, and also to learn how to properly perform CPR, is to take a hands-on course.
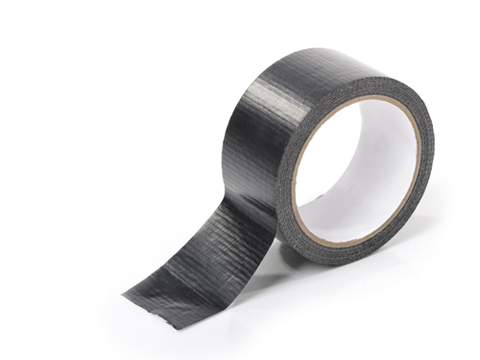
Gaffers tape doesn’t leave a sticky adhesive when removed. It’s perfect as a wrap to use for gun painting. Changing camo patterns for the seasons is a piece of cake.
Gaffers Tape: Perfect for Preserving Gun Parts
Gaffers tape is awesome stuff for camo gun painting. Personally, I try to avoid painting my equipment, preferring to keep it in original condition. Parts and accessories sell better if they’re not painted.
Gaffers Tape vs. Duct Tape
Why gaffers tape and not duct tape?
Gaffers tape has been used by the film industry for decades for temporary securing of wires, equipment, etc. It’s actually fabric, so it’s dull/matte. That’s different from duct tape, which tends to be shiny.
But the biggest advantage to gaffers is the non-messy adhesive. It does not leave a sticky, gooey mess like duct tape but still adheres very well.
This allows you to experiment with colors and patterns without getting your weapon covered in paint. Also, changing the camo with the seasons is easy. Just rip off the old tape and apply a new layer of camo paint.
Method #1: How to Use Gaffers Tape for Gun Painting
Wrap the gun parts in tape, then apply paint. Easy as that.
Method #2: How to Use Gaffers Tape for Gun Painting
Lay strips of gaffers tape on sheets of wax paper, spray them with paint and wrap them onto the gun.
Where Not to Use Gaffers Tape for Gun Painting
One place I don’t use tape of any type is the gun barrel.
During hunting, my barrels usually don’t get hot enough to reek havoc with tape adhesive, but there are occasions when more than a couple rounds are fired.
I usually use camo fabric to wrap the barrel instead. Colored chalk could break up the barrel profile, too.
Where to Get Gaffers Tape for Gun Painting
Gaffers tape is found in a variety of colors and widths. Hardware stores and online retailers carry a lot of gaffers tape, but I prefer Amazon because of the feedback ratings to avoid a poorly made version.
There’s much more to hypothermia than the air temperature. Here’s are five hypothermia causes that don’t involve the thermometer.
Causes of Hypothermia: Getting Wet
When you are wet, you get cold a lot quicker, and at higher temperatures, than when you are dry.
Wet clothes conduct heat about five times more rapidly than air. When you are immersed in water, you conduct heat 25 times faster than when you are surrounded by air. Your body temperature can get dangerously low in any water below about 91°F (33°C). Of course, the colder the water, the faster your body temperature drops.
Hypothermia-related deaths occur annually in boating accidents and the like, which explains most of the hypothermia deaths in Florida and Hawaii.
Causes of Hypothermia: Alcohol and Drugs
These substances dull your senses (especially if you pass out, to point out the obvious), so you don’t realize you’re cold until it’s too late.
Alcohol also dilates (increases the size of) surface veins, so your blood flows closer to the surface of your skin, releasing body heat that is normally kept in your core for your vital organs.
Causes of Hypothermia: Trauma
Trauma can wreak havoc with body temperature regulators. Also the victim might not notice how cold she is getting due to pain or an impaired mental status.
If you’re treating a trauma victim, remember to cover the victim with a blanket or whatever is available. Also get the person out of wet clothes.
Causes of Hypothermia: Age
As you age, your temperature regulators don’t work as well. The decline can begin even as young as age 65.
Children under age three have more skin surface versus body mass. Heat escapes through the skin, so they lose heat faster. In addition, the cold has a tendency to sneak up in on both these age groups before anyone notices.
Causes of Hypothermia: Chronic Diseases
Hypothyroidism, Parkinson’s, heart disease and severe infections are examples of the many problems that affect your body’s heat regulation. People with these issues can’t fight off the cold as well as people without health issues.
There are many types of commercial survival kits available on the market today. Some of these kits are well made. Some are sufficient. And some are lacking in serious survival components.
Although many of these survival kits provide the basics, the quality of the components must fit the selling price of the kit.
In other words, the components may not be chosen based on the quality of the item but on the price of the item. The total price of the items in the kit must fit within the overall selling price that allows the kit to be affordable.
I’m not opposed to commercial survival kits, but there are three reasons I prefer DIY survival kits.
#1 Reason to Make Your Own Survival Kit: Quality
Oftentimes a commercial kit does not provide the highest quality of components. I have always felt that you should spend as much as you can afford on components for your personal survival kit.
After all, you might depend on your kits for survival, and therefore, this is no place to be frugal.
#2 Reason to Make Your Own Survival Kit: Insight
I believe that a survival kit should be designed on an item-by-item basis. In this manner, you are familiar with the individual components.
By packaging your own survival kit, you also know where each item is in an emergency. When you buy a kit that is prepacked, you lose the flexibility of choosing a container that offers you the space for those extra items you desire.
If you do purchase a prepackaged survival kit, be sure you become familiar with it before you need it.
#3 Reason to Make Your Own Survival Kit: It’s Easy
Lastly, as you will learn from reading my new book, Build the Perfect Survival Kit, 2nd Edition, making your own personal survival kit is not difficult. You can choose your own container and components, and customize it for your needs.
One of the biggest hurdles for a mutual assistance group to get past will be allocation of survival resources.
The two most common problems regarding survival resources will be:
Do we combine all the incoming basic load supplies into a common storage system?
Do we have all members remain responsible for their own basic load of supplies?
Depending on the mutual assistance group makeup, there are a couple of ways to handle allocation of survival resources.
Survival Resources and the Diverse Group
If the mutual assistance group is diverse with several or many families, I suggest everyone bring a baseline set of supplies.
Members would be responsible for their own food stocks and feed themselves. Medical supplies and personal equipment can also be maintained within the individual families. If there is a need for additional survival resources by other mutual assistance group members, it would be up to the family to decide whether to share.
Note, there should still be community production efforts, such as agriculture, water collection, firewood collection, etc. Community efforts should be divided fairly with respect to distribution.
Survival Resources and the Big Family
If the mutual assistance group is one large, combined family, you may be able to combine supplies. It is still a good idea to secure everything, especially food.
Just as with the diverse group, you will have communal tasks and production of resources. It may be more difficult to get family to participate with chores, just because family rarely likes to take orders. Even so, crops, meats and other sundries should be doled out fairly and evenly.
Bartering for Survival Resources
Survival is far more than wandering the hills eating wild plants and bugs or living in a bunker until the war ends. There are extremely few people who can live totally self-contained. Even the most rugged of mountain men must ride into town to trade their furs for supplies or purchase feeds, building materials, parts, tools, etc.
The goal of a mutual assistance group is to create a self-reliant community of sorts. But for the skills and supplies not on hand, a way to obtain them must be found.
This is pointed out to get you thinking about surpluses. If you have extra of something, you may be able to barter with neighbors or in a community somewhere. In a world where food is in short supply, having extra may be better than holding precious metals.
The trick to bartering for survival is to establish a fair value of the items in hand. For example, a basket of fresh vegetables may be an even trade for a slab of fresh meat. A day of labor may be a fair trade for a couple of meals.
I’m not going to discuss bartering in-depth, but there are some things we suggest you do not do. It is never a good idea to trade ammo, weapons or other dangerous items with strangers. It is also not a good idea to offer toxic, contaminated food or equipment to an unknowing trade partner.
Airline travel is complicated, even more so if you plan on being prepared in flight and at your destination. Sometimes traveling light is a necessity and checking bags isn’t in the cards. Sometimes the airlines can misplace your bags for a day or more.
Regardless, it’s a good idea to have some items in your carry on that are approved for TSA.
Carry-On Emergency Kits for Before the Plane Ride
Don’t keep this kit in your luggage. Bring it with you on the plane in case the luggage becomes lost. Because that will be the day you really need it, according to Murphy’s Law.
During my last trip to West Virginia, we hit a deer not 5 miles from an international airport, totaling the car with the airbags deployed.
I have since added my tactical flashlight to the mix, since the deer ran off into the night (a nice 8-pointer, might I add). We were able to drive to a garage (with a deployed airbag, and one headlight), no thanks to roadside assistance.
So having an emergency kit ready to go in the carry before the plane ride is a good idea, too.
TSA-Approved Carry-On Emergency Kit
This list of items is put together for someone planning on spending a good amount of time outdoors. I have given some alternatives for someone wishing to pack a bit less, or don’t plan to venture outside too much once they reach their destination.
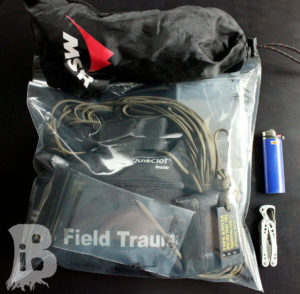
Field Trauma Kit, including athletic tape, extra Advil, Benadryl, and extra Quikclot
75 feet of paracord (550) (or 50 feet to go light)
Lighter (tinder can be made out of gauze and Chapstick in a pinch) with zip tie around button
Tactical flashlight with adjustable brightness and a strobe function. A carry pouch is nice to tether onto equipment so that you don’t lose it, and so that you can easily pull it out of your bag.
Spare batteries with the terminals taped off with either gaffers tape or electrical tape. Duct tape residue can make them worthless. Check the expiration date.
Signal mirror (mine is in a duct tape case with Velcro) Polycarbonate mirrors are lighter weight and won’t break with rough handling, but they don’t last as long as their glass counterparts, nor do they transmit as much light from the sun.
Signal whistle
Two (2) space blankets
TSA-approved multitool, such as the Style PS from Leatherman.
Small LOKSAK (for smaller items, and can be used to flush wounds)
Large LOKSAK to carry it all in
Two (2) Nalgene bottles with duct tape (or gorilla tape) and paracord loop, or an MSR Dromedary if going to a hot climate.
One (1) glacier cup
Water filter or purification tablets
Dealing with the TSA
The first thing to know about TSA is that items that are questionable, yet permitted, are judged based on the appearance of the person carrying them. I have carried a tactical pen on 10 or so flights. On the 11th flight, I was told it was prohibited, and TSA proceeded to take my boarding ticket and ID, then had a sheriff run me through the system for warrants. (Great news, I’m not wanted for any crimes!)
This sort of special treatment is usually reserved for people carrying illegal items. Things like the Bic lighter and the multitool should be declared at the x-ray machine (along with your keys and coins) to make the screener’s life easier, and to cut down on your time through security.
Learn how to make a wikiup survival shelter using forest debris, such as leaves and branches, to keep warm in an outdoors emergency.
A wikiup shelter is at least a five- to six-hour project, even taking up an entire day, and requires regular resupply of leaves. Remember to gather debris farther away from the build site and work your way in for less traveling in the later stages.
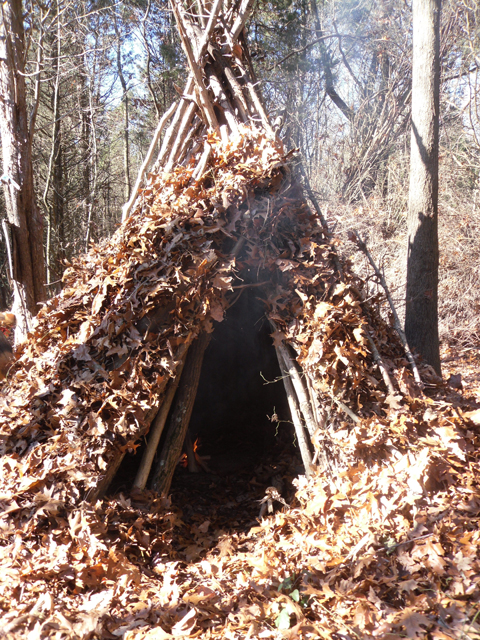
A wikiup is essentially a “teepee” style shelter made with forest debris. There are other less time-consuming primitive shelters that you can make in a pinch. However, in a longer term survival scenario in colder weather, the wikiup is king for an important reason: it allows the use of a fire inside the shelter.
Note that no tools are need to make this survival shelter. This makes it ideal for a scenario where you may have been separated from your survival gear.
Wikiup Step 1: Prep the Space
Start by clearing the forest floor where the wikiup will be built. Don’t throw those sticks and leaves too far, as they will be used later.
Wikiup Step 2: Make a Tripod
You then need to find three main support poles. These need to be strong, as they will be bearing a lot of weight by the end of this build.
You may choose to secure these poles together with a tripod lashing, although it is not necessary. I like to use poles with a “Y” shape on one end so that they can be locked together and spread apart at the bottoms to make the basic tripod for the survival shelter.
Wikiup Step 3: Add More Poles
Once the tripod is in place, continue to place straight poles around the circumference of the shelter. Place the poles as close to one another as you feel necessary, but don’t worry about closing all the gaps. They’ll be filled in soon enough.
Wikiup Step 4: Add Insulation
By this point your shelter will start to look like a home. However, the real work is about to begin.
The next objective is to get insulation/shingles installed. For that you will be using forest debris.
This is no different than putting shingles on a house. Start at the bottom and work your way up. The same is true with any primitive shelter. This allows the survival shelter to properly shred rain. If you get this wrong you may not get another chance to correct it.
Continue to piles leaves, pine needles and any other debris in the area to the wikiup. The more insulation added, the more dead air space that can be trapped and ultimately the warmer the inside of the shelter will become.
Sleeping in the Wikiup
Once a sufficient amount of insulation and rain protection is installed, it’s time to think about the sleeping options for this shelter.
For me, provided that I don’t have any modern gear, I would opt for a post bed. It’s as simple as it gets. You first place a pole to one side of the wikiup (making sure to give yourself enough room to lay comfortably), and then you fill the cavity with the driest debris you can find.
The pole you place on the edge of the bed with help keep the leaves in places as you add to your bed, and also keep them away from the fire at night. I recommend adding as much debris as you can, then laying down on top of them repeatedly to condense everything into a thick mattress. This will keep you off the cold ground.
The last step is to gather firewood and bust out that bow drill kit, or ferro rod if you were prepared, and smoke the creepy crawlies out of the shelter before laying down for the night.
I have spent a lot of time over the years staying in wikiups and they are extremely comfortable, even on the coldest winter nights.
Weather stripping and plastic window insulation are perfect winter preparedness tasks to do now before the deep cold hits.
As we get ever closer to our annual rendezvous with Old Man Winter, we human beings are sort of biologically, as well as psychologically, wired to batten down the hatches, so to speak. For many of us, we go into full “prep” mode, striving to stock up on everything and anything. This isn’t a bad idea, provided you don’t go overboard with it and miss a mortgage payment because you couldn’t resist buying three pallets of toilet paper, even if the price was absolutely stellar.
For those new to prepping, what follows is a short list of chores you might consider adding to your To Do list before winter hits. For the more experienced among you, consider these reminders to ensure they get done properly.
Fall Prepping Chore #1: Stock Up on Firewood
If you have a fireplace or wood stove, lay in a good supply of seasoned firewood. While a couple cords of split logs are great, don’t forget the smaller stuff for kindling.
Several years ago, I built a small cubby in our attached garage where we can store enough firewood to last a few days at a time. It is an unheated garage and the cubby is on the opposite side from the house, so I’m not overly concerned about bugs getting into the home from the wood.
We also have a lawn cart that we’ll fill with kindling and wood scraps. I don’t know about you, but I’ve found strips of thick bark are awesome for kindling. I’m to the point now where I’ll often strip off bark from logs before bringing them into the house, setting the bark aside for kindling for future fires.
Fall Prepping Chore #2: Turn Off Spigots
Turn off and cover all outdoor spigots. Pipes bursting due to ice is never a good thing. Head to your local hardware store and spend the buck or two on foam covers for the spigots. If you have a shut off valve inside the home for those faucets, turn them off and drain the water that remains in the line.
Fall Prepping Chore #3: Insulate
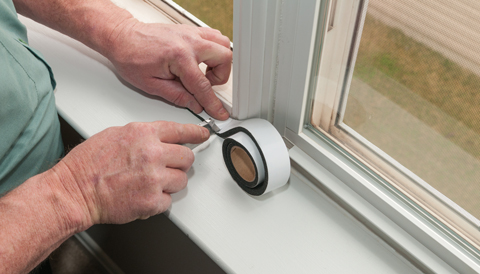
Install weatherstripping and insulation as needed around all doors and windows. Older homes in particular can be very drafty. In an emergency, when the furnace isn’t pumping out warm air, you want to prevent cold air coming in as much as possible.
Fall Prepping Chore #4: Check Cold Weather Gear
Check all snow shovels and other snow removal equipment and repair or replace as needed. When there is a foot of snow on the ground is not the time to remember your snow shovel broke last year and you never got around to buying a new one. While you’re at it, pick up a bag or two of salt or sand.
Fall Prepping Chore #5: Cover Outdoor Furniture
Store or cover your patio furniture and grills. Melting snow will rust grill burners. I learned that the hard way. If something were to happen that would necessitate using the grill in place of your stove top, it would be easy enough to wheel it out of the garage or uncover it.
Fall Prepping Chore #6: Clean Gutters
Clear all gutters of leaves and debris. Gutters freezing up leads to ice dams along the roof overhang, which is a costly repair.
Fall Prepping Chore #7: Review Cold Weather Clothes
Go through your winter outerwear (coats, snow pants, boots, etc.) and inspect each item. Repair or replace anything that isn’t in good condition. Make sure everything still fits, too.
Fall Prepping Chore #8: Take Advantage of Grocery Deals
Stock up on staples. As we approach the holidays, you’ll notice many grocery stores put certain items on sale at very low prices. I’m talking about things like baking ingredients (flour, sugar, butter, mixes) as well as hams and turkeys. If you have room to store these things, stock up when the prices are low.
Fall Prepping Chore #9: Check Vehicle Emergency Kits
Inspect all vehicle emergency kits. Replace anything you’ve used up through the year, rotate food and water supplies. Be sure you have a good ice scraper in the car, too.
Fall Prepping Chore #10: Stock Up on Entertainment
If you don’t have it already, get yourself a DVD copy of A Charlie Brown Christmas. Seriously, this is, hands down, the best Christmas special to ever air on TV. Don’t count on being able to remember to tune in when it airs this year.
Here’s how to treat a black widow spider bite from Dr. James Hubbard, MD. Learn to spot symptoms and know where this spider likes to hide.
Colder temperatures mean spiders are headed indoors. In many parts of the country, that includes black widows. Here’s how to treat a black widow bite.
Black Widows: Know Your Spider
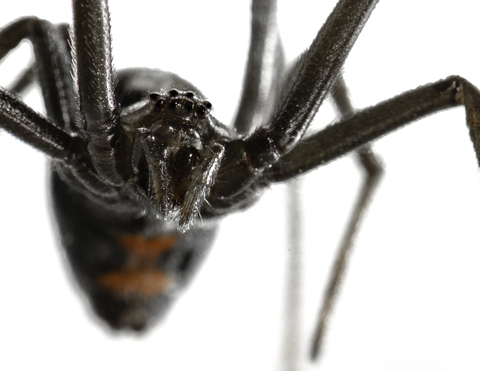
Black widows typically have some sort of red marking on their abdomens, but not always. The marking is usually shaped like an hourglass. These spiders live under eaves and around undisturbed debris, woodpiles, porch furniture, barns, sheds and outhouses.
Signs and Symptoms of a Black Widow Spider Bite
If you get a black widow spider bite, you may experience some or all of these symptoms:
painful bite (but not always)
two tiny fang marks, possibly a little red mark, maybe some swelling (but sometimes there’s no evidence of the bite)
muscle aches and cramping of the abdomen, back and extremities that can be severe
increased sweating or salivation
elevated blood pressure
rarely, seizures or respiratory difficulties that can result in death, usually in children
symptoms usually peak within about 12 hours but can continue for several days
How to Treat a Black Widow Spider Bite
Apply cold packs to the bite area intermittently for five- to 10-minute intervals. (Place a cloth between the pack and the skin.)
Call the regional poison control office for advice. Its number should be on your speed dial. Find the number for your regional office at www.aapcc.org.
Seek medical care, if possible. There is an antivenom for those who develop severe symptoms.
Wash the bite area with soap and water, and apply an antibacterial ointment.
Take whatever you have for the pain. Often, strong narcotics are needed.
Hello and welcome to what I hope will be a long running and helpful column for the disabled community. There will be some inconvenient truths revealed and discussed, along with ideas and helpful web resources cited.
A bit about me. I live in Earthquake Faults, Nevada, am a non-service connected veteran (NSC), and an incomplete paraplegic, but am studying for my finals! I have Primary Progressive MS, and did a bout with prostate cancer, with the treatment leaving me in the state I’m in, as well as being temperature sensitive (heat and cold) and photosensitive due to medications. About the last statement- it was a 50-50 chance that things would go south, I knew this going in and made my choices.
Unabashed Public Service announcement: Guys age 30 on- get your Christmas Goose during your annual physicals, as a PSA won’t always show a problem!
Prior to diagnosis, I have worked in medical, engineering, architectural, electrical engineering and legal fields, am pro-Second Amendment and pro-privacy, along with being a DIY type person, and was known to go camping 24/7/365 in the desert. My wife is a retired RN who volunteers with the local Red Cross and other disaster response agencies.
The Web as we know it is a wealth of information. It’s great for newsfeeds, for gathering intelligence on various issues after proper sifting and to find what disaster protections exist to help or hinder you, and to source ideas to make your life a bit easier before and during disaster strikes.
Now for anyone not bound by physical limitations, bugging out is viable, for a lot of us bugging in is going to be the reality that we deal with. Add to that hygiene, especially critical during emergencies, environmental conditions to deal with and getting necessary medications, and if you have a service animal (SA), then the fun(?) truly begins.
I’m sure everyone has read all the bugging out and bugging in lists of necessities. They are good thinking points, but as every disability issue has different needs and necessities combined with basic survival needs, I’ll leave you with the following thing points.
What is your bugging out and bugging in reality?
What types of medications do you use and what is their availability and storage conditions?
What type mobility device do you use? (manual chair, power chair or scooter, crutches, etc.?)
What type of personal transportation do you use? (adapted van, vehicle with mobility device carrier, etc.)
These topics are complete discussions unto themselves. A serious assessment and realization of their limitations and pluses will be discussed in future columns. As there is no real right, wrong or in between answers, I would ask readers to weigh in on this.
Remember, we are on the bottom of the food chains of disaster response and evacuation, much less any LEO protection.
Is high-velocity ammunition for your handgun worth the extra cost? – John Q., Living Ready reader
High-Velocity Ammunition Answer
Good question, John. My opinion is, for the average shooter, probably not.
Handgun ammo comes in many different loadings within caliber. High-velocity ammunition varieties (often referred to as “+P”) come with higher combustion pressures and more sophisticated bullet designs. Advanced projectiles upset more (increase their frontal area) to create a larger wound channel, and higher pressures produce more energy transfer into the human body. The desired result is faster incapacitation, and if you know you can handle it, this is a good thing. For experienced shooters the extra cost is well worth it.
What’s the Problem with High-Velocity Ammunition?
The problem is higher pressures bring more recoil and muzzle flash. In some loadings, this means a lot more recoil and flash. This is especially significant when the gun must be fired at night.
High-velocity handgun rounds can create a muzzle flash or “bloom” (especially in today’s shorty handguns) so distracting that it can take you out of the fight tactically by destroying your night vision.
With a lot of practice, you can learn to tolerate the recoil and using a tactical light properly can reduce the flash effects. In my experience, most civilians and many cops don’t practice enough to overcome either side effect of the high velocity loadings. The increase in stopping power may then be offset by poor shot placement. And if you have not fired your “duty round” in the dark, you really have no idea what you are carrying.
Standard Velocity Ammunition May Offer Better Results
I teach my rookies that the most significant factor in surviving a gunfight is the ability to put an aimed round of adequate ballistics in the center mass of the adversary before they get one into you. That doesn’t mean that you rush the shot. It means that you quickly decide you need to shoot and smoothly present the gun, acquire the front sight and press the trigger.
Plus P ammunition has no positive bearing on that dynamic, and in fact, may retard it. If you fear the recoil or flash of the weapon, you will likely not be smooth and decisive when it counts. A solid torso hit with a standard velocity hollow point is better than a miss with your super-zipper-zombie-zapper any day.
Ammo choices have also been complicated by the shortages caused by the recent panic buying situation. Most folks don’t store a lot of ammo and you may find that your usual loading has vanished from the shelves. If that happens, I recommend a lower velocity loading than a higher one as an alternative unless you can get quickly to the range and try out the new stuff.
I don’t want anybody to feel under-gunned with standard velocity loads. Shot placement trumps bullet energy, and there is no such thing as a guaranteed fight stopper pistol bullet. (Remember, a handgun is what you take if you don’t think you are going to get into a gunfight.)
So in a gun store with staff you trust, ask them to recommend a standard velocity, hollow point load and practice with it. If you practice regularly with the ammunition you use for personal defense you should be just fine. When in doubt, go with standard velocity.
(Note: If you are really interested in how bullets do their job and what actual autopsy data suggests are the best loads for your gun, get the definitive work in the field, Handgun Stopping Power, by Marshall and Sanow. It is very readable and I recommend it highly.)
And remember, please, every person has unique needs and capacities and every armed encounter is different. When developing your defensive tactics always get a second opinion.
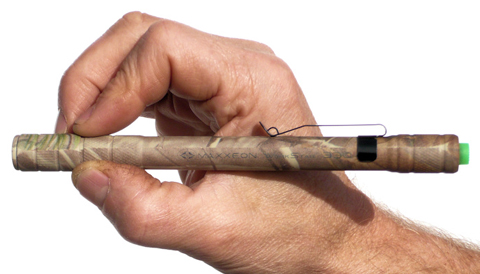
The Maxxeon WorkStar 330 Hunter’s Pocket Floodlight is perfect for focusing an even wash of light over a work area. Consider adding one to your survival kit. (Photo via Maxxeon.com)
I can’t say I’m a true flashlight nut, but I do appreciate having something reliable to light up the night. I’ve owned several Maglites of various sizes, as well as several other name brand and off brand lights.
The light has a rubberized RealTree camo print coating. While the camo pattern is nice and all, the coating itself immediately grabs your attention, as well as your fingers. It has an almost-but-not-quite sticky feeling. From the first time you hold it, you have no worries about dropping it, even if your hands are wet.
The Maxxeon Pocket Floodlight takes 3 AAA batteries, which are included. What is really nice is these batteries are Energizers, not some no name brand. You unscrew either end of the light to insert the batteries and the battery placement diagram is right on the package. Though, if you miss seeing it and put the batteries in wrong, it is a simple matter to reverse them so the light turns on properly.
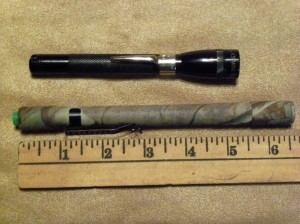
At 6.5″, it is a bit longer than other flashlights of this general size. This isn’t necessarily a bad thing, just an observation.
The on/off button is at the butt end of the light. You have two options, either press it lightly and hold or press it firmly until it clicks on. The button is a little stiff but I like that as it will help prevent the light from being turned on in your pocket or pack.
There is a pen clip on the side of the light, so you can keep it secured in a shirt pocket or attach it to the brim of a ball cap.
The threaded joints as well as the glass lens have embedded O rings, making the light water resistant. The on/off button is also covered in rubber, completely sealing the inner workings of the light. The cap on the button is also glow-in-the-dark, though it didn’t glow all that brightly for me. But, really, if you need a glow-in-the-dark button to tell you which end is which on this light, you have some serious issues.
Using the Maxxeon Pocket Floodlight
Information provided by Maxxeon states the Pocket Floodlight puts out about 140 lumens. I have no real way to test whether it is truly 140 lumens, but I can tell you this. If you accidentally shine it into your eyes, your reaction is going to be along the lines of OH MY GOD, TURN IT OFF! followed by rapid blinking as you try to get rid of this floating ball of light that seems to now be permanently part of your vision. This is an extremely bright light.
What is really cool about this light is that there are no “hot spots” or shadows. With most pen lights and other flashlights, you’ll get a bright spot in the center, then it sort of fades out around that. With the special reflector Maxxeon has devised, here you get a bright light that is consistent from side to side. It also shines at sort of a 1:1 ratio, meaning the circle of shining light is roughly the same diameter as the distance between the light and the object. In other words, holding the light 12 inches from a wall gives you roughly a 12 inches diameter circle of light.
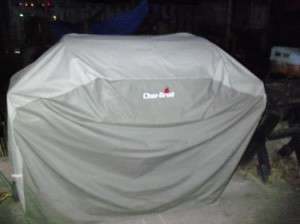
For comparison purposes, I took both the Maxxeon Pocket Floodlight and one of my Mini Maglites outside at night. Standing about seven feet away from my grill, here is what the Mini Maglite illuminated.
From the same distance, here is what the Maxxeon Pocket Floodlight showed:
There are few downsides to this light, in my opinion. With other pen lights, you can twist the lens and the light adjusts narrow or wide. There is no such adjustment here. I don’t know that it is truly needed, though.
This light also isn’t great for distance. It is a flood light, meaning it, well, floods the area with light. This is as opposed to a spotlight, that allows you to focus the beam onto a specific area. Again, not a bad thing as long as you understand that going in.
Information from Maxxeon states the battery life is about 2 hours to half-life and 4 hours total of useable light. Admittedly, I’ve not used a stopwatch every time I’ve turned the light on but I can say I’ve spent a LOT of time playing with this thing outside at night and it has yet to even noticeably dim.
With the batteries installed, the Maxxeon Pocket Floodlight weighs in at about an ounce. Heavy enough to where you’ll know it is in your hand, yet light enough to carry in your pack or pocket without concern.
Maxxeon Pocket Floodlight: The Verdict
The Maxxeon Pocket Floodlight retails for about $45, plus shipping. This product would make for an excellent addition to any survival kit, particularly one stored in a vehicle so as to not only provide light for repairs but also to signal for help.
The Ruger Single Seven is a dandy new mini-magnum that is perfect for small-game hunting and worth serious consideration as a lightweight, authoritative survival gun.
From Ruger single actions and the latest big bore .44, to European-styled No.1 rifles, here’s a few new dandies from the Ruger stable.
At the 2015 SHOT Show, there was no doubt as to which gun company won the award for most new products. Despite incredible sales and production demands over the last few years, Ruger’s product development guys steadfastly manned their stations and showed up in Vegas with lots of cool new stuff for shooters. Perhaps best of all is that when Ruger announces new guns, the company has production items in stock and ready to ship. Gone are the days when a new product announcement was simply a promise of something good to come at an undetermined future date. Having something new means they have some boxed and ready to travel. If you end up having to wait for product, it’s because you were slow to react and initial stocks were gobbled up.
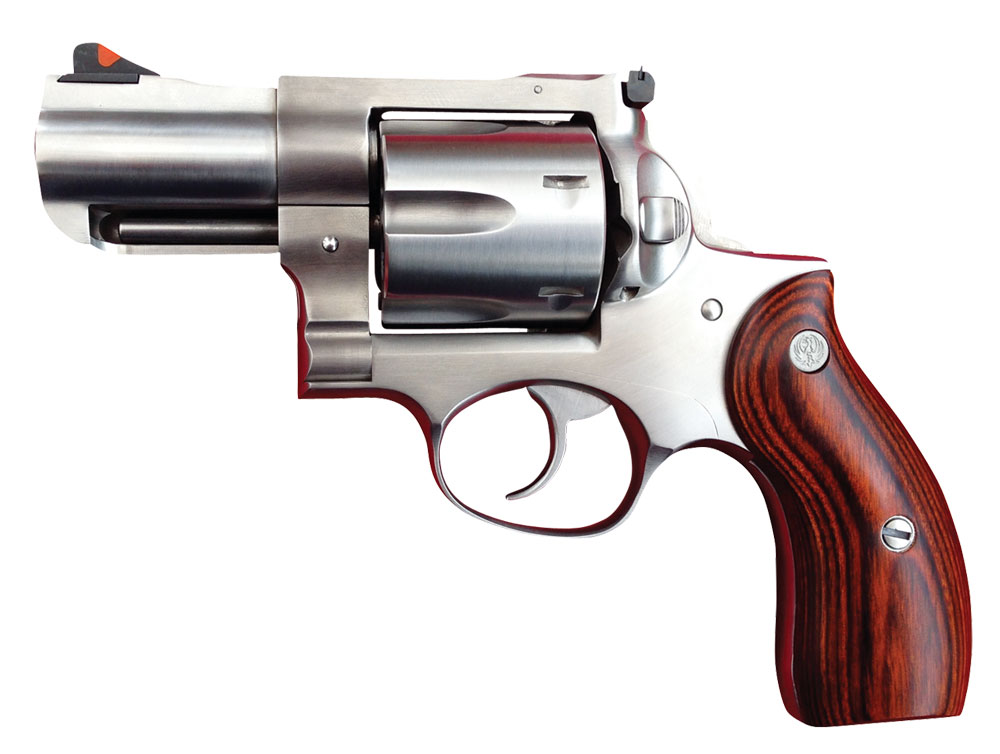
Ruger Redhawk .44
The Ruger Redhawk in .44 Magnum with 2.75-inch barrel doesn’t really qualify as a pocket pistol, but it may be the most effective and decisive CCW weapon ever. Photo by the author.
As a longtime handgunner, I have to start with the short-barrel products, and being a big-bore believer, I’m homing in on the new compact Redhawk in .44 Magnum. The stainless steel revolver sports a 2.75-inch barrel, weighs in at just under 3 pounds and holds six rounds of whatever brand and power level of .44 you’d care to load and think you can control. It has the small, fitted wood grips that I remember on the first Redhawks introduced around 1980. It’s good looking and compatible with smaller hands (unlike some other magnums,) but with recoil that can become quite unpleasant as the power level of the ammo increases.
Sharp edges have been rounded, or dehorned if you prefer, to minimize any damage the Redhawk may inflict on your hands in recoil, but as is the case with all magnums, you will still need to determine what level of performance you can handle.
With .44 Special ammo at 800-900 feet per second, the Redhawk rivals the .45 ACP for fight-stopping potential, at least for the first 6 rounds, and it doesn’t get much better than that. Should you want more power or penetration, Buffalo Bore, Corbon and Double Tap offer higher velocity .44 Special ammo loaded with jacketed hollowpoints or heavyweight hard cast bullets. For me, the “lightest load” from Garret Cartridges of Texas featuring a 310-grain hard cast lead bullet that generates around 1,000 fps was about all I wanted to handle, but it will still penetrate anything you might encounter.
When a group of writers attended a seminar at Ruger to fire a pre-production model of the compact Redhawk, the only guy “tough enough” to shoot more than a cylinder of full-power 240-grain .44 Magnum factory ammo was a strapping young Border Patrol agent. While I liked the gun on sight and knew it would make a great general-purpose revolver, my happy quotient was fully satisfied after six rounds of the heavy ammo. If you want to flatten the trajectory with higher velocity, you might look at some Magnum loads with the lighter 180-grain bullets and determine at what velocity your tolerance for recoil is reached. Given the Redhawk’s short sight radius and limited range, I’m more interested in maximizing power with heavier bullets at lower velocities inside 50 yards.
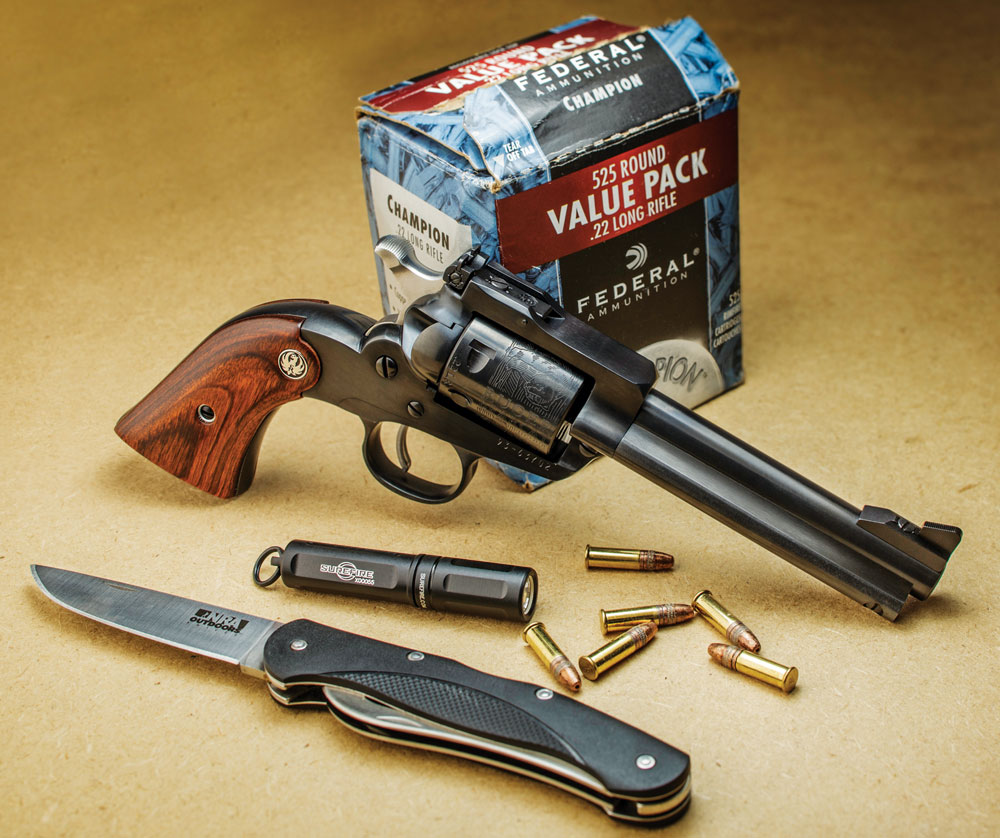
The perfect package for a day afield: a new Ruger Bearcat with adjustable sights, a brick of Federal ammo, a good pocket knife and a handy flashlight in case you want to stay out after dark.
The rear sight is fully adjustable with a white outline surrounding the notch. The front sight has a red plastic insert for enhanced visibility and is mounted in a slot cut into the heavy rib on top of the barrel.
It can be replaced by a different sight simply by pushing in the spring-loaded pin and lifting the sight off. The red plastic insert is nicely visible against a dark background as long as there is adequate ambient light. The red becomes dramatically less visible as light diminishes. I find the factory red insert quite serviceable for general use and as a field gun.
Capable of both single- and double-action firing (with a very smooth double-action pull) the Redhawk is better than many magnums in the event things deteriorate and you find yourself in a defensive situation. Mounted in a Galco D.A.O. belt holster, the compact .44 is readily accessible and can be carried for long periods of time with little or no discomfort.
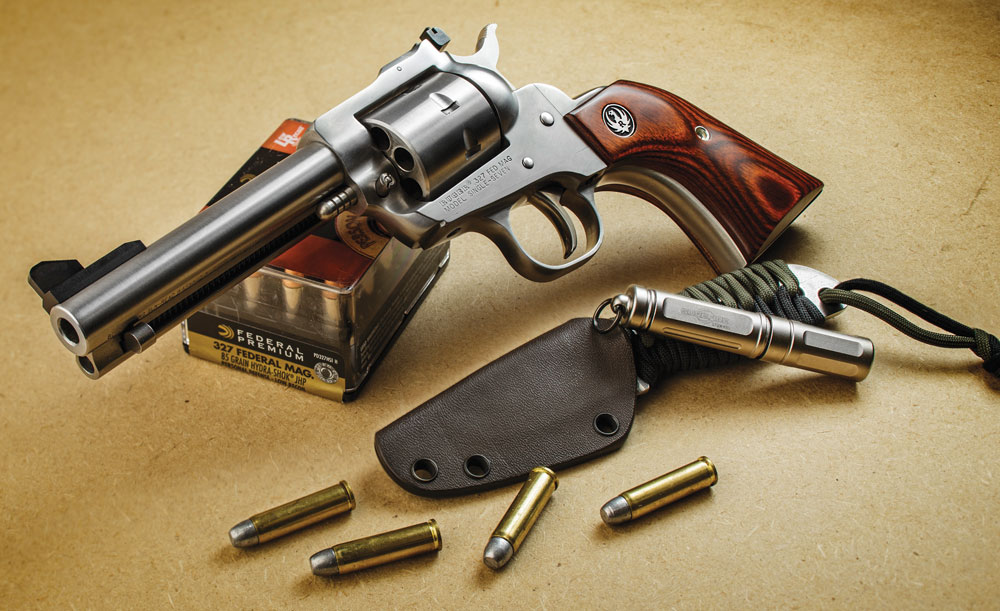
Ruger Single Seven .327 Fed Mag
A few years back, Ruger chambered its classic Single Six revolver in .32 H&R Magnum. This year, the Single Six is again available in a magnum caliber, only now it holds seven rounds of Federal’s .327 Magnum. While the power output is increased by 50 percent over the original .32 Mag., you can still shoot the original .32s for small game and a quieter field trip. Since this is the same size gun as your first Ruger .22 single action, there’s no learning curve; you’re as good a man as you were when you got that first Ruger .22 at age 16!
Except for its stainless steel, the .327 Fed. Mag. Single Seven is the classic .22 Ruger with larger holes in the barrel and cylinder. Good news is that all three of the “classic” single-action barrel lengths are available: 4.75, 5.5 and 7.5 inches. During some very brief range time, I was able to shoot all three. My quick conclusion is that the 7.5-inch barrel had slightly more muzzle flip with the more powerful .327 loads, while the 4.75-inch was easiest to carry. The 5.5-inch was a compromise but felt more like the 4.75-inch barrel. Advantage of sight radius goes to the longest barrel, although all of the models have the adjustable, black Ruger single-action revolver sights that are quite good for daylight hunting.
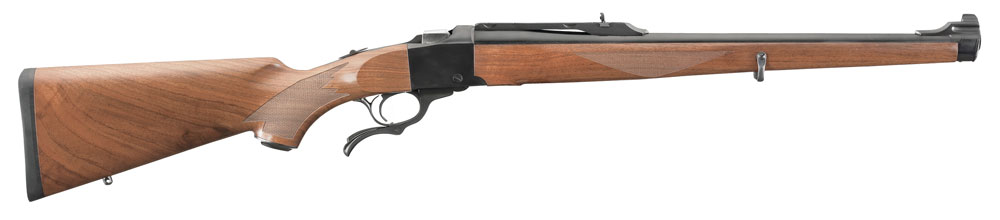
Ruger’s No. 1 RSI-International rifle in .257 Roberts may not be for everyone, but the international touch of a full-length stock has always been able to loosen the author’s purse strings.
The variety of factory ammunition available for the .327 is excellent. Cast and jacketed hollowpoint .32 Mag loads are available from Black Hills and Double Tap, while Hornady offers their Critical Defense FTX bullet load. More powerful .327 Magnum loads come from Federal (jacketed hollowpoints) and Double Tap (both JHPs and heavier 115-grain hard cast solids). Depending on barrel length, you can get anywhere from 800-1,600 fps. This may be the ideal small- or medium-game gun and caliber combination, and if I don’t get a chance at jack rabbits and javelina this spring, the .327 and I will go after prairie dogs this summer at the SPUR Ranch in Wyoming.
Ruger Bearcat .22
Also in the Lilliputian category, Ruger has introduced a long awaited variation of the Bearcat, this one with adjustable sights. Slightly smaller than the Single Six, the Bearcat is all steel (either blue or stainless), sports a 4.2-inch barrel, weighs 24 ounces and holds six rounds of .22 Long Rifle ammo. The front and rear sight look like the adjustable sight system on the Single Six with a wide ramp front blade and fully adjustable rear blade with a wide notch. Given enough ambient light, even I can get a good sight picture without glasses. I’m not sure whether the Bearcat is intended as a first gun for young kids or the final plinking revolver for older guys with fading vision. If this Bearcat had been available when I was young, I would have purchased it as my first handgun, then given it to my kids and taught them how to shoot with it, and finally tried to borrow it back in my “golden years.”
Like Ruger’s other modern revolvers, the new Bearcat has the two-screw frame and transfer-bar system and also a half-cock position for the hammer. Opening the loading gate does not release the cylinder to turn freely; only putting the hammer at half cock allows you to rotate the cylinder for loading and unloading. Cylinder chambers align perfectly with the ejector rod at the cylinder stop points. Despite the gun’s petite size, the hammer is quite wide – much like the Super Blackhawk. With serrations on the spur, it was extremely easy to operate with the thumb of either hand. What a dandy gun for an afternoon walkabout in the country!
For years Ruger has offered a limited selection of their No. 1 single-shot rifles with Mannlicher (full length) wood stocks in a few calibers. This is the Model RSI-International, and production lines do not run year-round, so availability of the different calibers can be restricted. Last year, Ruger introduced a new caliber in the rifle, the .257 Roberts. What a great American caliber choice for a European-style rifle! New this year is the 6.5×55, truly a European caliber for a European/International-type rifle.
Guns are an exclusive through Lipsey’s Wholesale Firearms Distributor. Lacking an action behind the barrel, these rifles are incredibly compact and handy with their 20-inch barrels. If your shooting objectives are to maximize the number of rounds downrange in the minimum amount of time, this is not the gun for you. But for those of you who like precise shooting and also suffer from my “long stock” affliction, they are irresistible, and Ruger seems interested in making them available in additional calibers. I have the .257 in my vault but have not yet scoped and fired it. If I can obtain a 6.5 and a writing assignment, perhaps a handful of fellow cultists will have some interesting reading next year.
Worthy of mention is that the Red Label over/under shotgun has been taken out of production. It was put on hiatus for a couple of years recently and then made a brief comeback, but this may be the end of the line for the Ruger scattergun. Although, the company has made no official announcement as of this writing.
Other surprises will be forthcoming from Ruger as the year moves ahead, but in keeping with their “No production quantities, no announcements” policy, we’ll have to wait and see. Meanwhile, keep an eye on the Ruger website; if you see it there, it’s available.
Looking to go armed, but are stuck in the weeds as to what to arm yourself with? Here are 20 of the best concealed carry gun options that will keep you on the defensive.