[imagebrowser id=454] Pine trees and lobsters typically come to mind when talking about the state of Maine. But, really, firearms shouldn’t be too far behind—particularly the collectable kind.
That is because just up the road a spell from the state’s rocky coastline is one of the nation’s premier firearms auction houses. And recently, this nearly 60-year-old company continued to prove it is among the top places to move highly sought after handguns, rifles and shotguns.
James D. Julia reported raking in approximately $15 million in its Oct. 5-7 gun auction with an impressive volume of guns moving across the block at some jaw-dropping prices. The auction house reported 412 lots moving for $10,000 or more, 175 for $20,000 or more and 7 for $100,000 or more. But the auction company was not the only show in town.
In the preceding three days to the Julia auction, Poulin Auction Company—located directly next to Julia—recorded some $4 million in firearms sales. This means that in six days, Fairfield played host to around $19 million in gun sales. And after a quick gander at what James D. Julia was moving, it doesn’t take a seasoned collector to know why pocketbooks were broken out.
As the above gallery proves, the auction house moved some truly beautiful and historic guns. Take a look. Just be careful not to drool on the merchandise, please.
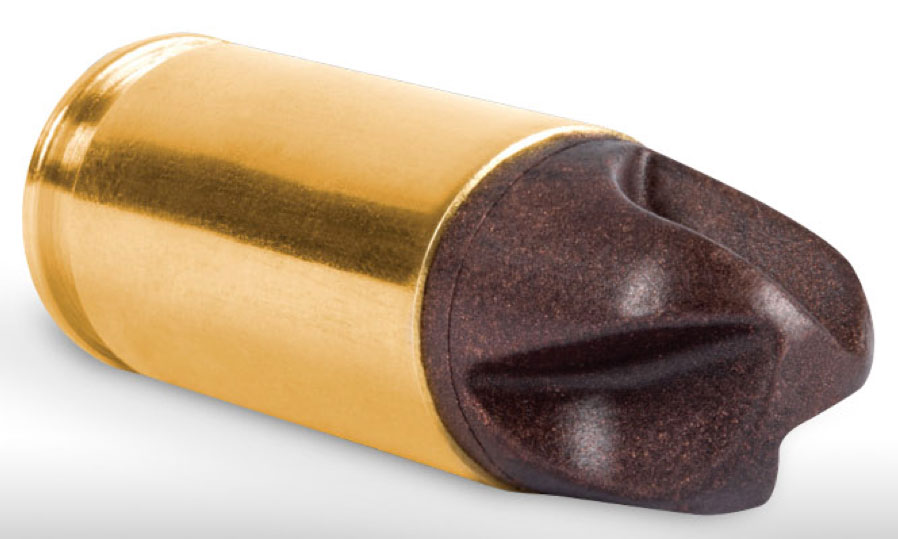
A new polymer-copper blended bullet made by PolyCase Ammunition and licensed by Ruger promises to deliver ultra-high velocity and superior terminal ballistics for personal protection.
Plastic bullets aren’t new, they’ve been used since the early 1970s as non-lethal projectiles and training aids. However, a new polymer-blended-with-copper job from Ruger and PolyCase Ammunition aims to take copper-impregnated plastic onto the mean streets and is billed as a “force multiplier” for lethal force applications.
According to Ruger, the distinctive bullet profile transfers maximum energy to the target by fluid dynamic effect. The non-expanding Ruger ARX exploits the bullet’s velocity to redirect energy laterally via flutes in the bullet ogive. This effect results in stopping power and terminal performance that rivals that of many expanding handgun bullets, they report.
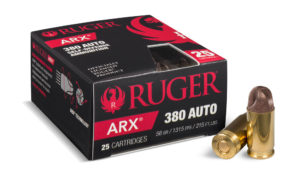
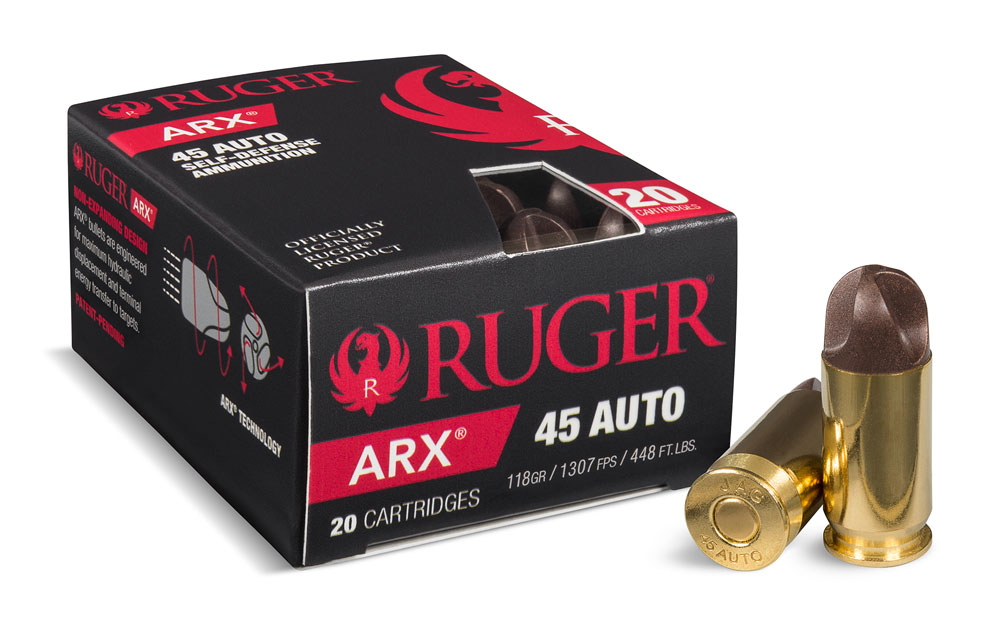
ARX Self-Defense Ammo
The design of the Ruger ARX allows it to feed like a round nose yet still transfer energy to targets effectively over a wide range of bullet velocities. The ARX penetrates many barriers without deformation and penetrates through clothing without clogging and degrading terminal performance.
The Ruger ARX ammunition utilizes injection-molded copper/polymer matrix projectiles. Unlike traditional bullets, this unique material can be molded into complex shapes like the ARX bullet configuration. These lightweight bullets are launched at high velocities and achieve very high energy levels, but at nominal or even reduced recoil levels—while reducing the loaded weight of firearms and spare magazines. The copper/polymer bullets fragment upon striking solid backstops, Ruger said.
Currently, the ammo is available in .380 Auto and .45 ACP. The .380 is said to be clocking 1,315 feet per second (fps) with a 56-grain bullet—putting about 215 foot-pounds (ft.-lbs.) on target. The .45 ACP does about double that, with its 118-grain bullet at 1,307 fps for 448 ft.-lbs of energy.
Browning’s new X-Bolt Varmint Stalker is tailored to tackle everything from hogs to prairie dogs.
Browning’s new X-Bolt Varmint Stalker is tailored to tackle everything from hogs to prairie dogs.
There are many factors that drive the popularity of game species. Perhaps the chief among these are accessibility to hunting grounds and success once there.
With these factors in mind, it’s no wonder the ranks of varmint hunters have swelled in recent years. There are coyotes coast to coast. Hogs abound from the Deep South to America’s Heartland. And nearly everywhere there are more woodchucks, prairie dogs and other rodents than you can shake a stick at.
The interest in taking these less-than-desirable beasts has had its effects on the shooting industry. More and more gun makers are producing firearms chocked full of features that help ensure a round lands on the critter it’s aimed at. Browning is among them.
The Utah-based company recently expanded one of its most extensive rifle collections to include a model tailored for taking sly little beasties. And, at first blush, the X-Bolt Varmint Stalker appears to have the bells and whistles that would make it a dandy, whether calling ‘yotes or assaulting prairie dog towns.
What should catch the attention of varmint hunters right off the bat is the new X-Bolt’s barrel. It is outfitted with a heavy sporter barrel, which should aid in the gun’s accuracy by providing more rigidity and better harmonics. And for those who eye a Varmint Stalker as a range gun, the heavier barrel also has the added benefit of being more resistant to heat flex from shooting long stints.
The barrel measures in at 24 inches on four of the rifle’s calibers — .204 Ruger, .223 Remington, .243 Winchester and .308 Winchester. However, the .22-250 has a 26-inch barrel. Each caliber has a different twist rate, tuned to take advantage of lighter bullets and higher velocities.
Even with more weight invested into the barrel, the overall platform is light. Browning has achieved this by outfitting the gun with a composite stock, which has the Varmint Stalker tipping the scales at a whisker under 7 pounds. As a bonus, the stock is finished with Mossy Oak’s Brush camouflage pattern, allowing it to blend into a wide variety of cover.
The Varmint Stalker has a number of features common to all X-Bolt rifles. Of these, among the most notable is the Feather Trigger, which has a pull weight that can be adjusted from 3 to 5 pounds. Other common features include: an X-Lock scope mounting system, bolt unlock button, Inflex Recoil Pad and detachable rotary magazine.
Presently, Browning lists the Varmint Stalker’s MSRP at $939.99.
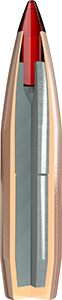
Hornady engineers, using Doppler radar to study bullet flight, have discovered that polymer tips melt as they slice through the air, resulting in a varied ballistic coefficient (BC) from the time the projectile leaves the muzzle until impact.
This revelation lead to the development of the Hornady® ELD-X™ with Heat Shield™ Tip, which promises improved match-grade accuracy with the terminal performance of the company’s top-performing hunting bullets.
The new Hornady ELD-X™ (Extremely Low Drag – eXpanding) is really exciting news for long-range hunters and match shooters taking pokes beyond 400 yards. That’s because, while the accuracy of the super-tip pill is said to be sub-MOA — something accuracy hounds will appreciate at any distance — the new revelations about changing BC from tip meltdown will really prove beneficial in predicting long-range shots.
“While I have never had the opportunity to witness a melted polymer tip on any of the bullets I’ve ever used – all that I’ve recovered have been deformed from impact – this principle unveiled by Hornady certainly makes sense,” said Gun Digest contributor Philip Massaro, author of Understanding Ballistics. “The correction of this heretofore unknown issue will certainly aid in long-distance accuracy by keeping the bullet conformation constant and maintaining the highest Ballistic Coeffiient possible. I look forward to testing Hornady’s new bullet.”
The new heat-proof pills are available as component bullets for reloaders or in factory-loaded ELD-X Precision Hunter ammunition. ELD-X bullets are “heavy caliber” — the 7mm offerings are 162- and 175-grain right now — and are designed for maximum ballistic coefficients, highest levels of accuracy, consistency and extreme lethality at all practical hunting distances, according to Hornady.
ELD-X™ EXTREMELY LOW DRAG – EXPANDING
Best-in-class BCs Verified by Doppler radar, the Heat Shield™ tip defies the effects of aerodynamic heating and retains its shape to maintain the highest-in-class BC over its entire trajectory.
Match-accurate hunting bullet Streamlined secant ogive with optimum boattail design + highly concentric AMP® bullet jackets + patent pending Heat Shield™ tip combine for radically superior aerodynamic efficiency.
Devastating conventional range performance With high velocity, 0-400 yard impact, the bullet continually expands throughout its penetration path. The thick shank of the jacket and high InterLock® ring keep the core and jacket together providing 50-60 percent weight retention.
Best extended range terminal available Upon low velocity, 400+ yard impacts, Heat Shield™ tip drives backward into bullet to initiate expansion. Exhibiting expansion with a large and 85-90 percent retained weight provides deep penetration and large cavities. Available as component bullets or in factory-loaded Precision Hunter™ ammunition.
Caliber
6.5mm
7mm
7mm
.308
.308
.308
.308
Weight
143 gr.
162 gr.
175 gr.
178 gr.
200 gr.
212 gr.
220 gr.
G1 BC
.620
.613
.660
.535
.626
.673
.650
G2 BC
.311
.308
.330
.271
.315
.336
.325
Also Check Out:
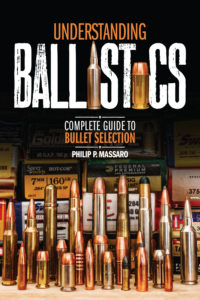
Understanding Ballistics Tailor your ammunition choice to the task at hand and ensure you’re choosing the right bullet every time with Understanding Ballistics by Philip P. Massaro. Narrow down the vast array of ammunition options with detailed information and expert reviews of available bullets, and come to a better understanding of bullet technology and performance. Plus, learn about the physics of the bullet and its effects once it hits the intended target. Get Your Copy Now
Internet retailer Midwest Gun Works (MGW) does a steady business in selling gun parts, both for repairs/replacements and upgrades.
“This time of year [late summer] with trap shooting in full swing and the hunting season upon us, shotgun parts, parts kits and performance upgrades are in high demand,” MGW’s customer service manager Geno Valenti said. “Many MGW customers order OEM [original equipment manufacturer] parts for quick repair while others will be stocking up on parts as spares, should a problem occur in the field. High performance Shotgun parts upgrades are always big sellers. Sure Cycle systems for the entire line of Benelli shotguns always remains a top seller.”
For handguns, trigger upgrade kits and aftermarket grips are selling well. However, Valenti points out, “The most popular upgrade for pistols that we sell has to be new sights. Between adjustable rears and night sight sets, we regularly have customers sending in the slides for their guns for us to install the sights for them.”
Mini red dot sights, by Insight, are strong sellers here, starting at $459, while Tritium night sights by AmeriGlo are always popular.
For AR shooters, top replacement parts include spring, pin and bolt component kits. A very big seller in this line is the DPMS Field Repair Kit for just over $22.00.
Editor’s Note: This brief originally appeared in the October 2015 issue of Gun Digest the Magazine.
Perhaps the oldest gun to make headlines in 2015 was also the one that captured the most imaginations. That’s to be expected with a firearm that presents as much mystery as the Winchester 1873 found at Nevada’s Great Basin National Park.
Theories abound as to exactly how the iconic lever-action found its way under one of the park’s many pine trees. And for the most part, the rifle’s roots will most likely remain a head scratcher.
Or at least that’s Ashley Hlebinsky’s contention in the above video by the National Shooting Sports Foundation. The curator of the Cody Firearms Museum in Cody, Wyo., fully admits there can only be some ballpark estimates made about the rifle’s origins. But she adds that’s most likely the reason why the Winchester has become such a sensation.
The entire video is worth a watch with Hlebinsky going into some of the conservation efforts being made on the historic rifle. She also touches upon some interesting discoveries made once the rifle reached the museum.
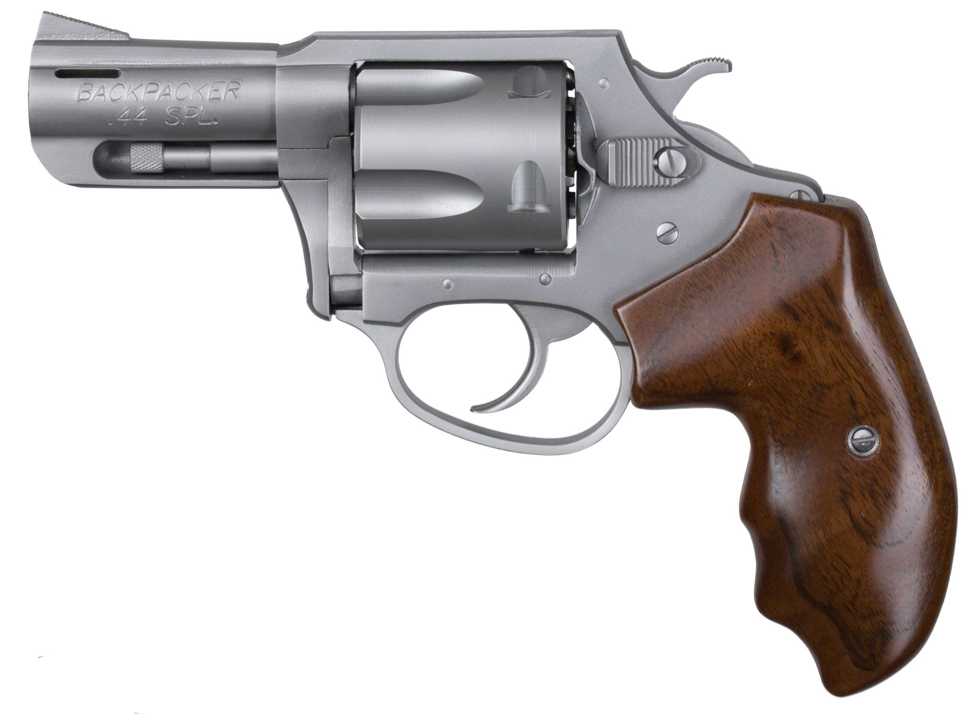
Lew Horton is offering a classy looking Charter Arms .44 Special — the Backpacker Revolver.
There have been plenty of companies that have bored revolvers for the venerable .44 Special. But in the modern era, there is one manufacturer whose name has become particularly intertwined with the big-bore round.
Charter Arms founder Doug McClenahan introduced his .44 Special revolver — the Bulldog — in 1973. It was a move that flew in the face of conventional wisdom at the time. Many believed at that point the .44 Magnum had relegated the older round to the ash bin of history. But McClenahan’s intuitions about the .44 Special proved to be accurate.
The Bulldog earned its place in firearms history, becoming one of the top selling revolvers of the 1970s and 1980s. All that time, the sturdy, compact and safe Bulldog never lost it blue-collar looks or reliability. But recently, the Connecticut manufacturer’s easy-to-carry .44 Special has received a bit of a makeover.
Well, to be more exact, Charter Arms is offering a dolled up limited edition version of its Bulldog through Lew Horton Distributing — the Backpacker Revolver.
Perhaps the most eye-catching aspect of the special edition revolver is its grips. The five-round handgun has been fitted with an elegant set of walnut grips, designed not only to enhance form, but also function. The round-butt naturally conforms to the hand, and the grips are further enhanced with three finger holds to ensure a firm purchase on the firearm.
The revolver also has its special edition name — Backpacker — etched on the left side of its 2.5-inch barrel. While perhaps not the biggest selling point to some, it nonetheless adds appeal to the gun given its extremely limited run. Only 50 Backpackers have been produced.
The .44 Special has fixed front sights and a sight groove in place of a rear sight. It also has all the features fans of Charter Arms have become familiar with over the years. Of these, the most notable are its one-piece frame, three-point cylinder lock, short hammer throw and hammer block transfer bar safety. This final feature ensures the revolver does not fire unless the trigger is at its full rear position.
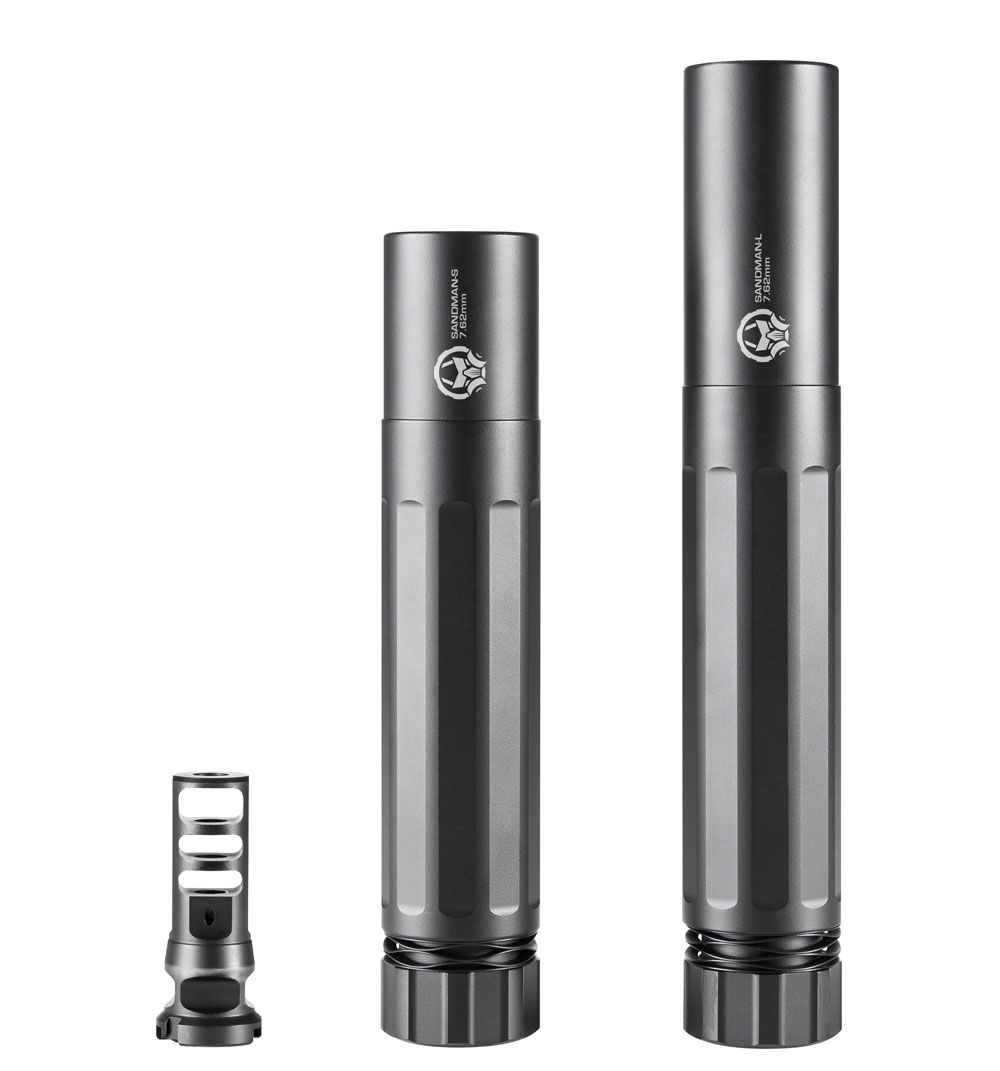
There are many good reasons to add a suppressor to a home defense gun, and not too many arguments against.
The muzzle blast from a 16-inch-barreled AR-15 is noticeable; out of a 10-inch barrel like the one found in the SIG P516 AR-style pistol, the blast is even closer to the user.
I imagine in the confines of a small room the sound and force must sound and feel like fury unleashed.
Some shooters have an aversion to the .223 round not so much for the recoil but for the muzzle blast a 60-grain bullet leaving a barrel at 2,700 fps is going to create.
One of the jobs a suppressor can do is reduce muzzle blast. Buying a can adds weight and length to an AR pistol, plus there is the required paperwork and $200 tax stamp, but that might be the trade-off.
The SIG SRD556-QD offers reduction in sound and muzzle blast, so a sensitive or experienced shooter is less affected by the blast and can better concentrate on shot placement. The SRD556-QD offers a quick-detach interface and is available in steel or titanium construction.
The Dead-Air 7.62 Sandman-S (the “S” stands for Short) offers easy attachment and detachment and is constructed using heat-treated stainless steel. The Delta P Design BREVIS II is a lightweight suppressor that offers reduced sound and visual signature in a stubby can that is only 3.7 inches in length.
This article appeared in the Fall 2015 issue of Gun Digest the Magazine.
Over-penetration is a concern with home defense ammo no matter what the caliber. Here are some loads up to the task.
When using the .223 for home defense, leave the FMJs for range work. These bullets are designed to punch holes in flesh, steel, wood or nearly any material that is in its trajectory.
Bullet technology has evolved in recent years. Now there are bullets that break apart when they strike drywall or wood, and when they hit flesh, they do no over-penetrate, instead transferring most of the energy into the home invader.
HPR Ammunition’s Black Ops OTF is designed for law enforcement and home defense. Using a 62-grain Open Tip Frangible bullet, it is designed to create massive force trauma in soft targets, while breaking on impact on hard targets.
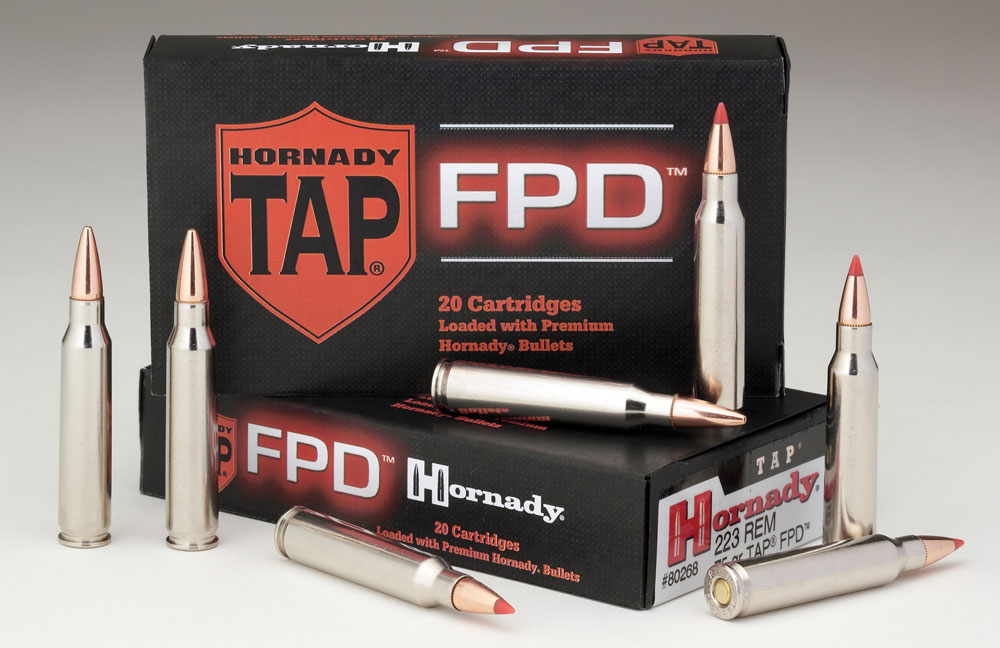
Other loads suitable for home defense include Hornady TAP FDP Personal Defense Ammunition and Winchester PDX1 Defender Self Defense ammo. The Hornady TAP FDP is deigned to cause dramatic wound cavities while reducing the risk of over penetration. The cases are also nickel plated for optimal reliability.
The Winchester PDX1 60-grain bullet uses Split Core Technology (SCT) that features a quick-expanding front lead core and deep-driving bonded rear lead core.
The bolt-action hunting rifle that inspired a million copies is back in production and better than ever. Check out Rigby’s Magnum Mauser in .416 Rigby.
Considered the perfect repeating bolt-action dangerous game rifle, Rigby’s Magnum Mauser in .416 Rigby delivers 5,100 foot-pounds of energy and 52 foot-pounds of recoil.
An excellent compromise between full-sized and sub-compact, the Glock 19 remains a top choice in double-stack 9mm pistols.
Why you should consider the Glock 19 for concealed carry:
Outstanding middle ground between full-sized and sub-compact pistols.
Handles and shoots much like a full-sized pistol.
Magazines are and will always be plentiful.
Variety of magazine capacities available.
Very trim compared to other 15+1 capacity pistols.
Relatively easy to conceal.
Widely used in law enforcement.
Glock 19 Gen 4 and Glock 19 Gen 5 offer removable backstrap systems.
The Glock 19 was the second Glock pistol released to the civilian market, with production beginning in March,1988 (It beat the G17L by one month). The Glock 19 is one of the two pistols that have been around for all five generations, though first-generation G19 Glocks were only prototype, so they are extremely rare. After all these years the Glock 19 is still the second most popular Glock model, after the Glock 17.
Glock 19 Vs Glock 17
This compact 9mm Glock is just a G17 that has been made 0.67 inches shorter in length and 0.56 inches shorter in the grip. It’s about 1.4 ounces lighter. It is an excellent compromise between the full size and the sub-compact. The definition of a “compact” pistol can sometimes get a little murky because if you look at the Glock 19, it looks like a full-size handgun. The designation is relative and differs from company to company. What one company calls a full-size, another calls a compact. This is especially true for companies like Glock, which manufactures combat/duty pistols that are often larger than other pistols.
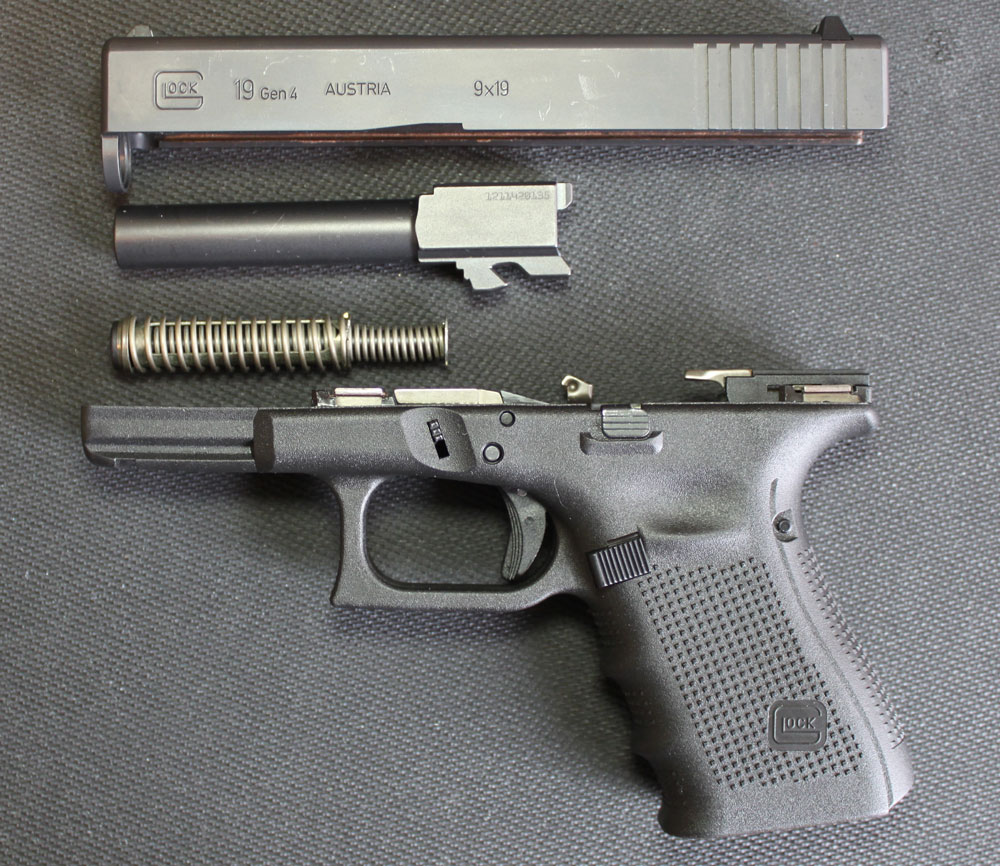
A field stripped G19.
The Glock pistol sizes can be summarized by how they are used within police departments—the full-size pistols (Glock 17, Glock 22, etc.) are generally issued to uniformed police officers who open carry. The compact pistols (Glock 19, Glock 23, etc.) are generally issued to plainclothes officers, where concealment is not necessary, but being discreet is.
The sub-compact pistols (Glock 26, Glock 27, etc.) are generally issued to undercover officers, where concealment is needed. Of course, this is a generalization and not always the case; some departments just issue the compact pistol to everyone.
If I could only own one handgun, which is thankfully not the case—God bless America—it would be this one. It’s big enough that it handles and shoots much like a full-size handgun, yet compact enough that it can be concealed with a jacket, vest, or even a properly designed shirt. It’s roughly the size of a 1911 Commander, though a little bit smaller and lighter. It makes for an excellent “go to” handgun.
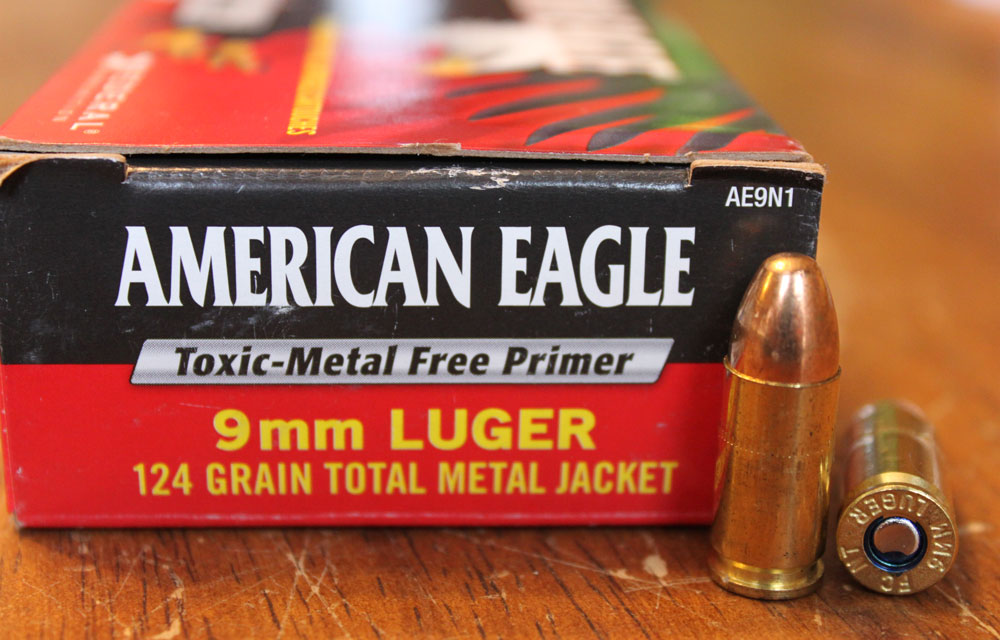
The 9×19 cartridge is the most common cartridge in America, and aside from the popularity among civilians, it is the US military standard cartridge, the NATO standard cartridge, and the choice of many police departments. Plus, since it also uses Glock 17 magazines, with the sheer number of G19s and G17s in America, magazines will always be plentiful.
Glock 19 Capacity
Whether real or perceived—and I’m going to refrain from entering into politics here—the threat to “high capacity” magazines (or what we in the gun community call standard capacity) has led to a boom in sales of these magazines, with boom being an understatement. So there are a lot of them out there.
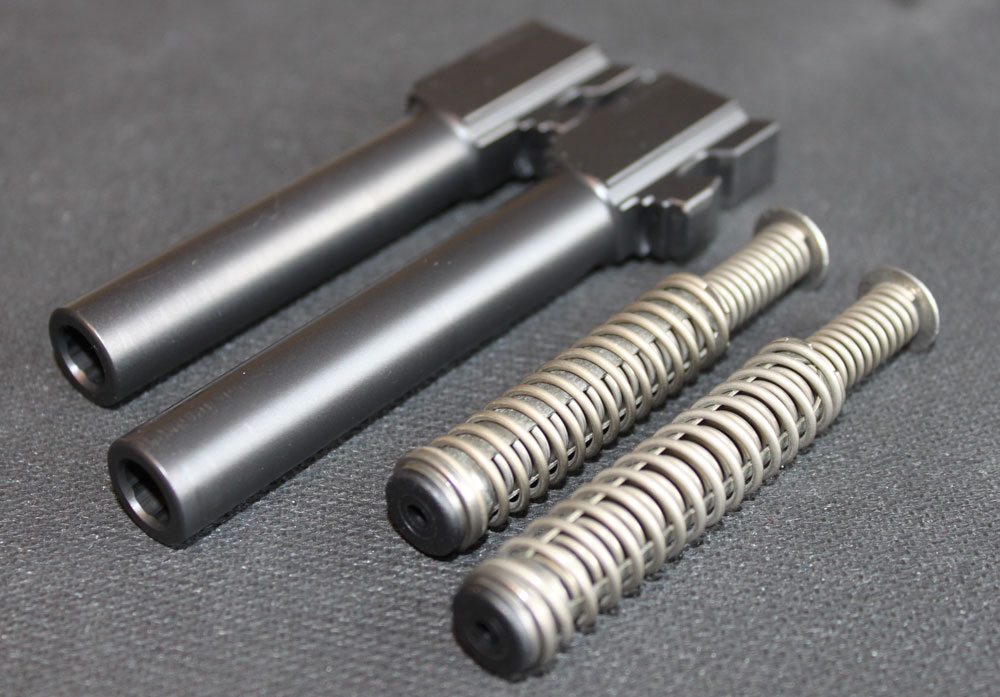
A Glock 19 barrel and spring (the top barrel and the top spring) compared to a Glock 17 barrel and spring.
Glock engineers have always been excellent at stuffing the maximum number of rounds into their magazines. Evidence of this is found when you compare the same-class offerings of other manufacturers. Compare the Ruger SR9c, Smith & Wesson M&P9c, and Springfield Armory XD(M) 3.8 Compact. To compare magazine capacity, one must consider height, which is determined primarily by grip height, and this, along with grip width, is one of the biggest determinants of magazine capacity.
Of the compact models, the Glock 19 has a 15-round capacity, with a 4.9-inch height and 1.18-inch width. It has a slightly longer grip than the other three, but that extra grip gives you the highest magazine round count at 15. The XD(M) 3.8 Compact is 4.75 inches in height with a magazine capacity of 13 rounds, so it’s only .15 inches shorter than the Glock 19, but loses two rounds. The Smith & Wesson is 4.3 inches in height with a 12-round capacity. It’s 0.6 inches shorter than the Glock 19, and it loses three rounds. It’s not a terrible trade-off, three rounds for just over half an inch—better than losing two rounds for only a .15-inch shorter grip.
The Ruger falls somewhere in the middle, with a 4.61-inch grip height, but loses out in capacity with a 10-round magazine—five rounds less than the Glock 19. That’s only two-thirds the capacity. I’m a fan of Ruger, but in this case it looks like they chose lawyers and economics over consumer desire for higher magazine capacity.
The popularity of the 9mm is at an all-time high in the US. So when advancements are made in handgun cartridge design, it’s going to hit the 9mm first.
Everyone has to make a 10-round magazine for states like California, but Ruger chose to make all of its SR9c magazines 10-round capacity. I guess that saves money because they only have to have one type of magazine made for them, and only half the models in inventory (other companies have two of each model, one regular-capacity model, and one 10-round magazine model for states that have magazine maximum capacity laws—effectively making two models for what would only be one model).
I don’t like it when lawyers drive design, and I also don’t like it when companies go strictly off the bottom line. I realize that a company needs to be profitable, and it’s their choice to only offer a 10-round magazine, but I think in the long run it hurts their market share.
Glock 19 Specs:
Caliber: 9mm Capacity: 15+1 Weight (unloaded): 21.16 ounces (Gen 3 & 4); 21.52 ounces (Gen 5) Barrel Length: 4.02 inch Overall Length: 7.36 inch Slide Length: 6.85 inch Overall Width: 1.26 inch Slide Width: 1.0 inch Height (including mag): 5.04 inch Sight Radius: 6.02 inch (polymer); 5.98 inch (steel), 5.94 inch (GNS) Trigger Distance: 2.80 inch (Gen 3); 2.76 inch (Gen 4 & 5)
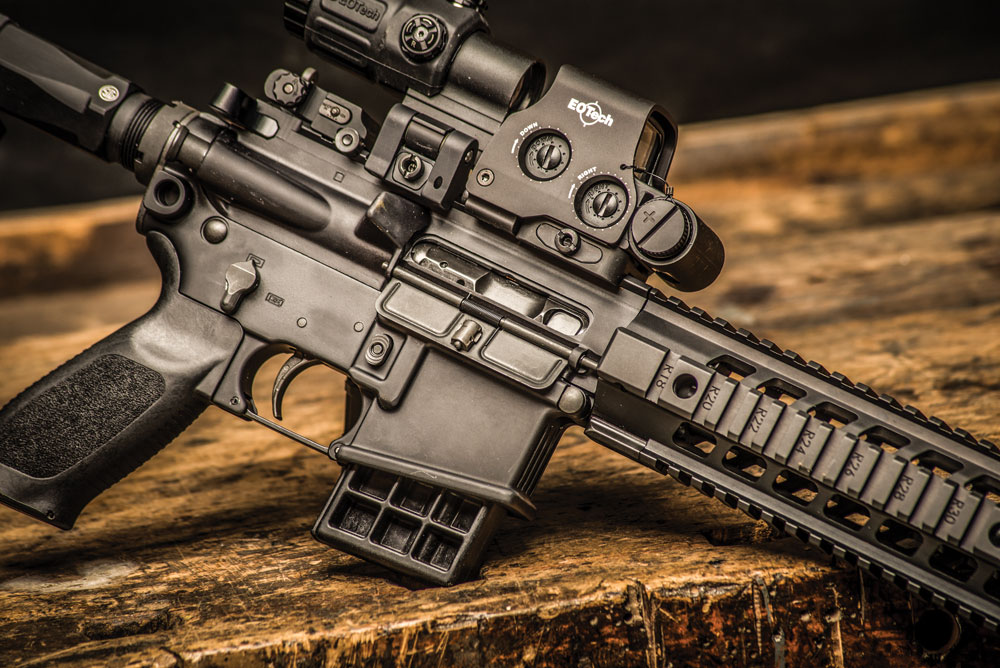
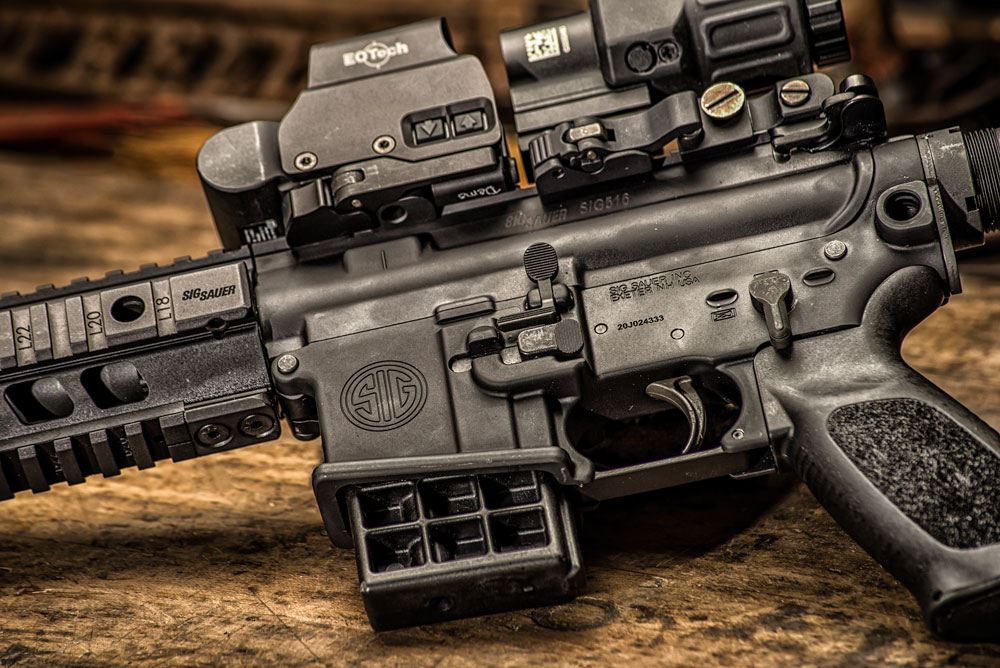
The author takes a look at a world-class AR pistol well-suited for home defense in this SIG P516 review.
The P516 features SIG’s proprietary grip.
The weapon you choose to defend your home must be maneuverable, compact, simple to use for you and your household members, and it must provide the necessary firepower to stop an intruder. AR pistols are just that type of weapon for home defense, and the SIG P516 pistol with the SB15 Pistol Stabilizing Brace is the type of weapon designed for close-range maneuvering. The SIG P516 has a hard earned reputation among military and law enforcement personnel in the U.S. and around the world as a reliable, capable firearm.
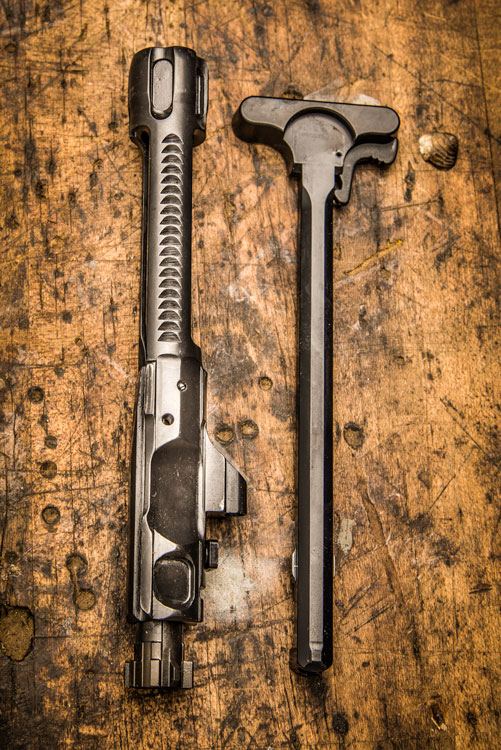
The P516 is based off the SIG 516 rifle, which is built on an AR-15-type platform with a refined operating system that is combat-reliable. Instead of the traditional direct-impingement gas system found on a standard AR-type platform, the 516 series—both the rifle and the pistol—use a short-stroke, gas-piston/pushrod operating system. This piston system ensures that carbon fouling and excess heat never reach the chamber or bolt carrier.
In turn, this significantly improves the weapon’s functionality. There is minimal heat to dry out oil or gunk from burning gases.
All About That Gas
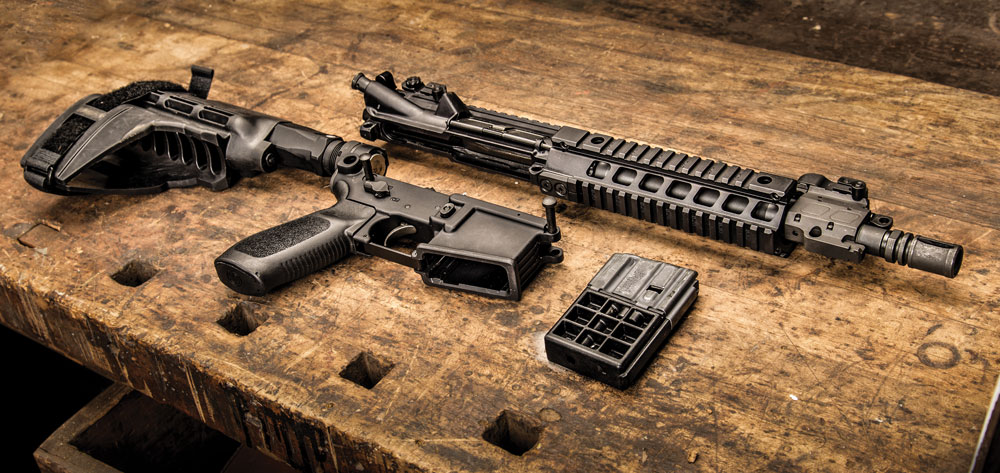
P516 shown with Brownells magazine.
This operating system also uses a four-position gas valve that allows a user to adjust the gas in one of four positions. Position No. 1 provides normal gas flow to operate the P516. Position No. 2 allows extra gas flow for adverse situations, such as when the weapon is fouled and short stroking. Position No. 3 reduces gas flow to enhance suppressor use, and position No. 4 turns off the gas value for optimized suppression and makes the P516 function as a single-shot pistol. Most users will keep the gas value in position No. 1, but it is useful that SIG’s engineers allowed the value to be adjusted for numerous scenarios and circumstances. Practically useful, the valve can also be adjusted using the tip of a cartridge.
When it comes down to it, an AR pistol is a compromise that spans the gap between a typical 16-inch-barreled AR-type rifle and an AR-type Short Barreled Rifle (SBR). The difference between the 16-inch AR-type variant and the SBR, other than the barrel length, is the paperwork required to legally own an SBR. This includes an ATF Form 1, local law enforcement approval and the purchase of a $200 tax stamp. The “AR pistol” designation allows gun owners to avoid the additional paperwork while maintaining a shorter barrel. The compromise, of course, is the absence of a butt stock. The solution to that problem, if you can call it that, is the SB15 brace. The SIG P516 with the SB15 brace makes the pistol easier to control. It’s certainly not the rock-steady hold of a butt stock, but it’s steadier than the typical handgun hold.
The P516 is built with forged 7075-T6 aluminum upper and lower receivers with a hard coat anodized finish. The upper features a free-floated, military-grade, nitride-treated, 10-inch barrel with a twist rate of 1:7 inches with six grooves. At the muzzle is an A2-style flash hider. When decreasing the length of barrel in the AR-type platform, having adequate gas to operate the system is an engineering challenge. After speaking with a SIG spokesperson, they agreed it was a challenge, and that is why the short-stroke system is used.
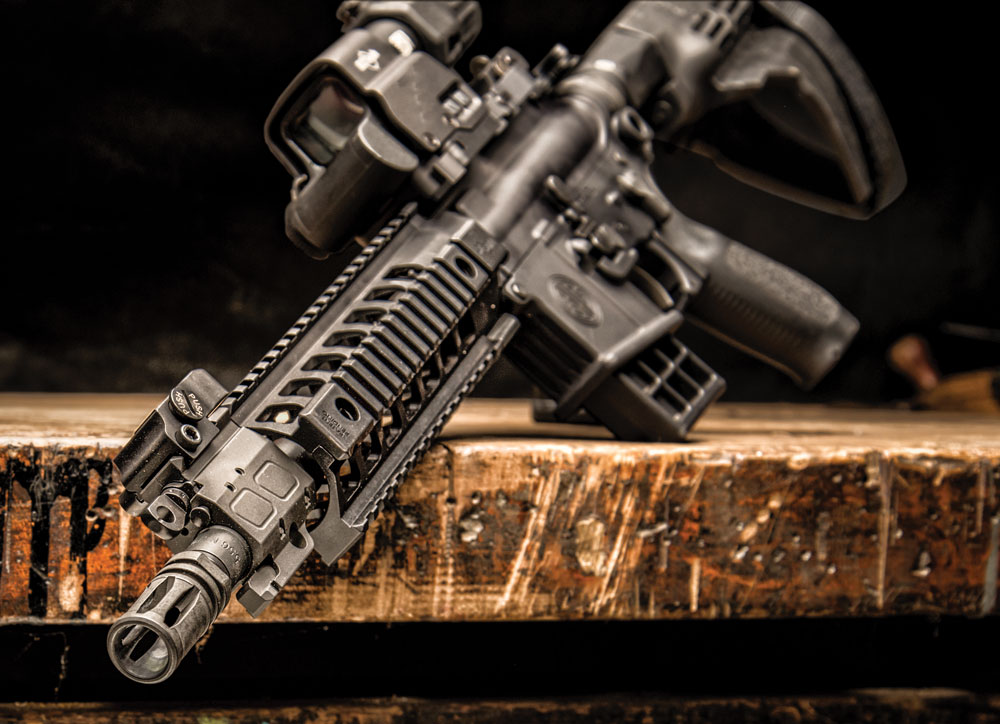
The P516 sports an aluminum quad-rail handguard that offers plenty of options for accessories.
“The P516 requires a bit more gas than the SIG 516 to run reliably since there is less recoil mitigation when compared to a stocked rifle,” according to SIG. “So the gas port is larger on the P516, and since it enhances reliability on SBRs, the SIG 516 SBR also runs the same gas port.”
SIG’s short-stroke gas pushrod system also makes SBRs and P516s run more reliably than a direct-impingement gun. This becomes magnified once the barrels become 11 inches or shorter. So, if you’re looking for the most reliability out of a SBR or an AR pistol, you really should be looking at a short-stroke gas pushrod system.
The barrel and the short-stroke piston system are then sheathed in an aluminum quad-rail handguard. The quad rail allows a user to mount accessories, and in the case of a homeowner there is plenty of rail space for a tactical light. Ergo rubber rail covers are included with the pistol, so the unused quad rails are more comfortable to hold and less abrasive. The topside is a true 1913 Picatinny rail that runs from the very rear of the upper to the adjustable gas valve, giving the user plenty of mounting options for optics.
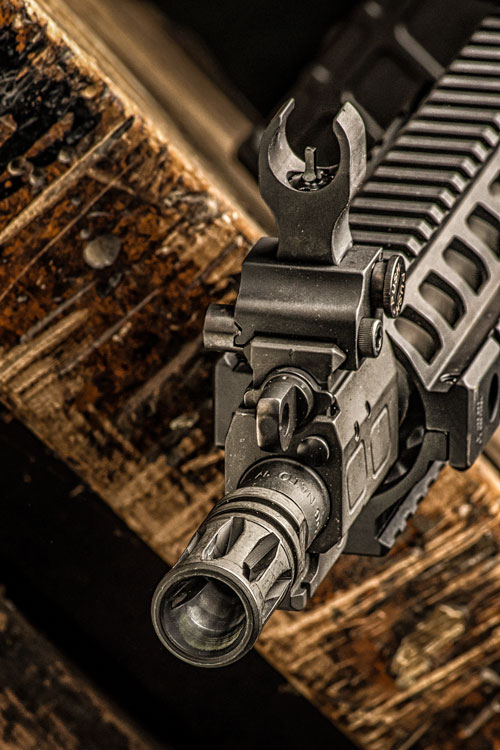
A red dot or reflex sight is a natural choice for close-up work in a room or down a hallway. Adjustable flip-up iron sights snap upright into position, then fold back away from the muzzle. They deploy in seconds. The rear sight offers two aperture sizes and is adjustable for windage, while the front post sight is protected by wings and is adjustable for elevation. I found the iron sights perfectly adjusted for 25 yards. I mounted a Mepro Tru-Dot RDS with a 1.8 MOA red dot reticle, which offers rapid target acquisition with both eyes open through a large viewing window. The RDS is a commercial version of similar sights used by Israeli Defense Forces.
The SIG Sauer P516 features ambidextrous controls and comes with factory-installed flip-up iron sights.
Constructed with an aluminum body and tough polymer frame, the RDS runs on a single AA battery, providing thousands of operating hours, plus it features an automatic shut off to conserve power. The reticle has four brightness settings: three for day/night use and one for use with night vision gear and magnifiers. The unit features an integral Picatinny rail mount with QD levers, and when mounted, it perfectly co-witnesses with the flip-up iron sights. At 10.5 ounces, it is lightweight and only takes up 4.5 inches of rail space.
The lowers on the SIG 516, SIG 516 SBR and P516 are identical. There is no difference other than the lack of stock on the pistol. The P516 features an ambidextrous selector and magazine release, making the P516 more versatile and faster to operate regardless of whether you are right- or left-handed. The Phase 5 extension tube is fitted with SIG’s SB15 pistol stabilizing brace. The brace is shaped like a clamp and made of a rigid yet flexible rubber similar to that used in swim fins and diving mask material. The operator’s shooting arm is inserted into the brace, and an attached hook-and-loop strap secures the weapon to the user’s forearm. A second strap can also be used to more securely attach the weapon to the shooter’s arm. The brace is easily removed or installed by pulling it off or sliding it onto the buffer tube. The SIG P516 can be used with or without the brace.
The pistol grip is SIG’s proprietary pistol grip with an ample texture and an arched backstrap. It is very comfortable to hold. The single-stage trigger pull measured on average 7.6 pounds but felt lighter. There was a slightly perceptible bit of creep but not enough to interfere. This is a defense weapon, after all, and not a target pistol.
At the range, my assumption was that the P516 would not be as accurate as a typical 16-inch barrel variant. I was wrong. Using a rest, I was able to average ½-inch groups or better at 25 yards with five shots using 55-, 62- and 77-grain ammo. The P516 is a shooter. It particularly liked the new Norma USA 77-grain Sierra MK HPBT ammo and the new Barnes VOR-TX all-copper 55-grain TSX FS bullet. Even the economical Fiocchi 55-grain FMJ BT performed well.
The pistol runs on a short-stroke gas system, which is more reliable and cleaner than the direct-impingement gas system found on many ARs.
The new HPR Black Ops OTF uses a 62-grain Open Tip Frangible bullet that is specifically designed for home defense and offers less over penetration. Going to off-hand shooting, I found the brace helped provide more stable shooting. Don’t get me wrong, this is a pistol with a 10-inch barrel that weighs 6.5 pounds, and holding at arms length gets tiring fast. Firing for speed from the hip, the SB15 brace kept the P516 steady.
Removing the SB15 brace, I also attached a Blackhawk one-point Storm Sling to the P516 via a Magpul QDM sling swivel. The P516 has a built-in sling-swivel mount on each side of the lower. With the sling over one shoulder and across my chest, I pushed the pistol out from my body, and the sling provided a more steady set up. Holding the P516 in two hands, the pistol was easy to manipulate and hold steady. I liked shooting the P516 with both the red dot and iron sights. With either the SB15 brace or a one-point sling, you give yourself an edge with a more solid hold. With no snags and excellent accuracy, the P516 offers everything you need when picking up a weapon in haste to defend your home.
Other than the AR pistol itself, considerations for home defense include choosing the right ammunition and, where legal, a suppressor. Suppressors can greatly reduce the noise from discharged rounds in confined spaces, thus protecting your hearing. As always, it’s important to check the laws in your state and make the best decision for you and your family.
SIG Sauer P516 Caliber 5.56x45mm NATO/.223 Rem. Barrel Length 10 in. Overall Length 26.5 in. (with SB15 brace) Weight Unloaded 6.5 lbs. Grip SIG textured grip Sights SIG adj. flip-up front/rear Action Short stoke gas piston Finish Matte black hard coat anodize Capacity 10+1 MSRP $1,754.00
This article appeared in the Fall 2015 issue of Gun Digest the Magazine.
For those paying attention, .32-caliber handguns have been enjoying a bit of a renaissance as of late.
Much of this has been due to Ruger’s reintroduction of the .327 Federal Magnum into its revolver lineup. But another company has set its gaze upon what has perhaps been a historically more popular iteration of the caliber.
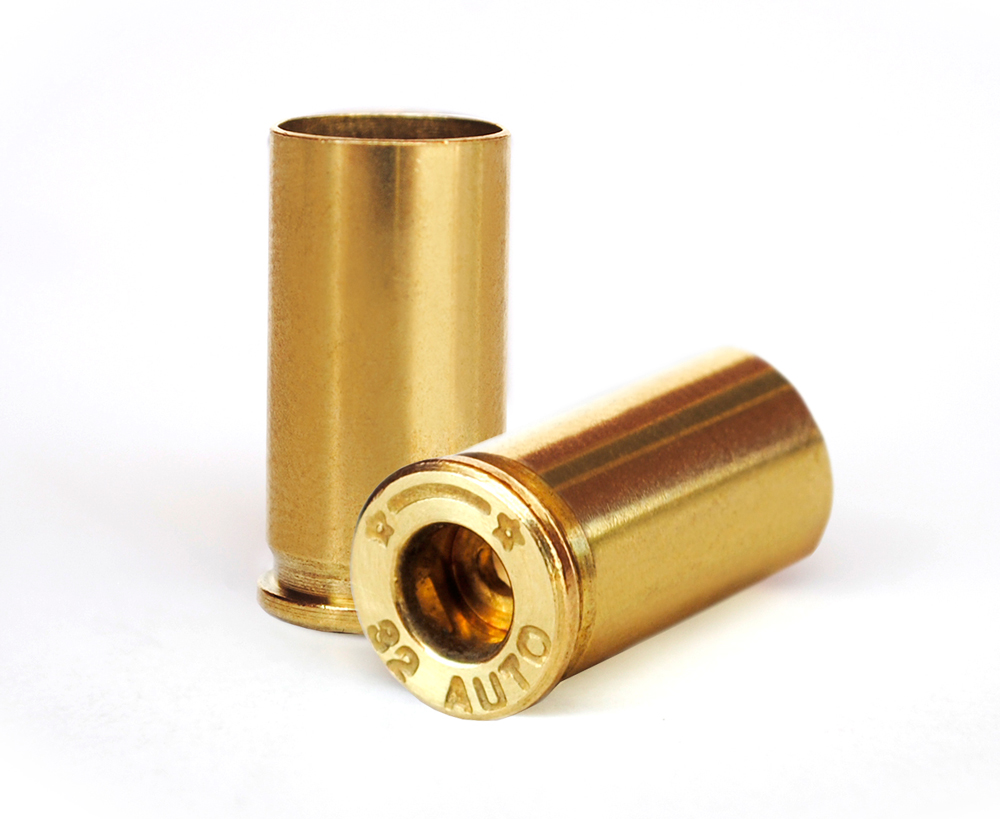
Starline Brass recently expanded its catalog to include .32 ACP cases, a move that fits right into the Missouri company’s wheelhouse. While the manufacturer offers a number of familiar cases, it has carved a niche in the reloading market by producing components for more oddball rounds.
The .32 ACP, presently, really doesn’t fit into either the familiar or oddball categories. There are a number of gun companies that produce firearms chambered for the semi-rimmed round; Starline pointed to seven, including Kel-Tec, North American Arms, Century Arms, Taurus, Beretta, Pardini and Bersa. However, the more than century-old round is definitely not as ubiquitous in modern-day gun making as, say, the 9mm, .40 S&W or .45 ACP.
There are still a slew of handguns that feed on the snappy little round, particularly for shooters that are fans of vintage European pistols. This is mainly due to a number of Continental law enforcement agencies adopting the .32 ACP, where it is known as the 7.65mm Browning.
Starline’s brass is 70-percent copper and 30-percent zinc, which is vertically drawn to keep wall thickness consistent. The company anneals its cases between each draw to ensure malleability and inspects each case between each step of the manufacturing process.
Starline is offering .32 ACP bass in boxes of 500 (MSRP $88) and 1,000 ($150).
Have a yen for handguns? Then we’ve got just the thing for you — The Handgun Cartridges poster. This attractive and informative poster features more than 320 life-sized images of nearly every shape and size of pistol and revolver ammo. This is the perfect, eye-catching addition to any den, gunroom or reloading room. Get Yours Now
One of the appeals of revolvers, especially for self-defense, is their reliability. To be sure, wheelguns can malfunction, but overall they are rare.
With that said, the platform does present its challenges, none more pressing than the reload. There is no two ways about it; revolvers require many more movements to get back in action than do semi-automatics once they’ve run dry. But take heart, if you aim to carry a revolver, replacing the five or six spent cartridges in an expedient fashion is more than doable.
In the above video, iconic gun instructor and Gun Digest author Massad Ayoob advocates and demonstrates a method he popularized—the stressfire reload. As Mas shows, this technique has some distinct advantages that help ensure a smooth and timely reload, while protecting the integrity of the revolver.
Like all systems, there are some cons to the stressfire reload. In particular, some may not like the gun switching hands in the course of the reload. But as the start of the clip shows, there are some distinct advantages to a system that does not strictly rely on the offhand holding the revolver.
As an added bonus, the video gives some key pointers on how to use a speed loader to maximum effect. It also shows how to execute a stressfire reload if you happen to be a southpaw.
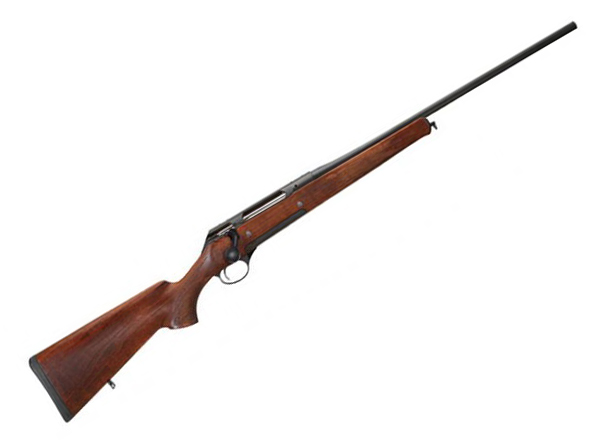
The new Merkel R-15 offers shooters a lot of rifle for a respectable price.
Merkel is aiming to punch a toehold into the American market with a new rifle – the Merkel R-15 – that comes with everything but a hefty price tag.
Merkel has always had a knack at marrying elegance and performance in their firearms.
The German gun maker has been churning out truly unique and accurate specimens for more than a century. But whether it was one of its ornate double rifles or innovative Helix straight-pulls, shooters were going to pay to own a Merkel. But the times appear to be changing.
Recently, the Teutonic manufacturer expanded its gun library to include a model that should score a bull’s eye with the budget-minded. In the $700 range, the new Merkel R-15 has a price point that fits right into the American market. And if it preforms like the rest of the company’s offerings, then it could turn out to be among the best values out there.
The R-15 is a marked break from the company’s traditional fare, which focused on firearms that started at $5,000 and went up from there. Most likely, this change in course has been due to Steyr acquiring Merkel around 5 years ago. The Austrian gun maker has made a concerted push into America in recent years; the R-15 project appears to fit very much into this effort.
The Merkel R-15 is outfitted with a rock-solid three-lug bolt.
Merkel is offering two variations of the three-lug bolt action. There is a Grade-1 walnut stock model weighing in at 7 pounds 4.4 ounces. And there is a synthetic-stocked model that tips the scales at 6 pounds 9.8 ounces. There is also a price difference between the variations, with the wood-stocked R-15’s MSRP being $799 and the synthetic’s being $699.
Both models of the rifle share a number of common features, including the eight different calibers they’re available in: 6.5x55mm, .243 Win., .270 Win, .308 Win., .30-06 Sprg., 9.3×62 Mauser, .300 Win. Mag and 7mm Rem. Mag.
The standard calibers are outfitted with 22-inch barrels, while the magnums have 24-inch barrels to help the rounds better achieve their ballistic potential. Standard calibers come with a three-round detachable box magazine, while the magnum’s holds two.
The R-15 comes without sights but is drilled and tapped for Savage-style mounts. The rifle has a direct trigger tuned to a snappy 2-pound 10-ounce pull weight.
At The Tradesmen, owner Edward Wilks sees a number of related trends that begin with more women than ever taking the establishment’s concealed carry certification class.
“It used to be, out of a class of 16, I’d have maybe two women,” says Wilks. “Now, at least half my students are women and sometimes more.”
The handguns these ladies favor? BUGS, or what are often called “back-up guns,” because of their smaller size—usually semi-automatic pistols chambered in .380 Auto. The Smith & Wesson Bodyguard semi in .380 is his top seller right now, and for just under $400 customers get one with a laser sight.
More than ever, self-defense handgun ammunition is moving off the shelves here, too. Again, .380 Auto leads the pack, this time in the form of the Civil Defense 50-grain loads made by Liberty Ammunition.
Across the board, long gun sales are way down. “Shotgun sales are dead,” says Wilks. “I’m selling a few rifles—but only a few.”
However, fully automatic firearms are moving surprisingly well here, despite the fact that they are very expensive. Wilks recently moved a pair of consecutively serial-numbered full-auto M-16s, for example, for over $20,000 apiece.
Optics are big movers, too, and the market here, Wilks notes, has shifted. “We used to sell a lot of $50 to $100 rifle scopes,” he says. “Now, people are spending $300 and up for a nice Leupold or Vortex model. Spotting scopes, rangefinders and binoculars are steady sellers, too.”
Interest in concealed carry is at an all time high. In this 2nd edition of the Gun Digest Book of Concealed Carry, Massad Ayoob delivers the tips readers need to protect themselves in life threatening situations – without running afoul of the law. Learn from the best, and you’ll be prepared for the worst, with this industry standard concealed carry reference. Get Your Copy
Looking to go armed, but are stuck in the weeds as to what to arm yourself with? Here are 20 of the best concealed carry gun options that will keep you on the defensive.