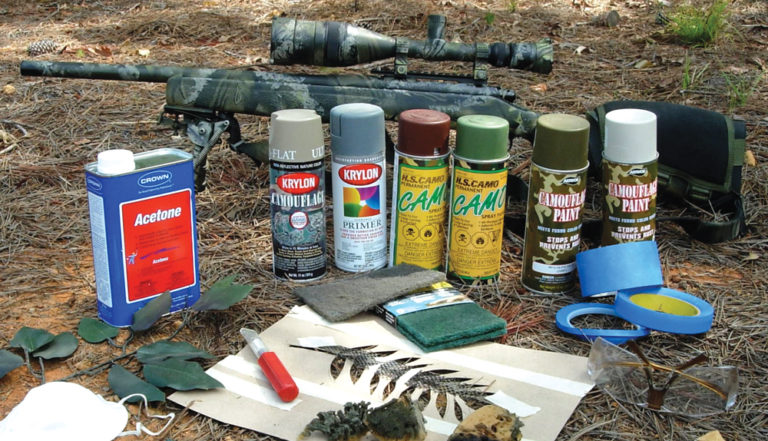
Learn about camo rifle painting so it, as well as you, can blend in no matter where you are with this easy do-it-yourself project.
There is nothing that visually stands out more than a rifle. It can be a modern urban environment, a dusty village in Iraq, or the middle of dense bush and the first thing that will grab someone’s eye will be the shape of a rifle. Rifle painting is one solution.
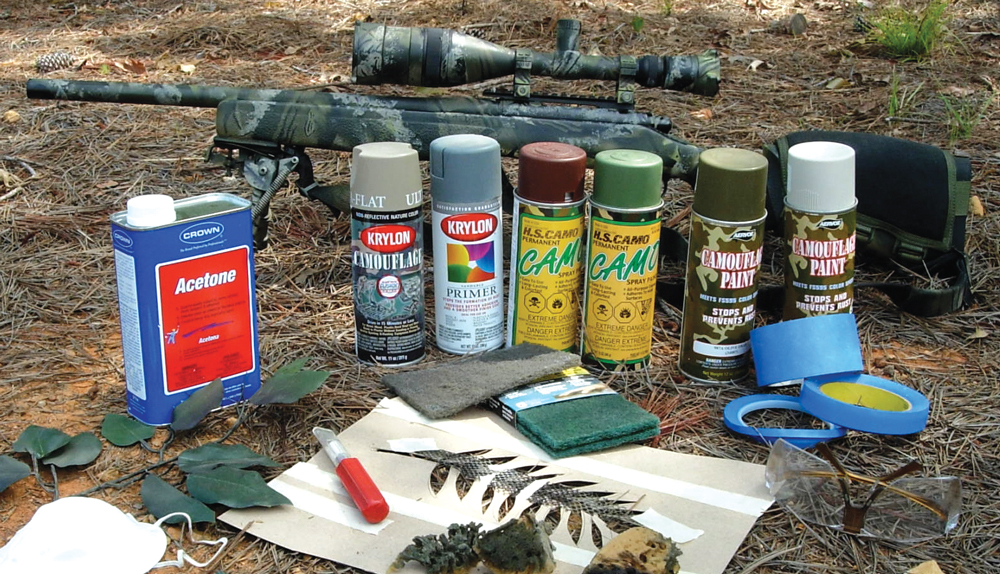
Camouflaging your equipment can be accomplished in a variety of ways. Here are three techniques for custom rifle painting.
Sponging
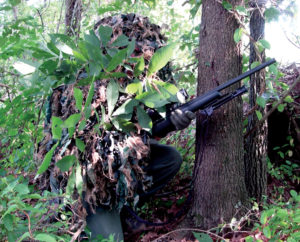
“Sponging,” using a rough sponge to blot on color, is one of the easiest techniques to use when painting your gun. Most people who have painted the inside of a home are familiar with this interior decorating standard.
The first step is to tape off any areas that you don’t want to be painted or damaged, such as the lens and dials on optics, and iron sights. Make sure you cover other areas that are critical to its operations, such as the muzzle crown or bolt.
After donning a pair of gloves, I degrease the weapon to ensure there isn’t any oil present. Depending on the weapon, you may need to prep the surface by lightly scuffing the parts. If you have wood stocks — especially anything with a slick clear finish — you may need to take extra time and sand it. Once you’ve prepared the surface, degrease again.
Spray a base coat using at least two colors, and blend one into the other to create the “blurring” effect. Then, taking a coarse painting sponge (available at any major hardware store or craft shop), sponge the next color onto the areas where the base colors meet.
I cut the sponge into different sizes and shapes and constantly rotate the shapes so I don’t end up with a repetitive pattern. To apply the paint to the sponge, just spray it until it’s good and moist, then sponge until it’s dry. Then repeat.
Once this is done, I’ll sometimes use a fourth color and sponge on the highlights using a lighter color, or create shadowed areas using a darker paint.
Stenciling
“Stenciling” is about as easy as the sponging method. The prepping process is the same.
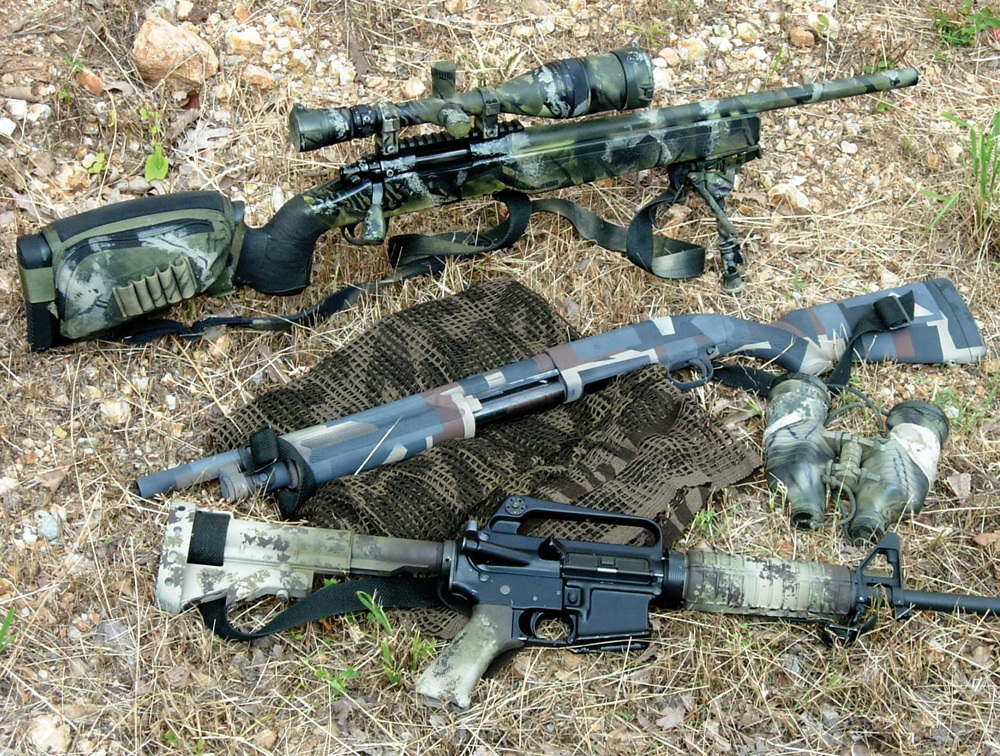
Again, start by laying down a base coat using at least two colors. Once it’s dry, use a stencil to add more defined patterns.
Stencils can either be positive — such as a section of fake plastic plant — or negative, created by cutting patterns from cardstock to create a silhouette or a negative stencil.
Attach the stencil to the rifle by the stencil to conform to the weapon’s shape, and tape it to the rifle. It doesn’t have to be perfectly formed to fit the rifle; anywhere the stencil is not touching will create a blurry area to provide a sense of depth.
With the stencil attached, spray the next color, being careful not to spray too heavily (once you remove the stencil, there’s usually too much contrast). Then move the stencil to a different location or attach another stencil and repeat the process.
Using different colors or stencil shapes will create a more random pattern. This technique works really well for field environments where you’re trying to reproduce the chaos found in nature. Let your wild side guide you.
Masking
“Masking” is a little more complicated and time-consuming, but also produces some of the best results.
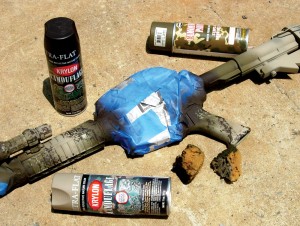
Use masking tape to create shapes as you layer on your paint. I recommend starting with your darkest color and working your way to the lightest. You can always blend colors for depth.
Begin with your base color. Cut out masking tape to cover the areas that you want to remain that color. Any areas left uncovered will be painted over, so advance planning is necessary — especially if you’re trying to reproduce or match an existing camo pattern.
Once you have the areas masked off, apply the next color. Let it dry. Mask off the areas you want to remain that color and spray again. After completing all the masks and colors, remove the tape to reveal the finished product.
The cool thing about these techniques is that you can combine them to obtain a variety of results. Consider the environment in which you’re most likely to use your weapon and use colors and shapes that match that area. When in doubt, use lighter colors rather than darker.
For practice, use wood 2x4s until you have your technique squared away. If you run a paint application on your weapon you don’t like, you can always scuff it up and paint it over again. If you’re a little squeamish about painting your weapon, just paint the “furniture” (stocks, grips, and handguards), leaving the receiver and barrel plain.
Think about the practical “field” applications of camouflage: Don’t stand out and draw attention. For the sniper, this means blending into the environment for a successful mission. For a hunter, it can be the difference between putting meat in the freezer and just spending a nice day in the field.
Tiger McKee is director of Shootrite Firearms Academy, located in north Alabama, and author of The Book of Two Guns. McKee can be reached at www.shootrite.org.

Next Step: Get your FREE Printable Target Pack
Enhance your shooting precision with our 62 MOA Targets, perfect for rifles and handguns. Crafted in collaboration with Storm Tactical for accuracy and versatility.
Subscribe to the Gun Digest email newsletter and get your downloadable target pack sent straight to your inbox. Stay updated with the latest firearms info in the industry.

![Best Concealed Carry Guns In 2025 [Field Tested] Wilson Combat EDC X9S 1](https://gundigest.com/wp-content/uploads/Wilson-Combat-EDC-X9S-1-324x160.jpg)


![Best 9mm Carbine: Affordable PCCs [Tested] Ruger Carbine Shooting](https://gundigest.com/wp-content/uploads/Ruger-Carbine-Shooting-100x70.jpg)
![Best AR-15: Top Options Available Today [Field Tested] Harrington and Richardson PSA XM177E2 feature](https://gundigest.com/wp-content/uploads/Harrington-and-Richardson-PSA-XM177E2-feature-100x70.jpg)

I have painted a few rifles now from 65/55 to a 300 rum in order to make paint stick to a rifle you first need to remove all blueing then apply a acid etching primer it has to be a light coat so you can see through it then apply base coat then clear .Yes if you do not seal up your barrel and trigger it is a tight mare to clean out .I am using automotive paint but I know how it works about barrel whip and coefficient of linear expansion. If you do not know what you are doing I recommend leaving it alone .If I knew how to put a pick on hear I would show you the work I have done, and yes these rifles do get used .
Remember this: Any time you alter a factory firearm you decrease its value tremendously. What is the ‘cats meow” to you will be a “frankenmonster” to the majority of future prospective buyers. You may very well end up getting half of what the gun would have been worth if you had left it in its original factory configuration.
NOooooooooo! Painting with rattle cans (Krylon, et al) or Automotive Paints is quite often a recipe for disaster!
Pony up the extra $$$ for real applied finishes such a KG Gunkote, Cerakote, or Duracoat! Your prep & application times will be similar & everything ultimately relies on the prep!!!
The spray cans will NOT hold up & will not be repellant to abrasion & solvents used on firearms! As a professional firearms finisher, the only time we advocate basic spray paints is for temporary use by “operators” for mission specific camo. Even in that instance, we recommend a base coat of a true applied finish, followed by VERY LIGHT spray paint patterns…this enables the spray paint finish to be flushed off back to a base coat by simply spraying the firearm down with carb/brake cleaner!
Ultimately the mil thickness of spray paint can gum up internal workings, especially if it gets loosened by solvent!
If you’re gonna spent the time to do it…do it right the first time…You won’t be sorry!
Although I haven’t painted a rifle yet, I did conduct some tests a while back with camo patterns and coating durability. The results suggested that slow-dry (4-10 hours drying time in hot sun) enamel and epoxy paints exhibited the best long term performance. Paints from Aervoe Industries, which has a wide variety of hunting camo and military pattern paints, come to mind. If flat finish paints are not available in the desired colors/patterns, you can overcoat with a compatible matte finish clear coat.
Arrgh…NOOOOOO!
As an experienced Applied Firearms Finisher you need to be VERY cautious when using any “rattle can” or automotive finish on a firearm. Simply put, they are NOT intended for these surfaces & will not endure!!! If anything, they will gum up & make a firearm unusable if allowed to get into internal workings!
“Krylon” & similar over the counter finishes can make a decent temporary finish but if you want an effective finish pony up the extra $$$ for the correct product or send it to a professional finisher. KG Gunkote, Cerakote, Duracoat, & the like are what you need to use. When properly applied they will NOT chip, abrade, or run with solvents.
We do however, occasionally provide base-coated applied finishes to operators so that they can use the “rattle cans” for a mission specific camo, which can be rinsed off back to its original applied finish via a good dousing with Carb/Brake Cleaner!
The few extra $$$ for the correct product will save you TONS of time! TIP..A Successful finish is in the PREP!!!
Does wonders for rust prevention on blued/parkerized finnicky finishes!