
Of all the fundamentals of precision marksmanship, trigger control is among the most weighty for consistent and accurate shooting.
What Are The Finger Mechanics Behind Trigger Control:
- The trigger shoe squarely on the pad of the finger.
- Finger should create a 90-degree angle at the second joint.
- The trigger finger should not touch the stock.
- When executing the press, the trigger finger should move like a hinge straight to the rear.
Trigger control is defined as the manipulation of the trigger without disturbing the rifle or the lay of the sights on the target. Most errors when shooting can be attributed to improper manipulation of the trigger. In fact, we are such creatures of habit, we can improperly actuate the trigger over and over yet still manage to group well. This is the most influential point, because we are turning on the machine. Pressing the trigger to the rear starts the process. In most people’s minds it is also the end, which causes them to inadvertently affect the shot placement. We literally beat the bullet out of the bore by moving the rifle and altering the sights off the target. In some cases, the shooters are so relieved at having fired the shot that they immediately disengage from the rifle. This is a bad idea.
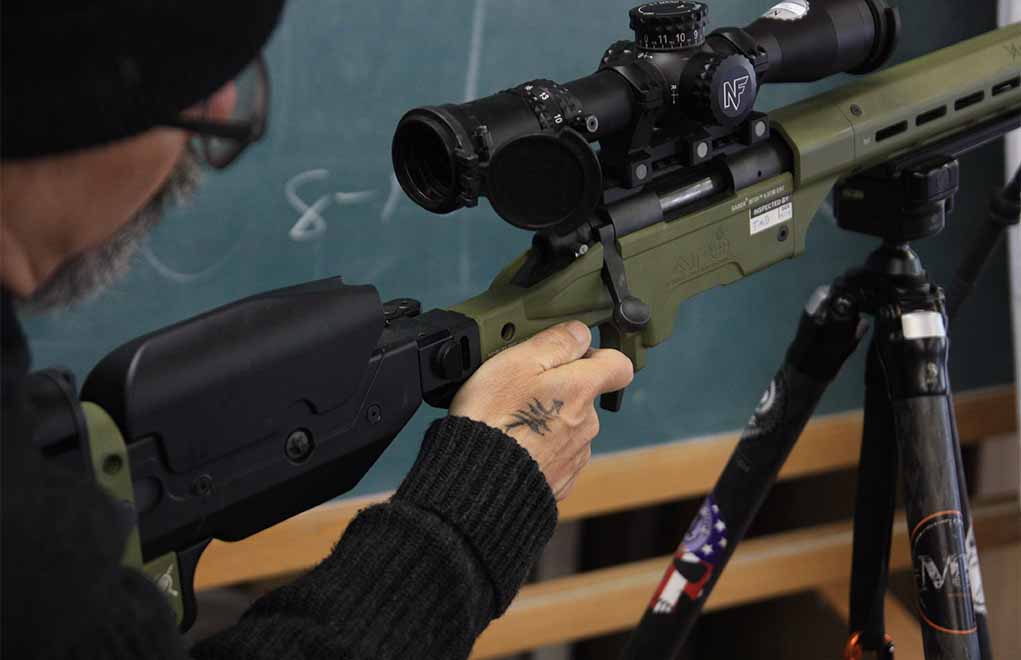
Firing Hand Mechanics
The purpose of the firing hand is to manipulate the trigger and hold the rifle into the shoulder pocket. We aren’t gripping it like a handgun, rather holding it straight back to the rear. This requires very little pressure, so we don’t want to have a death grip on it. The shooter should establish a firing position on the stock that starts from the trigger back and not from the stock forward. This is more a mental process than a literal one, as we don’t want people putting their fingers on a live-weapon trigger first. The initial practice should have the shooter visualize the trigger finger before the grip. You can do this during dry practice, which is highly recommended.
Trigger Finger Placement
We want to place the trigger shoe squarely on the pad of the finger, creating a 90-degree angle with the finger and second joint. This will vary slightly from shooter to shooter based on their hands, and type of stock, but the goal should be to get the fingernail to point to 9 o’clock for a right-handed shooter, 3 o’clock for a left-handed shooter. This right-angle position should be there before the trigger is pressed and remain there afterward. Shooters who find their trigger fingers curling or even flying off the shoe, need to work on their trigger control and follow-through.
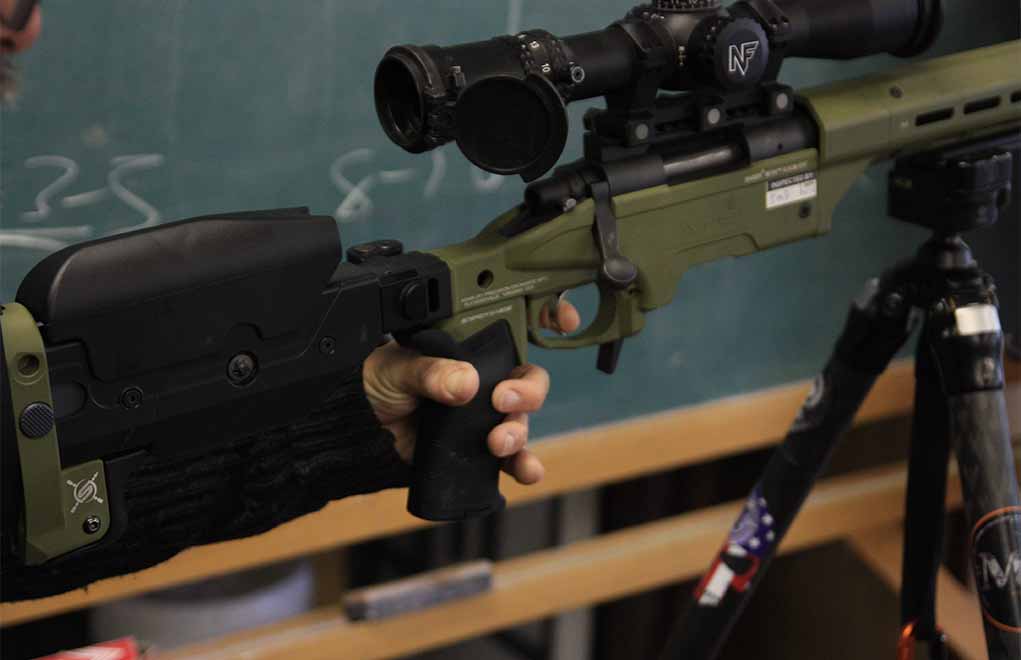
When addressing the stock, regardless of the type, we want to make sure the movement of the trigger finger is not touching the stock. In the old days, they called this “dragging wood” for the obvious reasons. If the trigger finger is resting against the stock, you will influence the rifle, which is not good. As our skin moves, it compresses the muscles and pushes our flesh out under the skin creating a lateral movement on the stock.
The trigger finger should be moving like a hinge, straight to the rear using our body mechanics to our advantage. If the fingernail starts at 9 o’clock and ends at 9 o’clock, you can rest assured you are manipulating the trigger straight back to the rear. In many cases, you’ll find the finger is moving much less than it moves if you are incorrectly pressing the trigger shoe.
Get On Target With Frank Galli:
- Mils vs. MOA: Which Is The Best Long-Range Language?
- Buying the Perfect Precision Scope
- Shooting Positions: Variety Is The Spice Of Life
- Riflescope Tracking: Why It’s Crucial To Test It
- Long-Range Shooting: Becoming Your Own Spotter
Other Fingers … Where Do They Go?
The three fingers below the trigger finger should be pressing the stock straight back into the shoulder pocket. The pressure should not be so great to discolor them visually. We want to develop a front-to-back management of the stock, and the thumb should be there to support this front-to-back pressure. It’s not necessary to engage the thumb. Depending on the stock type, many will lay the thumb on the strong side or use it as a reference point on the stock, putting it in an out of the way place. We call this floating the thumb, and it is a perfectly acceptable position as we don’t need our thumb for the task of shooting.
Correcting Trigger Control Errors
Correcting a shooter’s trigger control is our main priority when teaching classes. One of the most common errors in trigger control is variety. We see shooters manipulating the trigger in a different way every single press. No consistency is what we observe.
Do not underestimate dry practice. It takes roughly 3,000 repetitions to create a new positive neural pathway and about 9,000 repetitions to fix a bad habit. The worst part about fixing bad habits is those 9,000 new repetitions have to all be exact. When dry firing, you can watch your finger.
It’s OK to dry fire your centerfire rifle. There should be no damage to the system. If you feel uncomfortable doing so, invest in a snap cap to absorb the impact of the firing pin. But it is generally safe to dry fire a centerfire rifle.
Dry practice needs to be carried out as if it is a live shot. Sloppy dry practice will instill sloppy fundamentals. Invest in perfect practice. Don’t just sit there snapping the trigger, engage the rifle like your life depends on it. The more you dry practice, the better shooter you will become. For indoor dry practice, consider purchasing an Indoor Optical Training Aid (IOTA) lens device; this allows you to focus your scope indoors at 11 feet.
Given time and opportunity before a shot, always dry fire. Set up your position so, without breaking that position, you can easily reach over and insert a live magazine or load a live round so the actual shot mimics the dry fire. We see shooters all the time dry fire perfectly and then change their hand position or cadence of fire by simply going live.
Editor’s Note: This article is an excerpt of Precision Rifle Marksmanship: The Fundamentals – A Marine Sniper’s Guide to Long Range Shooting.

Next Step: Get your FREE Printable Target Pack
Enhance your shooting precision with our 62 MOA Targets, perfect for rifles and handguns. Crafted in collaboration with Storm Tactical for accuracy and versatility.
Subscribe to the Gun Digest email newsletter and get your downloadable target pack sent straight to your inbox. Stay updated with the latest firearms info in the industry.


Trigger control,use it or lose it, it takes constant mind over matter regardless of recoil ..