A DIY rejuvenation and restoration of a classic Browning Auto-5 shotgun.
The year was 2020, and the global pandemic was at its peak, with businesses closing, folks masked up around the world and craziness abounding. During this time, one of the more random opportunities came about. You see, during this time, life continued; folks still had to make a living, needs still had to be met, and projects still had to be completed. It may have seemed like the world stopped turning, but the reality is things still needed to happen, both big and small.
One of these things was the fact that I needed a haircut, and while I certainly didn’t trust myself to do it, my wife likewise did not trust herself to cut my hair. The local shop I usually go to, with my barber’s chair way in the back, had a closed sign in the window like many other small businesses during this time. If you don’t have enough customers to pay the light bill, the best course of action is to keep the lights off—a sad reality of those times. Thankfully, I had his phone number; he cheerfully answered and told me to swing by the house for a cut and a shave. He also had some fresh items from the menu displayed in his garage, which he’d turned into a makeshift barbershop for the time being.
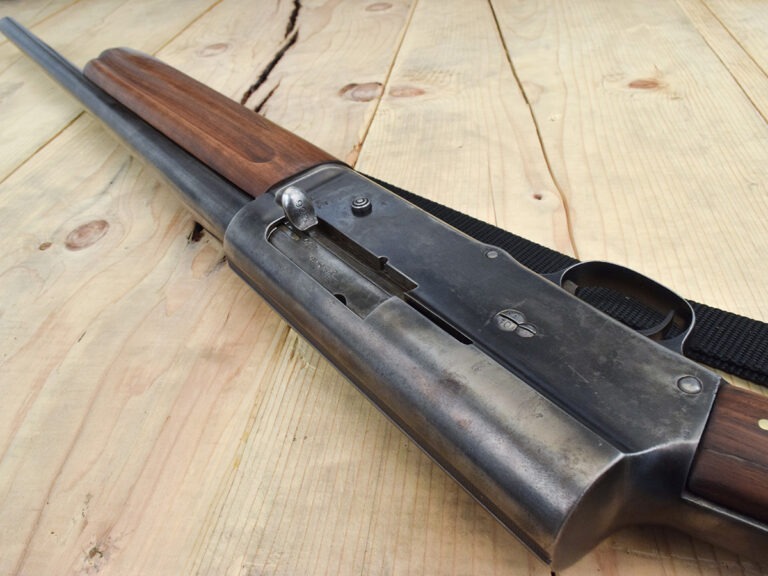
After about an hour, my hair was cut and my beard trimmed and my wife and I were perusing the menu; on this list were all sorts of firearms, from Remington 700s to a 12-gauge CZ Supreme Field. You can now see the reason why I go to this specific barber. This time, everything on the menu was on full display in racks and on tables in the garage. One caught my wife’s eye; there was a pair of FN-made Browning Auto-5s. One was beat up, old for sure and Bubba had put the latest in recoil reduction technology thanks to some superglue and 2-inch construction screws. With a cut-down 18.5-inch barrel, several proof marks and other stamps, and worn bluing, this one was a bit of an eyesore. The other featured a 26-inch barrel and overall was in used but original condition. However, the little shorty is what caught my wife’s eye; I could tell she liked it and wanted it.
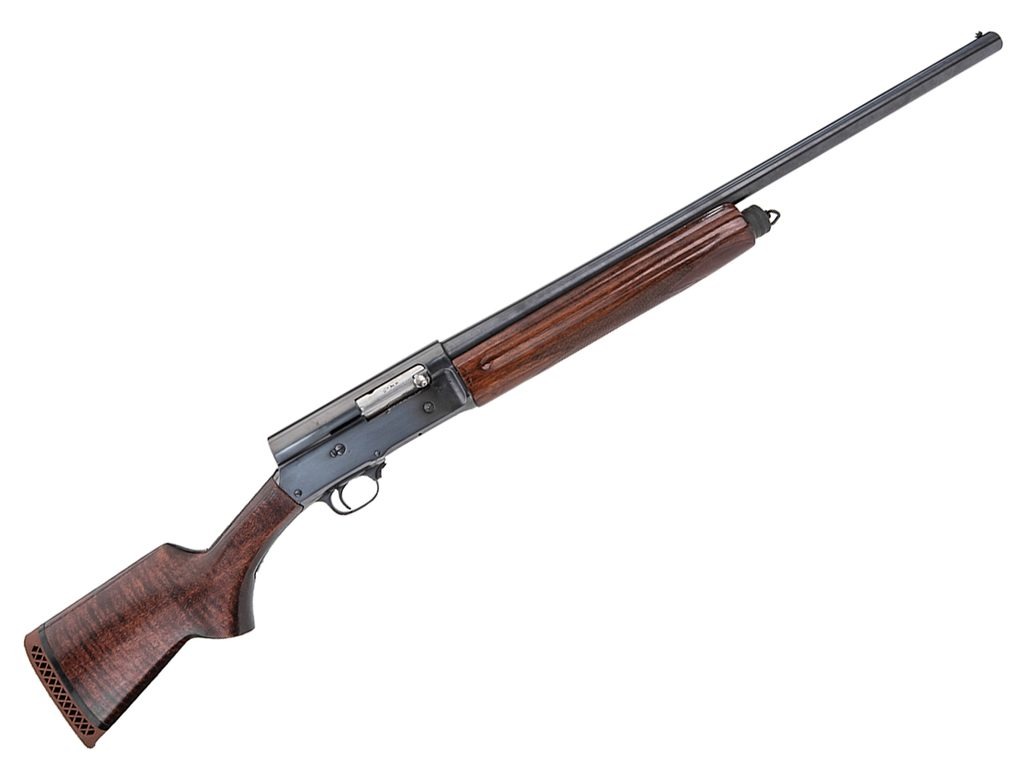
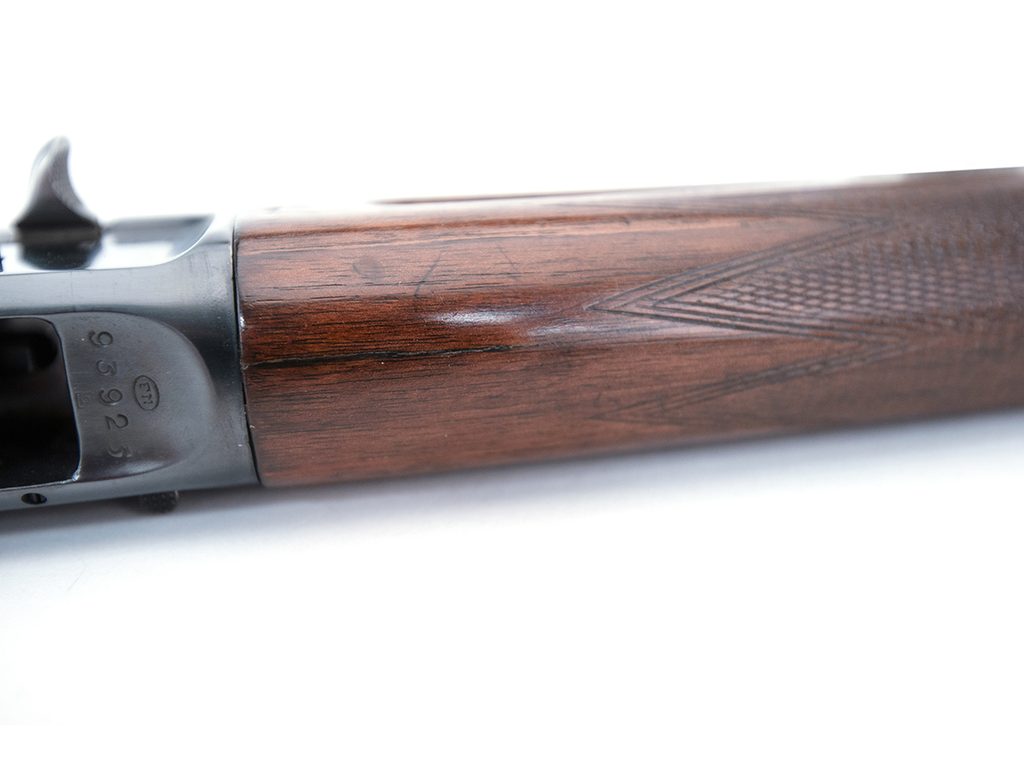
After another customer explained to us that the shorty was an old shotgun that could have been used in World War II, it prompted me to examine it more closely and I noticed a very low serial number, putting this gun roughly around the 1920s era. Unfortunately, there were no other markings to indicate U.S. Military service. After some more conversation on history, my wife gave me the side-eye, to which I nodded and said, “What’s your price for the shorty here?” $400 later, I got my haircut, and my wife got a 12-gauge, FN-made Browning Auto-5.
Just A Little Makeover
Immediately on the ride home, the discussion turned to fixing up and restoring this shotgun. Normally, I leave historic firearms as they are, but since this one was already poorly tinkered with, I had no problem restoring it to its former glory. Plus, this would make for a fun project while allowing me to fit the shotgun for my wife. Her length of pull is only about 12.5 inches, and as we know, a properly fitted shotgun makes all the difference in feel and performance. It was decided then and there that this would be our pandemic project.
The first order of business was to remove the stock and replace the wooden spring plug and spring with a Sure Cycle Auto-5 Action Cycle Kit. It still amazes me that these early model Auto-5 shotguns have a wooden spring plug; the replacement is machined aluminum. That task was easy enough. The parts were ordered, along with a dandy stock blank my wife found on eBay for a mere $35. I used the correct-sized screwdriver bit to remove the screws; the A-5 screws are very easy to strip, especially the smaller set screws.
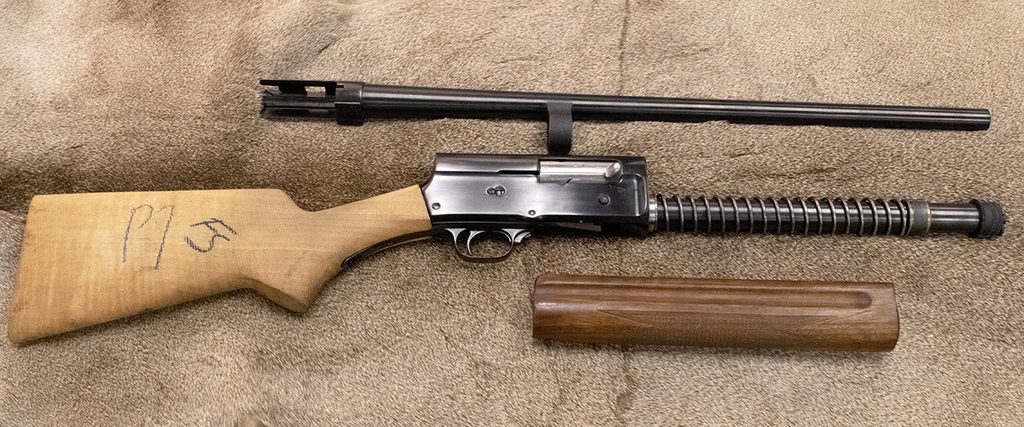
Then, it was time to pull and strip the forend; we wanted to match the forend finish to the stock. After removing the forend, we found a large crack right at the base where it meets the receiver. We also had to address this and figure out how to work around the checkering. Fortunately, I had a trick up my sleeve.
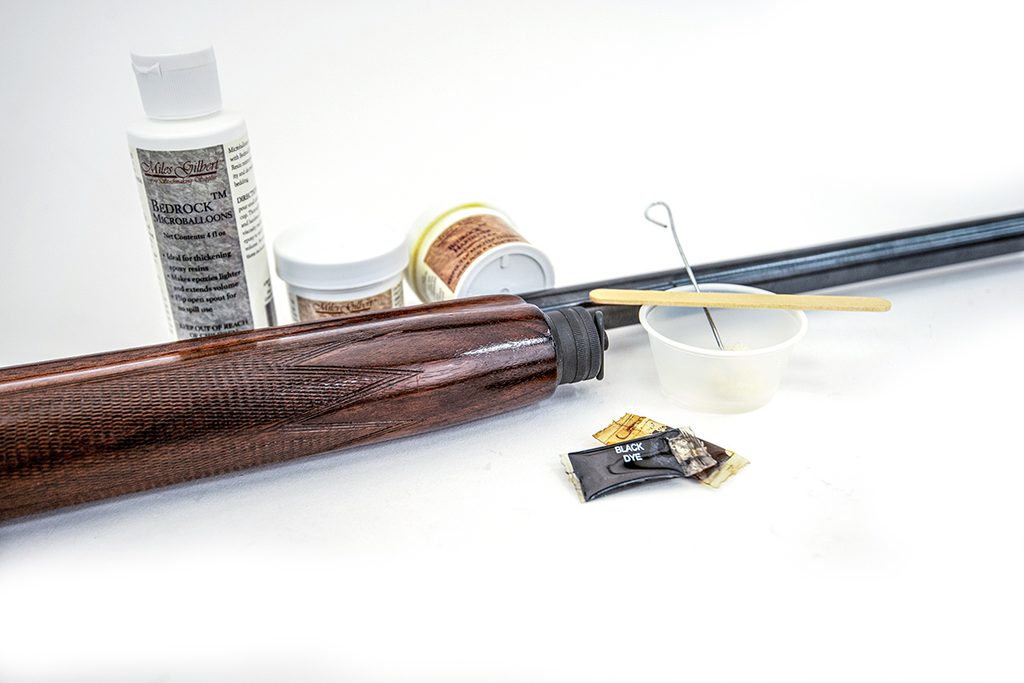
We used a combination of Citristrip to remove the old finish, 0000 steel wool, and 600-grit sandpaper to preserve the factory checkering. With the factory finish removed, we began to attack the cracked forend. For this, we used Miles Gilbert BedRock glass bedding, which takes stain nicely and let us match the forend’s grain color. Following the mixing instructions, we laid a small pad down and worked it in until the crack was completely filled and proud on both sides. We then flattened the bedding into a small square that completely covered the crack and sanded both sides flat. It was like it never existed.
In the meantime, the stock came in, and underneath all the dust and gunk, there was a beautiful figure. A few drops of water revealed the beauty held within the walnut. We measured the length of pull and cut the stock down so the final length would be 12.5 inches with a Pachmayr F325 Deluxe recoil pad. You can do this with a bandsaw or a handsaw; just make sure your mark and cut are straight and use a guide if possible. I always recommend leaving it at least ¼-inch long so you can sand it flat to fit the recoil pad. Then, we began sanding: starting with a belt grinder to fit the recoil pad, moving to 220-grit, then 400-grit, until there was no discernible seam between the wood and the recoil pad. Then, we carefully fit the stock to the receiver tang with chisels to fine-tune the fit. Then, it is back to sanding down to 400-grit. The blank was about 85 percent of the way there and still needed hours of sanding and fitment checks. This allowed us to get a perfect fit to the tang and ensure the comb height fit my wife better than her favorite boots.
An Air-Tight Fit
There is an art to fitting a shotgun stock to an individual. Take your time; once material is removed, it cannot be readily added back to the stock. After about 200 times putting shotgun to shoulder, we finally had it dialed in; thankfully, the cast of this stock was more than good for my wife. As for the comb and heel drop, they only required a few hours of sanding to get right. If you are unsure whether to remove material, cardboard or paper shims are easy to make and will give the shooter a clear indication of how close or far you are from that perfect fit.
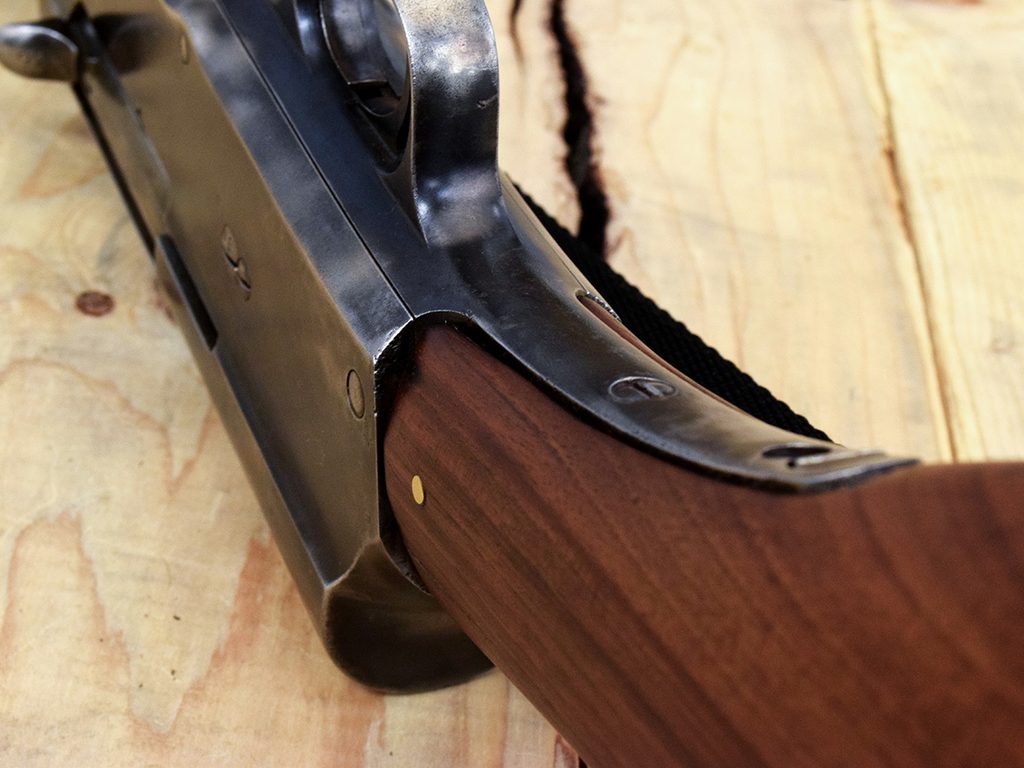
Finally, it was time to apply a stain to the stock and forend; a brief rubdown with 0000 steel wool, followed by a tack cloth, ensured the stock was ready. We mixed up a homebrew of Minwax Red Mahogany and Early American colors thinned with a bit of mineral spirits. This was the most challenging aspect of the restoration. It took a lot of experimentation to get close to the original color of the A-5 while retaining the darker color that usually comes with age. Thankfully, I had some scrap walnut from knife scales, so we could test our concoction before committing to the entire stock and forend. I was nervous about the forend taking the stain differently than the stock, but all the sanding and prep paid off, and they actually matched quite well.
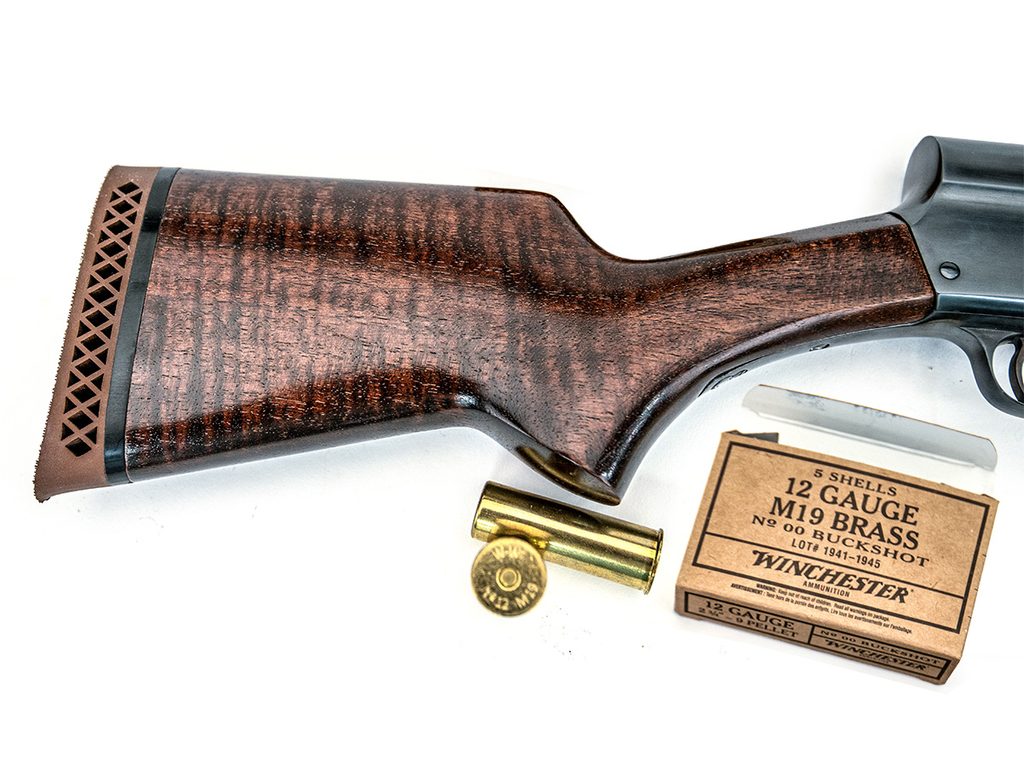
Last and possibly the most important step was to apply a finish. While I have dabbled with many finishes on everything from knife scales to shelving and cabinetry, I left this final decision up to my wife. After some deliberation, she settled on another 1:1 homebrew ratio of Birchwood Casey True Oil and mineral spirits. This thins the true oil and prevents an ultra-high-gloss finish, leaving a semi-gloss to satin finish. This also allows the true oil to penetrate better and helps prevent thick coats, so you can apply thin coats and work it into the wood with your fingers to create a unique, appealing finish for your project. In total, about 10 coats of this concoction were worked into the wood all by hand. Some gunsmiths will do upward of 20 coats and even 30 coats are common on some higher-end bespoke English rifles.
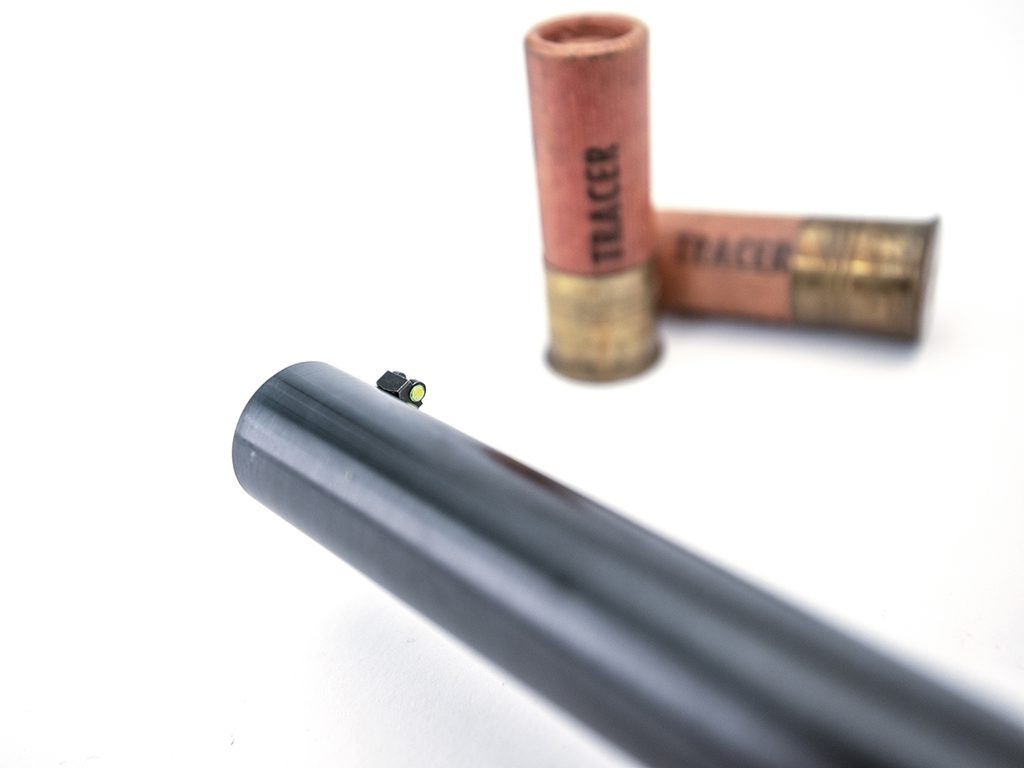
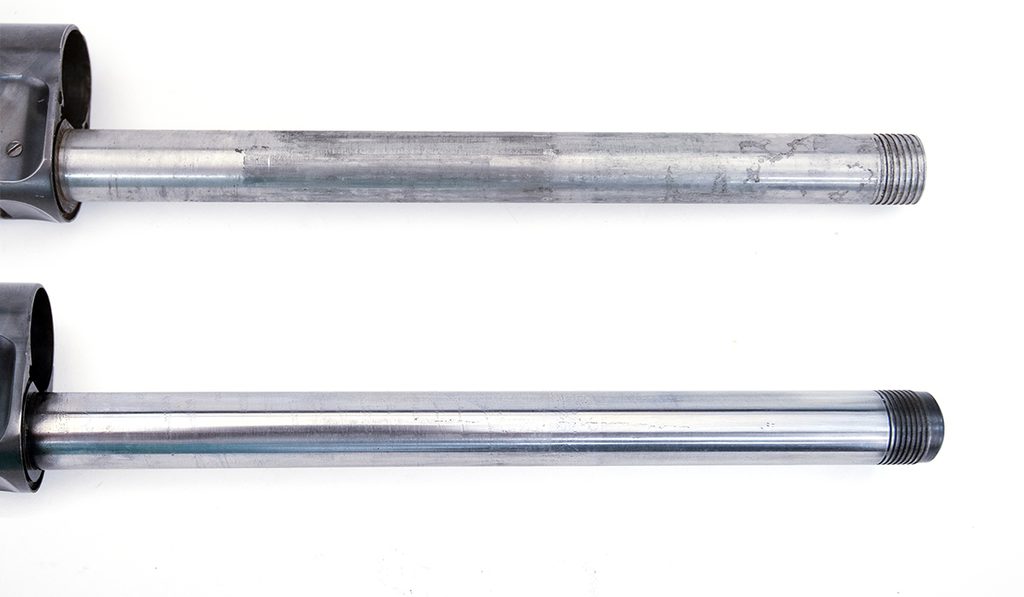
To finalize the restoration, a fiber-optic front sight was added, as it is easier to pick up, especially in low light. The exterior of the magazine tube was given a good, clean polish and oil. This extra step helps reliability across a wider range of loads, especially in older guns, and it’s simple to do by hand or with a buffing wheel and white polishing compound. Due to the peculiar odor of this A-5 to which my wife was tired of smelling during the fitting process, the gun was taken to Finks Custom Gunsmithing in Paulden, Arizona, to reblue and refinish the metal. He did an exceptional job and parkerized the forend cap to provide a touch of contrast and add durability, as well as opening up the chamber to accept 2¾-inch shells. All that is a story for another time, but the overall project turned out wonderfully, and my wife and I had a lot of fun restoring this old warhorse.
Fitting a stock and refinishing a forend may sound intimidating, but with care and, most importantly, patience, it is a fun and completely doable DIY project. The best advice I can give is to enjoy it and take your time. If you find yourself rushing, take a break and pick it up later. You won’t regret the extra time, if it turns out right the first time. While I was there watching and helping, my wife performed over three quarters of the work on this job. Not too shabby for her first restoration!
History Notes On The Browning Auto-5
The Browning Auto-5 production began around 1902 and was, of course, designed by the famous John Moses Browning. The A-5 uses a long-recoil operating system, meaning the barrel and bolt both reciprocate; it’s a mechanically fascinating and relatively rare system that was complex for its time. However, for the end user, the manual of arms, disassembly, and operation are relatively simple. It is for this reason the Auto-5 is legendary among both sportsmen and shooters alike. From 1902 to 1940, FN in Belgium manufactured the Auto-5 until World War II interrupted production. These early guns are highly sought after, and the example shown here is one such early production gun.
After the war, production resumed and continued into the late 1970s, with over 2 million Auto-5 shotguns produced. By 1976, Miroku in Japan began making the Auto-5 and the Belgian production eventually ceased. Browning has kept very good records of serial numbers, so dating these shotguns is relatively easy, although early guns are a bit more challenging, and this particular A-5 falls into that category with a serial number below 200,000.
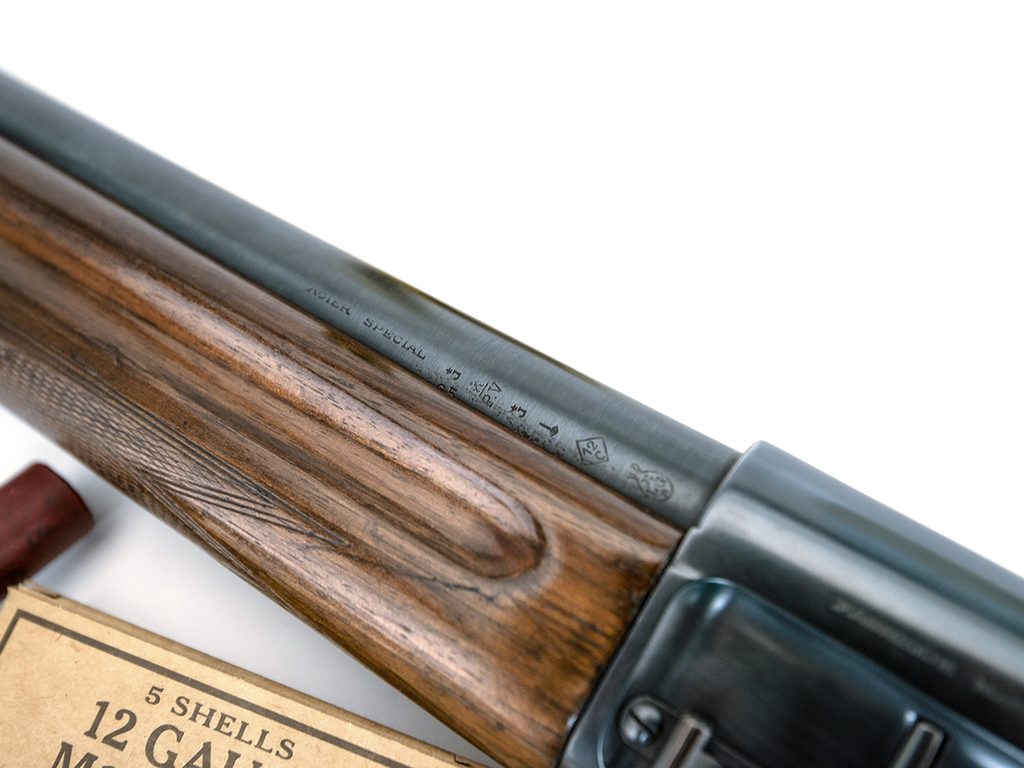
Browning A-5 Markings & Stampings
While I am no expert or collector when it comes to proof marks, they do tell a story and can verify the story of a seller. It seems like every time you want to buy a vintage gun, there is some story behind it: Billy the Kid used it once; a Marine carried this on Peleliu to save his life from a banzai charge. This particular FN Browning Auto-5 features a lot of proof marks and stampings that can give us a hint to its legacy that lives on today in new resplendence. The serial number is low, and the records suggest this shotgun was made around 1927.
However, according to two sources online, the 12C inside a diamond/lozenge was only used up to 1924 and indicates this is a 12-gauge smoothbore, so either the barrel was replaced or the early records are not as accurate as we may like. Both of these situations are equally probable. The crowned ELG is a Belgian proof mark from the Liège proof-house; this also lines up with the story of this being an early production A-5. The “ACIER SPECIAL” stamping is French for “special steel” and was common on the early Belgian-made Brownings.
The final mark I want to address is the hardest to read, but it gave me a hint about this shotgun’s chamber; some of it is missing due to pitting and wear. There is a faint “D=” with a Dash splitting “65” on top and 20.7 on the bottom; it is followed by “M/M.” The 65 represents the chamber length in millimeters, shorter than our standard 2¾-inch shell, which comes out to 70mm. The 20.7 represents the chamber diameter, indicating this is indeed a 12-gauge chamber. This means this chamber is a little short for standard American shotshells, because it has a vintage European chamber designed for 65mm or 2½-inch shotshells.
This is likely why the forend had a crack and likely affected the firearm’s accuracy and potentially its reliability. Also likely why we got such a good deal on it. Some of these old guns do speak for those who are diligent enough to listen. I imagine a lot of 2¾-inch shells have been run through this shotgun, which increases pressure, felt recoil, and wear on the gun, though it generally speaking won’t cause a catastrophic malfunction.
Editor’s Note: This article originally appeared in the December 2026 issue of Gun Digest the Magazine.
More Classic Guns
- Ten Classic Guns You’ve Got To Own
- High Standard .22 Pistols
- Collecting The Colt Single Action Army
- The Colt Model 1903 Pocket Pistol
- A History Of The 1911

Next Step: Get your FREE Printable Target Pack
Enhance your shooting precision with our 62 MOA Targets, perfect for rifles and handguns. Crafted in collaboration with Storm Tactical for accuracy and versatility.
Subscribe to the Gun Digest email newsletter and get your downloadable target pack sent straight to your inbox. Stay updated with the latest firearms info in the industry.