
The battle belt setup is an increasingly popular way to carry extra gear, so here’s a look at the different styles and how to best configure them.
Recent years have seen American shooting culture become more tactically-oriented, displaying an increasing amount of influence from the U.S. Military. This has resulted in a massive surge in the popularity of wearing body armor and other tactical gear associated with it.
While we’ve already looked at body armor and plate carrier setups, the next piece of kit worth discussing is the battle belt. While belts’ primary usefulness is typically keeping one’s pants from falling down, the purpose of a battle belt setup is to redistribute the bulk and weight of extra gear. Those who have seriously looked into configuring a plate carrier before know that they can run out of room for gear fast. And even if you do manage to squeeze everything you wanted to on your PC, the added bulk can hamper mobility.
We’ve all seen the meme images of soldiers wearing three or four layers of magazines across the chest of their carrier, and while this is technically a feasible way to carry extra ammunition, anyone with any amount of combat experience will tell you it’s a bad idea. The ability to go prone in the field is very important, and it’s generally accepted that smaller combatants make for harder targets. This is where the battle belt concept gains merit, as it allows one to take some of that gear off their chest and redistribute it around their waistline.
Battle Belt Basics
While a battle belt can be worn separately from a plate carrier, they were really intended to be used in conjunction with one. When the goal is to increase one’s odds of survival in some sort of life-threatening scenario, rifle and body armor serve as the primary tools of offense and defense. Because a plate carrier is required for wearing body armor, it only makes sense to use it to carry some spare mags and other items as well. If your body armor setup is purely for bolstering your home defense capabilities, however, a battle belt will likely be superfluous. Having a battle belt setup is really only useful for scenarios where one may need more gear than what can be comfortably attached to a plate carrier.
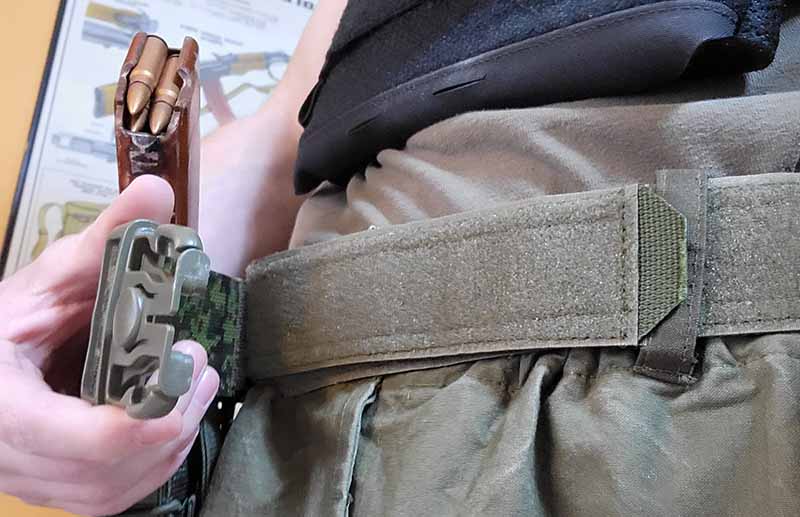
The fact that battle belts are mostly only useful when wearing a plate carrier leads to the first major consideration when choosing a battle belt setup, and that is the height of the belt itself. Battle belts that carry gear too high often interfere with the bottom of body armor, resulting in either an uncomfortable setup or one that impedes access to gear. The last thing anyone needs when it comes time to draw and use their pistol is the discovery that their plate carrier is preventing it from leaving its holster. These are all issues that should be worked out while training with your gear as if the first time you’re using it is during a bona fide defensive scenario you’ve already made a mistake.
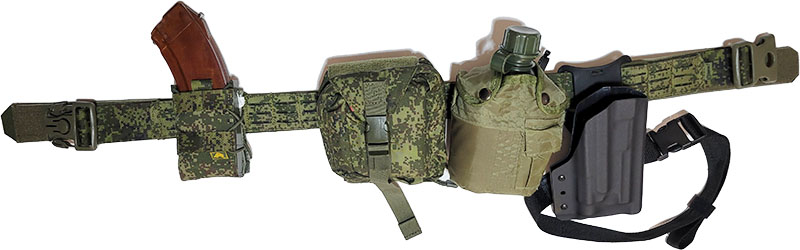
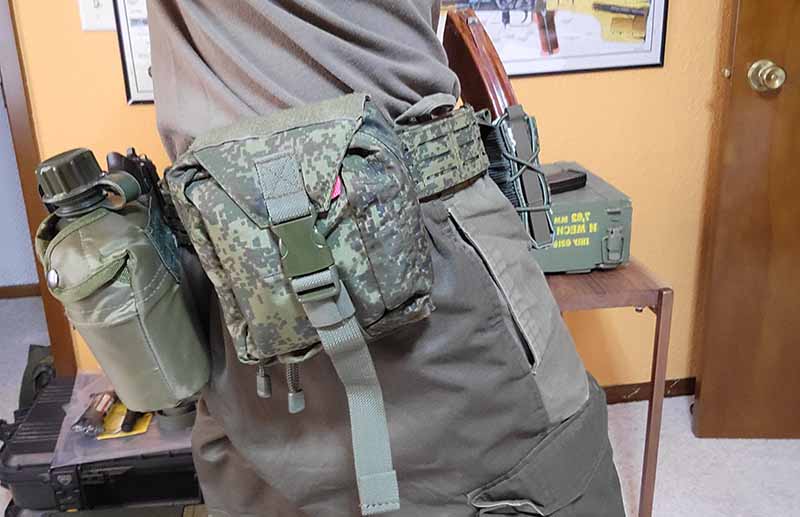
A proper battle belt setup is used in conjunction with a plate carrier to take some of the bulk and weight off of the chest and places it on their hips. It should give fast access to things like spare rifle magazines, medical equipment, water and other gear without interfering with movement. The belt itself needs to be sturdy enough to support the weight you intend to put on it and should have enough real estate for MOLLE accessories as well.
Battle Belt Setup
The placement and selection of gear carried on a battle belt is extremely important, as an improper setup may be more of a hindrance than a help. After ensuring that your belt doesn’t interfere with the wearing of your body armor, the next step is configuring the belt itself.
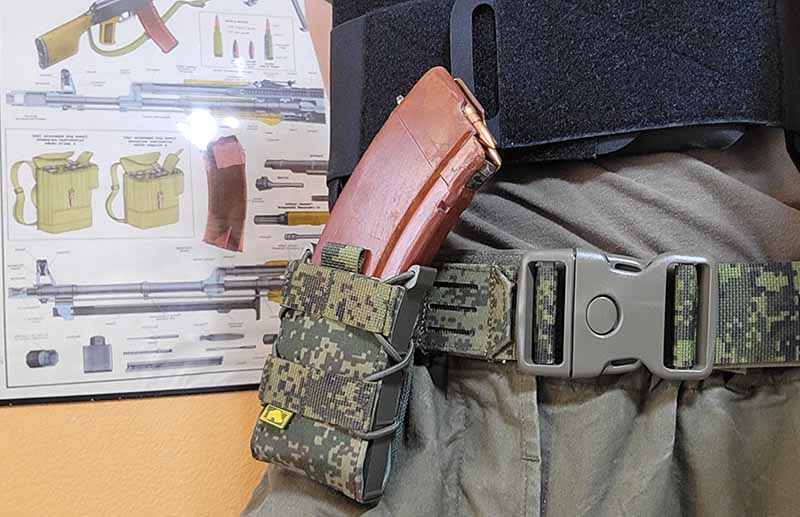
The current thinking surrounding magazine placement on a battle belt is to position them ideally for reloading, typically on the left hip. Whether or not you subscribe to the uber-tactical high speed, low drag training where this concept originated, it seems to have been established that reloading from the waist is faster and more consistent than reloading from the chest. Most of the guys these days who use this kind of gear typically teach that one should reload their rifle from their belt and then reload the belt from the plate carrier or chest rig.
The positioning of medical gear like an IFAK or tourniquet is less of a settled science than it is for spare mags. Medical gear is only as useful as training allows it to be, and even with the proper training one may be too severely injured to apply it to themselves. In the military, IFAKs are carried to be used on wounded individuals by other members of their team, not by themselves. If you lack team members or proper medical training, carrying an IFAK at all may be mostly useless and you should individually assess which items in the kit you could reasonably expect to apply to yourself. Could you apply a tourniquet to your own leg? Probably, but don’t expect to decompress your own chest. Personal situation and skill level need to be considered when choosing what medical equipment belongs on your battle belt setup.
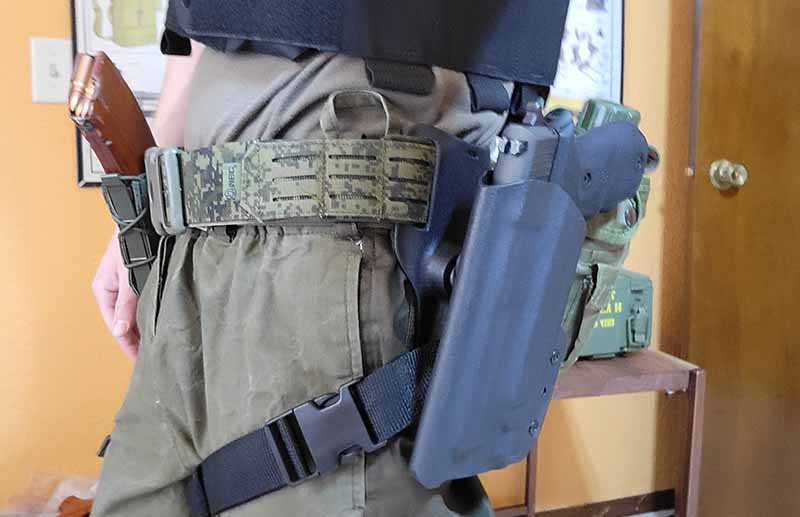
As we already discussed, if you plan on carrying a sidearm on your battle belt you need to determine that it is compatible with your plate carrier. Typical OWB holsters that ride at the same level as the belt usually don’t work for these purposes, and low-ride holsters have become the preference. While low-ride holsters often have a thigh-strap as well, these are distinct from drop-leg holsters as the weight is suspended by the belt rather than the straps that attach the rig to the leg. Anyone who’s tried to run with an old-school drop-leg holster will tell you that these are not ideal, and that the more modern low-ride models are greatly superior.
Some other gear that can be incorporated into a battle belt setup include a dump pouch for empty magazines, a canteen of water or other small pieces of kit such as gloves.
Battle Belt Styles
Like all things in the tactical gear world, there is quite a range in the price and quality of battle belts on the market. The best battle belt for you will depend not only on your budget, but what you intend on using it for. If you’re browsing battle belts to have a basic way to equip a sidearm and a couple of spare rifle mags during a potential home invasion, you can get away with buying a much simpler and cheaper belt than you could if you intend on wearing it during the apocalypse.
There are wide belts with ample real estate for attaching MOLLE gear and thin belts that could realistically be worn with a normal pair of pants. There are simple, one-layer models that are worn over other clothes as well as models that feature an inner belt with hook and loop for securing an outer belt worn over it. The style and quality of the buckle can play a big role in price as well.
One will have to determine the best battle belt style for them based on whether they intend on wearing it to training classes and competitions, during a SHTF scenario or just in case of a break-in. Here is a small spread of some of the different styles available:
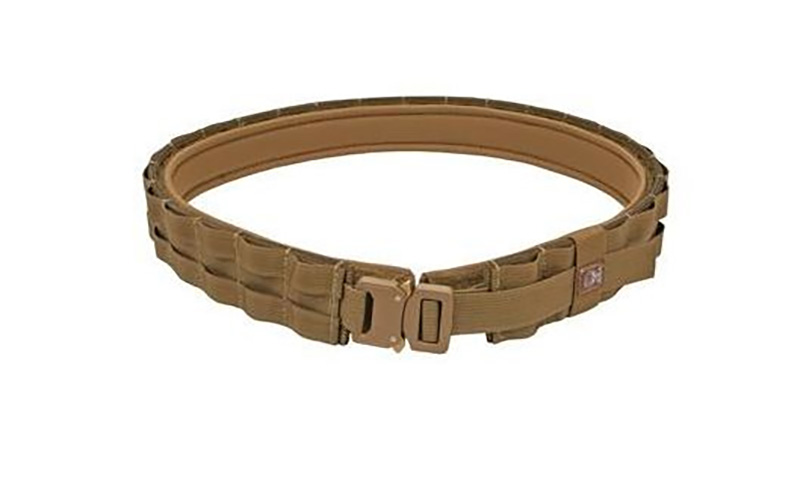
Condor Tactical Belt
This condor belt represents the simplest and cheapest of what could still be considered a battle belt. On its own, it has no provisions for mounting MOLLE accessories and has a very simple plastic buckle. This style would not be able to carry a large amount of gear, but if all you needed to attach was a holster for a sidearm and a pouch for a rifle magazine, it could still get the job done.

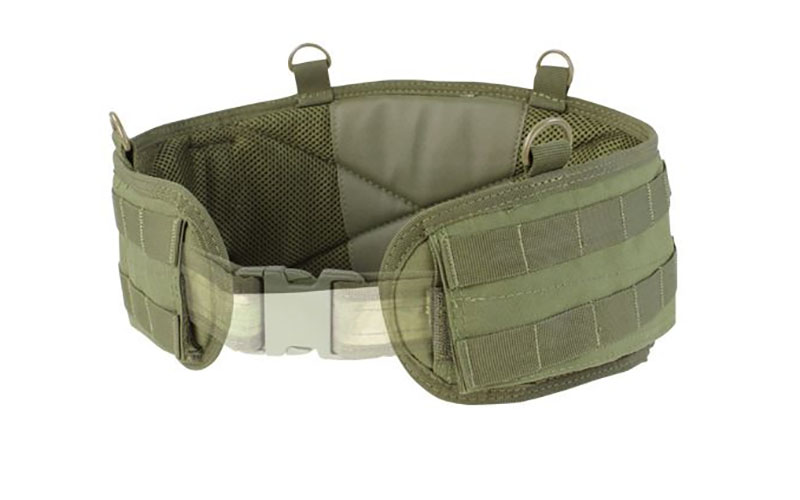
Condor Gen II Battle Belt
Designed to be used in conjunction with another belt such as the previously listed Condor example, systems like this one can be used to provide the necessary real estate for mounting a greater amount of gear. This style should also be more comfortable to wear than the thinner belts, but the extra height may make them incompatible with certain plate carriers. This model also has provisions for attaching suspenders for extra security if mounting a lot of weight.
Grey Ghost Gear UGF Battle Belt
This model represents the higher end of battle belt setup options. This example is the two-layer style, with an inner belt that is worn traditionally to secure the outer belt using hook and loop. It also has a sturdier, more desirable metal buckle and comes with the appropriate webbing for attaching MOLLE gear. A belt like this will be more stable, secure and capable of retaining more gear than the simpler models, but those features are reflected in its price tag.
Final Thoughts
Whatever style of battle belt you’ve decided on, just remember that it’s worthless unless you wear it while you train. Training in your kit will reveal the shortcomings of a setup before it’s too late to remedy it, and training is the single most important aspect of increasing your chances of surviving a defensive encounter.
More Tactical Gear
- Body Armor Buyer’s Guide
- Picking A Plate Carrier Setup
- Weapon Light Buyer’s Guide
- Eight Pro Shoulder Holster Options

Next Step: Get your FREE Printable Target Pack
Enhance your shooting precision with our 62 MOA Targets, perfect for rifles and handguns. Crafted in collaboration with Storm Tactical for accuracy and versatility.
Subscribe to the Gun Digest email newsletter and get your downloadable target pack sent straight to your inbox. Stay updated with the latest firearms info in the industry.


