
Getting a custom paint job on your AR doesn’t have to come with a custom price.
What are some simple tips for getting a great paint job on your own?
- Gather the necessary supplies: the paint you intend to use, a mask, gloves, a degreaser (acetone or Brownells’ TCE cleaner), scuff pads or sandpaper and masking tape (the good, blue type).
- Decide which method you intend to use for your paint job: “Sponging,” “Stenciling” or “Masking.”
- If your goal is a good camouflage, strive for “depth.” You want areas that are sharply defined that contrast with areas that blend together more easily. Above all, you’re looking for it to appear to be a different shape.
The thing about ARs is they pretty much all look alike. If you want to stand out, or blend in, a paint job is the way to go. You can get a professional to do it, but using spray paints is also an easy D.I.Y. project. With a little time, effort and creativity, you can create a professional-looking paint job. And, the same techniques can be used with any of your gear.
The materials you need are simple. (This varies some depending on what method you’re using.) For a camo job, use “flat” paint that doesn’t have a shiny finish. I use Aervoe-Pacific camo paint from Brownells. It comes in a variety of colors, covers extremely well and dries quickly.
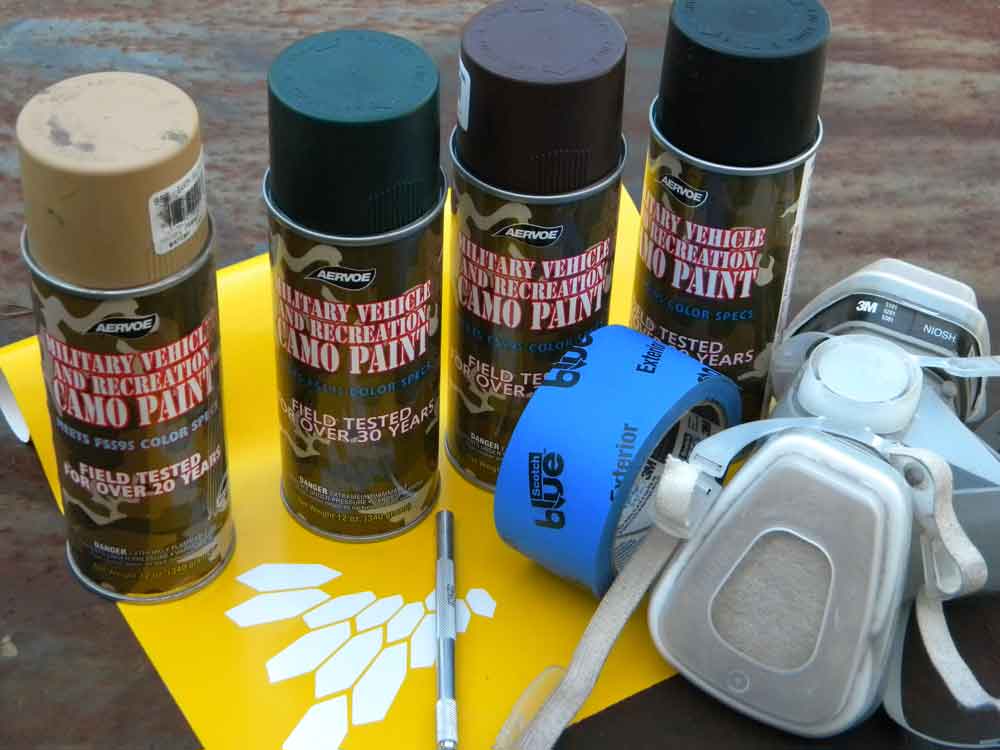 You’ll want a mask, to prevent inhaling fumes and overspray, and a set of safety glasses. Wear gloves to protect your hands and prevent oil on them from transferring to the gear. Use a degreaser — acetone or Brownells’ TCE cleaner — to remove oil from the weapon and scuff pads or sandpaper to prep the surfaces. You’ll need masking tape — the good blue type made for painting — to cover areas you don’t want painted. I use a sharp X-ACTO knife to trim tape and cut stencils. Having a way to hang your gear allows you to work it from all angles.
Sponging
There are a variety of different methods you can use for a paint job. “Sponging” is one of the simplest and produces good, random patterns. Tape off any areas you don’t want painted — optic lens/dials, other sights and areas like the muzzle crown and other controls. Use a degreaser to clean everything, and lightly scuff everything to give it some “tooth.” Clean everything again to remove any contaminants.
Start with a base coat of two or three colors. Then use a course painting sponge to apply other colors in a variety of patterns. Cut the sponge into different sizes and shapes and spray it until it’s wet. Start dabbing. Repeat with other colors, and if needed spray some more paint over this to break up some of the sharp edges.
Stenciling
Probably the most common method is “stenciling.” Prep everything as mentioned above. Apply a base coat with one or multiple colors. Now you’re ready to attach your stencil. Almost anything can be used as a stencil. You can make your own, cutting out shapes or designs using cardboard or masking tape. Brownells offers pre-cut stencils, such as the “Peel ‘n Spray” series from Lauer Custom Weaponry, the same people who make Duracoat finishes. You can also use materials like mesh laundry bags, which create good random patterns. Also, try combining different stencils to discover what works best. Don’t be afraid to experiment using pieces of wood, laundry bottles or anything else you can paint.
Attach the stencil by taping it to the rifle. Don’t worry if it doesn’t fit perfectly. You’re not looking for perfect; remember, in nature things are random and chaotic. Having sharp and blurred edges looks natural. Spray your next color or two over the stencil, and then move the stencil to another location, or attach another stencil, and repeat the process.
Masking
“Masking” is a simple process that produces great results. You spray one color or two base colors, and then mask off the areas you want to remain that color. Remember, any areas left uncovered will be painted over, so you have to do a little planning in advance, especially if you are trying to reproduce or match an existing camo pattern. Spray your next color, put down more masks and repeat. I start with my darkest color and work through to the lightest color. You can also blend one color into another for smooth transitions. After completing all the masks and painting, remove the tape to reveal the finished paint job.
As mentioned, you can combine the different techniques — sponging, stenciling and masking — to create unique and individual patterns.
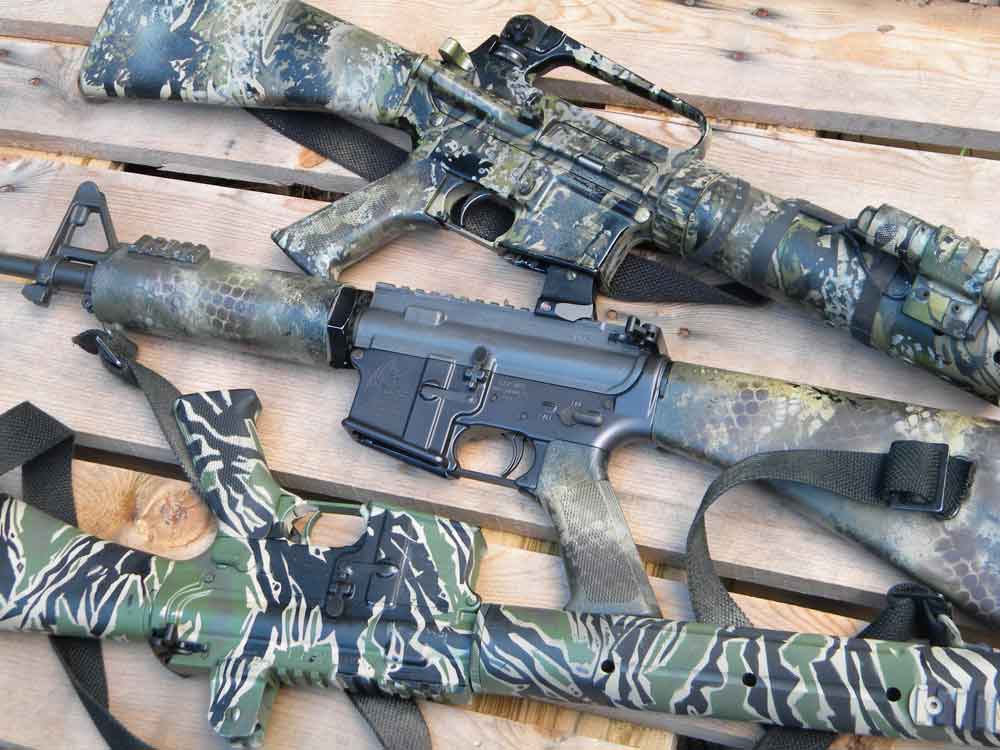
Camouflaging is all about blending into the surrounding terrain and trying to deceive the eye. The colors and patterns you use will depend on the environment. Our eyes will quickly pickup on anything “abnormal.” For example, pure black does not exist in nature or man-made environments, so avoid that color.
You want to create “depth.” This is accomplished by having both sharply defined areas that contrast with areas that gradually blend from one color to another. Camo should make the object appear to be a different shape. An object that is one color is usually light on top, where the light is hitting, and dark on the bottom, where there are shadows. Nature reverses this out; animals are usually a dark color on top and light colored on the bottom. This makes them appear to be upside down. Use this same principle to break up the shape of your equipment, almost bending the “light.”
Or, you want your rifle to stand out from the crowd. So, it’s bright colors and black for contrast for a “race car” look. It all depends on the look you are going for with your paint job.
Once you’ve got everything painted, it’s time for testing. Put your gear into the field – urban or rural – and have someone try to spot it. Does it blend in, successfully deceiving the eyes? Or, does your rifle stand out in a crowd of others that all look the same? The cool thing about doing this yourself is that if you don’t like the results, it can be redone. With a little practice, time and inexpensive materials, you too can create works of art.
Editor’s Note: This article is an excerpt from the August 2017 issue of Gun Digest the Magazine.

Next Step: Get your FREE Printable Target Pack
Enhance your shooting precision with our 62 MOA Targets, perfect for rifles and handguns. Crafted in collaboration with Storm Tactical for accuracy and versatility.
Subscribe to the Gun Digest email newsletter and get your downloadable target pack sent straight to your inbox. Stay updated with the latest firearms info in the industry.


