
Of all the AR’s parts, the operation of the charging handle and bolt catch (also known as the bolt release) seems to confuse shooters most.
The charging handle assembly is used to manually cycle the bolt group during loading and unloading, and while clearing malfunctions and stoppages. To perform this and other tasks efficiently — and to prevent wear and tear on your AR — it’s important to implement the proper techniques when using the handle catch/release in tandem, as well as when using them independently.
For starters, the charging handle is used when performing a chamber check. The handle and bolt catch are used together to manually lock the bolt open. However, you don’t use the handle to perform an empty reload; for that, you use the bolt catch as a release. Knowing when and how to use the charging handle and bolt catch in harmony is key to operating the AR efficiently.
Nuances of the Charging Handle
Improper technique of the charging handle creates friction and wear, and it requires more force than necessary. In fact, you can actually torque the handle out of shape. Once the handle is bent, the bolt carrier can’t reciprocate — and the AR ceases to function. Incorrect technique could also break the latch, allowing the charging handle to follow the bolt back, thereby impacting your head. Cycling the handle is all about using proper technique, not brute force.
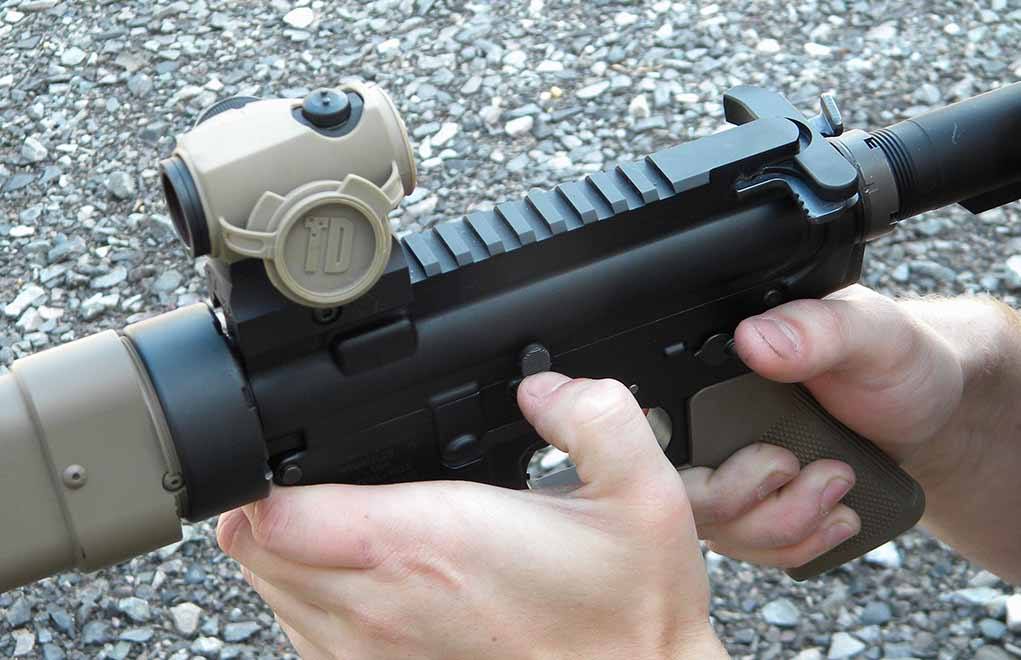
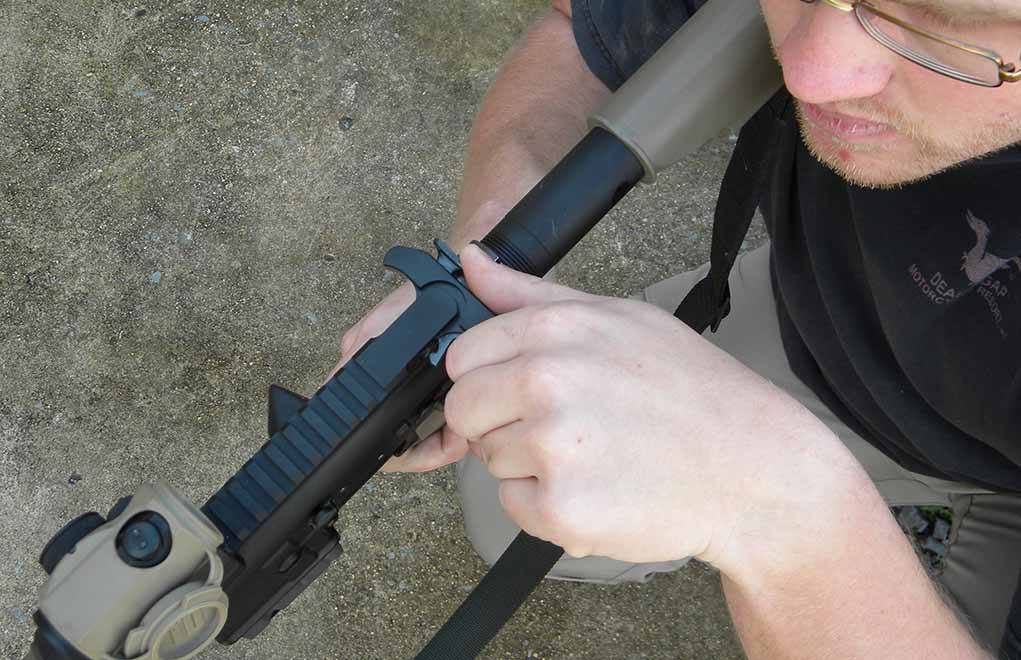
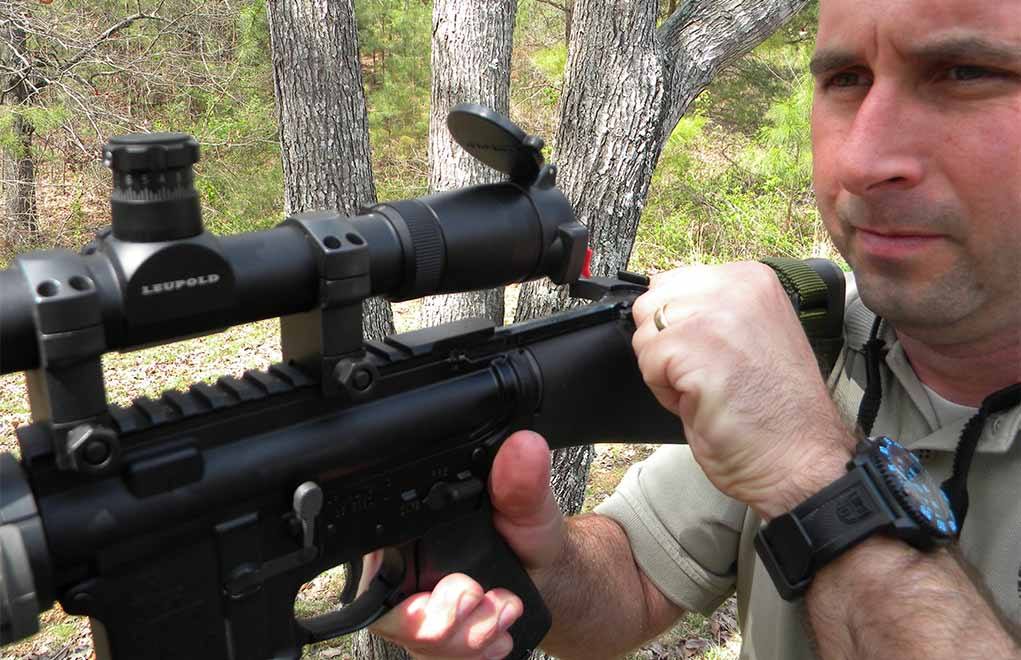
Normally, the strong hand maintains its grip on the AR, and the support hand is used to operate the charging handle, which is a three-step process: First, position the thumb of the support hand on the back of the handle in its center. Next, use the index finger to unlatch. Then, using the elbow (not the shoulder), cycle the handle aggressively, pulling it straight to the rear. The thumb should follow the center line of the stock as it moves rearward, maintaining alignment between the handle and its channel in the upper receiver.
Need More AR Knowledge:
- 7 Affordable 9mm Carbine Options
- Top Options In AR Pistols From Daniel Defense
- Properly Using A Defensive AR-15 From Cover
- Should You Own A Pistol Caliber Carbine?
Once the handle has reached full extension, allow it to strip from your hand: Release it as you would a bowstring, allowing the bolt group to snap forward under full spring pressure.
The most common issue I see with the AR is students letting their support hand impede the handle and bolt group’s forward movement. This creates a stoppage, requiring additional manipulations. Pull the charging handle all the way to the rear and release it — every time.
I teach left-handed shooters to use the first two fingers of the support hand (think “snake fangs”) on the left and right side of the handle, with the thumb centered in the back. Lefties can install an ambidextrous charging handle with a release on each side. Just remember that you might not always be firing your AR, so you must know how to work with a military-type handle.
Other Charging Handle and Bolt Catch Duties
As mentioned earlier, the charging handle is used to check the condition of the chamber. It sounds simple, right? Maybe, but “simple” and “smooth” are not the same thing.
After cycling the handle with the support hand, it’s repositioned on the handguard. The strong hand comes off the grip to the charging handle. Right-handed shooters use their “snake fangs” to grasp the handle; left-handers use the right-hand technique described above. The strong hand pulls the handle slightly to the rear, allowing you to confirm there’s a round chambered or that the chamber is clear.
The charging handle is also used to manually lock the bolt to the rear. Here, again, the strong hand is used to pull back on the charging handle, while the support hand is positioned at the magwell of the lower receiver. Right-handers use their left thumb to engage the catch; lefties use the index finger of the right hand.
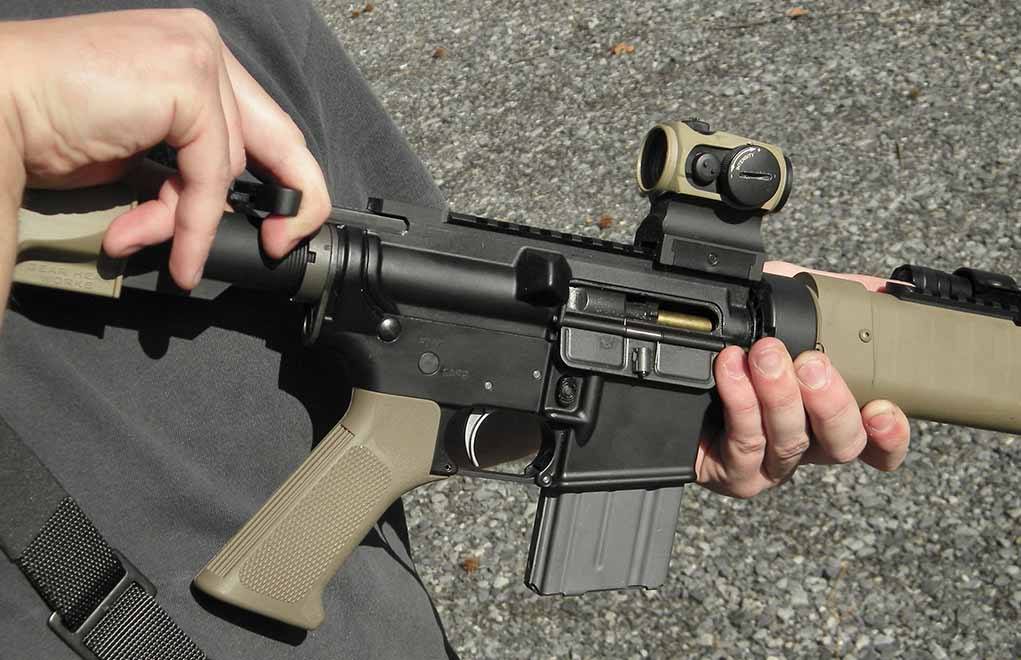
In addition, the charging handle is used to manually cycle the bolt group. To perform an empty reload when the bolt is locked to the rear, it’s best to use the bolt catch as a bolt release. Hitting the “bolt release” is the most efficient and ergonomic way to chamber a round during an empty reload.
A right-handed shooter releases the bolt by pressing with the thumb of the left hand. The new mag is inserted and locked in with the left hand, so the thumb is already there and ready to release the bolt. Left-handed shooters should use the right hand to feed a fresh mag and their trigger finger to release the bolt. Using the bolt catch as a release chambers a fresh round, and the bolt has the energy necessary to lock in battery. You’re now ready to fire.
Final Thoughts
The charging handle and bolt catch are critical components of the AR. They’re simple to use — as long as you use the correct technique.
Knowing when to use the charging handle and bolt catch separately or in unison is mandatory to operating the AR efficiently. And, as it is with any piece of precision machinery, it’s up to you to learn it well.
The article originally appeared in the May 2019 issue of Gun Digest the Magazine.

Next Step: Get your FREE Printable Target Pack
Enhance your shooting precision with our 62 MOA Targets, perfect for rifles and handguns. Crafted in collaboration with Storm Tactical for accuracy and versatility.
Subscribe to the Gun Digest email newsletter and get your downloadable target pack sent straight to your inbox. Stay updated with the latest firearms info in the industry.


