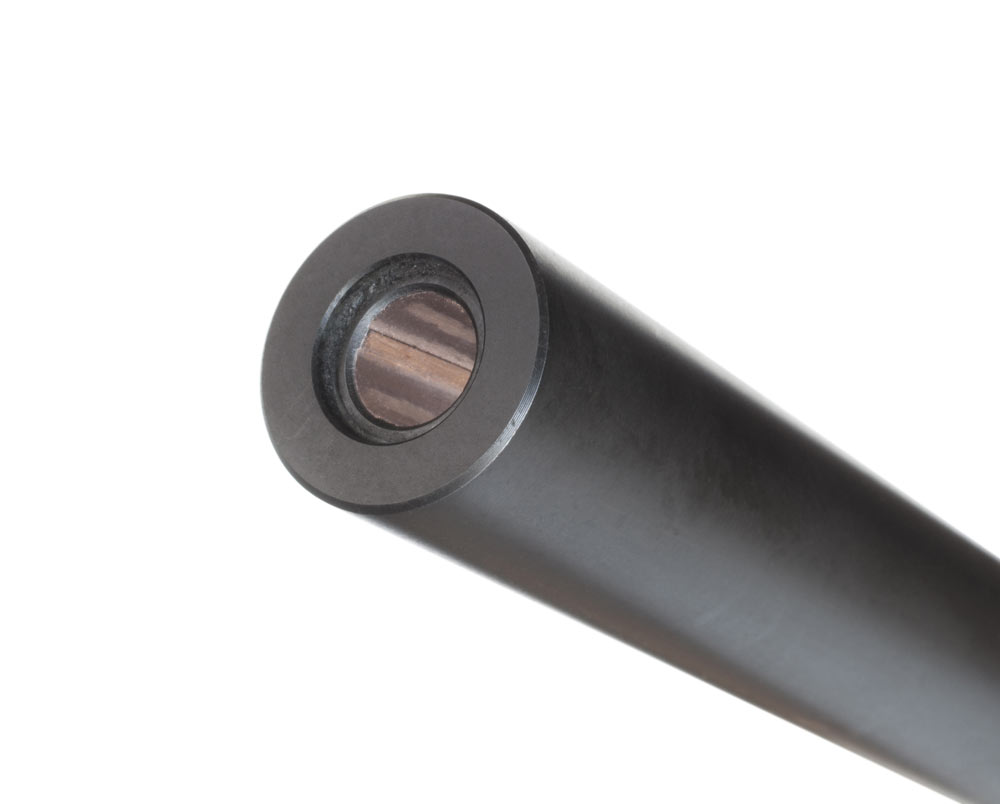
Quality, proper break-in and care are important factors for squeezing performance from your precision rifle.
While there is no single most important part of a precision rifle, the barrel is probably as close as it comes. Nothing physically touches the bullet the most in the shortest amount of time than the barrel. Picking out the best barrel that the marksman can afford and proper break-in and care is the heart of an accurate rifle. The barrel consists of a tube with rifling and a crown on the dangerous end. The other side next to the receiver is the chamber. It is cut into the fat end of the barrel and must be precise so that when the barrel is torqued onto the receiver it will headspace correctly.
With the barrel being such an important part of the rifle, there is usually a big difference between a factory barrel and a custom barrel. All barrels start out a piece of round steel blank that is cut to rough length, stress relieved and drilled. Usually they can be had in stainless steel or chrome moly. Chrome moly can be polished and blued or painted with one of the oven-roasted paints from Brownells. Stainless is one of the better materials for durability in the weather and it makes a fine tactical barrel, but I prefer chrome moly steel with a bead blasted matte blue finish. The stainless can be painted with the heat paints also if tactics dictate.
The rifling can be hammer forged into the barrel or button rifled. The hammer forge produced rifling is made by hammering a mandrel that is shaped with ridges through the drilled bore forging the lands and groves. Button rifling has gained popularity for rifling by many manufacturers and is superior to hammer forging. The button is attached to a long mandrel that is pulled or pushed through the bore slowly and rotationally to cut the desired rifling. This is superior because the stress from the hammer forging can cause warping as the barrel heats up.
We all know the effects of a barrel heating up and affecting point of impact (POI). One way to neutralize this is cryogenically treating the barrel. Some manufacturers like Krieger treat all their barrels and some offer it as an option. It is something that can be considered when super tuning a rifle or changing barrels. Basically this process involves cooling the barrel over a period of time to -300 C and then slowly raising it back to room temperature. This treatment minimizes warping because of barrel heating and also eliminates seasonal temperature change effects.
Before the chamber is cut, the barrel is then put in a lathe to cut the contour. It then has to be threaded and fitted to the action and the chamber reamed out. The chamber is formed by first drilling and then slowly bringing it up to size with several reamers. The first a rough out, semi finish, and finish reamer are followed by a high polish.
The custom barrel is a whole different animal. After the bore is drilled a precision reamer is pushed through smoothing surfaces and increasing consistency all the way along the bore. The rifling is pushed out with a carbide button and then the barrel is heated again and held at 1200 degrees to relieve any stress from rifling. Some barrels are “cut” when referring to rifling, which means one groove was cut at a time. The barrel is then cut, cleaned, and lapped for final cleaning.
The chamber must be precisely cut to center alignment with the bore. This is critical so the bullet will properly enter the throat and cut into the rifling as it starts its journey. Many manufacturers produce short cut barrels that have the caliber chamber cut with only some finish reaming necessary to install it with correct headspace.
They are usually also threaded to a specific receiver. Many gunsmiths like to start with a contoured blank so that the chamber, threads, and barrel shoulder can be cut with the same setup for more consistency. I have used both with good results.
The rate of twist in the barrel should be decided on when planning the caliber of the finished rifle. The rate of twist is how many inches the bullet travels to make one revolution. For instance, a 1-in-10 twist tells me that the bullet has to travel 10 inches down the barrel to make one revolution. For the Winchester Featherweight action I recently re-barreled, I went with a 1-in-10 twist.
The 30-caliber blanks commonly come in 1-in-10 and 1-in-12 – matching the rifling twist to the bullet you are going to use will improve the bullet flight. I went with the 1 in 10 because I was going to mostly use 168-grain Sierra HPBT Bullets. I have been shooting Sierra Match King Bullets since I reloaded my first round of 308. They haven’t given me a reason to switch to anything else.
The barrel is finished off with a proper crown. There are many different styles of crowns, but the most important feature is the cut along the end of the bore side of the barrel. It needs to be cut perfectly perpendicular to the axis of the bore. This allows gas to escape evenly around the bullet keeping its first milliseconds of flight on line. Damage to the crown is a destroyer to accuracy and the different styles help protect this edge. The standard barrel is the rounded off type used on hunting barrels. I like a target crown with an 11-degree bevel from the bore out to the edge. There are several versions of the target crown, and they work nicely on heavier barrels.
I am in the breaking in mode of the Winchester I re-barreled. Proper break-in is important to start the rifle off and get the most wear out of the barrel. I started with a Shilen barrel from Brownells in a number five contour. I chucked it up in the lathe and cut the face, the stub, threaded and chambered it all from the same set up in the machine. I like threading my own so I can get a custom fit to the threads of the action I am working with. This helps to make a very important fit, the barrel/action union. These two surfaces must perfectly and evenly touch all around upon tightening, lining up the action with the barrel axis.
All this work deserves proper attention by breaking in and cleaning the barrel correctly. All new barrels and guns should be broken in properly using this method or one close to it. One of the biggest things to remember is to let the barrel cool in between shots. The chamber and barrel are subject to enormous pressures and temperatures upon ignition. The temperatures will rise to 6500 degrees. Proper cooling in between shots is also necessary to keep tabs on the POI from a cold shot. Most precision riflemen are more interested where the first shot is going to hit. I always have cleaning gear with me at the bench. First, or cold, shot accuracy can only be achieved by taking every shot the way the rifle is stored. This is a very important factor for the SWAT rifleman.
In between each shot for the first 5 to 10, some folks recommend five, I go 10, the bore should be swabbed out with a powder solvent, then a copper solvent, brushed, and dry patched. I use the ammonia smelling solvents for the copper removal; they seem to work a bit faster. I really like the Barnes CR-10 copper solvent. For a powder solvent I have used Hoppes #9, Shooters Choice, and Kroil. They all work great and Kroil is a good cleaner and lubricant.
I will give the bore about 10 lashes with the proper sized solvent soaked brush to get out stubborn copper. I have found in my general cleaning, there is more copper fouling left in the bore than most shooters perceive. This copper will continue to build up and affect the break in. Running bullets down a nice clean barrel will continue polishing and lapping the bore, even if the barrel is on a high dollar custom rifle. After the first 5 to 10 shots the barrel should be swabbed out every five shots up to 50 rounds. As you can see this will not all occur in one session.

Proper cleaning is the next stage to barrel life and performance. As mentioned earlier, I have seen copper that is very stubborn and the barrel should be closely inspected until every speck is gone. I have cured other riflemen’s accuracy problems in the shop with an extreme cleaning job. This copper will continue to build up over time and ruin accuracy. I remove the bolt and push the cleaning rod through the breech end being careful not to nick the edges of the throat. I use a slotted tip jag to wet the bore and a pointed bronze jag type to push the gunk out after brushing. This is a little excessive but with stubborn copper sometimes it helps to let it soak. The pointed jag doesn’t leave enough solvent behind to soak because it is designed to push gunk out.
I start out with a powder solvent as before then soak the barrel with one of the copper solvents. I let it sit for several minutes and clean up and oil the bolt. I don’t take the bolt apart every cleaning but will inspect it for brass residue and chips that might work down into the firing pin hole and cause problems.
Then I work the proper sized brass brush up and down the barrel from the breech end 10 to 15 strokes followed by another wet patch. If there is stubborn copper fouling I will work the brush longer. A dry patch pushes the gunk out the muzzle end. I look down the barrel with a light to see if I can detect any copper in the rifling. At the end of the barrel usually I can see the copper in the grooves, so I continue until I can see no more fouling. Sometimes I will leave the bore soaking while I eat dinner and come back out and finish. The copper will soften eventually and come out. I continue the soak and brush until it is all gone. If I don’t do a good job of removing the copper I will notice my groups getting bigger and a return to the cleaning bench fixes it right up.
The barrel is an important part of the rifle and performs at its peak when properly fitted to the fine tuned action. Proper break-in and routine care will keep this most important artery clear of accuracy robbing deposits and fouling. Whether the rifle is for a SWAT precision rifleman, competition shooter, or the hunting rifle that will be handed down to successors, proper care will guarantee the most life out of the barrel.
Read Part 1
Read Part 3
Read Part 4

Next Step: Get your FREE Printable Target Pack
Enhance your shooting precision with our 62 MOA Targets, perfect for rifles and handguns. Crafted in collaboration with Storm Tactical for accuracy and versatility.
Subscribe to the Gun Digest email newsletter and get your downloadable target pack sent straight to your inbox. Stay updated with the latest firearms info in the industry.

![Best Concealed Carry Guns In 2025 [Field Tested] Wilson Combat EDC X9S 1](https://gundigest.com/wp-content/uploads/Wilson-Combat-EDC-X9S-1-324x160.jpg)


![Best 9mm Carbine: Affordable PCCs [Tested] Ruger Carbine Shooting](https://gundigest.com/wp-content/uploads/Ruger-Carbine-Shooting-100x70.jpg)
![Best AR-15: Top Options Available Today [Field Tested] Harrington and Richardson PSA XM177E2 feature](https://gundigest.com/wp-content/uploads/Harrington-and-Richardson-PSA-XM177E2-feature-100x70.jpg)
