David Arnold, the conservator at the Springfield Armory National Historic Site Museum in Springfield, Massachusetts says there are a few simple guidelines to help care for an antique gun – or a collection.
Avoid dramatic swings in relative humidity (RH). Try to keep the humidity stable and between 40 and 50 percent. Consistency is more important than precise maintenance of a specific RH reading, though RH control is critical because of an unusual physical property of wood called anisotropy. Wood cells expand or contract very differently in response to changes in relative humidity – depending on their specific grain orientation (axial, transverse or radial) in the log from which they came.
Large swings in RH can result in cracks caused by compression-set shrinkage. If the humidity remains fairly constant, changes in temperature make little difference to either metal or wood. A rapid rise in temperature, though, can pull the moisture out of the environment (including your artifact), causing a sudden drop in RH. Cell shrinkage and cracking or splitting can then occur.
Handling
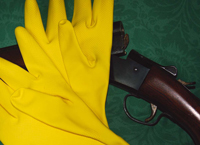
Wear gloves when handling your collection. No protective coating can stand up for long against repeated barehanded handling. Best to always wear gloves and I recommend Nitrile examination gloves when cleaning and coating your collection. Once an item has been coated, wear plain cotton gloves.
Housekeeping
Keep your firearms dust-free. Dust can trap moisture increasing the likelihood of corrosion occurring.
Don’t use commercial dust cloths, though. They often leave an oil film behind which traps dust and dust traps water vapor from the air. When dusting, use either a vacumn with a soft brush or a soft cotton cloth very lightly dampened with water. Without moisture, dust merely gets shoved around and will not be picked up. Dry the gun immediately with a clean cloth.
Don’t use alcohol of any kind when dusting or cleaning a firearm stock. It can skin or strip an historic finish. Never use liquid or spray dusting products, either, because most of them leave mineral oil behind, which traps dust. Remember that dust traps and collects moisture.
Storage/Display
Narrow hooks or loops of wire should not be used to support collection pieces either in storage, transport or on display. The weight of most long arms on such devices is sufficient to cause indentations in their stock at the points of contact. Instead, use broad, padded supports.
We use thin sheets of a closed-cell polyethylene foam material to pad our display fixtures. To avoid mold and mildew during long-term storage, avoid at least two of the three conditions known to promote bloom outbreaks: elevated temperature, still air and elevated humidity.
Cleaning and Coating: Cleaning Wood Stocks

First, separate the wooden parts from the metal parts. They are cleaned and coated differently. Unless it should become absolutely necessary, leave the unfinished interior wooden surfaces alone.
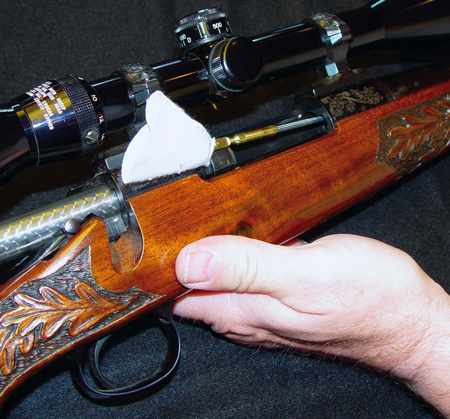
Clean the exterior of the stock by placing a few drops of a mild detergent in a gallon of warm distilled water. Apply with a slightly damp soft cloth and rinse with clean cloths dampened with distilled water. Dry with soft cloths immediately after rinsing.
Clean again with mineral spirits, using a soft cloth to apply. Be sure to work in fresh air or a well-ventilated area. Avoid using “oil soaps” as they can be caustic and may damage an historic oiled surface.
Cleaning Barrels and Other Metal Parts
[Please note: I believe that it is essential to practice any new technique on a sacrifi cial piece first, before applying it to something irreplaceable.]
Use nylon or animal-bristle bore brushes. Avoid using brass or steel brushes because such hard materials can scratch, but also might (under certain conditions) cause galvanic (bi-metallic) corrosion (specifically when using a copper-alloy brush on ferrous metals) by leaving a slight metallic smear behind. Use mineral spirits to soften accretions. Work in fresh air or a well ventilated area. (Are there other solvents that are stronger? Yes, but they are difficult to work with safely.) Swab clean with a cloth patch.
Use only extremely fine abrasives such as oil-free 0000 steel wool. Use only if absolutely necessary to remove stubborn rust or other accretions. Work slowly and watch constantly for any changes to the surface. There is always an element of risk in such work. If you are at all uncertain, hire a conservator or qualifi ed gunsmith before causing irreversible damage. When cleaning brass parts, never use products that contain ammonia.
Ammonia can damage old copper alloy materials by corroding them from the inside out. In addition, such products may include abrasives, which may prove too harsh. Elbow grease and mineral spirits should be tried first. If something slightly stronger is needed, try applying small amounts of wet tooth powder with a cotton swab and rinse with water. So – a general comment about commercial rust removers.
To date, I have not found a rust-removal product that is entirely safe to use on historic metal surfaces. The problem is that most rust removers can’t tell the difference between iron oxide and iron metal, and will leave an etched surface even where there is no rust. Some products do seem to come close, though. Often they require extremely close attention and precision – too much for most of us operating on a home workbench.
In short, there are no magic solutions that are risk-free and I advise against their use on anything you value. Most surface rust can be removed by first lubricating the area with a light penetrating oil and cleaving it off with a sharp scalpel held at a very low angle to the metal. It requires close attention, a steady hand, and some patience, but if you are careful, you will probably get most – if not all – of the surface rust off without leaving a scratch. When done, remove any remaining oil with mineral spirits.
Disassembly and Reassembly
If you are organized and systematic you should be able to safely disassemble and reassemble most firearms successfully. First, probe the floor of every external screw slot with a sharp point held at a very low angle. It’s amazing how much dirt can be packed into a clean-looking slot. All foreign matter must be removed for the screwdriver to do its best, safest work. A good selection of screwdrivers is a must.
Their tips must be matched perfectly to each slot in order to maximize the area of mechanical contact. Taking this precaution will minimize slippage and the scratching and scarring that can result. The internal shapes of screw slots have changed a lot since their invention and screwdriver tips often have to be ground or filed in order to get a good match. Keep this in mind when regrinding a screwdriver’s tip. There are many publications that offer exploded drawings and disassembly/reassembly tips.
There is also a brilliant web site that illustrates with moving images how various types of firearms work.
Coating Stocks

Wood is neither thirsty nor hungry. It is usually covered by a finish that may have become corrupted in some way, thus making it look “dry.” The wood beneath the finish does not need to be “fed,” despite what wood-care product commercials may claim. So never put oil of any kind on an historic finish. There may well be unintended but permanently damaging consequences to ignoring this advice.
A cautionary word about linseed oil. Linseed oil takes forever to dry, will trap dust and will not stop water penetration, either. When linseed oil oxidizes, its molecules cross-link with one another, making it increasingly more difficult to remove as time passes. Oxidized linseed oil (linoleic acid) eventually becomes linoxin, better-known commercially as linoleum!
Repeated, or seasonal, applications eventually develop into a surface that can look like very dark brown alligator skin, and can become almost impossible to remove. Applying a modern finish over an equivalent historic finish can forever confuse the finish “history” of a stock by making it difficult, if not impossible, to tell what (if anything) is original, and what is a restoration material – even with an analytical microscope. Therefore, you would not want to touch up, say, a shellac finish with shellac.
Use paste waxes only. I prefer carnauba-based furniture waxes such as Kiwi Bois, Mohawk or Behlen, or Black Bison on wood stocks. I also recommend using pigmented paste waxes. “Clear” waxes can collect in pores and appear as white specks against a dark wood background. As much as we love bees and honey, avoid wax mixtures that include a high percentage of bee’s wax when preserving wooden firearm parts. These wax mixtures are not especially harmful, but they are relatively soft (fingerprint easily) and can be slightly acidic.
Coating Metals
(Note: this advice is strictly for guns which have been “retired” from use and will never be fired.)
Avoid using oils. Oil is not the best material for long-term protection of collection pieces because it traps dust and dirt, eventually breaks down and has to be periodically replaced. A high quality light oil is fine for maintaining a gun you still shoot. Use a microcrystalline wax, such as Renaissance Wax as a protective coating. Such a wax is practically inert, remaining stable for a very long time. Apply and buff out with a soft cloth or brush. I coat all parts this way, inside and out. Brass parts can also be coated with wax.
I prefer to use Incralac acrylic spray lacquer because it is easily removed with solvents but bonds especially well to copper-alloy metals, and will withstand more abuse and last longer than wax.
Minor Stock Repairs
If a split or detached piece of a stock must be repaired, use an adhesive that is both strong and reversible (i.e., can be safely removed at any time in the future). There is only one: traditional hide glue.
Do not proceed if there is evidence that the damaged site has been previously repaired. In this case, if the gun has any value at all, I recommend that you consult a conservator. Unless you work with hide glue every day, make it up fresh in small amounts as needed.
It doesn’t take long to prepare and it will do a better job than using old glue. Hot hide glue is preferable to liquid hide glue as it is less affected by humidity. Dampen the area to be glued with hot water. Blot the area and wait a few minutes. Then apply hot glue to both surfaces with a brush and clamp immediately. An appropriate clamp can be as simple as a few pieces of masking tape, rubber bands, bicycle tire strips or small padded weights.
Use the least force needed to do the job. Clamps can usually be removed in a few hours, but it takes at least 24 hours for the repair to fully harden. Excess glue can be removed with a lint-free cloth dampened with hot water. The best time to do this is usually right after removing clamps. If you still need help, seek the services of a professional conservator. Contact me or the American Institute for Conservation of Historic & Artistic Works for a referral.

Next Step: Get your FREE Printable Target Pack
Enhance your shooting precision with our 62 MOA Targets, perfect for rifles and handguns. Crafted in collaboration with Storm Tactical for accuracy and versatility.
Subscribe to the Gun Digest email newsletter and get your downloadable target pack sent straight to your inbox. Stay updated with the latest firearms info in the industry.

![Best Concealed Carry Guns In 2025 [Field Tested] Wilson Combat EDC X9S 1](https://gundigest.com/wp-content/uploads/Wilson-Combat-EDC-X9S-1-324x160.jpg)


![Best 9mm Carbine: Affordable PCCs [Tested] Ruger Carbine Shooting](https://gundigest.com/wp-content/uploads/Ruger-Carbine-Shooting-100x70.jpg)
![Best AR-15: Top Options Available Today [Field Tested] Harrington and Richardson PSA XM177E2 feature](https://gundigest.com/wp-content/uploads/Harrington-and-Richardson-PSA-XM177E2-feature-100x70.jpg)

Thank you for your advice to handle your collection with gloves. My husband has started collecting some older guns lately and he’s been trying to figure out displays and care for them. I’ll be sure to mention this to him or just purchase some for him so that he can start thinking about all the other things like cleaning them and finding the perfect display for them. https://ctfirearmsauction.com/upcoming-auctions/