
We take a look at how to tweak your rifle to maximize its potential for accuracy.
Ten-thousand miles.
That’s how far my rifles must travel before the safari begins. Along the way, they’ll be herded by soulless conveyor belts, bounced off concrete floors and fingered by dubiously qualified “inspectors.” Bag-checking rifles for international travel feels like releasing a kid on a bike without training wheels. Though I expect to re-zero the scopes in Africa, I want to ensure the optics on my rifles are set up correctly before I leave. More importantly, I want to be confident I have the skills to return them to a reliable standard if they arrive with problems.
Courage, Tools and Torque
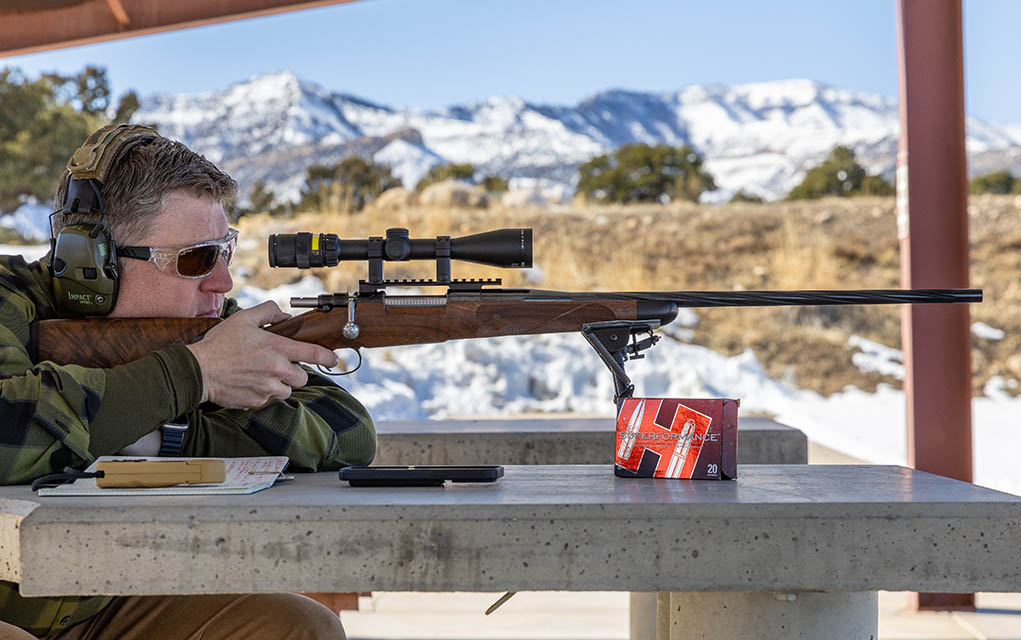
I teamed up with Caylen Wojcik, founder of Modern Day Rifleman, to coach my optics setup on two rifles I’d take to Africa. A former Marine Scout Sniper, Caylen teaches precision shooting for military, LEO and civilian shooters. He also teaches a precision shooting course for hunters.
Wojcik frequently sees similar optics problems when students dust off their hunting rifles after a long off-season. Luckily, most problems are avoidable or easily correctable with a step-by-step approach and a few simple tools.
“Shooters should not be intimidated by assembling and disassembling their hunting rifles down to their core components,” Wojcik says. “We’re just talking about turning screwdrivers, using a level and being thoughtful about torque adjustments. The key is to understand the goal of each step and be methodical.”
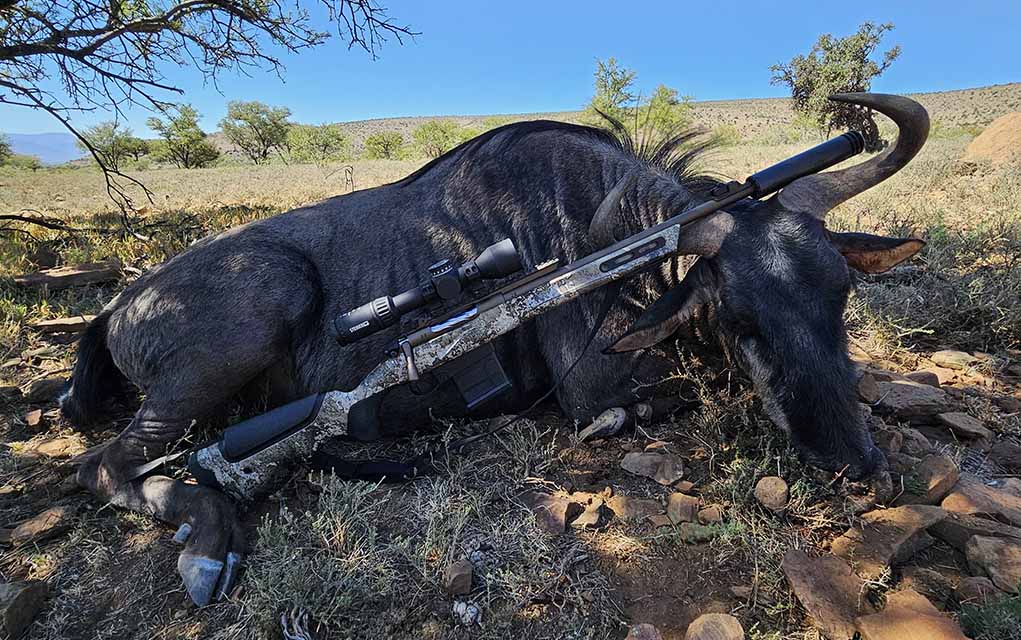
These rifles and their intended application present few unique variables. Both of my rifles are bolt actions and chambered in calibers for African plains game, so nothing “dangerous” or larger than a North American elk. One of my rifles, the Franchi Momentum All Terrain Elite (.308 Win.), is a test rifle, so I can’t make permanent modifications. It’s also new, unassembled and unfired. We’ll focus most of our attention on it.
The other rifle is a scoped and sporterized version of a 117-year-old Swedish Mauser (6.5×55 Swede). I own it, and it was set up and zeroed a few years ago. Though it’s been trapped in my gun safe ever since, the Mauser’s getting the same inspection. For most African hunting scenarios, the shots are from a standing position, supported by shooting sticks, at ranges inside 300 yards. So, we are taking care to get the basics correct, but our process isn’t intended for extreme long-range shooting.
Indeed, we used simple tools. Though bit shapes and sizes varied between components and manufacturers, the ultimate tasks weren’t more complicated than aligning one part with another and tightening the connecting screws to a prescribed tension. Torque-adjustable screwdrivers or torque-limiting ratchets are outside the basic toolboxes of many shooters, but they shouldn’t be. For a moderate outlay, you can have the same basic gunsmithing tools. “Torque” is an important concept to understand from the start. Torque is force applied in a rotational motion—for our purposes, it’s how hard you tighten a screw into a threaded hole. In standard (not metric) terms, it’s expressed as “inch-pounds.”
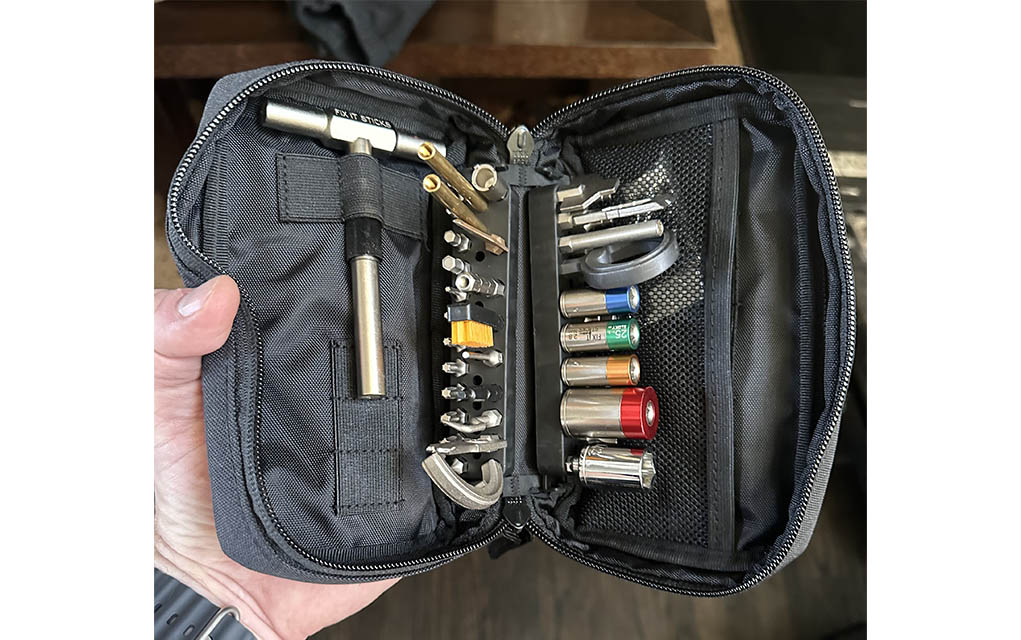
Why should you care? Because “hand tight” varies from person to person. Rifle and optics screws that are too loose can result in inconsistent accuracy. Overtightened screws can break off in their threads, rendering your rifle unusable and requiring a trip to a gunsmith. Tightening to the factory-prescribed torque values removes the guesswork from optic setup while avoiding costly mistakes.
Tight Action
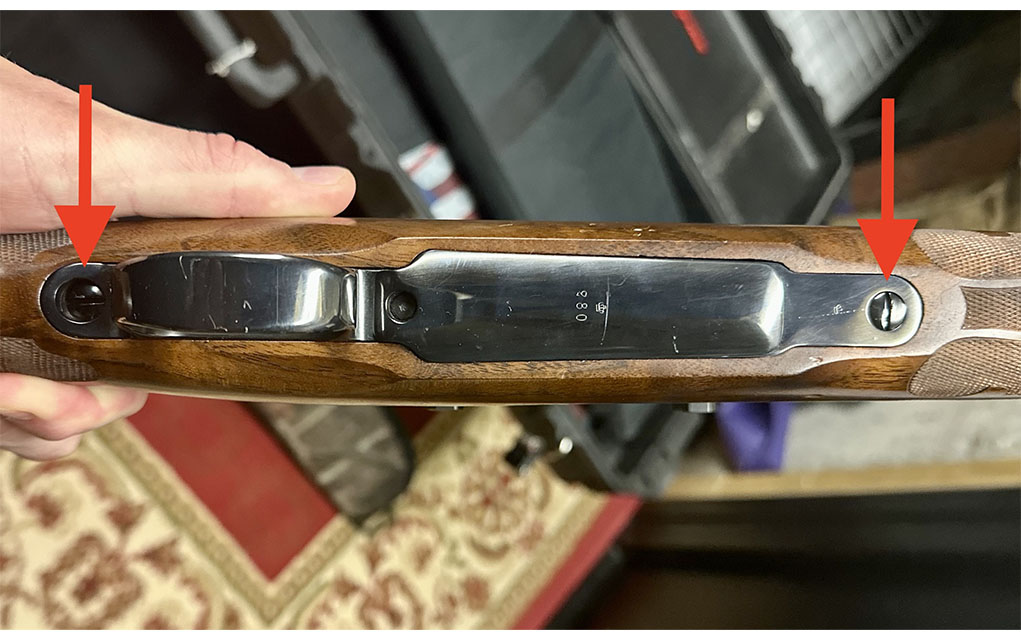
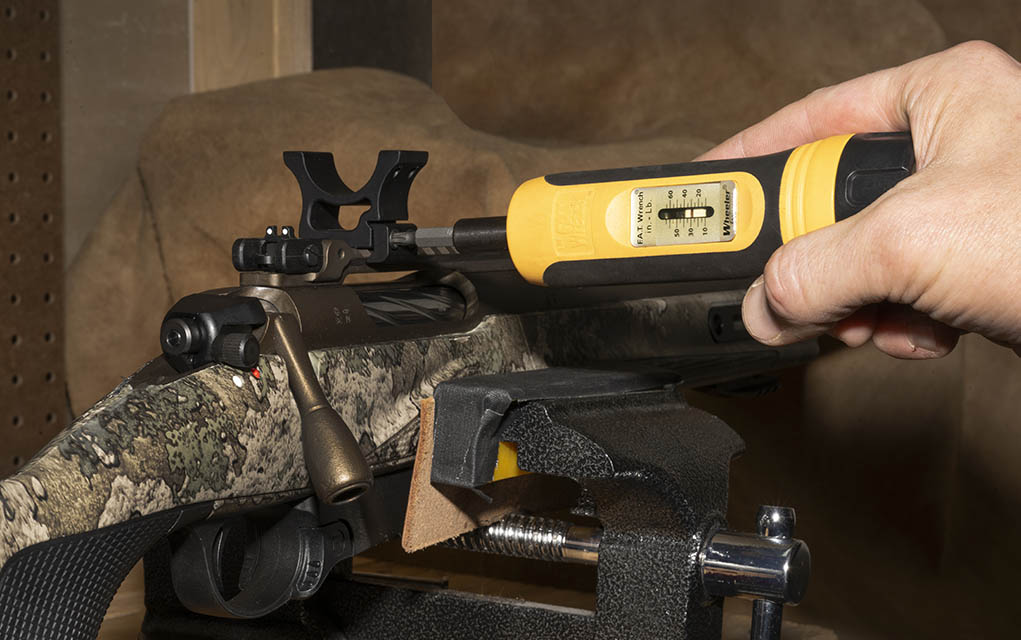
With any process, you must choose a rational starting point; for bolt-action rifles, it’s the action screws. Action screws, also known as guard screws, hold the barreled action to the stock. There are generally two—one in front and one behind the trigger guard. This junction is the foundation for performance consistency for the rifled action and all the components mounted above it.
Wojcik says more of his marksmanship students arrive with loose action screws than not. “It’s not uncommon for shooters to over-analyze scopes and rings, but they’re shocked when their action screws aren’t even hand-tight,” he says.
Both my rifles had loose action screws … or at least inconsistent torque adjustments. The Mauser’s action screws were so loose I could turn them with a press and turn of my finger into the flathead slots.
We torqued the action screws on both rifles to 65 inch-pounds. Again, using factory torque specs, where possible, is critical. However, they aren’t always available. In the case of a 117-year-old Mauser, the new custom stock was glass-bedded walnut, and I felt it could take the pressure. Was it too much? Time will tell, but I now know exactly how much pressure is on the screws if I want to readjust. After the tightening, the rifle shot groups inside 0.65 MOA, which was a 0.3 MOA improvement over previous groups, so this small adjustment provided an immediate benefit.
A few commonsense principles apply to action screw torque settings in the absence of a factory number. First, metal-on-metal contact points can take more pressure than wood or polymer synthetics. Second, heavier caliber rifles producing greater recoil generally require more torque, so be mindful of the difference between rimfires versus magnums. Finally, when in doubt, call a trained gunsmith and ask for advice.
Ride the Rail
On some rifles, scope bases are metal blocks mounted directly to threaded holes in the receiver or clamped onto a dovetail notch. Such was the case for the Mauser and its Trijicon scope and rings. The Franchi rifle comes with a Picatinny rail common on many new rifles.
“Most Pic rails on new rifles come with oil between the rail and the receiver,” says Wojcik. “I suspect it’s part of the manufacturing process. But fluids are dense under pressure, and I want the parts as flush as possible, so I routinely remove the rail from the rifle and clean the contact surfaces.”
When we removed the Franchi’s rail, it had a line of oil underneath its entire length. So, we cleaned the bottom of the rail and top of the receiver with alcohol and replaced the rail, re-torquing the screws to 25 inch-pounds. For the Mauser, I confirmed the same torque on all its scope base screws.
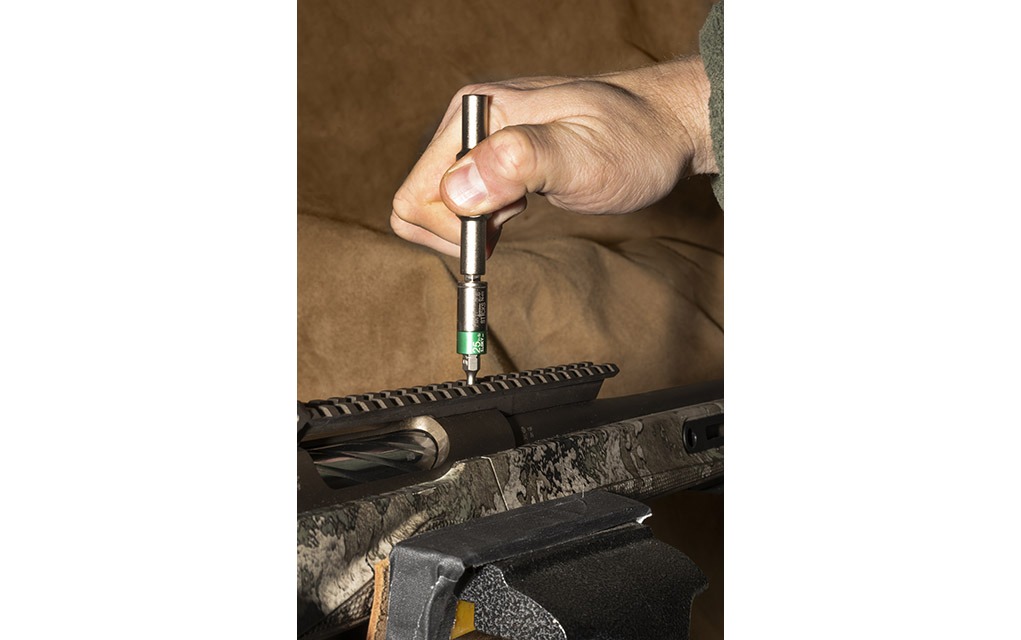
Care should be taken when removing Pic rails, especially the long ones like the 10-incher on the Franchi. The screws may be of different lengths or diameters depending on whether they mount to the receiver or the barrel. I usually throw screws and small parts into a magnetic tray, but in this case, I’d recommend you place them thoughtfully so there’s no doubt about how they’re replaced.
There are a few helpful techniques to consider when replacing a Pic rail. First, a bonding agent on the screw threads is a good idea. We used blue Permatex 24010 gel. Second, tighten the screws from the middle to the outside. This will correct for slight warps in the rail. If the rail is noticeably warped or damaged, replace it.
Level to the World
The next step is leveling the rifle and installing the scope rings.
Personal preference varies on the best method to secure a rifle for leveling and scope installation. I’ve found a high-quality bench vise with leather padded jaws is faster and more rigid than purpose-built cradles made from soft plastic. No matter your choice, the following steps are the same.
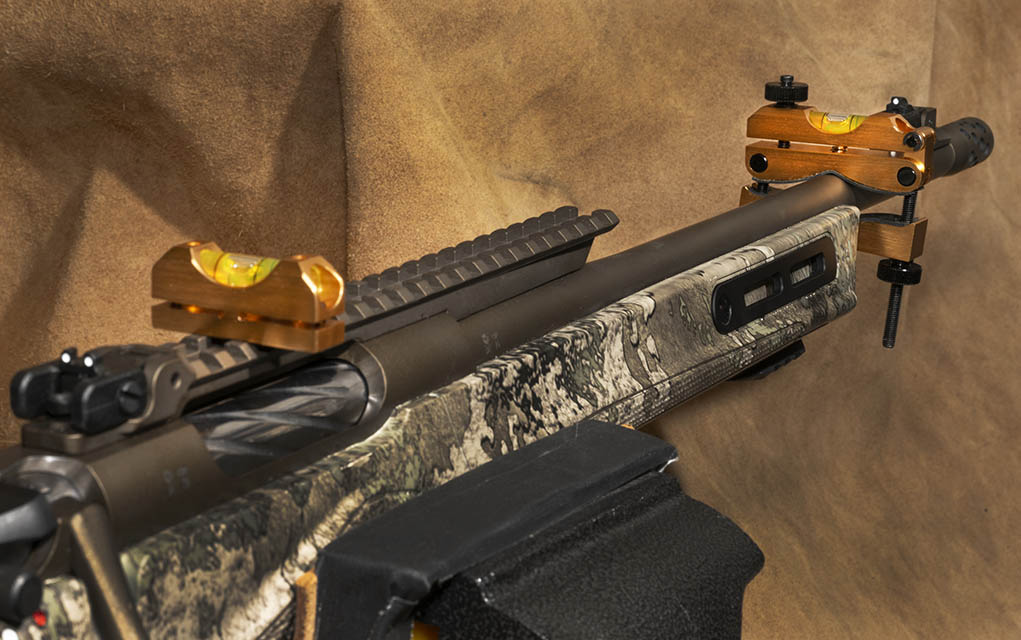
“You have to get the rifle level to the world, which means leveling the bore horizontally and ensuring the centerline is square, vertically,” advises Wojcik. “Take your time to get it right, and then lock it in.”
For this task, I chose a Wheeler Professional Reticle Level System that uses a reference and barrel clamp level. The reference level is placed on a flat surface in or around the receiver to level the rifle in the vice. Once the rifle is leveled in the vice, the barrel clamp level is attached and adjusted so that its bubble is centered and matches the reference level. The rifle can now be removed from the vice but quickly replaced and returned to level without starting over. Other, more expensive kits and methods exist, but for our purposes, this system works.
Next, we attached the ring bases to the Pic rail.
Tip: If the bases have flush screws, it makes sense to orient the bases so the screw heads are on the same side as the bolt handle—that way, you don’t have to reach over or move the rifle to make adjustments. For bases with protruding nuts, installing the bases so that the nuts sit on the non-bolt handle side will ensure they don’t come in contact with knuckles when cycling the bolt. It’s a bit more trouble, but your hands will thank you.
With a Pic rail scope base, the mounts should always be pressed forward (toward the muzzle) and flush with the vertical surface of the Pic rail notch. This ensures the rifle’s recoil won’t creep the base forward and change the scope’s orientation with the receiver. If you choose a one-piece mount that combines the bottom scope ring and base, be aware that many are manufactured with a cant (horizontal angle) to give the scope more adjustment range.
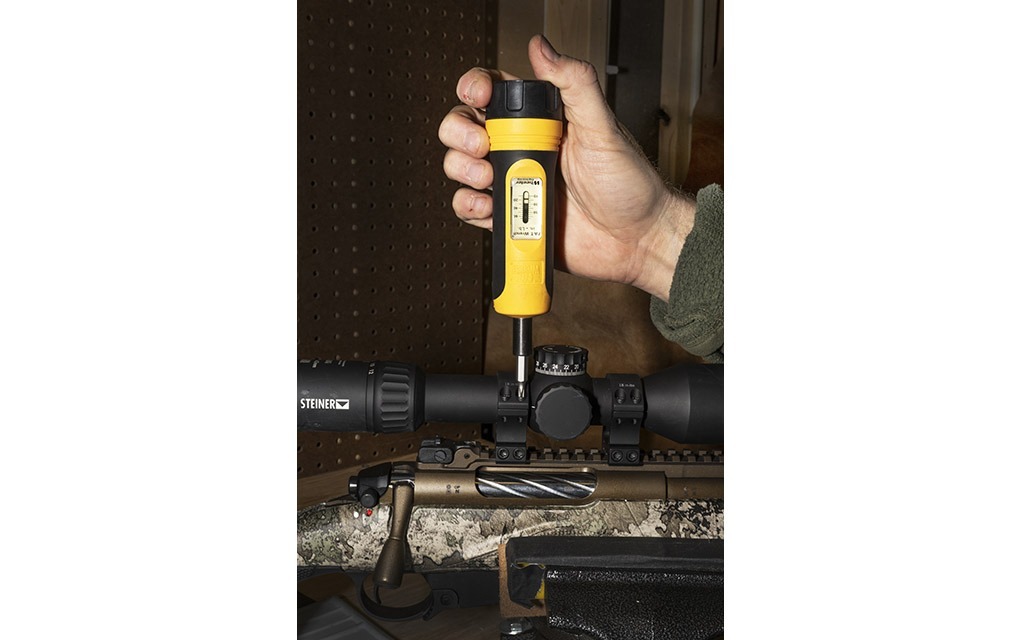
Conveniently, the clamshell Vortex rings I’ve chosen for my Steiner scope have the torque specs printed on the parts. A word to the wise on scope ring screws—screw metal quality can vary widely across manufacturers … and even between models. Sadly, this junction, critical to establishing and maintaining accuracy, is often achieved with the cheapest materials bought in mass quantities from the lowest bidder. It’s very common for cheap screws to shear off or warp, even at factory specs.
Consider investing in a variety pack of backup firearm optic screws. For a small investment, you can always use fresh screws when you change mounted optics, and you’ve got backups if one strips, shears or falls through the floorboards. I followed this advice a few years back, and having a variety of spares around saved my bacon at least a dozen times.
Lock in the Glass
Scope ring height and placement are subjective decisions. Rifle design factors such as bolt handle clearance, receiver shape and the stock’s length and comb height combine with human factors like head size and visual acuity to create a complex challenge. Ultimately, shooters should orient the scope according to their physical and visual needs, but here are a few guidelines:
- Base Placement: Place the rear base as close to the rear of the rail as possible, especially if you have backup iron sights. The front base should land on the uniform section of the tube midway (roughly) between the adjustment turret and where the tube flares into the objective bell.
- Scope Prep: Wojcik recommends turning the windage and elevation adjustments to their limits in both directions several times before mounting the scope. Especially for new scopes, there is often a spot of grease that may not be uniformly spread over the internal parts. This quick step will spread the lubricant and confirm that no spots bind, limiting the scope’s adjustment range. If your scope adjustments do not turn with light to moderate pressure, don’t mount it—repair or replace it.
- Scope Placement: Orient the scope so the magnification adjustment ring is over the trigger. Yes, the distance between adjustment rings and the ocular lens varies between scopes, but this is a reliable starting point. Adjust accordingly to your eyes, face and stock length.
- Eye Relief: Eye relief is the distance between your eye and the ocular lens. To adjust it, tighten the screws on the rear ring just enough to hold the scope loosely in place. At its maximum magnification, move the scope forward and backward until you achieve a comfortable shooting and head position where you can see a full field of view through the optic, free of shadows. Different styles of shooting call for different head orientations on the stock, so I adjusted my eye relief with an upright hunting posture in mind.
- Leveling the Scope: With your eye relief established, it’s time to take a breath and get patient. This step may take a few tries.
If possible, remove the elevation cap and use the erector screw to level the scope. Why? Though the elevation adjustment cap may seem level and square to the line of the scope, some are not machined to seat squarely. If the elevation turret caps are rounded, leveling becomes a guessing game. The erector screw is a better option if you have it.
Level the scope by sequentially tightening the ring screws in an “X” pattern ending with all screws torqued to spec and a level reticle. Screw tension will move the level’s bubble, but tightening the opposite side of the ring will move it in the opposite direction. This final step requires a methodical give-and-take of tension and adjustment. Be patient, as you might have to start over. Just remember to continue to visually reference the levels on the barrel and scope to guide your adjustments.
It took us two tries to get the Franchi assembled and leveled.
The Mauser’s bases and rings received uniform torquing. Thankfully, the adjustments didn’t require re-leveling the scope.
Set Up for Success
Factory torque settings, a clear scope picture and a level reticle will not increase the likelihood of encountering a trophy kudu bull. But, establishing a properly configured rifle and optic, and learning how to correct basic problems, gives you added confidence and a consistent basis to establish your rifle’s best possible zero and, by extension, your most accurate shots on game.
One final note of advice: Take your time with each step. Don’t wait until the night before opening day—get your rifle set up early, zero your optic and spend the extra time confidently practicing, knowing your equipment won’t hold you back.
Both my rifles made it to Africa (and back) without damage. Once in-country, I confirmed the torque on the screws, visually confirmed level reticles and adjusted the zeros to the location’s higher temperature and lower altitude.
I’m not without superstition: I believe Murphy’s Law is stronger in Africa than it is in the States. But because I was ready for him, he took his mischief elsewhere.
Editor’s Note: This article originally appeared in the July 2024 issue of Gun Digest the Magazine.
More On Long-Range Accuracy:
- Mils vs. MOA: Which Is The Best Long-Range Language?
- Buying the Perfect Precision Scope
- Shooting Positions: Variety Is The Spice Of Life
- Riflescope Tracking: Why It’s Crucial To Test It
- Long-Range Shooting: Becoming Your Own Spotter

Next Step: Get your FREE Printable Target Pack
Enhance your shooting precision with our 62 MOA Targets, perfect for rifles and handguns. Crafted in collaboration with Storm Tactical for accuracy and versatility.
Subscribe to the Gun Digest email newsletter and get your downloadable target pack sent straight to your inbox. Stay updated with the latest firearms info in the industry.


