
If you plan on swapping an AR barrel, you’re going to want a reaction rod, and the Otis PRO+ A15 UpLock is one of the best.
I still remember the early days of installing an AR-15 barrel. Trying to clamp everything without crushing anything was a major undertaking. That problem was solved long ago, but Otis, as expected, has some improvements.
The Pro+ A15 UpLock is something you need if you plan on installing or replacing a barrel. It’s a reaction rod, a simple bar to hold the barrel in place.
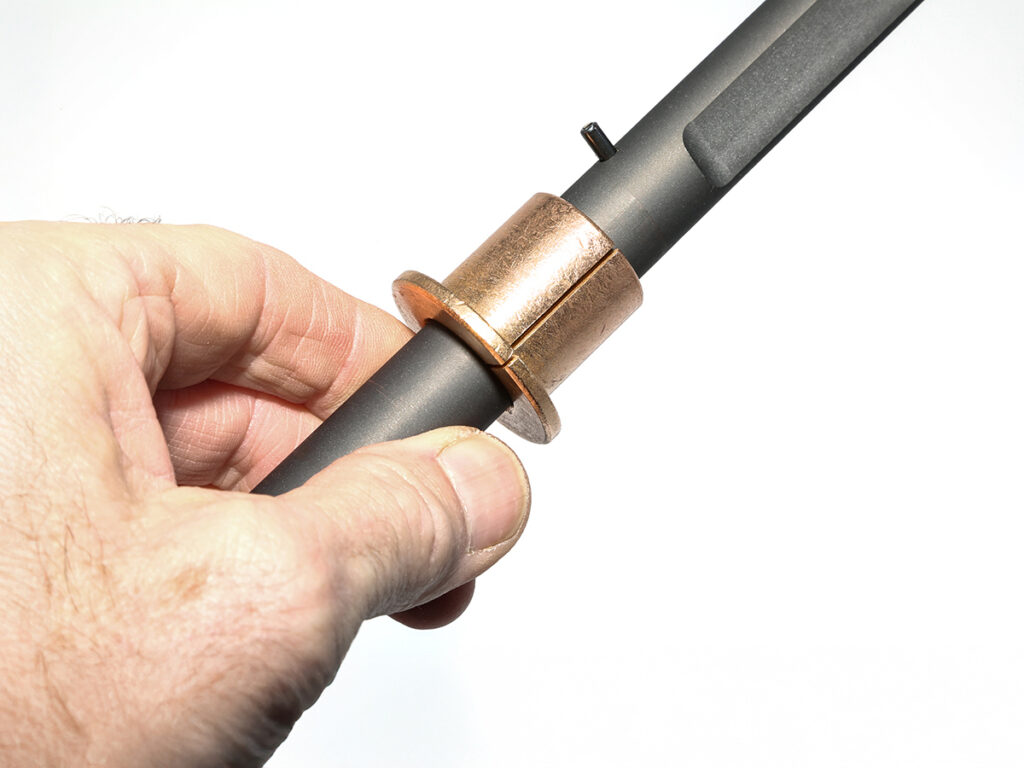
A quick look: The front is lugged to match the locking lug slots on the barrel extension. Behind that is a bronze bushing with a roll pin stop. At the back, it’s machined with flats, so you can clamp it in the vise.
To use it, simply clamp the rod on your vise, the bigger and stronger the better. Your bench should be big and strong, too, so it doesn’t “walk” around when you do your wrenching.
If you’re installing a barrel, slide the receiver over the rod. If the receiver is a loose fit, take the bronze bushing (collar to the rear) and use it as an insert to keep the receiver in place. Slip the barrel onto the rod, engaging the slot in the lugs. Then, spin the barrel nut down and begin to do the barrel nut tightening mambo.
Yes, reaction rods are not new, but the Otis rod is well made, and the addition of the bronze bushing is a boon if you must deal with off-spec receivers. If you don’t, it is just as good as it would be not needing the bronze bushing.
I’ve got a rolling cabinet full of various gunsmithing tools, and the Otis is at the front of the drawer, because it’s the one I want handy when needed. You’ll notice the bronze busing in the photo is reversed—not because that’s the way it works, but it acts as a mnemonic for me.
“Bushing back, bushing check” is my mental step to check the rear of the upper receiver opening to see if the bushing is needed. It’s easy enough, once the rod is clamped in place, to slide the bushing off and see if it fits into the receiver.
If it does, I use it. If it doesn’t, I put it on the bench while I fit the barrel. Once done, it goes back onto the rod, reversed, as the memory aid for the next installation.
Some of you might be thinking, “Sweeney is getting old, he needs memory aids.”
Nope.
When the details matter, you want to make sure you have all the details right. Pilots use a checklist for every operation not because they can’t remember, but because it matters to get it right.
I appreciate Otis’ extra effort and want to have that advantage, enough to keep the bronze bushing on the rod and check it each time. If I took it off and left it loose in the drawer, I might just go ahead on a barrel install when the bushing would have helped.
As a tool making and tool using animal, you really should be in the habit of using tools correctly.
Editor’s Note: This article originally appeared in the January 2026 issue of Gun Digest the Magazine.
More On Tools & Gunsmithing
- Tales Of Woe: Are You Making These Gunsmithing Mistakes?
- Gunsmithing Tool: Real Avid Smart Drive 90
- 11 Essential Gunsmithing Tools To Have
- Avoiding Common Gunsmithing Mishaps

Next Step: Get your FREE Printable Target Pack
Enhance your shooting precision with our 62 MOA Targets, perfect for rifles and handguns. Crafted in collaboration with Storm Tactical for accuracy and versatility.
Subscribe to the Gun Digest email newsletter and get your downloadable target pack sent straight to your inbox. Stay updated with the latest firearms info in the industry.


