
The gun-loving American is fortunate to live in these times. Even through the constant efforts of the statists, in the open or darkly concealed, we have at our fingertips the greatest assortment of firearms, and the greatest ability to possess them (Okay, not including early America), of any people that have ever lived. Also as Americans, we are innately susceptible to the “Flavor of the Month” complex. We love the newer and hopefully better.
Our market economy allows any itch to be scratched. If someone wants to hang some thing on his rifle, someone else will produce that thing to be hanged, and another the method for the hanging. Higher tech materials and production methodology multiply the effects even further. In practice, this makes an almost limitless selection of goodies available to the modern American gun owner.
This brings us to the subject of this particular excursion into gun goodness. The current flavor of the month (decade, really) is the AR-15. While this rifle has been discussed and touched upon in this column in more than one installment, the actual elaboration of the beginning to end construction of such a device has not been explored, and indeed is difficult to do, as there are so many steps to go through.

Don’t confuse multiple steps with complexity, however, as this is easily the simplest repeating firearm to assemble, requiring very few specialty tools. The average homeowner or tinkerer has most of the tools required.
Post the recent elections, the sales of ARs and similar themed firearms skyrocketed. Indeed, beyond the purchase of complete rifles, many thousands of stripped lower receivers were obtained, often with customers buying several “for a rainy day.” Most were shoved in a safe, but others were destined to be built to conform to the owners’ mental architectural designs. Manufacturers rushed to fill the demand for these lowers, delaying production of other components in order to feed the buying frenzy.
So what do we do with those stripped lowers? This author decided to explore a pattern of extremes. Building an inexpensive (not “cheap,” however), affordable carbine, and building an expensive (“expensive”) deer rifle should sufficiently illustrate the wide range of possible outcomes.
WHAT RECEIVERS ARE THOSE?
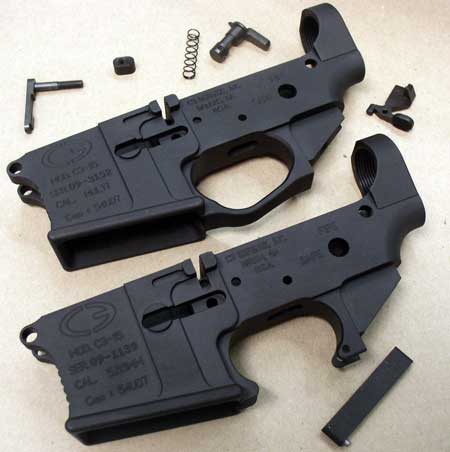
I chose to order my stripped lowers from a new company on the scene, C3 Defense (www.c3defenseinc.com, 678-363-5899). When initially ordered, C3 offered only upper and lower receivers, but they have now expanded into full rifle production, concentrating on the personal defense and law enforcement markets. C3 Defense is one of the expanding numbers of manufacturers that are machining receivers from billets rather than forgings (the normal run of the mill Mil-spec method). These types of receivers are identified by a more linear, “slab sided” appearance, one characterized by straight lines rather than curves.
They do tend to be a bit heavier, but cosmetically and functionally have properties that forgings do not.
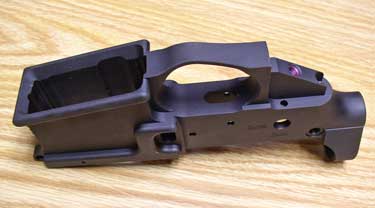
Both C3 lowers show these trends. Thicker sidewalls allow a more aggressive magazine well bevel, more structural reinforcing around the buttstock attachment area (weak point), mag well, bolt catch, mag catch, and trigger guard, a raised gripping surface on the front of the mag well, and a great looking appearance. The enhanced model also features a machined-in expanded trigger guard, large enough for thick-gloved fingers.
Both sport a helicoil in the pistol grip screw hole (these threads are easily cross threaded, but not now), and a nylon tipped screw to place tension on the rear lug of the upper receiver to keep the rattle down, and enhance accuracy. Made of 7075 aluminum, the anodizing was flawless and completely even. This doesn’t happen much. Most AR receivers have some little color or finish flaws, and one major manufacturer, a while back, had at least one production run that was actually purple.
Most impressive was the mag well. Some manufacturers finish cut the mag well by wire EDM, but most use a broach to form the corners of the well. Broaching has a tendency to bow out the sides a bit, leaving a mag well that is not perfectly “square” with the outer wall. The result is a tight mag well that pinches magazines from the sides. Wire cutting them makes a perfect cut, but is more expensive. These lowers were broach cut and showed no bowing, and from a gunsmith and armorer’s standpoint, this showed top quality control and attention to detail. Very pleasing to see.
The rifle parts kit came from Del-Ton (www.del-ton.com, 910-645-2172), a known source that has a reputation for very competitively priced, yet well-made products, and a very customer friendly customer service. They have a variety of basic choices, all of which can be heavily customized at your whim with easy to use, drop down menus. The kit that was ordered was a 16” heavy barrel carbine flattop kit. Why that one? It was available, that’s why.

Everybody wants one of those silly looking M4 barrel kits. I didn’t care. I just wanted a kit. It includes everything needed to turn a stripped lower into a fully functioning rifle. This was used to build on the standard lower, the process of which is soon to be relayed. The enhanced lower will begin receiving next month a variety of my favorite parts from my favorite manufacturers, to produce the ultimate AR deer rifle.
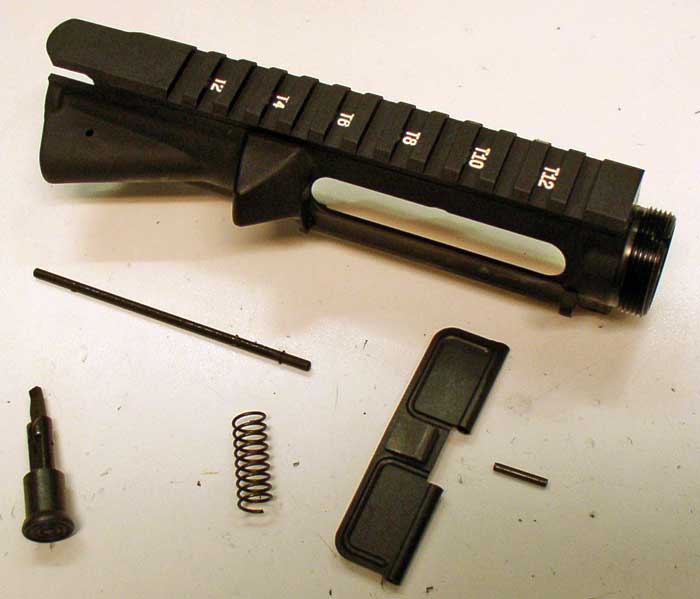
I should point out that to illustrate in this article, Del-ton kindly sent me the kit in parts, but normally they sell rifle kits with the upper half already assembled. The following processes should be representative of any basic part or kit builds that the reader would likely attempt.
SO LET’S GET STARTED
You need the following tools:
•Bench vise with hard padded jaw covers
•AR-15 action wrench (pick one, they all work and you must have one)
•Carbine stock wrench (absolutely necessary, but cheap, like ten bucks cheap)
•Upper receiver vise block (not completely necessary, but very useful)
•Needle nose pliers
•Anti-seize
•Brownells or Wheeler screwdriver set (I have both and love them both)
•Punch set
•Roll pin punch set
•Roll pin starter punches are recommended as well
•Small hammer
•Fingers with a moderate amount of dexterity
•GO, NOGO, and Field headspace gauges (you can pay your gunsmith a small fee to test headspace, but they are nice to have)
•It also doesn’t hurt to have a few spares of the really small springs and detents. I won’t bother to tell which ones. You’ll figure it out.

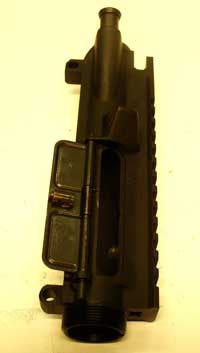
We’ll begin with assembling the stripped upper receiver. The first thing to do is to add the completely useless forward assist. This is used to fill the large hole on the right side of the upper that houses the completely useless forward assist, preventing lots of hot gases from coming out of that hole that should house the completely useless forward assist (like the arguments supporting evolution, this is called a tautology). It is retained by a simple roll pin. Put it in, then function test by inserting the bolt carrier in the upper and pushing the big button. The carrier should move slightly forward, thus displaying that even a completely useless device can still justify its own existence.
Next: the ejection port dust cover. Put the little E-clip in the slot on the cover pin first. After you drop it, pick it up and try again. Then insert the other end of the pin about one fifth of the way through the front loop on the receiver. Take the cover itself and put it in place and push the pin until it comes halfway through the gap in the middle. With the cover in the open position, place the spiral spring on the pin so that the long arm is on the inside of the open cover.
Then twist the short arm of the spring so that it will bear against the bottom edge of the ejection port, while simultaneously pushing the pin all the way through the spring, cover, and rear loop. From the installer’s perspective, the long leg will be pointing down, on top of the cover, and the short leg will be pointing up into the ejection port. Test it by closing the cover and inserting the bolt carrier. The carrier should cause the cover to spring open.
If the port won’t stay closed on its own, check that you put it on with the little springy detent on the top positioned to the inside when the cover is closed. If you put the thing on backwards, you deserve ridicule. Don’t show your face in public for at least 14 hours.
That’s all we have room for this month. We’ll continue the detailed examination of this build as it progresses next month. Till then, go out and buy another lower or two. The buying spike has all but flattened, and the manufacturers really need to keep selling stuff. Plus then, when the ban legislations actually start showing life, and you know they will eventually (probably in December of 2010 or 2012), you will already have something to build on. Or sell.
This article appeared in the November 23, 2009 issue of Gun Digest the Magazine.
Gun Digest Guide to Customizing Your AR-15
Whether you’re in the brainstorming phase of planning the future of your AR-15 and what it will become, or you’re already applying the finishing touches to your custom AR-15 creation, Gun Digest Guide to Customizing Your AR-15 by Kevin Muramatsu will help you wade through and understand the wide variety of available options for almost every imaginable variation. Though the array of AR accessories and customization options seems to constantly grow, turn to this book for an examination of the customization landscape and helpful recommendations for which options would work best for the growing population of AR owners.


![Best Concealed Carry Guns In 2025 [Field Tested] Wilson Combat EDC X9S 1](https://gundigest.com/wp-content/uploads/Wilson-Combat-EDC-X9S-1-324x160.jpg)


![Best 9mm Carbine: Affordable PCCs [Tested] Ruger Carbine Shooting](https://gundigest.com/wp-content/uploads/Ruger-Carbine-Shooting-100x70.jpg)
![Best AR-15: Top Options Available Today [Field Tested] Harrington and Richardson PSA XM177E2 feature](https://gundigest.com/wp-content/uploads/Harrington-and-Richardson-PSA-XM177E2-feature-100x70.jpg)
