
Block bedding is a very effective way to accurize the newer factory synthetic stocks that have internally structured compartments in the forend and around the action area.
- Block bedding basically involves surrounding the recoil lug with a block of steel.
- You’ll bed the rifle at four points: recoil lug, back of tang, around the two guard screws.
- A metal epoxy, such as Devcon, is used to create the bedding.
- Modeling clay is used to control its flow in the stock.
- If this doesn’t work for you, the block in front of the lug can be removed.
- Then the entire barrel is free floated.
Block Bedding A Synthetic Stock
So, what is block bedding? Basically, block bedding involves surrounding the recoil lug of the rifle with a giant block of solid steel. It’s accomplished by filling in the structural chambers in front of and behind the recoil lug.
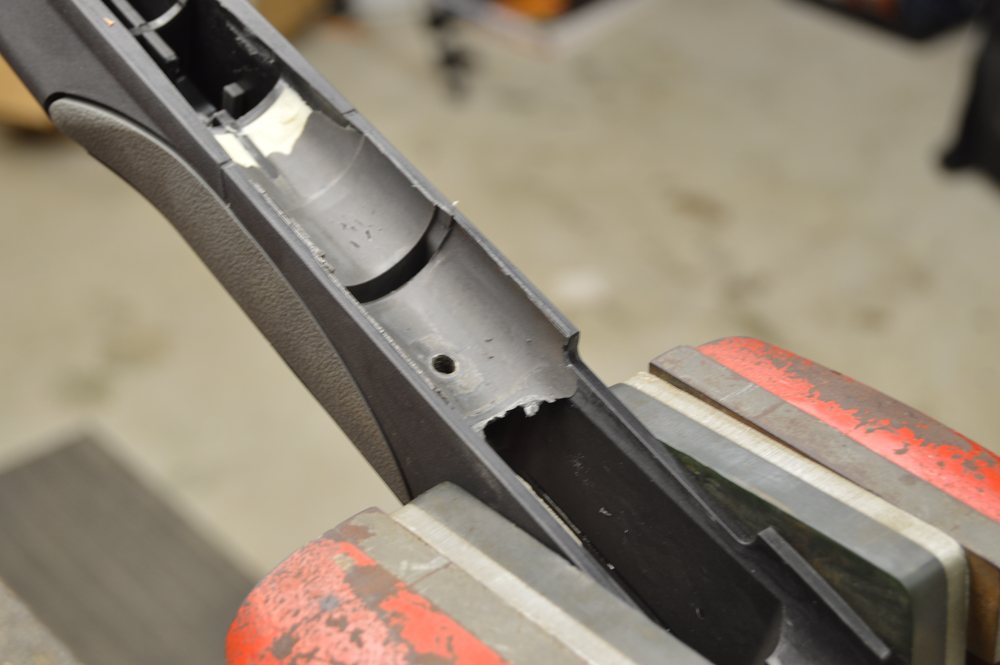
There are two chambers directly in front of the lug that measure about .750 of an inch, and two chambers behind the lug that measure about 1.25 inches, which becomes our 2-inch block of steel.
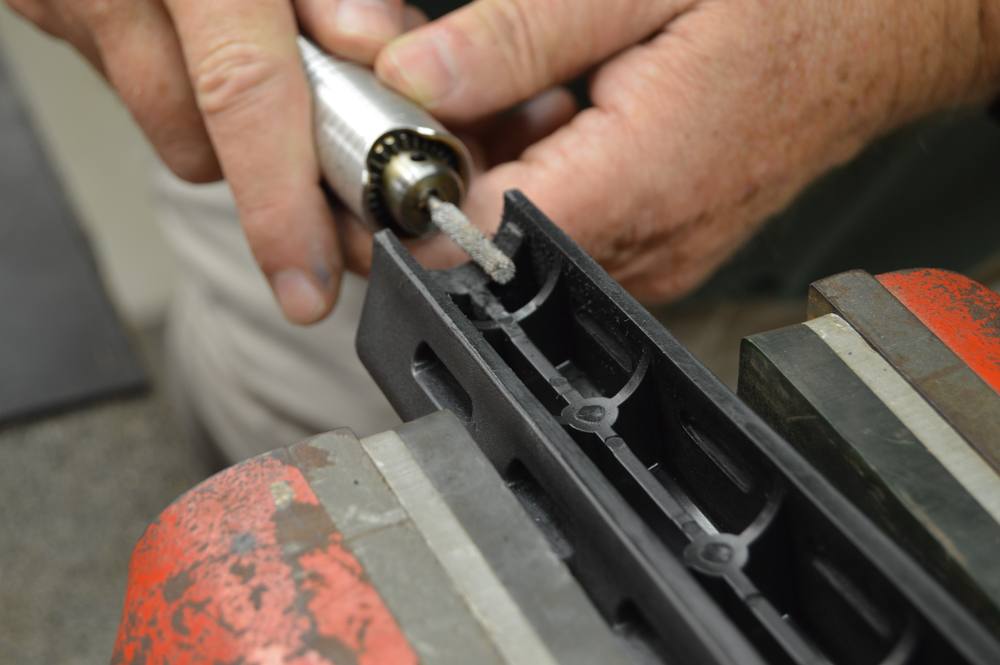
To get started, ensure the rifle is unloaded, and remove the two stock screws and the bolt. Take the floorplate off, along with the magazine box. Separate the stock from the rifle. Notice on the forend’s tip that there are two pads of material.
Fire up your Dremel or Foredom tool, and remove these two pads. They are there to provide upward pressure on the barrel when the stock is screwed on, and keep reverberation to a minimum upon firing.
Old-time benchrest shooters tried this technique with varying levels of success in the 1960s with wood stocks, and it’s an inexpensive way for a mass-produced firearm to achieve a decent level of accuracy out of the box, but you can do better.
You are going to bed this rifle at four points — bedding the recoil lug, back of the tang, and around the two guard screws underneath the rifle at the trigger guard.
First scrape out the stock material where the bedding material will go. This ensures a large enough gap for the bedding material, as you don’t want stock-to-metal contact. Always maintain a gap between the stock and the firearm, this will make room for the epoxy.
Also, by scraping, it will rough up the stock so the epoxy will stick to it. You will need to use sandpaper to really rough it up. I use #120 grit, and if I had access to a bead blasting cabinet, I would tape off the stock and bead blast the epoxy areas to further rough it up. After scraping and sanding, spray it out with brake cleaner and blow it dry.
Next step is to tape the barrel. You want to free float the barrel, but you need to extend the bedding material out in front of the recoil lug about ¾ of an inch, rather than have the barrel completely free floating like you would when using the spot bedding technique.
Tape off the front of the barrel at the forend tip, and wrap tape around the barrel ¾-inches in front of the recoil lug. Look down the muzzle of the rifle to make sure the barreled action is exactly on center and you haven’t used too much tape, causing it to sit too high.
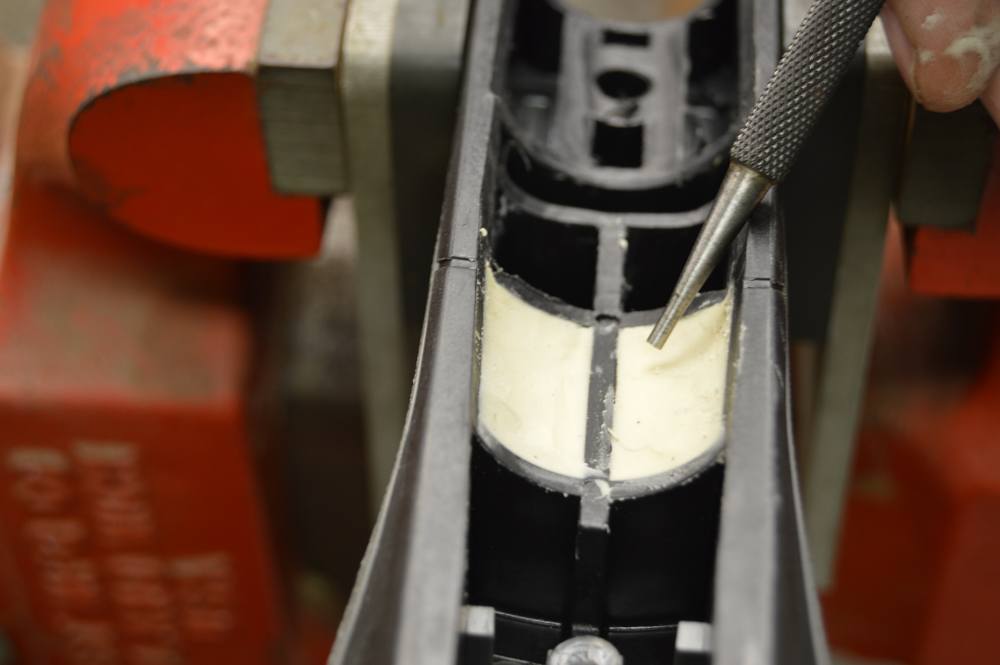
Everything should be leveled and centered at this point. Next get out the modeling clay, and fill the barrel channel chambers in front of the two chambers you are using that are located in front of the recoil lug. That is, from front to back, epoxy goes in the two chambers in front of the lug, then the lug chamber, and two chambers behind the lug. See the photo if this is not perfectly clear.
You want to fill the two chambers in front of and behind the recoil lug, but don’t waste expensive epoxy by allowing it to flow into chambers where it’s not needed. Next, spray release agent onto the areas of the barreled action, the stockmakers’ screws and the floorplate. Remove the magazine follower and spring from the floorplate, as these just get in the way.
Once you have everything taped off, greased up with release agent, and modeling clay applied in places you don’t want the epoxy to flow, mix Devcon in a 2.5 to 1 ratio.
Apply it to the four points within the stock, starting with the chambers in and around the recoil lug. There is a special technique to use when filling in deep areas like that with an epoxy that has a thick consistency such as Devcon.
Use a Popsicle stick to apply a thick glob of epoxy down into the chamber, stir with a butter-churn action to get the bubbles out; otherwise, large voids and bubbles will form, negating the beneficial effects of a big block of steel around the recoil lug, which is the whole reason for doing this job.
You’ll know you are getting the air bubbles out by the popping noises.
Once you have all of the epoxy in place, screw the rifle together, being careful to not screw it together too tightly, just enough to snug it up. Set the rifle in a cradle to let the epoxy set up, do not put the stock or the barrel in a vise during the curing process. You want the stock to sit as stress-free as possible. Wipe off the excess epoxy, and let the rifle sit overnight.
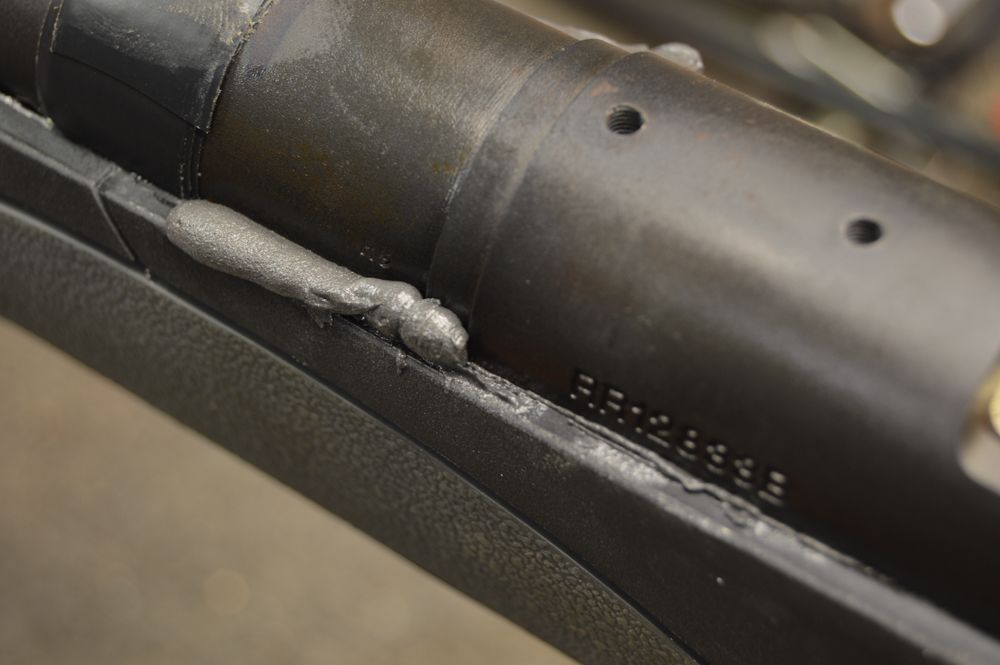
The next day, break it apart and take a look. It should look like the photos. Use the Dremel or Foredom tools with the structured tooth carbide bit to grind off the excess steel epoxy where it overflowed, and degrease the entire rifle.
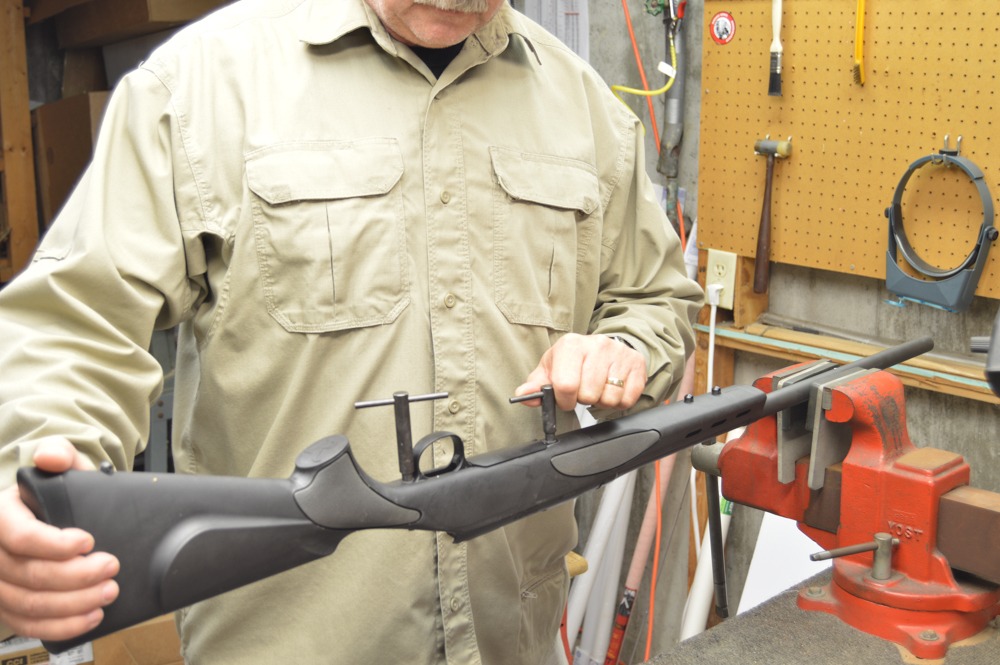
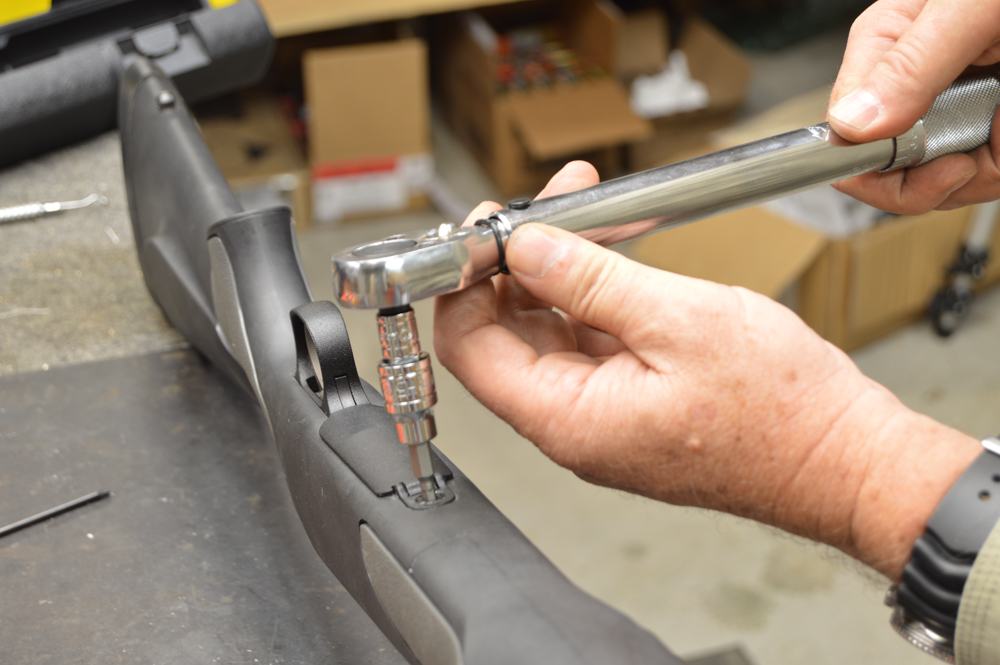
Put everything back together, and give it a good function test, making sure all of the safeties work and that the rifle will feed dummy ammunition. Set the torque on the front and rear guard screws to 65 in.-lbs. and mount the scope.
That completes block bedding a bolt-action rifle in a nutshell. It’s a basic yet very good technique to improve accuracy, especially with heavy-barreled rifles, or rifles that generate quite a bit of recoil that use a synthetic stock with compartments in the forend.
Notice that, in this project, you applied a bedding block in front of the recoil lug, and also bedded the barrel for about ¾ of an inch in front of the lug. Free floating the entire barrel is another option, but which technique is correct, or most effective? It depends on who you ask. I’ve used both methods and have had good results with both.
In most cases, placing a small amount of bedding on the barrel in front of the recoil lug produces more consistent results, especially with very heavy varmint barrels.
I believe that is due to the fact that supporting that section of the barrel tends to dampen the harmonics in a positive way. Remember, when the rifle is fired and the bullet is traveling down the barrel, the barrel is acting like a whip, but is also rotating around in a circle as it’s snapping whip-like. I think this block reduces this whip-like effect, makes it more consistent, and better controls the barrel’s harmonics.
So why did you remove the pads at the front of the forend on this stock? Wouldn’t that have the same positive effect? The short answer is no. Applying upward pressure at the forend exerts pressure unevenly, and causes a very inconsistent bounce or slapping effect from the stock and the forend out toward the end of the barrel.
It’s an OK way to get a decent amount of accuracy from a mass-produced rifle, but you are trying for more than just decent accuracy, especially from a potentially tack-driving caliber like the .22-250 — one intended for small targets at long range.

This is why I’ll free float the barrel, except for the first ¾ of an inch or sometimes a full inch and a half past the front of the recoil lug with a really heavy barrel.
Some barrels may not respond to this technique. If the rifle won’t shoot and you’ve exhausted all other possibilities, you can always easily remove the block in front of the lug and free float the entire barrel to see if that improves accuracy.
Remember that none of these techniques involve pillar bedding. These are techniques that you as a beginning home gunsmith can use to get your “feet wet” in the technique of custom riflesmithing.
This article is an excerpt from Custom Gunsmithing for Self-Defense Firearms.

Next Step: Get your FREE Printable Target Pack
Enhance your shooting precision with our 62 MOA Targets, perfect for rifles and handguns. Crafted in collaboration with Storm Tactical for accuracy and versatility.
Subscribe to the Gun Digest email newsletter and get your downloadable target pack sent straight to your inbox. Stay updated with the latest firearms info in the industry.


