

Upgrading from a standard to a free-floated handguard can increase your AR-15’s accuracy potential, and it isn’t difficult following this procedure.
How to swap out for a free-floated handguard:
- Remove upper receiver and pull back delta rings to remove standard handguard.
- Remove retaining pins from the A-Frame — after the gas tube is removed.
- Use a special bench block to keep rest of upper elevated.
- Once pins are removed, gas block collar should slide off the barrel.
- Upon removing barrel retainer nut, new free-floated handguard is ready.
- Before new handguard is fitted, a new minimized gas block must be installed.
- Once the gas system is in place, tighten handguard onto nut.
This is the typical process to change a standard handguard to a free-floated handguard. Start with no lower assembly. The upper assembly should be detached and in a bench vise. You will want to use your upper receiver blocks for this entire sequence.
The first thing is to pull back on the delta ring to remove the lower piece. It just seems easier usually to do the bottom first. The piece should be lowered from the back and then pulled out of the cup at the front. Follow this up by then removing the top piece. You should now see an upper assembly with no handguard, with the barrel and gas tube naked and exposed to all creation. This is way easy with a forend/handguard tool. I will restate that I prefer to remove the gas tube at this time as well, so as not to risk banging it up when we start banging on the front sight block.

You will have to remove the front sight’s tapered retaining pins from the bottom of the A-frame. They are TAPERED, which means they only go out one way, and some companies think it’s just the coolest thing ever to really, really jam those things in there. Granted, you don’t ever want them coming out without actually wanting them to come out, but they are often in there so tight that you might have to cut or drill them out. We’re talking baby bunny under a porch step here.
Sometimes you can get them out by putting the barrel or the sight tower in the vise, and most times you can get them out using a specialty bench block. I wish I could tell you a universal way to get them out easily, but I can’t. Some are relatively easy, and some aren’t.
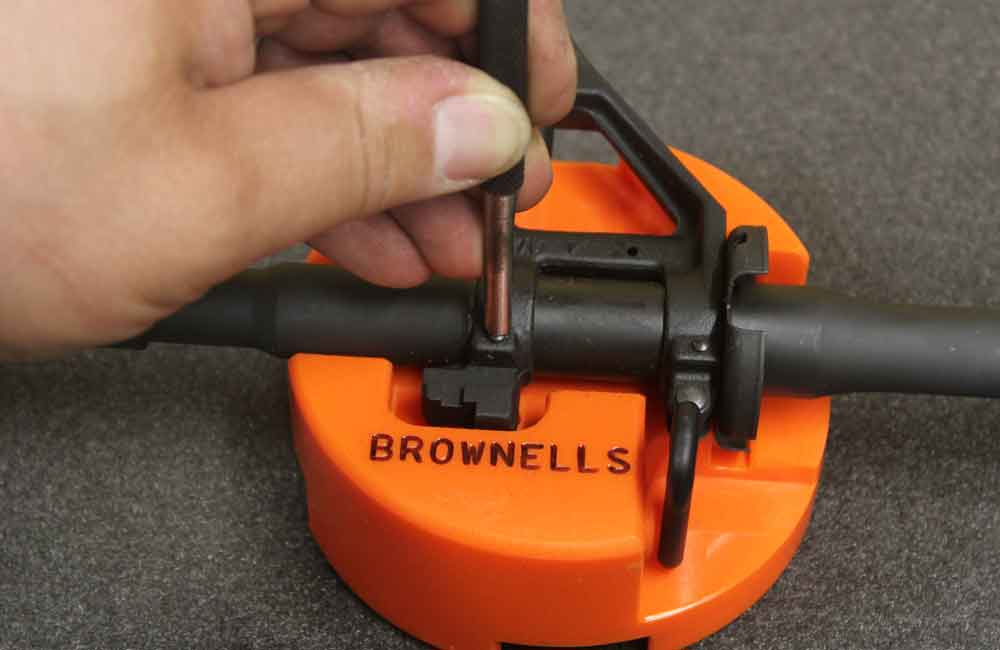
The specialty bench block to which I refer is the front sight bench block that Brownells sells. It is machined out so that the front sight tower will fit either way into it and you can hammer out the pins; it even has directions on it.
You will want to support the rest of the upper on a similarly elevated surface for ease of use. By the way, they virtually always go out from left to right. There is a noticeable difference in diameter, left to right. Use a short, thick punch to get them started and then a longer punch to finish pushing them out to the right. The front sight tower may be quite tightly attached still, so a little twisting and possibly a little propane heat on the tower rings may be in order.
Once it is off the gas block collar of the barrel, it should easily slide off the muzzle, assuming you have removed whatever muzzle device might be present. It can however be on tightly and require a little heat to expand the rings. Take care to not kink the gas tube if you left it in place. If you twist the assembly too far with the gas tube installed, you will likely damage the tube. It’s supposed to have a bend in it but not more than it started with. Honestly, it’s best to remove the tube before you play with the block, but not necessarily mandatory.
Now the barrel should be clear of stuff. If by chance there is something still on the barrel, now would be the time to remove it. Since we are assuming a standard rifle upper here, there should not be anything else there.
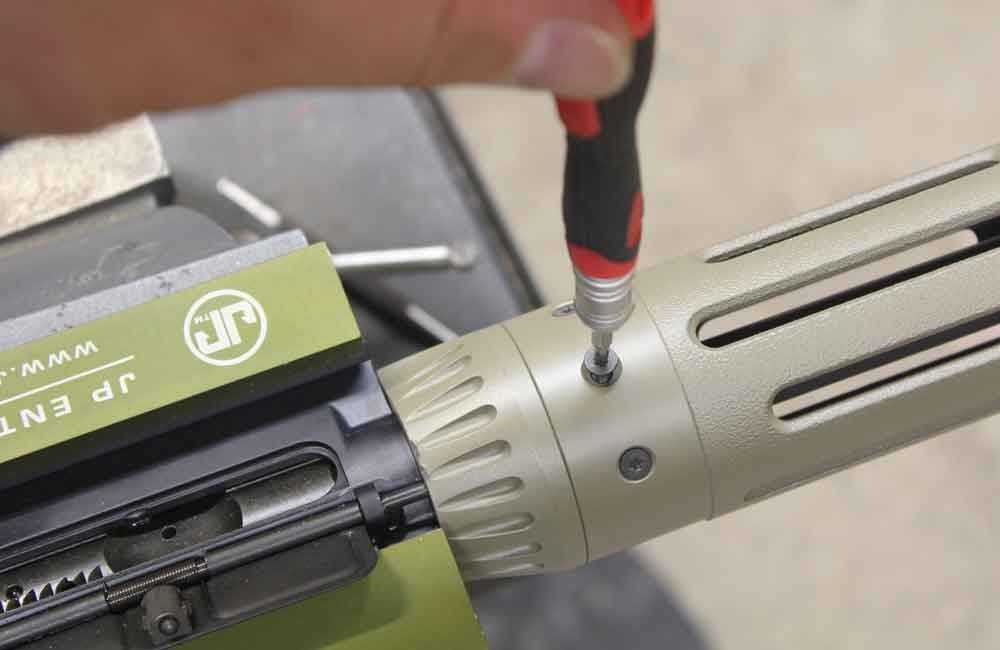
Here is where you take your handy dandy action wrench to remove the barrel retainer nut. Once that is done, you are ready to install your new handguard. Let’s for the sake of argument say that it is a JP Enterprises Modular handguard. This is one of the less common styles of handguard, using both inner and outer retainer nuts.
The outer nut is screwed onto the receiver, often with thread locking compound to hold it in place in alignment while the inner nut is tightened against the barrel extension. The same amount of torque is used to secure the nut as a normal nut, around 30–100 ft/lbs of torque, and if you don’t know what that feels like, then you should borrow a torque wrench from your buddy in the auto shop.

In the case of this JP handguard, the body of the unit is a simple extruded tube with slots cut in it for ventilation. The rear end of the tube is counter-bored to accept the outer handguard nut and has six holes around it to fasten it to the nut. However, since we are replacing a carbine-length standard handguard with a rifle-length free-floating handguard, we now have to install a minimized gas block first, since it is going to be fully inside the confines of the tube and virtually impossible to install correctly with the tube emplaced. If you are going to install accessory rails to this tube, this too should be done before the tube is attached.
This JP tube uses six flat head screws to hold the tube to the nut. The tube can inadvertently be installed upside down, so don’t do that. With these six screws attached, you are pretty much ready to go, as long as you remembered to install the gas tube and gas block.
Of course, you no longer have a front sight. Perhaps you decided that you don’t really want one and you are going to use only optics. OK, so you’re one of those…people. Well, I guess that’s OK, and you can stop here, since your super optic mega scope will take care of everything. If you aren’t one of those…people, then you can still mount a front sight to the front end of the handguard tube. JP sells partial or full sized rails for that purpose. Flip up sights can still be used effectively with optics, and particularly offset sights are a good choice for rifles with high magnification scopes used as the primary sighting device.
Editor's Note: This article is an excerpt from Gun Digest Guide to Customizing Your AR-15.

Next Step: Get your FREE Printable Target Pack
Enhance your shooting precision with our 62 MOA Targets, perfect for rifles and handguns. Crafted in collaboration with Storm Tactical for accuracy and versatility.
Subscribe to the Gun Digest email newsletter and get your downloadable target pack sent straight to your inbox. Stay updated with the latest firearms info in the industry.


")
")

")