
While a box stock Glock will run like a champ right out of the box, these four Glock upgrades will make yours even more accurate and shootable.
Four Must-Have Glock Mods:
The Glock pistol made its debut in 1982. Since that time, it has become one of the most popular handguns in the world. Some people love ‘em, and some people hate ’em, but either way, the pistol has some very good features that make it an effective handgun for self-defense, offensive tactical operations, and competition.
I purchased my Glock in the late 1980s, and I’ve had quite a bit of fun with it in USPSA, IDPA, and many informal practical matches. Since that time, I’ve added a few items to it to enhance the pistol and make it more personal and “shootable,” a word which means different things to different people.
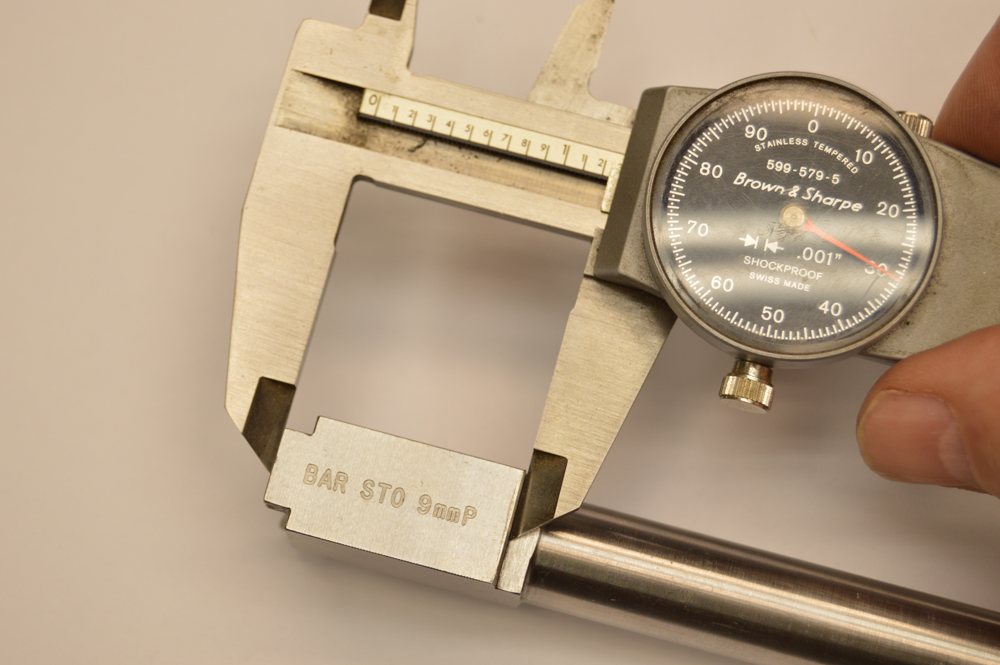
In my case, one of the first items I added was the superb Bar-Sto stainless match-grade barrel. Being an old Bullseye competitor with the Army Marksmanship Unit, I view accuracy as the Holy Grail, and the match barrel from Bar-Sto is the best there is.
I opted for the oversized barrel, although the drop-in version will give excellent accuracy as well.
Being a gunsmith has a few benefits, not the least of which is that I know my way around a #2 Swiss pattern file and an India stone, but even someone with basic gunsmithing skills can easily install a match barrel in the Glock, since there are only three fitting points, and the amount of material that needs to be removed is not much.
As long as you go slow and check your work, fitting the barrel is very straightforward and the benefits are huge.
I also installed a set of Trijicon white outline night sights, and a Brooks Tactical Grip System.
The Trijicon sights are excellent and glow very bright, but typical night sights only last about ten years and these were much older than that, so the nighttime effectiveness was severely diminished.
Lastly, the Brooks Tactical grips give excellent results and actually work better when wet, but they had worn smooth and didn’t provide the same gripping surface as they did when initially installed.
So, this section will go through the refurbishment of a Glock, with the addition of a 3.5-lb. trigger connector.
Note that the addition of a light trigger and a match barrel may change which IDPA classifications you’ll be allowed to compete, so check the rules.
Also, if the gun is to be used for self-defense, be careful about installing aftermarket parts that affect the feeding, firing, extraction and ejection of the gun. Any time such parts are added, always test the gun with a large quantity of ammunition before entrusting it with your life.
Add A Custom Glock Barrel
Not that we have that out of the way, let’s get started. Installing the Bar-Sto barrel, as I mentioned, is really straightforward.
There are two main fitting points — the front of the barrel hood, and the bottom flat of the barrel that sits on the Glock barrel block.
First, start by making sure the gun is unloaded (you knew that) and remove the slide from the frame. Remove the recoil spring and guide, and finally, take out the old barrel. The pistol is now field stripped, and you can begin fitting the barrel.
Measure the width and length of the hood of the Bar-Sto replacement, and measure the ejection port opening of the Glock. Subtract the length of the Glock port, from the length of the barrel hood: this is the difference you need to remove from the front edge of the Bar-Sto barrel.
Use a #4 Swiss pillar file to take down the edge. Do this by taking a stroke or two on the sides of the barrel hood, then try fitting the barrel into the slide. Press hard to make the barrel go into lockup, and use a soft nylon hammer to tap it into place.
Use a blue Magic Marker to check, making sure you are filing the surface square, taking off only the high spots. If you are a little unsure of yourself with a file, use a soft India stone to accomplish the same thing, it will just take longer.
With the stone, you don’t have a safe (non-cutting) edge as on the pillar file, so be careful not to take off material from two surfaces of the barrel at the same time. Once the sides of the barrel are fitted, fit the front of the barrel. Only the material from the front edge of the barrel hood should be removed.
Fit the barrel to the point to where you can push it up into battery and it stays locked, but will also drop out of battery with slight downward pressure of a fingertip on the hood. This is the ideal fit.
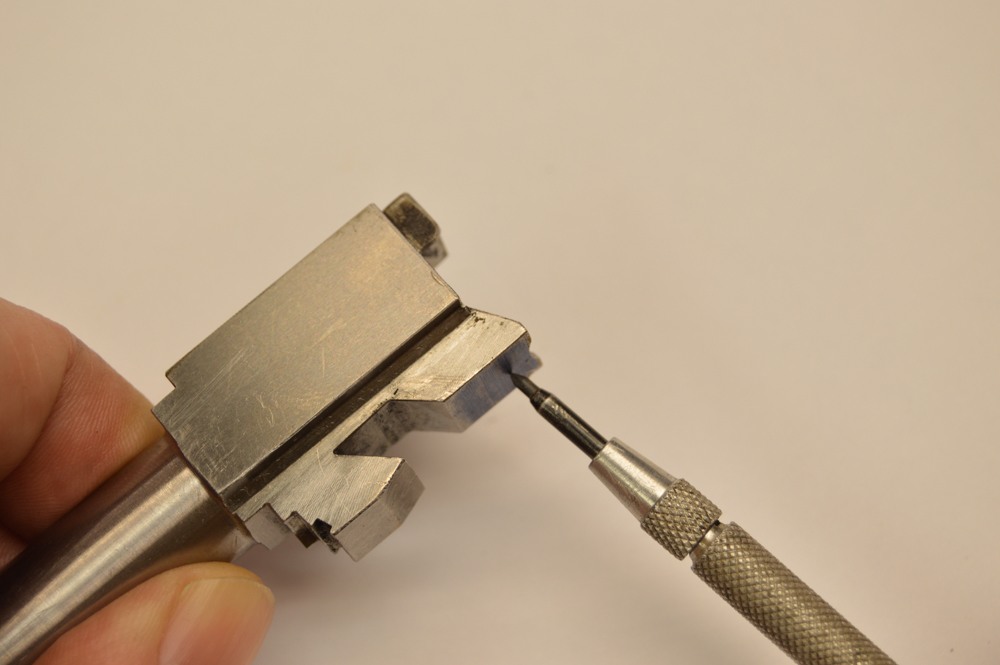
Once the barrel is fitted to the slide, remove material on the bottom flat of the barrel where the flat sits on the barrel block. Again, use Magic Marker to show the high spots where you need to remove material.
You are finished with the barrel/slide assembly when the assembly will install on the frame. If it won’t go onto the frame there is still material to be removed from the barrel flat.
Once these two fitting points are taken down so the barrel locks up fully into the slide, and the slide assembly will install onto the frame, you are done. Install the slide onto the frame and cycle the gun a few times.

Glock Sight Ideas
When talking Glock upgrades, the next place to look would be the sights. Again, Trijicon are excellent when they are new, but after 20-some odd years, the Tritium can dim.
In my case, it was time to go with something brighter that would give me day/night capability, ergo, the newer fiber optic sights. These sights absolutely are like a huge neon beacon.
Since I still want the nighttime visibility afforded by Tritium sights, but also the bright glow of the fiber optic for daytime use, I went with Tru-Glo sights. This sight combines the best of both worlds — Tritium and fiber-optic inserts — providing 24-hour visibility.
Removing the old front sight is straightforward. Just remove the 3/16th-inch nut that holds the front sight in place. It takes a special nut driver to get in there, but once it’s out, you can install the new sight.
Degrease the threads of the new sight screw and, with a toothpick, place a tiny drop of blue Loctite onto the screw threads. Place the sight into the slide, and secure it with the screw. Do not overtighten it or you will strip the threads. Just run it up snug; with the thread locker in place that sight isn’t going anywhere. This is how I installed my original Trijicon sight and it’s been securely fastened, and has had over 40,000 rounds through it without any issues.
The rear sight is different. It is mounted in a dovetail, and as such, there are certain “best practices” to use when installing into a cross dovetail. The main point is that the part, any part, is always installed from right to left into the dovetail, as looking from the rear of the gun. If you install a part from left to right, then the next time you go left to right or vice versa the dovetail slot will be opened up and the part will never be able to be installed tightly.
Dovetails are always very slightly tapered from larger to smaller, from the right side to the left of the dovetail. So, the part gets installed from right to left, and removed from left to right, always!
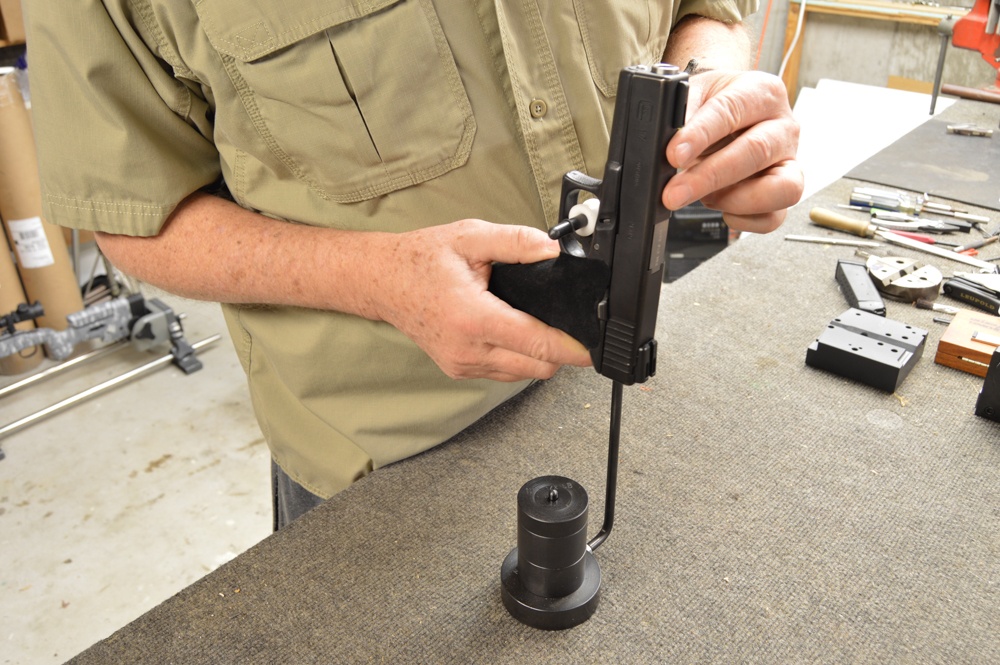
Use the Glock sight tool, because Glock rear sights require downward as well as sideways pressure for removal.
The Tru-Glo rear sight was a perfect fit going into the Glock M17 dovetail, and all it took was a few good raps with a nylon drift punch and a brass hammer in order to set it in the center with a light-driven, almost press fit.
I ran the sight set screw up snug, but didn’t use any threadlocker since I’ll do that once the gun has been zeroed.
Solving Glock Trigger Woes
Now that you have the barrel and sight installed, the next of your Glock upgrades is to install the 3.5-lb. trigger connector. This will provide you a nice, light trigger, but again, if you are using the gun for purely defensive work, I would leave the original factory trigger connector and springs installed.
The Glock is a great service pistol, but it has a service pistol-grade trigger, which is fine for most uses: For example, law enforcement, personal defense and military applications, and even competition and informal plinking if you don’t mind the heavy trigger.
But if you want to use the gun strictly to compete in the various types of practical pistol competitions, then the service grade trigger is not ideal, and that’s where the 3.5-lb. trigger connector comes in.
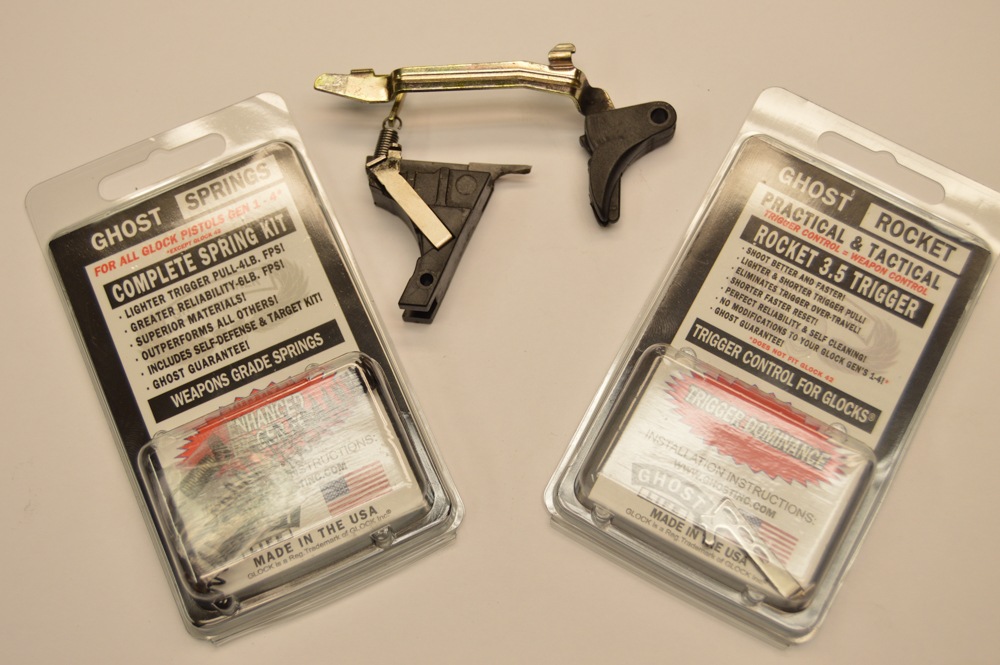
There are a number of lightweight Glock trigger connectors available, and I chose the Ghost trigger from Ghost Industries. It comes with a 3.5-lb. trigger connector, and a variety of springs to set its weight.
I installed the 3.5 connector, but opted for the heavier 6-lb. trigger and firing pin springs that will yield a little heavier trigger pull in case I do want to carry the gun out and about. The result is a trigger that breaks a little over 4.5 lbs.
The trigger connector is a direct replacement, and removing the old connector allows for replacement of the new, Ghost Industries part.
The Ghost trigger connector comes with a small tab on the connector, which requires minor fitting. This tab acts as a trigger stop — a nice feature to have on a competition gun.
The kit also comes with a clear slide backplate in order to view the sear and firing pin engagement when fitting the trigger connector.
A Better Glock Grip Made Simple
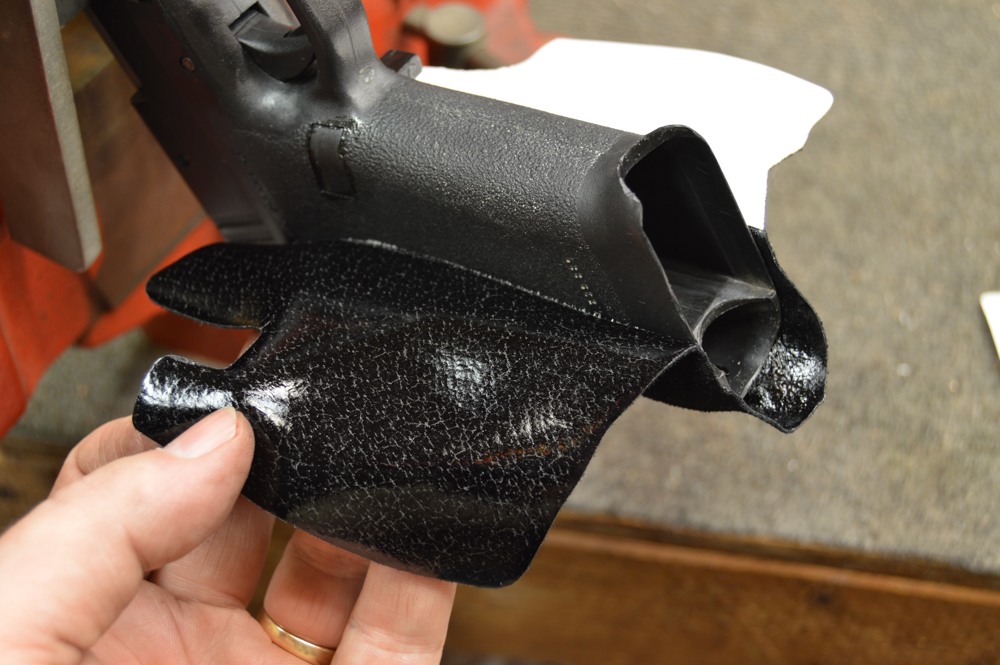
The last step is to remove the old Brooks Tactical Grip, and install the new one from the same company. This is the exact same grip that I originally installed over twenty years ago, but the old one had worn with age. Installation is simple.
Once the old one is peeled off, degrease the grip area with brake cleaner, and wipe it down with the alcohol pad supplied with the new grip.
Since the grip covers the magazine button on both sides, the instructions demonstrate that the area around the mag button on both sides needs to have a tiny amount of oil applied so the grip doesn’t adhere to the mag release.
Again, I’ve had the old Brooks Tactical grip installed on my Glock forever and have never had an issue with the magazine release not functioning properly.
Wrap the new grip onto the pistol’s frame per the instructions. If it isn’t applied exactly correct, you can lift it and move it, but try not to do that too many times. (The grip overwraps itself, so if you wrap it together, it’s difficult to remove it.)
Once the grip is installed, the entire pistol gets reassembled, and function checks are done, along with functioning using dummy rounds. Checking the trigger pull with the NRA weights, mine came in at just over 4 ¾ lbs. That’s not too light or too heavy, and has minimal overtravel.
So there you have it — these Glock upgrades result in a pistol that is extremely accurate with the Bar-Sto barrel, has excellent sights with 24/7 visibility, a light, crisp trigger, and excellent textured grips that work in all environments — even better with wet or sweaty hands. Now I just need to take it out to the next IDPA match and run it through its paces.
This article is an excerpt from Custom Gunsmithing for Self-Defense Firearms.

Next Step: Get your FREE Printable Target Pack
Enhance your shooting precision with our 62 MOA Targets, perfect for rifles and handguns. Crafted in collaboration with Storm Tactical for accuracy and versatility.
Subscribe to the Gun Digest email newsletter and get your downloadable target pack sent straight to your inbox. Stay updated with the latest firearms info in the industry.


It seems that “Shootable” has some level and is the excuse to have a gun be tinkered from its original condition and “shootability”. The Glock being a quality pistol is “shootable” already when it was made;then replaced the barrel, trigger mechanism and other “enhancement” to make it [more] “shootable”. The 1911 has its standard 5 pounds factory trigger pull- you let the the 5 pounds (without magazine) 1911 gun hang on your finger on the trigger and it should not go off; and this is standard safety trigger pounds for that model; and many compete with it without tinkering the original trigger pull and it is still very “shootable”, fast and accurate. The same perhaps for the Glock, its original trigger pull is already “shootable” which makes it more earnestly wanted to be shoot because it gives the shooter the feeling that he is genuinely really good in shooting when he can shoot it accurate and fast with the original (stock) condition.