![]() GUNS
GUNS
LINK: https://bit.ly/8MKVxs
Building a rifle is easy, all it takes is a little planning
@GunDigest
LINK: https://bit.ly/70vOFY
Gunsmithing Article: Does Lug Lapping Increase Accuracy?
@GunDigest
LINK: https://ow.ly/YADD
Need Help to ID these Dueling Pistols (pics)!
@firearmstalk
LINK: https://bit.ly/5RJzzF
You, Me, and the CMP (civilian marksmanship program)
@GunDigest
LINK: https://bit.ly/5yWFhj
Choosing home defense shotguns for women
@GunDigest
GENERAL GUN INTEREST
LINK: https://j.mp/7Q5IDq
Mark Keefe sat down w/Pulitzer Prize-winner Stephen Hunter and picked his brain
@NRA_Rifleman
LINK: https://tinyurl.com/yz34tqd
Ode to the Brady Campaign
@austingunrights
LINK: https://www.foxnews.com/story/0,2933,583508,00.html?test=latestnews
Trijicon defends biblical inscriptions
LINK: https://bit.ly/8e0Hjo
NZ Army will remove Bible verses from armaments
@dominionpundit
The Trijicon company announces it will no longer put bible citations on gun sights provided to US military
@Nightline
LAW
LINK: https://scrnch.me/3h63z
NJ Court Says Americans Have No Right To Buy
@SensiblePatriot
LINK: https://tinyurl.com/yjr8a7m
Association of New Jersey Rifle & Pistol Clubs Files Lawsuit Against 1-Gun-A-Month Law
@Gunservatively
LINK: https://tinyurl.com/yd3b4ht
Another Anti-Gun Bill Introduced in Virginia
@Gunservatively:
LINK: https://bit.ly/72olSt
More Gun Control Nonsense
@Amber_126
LINK: https://bit.ly/6FaeVn
BATF Notice Bans Private Gun Sales In Texas
@rickto11
SHOT SHOW REPORTS
LINK: https://is.gd/6KcaQ
Was FBI foreign-bribery sting operation intended to “leave the firearm industry wounded”?
@secularright
LINK: https://tinyurl.com/yen4y5e
GLOCK Inc has unveiled new pistols at the SHOT Show in Las Vegas
@sonicjamesdean
ART: https://bit.ly/7jRUvr
SHOT Show 2010: Smith & Wesson debuts new BODYGUARD firearms –
@police_products
LINK: https://gunholsters.com/blog/shot-show-2010-day-two-videos-tweets/
Day 2 Videos + Tweets
@jnetcat5
LINK: https://tinyurl.com/yhzqpw7
Live from SHOT: New Guns, New Gear, and Autographed Panties
@Gunservatively
Ammo shrtg appear 2B with us. The Kool-Aid appears 2B military demand -I have my doubts. We the media need to chase it down.
@Twobirdsflying
I wonder what the Vegas odds would have been for me to pick a 5-day trip to the desert city and experience rain each day.
@jim7226
Armalite enters monolithic AR upper biz w/ the SPR-A1. They went further by providing reconfigurable 1913 rails.
@Twobirdsflying
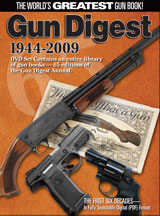
 Get more comprehensive coverage and stay abreast of what’s happening in the gun industry when you read Gun Digest 2010, 64th Edition – the World’s Greatest Gun Book. Click Here to Order.