Installing the fire control is easy. Stick the safety/selector in from the left side and turn the receiver upside down on the vise block. Drop the detent in its hole. Place the selector detent spring into the small hole on the top of the pistol grip, hold it there with the tip of your finger and put the pistol grip onto the receiver, then hold it while you fiddle one handed with the grip screw.
I can’t figure why everybody insists on using a stainless steel flathead screw here, instead of an alloy socket head. Must be “mil-spec.” Take your guide tool (firing pin with tip cut off) and use it as a slave/guide pin for the hammer and trigger. Install the trigger first, without the disconnector. Drop the trigger in and insert the guide tool in from the left and all the way through. Push the trigger pin in from the right, all the way through.
Do the same for the hammer; and you may have to gently tap the hammer pin in. Then push the trigger pin a little more than halfway out and insert the disconnector into its slot in the trigger, hold it with the guide tool, and push the pin back all the way back through. This little guide tool will save you many number 10 frustrations.

Test the function by cocking, “firing” and recocking again without releasing the trigger. The hammer should be retained by the disconnector and should reset with an audible clack when the trigger is released. Do this multiple times. The hammer should not fall upon trigger release, though that may happen when the disconnector gets worn after extensive use. The safety should engage and prevent trigger pull beyond a little take up. The take up should reset upon trigger release. If this all works, slap the upper onto the lower, and repeat the fire control test while cycling the bolt. If it’s still okay, you are done. For best results apply a dab of grease to the sear/hammer surfaces, the slots in the takedown and pivot pins and selector.
Shameless Promotion
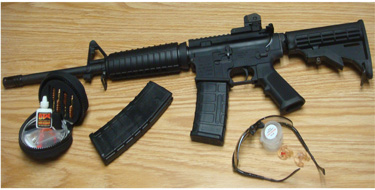
The go-to carbine was finished off with a DPMS detachable rear sight that was in my pack rat box. There is now before my eyes a basic, quality utility carbine. Add a PMag and it’s heaven on earth. This is now my house gun.
We haven’t really covered the hunting rifle, since it was my intent to get constructive descriptive only on the run of the mill assembly, which the hunting rifle really was not.
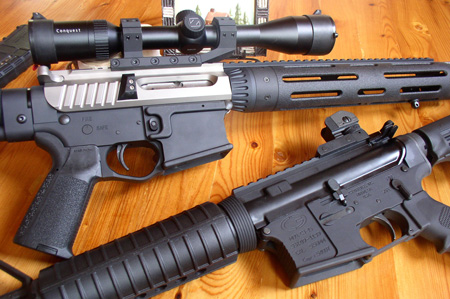
With the wife’s permission, an 18-inch 6.5 Grendel CTR upper, black barrel, with scope mount and two 10-round mags, were ordered from JP Enterprises. I then promptly tore it apart and sent some of it off to FailZero (www.failzero.com). These dudes apply an electro-less Nickel-Boron-Nitride plating, called EXO Technology, to the receiver, charging handle, hammer, and bolt carrier group. It is billed as a lubrication-free coating, and after hundreds of hand cyclings and dozens of actual shots, seems to be just as advertised.
So far there hasn’t been any flaking or chipping, or malfs. While there does appear to be a slight polishing on the bearing surfaces, that is actually a bonus, operating even more smoothly. Furthermore, it has a nice “Leupold silver” color that really looks fine on the black rifle. I figured that a deer rifle used in below freezing weather might just benefit from a lube-free nature, since many common gun oils don’t hold up so well in those conditions, and can freeze or gum up, counteracting their very purpose.

FailZero also offers kits of their own, one of which includes bolt carrier assembly, hammer, upper, and charging handle, in bare or black. I suspect that it would also be of great use in a talc-dusty environment like where our servicemen are shooting bad people. There are also a couple of fascinating (really) scientific papers describing the process linked to their website, explaining its superiority to hard chrome or other electro-less platings currently on the market.
Finishing off the hunting rifle was a Rock River Arms Match trigger (also from my pack rat box), a Badger Ordnance Gen II Tactical latch and ACE ARFX skeleton stock from Brownells, and my trusty, much used Zeiss Conquest 3-9×40 beat up test scope.
The RRA trigger is a nice set. It is smooth and crisp. As with the economy rifle, a dab of grease was slapped on the sear/hammer interface, and disconnector/hammer interface. There are some folks out there who say that is a bad idea, and can cause malfunctions. But it’s my experience that if a gun’s fire control malfunctions (fires on release, fails to disconnect, doubles, etc) it will do so whether there is any grease there or not. Greasing this used fire control set made it slicker than snot on an August afternoon.
The Gen II tactical latch is extended longer than a standard latch, but not nearly as protrusive as the original tac latch. Both are rather appealing, but since this rifle was going to be carried in the woods, your esteemed author didn’t really want a huge latch digging a new navel in his torso. The Gen II latch is just large enough to be obscenely useful, but not so big to be a nuisance.
The ARFX stock, another one of my favorites, is a lightweight, low profile stock. The best part about it is the foam covering the buffer tube, making the -10 degree cheek-weld a rapturous delight.
Conclusion
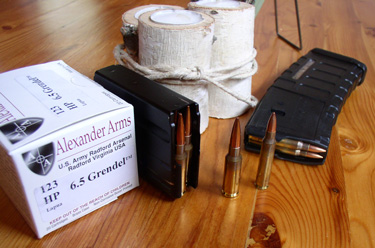
I’m happy with the set up; it shoots well under an inch at 100 yards, factory and reloads. The ballistics of the 6.5 Grendel cartridge are impressive and can be examined at the website of Alexander Arms (www.alexanderarms.com), the originators of the cartridge.
It shoots very flat, most bullets having very high ballistic coefficients. Even out of short barrels, it still retains enough velocity in 100- to 123-grain bullets to be supersonic past 1000 yards. Yet it is light recoiling, and the available bullet selection for reloading is large enough to waste some few hours tinkering with loads. It stands a chance of becoming my chosen all-around pick, for practicing long-distance stuff, to mid range steel, to close range Bambi carnage.
Value describes all the ingredients in these two recipes, value in thrift and in largess. The greater value is in building rifles with your own two hands, to the design that only you can perfectly derive, for the purposes only you can conceive, on those two hundred dollar chunks of machined aluminum that you bought for a rainy day.
This article appeared in the March 15, 2010 issue of Gun Digest the Magazine. Click here to load up on your subscription.
Gun Digest Guide to Customizing Your AR-15
You’ll appreciate this AR-15 book if:
- You want to learn how to customize an AR-15
- You need help sorting through the nearly endless array of AR accessories
- You’re looking for inspiration for your own AR-15 customization


![Best Concealed Carry Guns In 2025 [Field Tested] Wilson Combat EDC X9S 1](https://gundigest.com/wp-content/uploads/Wilson-Combat-EDC-X9S-1-324x160.jpg)


![Best 9mm Carbine: Affordable PCCs [Tested] Ruger Carbine Shooting](https://gundigest.com/wp-content/uploads/Ruger-Carbine-Shooting-100x70.jpg)
![Best AR-15: Top Options Available Today [Field Tested] Harrington and Richardson PSA XM177E2 feature](https://gundigest.com/wp-content/uploads/Harrington-and-Richardson-PSA-XM177E2-feature-100x70.jpg)
