
While it might sound like a simple step on the road to competitive shooting, there’s more to a proper grip than just picking up a pistol.
- Two of the keys to a proper grip in competitive shooting are consistency and tension, which allows shooters to reputably present their pistol in an instinctive fashion.
- Walking hand in hand with a consistent grip is trigger-finger placement, which can be honed with plenty of dry-fire practice.
- Developing a consistent grip also ensures a shooter will allow for a natural point of aim, thus making their shots more intuitive and natural.
- There are also a slew of grip don’ts shooters need to avoid, from employing the “tea cup” method to limp wristing their pistol.
The grip part sounds easy; simply pick the pistol up and you are gripping it, right?
Not so fast. There are several do’s and don’ts when establishing the proper firing grip. Two of the main aspects of establishing a proper grip are consistency and tension. For a bullseye shooter, it becomes even more critical since we are only using one hand to shoot.

Also, the firing hand and arm need to absorb the recoil and be an aid to a quick recovery, especially when firing the timed and rapid fire stages. This is even more true with the hardball gun, where the recoil is the most extreme since we are using full power .45 ACP loads and not the lighter recoiling loads of the centerfire or .45 match Wadcutter guns.
As I mentioned, one of the key aspects of the grip is consistency, not only in the application of the grip but also in the tension applied. Too loose of a grip, and the pistol will shift in the hand during firing. Too tight, and two things happen: the hand will tremble, and the trigger finger is partly immobilized. One way I’ve found to get the proper grip is to pick up the gun with one hand, and squeeze the pistol until the hand starts to shake, then slowly back off the tension until the pistol stops shaking.
This is a good starting point in applying the proper grip, and you may need to adjust this amount of tension up or down based on the gun and caliber of the pistol and the type of shooting you are doing. One aspect not talked about enough is that the grip should allow the recoil of the pistol, any pistol, to travel straight up the arm and not rotate around the wrist. This is especially important with heavy recoiling pistols. When firing with one hand, a la bullseye, the shooter should be able to draw a line from the front sight through the pistol straight up the arm.
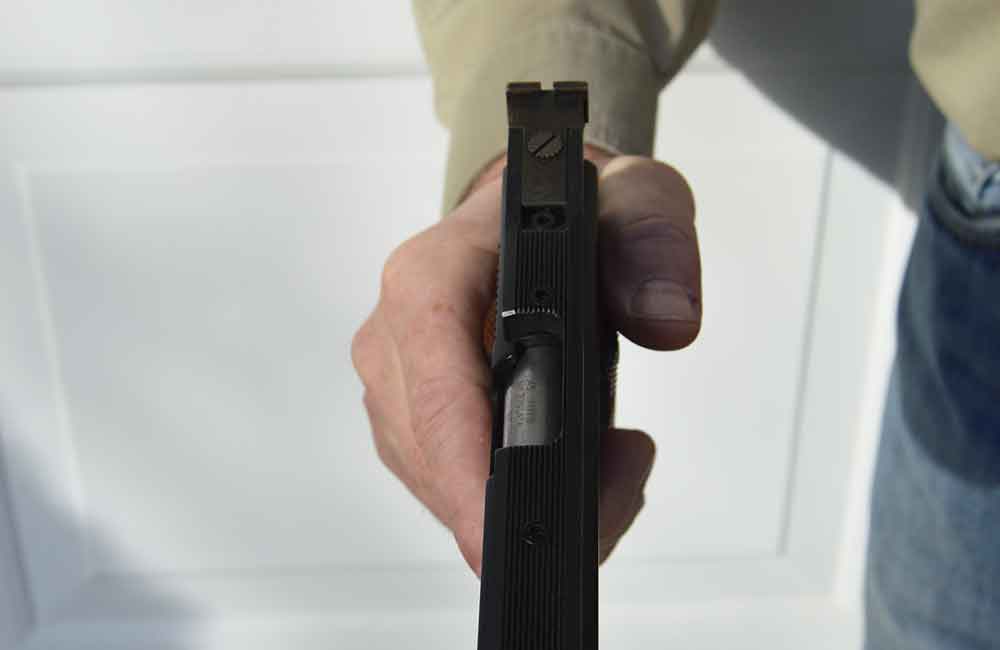
With a two-hand hold in an Isosceles stance this isn’t possible, but the recoil still needs to come up the arm as much as possible. Another aspect of the grip, especially with the two-hand hold, is the shooter needs to “choke up” on the pistol. In other words, the shooter needs to get the firing hand as high up on the pistol as possible. This helps direct the recoil to travel up the arms, and also keeps the pistol from rotating around the central point of the wrist. This “torque” makes the pistol twist up and over, making follow up shots much more difficult.
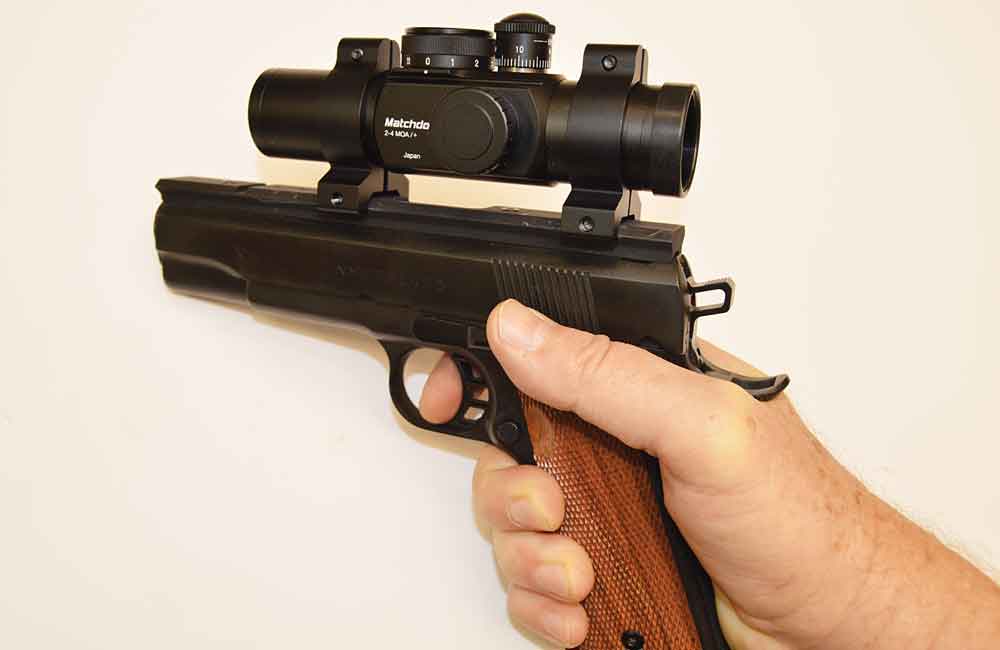
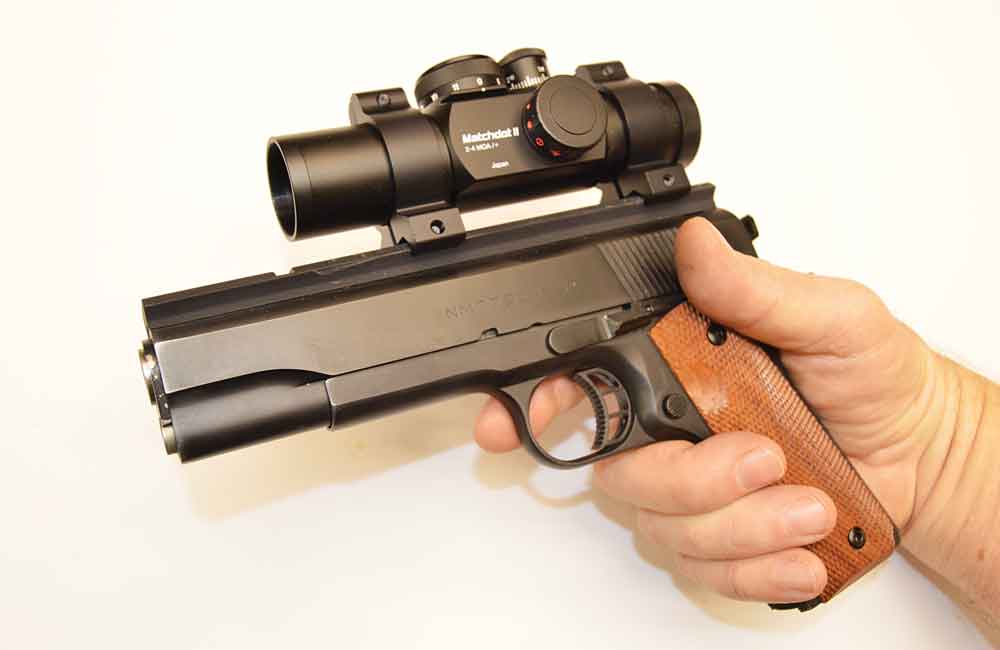
This is why handguns with a high grip, like the 1911 with the aftermarket upswept beavertail grip safeties, are so effective. They don’t just look cool, it gets the hand high up on the gun to better manage the recoil. The general rule of thumb is the lower the axis of the bore is, relative to the hand and forearm, the more manageable the recoil will be.
Another aspect of the grip that many shooters discuss is placement of the trigger finger. Like many aspects of shooting, there’s really no right or wrong way to place the trigger finger on the trigger. The two most common ways are the pad of the finger and the first joint. Both are used by many champion shooters, so decide which one is more comfortable and go with it.
One of the best ways to see if the placement of the trigger finger is correct for you is to dry fire. If, during a dry fire session, the pistol’s sights move to the left when the hammer or striker falls, then there is too little trigger finger applying pressure and the trigger finger is moving the gun to the left, assuming a right handed shooter. If the sights move to the right, there is too much trigger finger, most likely the shooter is placing the trigger finger on the joint of the finger and it’s pulling the sights to the right.
This brings up another point: dry fire. Dry firing is one of the single biggest methods a new shooter can use to improve their skills. It doesn’t matter if the new shooter is a bullseye shooter, IPSC, IDPA, silhouette or whatever, dry firing is the single best and fastest way to improve your shooting. If the shooter is an action-type shooter, IPSC, or IDPA for example, incorporating drawing from a holster into the dry firing routine will also pay huge dividends.
With dry firing, the shooter can practice almost all of the basic fundamentals of shooting − stance, position, grip, sight alignment, trigger control, breathing, and mental discipline − and can include loading and unloading safely (with dummy rounds) as well as drawing from a holster. The problem with dry firing is that dry firing to a shooter is like practicing scales to a musician. It’s not a lot of fun, it’s repetitious and it’s a little boring. But dry firing is probably the easiest, most cost-effective method there is to improve a shooter’s marksmanship.
One aspect about the grip that a new shooter wants to avoid is known as “milking the grip.” This is where the shooter begins to grip the pistol, then shifts the position of the hand, the tension of the grip, or both either during or just prior to the act of firing.
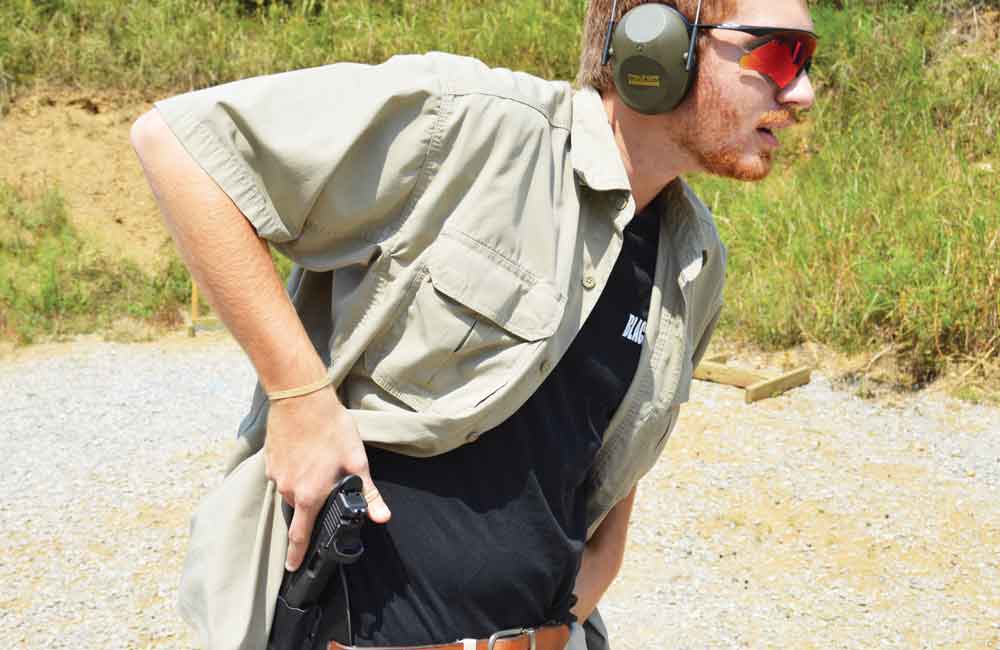
The next feature about the grip is that it needs to allow a natural point of aim. This means that when the pistol is brought up to the target, the front and rear sights should be in natural alignment, and there should not be any need to shift the pistol in the hand in order to get proper sight alignment. If you are a bullseye shooter, you can get a good natural grip before the load command is given. If you are an action-type shooter and are drawing from the holster, the grip you get out of the holster is the grip you will have when the shooting starts.
This is why a good shooter will dryfire for hundreds of hours in order to develop that muscle memory. To get that natural grip and natural point of aim, a good drill to employ is similar to the drill outlined in developing a good stance and position. Get a good grip on the pistol, either coming out of the holster or, if a Bullseye shooter, by holding the pistol at a low ready position.
Close the eyes, and raise the pistol. Open the eyes and the sights should be mostly centered on the target, but also the sights should be MOSTLY in alignment. If the front sight is left or right, relative to the rear sight, then the grip should be adjusted until they are lined up.
We are striving to place the body into the center of the target with the stance and position that get us in the general area of the center of the target. Then, by establishing the proper grip and natural sight alignment, we can complete a rapid fire string with good recovery and the front and rear sights will return to a natural state of alignment out of recoil.
If the grip has shifted or was not good to begin with, when the pistol comes out of recoil the sights will not be in natural alignment. At least with a proper grip, the sights will bounce back to the position they were in prior to the shot.
When using a two-handed grip, I mentioned that the shooter should “choke up” on the pistol, or get as high on the gun as possible. The shooter also needs to push slightly with the firing arm, and pull back slightly with the non-firing arm. This will create a good amount of isometric tension that will help overcome the effects of recoil.
Another aspect of the grip is the thumb of the firing hand. Make sure that the thumb does not drag on the slide, as this can strip energy from the recoiling slide and cause failures to feed and eject.
I’ve talked about aspects of the grip that the shooter wants to do, now here are a couple of don’ts.
Don’t use what’s called a “teacup” grip. You will see this type of grip in the movies from time to time, and is where the non-firing hand acts as a “saucer” to the pistol’s “teacup.” This type of grip offers little countering to the effects of recoil. The pistol will twist right out of the non-firing hand with this grip, although it does look cool in the movies.
Also, don’t fail to use the proper amount of tension in the wrist and forearm. This is really important, especially with semi-auto handguns. The reason for this is that semi-auto pistols need to have a solid platform for the gun to properly feed, chamber extract and eject. There’s a condition called “limp wristing,” where the shooter fails to provide enough tension in the wrist and arm and, in effect, takes away energy from the recoil spring as the slide is moving rearward, sometimes failing to fully eject the round.
The pistol will also not then have enough energy going forward to feed the next round fully. The classic “stovepipe” jam, where the spent round is caught by the slide that’s moving forward, and is sticking out of the ejection port, is usually caused by either too weak of the powder charge, or limp wristing the pistol. Many new shooters can’t visualize how this phenomenon can happen, and while it’s more prevalent with bullseye shooters since they are only using one hand and arm, it happens with action-type shooters as well.
Think of it like this, if I’m firing a semi-auto pistol and if I were able to move the pistol to the rear as fast as the slide was moving at the moment the gun went off, the slide would never unlock to extract or eject the fired case. If I were able to move the pistol to the rear at the moment of firing, half as fast as the slide was moving, the slide would only unlock and move to the rear halfway, and would only have the energy to move forward to feed and chamber the next round.
So, in effect, if you don’t provide a firm platform for the handgun to cycle, you are taking away energy from the recoil spring and can induce all manner of malfunctions. How much tension is enough? Remember, apply tension to the hands and forward to the point of inducing a tremble, then back off slightly to where the tremors stop, this is about the proper level of tension for your frame. Each individual shooter needs to experiment in order to fine the amount that is comfortable and provides consistent results with the pistol.
Although the shooter doesn’t want to fire a string with a grip that’s too loose, having a grip that’s too tight has its own issues. If the grip is too tight and there’s too much tension in the firing hand, it has a tendency to cause the trigger finger to freeze up, and not be as nimble and quick. This can cause all sorts of trouble when trying to fire off a quick string of shots.
You can take your shot timer and prove this. Fire a series of five or six shots with your normal grip, and then fire the same five or six, with the same accuracy, with a grip that is twice as firm. I guarantee the split times will be slower. It may not be much, but it will be measureable. The trigger finger just is not as responsive if the tension in the hand is excessive, because the muscles in the back of the hand are too tight. Excessive tension in the hand makes the muscles in the trigger finger more difficult to move independently. It also makes the trigger pull feel much heavier than it actually is.
Another tip for obtaining a proper grip is for the revolver shooters. Revolver shooters need to employ most of the aspects of obtaining the proper grip that the semi-auto shooters need, but with the awareness that the exposed hammer of the gun needs to be taken into account. I’ve taught many new shooters who started out with the revolver and one of the biggest mistakes they make is to wrap the non-firing thumb over the back of the firing hand. Both thumbs need to be on the same side of the gun, just like with the semi-auto shooters.
The reason for this is obvious the first time that the hammer comes back and pinches the thumb during a string of rapid fire when the thumb on the non-firing hand is wrapped over the top of the firing hand. This is also a bad idea with semi-auto handgun shooters. If the thumb is wrapped over the top, the slide can scrape and cut the top of the thumb during recoil.
Editor’s Note: This article is an excerpt from Gun Digest Shooter’s Guide to Competitive Pistol Shooting.

Next Step: Get your FREE Printable Target Pack
Enhance your shooting precision with our 62 MOA Targets, perfect for rifles and handguns. Crafted in collaboration with Storm Tactical for accuracy and versatility.
Subscribe to the Gun Digest email newsletter and get your downloadable target pack sent straight to your inbox. Stay updated with the latest firearms info in the industry.


