As we master the art of guiding a bullet consistently along its trajectory, we discover that shooting at steep uphill or downhill angles can cause a variance in point of impact.
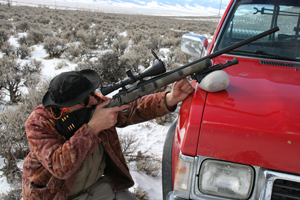
 My first entanglement with shooting at steep angles came when I was deer hunting in Nevada and hadn’t seen a thing in a week of hunting. As I worked along a trail on a steep side hill, I noticed I was being observed from below and could make out the black triangular patch and a nice set of antlers looking up the hill at me. It was a fair piece down the hill and I would say it was about a 55-degree angle. The jist of the story is I knew the rifle would shoot ½ minute groups and I was confident I could make the head shot. The problem is that was on level ground.
I shot and the critter seemed to fall, but I only found a piece of antler when I arrived to the spot. My bullet went high and I decided to calculate inclination into my shooting from that day on.
Shooting at an inclination will always make the bullet impact higher than the point of aim (POA). This is because the time that the bullet is in flight and affected by gravity is shorter than the actual line of sight (LOS). The distance the target is to the shooter on an inclined shot would be the true ballistic range (TBR).
This is easily explained through trigonometry and the formulas of the right triangle. The cosine of the angle between the LOS and the TBR is related to them. By doing some math we find that the TBR is shorter than the LOS. This formula is for both the uphill and downhill shot. The beauty of this formula is it is consistent and repeatable just like the trajectory of the bullet. It can be calculated and adjusted for consistently and precisely.
Once I have worked up a load that gives the ½ or better group I am looking for, it is time to figure the trajectory on level ground. I usually start with chronograph. I have found that the information in loading charts is close but not exact as far as velocities. Also, I like to make up trajectory cards for different temperatures. Temperature will affect the MV (muzzle velocity) enough that groups shot in the summer will have much different point of impact than those fired in the dead of winter. I then look up the trajectory on one of the many charts out there. Using the ballistic coefficient (BC), bullet weight, and velocity a trajectory can be calculated that will keep me on the paper as I increase shooting distances. I dial it in shooting at the various distances, but the charts are a starting point.
One of the better starting points is Holland’s Shooting Supply’s Ultimate Data Card. This program works off of Sierra’s Infinity Ballistic Software and prints out a card that can be laminated or taped to the rifle stock for easy  reference. One thing the program also prints on the card is compensation for different degrees of inclination. When the information is being fed in to configure the card, angles can be programmed in and changed to suit the shooter’s needs. The info can be programmed in to be read in MILS, MOA, or inches in drop whichever adjustment you prefer to work with.
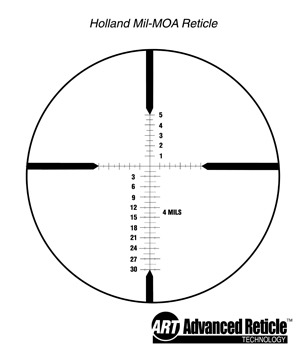
Holland’s also produces a variety of products to help the long-range marksman. His ART (Advanced Reticle Technology) can be installed in Leupold Mark 4 riflescopes. This reticle can be easily aimed using the correct hold over cross mark. By looking on the card that has been made at the yardage estimated the shooter can pick the correction and use that crosshair in the ART reticle. If there is a 20-degree incline (up or down), the shooter simply uses the correction in that column and the incline will be figured in. It is really a simple and fast system.
The calculation of inclined shooting is dependent on estimating the correct angle the rifle is pointed at. At shorter ranges and bigger targets, most shooters know the approximate hold to correct for the inclined shot. This estimation gets more accurate with experience, much like judging range.
If you are using the MilDot calculator/slide rule to calculate your distances, it has an angle estimator that is really precise. By attaching a string and a small lead sinker and aiming down the edge of the rule, the hanging string will indicate the angle. The cosine of this angle multiplied by the line of sight is the true ballistic range. The cosine is just a fancy name for the decimal equivalent of the angle.
Fortunately, we don’t have to figure out the cosine in our heads; it can be done with a calculator or looked up on a chart. Most shooting data books have the conversions in them. The table below will show some of the angle/cosine equivalents.
 SLOPE ANGLE MULTIPLY BY UP or DOWN RANGE
05 Degrees .99
10 .98
20 .94
30 .87
40 .77
50 .64
60 .50
70 .34
80 .17
90 .00
So if the LOS is 300 yards and the angle of the shot is 30 degrees, you would multiply 300 x .87 and the TBR of the shot is 261 yards. The yardage correction is a substantial 39 yards. A sniper taking a shot from a roof top on a bad guy holding a hostage could be a disaster. The average police sniper shot is still 77 yards, but in a skyscraper environment, the LOS will be longer and the angles can be steep.
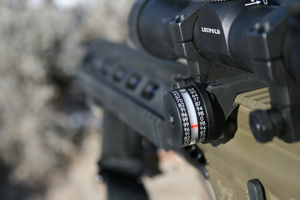
 A handy little tool from SniperTool Designs is the cosine indicator. This tool is carried by Brownells and gives the angle the rifle is pointed at in the cosine decimal. The tactician has a quick visual of the angle the rifle is pointed in the cosine equivalent. It can be used to figure the angle compensation or as last minute confirmation of the shot. The optional mount makes it an easy install on the picatinney rail of the rifle. It is a precise little tool and the only complaint I had with it is it needs another type mount for operators that do not have a picatinney mount on the rifle, such as a conventional bolt gun mount.
The picatinney rail has revolutionized mounting things to guns. One fix to the above problem is to mount the scope on the bolt gun with a picatinney rail mount from Holland’s Shooter’s Supply. These mounts are rock-solid mount and the picatinney rail has reputation for holding zero when the scope is removed and replaced on flat-top uppers. They allow for optically center mounting of the crosshairs without using up windage and elevation. This saves optimum travel for shooting correction up and down. This is an important factor when mounting a scope. I have always used mounts that allow for mechanical adjustment and shim the scope as closely to center as possible to save the turret adjustments for fine tuning only. Scopes perform much better when mounted correctly to optical center.
Like all other math calculations in our lives the inclined shooting problem has been made easier with technology. Rangefinder manufacturers realize the importance of the correct TBR and came up with an “everything in the box” solution.
 One such product is the RX-IV digital Rangefinder from Leupold. Any tactician knows that all the forces of nature affect the shot: inclination, correct yardage, temperature, and wind (to name a few). The more correctly we measure these forces, the more precise the shot will be. Leupold has everything but wind calculation in its rangefinder. In this easy-to-use one button box is temperature, TBR, LOS, MOA and inches in holdover and the user can select from 13 reticles to range through. It also tells the user what angle the shot is ranged at.
The RX-IV takes all the brainwork out of some of the important calculations for a precise shot. I live in an area that doesn’t have a formal shooting range close by and most of my long-range practice is out in the sagebrush. I constantly depend on a rangefinder just to set up my targets. Sometimes I wish I had a shooting range, but shooting in the natural environment is what we will try to aspire to when we leave the range. In my less-than-perfect shooting condition (really, it is perfect) the Leupold RX-IV helps me keep all the imperfections compensated correctly.
I never was a math type in school but I am glad that I listened enough to have it benefit my shooting. All the teachers had to do was tell me this would improve my shooting and I would have been a better student. Whether you figure out the calculations in your head, let the computer make you a data card, or just take the easy way out and get a laser rangefinder, figuring in the angle of inclination will definitely add some precision to your shooting.
Dave Morelli is a retired policeman, having served as a patrolman, trainer, SWAT operator, and a SAR tracker/trainer. He currently lives in Idaho and writes about various topics, including firearms, hunting, tactical gear, and training.

![Best Concealed Carry Guns In 2025 [Field Tested] Wilson Combat EDC X9S 1](https://gundigest.com/wp-content/uploads/Wilson-Combat-EDC-X9S-1-324x160.jpg)


![Best 9mm Carbine: Affordable PCCs [Tested] Ruger Carbine Shooting](https://gundigest.com/wp-content/uploads/Ruger-Carbine-Shooting-100x70.jpg)
![Best AR-15: Top Options Available Today [Field Tested] Harrington and Richardson PSA XM177E2 feature](https://gundigest.com/wp-content/uploads/Harrington-and-Richardson-PSA-XM177E2-feature-100x70.jpg)
