At GunDigest, we independently review products. However, we may earn a commission when you purchase through links on our site. Learn More
Put Your Practical Rifle Marksmanship To The Test

Think you’re slick with your iron? It’s time to put your rifle marksmanship to the test to truly show what you’ve got.
How good a rifle shot are you? Do you really know?
It’s a valid question, because you need to know your capabilities before you have to pull a trigger when it matters.
Since I became involved in writing about guns, I’ve been looking for a protocol I could use to evaluate the suitability of a practical rifle; more specifically—how the rifle interfaces with the shooter.

Sometime back, I settled on the Forty-Five Drill to do exactly the same thing with defensive handguns. I also found it to be an excellent tool to evaluate shooter skill. I wanted the same simple drill—sort of a qualification course—I could use for the same purpose with rifles and riflemen.
The Logic of Qualification
There are many different qualification courses for the rifleman. The Army requires a soldier to hit 23 out of 40 pop-up silhouette targets from between 5 and 300 meters. With a 90 percent success rate, a solider receives an “expert” ranking. The Marines use a similar, but tougher, course that’s arguably less practical. And the NRA offers a four-position, high-power rifle qualification that requires 50 shots fired at distances from 200 to 600 yards. Target type varies with distance, and an 80 percent score makes you an expert.
All these courses require lots of shooting. They also allow you to miss targets and still rank as expert. I fail to see the logic here; as Jeff Cooper said, “The purpose of shooting is hitting.” I believe a marksmanship test should require every round fired to hit the target.
Why? Well, Cooper was right: The purpose of shooting is hitting. Failure to hit your target represents either a miscarriage of instruction or a failure to learn.
Let’s look at it another way. If a police officer is allowed to qualify with misses, how can you defend the officer who shot at a bad guy, missed and hit an innocent bystander? The same applies to soldiers: If you allow them to qualify with misses, don’t be upset when they don’t hit the enemy; you knew it was coming. With hunters, it’s no different, and it’s one reason that too many take shots they know they can’t make.
Improve Your Rifle Marksmanship:
- 5 AR-15 Drills That Will Help You Master Your Rifle
- Dry-Run AR-15 Drills To Master The Platform
- 8 Steps To Better Long-Range Accuracy
- How B.R.A.S.S. Will Make You A Better Marksman
- How To: Mastering Carbine Basics With A .22 LR AR
Testing Practical Rifle Marksmanship
In order to test a rifleman, you must know what a “rifleman” is. The dictionary definition is: (1) a solider armed with a rifle; (2) a person skilled in the use of a rifle. This is a very general definition and is akin to calling a man who’s skilled with a sharp cutting instrument a “surgeon.”
I believe a rifleman should be able to hit his target from common positions—standing, kneeling, sitting and prone. I’m talking about basic rifleman skills anyone considered a “rifleman” should be able to demonstrate on demand. “On demand” means fulfilling an urgent or pressing need—right now, without warm-up. This “urgent or pressing need” establishes that the shooting must occur in a hurry or within a certain amount of time. Regardless of the situation, if time isn’t an issue, shooting is probably not needed.
This leaves us with determining the target to be hit and the distance at which it should be shot. However, beyond their practicality, neither is that important. It’s just as hard to hit a 3-inch target at 25 yards as it is a 12-inch target at 100 yards. If you increase the distance and target size by a factor of four, the difficulty remains the same.
With that in mind, few practical applications of a rifle require a target any smaller than 3 inches in diameter to be hit. If you can hit a snuff can quickly—and on demand—you’re demonstrating practical rifle application.
Practical Rifleman, Practical Test
If we’re to measure the practical rifle marksmanship, the test should also be practical. There’s no call for firing several boxes of ammunition, and there’s no need for shooting at excessive distances. The goal is to see if the shooter can hit targets—quickly—from the four basic positions. So, a practical test should not necessitate impractical resources.
Most shooters have access to a 100-yard range and a box of ammunition. If you can’t measure practical rifle skill within those confines, the test or qualification is, well, impractical.
Additionally, a practical qualification should be hard. I don’t mean hard to take, but hard to complete with a passing or positive rating. You wouldn’t consider the skills of an unpracticed rifleman to be practical, and you’d expect an unpracticed rifleman to fail any test designed to measure practical abilities.
The Qualification
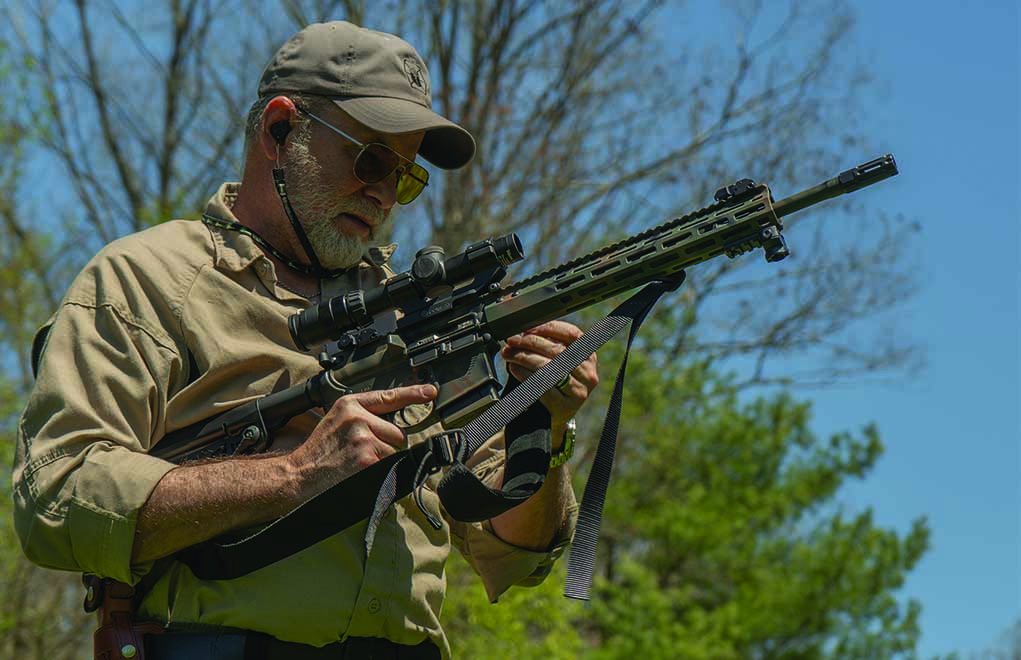
With influence from Jeff Cooper and a practice regime used by the great and early-1900s adventurer and marksman, Stewart Edward White, I developed the Rifleman Test. It reflects the practical application of a rifle and is built around four single-shot engagements that represent real-world scenarios. The exercise is also timed because, as we’ve established, if time isn’t an issue, shooting probably isn’t necessary.
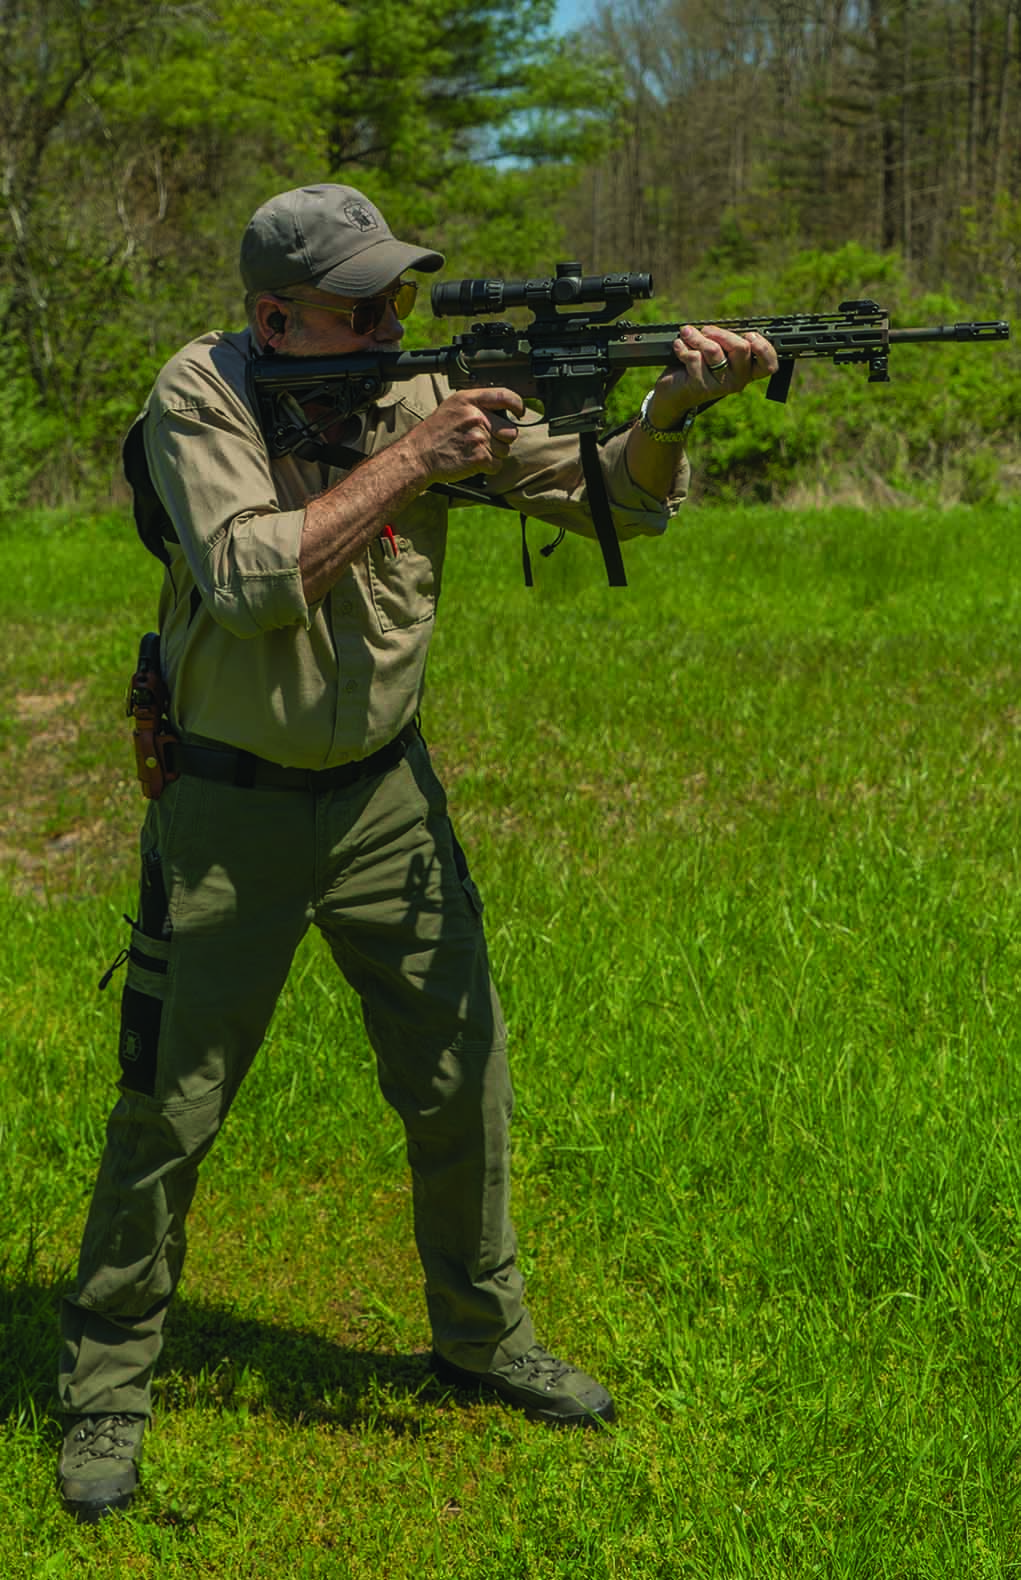
Engagement #1—The Snapshot: With a par time of three seconds, start with the rifle at the high-ready position. At the signal, fire a single shot from the standing position at a 12-inch target placed at 100 yards. This is a variation of a drill Jeff Cooper promoted. The concept is that you might have to quickly shoot a dangerous-game animal that’s charging and near or a human threat at a greater distance.
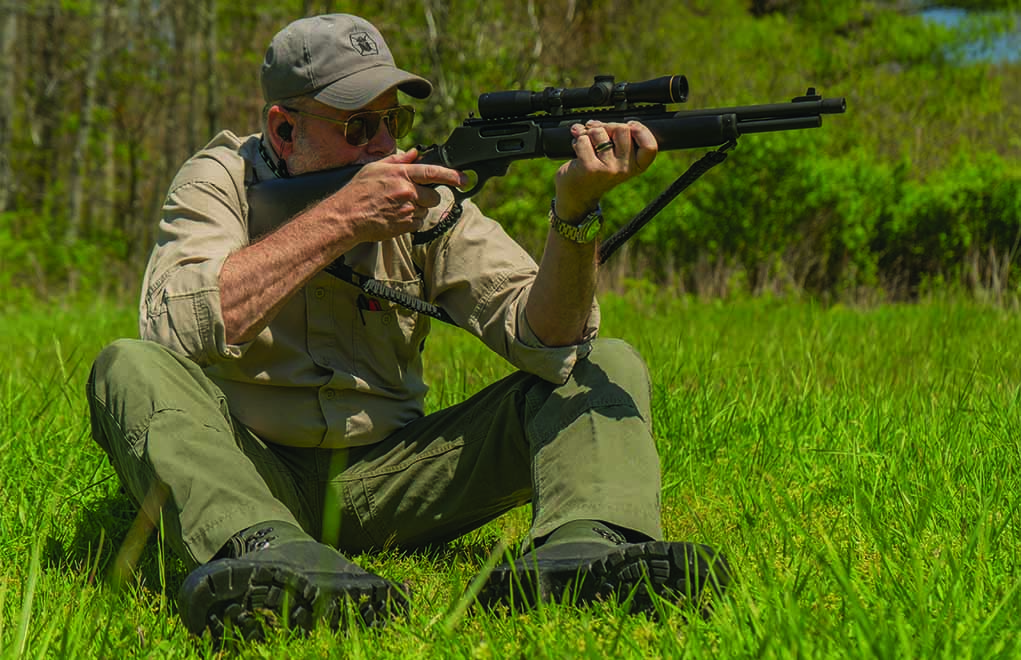
Engagement #2—Kneeling: Start in the same position, but at the buzzer, hit a 9-inch circle at 100 yards from the kneeling position within eight seconds. Although kneeling is better than standing, it’s not the most stable intermediate position. However, it provides the ability to utilize low concealment when hunting or low cover in a fight. It’s also the fastest intermediate position to assume.
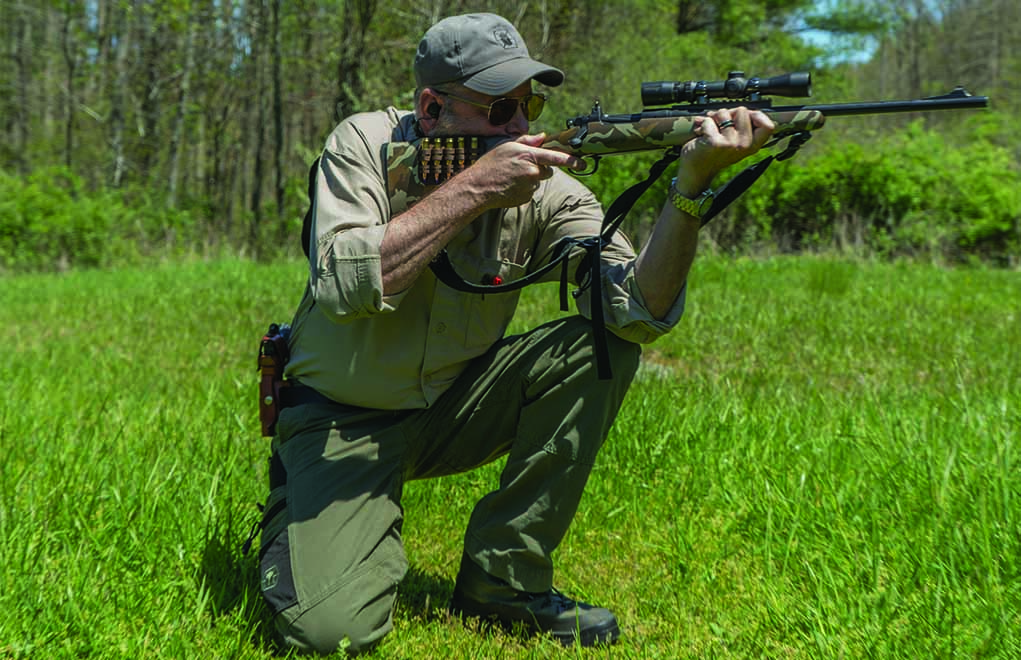
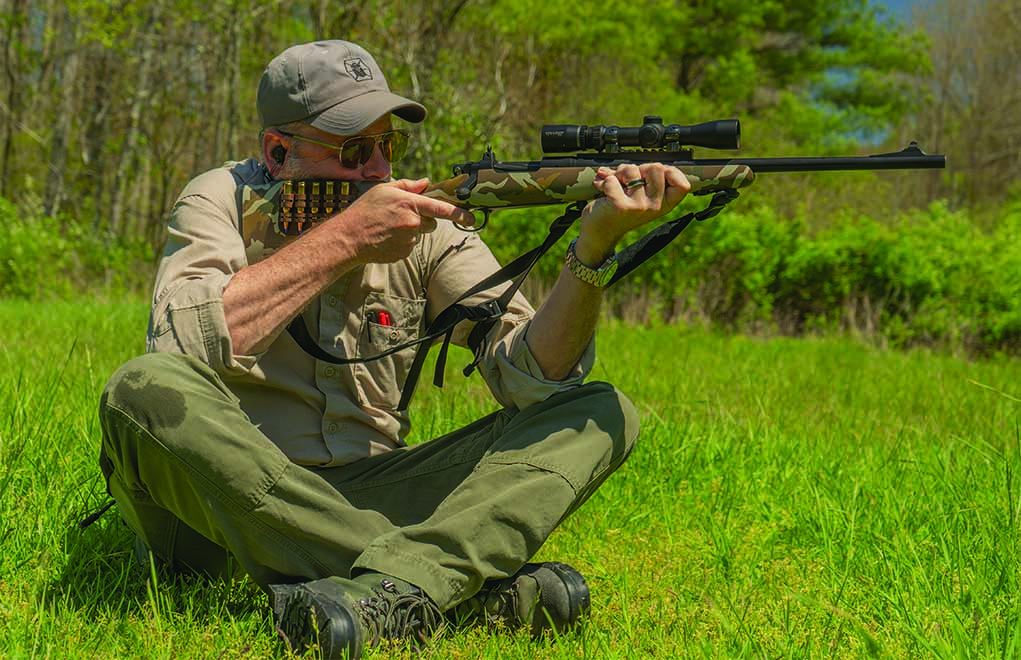
Engagement #3—Sitting: The seated position is the most stable intermediate position and is best used in conjunction with cover or concealment too high to permit shooting from prone, but not high enough to necessitate kneeling. Starting at high-ready, acquire the seated position and hit a 6-inch target at 100 yards in fewer than nine seconds.
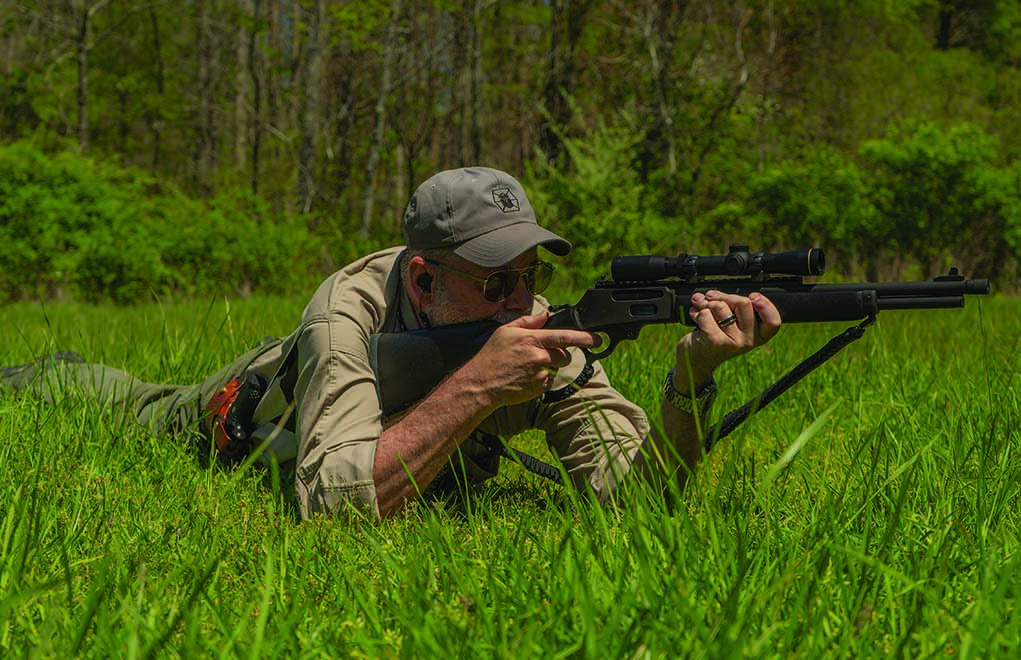
Engagement #4—Prone: As the most stable field position, prone provides the best chance for hitting. Start by standing at high-ready, drop prone and hit a 3-inch circle at 100 yards in fewer than 10 seconds. Why not a use a smaller target? Because, practically speaking, that level of precision isn’t necessary. For hunting or fighting, a bullet that lands within 1.5 inches of the desired point of aim is sufficient. (By the way, bipods are permitted but can’t be deployed before the timer starts.)
Now, while these drills can be performed individually, ideally, they’re combined with a par time of 30 seconds. This adds stress and requires the rifleman to move fluidly between field positions. To conduct the test, you need a proper target, a 100-yard range, a shot timer and a box of ammunition.
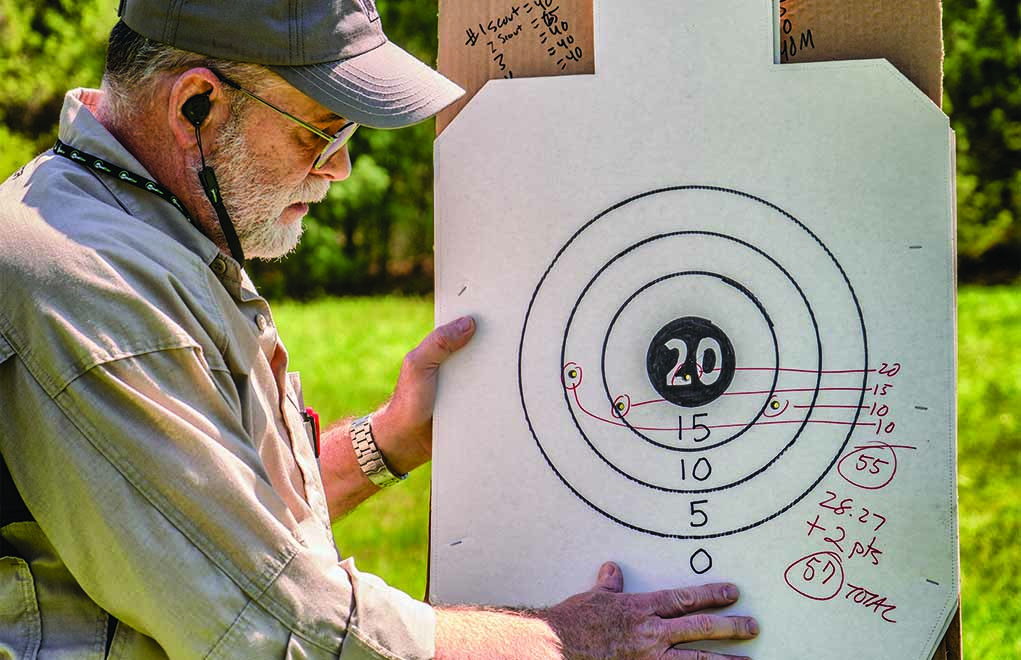
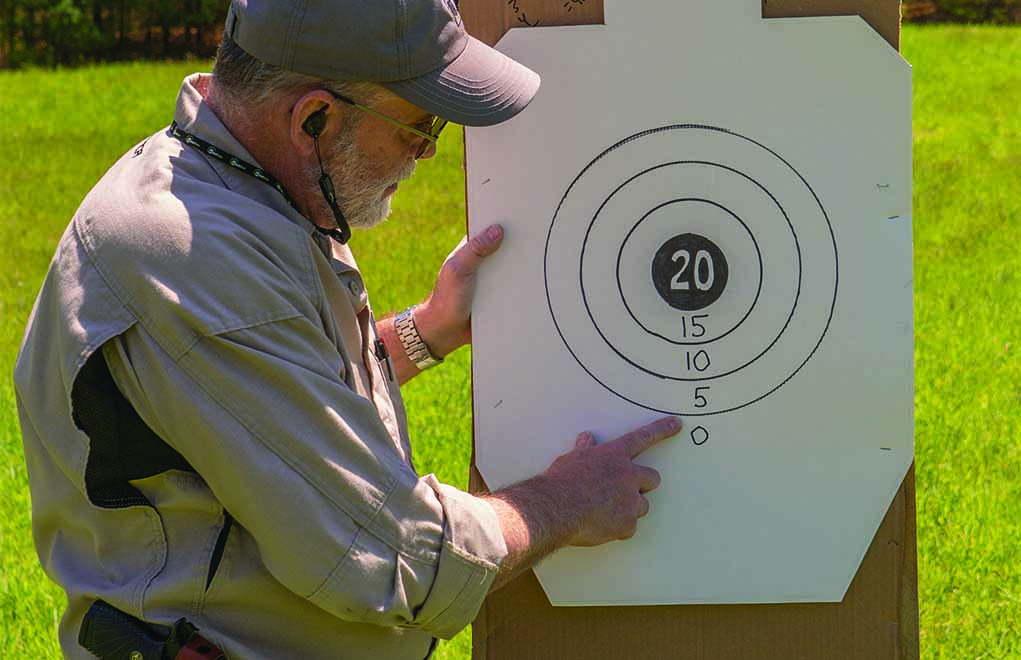
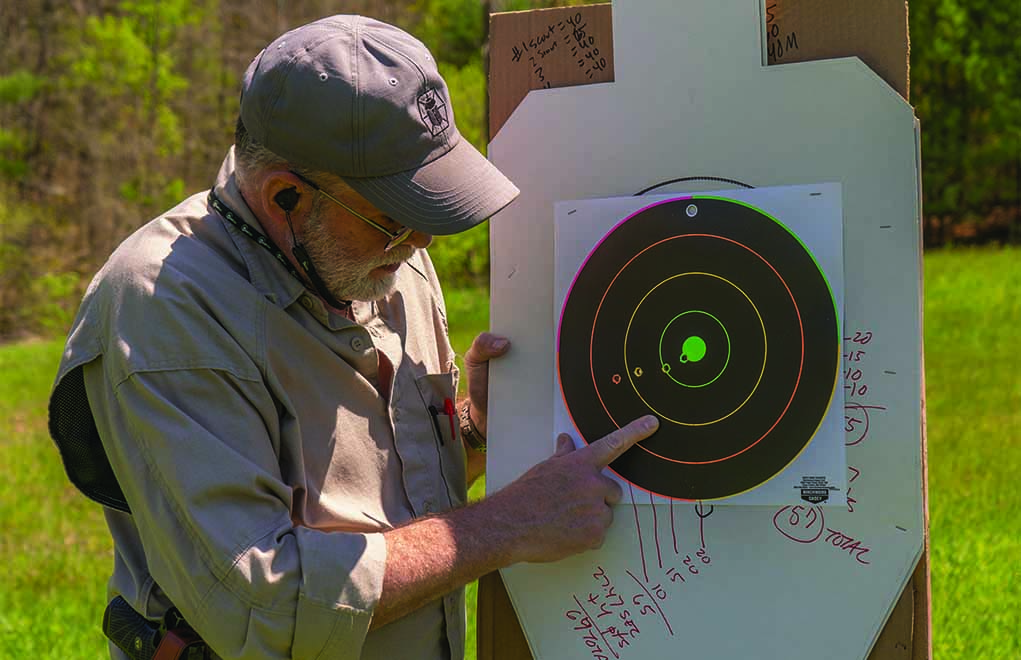
The target should be a circle with 3-, 6-, 9- and 12-inch scoring rings. For a while, I made these by drawing on a cardboard IPSC target, but this was unpractical as hell: It took longer to make the target than to shoot at it! After some searching, I found the Birchwood Casey DirtyBird target (stock number: BC-35830) with scoring rings of the proper diameter.
Scoring
Shots inside the 3-inch circle count for 20; inside the 6-inch ring, 15; 10 for inside the 9-inch ring and 5 for hits inside the 12-inch ring.
I know what you’re thinking: Each stage shoots at an increasingly smaller target. So, if you shoot a string of four shots at one target, how will you know which shot landed in which ring? You won’t, and it doesn’t matter. As they say, “A blind squirrel can sometimes find a nut.” What this means is that sometimes, a shooter of only moderate skill can make a great shot. When that happens, that shot counts no more or less than when a shooter of superior skill makes it.
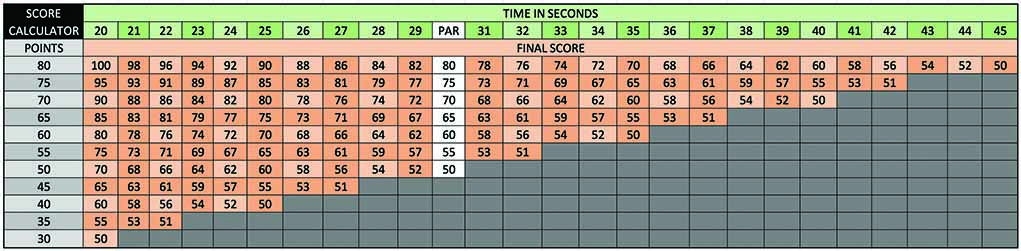
With exceptional shooting, 80 points (four hits inside the 3-inch ring) are possible. To qualify, a minimum of 50—with at least one hit within each circle with no misses—is required. Referring back to the “blind squirrel” philosophy, if a rifleman can obtain 50 points in 30 seconds with no misses, it doesn’t matter how those points are obtained. Additionally, for every full second less than 30, add two points; and for every full second over 30, subtract two points.
There are two ways to run this qualification. The first is to perform a single run/four shots. As with the Forty-Five Drill, this gives the rifleman a one-time—on-demand—opportunity to exhibit their skill level. On the other hand, you can run the drill five times (20 shots) to establish an aggregate score.
Lessons Learned
I’ve been running similar drills for years, and the first time I tried the Rifleman Test, I used my Wilson Combat AR15 in .300 Hamr and managed 75 points. But, it took me too long—45 seconds. So, my final score was a failing 45. I ran it four more times for an average score of 54.6, with a best run of 65.
What did I learn? The same things you can learn from performing this qualification. I found out my shooting was not the problem; rather, my weakness was not assuming the positions fast enough to give me the necessary time to make a good shot. I also learned that I really needed to sling-up to make a good shot from a kneeling position and that I had to get better (faster) at doing that.
Running the course with my Model Seven Scout Rifle from the Remington Custom Shop, I found that for best performance, I needed to keep the 2-7X Scout scope set at a midrange magnification and that I had to concentrate on working the bolt quickly as part of shot follow-through. In my best run, I scored 65. Four runs with a Marlin 336 Dark in .30-30 Winchester produced an average score of 45 and a best of 60. Interestingly, average times with all three rifles were within seconds of each other, and my weaknesses were similar.
Rifle Marksmanship Rankings
The best use of this qualification—any qualification—is self-evaluation. But shooters like to know how they stack up. You can rate your performance with a score of 50 to 59 as “rifleman,” 60 to 69 as “marksman,” 70 to 79 as “expert”; and, if you can get four hits inside the 3-inch circle in 30 seconds—80 points—you’re a damned fine rifleman and should be considered to be of a distinguished skill level.

My suggestion is that you film your attempts. That’s easy, now that we all have smartphones. This allows you to use the video to self-critique your performance. You’ll see how long it takes you to transition between positions, sling-up and operate your rifle’s action. This will help you perform better in the field—when it really matters.
How do you get better at getting the good hits? Hell, that’s simple: Perfect your ability to hold the sights on the target as you press the trigger.
Editor’s Note: This article originally appeared in the July 2020 issue of Gun Digest the Magazine.
Next Step: Get your FREE Printable Target Pack


Enhance your shooting precision with our 62 MOA Targets, perfect for rifles and handguns. Crafted in collaboration with Storm Tactical for accuracy and versatility.
Subscribe to the Gun Digest email newsletter and get your downloadable target pack sent straight to your inbox. Stay updated with the latest firearms info in the industry.
