


There are a variety of methods or formulas for zeroing the AR, but this might be one of the simplest and most precise systems out there.
Zeroing the AR means adjusting the sights so your point of impact — where the bullet strikes the target — is the same as your point of aim — where you are holding the sights. There is a variety of methods or formulas for zeroing the AR. Instead of trying to use different size targets at various distances and flipping back and forth between one aperture and the other on the rear sight — as required by some methods — I prefer to use the simple technique described below.
In my opinion, to get a “hard” zero with the AR you have to actually shoot it at the distance you’ve chosen for your zero, rather than simulate distance by using smaller targets. Once you’ve zeroed the AR, it’s time to fire it various distances to discover what the difference will be between your point of aim (POA) and the point of impact (POI).
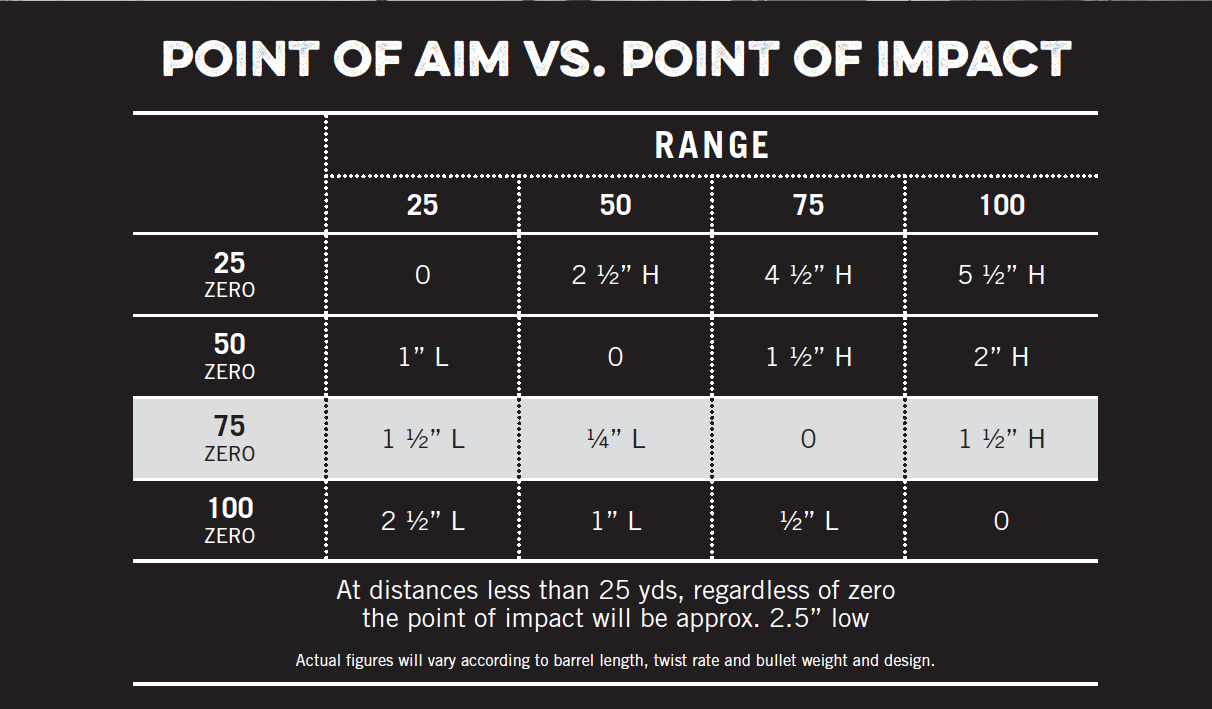
When it comes to choosing the distance for your zero there are several factors to consider. First is the offset between the sights and the barrel; the sights are higher than the barrel. This offset comes into play especially at close distances, where the POI will be lower than the POA. You have to aim or hold high for your round to hit where you need it to go. You also have to consider the trajectory of the round. For example, with a 55-grain bullet firing with a one hundred yard zero the POI will be approximately two inches low at 200 yards.
Before beginning the zero process you need to pick the distance for your zero. I use a 100-yard zero. The sights are adjusted so that at 100 yards the bullet strikes the exact point the sights are holding. A 75-yard zero gives you the least deviation between your POA and POI between 25 and 100 yards. At 25 yards the POI will be roughly one and one half inches lower than your POA. The POI at 100 yards will be and one half inches higher than your POA, which will give you a POI of about an inch or so low at 200 yards.
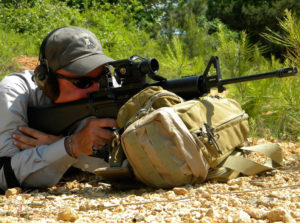
Take your time during the zeroing process. This isn’t something you can do quickly. For the best results, work from a bench, with rests or bags for support. Make sure the handguard is supported, as opposed to the actual barrel touching or resting on the bags. If the barrel is making contact with your rest, it will throw the shots off. For example, when the bottom of the barrel is touching the rest it will throw the shots high. Your goal is to create a solid, stable position – consistency – and apply the fundamentals of marksmanship for every shot.
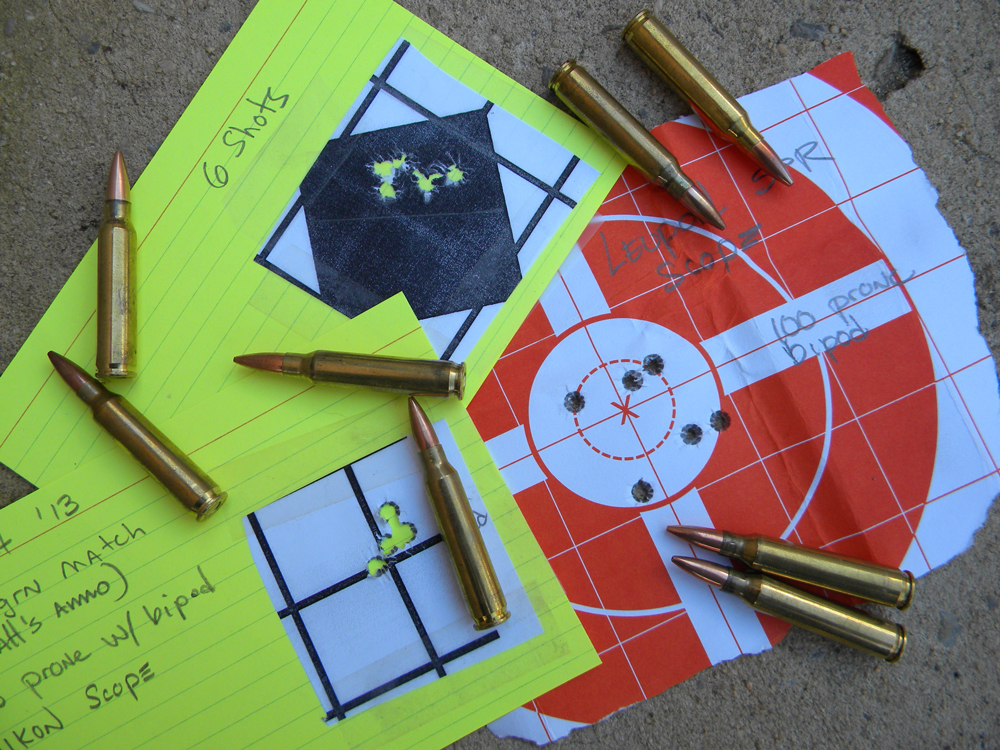
Start the zeroing process at 25 yards. Make sure you have a steady position, using a rest in order to take out as much of the human element as possible. Normally I’ll fire five or six shots, enough to satisfy myself that I’ve got a good group established. By firing several rounds, even if you have one or two shots that weren’t good, you’re still going to have a solid group to work with.
After establishing a good group you’re ready to adjust the sights — elevation and windage — but first unload the AR. Do not get into the habit of adjusting or doing any work on your firearm while it’s loaded. Unload, check and check again to confirm it’s clear, and then remember the safety rules are still in effect. After making adjustments you load and start again. The additional benefit of all this is that you’re getting in practice on your manipulations.
As mentioned earlier, at 25 yards your bullets should be hitting lower than where you are aiming. This low POI is necessary because of the offset between the sights and barrel. (Don’t get too worried about exact measurements here; you’re just looking to get it close, and will fine tune the sights as you move back, creating more distance.)
Once you have a rough zero at 25, again with the bullets striking about two inches below your point of aim, move back to 50 yards. Fire a good group, and adjust as necessary. At this distance your point of impact will be closer to the center of the target where you’re aiming. As you increase the distance the POI will move upward towards your POA. For example, if you’ve decided to work with a 100-yard zero, at 50 yards the bullets should be hitting about an inch below where you are aiming.
Fire a good group, and then adjust the sights as needed. Normally I will only adjust one direction at a time. For example, I’ll adjust the elevation with the front sight until getting that right, then adjust windage to get it in the right spot. Trying to adjust both the elevation and windage at the same time can sometimes get a little complicated, for example as you adjust the windage it can change the elevation slightly. You may find that after adjusting the front sight and then the rear sight for windage that you have to go back to the front sight for final adjustments.
After getting close at 50 yards, move back to 75 and repeat the process. If you want a 75-yard zero your bullets should be hitting where you’re aiming. Point of aim and point of impact are the same. For a 100-yard zero you’ll need to move back to that distance and repeat the process one last time, adjusting until your POI is spot on for where you are aiming.
You’ll also need to shoot it at distances closer than your zero, again to find out the difference between your point of aim and the point of impact. Remember, the sights are offset, higher than the barrel, so as you move closer than your zero the point of impact will begin to drop. At distances closer than 25 yards you’ll be aiming about two and one half inches high to compensate for this offset. (XS Sights have a modified rear sight that has a notch on top of the peep sight that you use for aiming at close distances that compensates for the offset.)
For zeroing a red-dot sight or a more traditional optic with magnification I use the same process. I start at 25, get a rough zero with the point of impact two to two and one half inches lower than the point of aim. Don’t’ worry about an exact measurement, you’ll have to be making more adjustments as you increase the distance.
This article is an excerpt from AR-15 Skills & Drills — Learn to Run Your AR Like a Pro.

Next Step: Get your FREE Printable Target Pack
Enhance your shooting precision with our 62 MOA Targets, perfect for rifles and handguns. Crafted in collaboration with Storm Tactical for accuracy and versatility.
Subscribe to the Gun Digest email newsletter and get your downloadable target pack sent straight to your inbox. Stay updated with the latest firearms info in the industry.


")
")
")
")